

Page 1
DNR200V Series Quick Connection Guide - English - R2
Information in this document is subject to change without
notice. As our products are subject to continuous improvement,
Digimerge Technologies Inc., a FLIR company, and our subsidiaries
reserve the right to modify product design, specifications and
prices, without notice and without incurring any obligation.
E&OE © 2013 FLIR / DIGIMERGE. All rights reserved.
www.digimerge.com
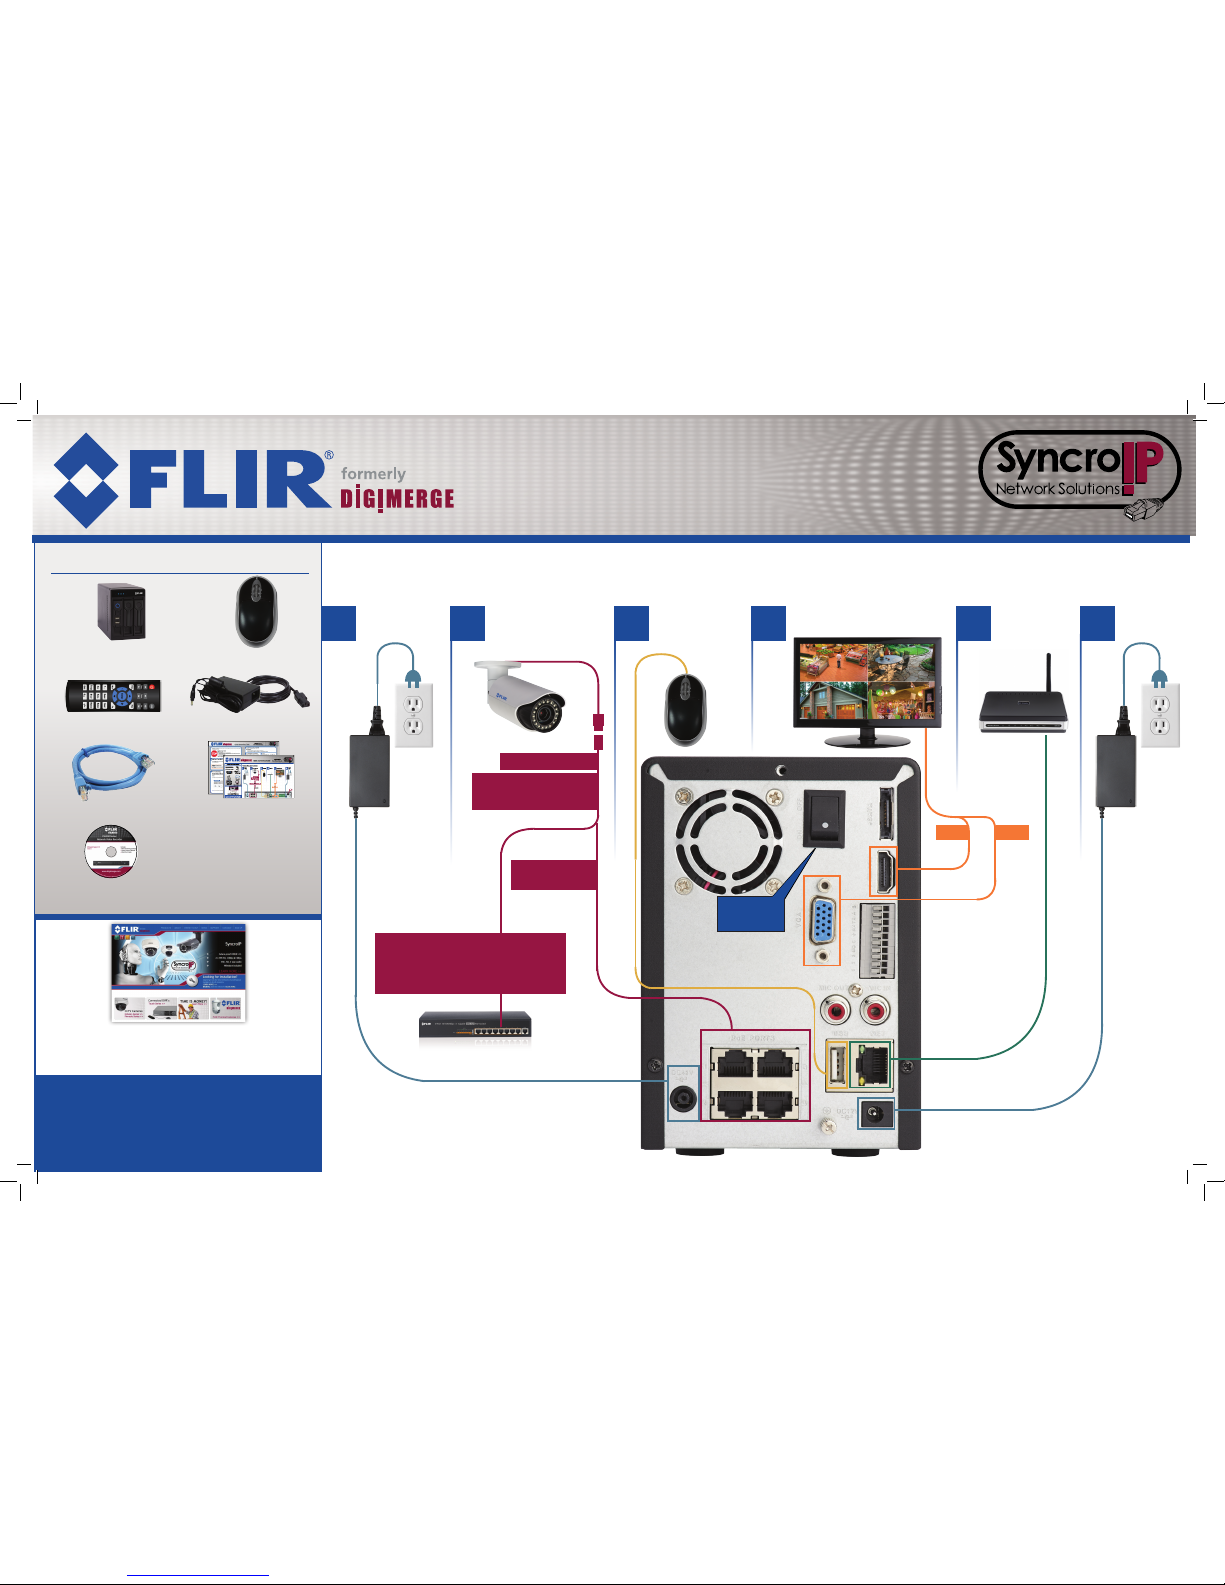
PACKAGE CONTENTS:
CD
(includes software & manual)
Remote control
Network Video Recorder (NVR)
Quick Start Guides
Power adapter (x2)
Ethernet cable
USB mouse
Connecting your system
*Not included/sold separately.
**See reverse to add cameras from your LAN; 8-port PoE switch
accessory sold separately (model: ACCDPS281).
51
4
IP Cameras* Monitor/TV* Router* Mouse
3
HDMI
Ethernet Extension Cable*
VGA*
OR
Network Video Surveillance Recorder
DNR200V Series
Quick Connection Guide
NOTE: It may take up to
1 minute for cameras to start up
and transmit video to your NVR.
For support, visit
Power
2
(to PoE Ports)
Connect cameras
1~4 to NVR
Power
(to NVR)
6
7: ON
www.flir.com/security
Connect cameras to a Router* or
Switch* on your LAN. If your NVR has
more than 4 channels, this is required
to connect channels 5 and higher**
OR
Page 2
DNR200V Series Quick Connection Guide - English - R2
1-21032013
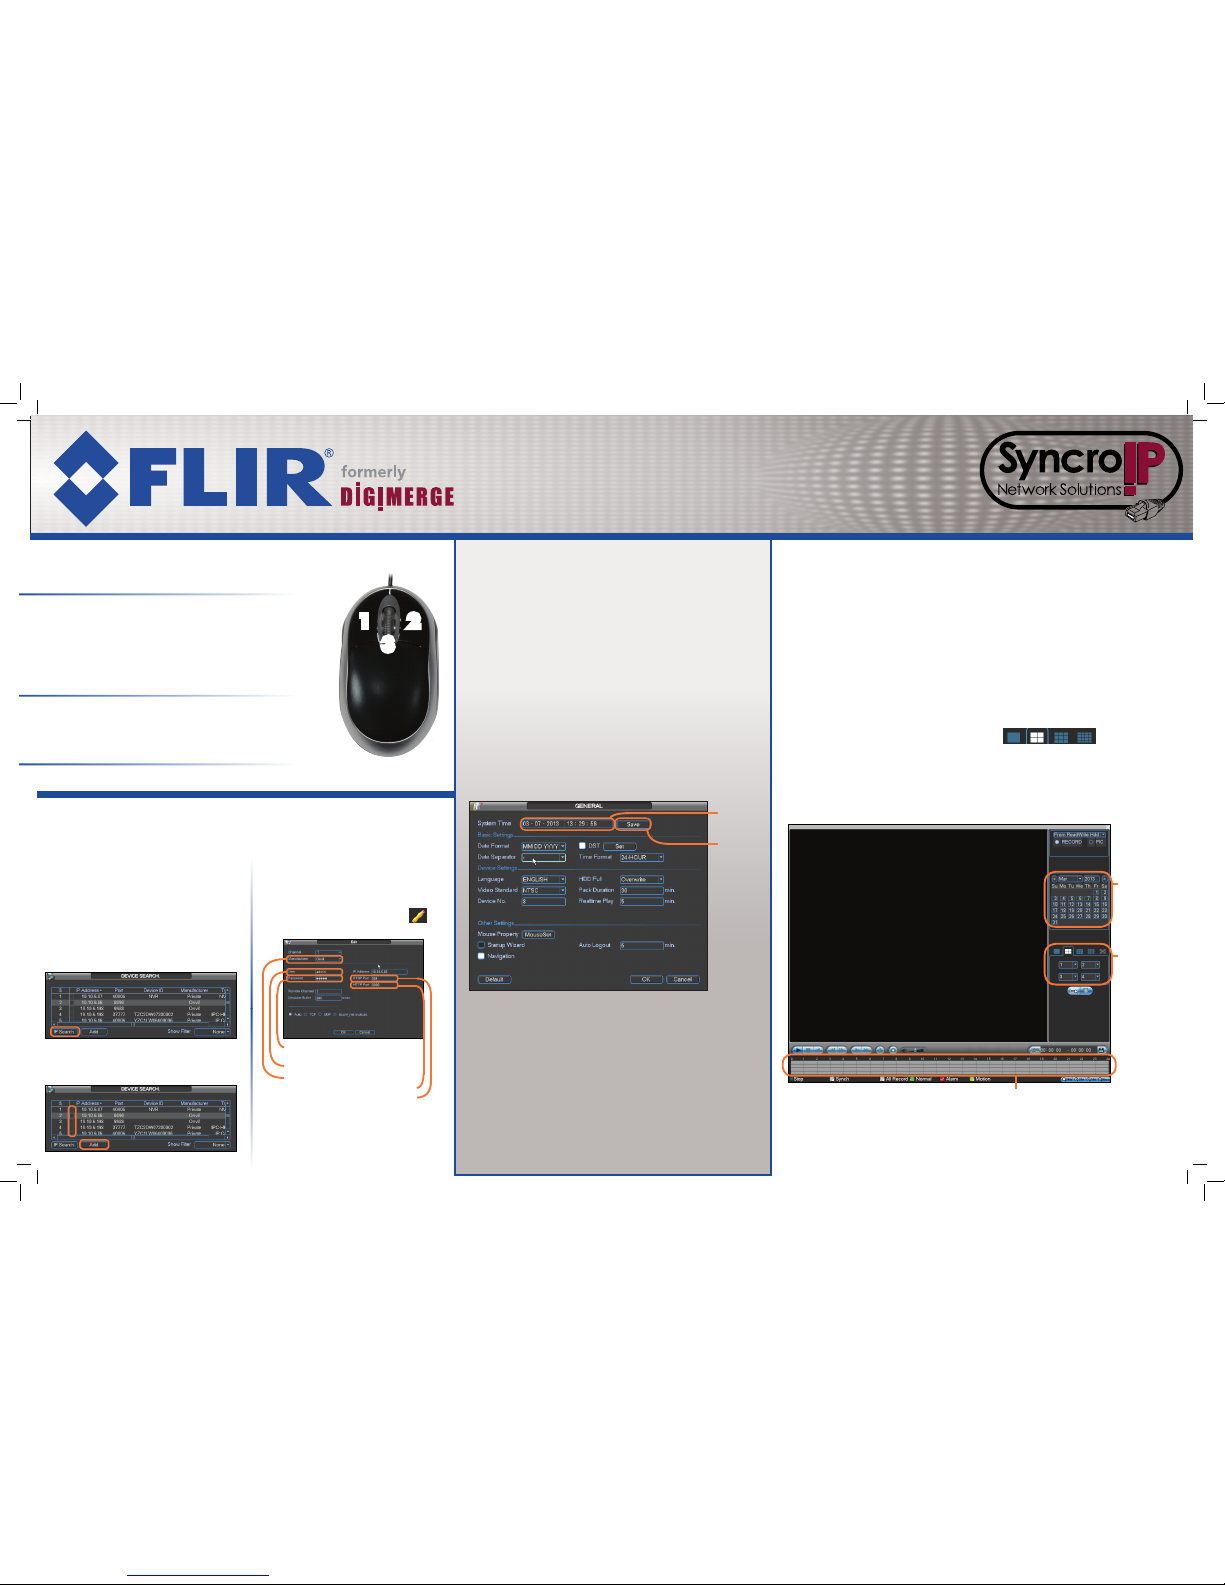
1. Left-Button:
• Click to open the Navigation Bar.
• During split-screen display mode: Double-click an
individual channel to view it in full-screen. Double-click
again to return to the split-screen display mode.
• While navigating menus: Click to open a menu option.
2. Right-Button:
• During Live View: Right-click anywhere on the screen to
open the Quick Menu.
• Within system menus: Right-click to exit menus.
3. Scroll-Wheel:
• Use to change menu options.
Using the Mouse Setting the Date & Time Searching & Playing Back Video
1 2
3
Network Video Surveillance Recorder
DNR200V Series
Quick Connection Guide
Adding Cameras from the LAN
1. Connect the camera to a router or switch on
the same network as the NVR.
2. Right-click and select Device Search. Log
in using the admin account (Default User Name:
admin; Default Password: 000000).
3. Click IP Search.
1. In the main viewing mode, right-click and click
Main Menu. If needed, log into the system using the
admin account (Default User Name: admin; Default
Password: 000000).
2. Click Setting>General.
3. Enter the current date (MM DD YYYY) and time
(HH MM SS) under System Time. Set the date and
time. Click Save.
4. Click Save.
Set the date
and time
Click Save
1. From live view, right-click and then click Search. If needed, log
in using the admin account (Default User Name: admin; Default
Password: 000000).
2. Use the calendar on the right to select the day to playback.
3. Use the drop-down menus to select the channels you would like
to playback. Click the display options ( ) to
playback multiple channels simultaneously.
4. Click inside the video bar to select the playback time.
Select the day
to playback
Select channels
to playback
Click inside the bar to
select a playback time
4. Check the camera(s) you would like to add
and click Add.
5. If the Status indicator is green, the camera
is connected and no further configuration is
required. Click OK to save changes.
6. If the Status indicator is red, click .
Update the following information, as needed.
Manufacturer: Select the manufacturer of
your IP camera.
User: Enter the camera’s user name.
Password: Enter the camera’s password.
HTTP Port: Enter the camera’s HTTP Port.
RTSP Port: Enter the camera’s RTSP Port.
7. Click OK. Click OK again to save changes.
NOTE: See the included manual on CD for details on
configuring Daylight Savings Time and Network Time Protocol.
NOTE: See the manual for your IP camera for details on
the default username, password, or ports used.
NOTE: Please visit www.digimerge.com for a list of compatible IP cameras.
 Loading...