

BHS-Series Bi-Ocular Quick Start Guide
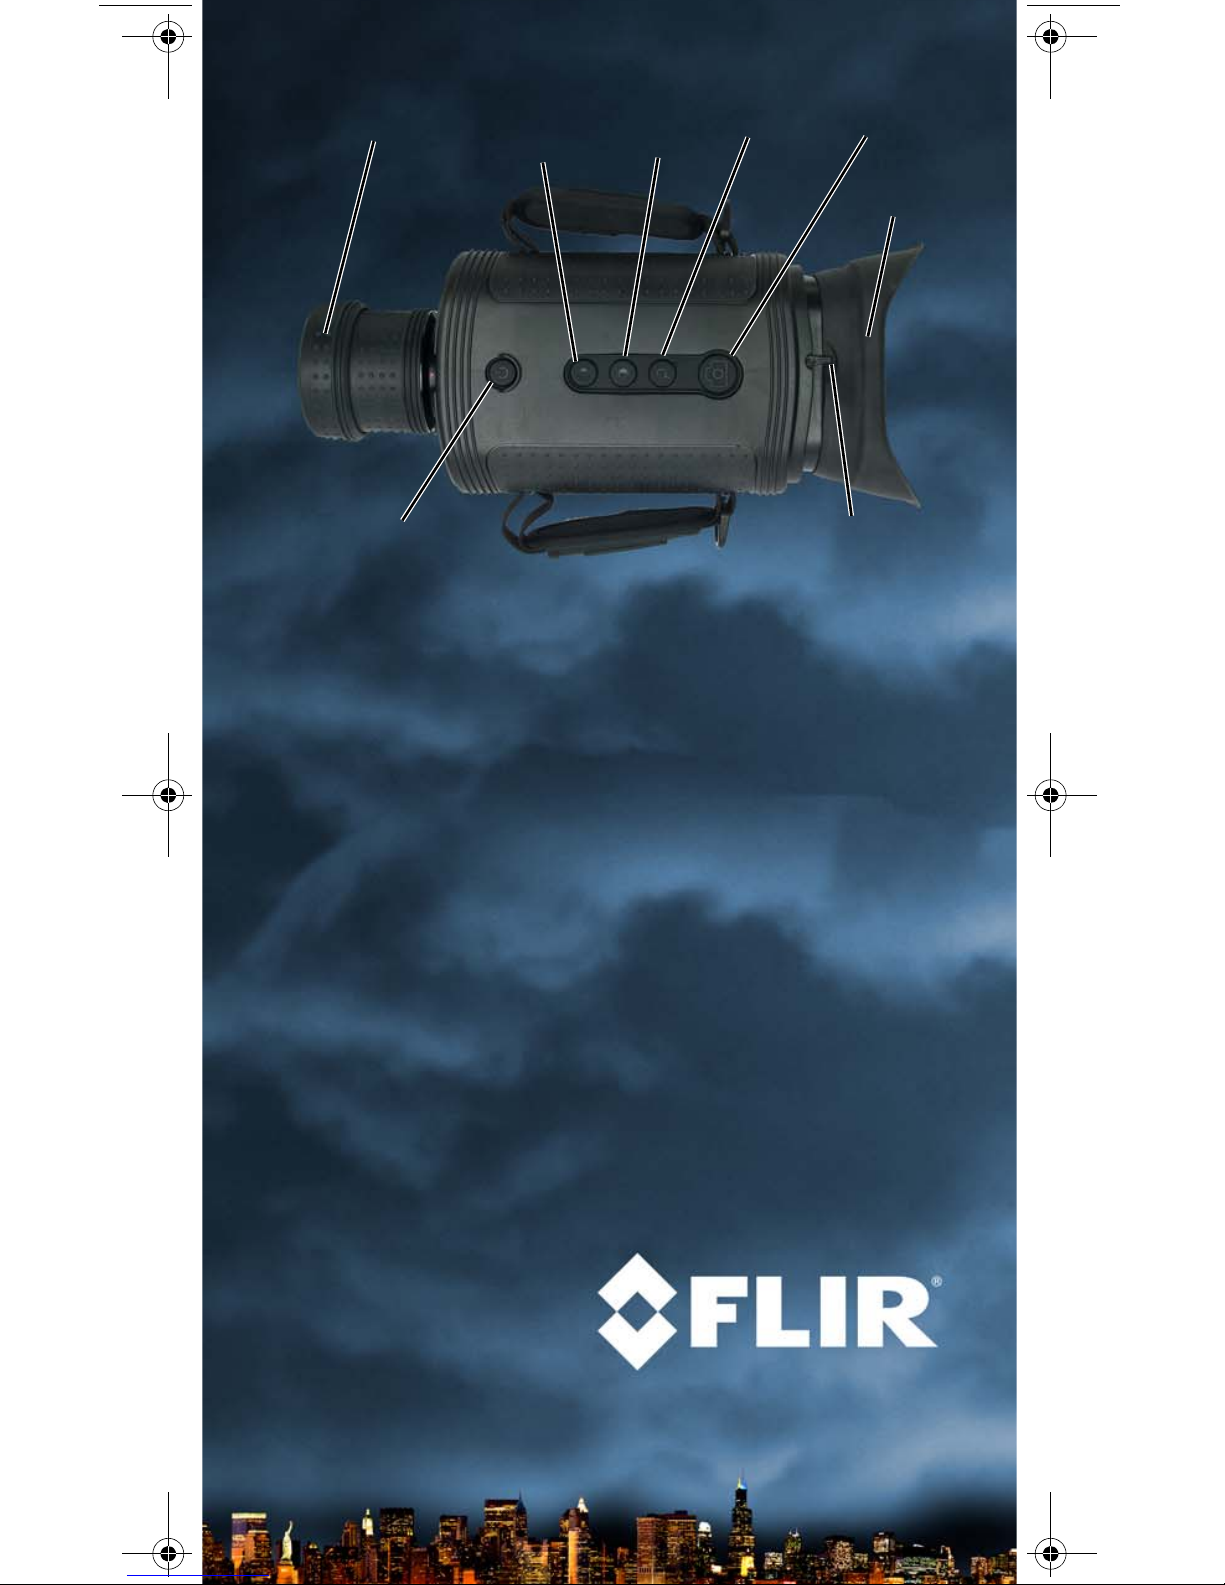
Manual Focus CaptureZoomWhite hot/
Display
Black hot
Interocular
Adjustment
Eyepiece
Power
Brightness
Ring
Power Button – The BHS-Series Bi-Ocular camera has 3 power
modes: On, Off, and Standby.
• On - Takes approximately 90 seconds (during bootup there is a
fast-flashing red LED on the eyepiece display).
• Standby - After the camera is on, pressing the Power button will
toggle the camera between On and Standby mode. (In Standby
there is a slow-flashing red LED on the eyepiece display.)
• Off - Push and hold the power button for 8 sec. to turn off.
Capture Button – Takes snapshots (press and release) or
video clips (press and hold 3 seconds to start video recording).
The files are stored on the integrated SD card.
Display Brightness – Toggle through five brightness settings.
White/Black Hot – In White Hot mode, hotter items appear as
white or light grey.
In the Black Hot mode, hotter items appear as black or dark grey.
Zoom –When enabled, causes the image to zoom to 2X.
Interocular Adjustment – The interocular adjustment lever allows
you to adjust the distance between the two eyepiece displays for
the most comfortable viewing.
This document is controlled to FLIR Technolog y Level 1. The information contained in this document pertains to a defense article controlled for
export by the International Traffic in Arms Regulations (ITAR). FLIR trade secrets contained herein are subject to disclosure restrictions as a
matter of law. Diversion contrary to US law is prohibited. [US Government authorization for public release has been obtained from the Office of
Security Review, authorization no. 11-S-3545.] Additional US Department of State authorization is not required prior to export or transfer to
foreign persons or parties, unless otherwise prohibited.
431-BHS0-00-QS Rev 110 Sheet 1
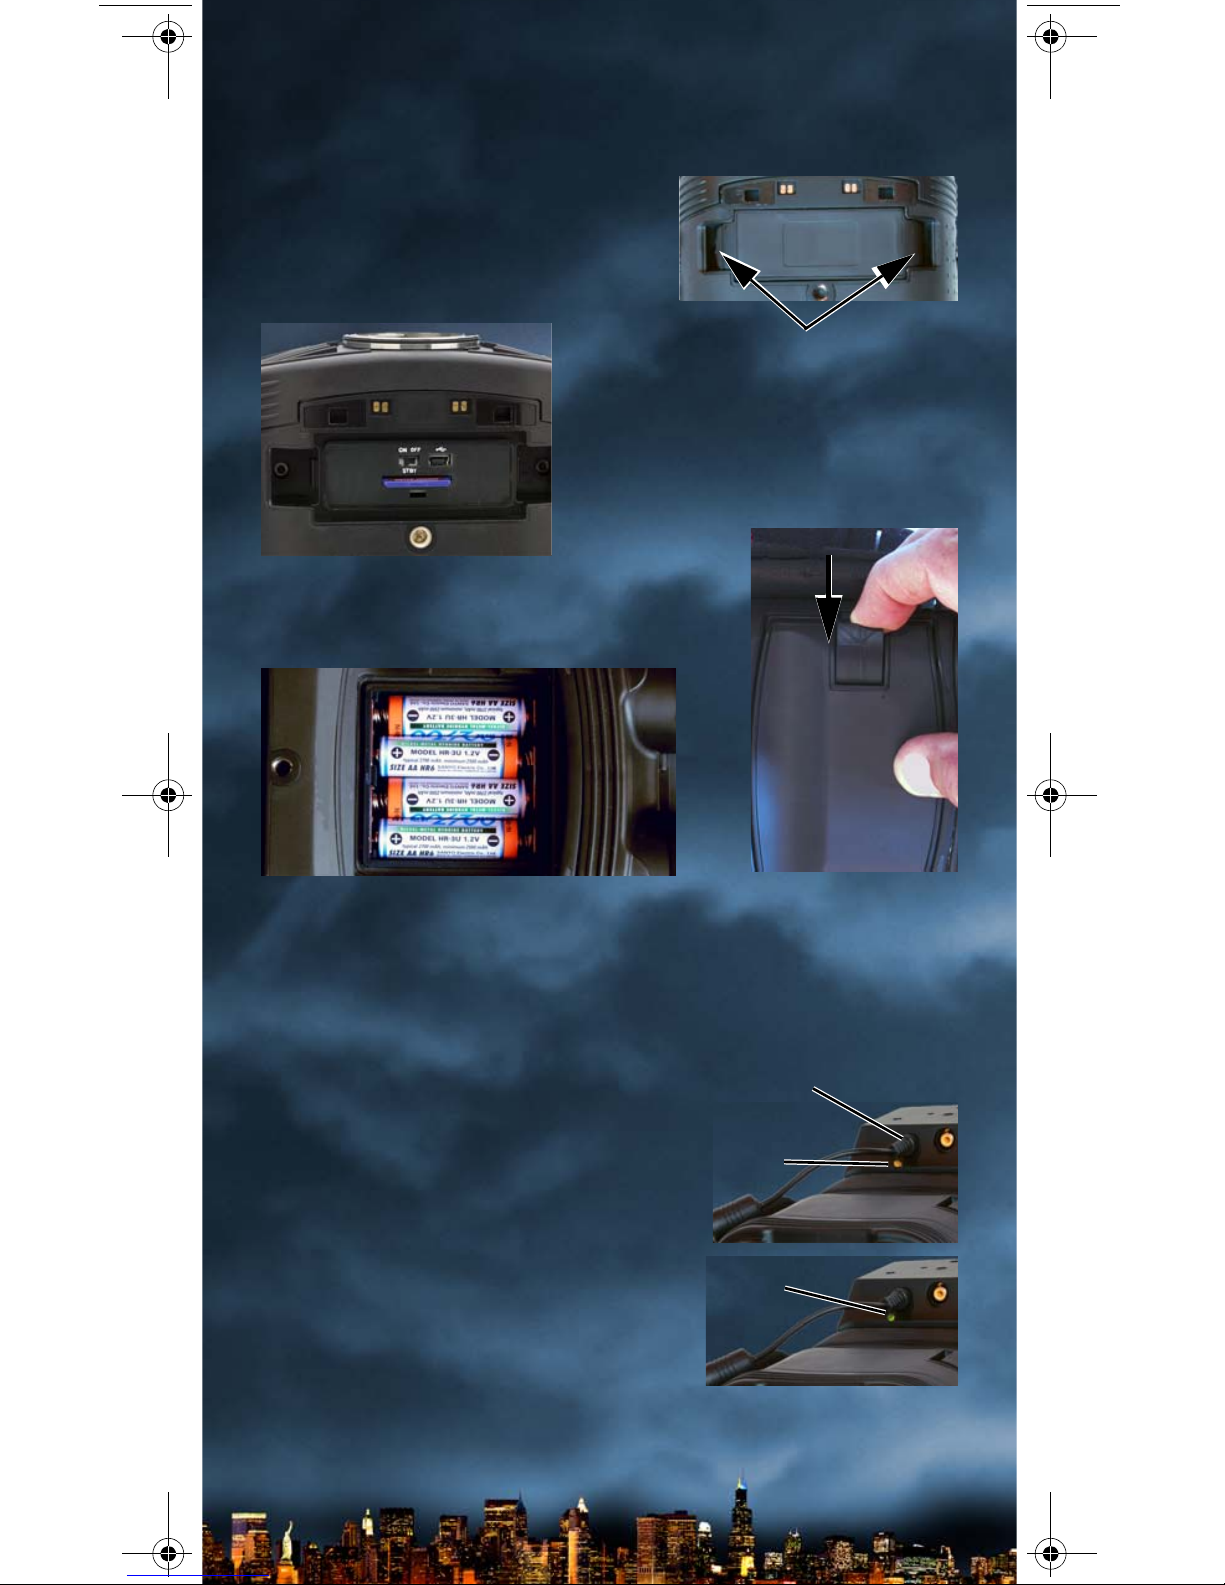
Installing the SD Card and Batteries
Grasp spring loaded buttons
on SD card door edges and pull
Battery
cover
latch
Plug from power adapter
Charging
indicator
Solid
green
The batteries must be installed and charged before using your
camera.
1. Remove the SD card door.
No tools are required.
2. Install the SD card into card
slot with label facing the front
of the camera.
3. Pull off the battery cover by lifting the
latch as shown at the right.
4. Install the batteries as shown.
5. Snap the SD card door back into place and re-install the
The batteries in the camera must be charged prior to first use.
1. Connect the Hot Shoe to your
2. Ensure that the plug is fully seated in
battery cover—it only fits one way.
Charging the Camera
camera.
the Hot Shoe.
When charging correctly, the
charging indicator will be lit yellow
and will blink green for one second
within about 35 seconds.
to blink at decreasing intervals until
the batteries are fully charged.
When fully charged, the charging indicator will be lit solid green.
The initial charge time is approximately 4 hours.
The charging indicator will continue
431-BHS0-00-QS Rev 110 Sheet 2
 Loading...