

Page 1

Observer User Manual | www.flashforge-usa.com
1
User Manual
Observer – Handheld 3D Scanner
V1.0 14.10.2014
Page 2

Observer User Manual | www.flashforge-usa.com
2
Page 3

Observer User Manual | www.flashforge-usa.com
3
Table of Contents
Thank you for choosing FlashForge Observer 3D Scanner
A. Overview
Chapter 1. Summary
A. Unboxing
B. Introduction
Chapter 2. Software
A. Software Installation and Usage
B. Shortcuts Set Ups
Chapter 3. Begin to Scan
A. Scanner Modes
B. Preferred Scanning Environment
Chapter 4. Cloud Server
A. Uploading
Page 4

Observer User Manual | www.flashforge-usa.com
4
Thank you for choosing
FlashForge Observer 3D Scanner
A. Overview
Observer User Manual | www.flashforge-usa.com
4
Page 5

Observer User Manual | www.flashforge-usa.com
5
A.Overview
Note: Thank you for reading and supporting this user manual. This
manual is for the use of FlashForge Observer 3D Scanner only. There are
three chapters on this manual and all operations described are base on
Windows 7, 64 bit operation system.
There are certain hardware requirements when using the FlashForge
Observer 3D Scanner. Faster CPU and audio card would increase the
speed of playback and color combining. However, it would not affect the
resolution on position and color.
Recommended hardware: i3 – i7 CUP, 4G memory, NVIDIA audio card
2G or above, USB 2.0 adaptor. The FlashForge Observer does not support
desktop of any kind. Also, the FlashForge Observer does not support
either AMD or Intel audio card.
Caution: when using the scanner, unplugging the data cable or power
cord of notebook computer is strictly prohibited and any damage caused
by this action would not be covered by our warranty. This manual is
available in different languages. Please contact your local reseller for
details.
2
4
Page 6

Observer User Manual | www.flashforge-usa.com
6
Chapter 1
Summray
A. Unboxing
B. Introduction
Observer User Manual | www.flashforge-usa.com
Page 7
Observer User Manual | www.flashforge-usa.com
7
A.Unboxing
Observer 用户使用指南 | www.sz3dp.com
6
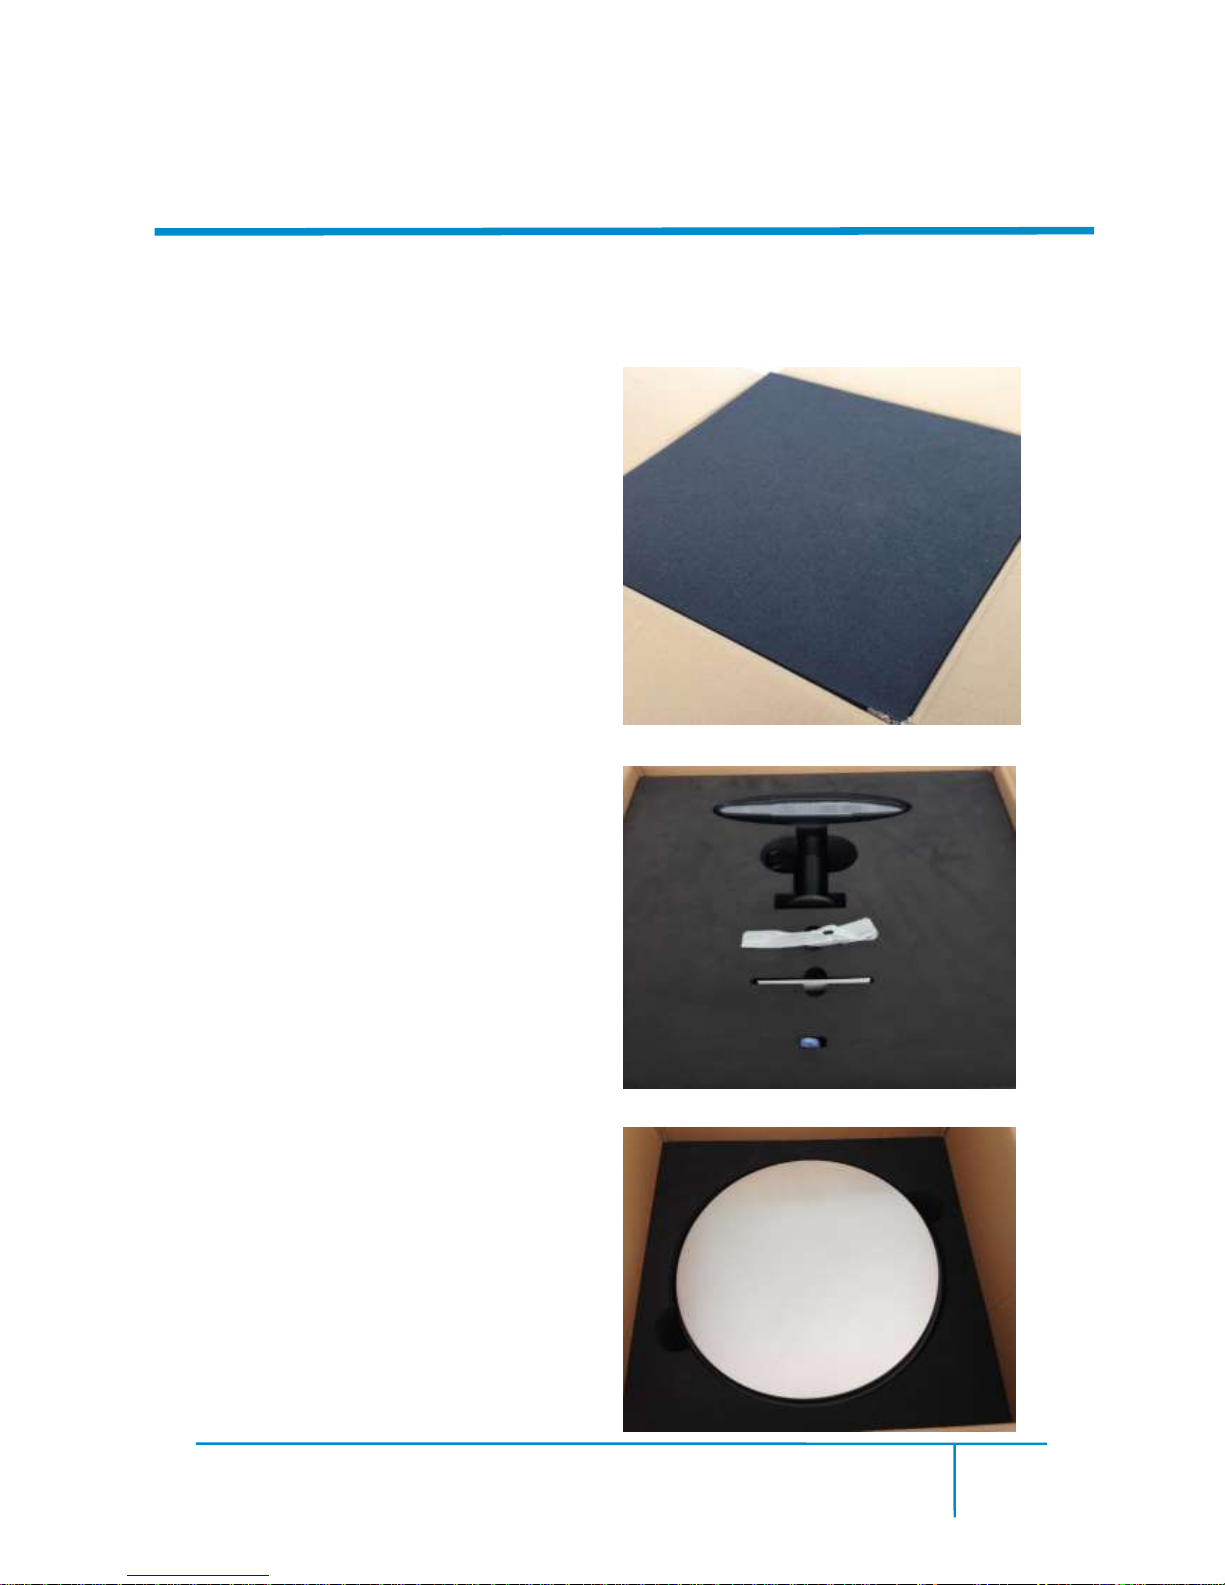
1、After opening the box, you will see a piece
of black foam sheet protecting what is inside.
2、Under the foam, you can see the Scanner,
Combination Key, Disc and After-sales
service card at their corresponding position.
3、By taking the first layer of foam out, you
will see a turntable. Under the turntable there
is a power cord, and a voltage transmitter.
Page 8
Observer User Manual | www.flashforge-usa.com
8
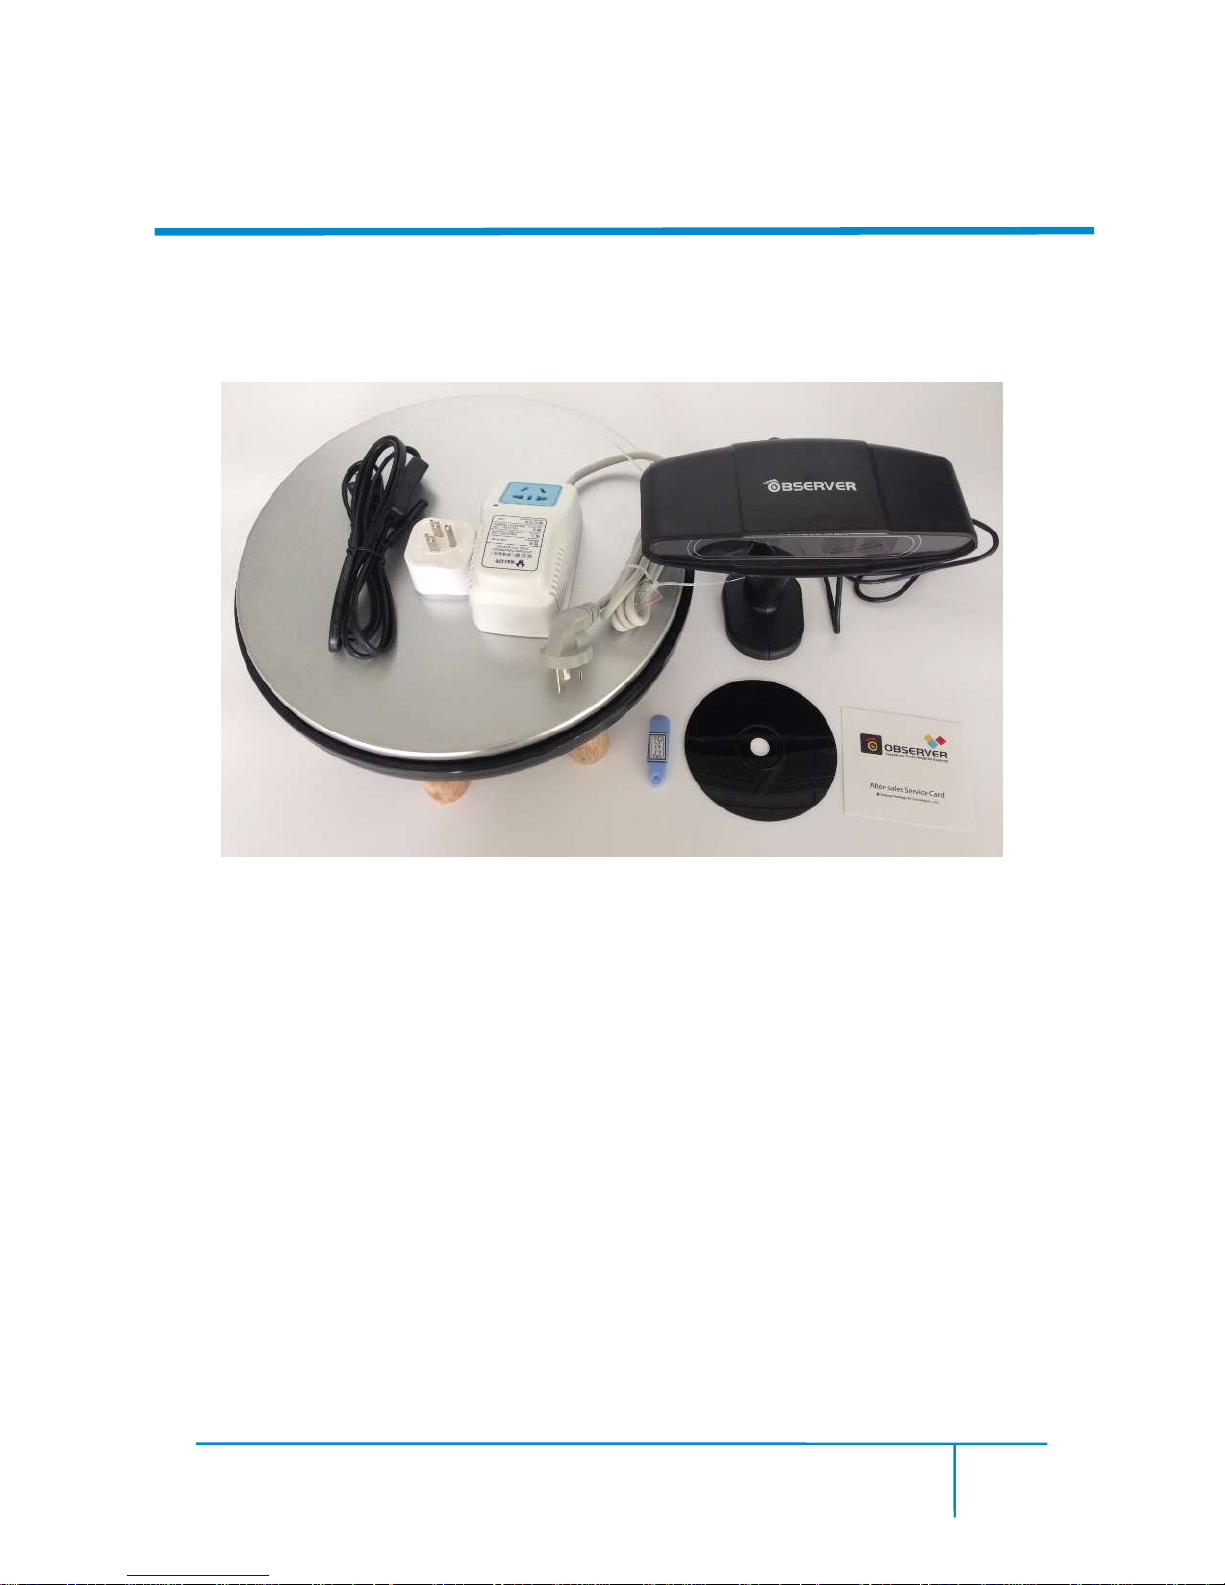
Everything in this picture should be included. If there is anything missing, please
contact us immediately, and we will provide a solution to you right away.
Page 9
Observer User Manual | www.flashforge-usa.com
9
B.Introduction
This chapter will talk about the function of each parts of the printer and how to use
them properly.
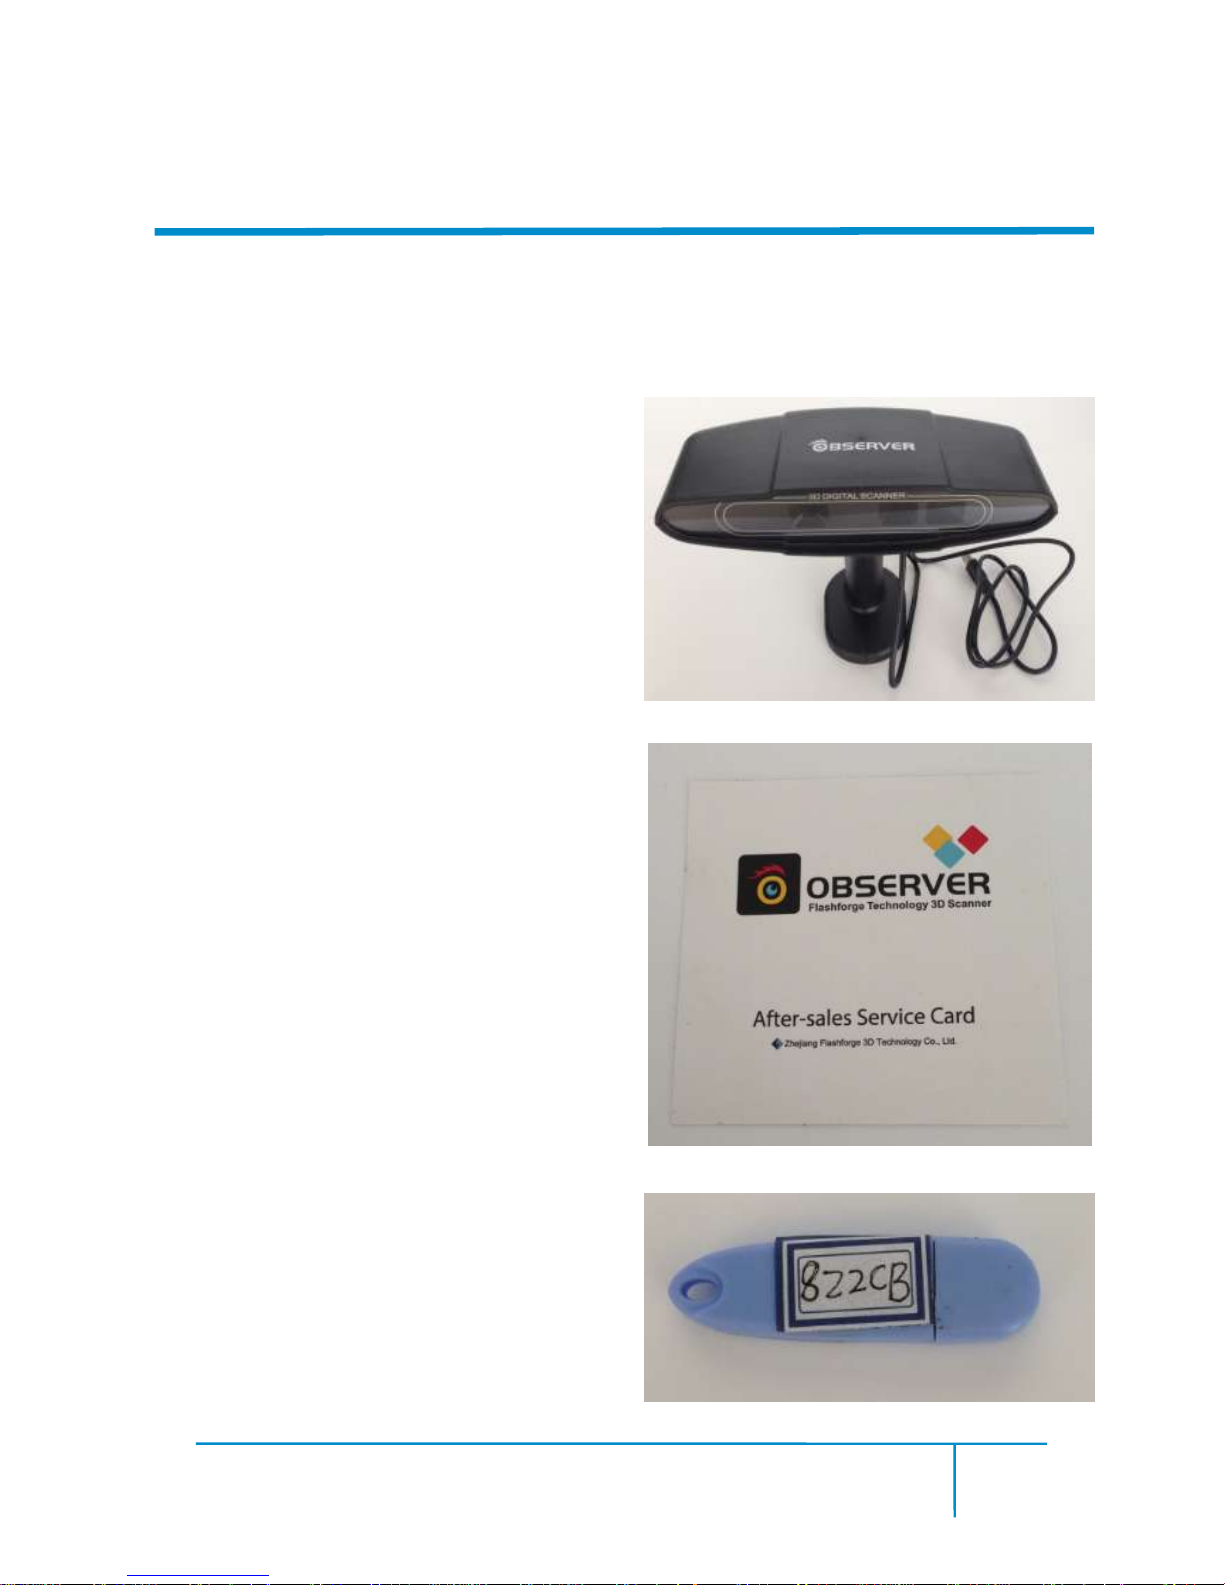
1、Handheld 3D scanner, insert USB cable to
notebook computer. We will talk in detail about
how to use the software to complete a scan.
2、 After-sales Service Card, it lists terms,
conditions and our contact information. Please
read carefully.
3、Combination key, every scanner comes with
a combination key. Scanner would only work
when this key is inserted.
Page 10

Observer User Manual | www.flashforge-usa.com
10
4、Disc, scanner software and videos of use are
stored here.
5、Turn table, requires horizontally leveled
ground, human standing on turn table say “turn
table turn”, used when constructing 3D model.
Turn table turns at 10 rpm. To prevent injury,
please do not step up or down the turn table
when it is turning.
6、Power cord (for turn table), this power cord
is used to provide electricity to the turn table.
There is a switch in the middle of the cord.
Page 11

Observer User Manual | www.flashforge-usa.com
11
This is an extra part for countries using 110V AC. Turn table only functions at 220 V
AC. Countries using 110V AC can use this adaptor to switch the voltage. This is a
temporary solution. There will be a voltage transmitter built within the turn table later
on.
Page 12

Observer User Manual | www.flashforge-usa.com
12
Chapter 2
Software
A. Software installation
and usage
B. Shortcut set ups
Observer User Manual | www.flashforge-usa.com
12
Page 13

Observer User Manual | www.flashforge-usa.com
13
A.Software Installation and Usage
Insert the disc, open the subdirectory where
the installation file is located. We will do a
hardware matching first, no need to plug-in
the scanner. Only need to match the
operation system driver. For example, if the
operation system is Win7 X64, then install
the OpenNI-Windows-x64-2.2.msi and
vredist_x86.exe.
Insert the combination key and scanner.
Combination key works with USB2.0 and
3.0. Scanner only works with USB2.0.
Double click the “Repin.exe” file to activate
the software that comes with the scanner.
Page 14

Observer User Manual | www.flashforge-usa.com
14
Click on ,choose a directory to save
the cache files, click save. At this time, the
scanner will flash to indicate start
successfully. We do not recommend saving
the files on C drive or desktop as the process
of scanning will generate a large volume of
cache. A large volume of hard disck is
required
Close the data window to show the scanned
view. If there is object appearing 40cm in
front of the infracted sensor, the left hand
side window will show modeling at real
time bases. If window is too small to show
the full image, drag the side of the window
to enlarge.
Page 15

Observer User Manual | www.flashforge-usa.com
15
First, set up the exposure of the camera, in
order to get a highly contracted image. If
lighting is not even or under-lighting, please
purchase four to six soft rated light box, put
them in different heights, and use a light
bulb of 75W or higher to light up the room.
To set up the exposure rate: click on ,
active color mode. Step on the turn table
while it is off. Keep moving the scanner
slowly and observe the exposure details
until you find a exposure point that makes
the human face look bright, and lip looks
vibrant. Hold the scanner and click on
to lock down the exposure data. At
this time, click on to take a photo
(take a photo before the scan for the purpose
of post-scan production). After taking a
picture, click on to go back to the
previous screen.
Page 16

Observer User Manual | www.flashforge-usa.com
16
B.Shortcut Set Ups
In default, press “space” to start and press “enter” to exit. If trying to set up start and
stop for other modes, the steps are as the following: press on the small triangle at the
right end of toolbar, pick “Add or Remove Buttons” then “custom…”
Click on “Keyboard” tap.
For example, pick “Operation” under “Category”, then pick “Open Device” under
“Commands”. You can see on the right side that the default short cut is “Ctrl+O”.
Click on the current shortcut and click “Remove” to remove the current shortcut.
Then, click on the space of “Press New Shortcut Key” and press the designated
shortcut key. Last, click on “Assign” to assign the shortcut key as the current shortcut.
Page 17

Observer User Manual | www.flashforge-usa.com
17
Chapter 3
Begin to Scan
A. Scanner Modes
B. Preferred Scanning
Environment
Observer User Manual | www.flashforge-usa.com
17
Page 18

Observer User Manual | www.flashforge-usa.com
18
A.Scanner Modes
The default mode is “face mode”. “body mode” can be switched by pressing .
Currently, Repin One’s newest scanning software, V5.1 Beta,support 4 different
kinds of scan modes: “face quick scan mode”, “body quick scan mode”, “face HD
offline scan mode”, and “free replay scan mode”.
We will discuss each scan mode in detail below.
Face quick scan mode
Make sure “Face” appears at the bottom right corner and currently using the 28s turn
table that comes with Repine One.
Scanner should be placed around 38cm away from customer. Customer is turning on
turn table in a constant speed, when customer’s left ear disappears, click on “space” to
start scanning. At the same time the left hand side will show a 3D model. When
customer’s left ear shows up again, immediately look at customer’s nose. Before the
tip of nose disappeared, click on “Enter” to exit. The window on the right hand side
will show the dot model. Click on to restore colors. The bottom right corner
will show restore progress bar. When it finished and shows “OK”, the dot model will
be refreshed automatically. Click on to save.
Page 19

Observer User Manual | www.flashforge-usa.com
19
Body quick scan mode:
Make sure “Body” appears at the bottom right corner. Modes can be interchanged by
pressing . Turn table is Repin One 28s turn table.
Customer turns on the turn table. Keep the scanner at about 50 to 60cm from the
customer. Start scanning by pressing “Space” when you see the back of the
customer’s head. The left hand window will show a model.
Body scan is separated into different parts. Scan one part first and move 50cm down.
Because we starts to scan from the back of the customer’s head, after one round, when
we see customer’s back, steadily move the scanner down. After turning another round,
move down again and so on. The whole body takes about four turns and the different
parts will connect together automatically. Click on “Enter” to exit. The right hand side
will show a whole body dot model. Click on to restore colors. The bottom right
corner will show restore progress bar. After running three times on the progress bar,
the dot model will be refreshed automatically. Click on to save.
Face HD Offline Scan Mode:
Click , the system will automatically use a portion of the space to supplement
memory. Customer stands on the constantly turning turn table. Keep the Scanner at
about 40cm from the customer. Make sure “Face” appears at the bottom right corner.
Turn table is 28s turn table that comes with Repin One. On the left hand side window,
when the left ear disappears, click on .
Note: Under this mode, there will be no model just now, but there will be countdown
at the bottom right corner. Keep the distance between scanner and customer. Click on
“Space” when countdown finishes. Now there will be model and numbers at the right
Page 20

Observer User Manual | www.flashforge-usa.com
20
hand corner will be fluctuating, playback starts.
Pay attention to the playback. When the nose tip of customer disappears and the left
ear completes, click “Enter”. The right hand side will show a whole body dot model.
Click on to restore colors. The bottom right corner will show restore progress
bar. When it finished and shows “OK”, the dot model will be refreshed automatically.
Click on to save.
Free play scan mode (5.0 beta and above):
This mode is a feature mode of Version 5.0 beta and above. Along with 5 meter and
above cable for Repin One, it can let model scans without using turn table to achieve
other posture.
Make sure the scan mode is either “Face” or “”Body”. “Face” mode does not connect
automatically. It only scans a certain area. This mode solves the problem of
incompleteness of top of head and chin. “Body” mode connects different body parts
automatically. It scans the whole body. It has no particular requirements to scan, just
up to the user’s feeling. As long as the scanner and customer is within a distance
range, all the data will be captured. However, using “Body” mode is not
recommended for beginners.
When customer has the right posture, put the scanner 50 to 60cm away from customer.
Click on or “V” to start scan. There will be no model image for now, but the
progress on the bottom right corner will increase. When the whole body scan is
finished, click on or “V” again to finish collecting data. Click on space at
this time, and 3D modeling will appears on the left hand side and playback will start
as well. When modeling is complete, click on “Enter”, and a model will appear on the
Page 21

Observer User Manual | www.flashforge-usa.com
21
right. Click on to restore colors. The bottom right corner will show restore
progress bar. When it finished and shows “OK”, the dot model will be refreshed
automatically. Click on to save.
Different modes suits different needs for scanning. For example, using more shortcuts
during exhibit will have a better experience on customer and decreases the calculation
time. Free mode usually used on senior or anyone who has trouble getting onto the
turn table.
Page 22

Observer User Manual | www.flashforge-usa.com
22
B. Preferred Scanning environment
This is about preferred location and how to set up soft lightings.
Pick a corner of the walls and put four (75W or above) lights as indicated on the
picture below. Ideally, six lights will be better. Try to position the light in parallel with
the wall surface. This way lighting around human will be very constant. Images
generated this way will have a good coloring effect. If there are no white walls, put
two pieces of white drapes on the walls.
Page 23

Observer User Manual | www.flashforge-usa.com
23
Chapter 4
Cloud Server
A. Uploading
Observer User Manual | www.flashforge-usa.com
23
Page 24

Observer User Manual | www.flashforge-usa.com
24
A.Uploading
When scanning is finished, the model is usually incomplete. This is due to the
limitation of technology using in this form scanning. For example, the top of head and
chin are two of the most difficult places to capture by the scanner. Therefore,
post-scan editing is required. It requires a special program to edit the 3D image. You
can upload your scan to a cloud server and we will have our technicians adding the
final touch for you in 24 hours. For new customers, we will provide the first 20
editing free of charge. Additional editing requires certain fees.
We are going to introduce how to upload files to cloud server.
1、Visit this link: www.dddcloud.net
2、Enter username and password. The default username is the 5 digit on the
combination lock and the default password is a letter “F” followed by the 5 digit on
the combination lock.
XXXXX
Page 25

Observer User Manual | www.flashforge-usa.com
25
3、After signing in, click on “shopping” on the left menu bar.
4、Because of the work required to edit full body and half body scans are different, so
are the charges (free for the first 20 editing). Click on “Buy now” for the
corresponding type of editing.
5、On the next screen, enter the quantity of scans you are trying to edit, and click on
“Update the cart” to refresh. After confirming the quantity, click on “check out”.
Page 26

Observer User Manual | www.flashforge-usa.com
26
6、On the next screen, pick the scan that needs to be edited. The corresponding file
extension is .asc. At the same time, a color picture of the person is also required. Click
on “choose”,and click on “Upload” on the pop-up. Choose the corresponding .asc
file and color picture of the person and click “OK”. When files finish uploading, click
on “Sub order” at the bottom right corner.
7、 After clicking “Sub order”, your files will be uploaded into cloud server. Our
specialist can view your scans now. For new customers using their free 20 editings, it
is done. We will send you the post-editing scan in the form of .stl or .obj in 24 hours.
If you have used up your free editings, then you will need to click on “Pay in Paypal
immediately.” To finish the payment process.
Page 27

Observer User Manual | www.flashforge-usa.com
27
All of our staffs are here for you and glad to solve any problem you might
have encountered during the use of Observer I. If you have a question that
you do not find the answer on our user manual, please send an e-mail to
Observer@ff3dp.com with the details of your questions and possibly
picture of illustrations, and we will provide you an answer in a timely,
efficiently fashion.
Thank you for your cooperation and support.
Page 28

Observer User Manual | www.flashforge-usa.com
28
 Loading...