

Page 1
OWNER'S MANUAL
Page 2
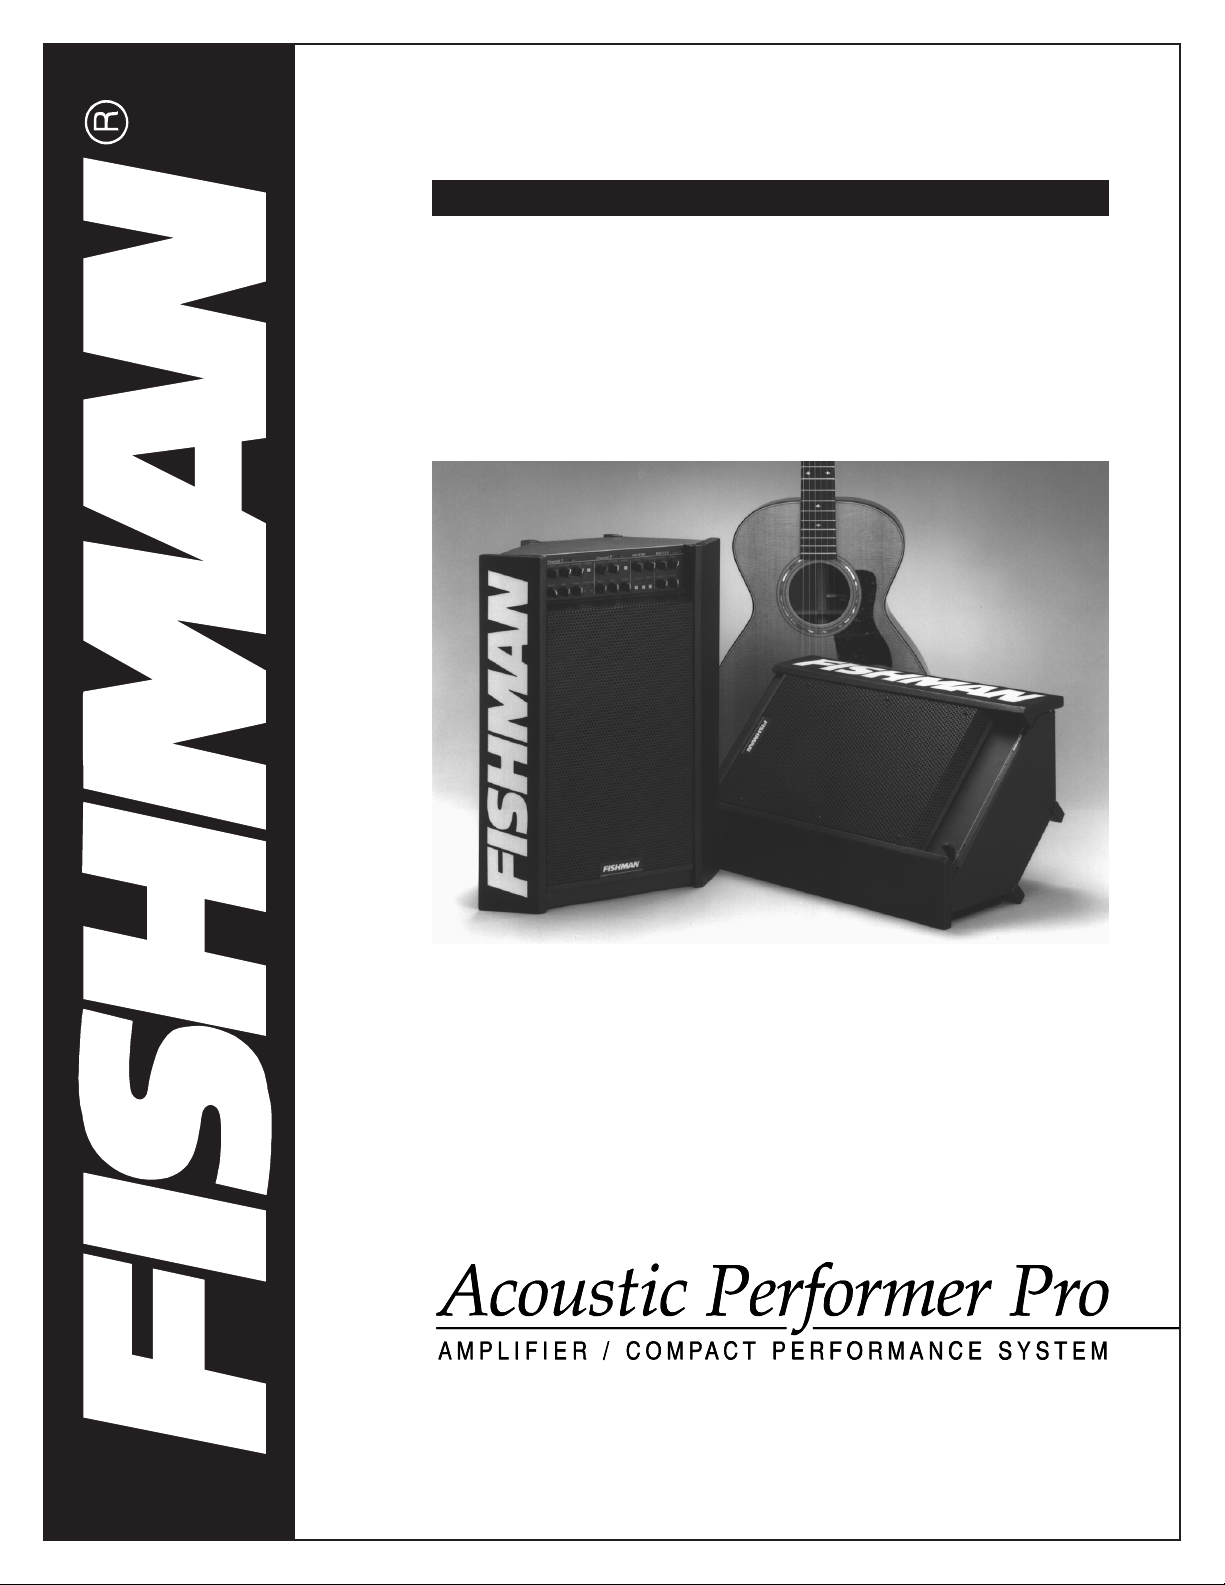
ACOUSTIC PERFORMER PRO
INTRODUCTION CONTENTS
3
-
Thank you for your purchase of a FISHMAN product. Please read this manual carefully. If you have
any further questions please call our PRODUCT
INFORMATION LINE at 978-988-9665.
Bringing a guitar, violin, banjo, mandolin, or any
other traditionally “unplugged” instrument to the
stage requires much more than simple amplification. Keeping the rich tone intact, eliminating feedback, and making sure that the audience gets the
right sound from your instrument entails a different
approach from the typical amplifier designed for,
say, an electric guitar.
The Fishman Acoustic Performer Pro is therefore
much more than a simple amplifier. It’s actually a
compact performance system and professional P.A.
system in a small enclosure. It includes two channels for instrument pickups or microphones (from
one or two instruments), as well as an input for a
vocal microphone. It also has a built-in digital
reverb, with its tone and reverberation characteristics tailored to accentuate your music. Phase
switches and an anti-feedback notch filter help to
maintain clarity without annoying squeals and
howls. And the Acoustic Performer Pro has a multitude of inputs and outputs that make it easy to connect to larger P.A. systems, recording gear, and signal processors such as pitch transposers and digital delays.
PACKING INFORMATION
SAFETY PRECAUTIONS
QUICK START
-
FRONT PANEL FEATURES
4
-
REAR PANEL FEATURES
5
6
-
OPERATING INSTRUCTIONS:
Front Panel Channel 1
8 Front Panel Channel 2
10 Reverb
12 Master Section
13 Rear Panel Channel 1
15 Rear Panel Channel 2
17 Rear Panel Mix Section
18 Rear Panel Power Section
19 Input Options
20 Using the Effects Loops
Using the Sends
21-POSITIONING THE ACOUSTIC PERFORMER PRO
OPTIONAL ACCESSORIES
PRECAUTIONS AND CARE
-
BLOCK DIAGRAM
22
-
SPECIFICATIONS
23
24
-
OTHER FINE FISHMAN PRODUCTS
LIMITED WARRANTY
Please fill in the following information for future reference:
MODEL NUMBER:
SERIAL NUMBER:
DEALER’S NAME:
DEALER’S ADDRESS:
DATE OF PURCHASE:
2
Page 3
ACOUSTIC PERFORMER PRO
SAFETY PRECAUTIONS QUICK START
although we recommend that you do read it in order to get
the most out of your Acoustic Performer Pro. Here’s what you
need to do if you want to “plug in and play.”
CAUTION!
THE FISHMAN ACOUSTIC PERFORMER PRO IS A DUAL
VOLTAGE AMPLIFIER. ALWAYS USE THE PROPER FUSE
FOR THE VOLTAGE SELECTED. REFER TO PAGE 18 FOR
INFORMATION ON VOLTAGE SELECTION AND CHANGING FUSES.
1
There are no user-serviceable parts inside.
1
Therefore, don’t open it up or try to modify it.
1
Always refer servicing to qualified personnel.
1
Always replace the line cord (AC mains supply) with the
same type and rating.
1
Always turn off the amplifier before making or unplugging
any AC connections.
1
Do not operate this amplifier in the rain or where excessive
moisture is present.
1
This amplifier is very loud. Never operate it with your ear in
front of the speaker.
1) Plug the AC cord into the Acoustic Performer Pro.
2) Make sure that the voltage selector switch, next to the
3) Plug the other end of the AC cord into an electrical outlet
4) Insert the plug from an acoustic instrument’s pickup (or
5) Make sure Channel 1’s Level 1 knob, Channel 2’s Level 2
6) Turn the amp on; the switch is in the lower portion of
7) Turn up the Master section’s Level to about the 12:00
PACKING INFORMATION
UNPACKING
After you unpack your Acoustic Performer Pro amplifier,
check it for any damage. We tested and inspected your amp
before we packed and shipped it, but in the unlikely event
that something was damaged before it reached you, contact
your dealer to remedy the situation. Do not use your amp if it
appears damaged.
8) Slowly turn up the Level 2 knob and strum or pluck the
9) Adjust the Level controls and Bass, Mid, and Treble EQ
AC receptacle, is set to the correct voltage for your area.
with the appropriate AC voltage.
1/4” plug from a shielded cord) into the Pickup In jack on
the Acoustic Performer Pro’s rear panel.
knob, and the Master section’s Level knob are turned all
the way down (fully counterclockwise).
the Acoustic Performer Pro’s back, next to the AC
receptacle.
position.
strings on your instrument (if the instrument has a volume
control, make sure it’s turned up).
NOTE: If your instrument is plugged into the Inst. Mic In
jack, then turn up Level 1 instead of Level 2.
controls to suit your taste.
PACKING MATERIALS
Save the original packing materials and the box that your
Acoustic Performer Pro came in. Should you ever need to
ship it, the box and its inserts will protect it.
You don’t have to read this manual to get up and running,
QUICK START
SETTINGS
ACOUSTIC PERFORMER PRO OWNER'S MANUAL
3
That’s the basic setup. It’s only the tip of the iceberg for this
extremely versatile amplifier / sound reinforcement system,
and you should read through the rest of the manual to find
out how you can get the maximum sonic benefits from your
Acoustic Performer Pro.
➥
Page 4
ACOUSTIC PERFORMER PRO
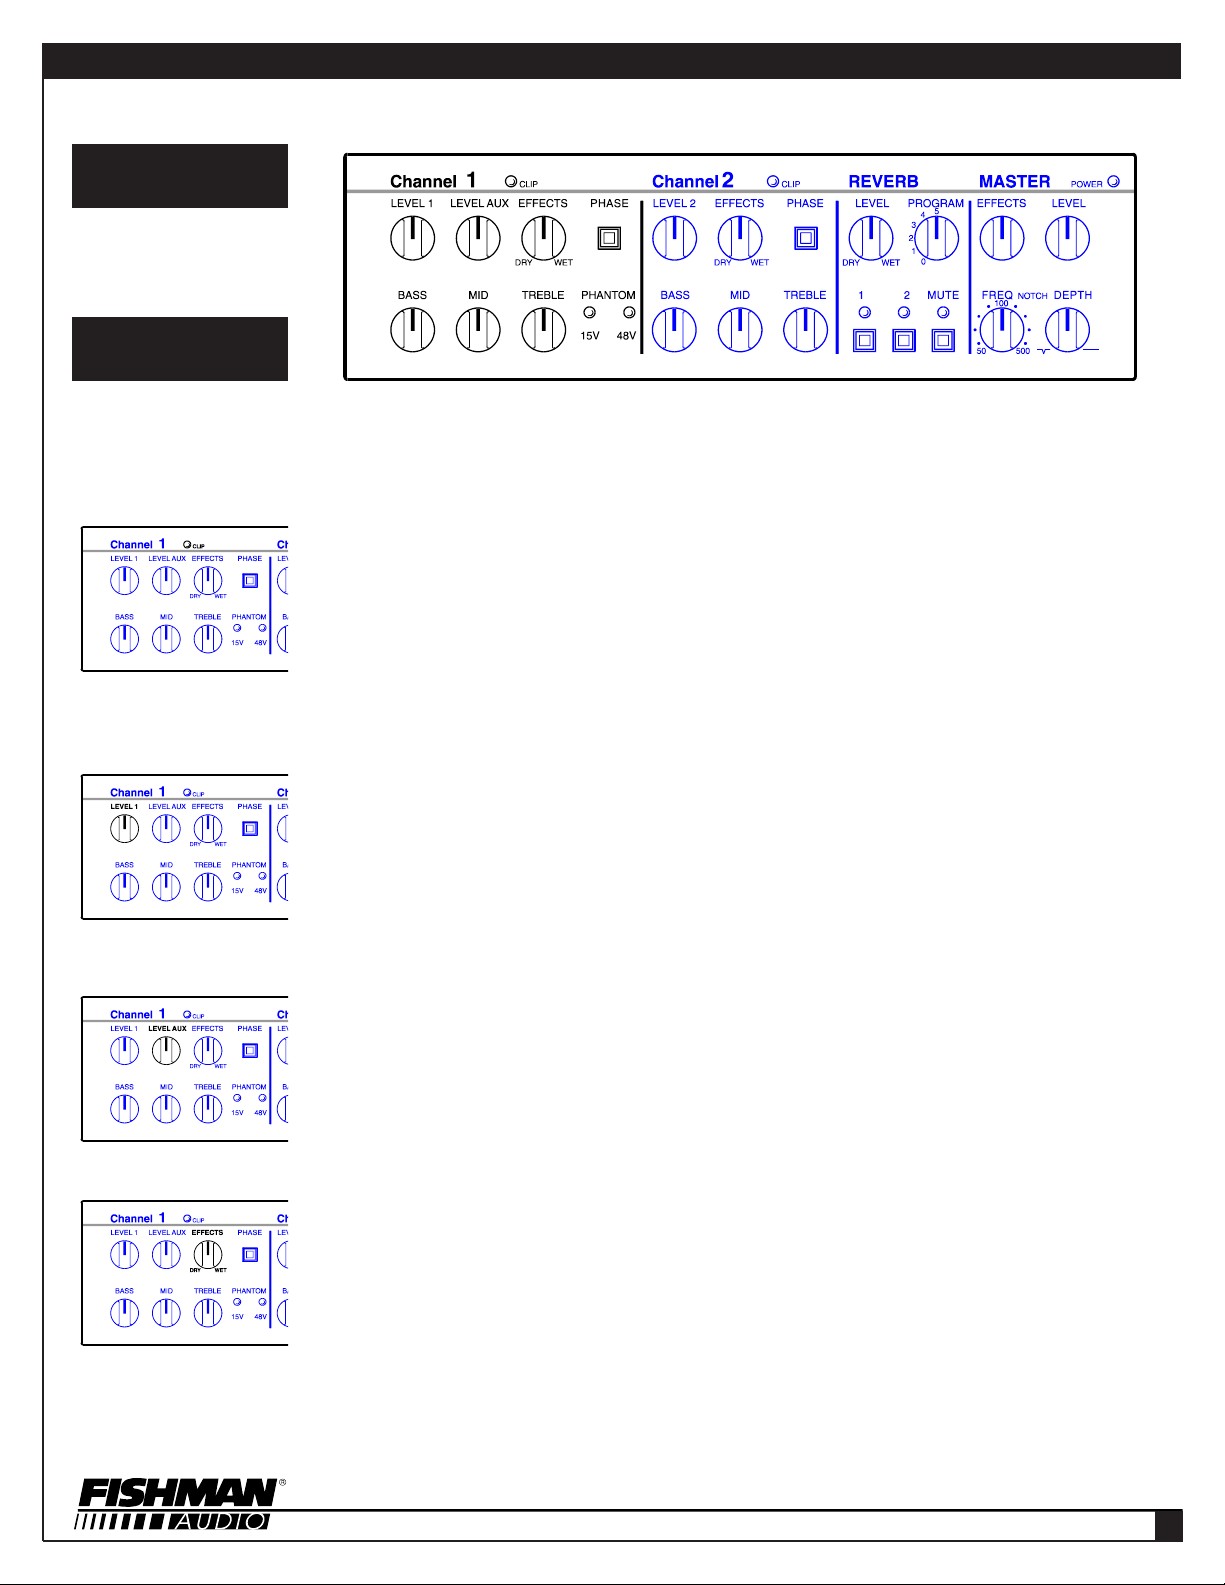
FRONT PANEL FEATURES
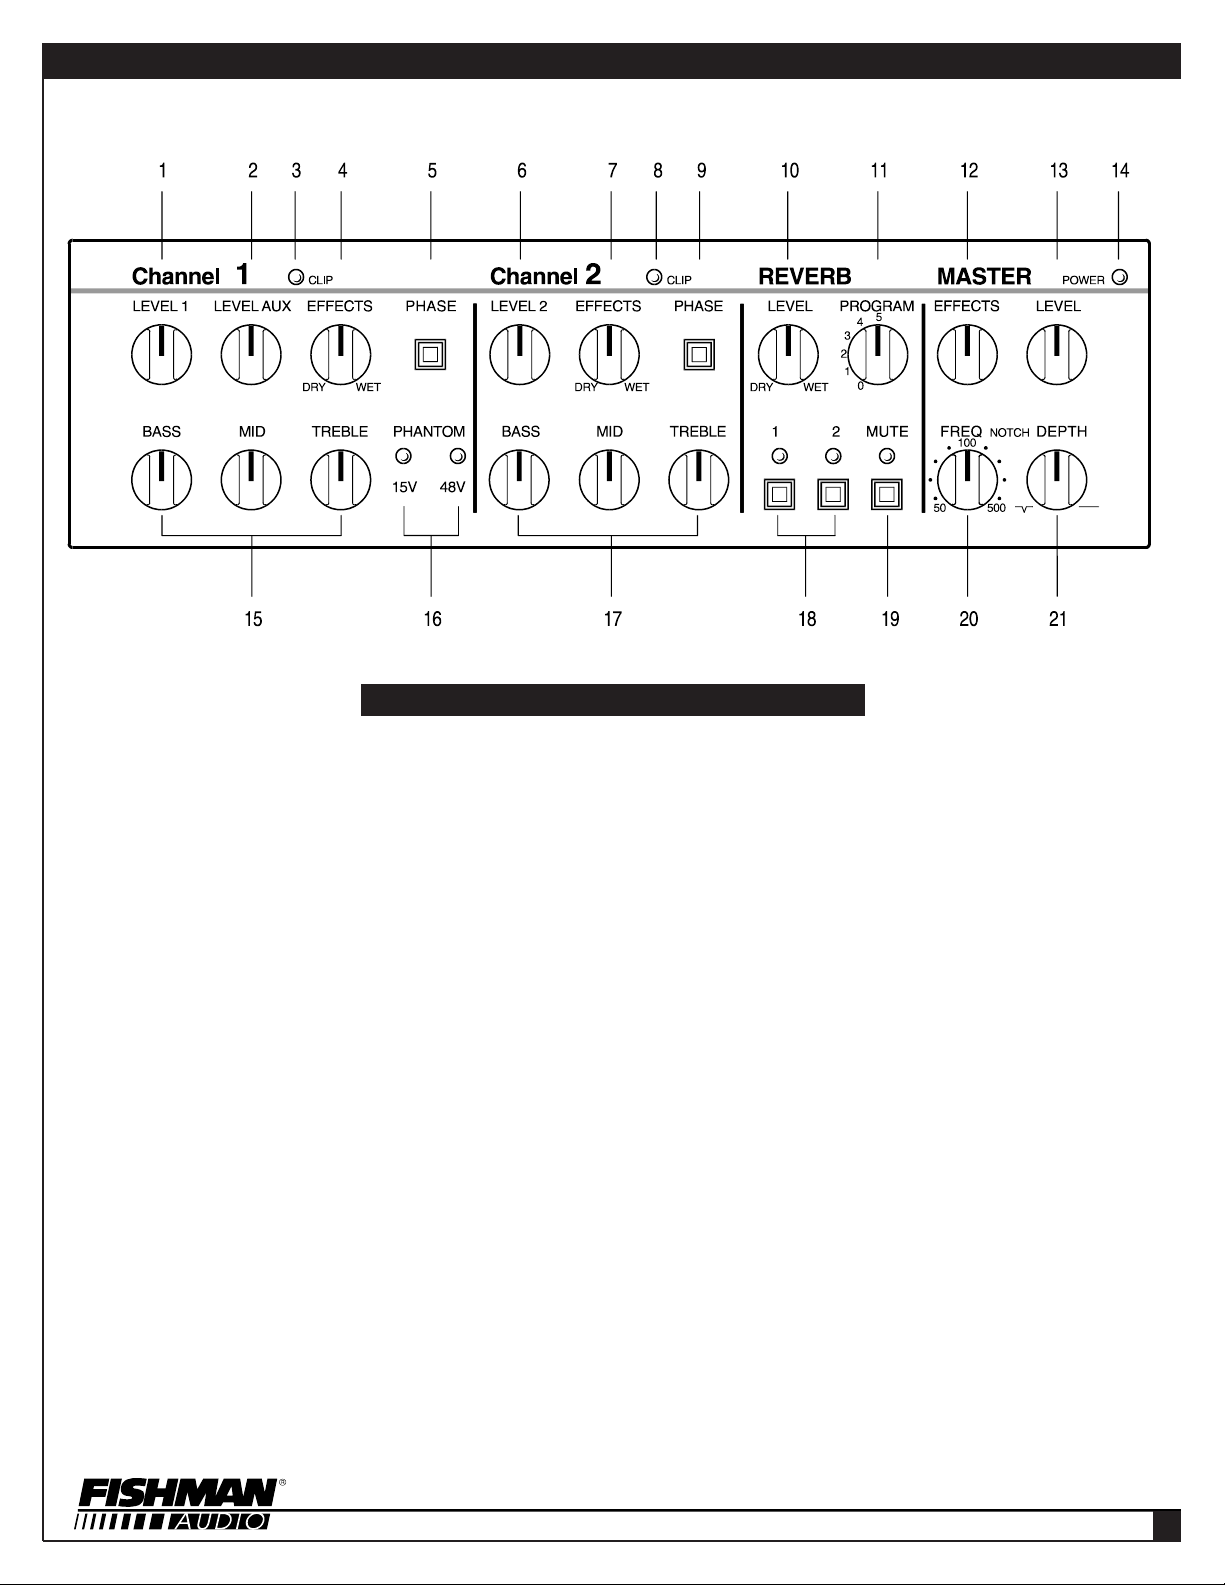
CHANNEL 1 LEVEL (See page 6)
1)
AUX LEVEL (See page 6)
2)
CHANNEL 1 CLIPPING INDICATOR
3)
(See page 6)
CHANNEL 1 EFFECTS LEVEL
4)
(See page 6)
CHANNEL 1 PHASE REVERSAL
5)
SWITCH
CHANNEL 2 LEVEL (See page 9)
6)
CHANNEL 2 EFFECTS LEVEL
7)
(See page 9)
CHANNEL 2 CLIPPING INDICATOR
8)
(See page 8)
(See page 7)
REVERB PROGRAM (See page 11)
11)
MASTER EFFECTS LEVEL (See page 12)
12)
MASTER VOLUME LEVEL (See page 12)
13)
POWER INDICATOR (See page 12)
14)
CHANNEL 1 EQ (See pages 7 - 8)
15)
PHANTOM POWER INDICATORS
16)
(See page 8)
CHANNEL 2 EQ (See page 10)
17)
REVERB CHANNEL ASSIGN
18)
(See page 11)
MUTE SWITCH (See page 11)
19)
NOTCH FILTER FREQUENCY CONTROL
20)
CHANNEL 2 PHASE REVERSAL SWITCH
9)
(See page 9)
REVERB LEVEL (See page 11)
10)
(See page 12)
NOTCH FILTER DEPTH CONTROL
21)
(See page 12)
4
Page 5
ACOUSTIC PERFORMER PRO
REAR PANEL FEATURES
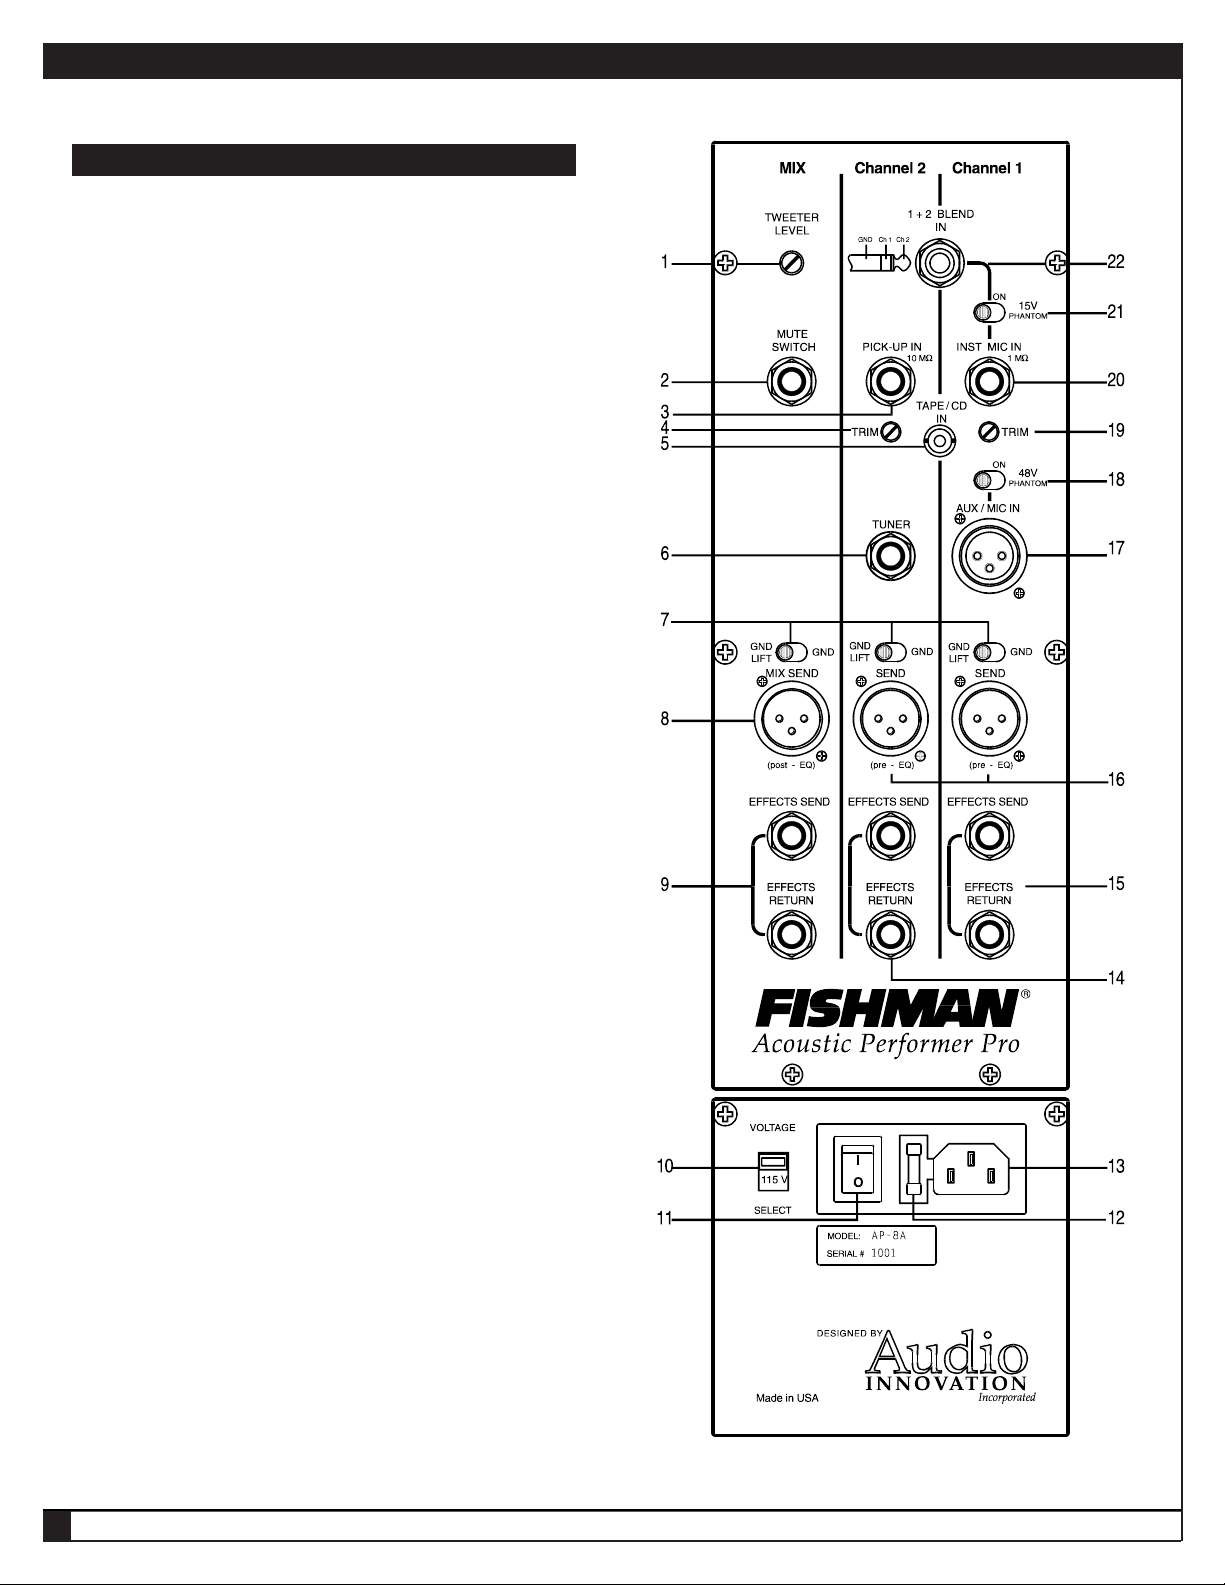
REAR PANEL FEATURES
TWEETER LEVEL (See page 17)
1)
MUTE FOOTSWITCH JACK (See page 17)
2)
CHANNEL 2 INPUT (See page 15)
3)
CHANNEL 2 TRIM (See page 15)
4)
STEREO TAPE / CD INPUT (See page 16)
5)
TUNER OUTPUT JACK (See page 15)
6)
GROUND LIFTS (See pages 14, 15 and 17)
7)
BALANCED OUTPUT - POST EQ (See page 17)
8)
MASTER EFFECTS LOOP (See page 17)
9)
VOLTAGE SELECT (See page 18)
10)
POWER SWITCH (See page 18)
11)
FUSE HOLDER (See page 18)
12)
AC RECEPTACLE (See page 18)
13)
CHANNEL 2 EFFECTS LOOP (See page 16)
14)
CHANNEL 1 EFFECTS LOOP (See page 14)
15)
BALANCED OUTPUTS - PRE-EQ (See pages 14 and 15)
16)
AUX / MIC INPUT (See page 14)
17)
48V PHANTOM POWER SELECT (See page 14)
18)
CHANNEL 1 TRIM (See page 13)
19)
5
CHANNEL 1 INPUT (See page 13)
20)
15V PHANTOM POWER SELECT (See page 16)
21)
STEREO INPUT (See page 16)
22)
ACOUSTIC PERFORMER PRO OWNER'S MANUAL
➥
Page 6
ACOUSTIC PERFORMER PRO
OPERATING
INSTRUCTIONS
FRONT PANEL
CHANNEL 1
Channel 1 is different from Channel 2 in a few ways. First, it has a 1 Megohm impedance when the 15V Phantom Power is off; when it is on, it has
the ability to power a guitar’s internal microphone. Second, it has an XLR auxiliary input that lets you plug in a vocal mic or other piece of gear that is
electrically balanced.
CLIP LED
This LED glows only when incoming signal levels from an instrument exceed the point at which the input stage or power amp
distorts, a sure sign that the signal level is too “hot”. Set the rear panel’s Trim control so that the Clip LED only glows when you
whack your instrument’s strings exceptionally hard (of course if you tend to always whack them very hard, ignore that suggestion, and instead adjust the Trim control so that it never glows). You may find that you must also set the Level 1 knob to keep
the Clip LED from glowing.
LEVEL 1
This knob sets the volume of the signal coming from your instrument to the Channel 1 preamp section of the Acoustic
Performer Pro. It also adjusts Channel 1’s volume relative to the Auxiliary Input’s level, and the level of Channel 2.
NOTE: Before you adjust Level 1, check the Master section’s Level control. If it’s set all the way down, no sound will come out
of the amp, regardless of how you adjust Level 1. Conversely, if the Master Level is set extra-high, then turning up Level 1 can
result in hair-raising loudness. Think of Level 1 and the Master section’s Level as operating in tandem.
LEVEL AUX
This knob sets the volume of the signal coming from a vocal microphone or external source that’s input through the Rear Panel
XLR jack labeled AUX/MIC IN. Always check the setting of the Master section’s Level control before adjusting the Level Aux
knob’s position.
EFFECTS
When you place an external signal processor (also called an effect, stomp box, etc.) into Channel 1’s effects loop, you can
blend the effect with your acoustic instrument’s sound. Fishman designed the Effects Loop to run in parallel with your main signal. Why? Most Effects Loops require sending the entire signal through the Effects Loop, thereby making it vulnerable to the
introduction of extraneous noise; it can also noticeably degrade the signal, especially if the signal processor isn’t as clean as
the Acoustic Performer Pro, or its frequency range is limited. The Acoustic Performer Pro’s strategy ensures a solid, dynamic,
straight sound and then blends the effect much the way a professional mixing console approaches effects blending.
NOTE: For the best sound quality and lowest noise, adjust the signal processor’s mix control (if it has one) so that its output
contains only a “wet” (effect-enhanced) signal.
6
Page 7
ACOUSTIC PERFORMER PRO
FRONT PANEL - CHANNEL 1 Continued
PHASE
When a signal is out of phase with another signal, it can cause cancellation, which (as its name implies) results in something missing. The opposite is true when two signals are in phase; the combined signals can be solid or absolutely overpowering, depending
on the sounds and how much “in phase” they are. Using the phase relationship between two sounds can be a powerful tool for fighting feedback or making multiple sound sources (such as a pickup and a built-in microphone) sound better together.
The Phase switch can accomplish a couple of different things. If you are using an instrument equipped with only one pickup or internal microphone, it can invert the signal’s phase, which can, in some cases, be a remedy for feedback. If your instrument has a builtin mic as well as a pickup, one of the signals may be out of phase in relation to the other, so employing the Phase switch on one
channel of the Acoustic Performer Pro corrects that, providing a stronger signal, often with better tone.
NOTE: When a pickup and an internal mic are used, try using the phase switches on both channels to check for correct phase relationships between the two sound sources. Also, if your instrument has only one pickup or microphone, try the Phase switch in both
its in and out positions, to be sure the best sound is being produced.
1
FOLLOW THIS PROCEDURE TO MAKE BEST USE OF THE PHASE SWITCHES
If you have a microphone in your setup, it is best to begin getting a sound from that.
With the Master Level at 3/4 of its maximum volume, bring the microphone’s volume up to the desired level. In the event that the
mic begins to feed back, adjust the volume lower or use the Bass, Mid, or Treble EQ controls to eliminate the feedback. Determine
the location onstage where you are going to play, and set the phase switch on the mic channel to the sound that is most pleasing.
Since the characteristics of microphones and their placement play a big part in the sound achieved, this would also be a good time
to adjust or aim the mic in your instrument to get the most appropriate sound. Keep in mind that given the nature of acoustic instruments and how they interact with amplifiers, once the phase is set, if you move more than 5 or 6 feet from your playing location, the
phase will reverse itself 180 degrees.
With the microphone volume on, adjust the transducer’s level until it is approximately equal in volume to the microphone. Next, flip
the transducer’s Phase switch and you will immediately hear what is correct. If it’s the incorrect phase relationship, you will get a
tremendous amount of bass loss because the bass frequencies cancel.
After taking these steps to determine the correct phase settings, make note of their relative positions. These settings between the
mic and transducer will remain the same from performance to performance, with the exception that each may need to be reversed
together in some instances. In other words, if you determine that the phase of the mic is in and the phase of the pickup is out, there
may be a case where you will need to set the mic to out and the pickup to in.
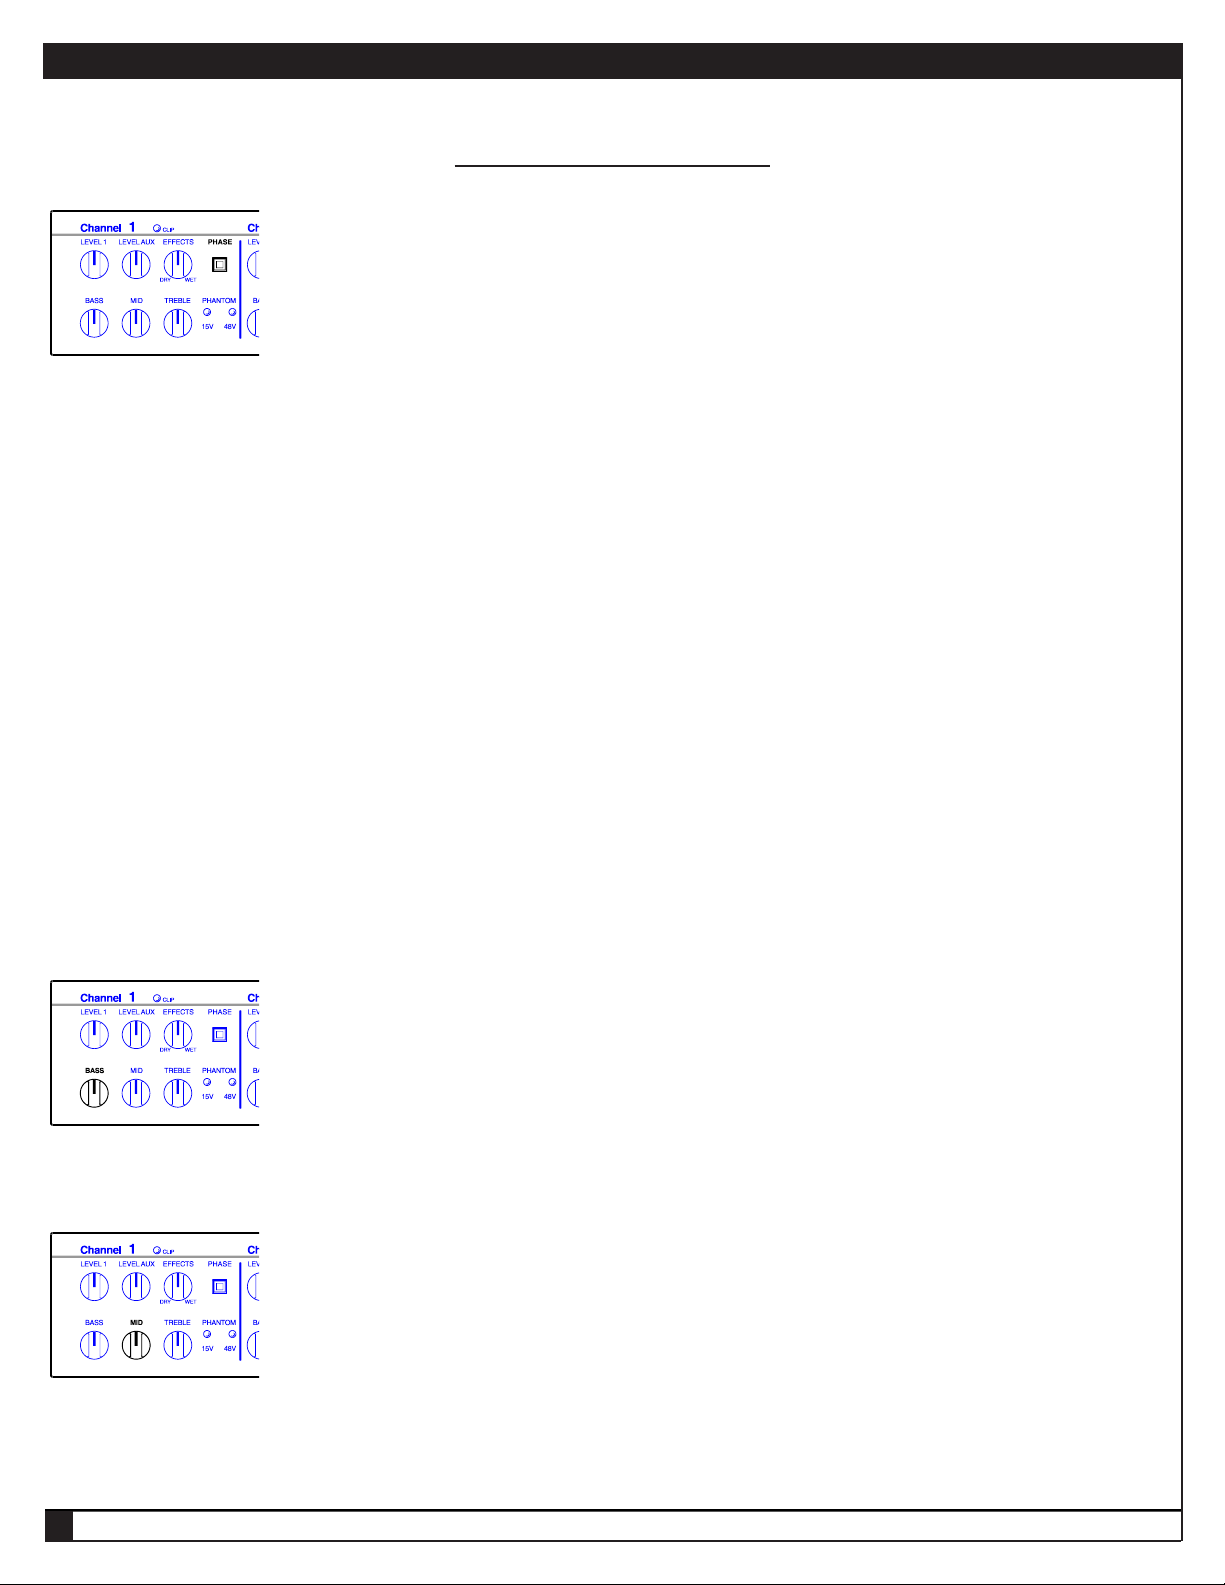
BASS
The Bass control governs the low-end equalization of your sound. The control provides a range of +/-10 dB of boost and cut, covering a range of approximately 20 Hz to 300 Hz. Using this control, you can shape the bottom end so that your instrument sounds
thumpy or solid or even thin (when you excessively cut the bass). The Bass knob can also be helpful in eliminating low-end feedback, especially in guitars equipped with internal microphones.
MID
The Mid control affects the midrange frequencies from approximately 750 Hz to 1,500 Hz, with a boost/cut range of +/-10 dB.
Midrange is a very important component of an instrument’s tone; especially with guitars, cellos, and banjos, in which a great deal of
their energy comes from this range. Boosting midrange can accentuate the “meat” in an instrument’s tone, while cutting it can give a
“scooped-out” tone that makes acoustic guitars, in particular, sound boomy yet bright.
ACOUSTIC PERFORMER PRO OWNER'S MANUAL
➥
7
Page 8
ACOUSTIC PERFORMER PRO
FRONT PANEL - CHANNEL 1 Continued
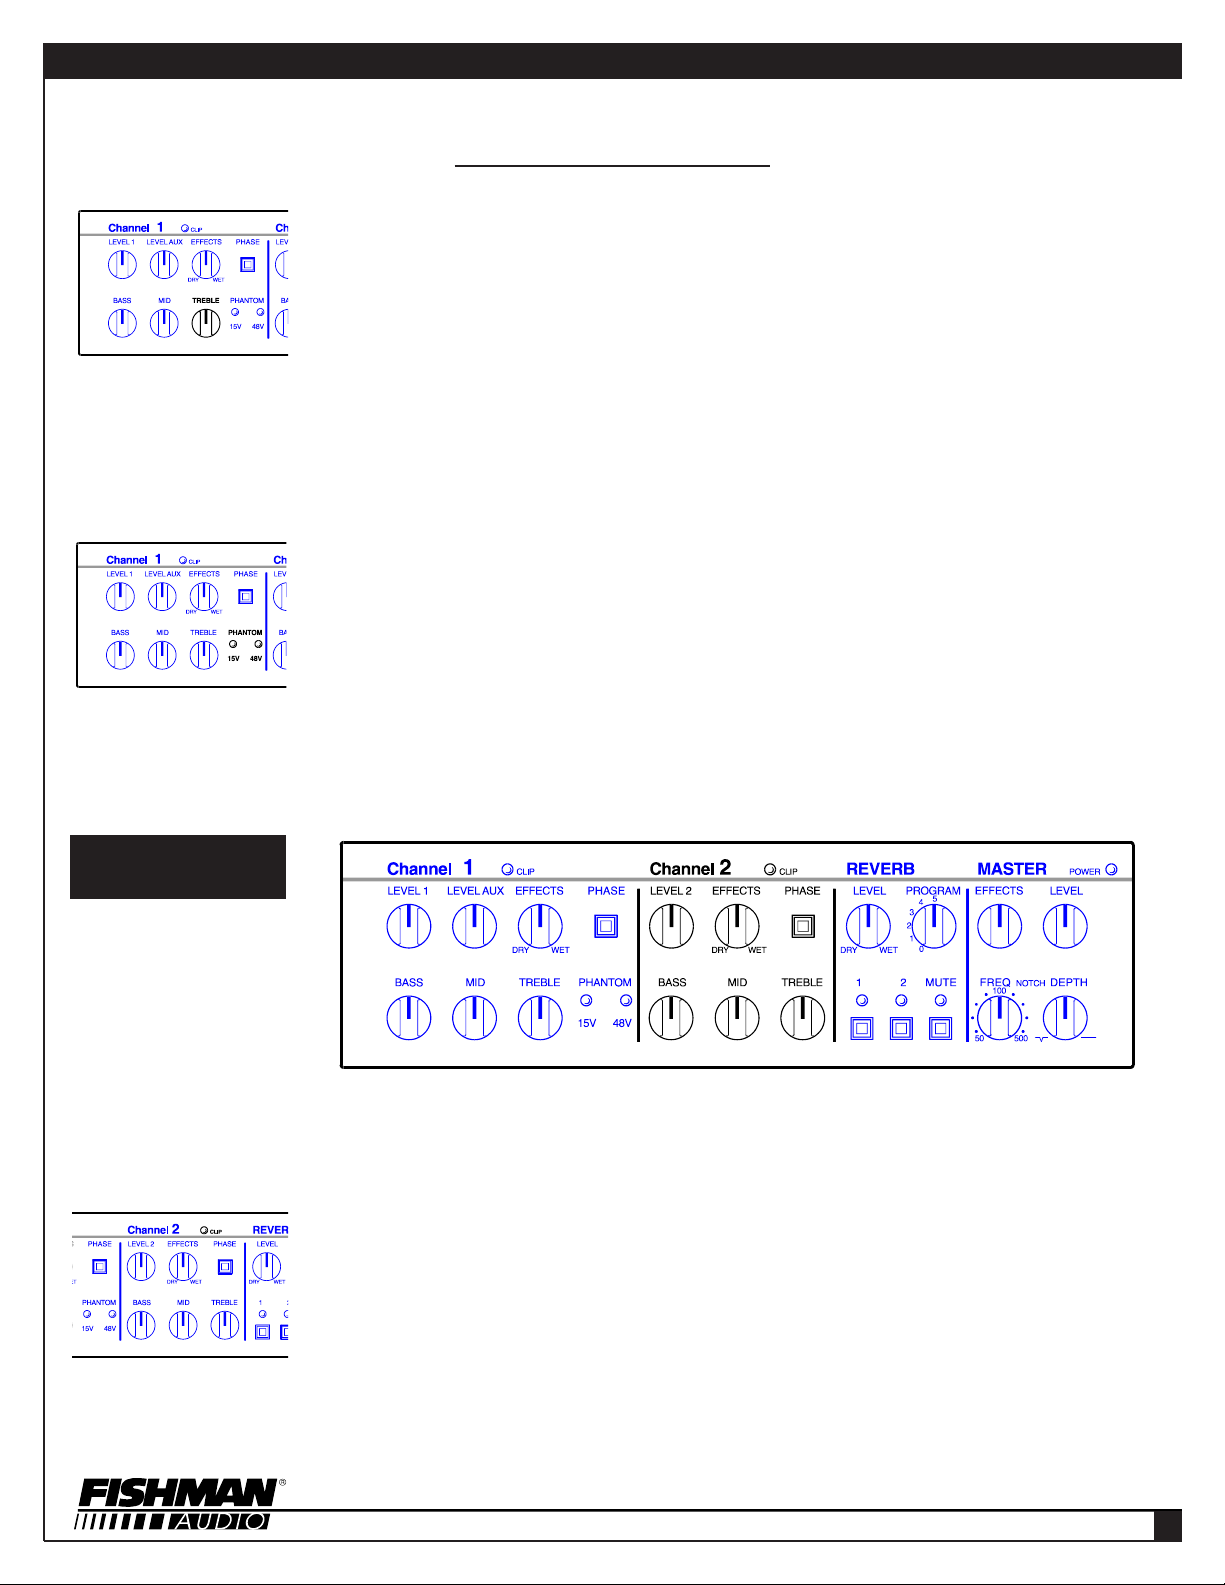
TREBLE
The Treble control allows you to shape the high-frequency content of your sound. It governs the range from 3,000 Hz to 20,000
Hz and has a boost/cut range of +/-10dB. Overly bright instruments (12-string guitars, mandolins, etc.) can be tamed with a
slight roll-back on the Treble control. Of course, if you want an edgier sound, or need more highs, you can also boost the highs.
Be careful with how much treble you add, since it’s easy to overdo it. Very often, your ears will gradually tune out extra brightness, even if your audience doesn’t. In addition, if the Acoustic Performer Pro is on the floor, or facing away from you, you may
not be aware of just how bright the tone is. Finally, boosting the treble by exaggerated amounts can increase the noise in
effects and preamplifiers and also increase the likelihood of feedback, especially if you stand very close to the Acoustic
Performer Pro.
NOTE: If you need more treble than the Treble control can provide, you may need to adjust the Tweeter Level control on the
rear panel of the Acoustic Performer Pro.
PHANTOM POWER 15V & 48V INDICATORS
Some pickups and microphones require external, or “phantom” power. When the Rear Panel switches are turned on to provide
this power (15 volts DC to the 1+2 Blend 1/4” jack and the 1/4” mic jack, and 48 volts DC to the Aux/Mic In XLR jack), the
Phantom LEDs glow. Check your pickup’s or microphone’s manual, or consult its manufacturer to determine whether it needs
phantom powering.
FRONT PANEL
CHANNEL 2
Channel 2’s input has an impedance of 10 Megohms, which is extremely high and well-suited to piezo bridge transducers and magnetic pickups. It’s
also a good match for stick-on pickups. Unlike Channel 1, it has only one input, and therefore has no Level Aux control. It also does not have phantom powering for its input.
CLIP LED
This LED glows only when incoming signal levels from an instrument exceed the point at which the buffer amplifier or power
amp distorts, a sure sign that the signal level is too “hot.” Set the rear panel’s Trim control so that the Clip LED only glows when
you whack your instrument’s strings exceptionally hard (of course if you tend to always whack them very hard, ignore that suggestion, and instead adjust the Trim control so that it never glows). You may find that you must also set the Level 2 knob to
keep the Clip LED from glowing.
8
Page 9

ACOUSTIC PERFORMER PRO
FRONT PANEL - CHANNEL 2 Continued
LEVEL 2
This knob sets the volume of the signal coming from your instrument to the Channel 2 preamp section of the Acoustic Performer
Pro. It also adjusts Channel 2’s volume relative to the Auxiliary Input’s level, and the level of Channel 1.
NOTE: Before you adjust Level 2, check the Master section’s Level control. If it’s set all the way down, no sound will come out of
the amp, regardless of how you adjust Level 2. Conversely, if the Master Level is set extra-high, then turning up Level 2 can result
in hair-raising loudness. Think of Level 2 and the Master section’s Level as operating in tandem.
EFFECTS
When you place an external signal processor (also called an effect, stomp box, etc.) into Channel 2’s Effects Loop, you can blend
the effect with your acoustic instrument’s sound. Fishman designed the Effects Loop to run in parallel with your main signal. Why?
Most Effects Loops require sending the entire signal through the Effects Loop, thereby making it vulnerable to the introduction of
extraneous noise, plus it can noticeably degrade the signal, especially if the signal processor isn’t as clean as the Acoustic
Performer Pro, or its frequency range is limited. The Acoustic Performer Pro’s strategy ensures a solid, dynamic, straight sound and
then blends the effect much the way a professional mixing console approaches effects blending.
NOTE: For the best sound quality and lowest noise, adjust the signal processor’s mix control (if it has one) so that its output contains only a “wet” (effect-enhanced) signal.
PHASE
When a signal is out of phase with another signal, it can cause cancellation, which (as its name implies) results in something missing. The opposite is true when two signals are in phase; the combined signals can be solid or absolutely overpowering, depending
on the sounds and how much “in phase” they are. Using the phase relationship between two sounds can be a powerful tool for fighting feedback or making multiple sound sources (such as a pickup and a built-in microphone) sound better together.
The Phase switch can accomplish a couple of different things. If you are using an instrument equipped with only one pickup or internal microphone, it can invert the signal’s phase, which can, in some cases, be a remedy for feedback. If your instrument has a builtin mic as well as a pickup, one of the signals may be out of phase in relation to the other, so employing the Phase switch on one
channel of the Acoustic Performer Pro corrects that, providing a stronger signal, often with better tone.
NOTE: When a pickup and an internal mic are used, try using the phase switches on both channels to check for correct phase relationships between the two sound sources. Also, if your instrument has only one pickup or microphone, try the Phase switch in both
its in and out positions, to be sure the best sound is being produced.
1
FOLLOW THIS PROCEDURE TO MAKE BEST USE OF THE PHASE SWITCHES
If you have a microphone in your setup, it is best to begin getting a sound from that.
With the Master Level at 3/4 of its maximum volume, bring the microphone’s volume up to the desired level. In the event that the
mic begins to feed back, adjust the volume lower or use the Bass, Mid, or Treble EQ controls to eliminate the feedback.
Determine the location onstage where you are going to play, and set the phase switch on the mic channel to the sound that is most
pleasing. Since the characteristics of microphones and their placement play a big part in the sound achieved, this would also be a
good time to adjust or aim the mic in your instrument to get the most appropriate sound. Keep in mind that given the nature of
acoustic instruments and how they interact with amplifiers, once the phase is set, if you move more than 5 or 6 feet from your playing location, the phase will reverse itself 180 degrees.
With the microphone volume on, adjust the transducer’s level until it is approximately equal in volume to the microphone. Next, flip
the transducer’s Phase switch and you will immediately hear what is correct. If it’s the incorrect phase relationship, you will get a
tremendous amount of bass loss because the bass frequencies cancel.
After taking these steps to determine the correct phase settings, make note of their relative positions. These settings between the
mic and transducer will remain the same from performance to performance, with the exception that each may need to be reversed
together in some instances. In other words, if you determine that the phase of the mic is in and the phase of the pickup is out, there
may be a case where you will need to set the mic to out and the pickup to in.
ACOUSTIC PERFORMER PRO OWNER'S MANUAL
➥
9
Page 10

ACOUSTIC PERFORMER PRO
FRONT PANEL - CHANNEL 2 Continued
BASS
The Bass control governs the low-end equalization of your sound. The control provides a range of +/-10dB of boost and cut,
covering a range of approximately 20 Hz to 300 Hz. Using this control, you can shape the bottom end so that your instrument
sounds thumpy or solid or even thin (when you excessively cut the bass). The Bass knob can also be helpful in eliminating lowend feedback, especially in guitars equipped with internal microphones.
MID
The Mid control affects the midrange frequencies from approximately 750 Hz to 1,500 Hz, with a boost/cut range of +/-10dB.
Midrange is a very important component of an instrument’s tone; especially with guitars, cellos, and banjos, in which a great
deal of their energy comes from this range. Boosting midrange can accentuate the “meat” in an instrument’s tone, while cutting
it can give a “scooped-out” tone that makes acoustic guitars, in particular, sound boomy yet bright.
FRONT PANEL
REVERB
TREBLE
The Treble control allows you to shape the high-frequency content of your sound. It governs the range from 3,000 Hz to 20,000
Hz and has a boost/cut range of +/-10dB. Overly bright instruments (12-string guitars, mandolins, etc.) can be tamed with a
slight roll-back on the Treble control. Of course, if you want an edgier sound, or need more highs, you can also boost the highs.
Be careful with how much treble you add, since it’s easy to overdo it. Very often, your ears will gradually tune out extra brightness, even if your audience doesn’t. In addition, if the Acoustic Performer Pro is on the floor, or facing away from you, you may
not be aware of just how bright the tone is. Finally, boosting the treble by exaggerated amounts can increase the noise in
effects and preamplifiers and also increase the likelihood of feedback, especially if you stand very close to the Acoustic
Performer Pro.
NOTE: If you need more treble than the Treble control can provide, you may need to adjust the Tweeter Level control on the
rear panel of the Acoustic Performer Pro.
The Fishman Acoustic Performer Pro has a custom-designed digital reverb built into it. Unlike spring-type reverbs, the sound is natural, without
springy, metallic undertones. There are five different reverb types, each with its own decay time and tonal coloration.
ABOUT REVERBERATION: Reverberation is a natural phenomenon in large rooms, halls, etc., where sound can bounce off walls, ceilings, and
floors. Small rooms have their own reverb sound and cathedrals have theirs. Sometimes, artificially created reverb can take the “dryness” out of a
sound, such as a solo instrument in a room that has a lot of carpeting, drapes, and other sound-absorbing materials. Adding reverb can make an
instrument sound larger, more full of life. Too much can make instruments sound distant or as if they were being played in a cave (an effect you
might actually like).
10
Page 11

ACOUSTIC PERFORMER PRO
FRONT PANEL - REVERB Continued
When setting an appropriate amount of reverb to create a realistic sound, a good rule of thumb is this: turn the reverb up higher than necessary, and
then gradually turn it down until you miss it. Now turn it up just a slight bit, and you’ve probably got a good balance. If you aren’t sure whether you
have the right reverb sound, ask a friend or two to listen and critique the tone. And remember, you don’t have to use reverb. In fact, if you’re playing
in a large, reverberant place such as a gymnasium, a large church, or a sporting arena, your sound may already be “swimming” in reverb. Adding to
it will just make your instrument sound muddy.
LEVEL (DRY/WET)
This knob adjusts the relative amount of reverb vs. non-reverb sound. “Dry” means fully reverbless, and “Wet” means full reverb.
This is the knob you want to use to balance your instrument to sound like it’s in a naturally reverberant room or a cave.
PROGRAM
You can choose from six different reverb programs. Progressively larger “rooms” are created by settings 0 through 5. Since all digital reverbs can add some noise to the signal, we recommend removing the reverb from the signal path altogether by setting the
Reverb Level to Dry (fully counter-clockwise) whenever you don’t use the reverb. This minimizes possible noise from the Reverb’s
circuitry from entering your instrument’s signal path.
ASSIGN SWITCHES & LEDS
You can choose whether reverb is added to either, both, or neither of the two channels with the Assign switches. When you want
reverb on Channel 1, push the Assign 1 switch; the LED glows, letting you know that Channel 1’s signal is being sent to the Reverb.
Similarly, pushing Assign 2 sends Channel 2’s signal to the Reverb.
MUTE SWITCH
Because of its location on the front panel, it may appear that the Mute switch is part of the Reverb section. In fact, it isn’t. When you
push the Mute button, the LED above it glows, and no sound comes out of the Acoustic Performer Pro. This is great when you take
a break but don’t want to adjust the Level knobs or turn it off. It’s also useful if you’re tuning with an electronic tuner: when a tuner is
plugged into the Tuner output on the Rear Panel, the signal from your instrument still reaches it, even though the Mute turns off all
sound going to the speakers. This gives your audience a break from listening to the ups and downs of getting your G string in tune,
and if someone else is playing while you’re waiting in the wings, you won’t be ruining their performance.
Another use of the Mute switch is to kill the sound when you’re changing instruments. If you remove the plug from one instrument
and then plug into another, the popping and buzzing can be tremendously loud. Activating the Mute switch before changing instruments saves wear and tear on your ears and the Acoustic Performer Pro’s speakers.
NOTE: A remote footswitch can be used to duplicate the Mute switch’s function.
11
ACOUSTIC PERFORMER PRO OWNER'S MANUAL
➥
Page 12

ACOUSTIC PERFORMER PRO
FRONT PANEL
MASTER SECTION
POWER LED
Whenever your Acoustic Performer Pro is turned on, this LED glows. If, for any reason, you encounter a problem with your
Acoustic Performer Pro (no sound, for instance), always check this LED. If it isn’t glowing, then either the Acoustic Performer
Pro isn’t turned on, plugged in, or connected to a working AC outlet. (Make sure the power cord is securely plugged in at both
ends. Check the outlet by plugging in something you know works.) If the LED isn’t glowing, even if the outlet is okay and the
power switch is on, then turn the Acoustic Performer Pro off, unplug it, and consult your dealer or Fishman Customer Service.
EFFECTS
When you place an external signal processor (also called an effect, stomp box, etc.) into the Master section’s Effects Loop, you
can blend the effect with the sounds from Channel 1 (including the Aux/Mic In) and Channel 2 combined. The Effects Loop runs
in parallel with your main signal for best sound quality and lowest noise. Regardless of whether other effects were used on
Channel 1 and Channel 2, the channels’ combined sound can be processed by the Master’s Effects Loop. Turning the knob
fully counter-clockwise to Dry eliminates any Master Effects Loop effect, while turning it fully clockwise to Wet sets the Effects
Loop’s level at its maximum.
NOTE: For the best sound quality and lowest noise, adjust the signal processor’s mix control (if it has one) so that its output
contains only a “wet” (effect-enhanced) signal.
LEVEL
Like the Level controls on Channel 1 and Channel 2, the Master section’s Level sets volume. However, it sets the overall volume of everything going to the speakers. Therefore, while Channel 1’s Level 1 and Level Aux and Channel 2’s Level 2 set relative levels for those channels, the Master section’s Level governs the combined signals, and therefore the overall loudness of
the Acoustic Performer Pro.
NOTCH FREQUENCY & NOTCH DEPTH
These two controls work together to control the Acoustic Performer Pro’s Notch Filter. The Notch Filter selectively de-emphasizes or cuts a part of the frequency spectrum so that you can tame feedback or cut out other undesirable resonances.
Let’s look at how the Notch Filter removes offensive feedback or resonance. Feedback occurs when a frequency is recycled
from the speaker back through the instrument and its pickup. It often creates a squealing or howling sound, and usually occurs
most prominently in one frequency range in any given instrument. Therefore, if you cut that frequency out, or at least bring its
volume down, you slice out the feedback. The same holds true for resonance; some instruments have one particular note that
seems much louder than others, due to the way it vibrates.
12
Page 13

ACOUSTIC PERFORMER PRO
FRONT PANEL - MASTER SECTION Continued
NOTCH FREQUENCY & NOTCH DEPTH Continued
To get rid of feedback, plug your instrument in, and turn up the Acoustic Performer Pro’s Channel and Master Levels until feedback starts. Move the instrument away from the speaker. Turn the Notch Depth control fully counterclockwise to the deepest
notch (the “V” setting). Now move the instrument closer to the speaker. When feedback begins, turn the Notch Frequency knob
slowly until the feedback disappears. Turn up the Master Level a bit more. If feedback starts up again, turn the Notch
Frequency a little bit clockwise and counterclockwise until the feedback diminishes again. Set the instrument further from the
Acoustic Performer Pro, preferably several feet away. Turn the Notch Depth control clockwise until the feedback starts again,
and then turn it back a little bit counterclockwise to make the feedback disappear. Now the Notch Filter is properly set to
remove the feedback with as little disturbance to your overall tone as possible.
To get rid of a resonance, plug your instrument in, and turn up the Acoustic Performer Pro’s Channel and Master Levels to
slightly higher than normal settings. Play chromatically up and down until you find the note that jumps out. Once you find it, turn
the Notch Depth fully counterclockwise to its “V” position. Now play the resonating note repeatedly or let it sustain, while you
turn the Notch Frequency knob slowly from one end to the other. When the volume of your resonating note drops, you’ve
zeroed in on it. Turn the Frequency knob a few degrees in both directions to make sure you’ve really got it in range. Play a few
notes above and below the one that was resonating, and check whether you’ve cut that one pitch too much. Then turn the
Depth control clockwise to make the notch shallower and bring that note up to an even level with the others. Keep checking
that note against ones above and below it.
Even if you don’t have a particular note that jumps out on your instrument, a resonance may occur when you tap the top (especially on acoustic guitars). Follow the same instructions for getting rid of a resonance, but instead of sustaining a note, thump
your knuckle on the instrument’s top.1
REAR PANEL - CHANNEL 1
INST MIC IN
If your instrument is equipped with an on-board microphone, plug it into this input for optimum sound. You can also plug a magnetic pickup into this jack if it has sufficient output
power. Phantom power is available at this input jack. See the section on Phantom Power
for instructions on turning it on.
NOTE: When a plug is inserted into the 1+2 Blend In jack, the Inst Mic In jack and the
Pick-Up In jack are disconnected.
TRIM
If your on-board microphone or pickup delivers an exceptionally high-level signal, requiring that you turn down the front panel Level 1 control to its lowest setting, or if there is a
disparity between the signal strength reaching Channel 1 and Channel 2, then you can
adjust this Trim control to bring down the level of the signal presented to the Channel 1
input circuitry. Turn the knob counter-clockwise to decrease the intensity, and clockwise
to increase it. If you are simultaneously using an on-board mic and a pickup (or two pickups) and are using both Channel 1 and Channel 2, try setting the Trim controls for both
channels in this way:
1. Set the Master section’s Level control low (9 o’clock to 7 o’clock). If this isn’t loud enough, turn it up as loud as necessary.
2. Set Level 1 and Level 2 to their midpoints (12 o’clock).
3. Play a note or chord on your instrument and adjust the Channel 1 and Channel 2 Trim controls until their outputs are equal,
or are balanced to suit your taste.
13
ACOUSTIC PERFORMER PRO OWNER'S MANUAL
➥
Page 14

ACOUSTIC PERFORMER PRO
REAR PANEL - CHANNEL 1 Continued
48V PHANTOM
Some professional-quality microphones require an external (phantom) 48-volt DC power source for proper operation, so this
switch makes it possible to deliver that power to any microphone plugged into the Aux/Mic In jack. If you are not sure whether
your microphone requires phantom powering, check with your mic’s user’s manual or consult its manufacturer.
AUX/MIC IN
The Aux/Mic In is an electrically balanced input designed to accept low-impedance microphones or pro-level sound sources.
GND LIFT
When connecting the Channel 1 Send to other gear, it’s possible that it can create a secondary path to ground, introducing hum
to the sound. Using the Gnd Lift (Ground Lift) switch disconnects the secondary ground path, removing the ground loop and the
hum that comes from it.
SEND (PRE-EQ)
This balanced XLR jack passes the signal entering Channel 1’s input on to other gear, such as P.A. systems or recording mixers. It is pre-EQ, meaning that it has not passed through the Bass, Mid, or Treble controls.
NOTE: The signal from the Send jack is electronically buffered, meaning that it is designed to drive other gear without a degradation in the tone and overall signal quality. Its output strength is not affected by the Level control, but it is affected by the Trim
control.
EFFECTS SEND
The Effects Send is an electronically buffered output that sends part of Channel 1’s signal to a signal processor (or effect
pedal). The sound sent from this jack is post-EQ, meaning that it is affected by any changes made via the Bass, Mid, or Treble
controls.
NOTE: The Effects Send can be used as a post-EQ output to drive other amplifiers or to send to mixers. It is not necessary to
have a plug in the corresponding Effects Return jack.
EFFECTS RETURN
The Effects Return jack accepts the return signal from a signal processor placed in the Effects Loop of Channel 1.
NOTE: If you are using another signal processor in the Channel 2 effects loop (or the second channel of a dual-channel signal
processor), make sure that the correct output jacks from the processor are connected to Channel 1’s and Channel 2’s Effects
Return jacks.
14
Page 15

ACOUSTIC PERFORMER PRO
REAR PANEL - CHANNEL 2
PICK-UP IN
This input accepts a wide range of signals, from piezo transducers to magnetic pickups
and microphones. It’s even suitable for signals from electric guitars, basses, and keyboards, as well as drum machines and vocal microphones. Phantom power is available at
this input jack. See the section on Phantom Power for instructions on turning it on.
NOTE: When a plug is inserted into the 1+2 Blend In jack, the Inst Mic In jack and the
Pickup In jack are disconnected.
TRIM
If your on-board microphone or pickup delivers an exceptionally high-level signal, requiring that you turn down the Front Panel Level 1 control to its lowest setting, or if there is a
disparity between the signal strength reaching Channel 1 and Channel 2, then you can
adjust this Trim control to bring down the level of the signal presented to the Channel 2
input circuitry. Turn the knob counterclockwise to decrease the intensity, and clockwise
to increase it.
NOTE: To balance the Trim controls for Channel 1 and Channel 2, refer to Channel 1’s
Trim information.
TUNER OUTPUT
The Tuner Output contains a signal from Channel 2’s pre-EQ stage. It is designed to be sent to electronic tuners, and is
always “live.” That is, even when the Mute function is on, and no sound comes through the speakers, the tuner still receives a
signal.
GND LIFT
When connecting the Channel 2 Send to other gear, it’s possible that it can create a secondary path to ground, introducing hum
to the sound. Using the Gnd Lift (Ground Lift) switch disconnects the secondary ground path, removing the ground loop and the
hum that comes from it.
SEND (PRE-EQ)
This balanced XLR jack passes the signal entering Channel 2’s input on to other gear, such as P.A. system or recording mixers. It is pre-EQ, meaning that it has not passed through the Bass, Mid, or Treble controls.
NOTE: The signal from the Send jack is electronically buffered, meaning that it is designed to drive other gear without a degradation in the tone and overall signal quality. Its output strength is not affected by the Level control, but it is affected by the Trim
control.
15
ACOUSTIC PERFORMER PRO OWNER'S MANUAL
➥
Page 16

ACOUSTIC PERFORMER PRO
REAR PANEL - CHANNEL 2 Continued
EFFECTS SEND
The Effects Send is an electronically buffered output that sends part of Channel 2’s signal to a signal processor (or effect
pedal). The sound sent from this jack is post-EQ, meaning that it is affected by any changes made via the Bass, Mid, or Treble
controls. It also contains reverb, if the Reverb Assign 2 switch is on and the reverb level is turned up.
NOTE: The Effects Send can be used as a post-EQ output to drive other amplifiers or to send to mixers. It is not necessary to
have a plug in the corresponding Effects Return jack.
EFFECTS RETURN
The Effects Return jack accepts the return signal from a signal processor placed in the Effects Loop of Channel 2.
NOTE: If you are using another signal processor in the Channel 1 Effects Loop (or the second channel of a dual-channel sig-
nal processor), make sure that the correct output jacks from the processor are connected to Channel 1’s and Channel 2’s
Effects Return jacks.
1+2 BLEND IN
Some instruments have both a microphone and a pickup/transducer built in, but instead of having two separate output cables,
there’s only one cable with a TRS (tip/ring/sleeve) plug on its end. Plugging it into the 1+2 Blend In jack lets the Acoustic
Performer Pro route the two individual signals to Channel 1 and Channel 2. For TRS connections, the mini-mic’s signal is on
the ring along with the 15V phantom power.
NOTE: When a plug is inserted into the 1+2 Blend In jack, the Inst Mic In jack and the Pick-Up In jack are disconnected.
15V PHANTOM
Some on-board microphones inside instruments require an external (phantom) 15-volt DC power source for proper operation,
so this switch makes it possible to deliver that power to any mic plugged into the Inst Mic In or 1+2 Blend input jacks. The 15volt power is delivered through the Inst Mic In’s tip, while the power is applied to the 1+2 Blend jack’s ring. If you are not sure
whether your microphone requires phantom powering (and, if so, its proper wiring to the jack), check with your user’s manual or
consult its manufacturer.
TAPE/CD IN
The Tape/CD In accepts signals from tape recorders or CD players and is perfect for adding accompaniment music or providing music during breaks. It does not have its own level control, so its loudness is governed by the tape or CD player’s output
and/or by the Acoustic Performer Pro’s Master Level (it even operates when the Mute switch is on).
16
Page 17

ACOUSTIC PERFORMER PRO
REAR PANEL - MIX SECTION
TWEETER LEVEL
Depending on how bright you like your onstage sound, you can adjust the Tweeter Level
control to deliver more signal through the high-frequency dome tweeter. Turning the control clockwise increases its level, while turning it counter-clockwise lowers the amount.
NOTE: Adjusting the Tweeter Level control does not affect the brightness of the signal
being sent from any of the Send jacks or the Effects Loops.
MUTE SWITCH
This jack lets you use a footswitch in place of the front-panel Mute button to activate the
Acoustic Performer Pro’s Mute function. Any single-pole/double-throw (SPDT) on/off
footswitch can be used for this. The Mute switch mutes all outputs except the Tuner output, allowing you to tune up with an electronic tuner without your instrument being amplified.
17
GND LIFT
When connecting the Mix Send to other gear, it’s possible that it can create a secondary path to ground, introducing hum to the
sound. Using the Gnd Lift (Ground Lift) switch disconnects the secondary ground path, removing the ground loop and the hum
that comes from it.
MIX SEND (POST-EQ)
This balanced XLR output contains the full mix of Channel 1 and Channel 2, plus all effects and reverb, including effects in the
Master Effects Loop. It’s great for sending a full signal to an Acoustic Monitor Pro or to a mixing console for P.A. or recording
purposes. Its output level is controlled by the Master section’s Level control.
EFFECTS SEND & EFFECTS RETURN
After signals from Channel 1 and Channel 2 are blended (including effects in their Effects Loops), the combined signal reaches
the Master section. The Master Section’s Effects Send and Return loop provides you with an opportunity to add one more
enhancement to your sound. Like the Channel 1 and Channel 2 Effects Loops, it operates in parallel with the straight signal
path, so it’s best to set your signal processor’s mix control to fully “wet” for lowest noise and best overall sound quality.
NOTE: When you aren’t using the Effects Loop, keep the Effects control set fully counter-clockwise to minimize noise.
ACOUSTIC PERFORMER PRO OWNER'S MANUAL
➥
Page 18

ACOUSTIC PERFORMER PRO
REAR PANEL - POWER SECTION
VOLTAGE SELECTOR
The Voltage Selector switch provides the option of powering the Acoustic Performer Pro
with either 115 volts AC or 230 volts AC. You must use a cord with the appropriate plug
configuration for the AC (mains) receptacles in the area in which you use it. If you are taking the Acoustic Performer Pro overseas, check with your dealer regarding the appropriate cord and plug configuration, or contact Fishman Customer Service.
ON/OFF SWITCH
The Acoustic Performer Pro’s Power Switch has a “I” symbol for On and a “0” symbol for
Off. Always turn the Acoustic Performer Pro off before unplugging it.
AC POWER RECEPTACLE
Plug your AC (mains) power cord into this receptacle and the other end into a grounded
outlet. Do not modify the cord in any way. Do not cut off the grounding pin, and never use
a 3-pin-to-2-pin adapter unless you ground the adapter’s grounding tab. If you use an
extension cord, always use a heavy-duty cord that is no longer than necessary.
NOTE: If your AC (mains) cord is ever damaged or lost, replace it only with the same
type.
CHANGING THE FUSE
The Fuse Holder is located to the left of the AC Receptacle (See Page 4, Item
#12). It is designed to hold a spare fuse. Insert a small screwdriver into the small
notch on the side of the Fuse Holder to remove it from the AC Receptacle. DO
NOT use a knife or sharp object. After replacing the fuse, slide the Fuse Holder all
the way into the Back Panel until it snaps into place.
IMPORTANT: When operating in the United States, always set the Voltage
Selection switch for 115V using a 5 Amp Slow Blow Fuse. In Europe, set for 230V
with a 2.5 Amp Slow Blow Fuse.
18
Page 19

ACOUSTIC PERFORMER PRO
19
INTERFACING THE ACOUSTIC PER-
FORMER PRO WITH OTHER GEAR
INPUT OPTIONS
The Acoustic Performer Pro has inputs to accept signal
sources from magnetic pickups, bridge saddle transducers,
internal microphones, vocal microphones, and tape or CD
players. Two separate instruments can be plugged into
Channel 1 and Channel 2, or both channels can be supplied
with signals from a single instrument either through the PickUp In and Inst/Mic In or through the 1+2 Blend In. If a tape
player or CD player is plugged into the Tape/CD In, the volume is controlled by the tape player or CD player, or the
Acoustic Performer Pro’s Master Volume control. The signal is
not affected by any of the Acoustic Performer Pro’s tone controls.
ACOUSTIC PERFORMER PRO OWNER'S MANUAL
➥
Page 20

ACOUSTIC PERFORMER PRO
INTERFACING THE ACOUSTIC PERFORMER PRO AMPLIFIER WITH OTHER GEAR Continued
USING THE SENDS
The Mix Send, Channel 1 Send, and Channel 2 Send use XLR balanced line output
jacks designed to supply high-level signals to professional gear such as mixing consoles for P.A.’s and recording. In addition, any of these can be sent to a Fishman
Acoustic Monitor Pro. The Mix Send contains a mix of both channels, plus any
reverb and effects that may have been added to the signals. The Channel 1 and
Channel 2 sends are pre-EQ, meaning that their signals are taken from the input to
those channels, so tone control settings and reverb are not part of the sound coming
from them.
USING THE EFFECTS LOOPS
All three Effects Loops are designed to send a portion of the channel’s signal to an
outboard signal processor and then mix it with the dry signal. Always use high-quality shielded cables for effects-loop use. The Effects Sends can also be used as
unbalanced line outputs from each channel and the Master section (a signal does
not have to return, nor does a plug have to be inserted into the Effects Return).
20
Page 21

ACOUSTIC PERFORMER PRO
POSITIONING THE ACOUSTIC PERFORMER PRO
The Acoustic Performer Pro’s unique design makes it ideal to be used
three different ways: standing upright, lying on its side, or supported
on a stand. When it’s standing upright, it projects its sound forward, a
good choice for club performances or wherever your Acoustic Monitor
Pro is acting as your primary means for bringing your sound to your
audience.
Placed it on its side, the Acoustic Performer Pro acts like a monitor
(as shown), projecting its sound upward and outward. If you are using
one of the Sends to feed a signal from the Acoustic Performer Pro to
a large house P.A. or to an Acoustic Monitor Pro, then this is ideal for
you. Point it toward yourself, and adjust the levels to provide the best
amount of sound from your vantage point.
OPTIONAL ACCESSORIES
Please contact Fishman Audio at 978-988-9665 for more information.
1
ACOUSTIC MONITOR PRO: a powered monitor similar to the Acoustic
Performer Pro for additional volume and sound reinforcement.
1
PA STAND MOUNTING KIT: allows you to mount your Acoustic Performer
Pro to a variety of PA Stands. (See Photo)
1
CARRYING BAG: made of durable padded nylon.
1
FOOTSWITCH: ON/OFF type allows you to control the MUTE function
remotely.
CARE OF YOUR ACOUSTIC PERFORMER PRO
Your Fishman Acoustic Performer Pro is designed for roadworthiness and is
protected by a rotationally molded polyethylene enclosure. All knobs and
switches are recessed to prevent accidental damage, and the speaker and
tweeter are protected by a steel grille. Some simple care will keep your
Acoustic Performer Pro looking good and working well for many years to
come.
1
DON’T ABUSE YOUR ACOUSTIC PERFORMER PRO
Even the best-built equipment isn’t indestructible. There is high-tech circuitry
inside the enclosure, and the outside was designed to look good. Throwing,
An optional mounting kit enables you to place the Acoustic Performer
Pro or Acoustic Monitor Pro on a stand (as shown) for maximum
sound dispersion. If you need some dispersion and want to hear the
Acoustic Performer Pro without laying it on its side, then consider setting it on a chair or similar object (make sure it can support the amplifier’s weight!).
dropping, dragging, and otherwise roughing up your Acoustic Performer Pro
isn’t going to prolong its life or make it work better. Therefore, treat it well.
1
KEEP IT DRY AND COMFORTABLE
Your Acoustic Performer Pro is an electrical device designed to operate in a
dry environment. Don’t use it near water or in the rain, or in damp basements.
And certainly don’t store it in harsh environmental conditions, such as in a
damp basement, a leaky garage, or the trunk of your car (especially in the
summer - temperatures can reach more than 150 degrees Fahrenheit in thereouch!). A road case or slipcover, or even the box it came in can prevent scuffing and jostling when it’s traveling with you.
21
1
NEVER OPEN YOUR ACOUSTIC PERFORMER PRO OR
TRY TO MODIFY IT
This is an electrical device, and there’s high voltage inside. Besides being
dangerous, opening the unit will void your warranty. Also, we designed every
aspect of the Acoustic Performer Pro very carefully, and it’s not built for modifying or “hotrodding”.
1
KEEP IT CLEAN
You can vacuum the front and back of the Acoustic Performer Pro, and you
can wipe it clean with a damp rag.
NOTE: Always unplug the Acoustic Performer Pro before any cleaning procedure. If it is especially dirty, you may use a weak solution of dishwashing liquid
and water to wipe the surfaces clean. However, never submerge the Acoustic
Performer Pro in water, nor expose the speaker or tweeter to water.
ACOUSTIC PERFORMER PRO OWNER'S MANUAL
➥
Page 22

ACOUSTIC PERFORMER PRO
BLOCK DIAGRAM
BLOCK DIAGRAM
22
Page 23

ACOUSTIC PERFORMER PRO
SPECIFICATIONS
POWER
Low Frequency: 230 W RMS (5 sec.)
High Frequency: 40 W RMS (5 sec.)
NOMINAL INPUT LEVELS
CHANNEL 1 and CHANNEL 2 -20 dBV
Balanced Microphone Input -60 dBV
Stereo Input -9 dBV
INPUT OVERLOAD
CHANNEL1 0 dBV
CHANNEL2 3 dBV
INPUT STAGE IMPEDANCE
CHANNEL1 10 M
CHANNEL2 Phantom Power off 1.0 M
CHANNEL2 Phantom Power on 10 k
Balanced AUX / MIC Input 4 k
PHANTOM POWER
Unbalanced Input 15 V, 3 mA
Balanced Input 48V, 5 mA
OUTPUT TYPE Electronically balanced XLR
OUTPUT IMPEDANCE 600
NOMINAL OUTPUT LEVELS
CHANNEL1 and CHANNEL2 -26 dBV
MIX -12 dBV
EFFECTS LOOPS NOMINAL LEVELS
CHANNEL1 -14 dBV
CHANNEL2 -10 dBV
MIX -13 dBV
EFFECTS LOOP SENDS IMPEDANCE 500
EFFECTS LOOP RETURN IMPEDANCE 100 k
EQUALIZATION CONTROLS
Treble Control Range ± 10 dB, shelving
Middle Control Range ± 10 dB, at 1 kHz 3 dB bandwidth: 550 Hz
Bass Control Range ± 10 dB, shelving
NOTCH FREQUENCY RANGE 50 Hz-500 Hz (-10 dB)
INTERNAL TRIM GAIN RANGE 14 dB
SIGNAL TO NOISE RATIO 85 dB (A-weighted, referred to nominal -20 dBV input)
OPERATING VOLTAGE 115V or 230V AC 50/60 Hz
WEIGHT 29 lbs. (13.2 kg.)
DIMENSIONS 19.30” H x 15.15” W x 7.19” D
Ω
Ω
Ω
Ω
Ω
Ω
Ω
All specifications subject to change without notice
23
Page 24

ACOUSTIC PERFORMER PRO
LIMITED WARRANTY
The FISHMAN ACOUSTIC PERFORMER PRO is warranted to function for a period of
90 days from the date of purchase. If the unit fails to function properly within the
warranty period, free repair and the option of replacement or refund in the event that
FISHMAN AUDIO is unable to make repair are FISHMAN AUDIO’s only obligations. This
warranty does not cover any consequential damages or damage to the unit due to
misuse, accident, or neglect. FISHMAN AUDIO retains the right to make such
determination on the basis of factory inspection. Products returned to FISHMAN AUDIO
for repair or replacement must be shipped in accordance with the Return Policy, as
follows. This warranty remains valid only if repairs are perfor med by FISHMAN AUDIO.
This warranty gives you specific legal rights and you may also have other rights which
may vary from state to state.
RETURN POLICY
To return products to FISHMAN TRANSDUCERS, you must follow these steps...
1) Call FISHMAN TRANSDUCERS at 978-988-9199 for a Return Authorization number.
2) Enclose a copy of the original Bill of Sale as evidence of the date of purchase, with
the product in its original packaging and a protective carton or mailer.
3) Clearly label the outside of the shipping carton with the Return Authorization number.
4) Ship the carton prepaid to:
FISHMAN AUDIO
340-D Fordham Road Wilmington MA 01887 USA
Phone 978-988-9199 • Fax 978-988-0770
www.fishman.com
10-18-94
# 600-010-001
 Loading...