

Fisher & Paykel RX216DT7XV2, RX216CT4XV2, RX216 Installation Instructions And User Manual

Installation instructions
and user guide US CA (EN)
Side by side refrigerator
Instructions d’installation
et guide de l’utilisateur US CA (FR)
Réfrigérateur à compartiments juxtaposés
US CA
RX216 models

English Page 1 – 47
Français Page 49 – 95

1
Contents
Introduction 2
Safety and warnings 3
Installation instructions 5
Before use 11
All about the display (RX216DT7XV2) 12
Temperature controls (RX216CT4XV2) 17
Fresh food features 18
Freezer features 21
Ice and water 22
Water filter 27
Food storage tips 29
Care and cleaning 32
Operating sounds 37
Troubleshooting 38
Warranty and service 45
Filter specification data 96
Important!
SAVE THESE INSTRUCTIONS
The models shown in this User Guide may not be available in all markets and are
subject to change at any time. For current details about model and specification
availability in your country, please visit our local website listed on the back cover
or contact your local Fisher & Paykel dealer.
EN
2
Introduction
Thank you for buying a Fisher & Paykel side by side refrigerator with chilled water and
ice dispensing through the door.
This refrigerator combines size and storage space with the latest features and functions. Many
hours have been spent researching how you, our customer, use your refrigerator and what we
can do to make life easier for you.
Select refrigerator models have a number of customizable storage zones, such as a Beverage
Chiller with adjustable temperature settings and a fruit and vegetable bin with adjustable
humidity.
Select models also have some special modes, such as
MAX COOL that boosts the cooling and
freezing power of your refrigerator, and
SPEED ICE that will increase ice production.
As your life changes, so can your refrigerator. This book explains the features and functions, and
will help you get the most out of your refrigerator.
We hope you enjoy your new refrigerator!
Important!
It is important that this User Guide should be retained with your Ice & Water refrigerator for
future reference. Should the appliance be sold or transferred to another owner, please ensure
that the User Guide is left with the appliance. This will ensure that the new owner can familiarize
themselves with the information and warnings contained within the Guide.
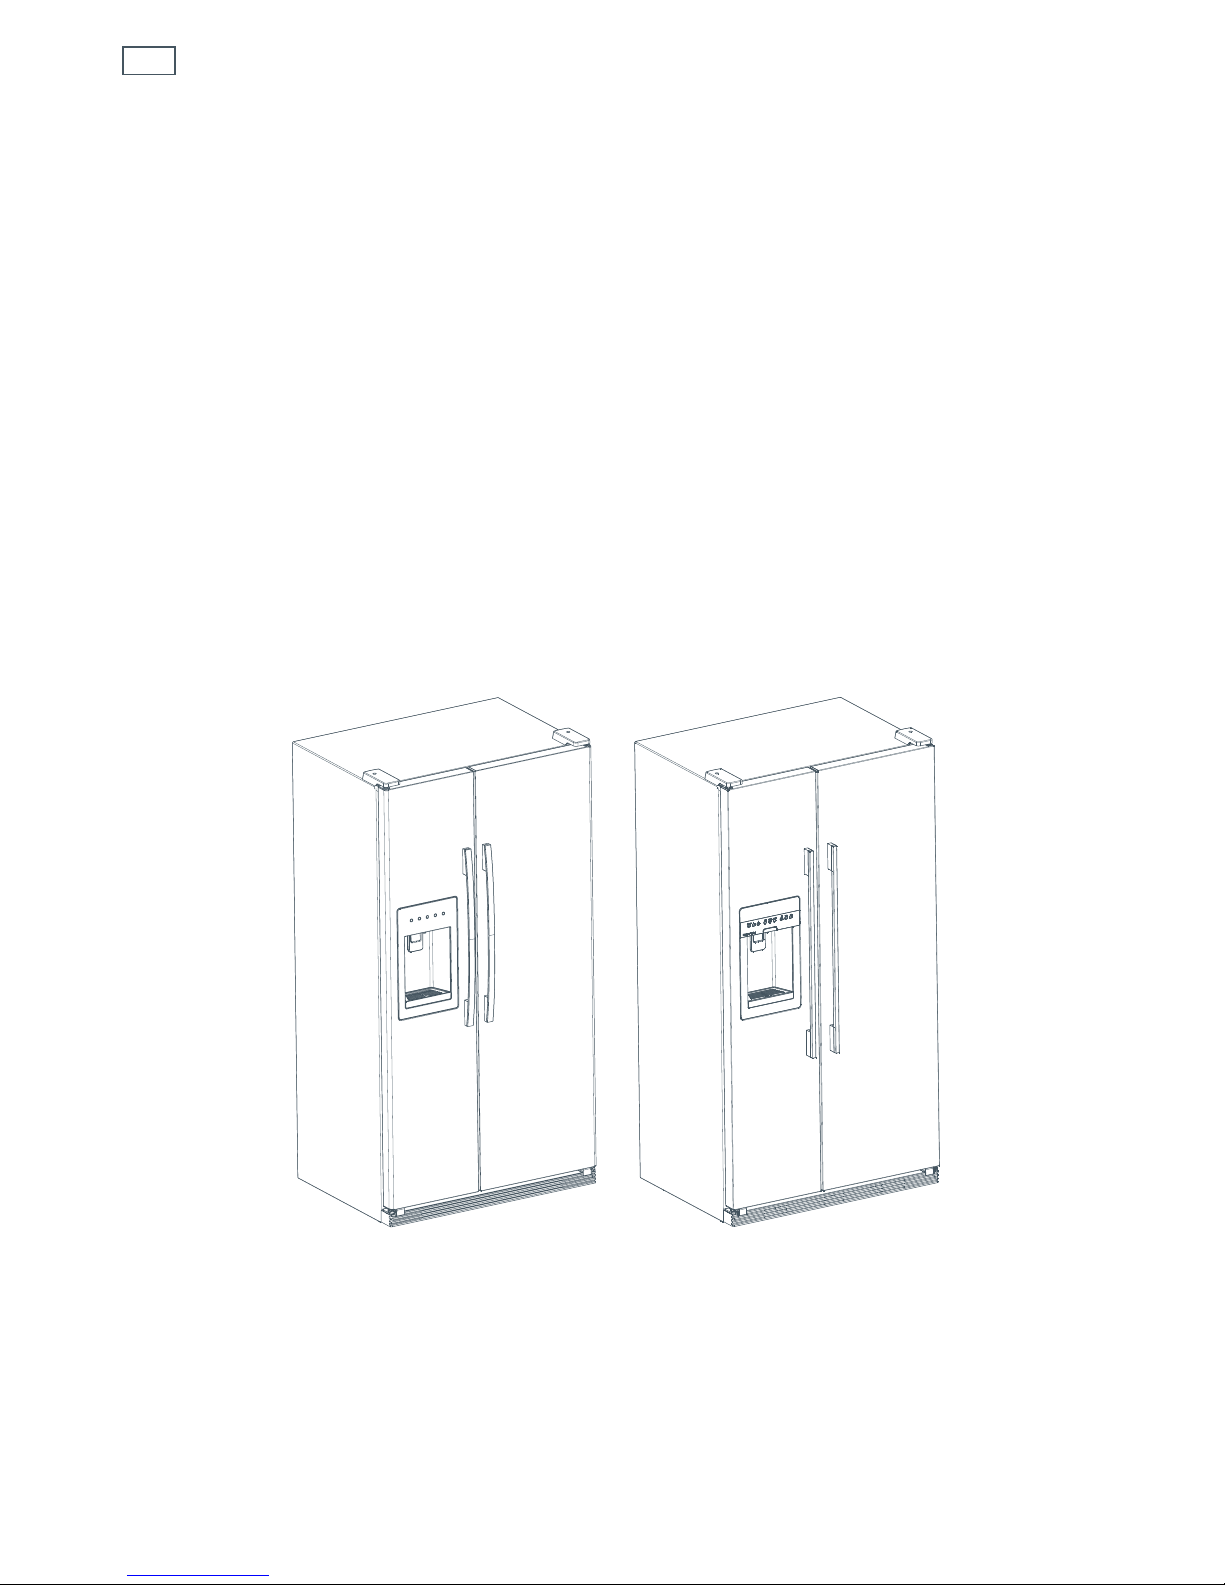
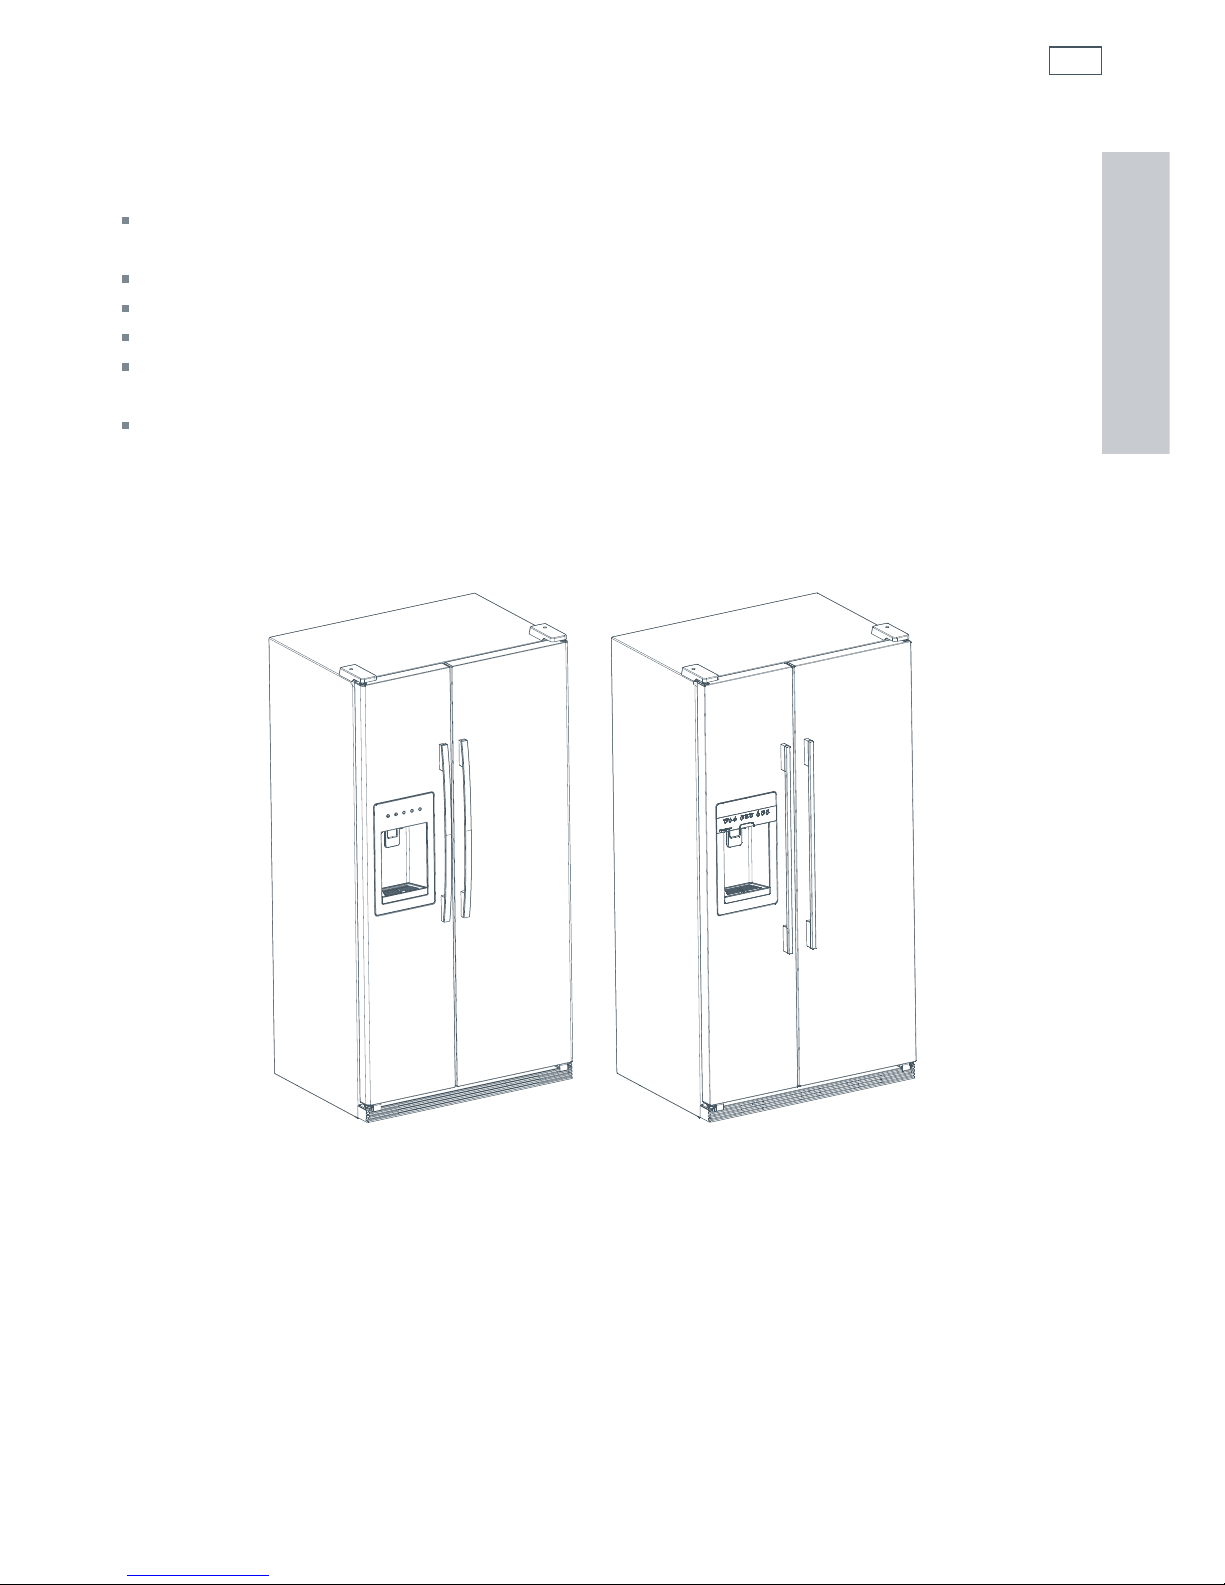
Fig.1 Side by side refrigerators
RX216CT4XV2 RX216DT7XV2
3
Safety and warnings
WARNING!
Electric Shock Hazard
Read and follow the SAFETY AND WARNINGS outlined in this User Guide
before operating this appliance.
Failure to do so can result in death, electric shock, fire or injury to persons.
Use this appliance only for its intended purpose as described in this User Guide.
Important safety precautions
Warning
When using this appliance always exercise basic safety precautions including the following:
Danger
This appliance is not intended for use by children or infirmed persons without supervision. This is
especially important when using the freezer compartment. Young children should be supervised
to ensure they do not play with the appliance.
Risk of child entrapment. Before you throw away your old refrigerator:
–
Take off the doors
–
Leave the shelves in place so that children can not easily climb inside.
The plastic packaging, off your new refrigerator, may be a choking or suffocation hazard to
children. Ensure all plastic is disposed of properly.
Disposal
Extreme care must be taken when disposing of your old appliance to avoid hazards. The
refrigerant gas must be safely removed and for the safety of young children, remove doors.
Your Fisher & Paykel Appliances Authorized Service Center will be able to give advice on
environmentally friendly methods of disposing of your old refrigerator.
Electrical
This new appliance must be properly installed in accordance with the installation instructions
before it is used.
Never unplug your refrigerator by pulling on the power cord.
Always grip the plug firmly and pull straight out from the outlet socket.
Do not plug in any other appliance at the same power point outlet socket your refrigerator is
using. Do not use extension cords or double adapters with these products.
EN

4
Safety and warnings
Repair or replace immediately all electric service cords that have become frayed or otherwise
damaged. Do not use a cord that shows cracks or abrasion along its length or at either the plug
or appliance end.
If the power supply cord is damaged, it must only be replaced by your Fisher & Paykel Appliances
Authorized Service Center because special purpose tools are required.
When moving your appliance back against the wall, be careful not to roll over or damage the
power cord.
Unplug your refrigerator before cleaning it or replacing the interior light bulb.
Storing food and drinks
Never store volatile or flammable materials in your refrigerator as they may explode.
Never freeze liquids in glass containers. Liquid expands during freezing, which may cause the
container to explode.
Never freeze carbonated drinks. They may explode.
Do not consume food if it is too cold. Food removed from the freezer compartment may be cold
enough to cause damage when brought into contact with bare skin, eg frozen ice cubes.
Power failure – food safety
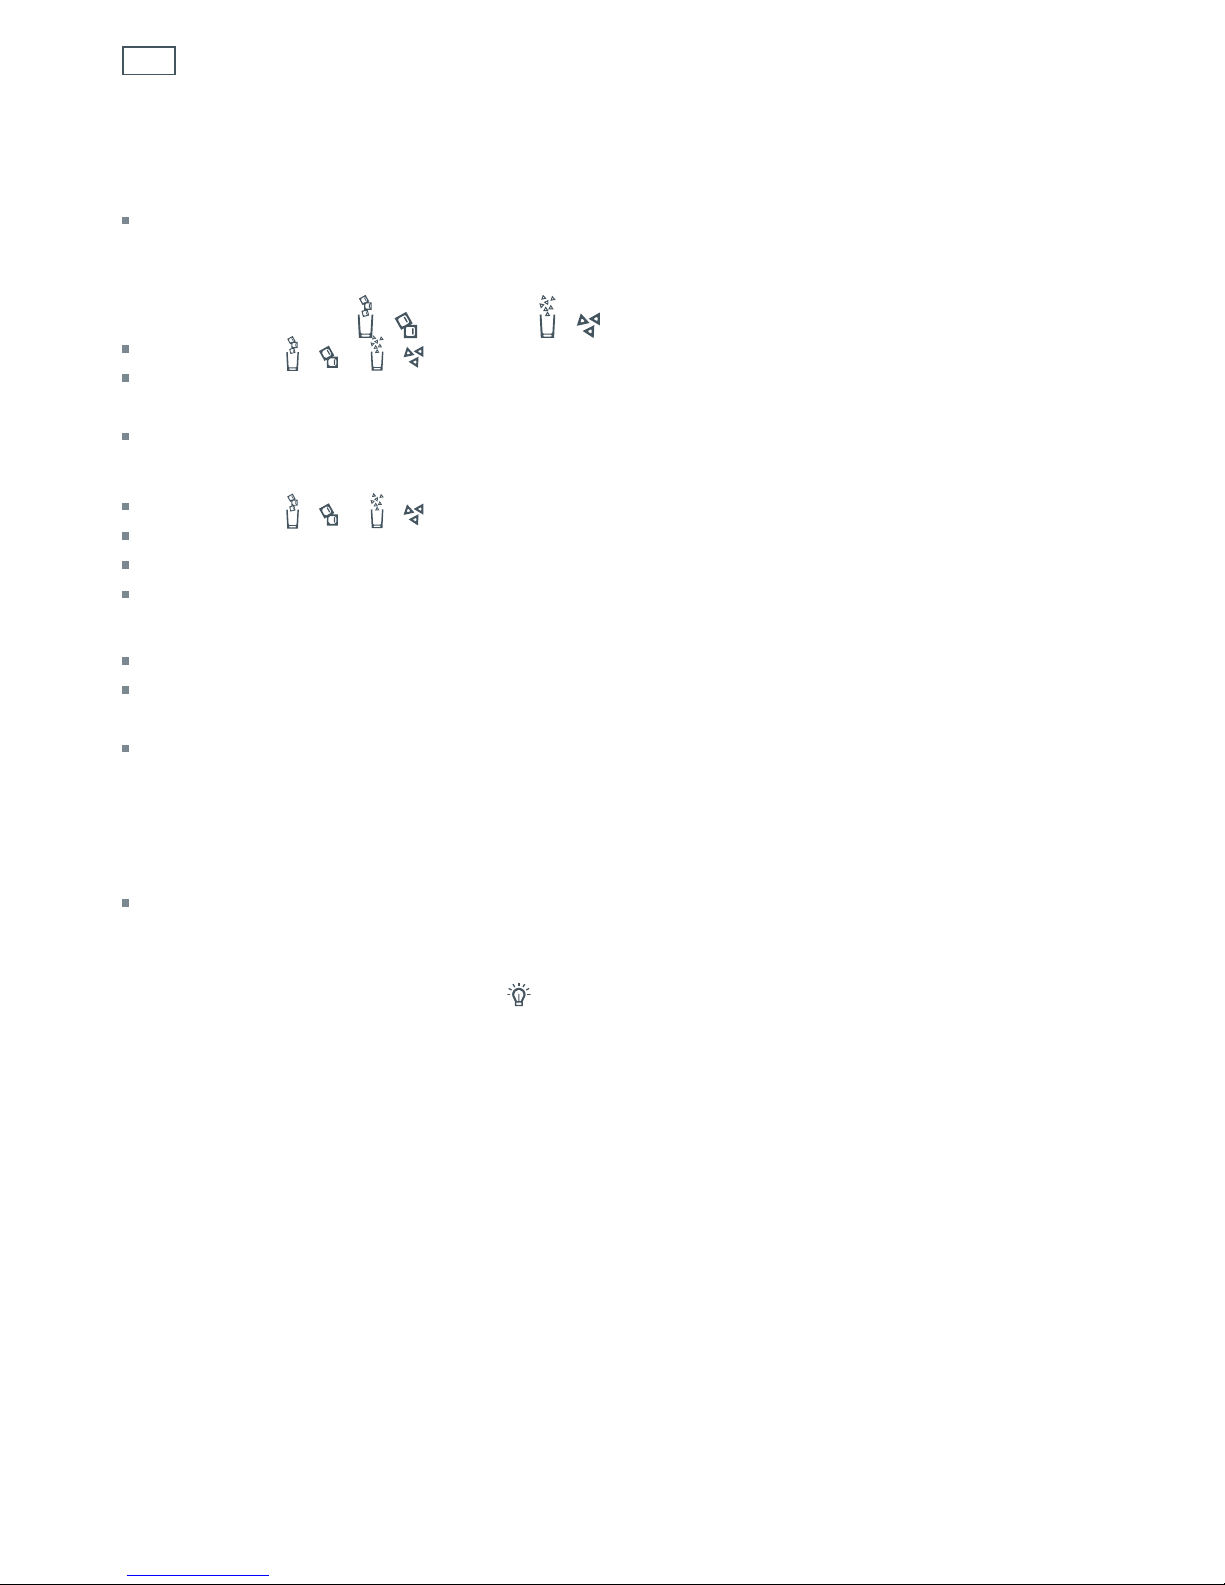
Do not refreeze frozen foods that have thawed completely. Follow the recommendations below if
you discover food in your freezer has thawed:
1) Ice crystals still visible – food may be refrozen but should be stored for a shorter period than
recommended.
2) Thawed but refrigerator cold – refreezing generally not recommended. Fruits and some cooked
food can be refrozen but use as soon as possible. Meat, fish, poultry – use immediately or cook
and refreeze. Vegetables – discard as they usually go limp and soggy.
3) Thawed and warmer than 41˚F (5˚C) – discard all foods.
Do not refreeze frozen foods that have thawed completely. The food may be dangerous to eat.
Important!
Cleaning
Many commercially available cleaning products contain solvents which may attack plastic
components of your refrigerator and cause them to crack. Please refer to the Care and cleaning
section of this booklet for further advice.
5
Installation instructions
WARNING!
Electric Shock Hazard
Read and follow the SAFETY AND WARNINGS outlined in this User Guide
before operating this appliance, pages 3 – 4.
Failure to do so can result in death, electric shock, fire or injury to persons.
Location
Do not install refrigerator near an oven, radiator or other heat source. If not possible, shield
refrigerator with cabinet material.
Do not install where temperature falls below 55° F (13° C) or rises above 110° F (43° C).
Malfunction may occur at these temperatures.
The refrigerator is designed for indoor household application only.
Measuring the opening
When installing your refrigerator, allow ½” (13 mm) space at the top and ½” (13 mm) space
behind machine compartment cover (located in the rear) for proper air circulation. If the
refrigerator is placed with the door hinges against a wall, you may want to allow additional space
so the door can be opened wider.
Subflooring or floor coverings (ie carpet, tile, wood floors, rugs) may make your opening smaller
than anticipated.
Some clearance may be gained by using the leveling procedure under Leveling, page 8.
Important!
If refrigerator is to be installed into a recess where the top of the refrigerator is completely
covered, use dimensions from floor to top of hinge cap to verify proper clearance.
Transporting your refrigerator
NEVER transport refrigerator on its side. If an upright position is not possible, lay refrigerator
on its back. Allow refrigerator to sit upright for approximately 30 minutes before plugging it in.
This will ensure oil returns to the compressor. Plugging refrigerator in immediately may cause
damage to internal parts.
Use an appliance dolly/trolley when moving refrigerator. ALWAYS truck refrigerator from its side
or back – NEVER from its front.
Protect the outside finish of the refrigerator during transport by wrapping the cabinet in
blankets or inserting padding between the refrigerator and dolly.
Secure refrigerator to dolly firmly with straps or bungee cords. Thread straps through handles
where and when possible. Do not over-tighten. Over- tightening restraints may dent or damage
the outside finish.
EN
6
Installation instructions
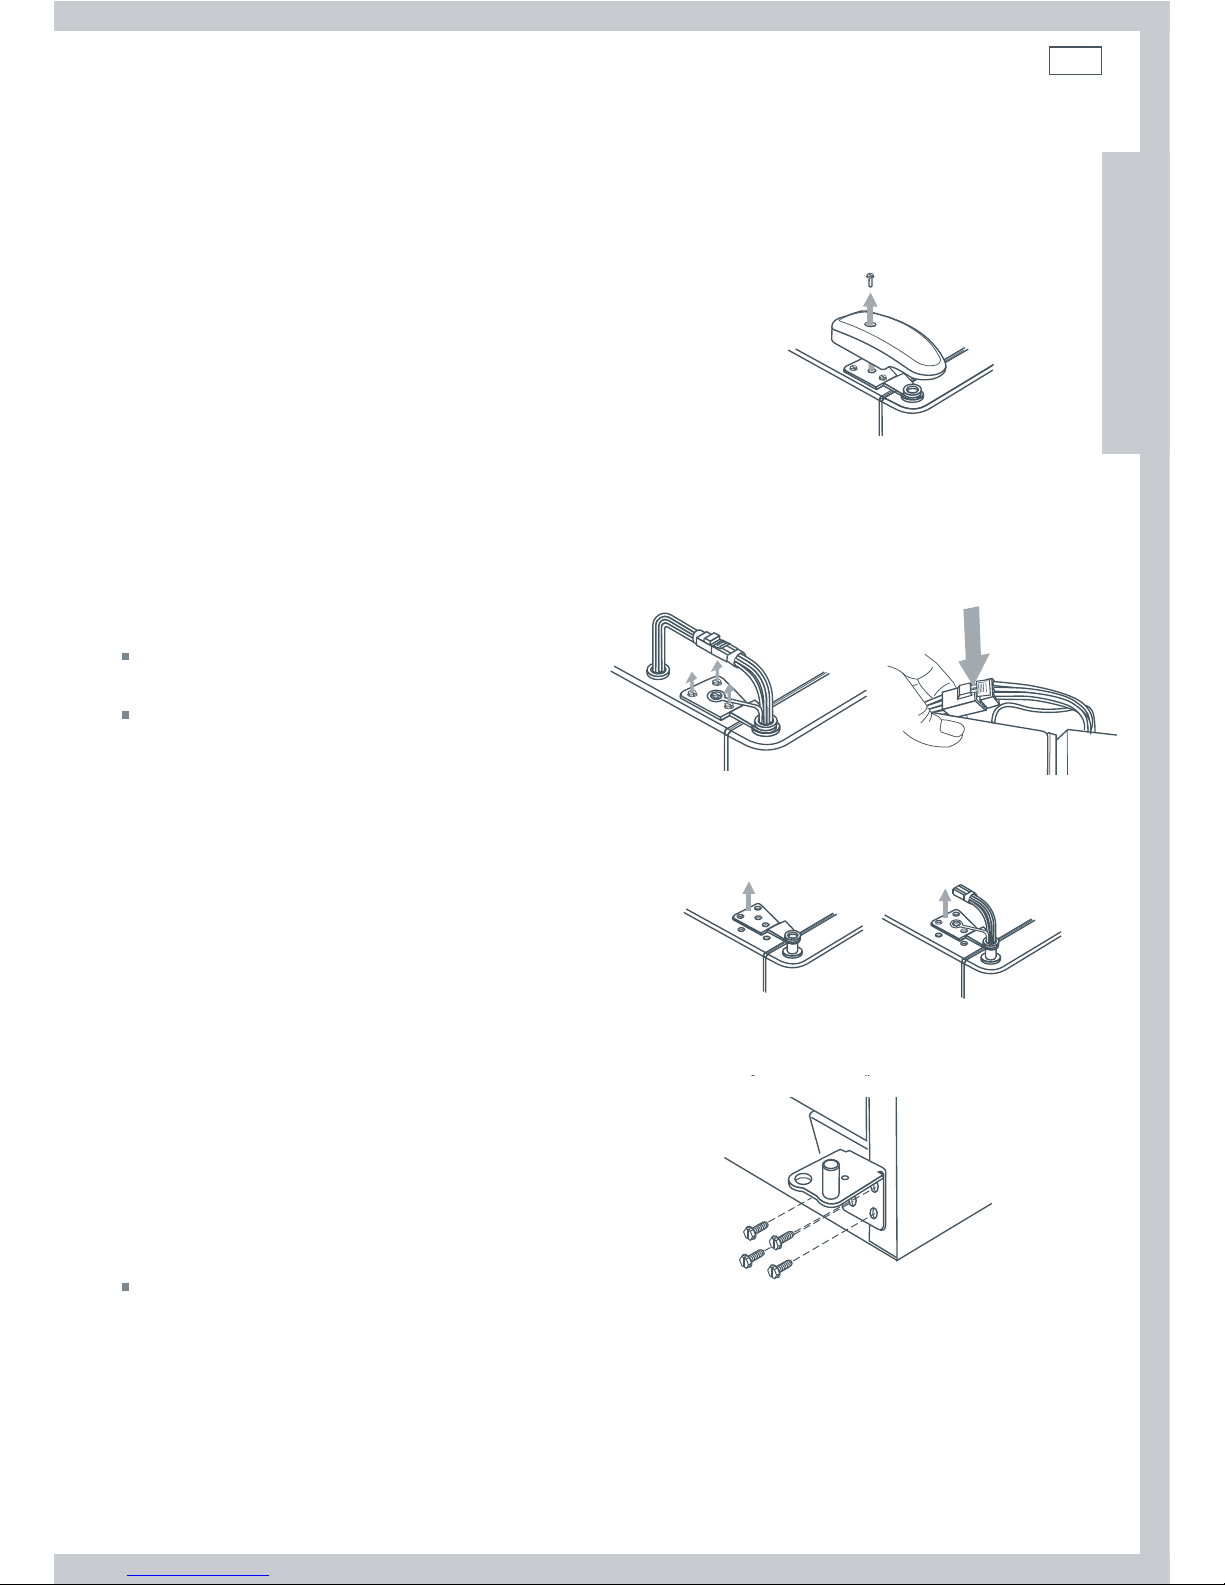
Door and hinge removal
Some installations require door removal to get the refrigerator to its final location.
Tools needed:
Phillips screwdriver
⁄” (9.5 mm) hex head driver
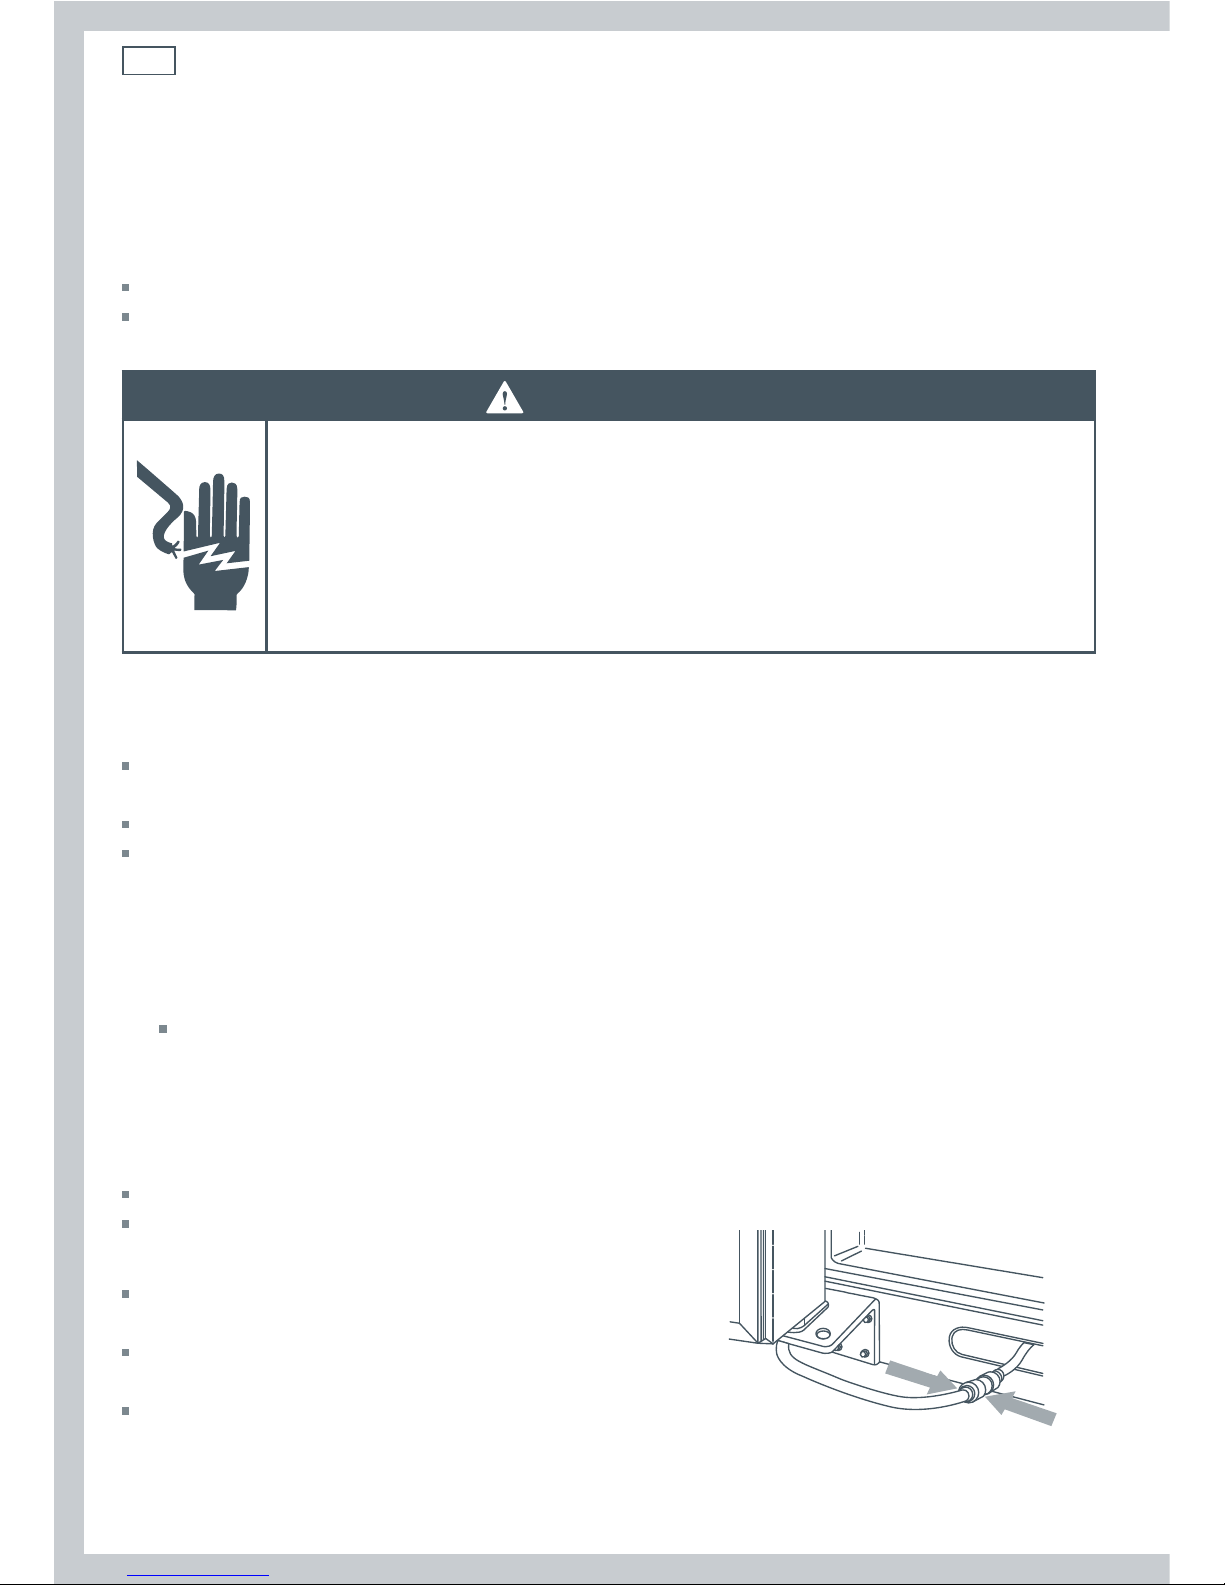
WARNING!
Electric Shock Hazard
Disconnect power to refrigerator before removing doors. Connect power
only after replacing doors.
Green ground wire must be attached to top hinge while performing door
removal and replacement.
Failure to do so may result in death, electric shock, fire, or injury to persons.
Caution!
To avoid property damage, observe the following:
Protect vinyl or other flooring with cardboard, rugs or other protective material, prior to moving
the refrigerator.
Tape decorative panels (select models) securely in place before removing door handles.
Do not adjust the refrigerator to be any shorter than 68½” (1740 mm) tall (minus hinge and cap).
Doing so may damage underside components.
1
Unplug power cord from power source.
2
Remove toe grille (see page 8).
Open both doors 180°, or as wide as possible.
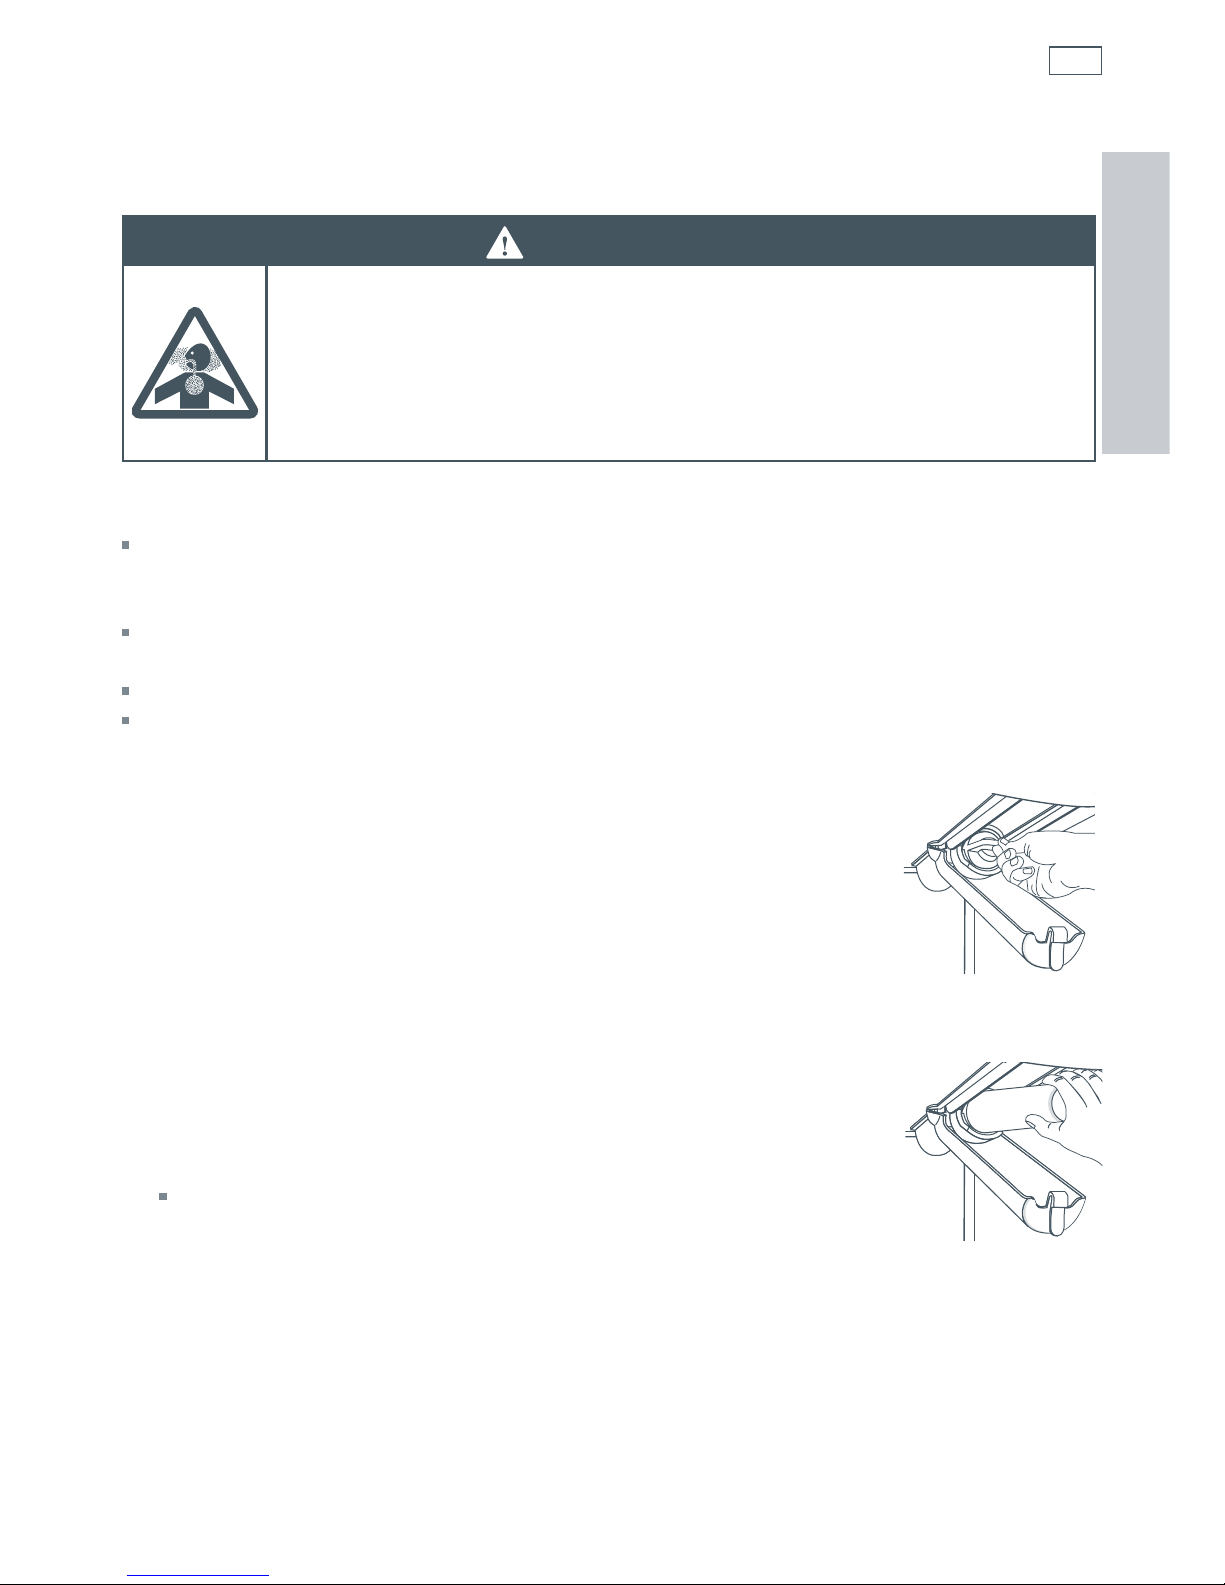
Note: for refrigerators in operation, shut off water before removing water line from the door.
To disconnect the water line:
Push in white collar (
a
) and hold.
Pull the door-side tube from the connector (
b
).
To reconnect the water line:
Firmly push tube ⁄” (8 mm) into the connector.
Use lines on the tube as a guide for full insertion.
If tube end is damaged, cut off ⁄” (8 mm) before
reconnecting.
If leaking occurs, cut and reconnect the line.
a
b
Step 2
7
Installation instructions
3
Close doors.
4
Remove top hinge covers by removing
Phillips screws.
5
Unscrew ⁄” (8 mm) hex head screws from
top hinges.
6
Detach main wire connector harness.
Do not remove screw connecting green
ground wire.
To detach main wire harness, use a flat
blade tool or fingernail to press junction
point between two connectors to release.
7
Remove top hinges along with doors.
8
Remove bottom hinges with a ⁄” (9.5 mm)
hex head driver.
Replacing the doors
To replace the doors, follow the steps in
door and hinge removal in reverse order.
Important!
If water line tube end is damaged, cut off
⁄” (16 mm) before reconnecting.
Fig.2 Door and hinge removal
Step 4
Step 6
Step 7
Step 8
EN

8
Leveling
Caution!
To protect personal property and refrigerator from damage, observe the following:
Protect vinyl or other flooring with cardboard, rugs, or other protective material.
Do not use power tools when performing leveling procedure.
To enhance the appearance and maintain performance, the refrigerator should be level.
Note:
Complete any required door reversal, panel installation and/or a water supply connection before
leveling.
Some models only have front leveling adjustment screws (
a
).
Tools needed:
⁄” (9.5 mm) hex head driver
Carpenter’s level
1
Remove toe grille.
Grasp firmly and pull outward to unclip.
2
Using hex head driver, turn front adjustment screws
(
a
) clockwise to raise and counterclockwise to lower
the front of the refrigerator.
3
Select models also have rear adjustment screws
(
b
). Using the hex head driver, turn each of these
adjustment screws (
b
) to raise or lower the rear of
the refrigerator.
4
Using the carpenter’s level, make sure front of refrigerator
is ⁄” (6 mm) or ½ bubble higher than back of refrigerator
and that the refrigerator is level from side to side.
5
If required, correct rocking of refrigerator by turning rear
adjustment screw clockwise to raise rocking corner.
If doors are uneven, do the following:
Determine which door needs to be raised.
Turn front roller adjustment screw (
a
) clockwise
to raise front corner of door.
If one refrigerator door has reached the limit of its
adjustment range and doors are still not level,
raise or lower the opposite door by turning roller
adjustment screw clockwise or counterclockwise.
Check with level to verify ⁄” (6 mm) tilt to the back for
proper door closure.
If refrigerator is aligned and stable, replace toe grille and hinge covers.
Align the toe grille mounting clips with the lower cabinet slots.
Push the toe grille firmly until it snaps into place.
Installation instructions
a b b a
Fig.3 Leveling the refrigerator
Step 1
Steps 2, 3
Step 5
a
9
Connecting the water supply
Important!
Read the instructions before connection, and do not attempt if instructions are not understood
or are beyond personal skill level.
It is recommended that an authorized plumber in your state or town is used to install the water
connection, to ensure all local codes and ordinances are followed. Consult a plumber to connect
¼” (6.35 mm) OD copper tubing to household plumbing to assure compliance with local codes
and compliance.
Installation precautions/warnings
CONFIRM inlet water pressure to refrigeration connection is between 35 psi and 100 psi. This
applies to reverse osmosis systems. If the pressure from your reverse osmosis system is lower
than this, consult a licensed, qualified plumber.
WAIT two to three hours before placing refrigerator in final position to check and correct any
water leaks. Recheck for leaks after 24 hours. Water damage to an improper water connection
may cause mold/ mildew growth. Clean up spills or leakage immediately.
DO NOT use with water that is microbiologically unsafe or of unknown quality without adequate
disinfection before or after the system.
DO NOT use a self piercing or ⁄” (4.7 mm) saddle valve. Both reduce the water flow, can become
clogged over time, and may cause leaks if repair is attempted.
DO NOT service ice maker unless specifically recommended in User Guide or published userrepair instructions.
CHECK the copper tubing under the sleeve is smooth and free from defects. Do not reuse an old
sleeve.
Tools needed:
⁄” (6.35 mm) outer diameter flexible copper tubing.
Shut-off valve (requires a ⁄” (6.35 mm) hole to be drilled into water supply line before valve
attachment).
Adjustable wrench (2).
⁄” (6.35 mm) hex nut driver.
Note:
Use copper tubing only for installation. Plastic is less durable and can cause damage.
Add 8’ (2440 mm) to tubing length needed to reach water supply for creation of service loop.
Installation instructions
EN
10
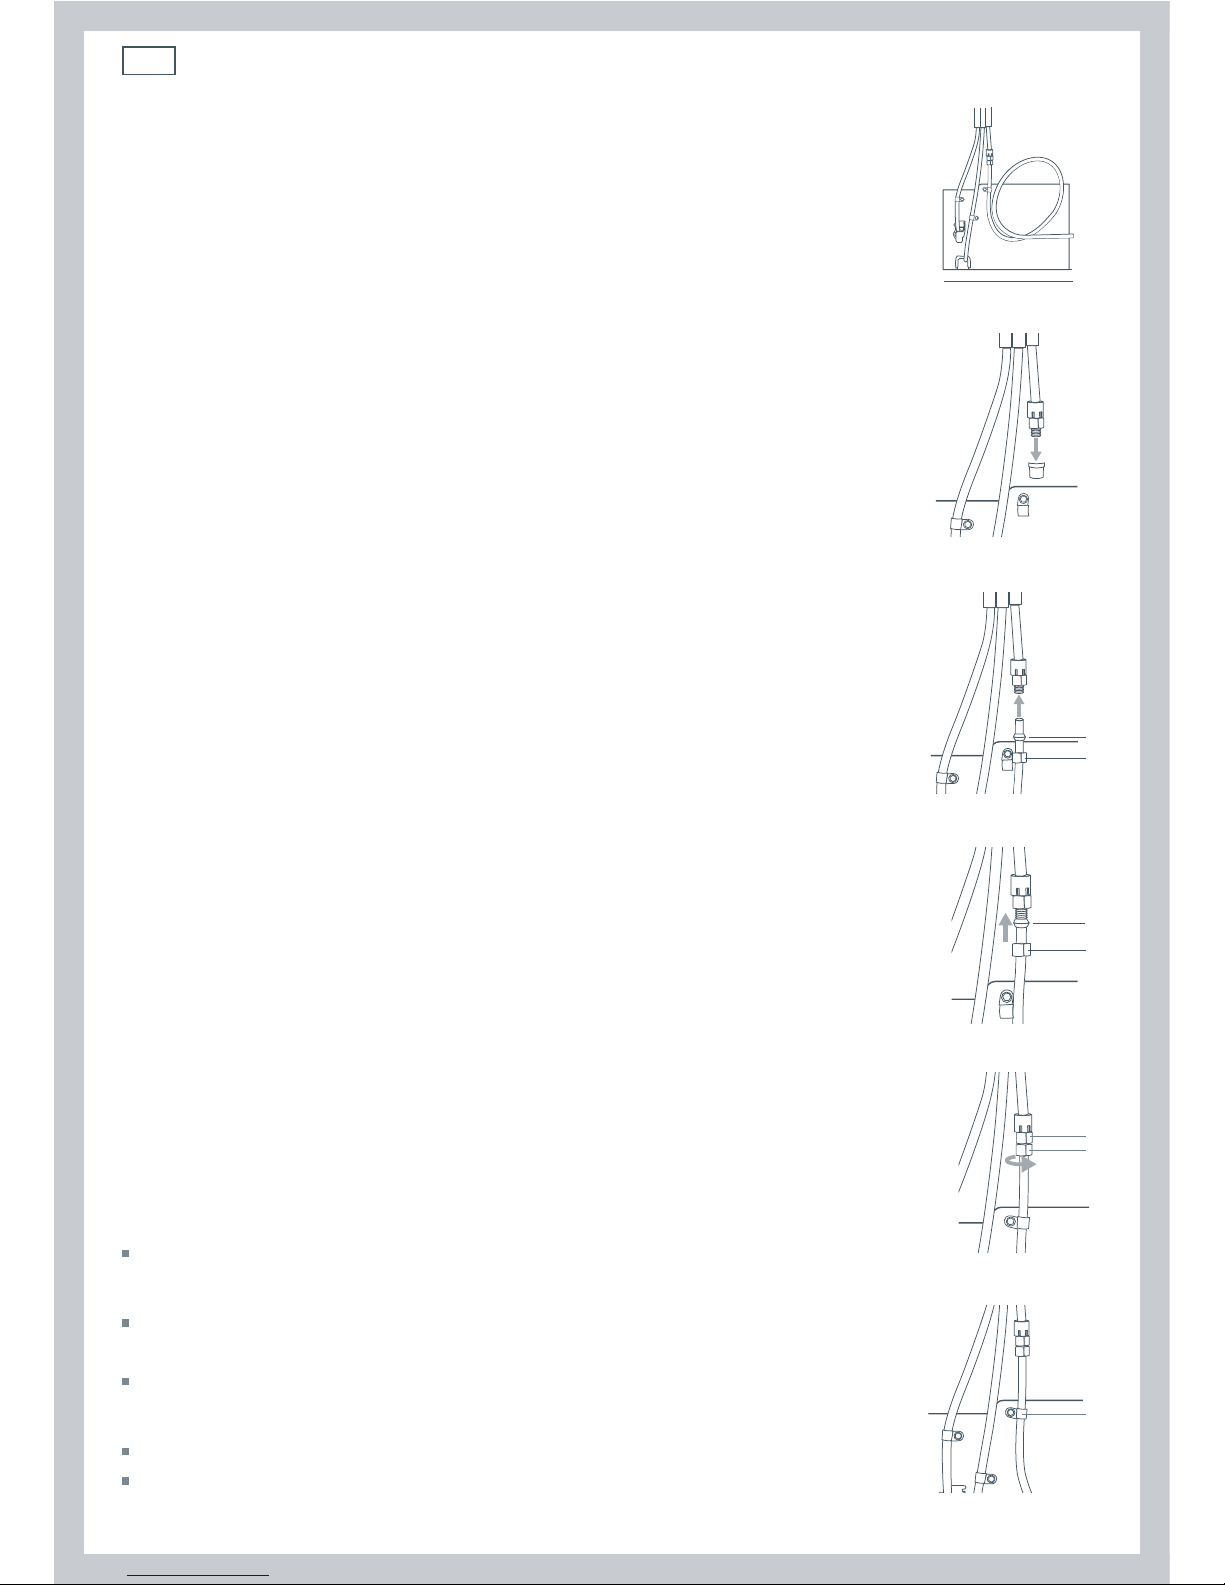
Water connection
Note: ensure refrigerator is not plugged into a power supply.
1
Create service loop with copper tubing (minimum 2’ (610 mm) diameter).
Avoid kinks in the copper tubing when bending the service loop. Do not use
plastic tubing.
2
Remove plastic cap from water valve inlet port.
3
Place brass nut (
a
) and sleeve ( b ) on copper tube end as illustrated.
Reminder: Do not use an old sleeve. The nut and sleeve are provided in the
Use and Care packet.
4
Place end of copper tubing into water valve inlet port. Shape tubing slightly
– do not kink – so that tubing feeds straight into inlet port.
5
Slide brass nut (
a
) over sleeve ( b ) and screw nut into inlet port.
Place adjustable wrench on nut (
1
) attached to plastic waterline and
maintain position. Using second adjustable wrench, turn the lower nut (
2
)
counterclockwise and fully tighten while holding the upper nut in place.
Important!
Do not over-tighten. Cross threading may occur.
6
Pull on tubing to confirm connection is secure. Connect tubing to frame
with water tubing clamp (
c
) and turn on water supply. Check for leaks and
correct if necessary. Continue to observe the water supply connection for
two to three hours prior to moving the refrigerator to its permanent location.
7
Monitor water connection for 24 hours.
Correct leaks, if necessary.
Handle removal
Handles are installed at the factory.
Tools needed:
⁄” (4 mm) Allen wrench
To remove:
Remove cap-screw from handle mounting post using ⁄” (4 mm) Allen
wrench.
Repeat the procedure on all posts to remove the handle.
To replace:
Align handle with the mounting posts.
Fully tighten all cap-screws to secure handle in place.
Installation instructions
Fig.4 Connecting the water supply
2’ (610 mm)
diameter min
Step 1
Step 2
a
b
Step 3
a
b
Step 5a
1
2
Step 5b
c
Step 6
11
Before you start using your refrigerator
Check refrigerator is switched on and has been allowed to cool for three to four hours before
loading with food.
Fit filter if desired (see page 27).
Check the water is connected correctly. No visible leaks.
Turn icemaker on (see page 25).
Dispense 5 qt (5 L) of water and discard. There may be a 1 minute delay until water is dispensed,
as the tank fills.
Discard the first 24 hours worth of ice.
Now you can enjoy the ease and simplicity of ice and water being dispensed out the front of
your refrigerator.
Before use
Note: Warm cabinet surfaces
At times the front of the refrigerator cabinet may be warm to touch. This is a normal occurrence
that helps prevent moisture from condensing on the cabinet. This condition will be more
noticeable when the refrigerator is first started, during hot weather or after excessive or lengthy
door openings.
Fig.5 Side by side refrigerators
EN
12
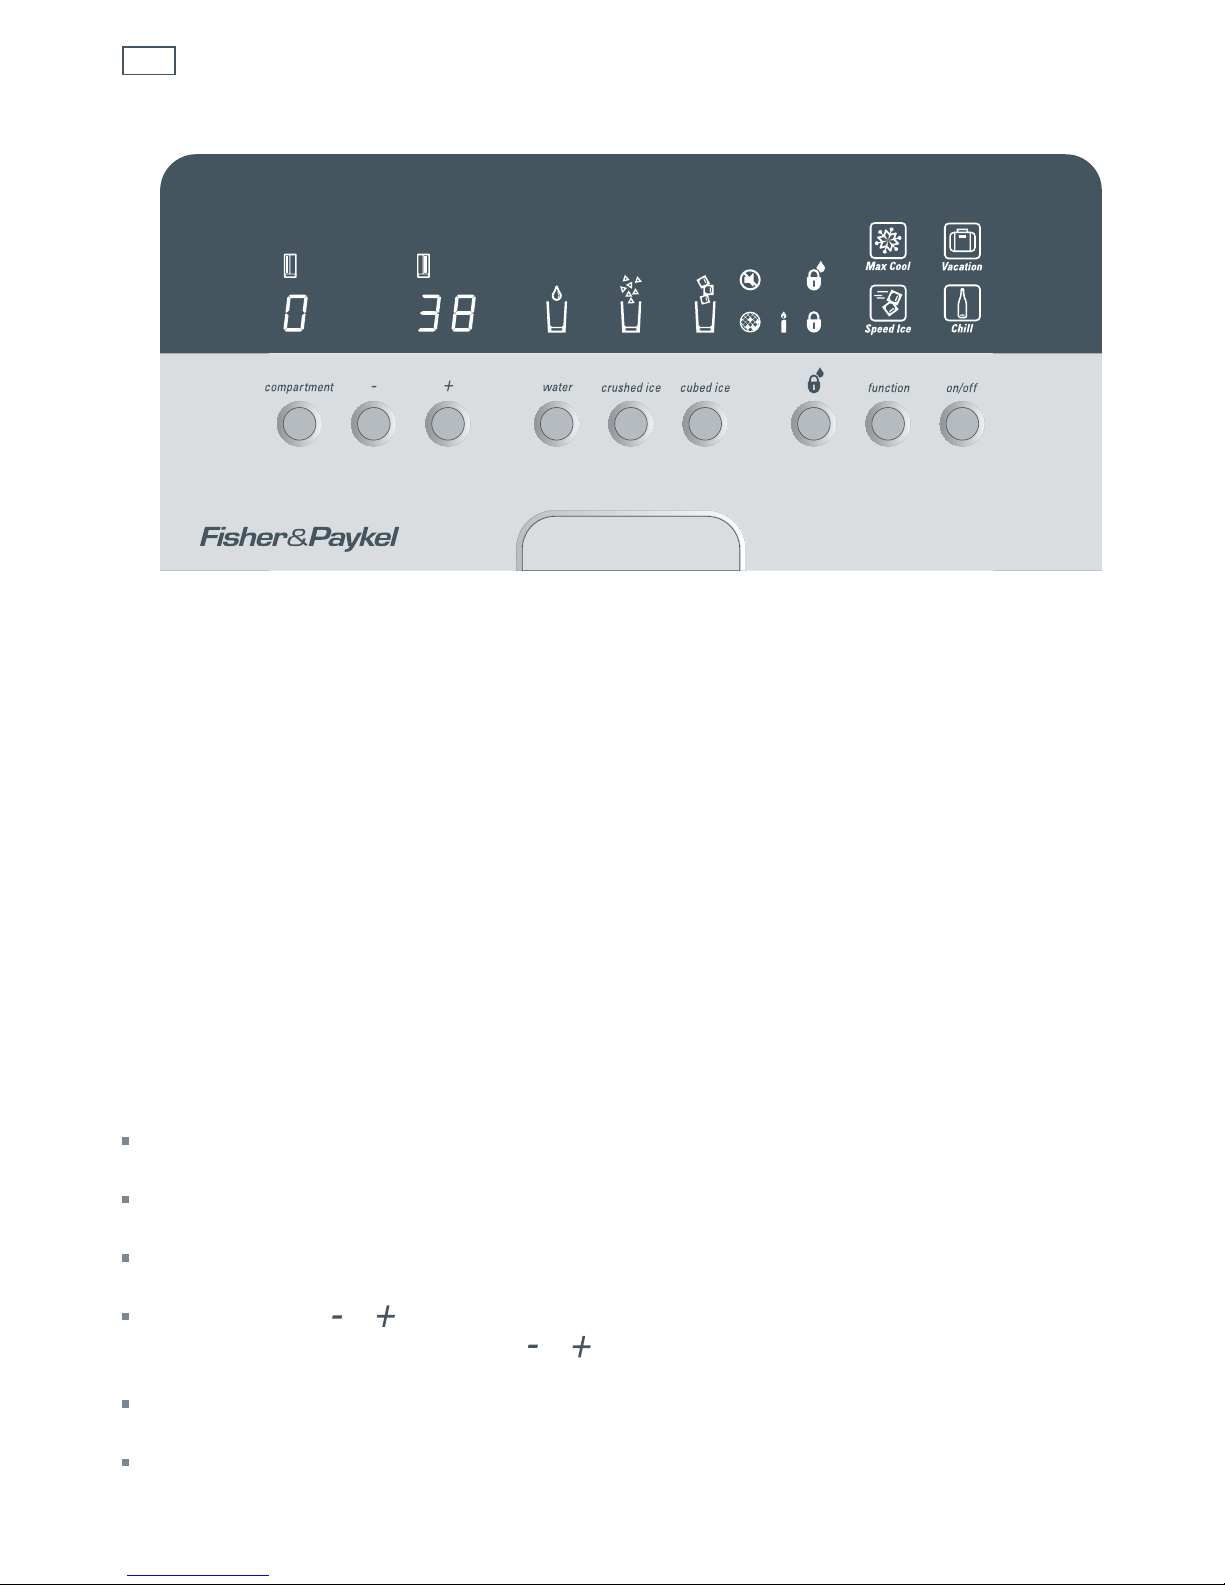
All about the display (RX216DT7XV2)
The display screen allows you to view and modify all the features on your refrigerator. You can
change the temperature of your refrigerator and freezer independently, and select the
MAX
COOL
function when you want to quickly cool or freeze food items. You may want increased ice
production when you are entertaining or want to quickly chill a bottle of wine when friends
arrive unexpectedly. The
SPEED ICE and CHILL functions allow for both. The VACATION function
allows you to save valuable energy, and reduces the refrigerator’s operational costs.
The temperature of your refrigerator and freezer
The temperatures are preset at 38°F (3°C) in the fresh food compartment and 0°F (-18°C) in the
freezer compartment. After being initially switched on the refrigerator will take several hours to
cool, depending on the environment it is placed in. You can start to store food in it 3 – 4 hours
after it was turned on.
After placing food in the refrigerator, leave it to stabilize for 24 hours. After this time you may
wish to alter the temperature.
The temperature of the freezer and refrigerator is displayed on, and can be controlled via, the
display.
The
COMPARTMENT button allows you to alternate between the freezer compartment (left hand
temperature) and the refrigerator compartment (right hand temperature) on the display.
Before any buttons have been pushed, the display shows the current temperature of both
compartments.
The first touch of
or button shows the current temperature setting in the selected
compartment. Further touches of the
or button will change the temperature setting in 1°F
increments.
The display will show the new setting for two seconds, and then return to the current
temperature within the selected compartment.
Do not change the temperature more than one degree at a time. Allow the temperature to
stabilize for 24 hours before making another temperature adjustment.
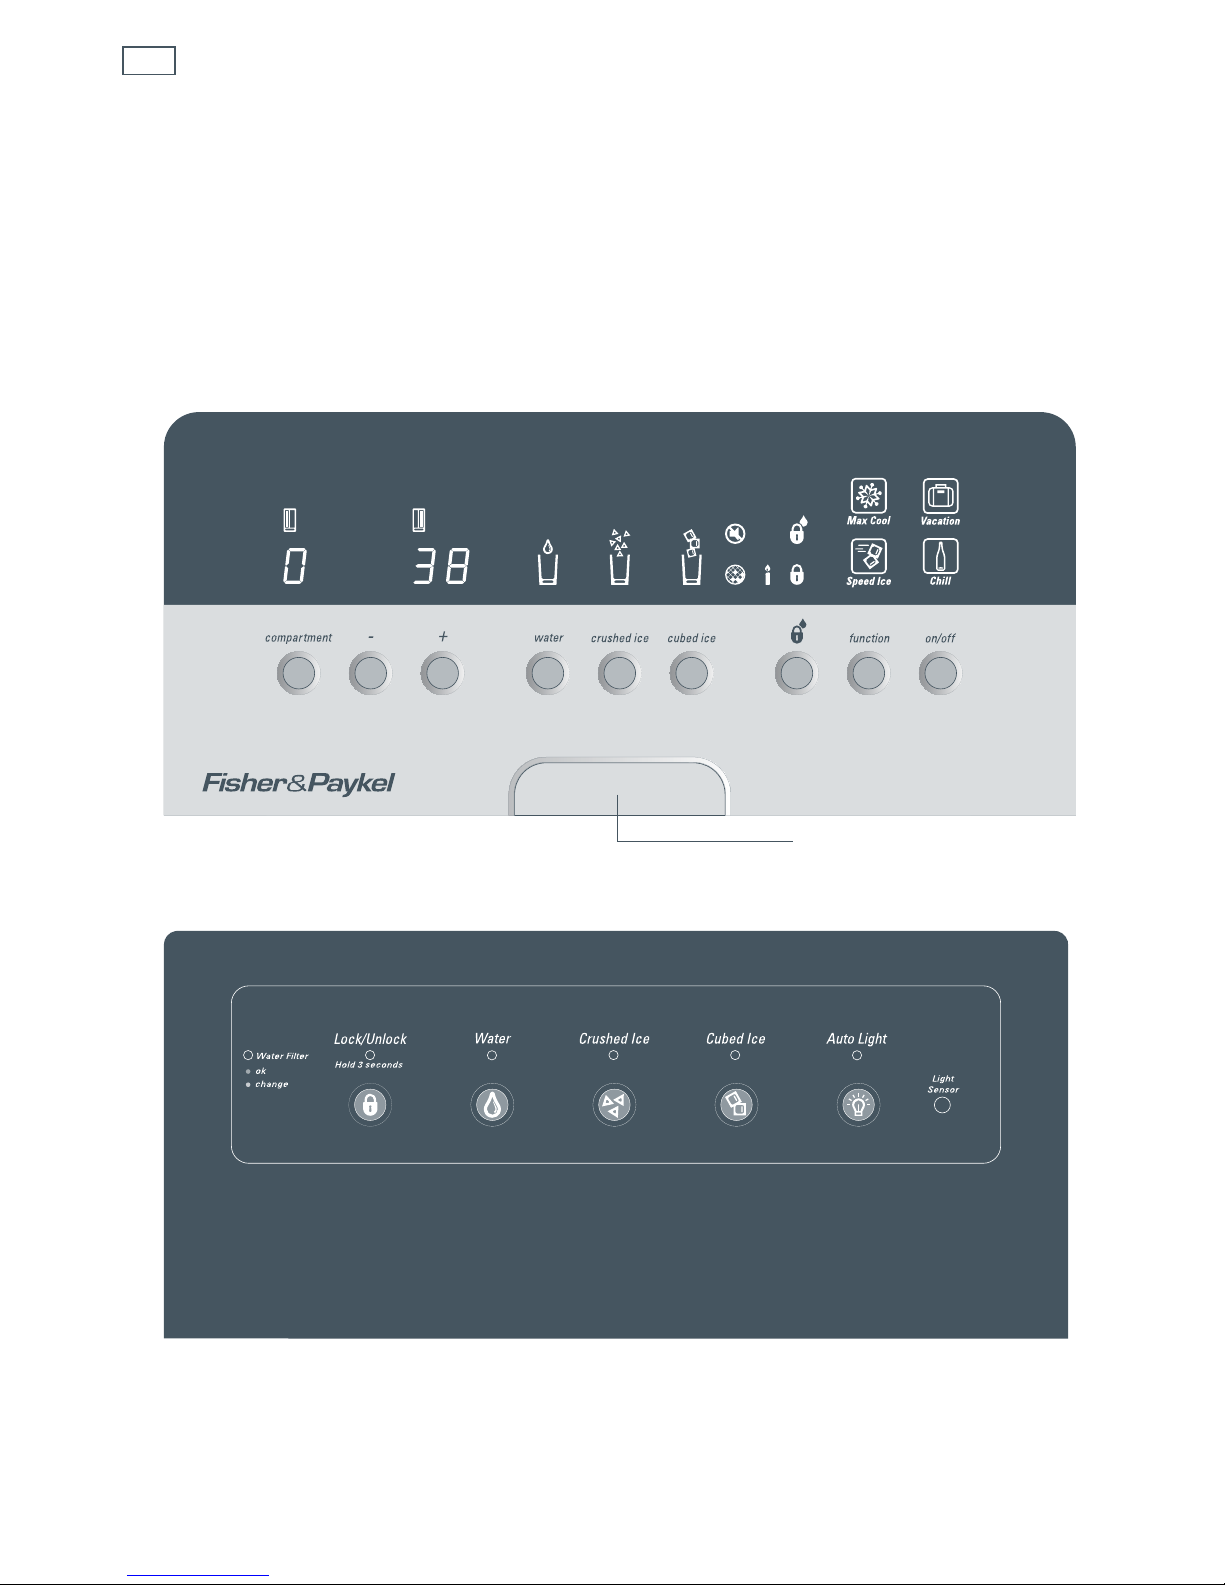
Fig.6 Control panel (RX216DT7XV2)

13
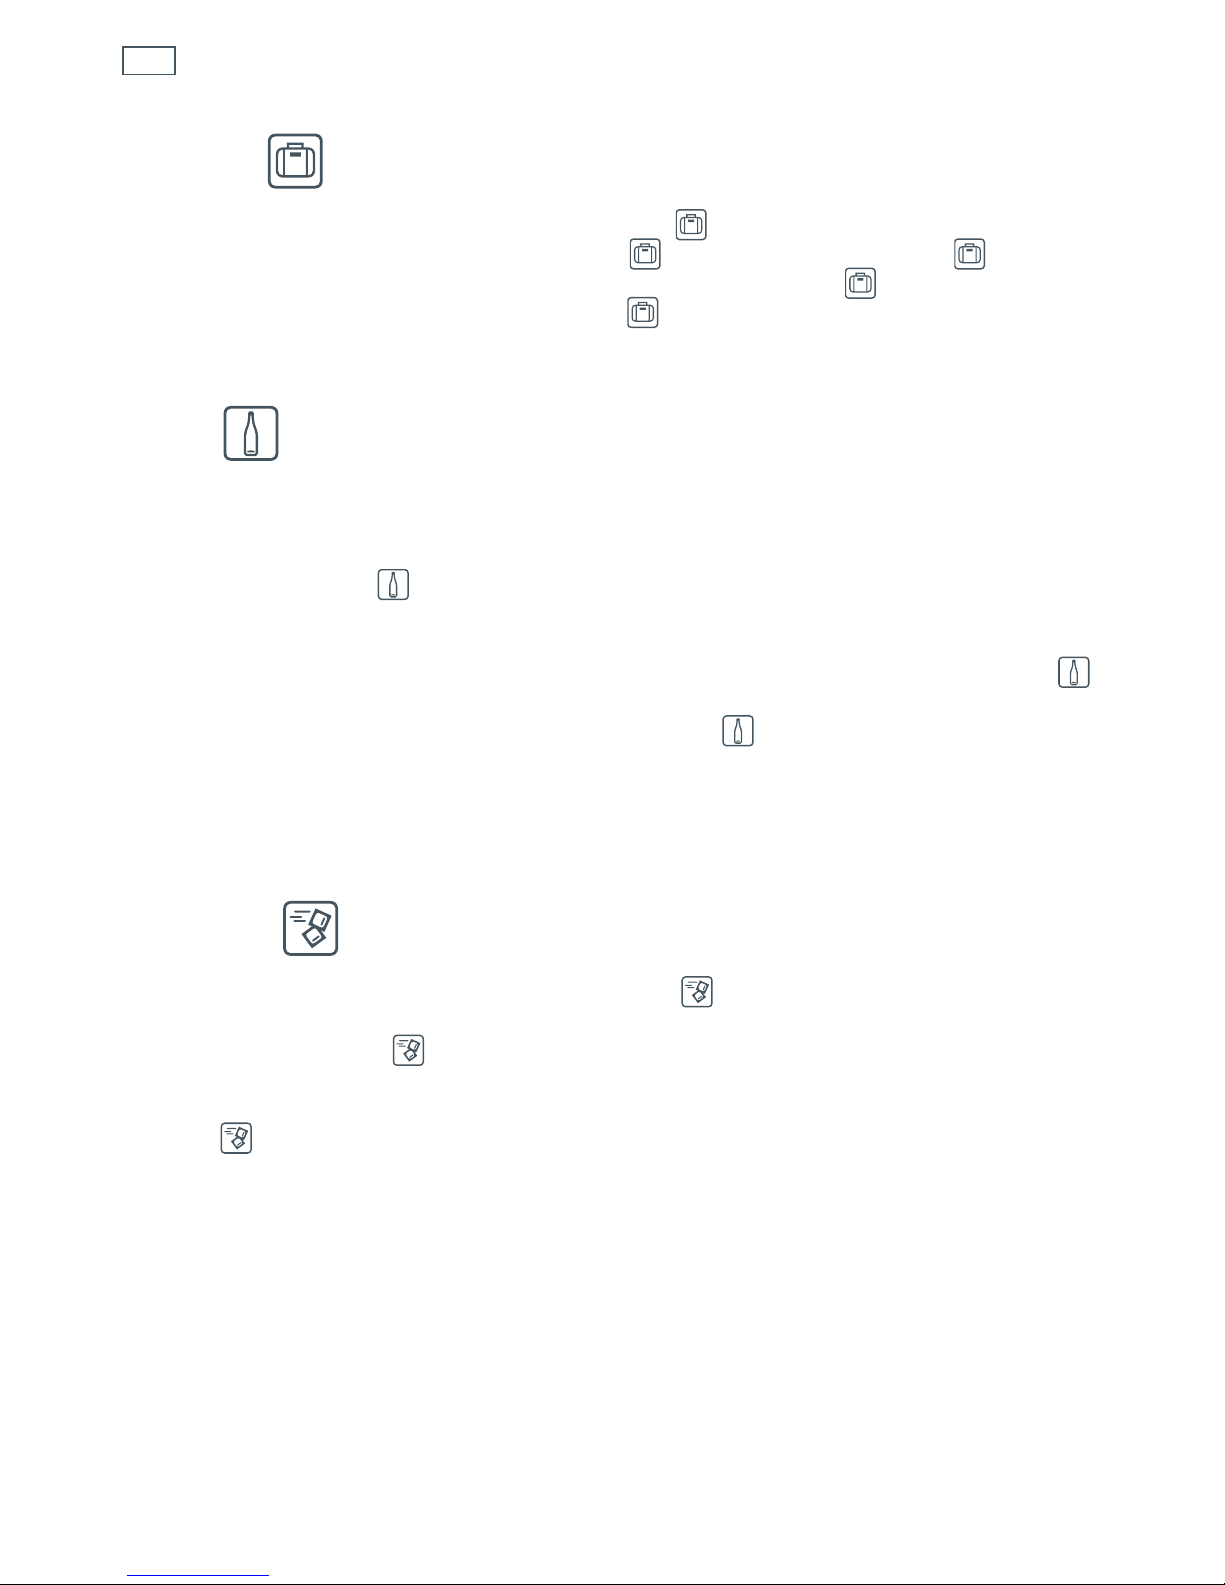
Special functions (RX216DT7XV2)
This refrigerator has four special functions for you to enjoy; MAX COOL, VACATION, CHILL and
SPEED ICE. By default all the options are off.
Special function selection
How to turn special functions on and off:
Press the
FUNCTION button to activate the Special Functions display.
Press the
FUNCTION button to scroll to the function you wish to turn on or off.
Functions will light up white if off, or red if on.
The selected icon will flash.
Press the
ON/OFF button to turn the selected function on or off.
The other three icons will be white if off or red if on.
Max Cool
Having either door open for a long time, or loading the refrigerator full of warm food (such as
after a trip to the supermarket) will raise the temperature of the refrigerator. The
MAX COOL
function boosts the freezing and cooling power, by dropping both compartments to their
minimum temperatures for 12 hours. This helps to ensure vital nutrients, freshness, texture and
taste of the food items are retained.
After 12 hours
will turn off automatically, and both compartments return to their previously
selected temperatures. To deactivate
before the 12 hours, turn off via the display.
When the
feature is activated neither of the temperature adjustments will operate.
EN
14
Special functions (RX216DT7XV2)
Vacation
If you are going on vacation, activating the VACATION function is an easy way to save energy
and money. Defrosts occur less frequently when
is on, consuming less energy. will remain
on until deactivated. To deactivate the mode, open either door or turn
off. Opening a door in
the first hour after activation will not deactivate
.
See Preparing for vacation (page 35) for more details.
Chill
This function allows you to chill your beverages in the freezer without the worry of forgetting
about them.
When activated,
CHILL will remind you after 20 minutes to remove your beverage by
sounding an alarm. The user alarm will continue to sound until any key on the display is pressed.
You may find larger bottles are not adequately chilled after the 20 minutes. For such bottles,
can be turned on a second time and placed in the freezer again. This should not be done with
smaller bottles, cans or beverages chilled prior to the first
. This could cause the vessel to
crack and/or explode or the liquid will start to freeze.
Important!
Do not leave the bottle inside the freezer longer than the time needed for chilling.
Speed Ice
Sometimes you need more ice than normal. SPEED ICE will solve this problem by dropping
the freezer compartment temperature down. This increases ice production by up to a third over
normal production. The
function will be activated for 24 hours. After 24 hours, the freezer
compartment will return to the previously selected temperature.
When
is activated the freezer compartment temperature can not be adjusted.

15
User Preferences menu (RX216DT7XV2)
User Preferences menu
The User Preferences menu allows you to further customize your refrigerator, altering the
settings to suit you.
To access the User Preferences menu, hold down the
COMPARTMENT button for four seconds.
When in the User Preferences menu, a short title for the feature will appear in the left/freezer
temperature display and the feature status will appear in the right/refrigerator temperature
display. For example, dEG will appear in the freezer screen and °F or °C will appear in the
refrigerator screen.
Use the
COMPARTMENT button to scroll through the features.
When the desired feature is displayed, use the
and buttons to change the status or setting
of the feature.
To exit the menu, hold down the
COMPARTMENT button for another four seconds.
The following features can be accessed through the User Preferences menu.
Fahrenheit/Celsius (dEG)
The display can show the temperature in degrees Fahrenheit (°F) or degrees Celsius (°C).
The temperature will change in 1° increments for both F or C settings.
Sabbath mode (SAb)
When Sabbath mode is on, the display screen, all control and exterior lights and the door alarms
are disabled until the feature is turned off. This feature does not disable the interior lights.
Sabbath mode will automatically de-activate after 80 hours, if not turned off earlier. When
Sabbath mode is on, the display will be inactive apart from a small red candle
on the display.
Temperature Alarm (see page 16) and the door alarm function will not operate if refrigerator is in
Sabbath mode.
Sound (Snd)
Turning the sound off, silences the button presses on the display and all audible alarms.
icon
will appear on the display when the sound is off. Turning sound off turns the door alarm function
off. Temperature Alarm will remain on when the sound is turned off, but the alarm will not
sound. Only the visual feedback from the display will be given (see page 16).
Door Alarm (dor)
When the door alarm function is on, an alarm will sound if either door on the refrigerator is left
open for longer than five minutes. This is to remind you to close the open door(s).
The door alarm will turn off when either Sabbath mode is turned on or when sound is turned off.
EN

16
User Preferences menu (RX216DT7XV2)
Temperature Alarm (tP)
When activated the Temperature Alarm tells you if compartment temperatures exceed normal
operating temperatures due to power outage (or other event) by sounding an alarm repeatedly.
The alarm will not sound if either Sabbath mode is on or if the sound is turned off.
The display will show the highest compartment temperature reached while the power was out.
Once the refrigerator starts to cool, the display will alternate between the current compartment
temperature and the highest temperature reached until normal operating temperatures are
restored.
Press any button on the display to turn the audible alarm off. Once the alarm has been turned off
the display will continue to alternate temperatures.
Temperature Alarm will not operate if refrigerator is in Sabbath mode.
Appliance mode (APL)
Turning Appliance mode off means that the entire refrigeration unit will turn off (both the
fresh food and freezer compartment). The lights will remain on inside both compartments.
Note: If turning the refrigerator off (Appliance mode off), ensure all food from both
compartments and ice from the freezer is removed.
Filter Reset (FLr)
When replacing the filter cartridge, turning the filter reset status to 'yes' then holding
COMPARTMENT button down, confirms filter counter has been reset.
17
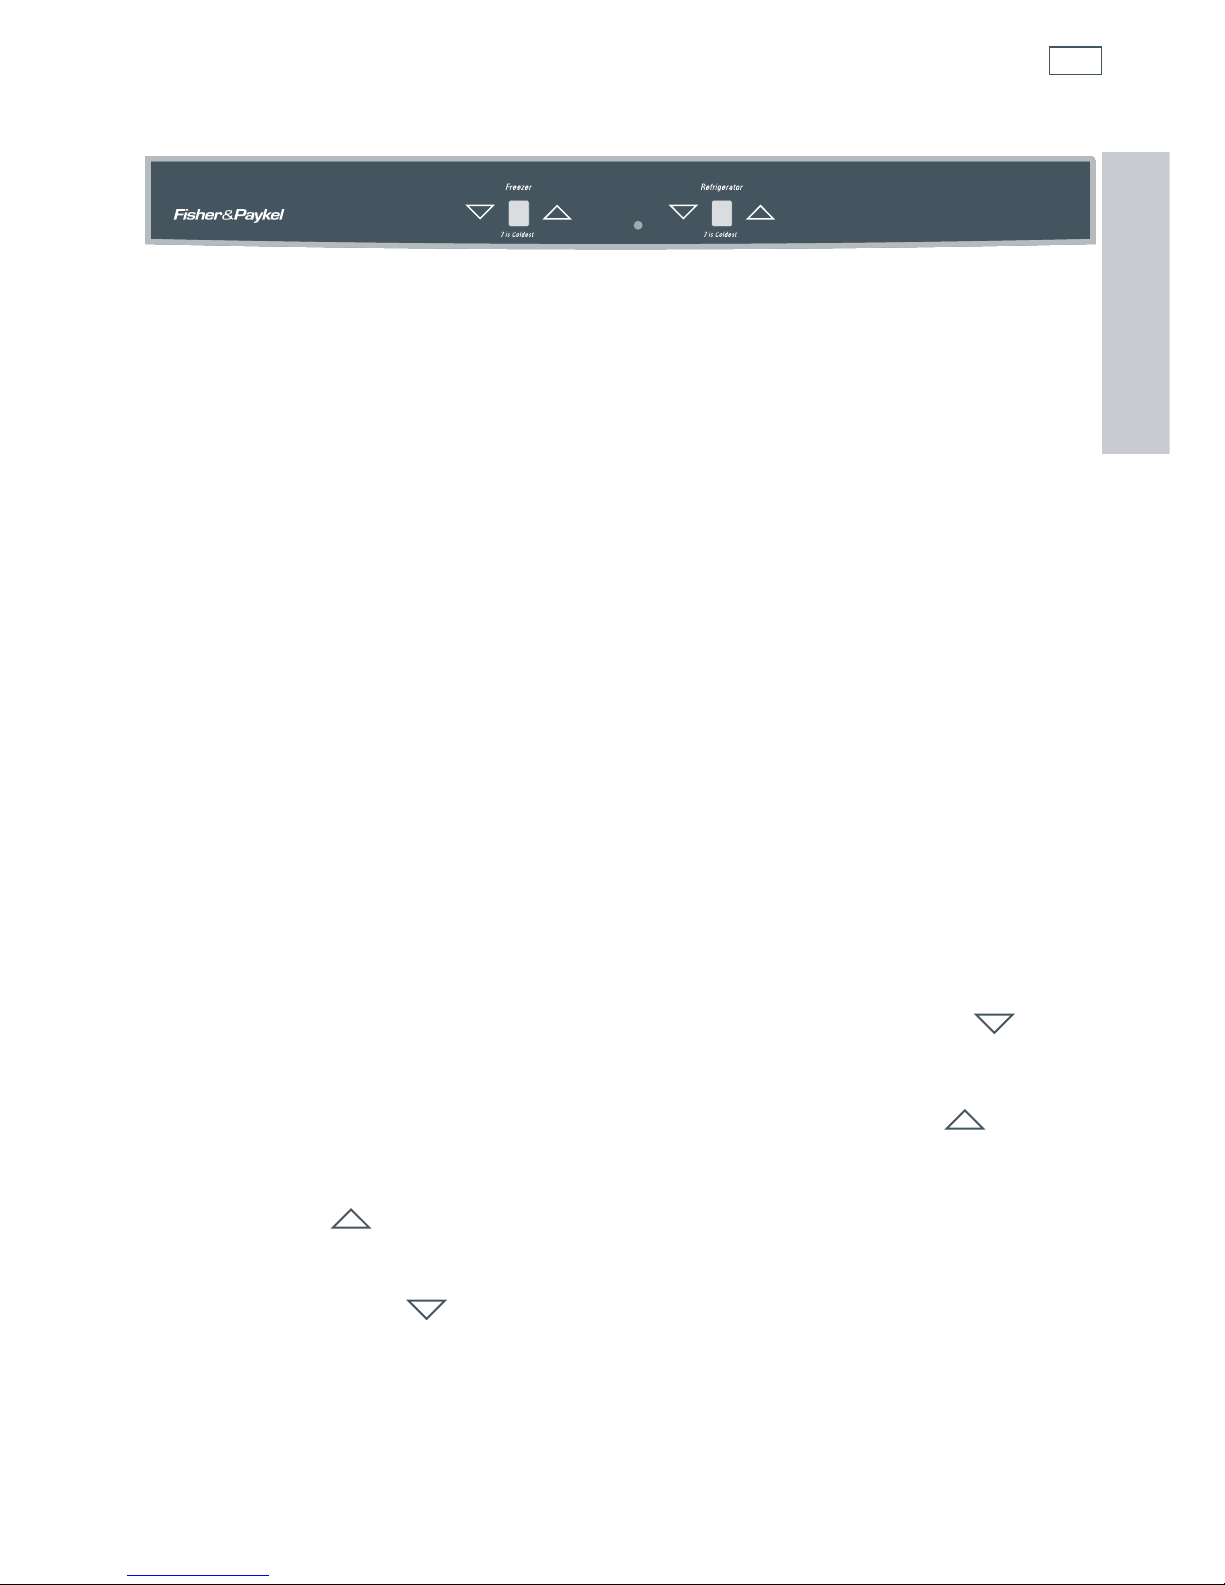
Temperature controls (RX216CT4XV2)
There are two control panels on your refrigerator, one on the outside of the freezer door and one
inside at the top of the fresh food compartment. Temperature is controlled via the control panel
located inside the fresh food compartment.
The temperatures are preset to setting 4 (recommended setting) in both the fresh food and
freezer compartments. After being switched on, the refrigerator will take several hours to cool,
depending on the environment it is placed in. You can start to store food in it 3 – 4 hours after it
was turned on.
After placing food in the refrigerator, leave it to stabilize for 24 hours. After this time you may
wish to alter the temperature. The fresh food and the freezer compartments are independent of
each other, and their temperatures are set individually.
There are seven possible settings for each compartment:
1 2 3 4 5 6 7
Warmest Recommended Coldest
Do not change the temperature more than one setting at a time. Allow the temperature to
stabilize for 24 hours before making another temperature adjustment.
If either compartment is too cold
Adjust the compartment temperature setting down one by pressing the appropriate button
for the compartment.
If either compartment is too warm
Adjust the compartment temperature setting up one by pressing the appropriate button for
the compartment.
To turn the refrigerator off
Press either of the buttons repeatedly, until the numbers disappear from the display. This
will turn the whole refrigerator unit off (both fresh food and freezer compartments), although
the compartment lights remain on.
To turn back on, press the
button until the desired temperature setting is reached.
Note: if turning the refrigerator off, ensure all food and ice is removed.
Fig.7 RX216CT4XV2 Internal temperature display
EN

18
Fresh food features
The fresh food compartment is designed to keep your food as fresh, nutritious and flavorsome
as possible.
Fruit and vegetable storage
Fruit and vegetables stored in the normal refrigerator environment will lose moisture very
quickly to the cold, dry air. This decreases their storage life as they will lose moisture and
shrivel very quickly. The fruit and vegetable storage bin provides an environment in which you
control the humidity. By controlling the humidity in the bin, the air is kept moist, and fruit and
vegetables retain significantly more moisture. This increases their storage life, keeping them
fresher for longer.
Fruit and vegetables have slightly different humidity/storage requirements, so the storage
bin has an adjustable humidity slide with three settings. Fruit requires lower humidity storage
compared with vegetables.
To remove:
Pull drawer out to full extension.
Tilt up front of drawer and pull straight out.
To install:
Insert drawer into frame rails and push back into place.
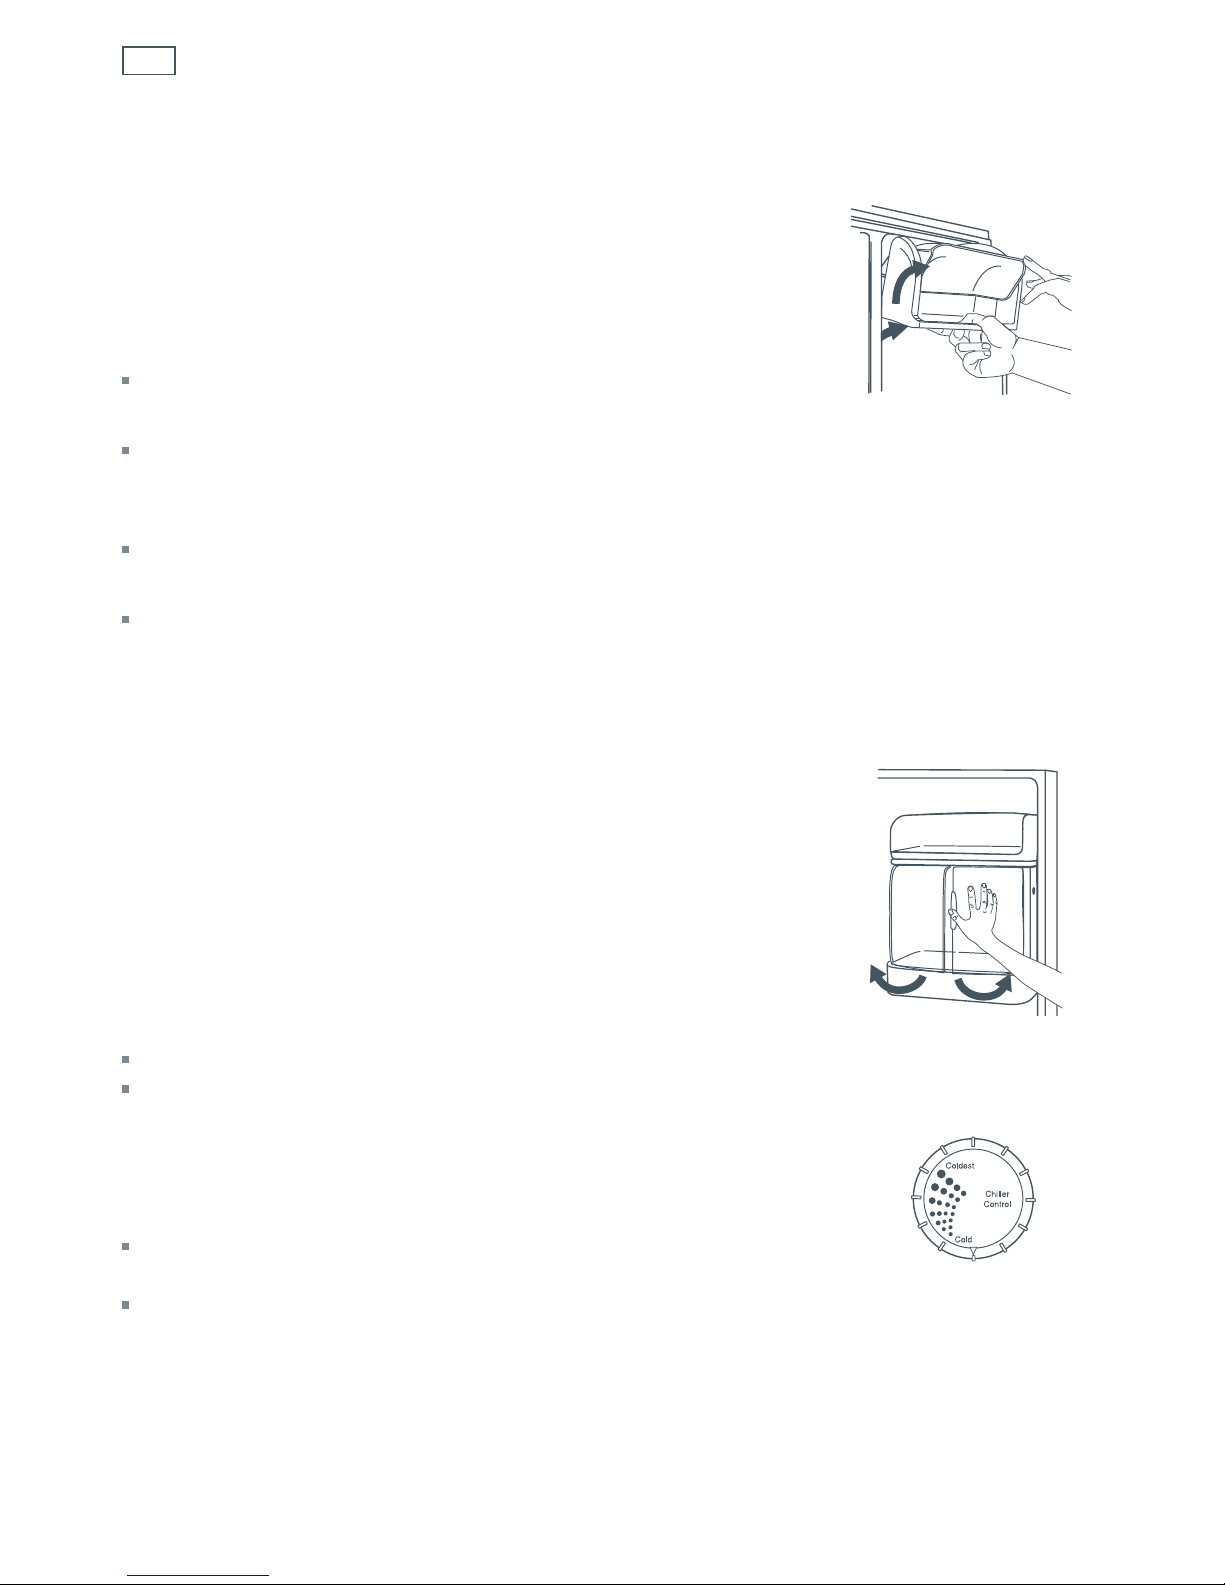
Meat drawer
The temperature controlled meat drawer at the bottom of the fresh food compartment provides
an environment perfect for storing a range of items. It has two slide settings – cold, and coldest
setting. The coldest setting is slightly colder than the rest of the fresh food compartment,
and is perfect for storing meat. The cold setting is a similar temperature to the fresh food
compartment, and is great for other fresh foods.
Fig.9 Fruit and vegetable bin
Fig.8 Humidity Control Settings
Vegetables
Lettuce
Spinach
Broccoli
Carrots
Mixed fruit
and vegetables
Fruit with
skin/peel
Oranges
Lemons
Grapes
Plums
Suitable for:
High Low
.....
19
Fresh food features
There are a number of customizable storage options throughout the compartment.
Shelves
Caution!
To avoid personal injury or property damage, observe the following:
Never attempt to adjust a shelf that is loaded with food.
Ensure shelf is secure before placing items on shelf.
Handle tempered glass shelves carefully. Shelves may break suddenly if nicked, scratched, or
exposed to sudden temperature changes.
Your refrigerator is fitted with shelves specially designed to retain spills, making clean up easier.
To remove a shelf:
Slightly tilt up the front and lift up the rear of the shelf, then pull the shelf straight out.
To install a shelf:
Tilt the front edge up and insert the hooks into the desired frame openings and let the shelf
settle into place. Be sure the shelf is securely locked at the rear.
The top of each bin serves as the shelf above it. To remove the bin top place your hand under
the frame to push the glass up. Lift glass out. To install, reverse the instructions.
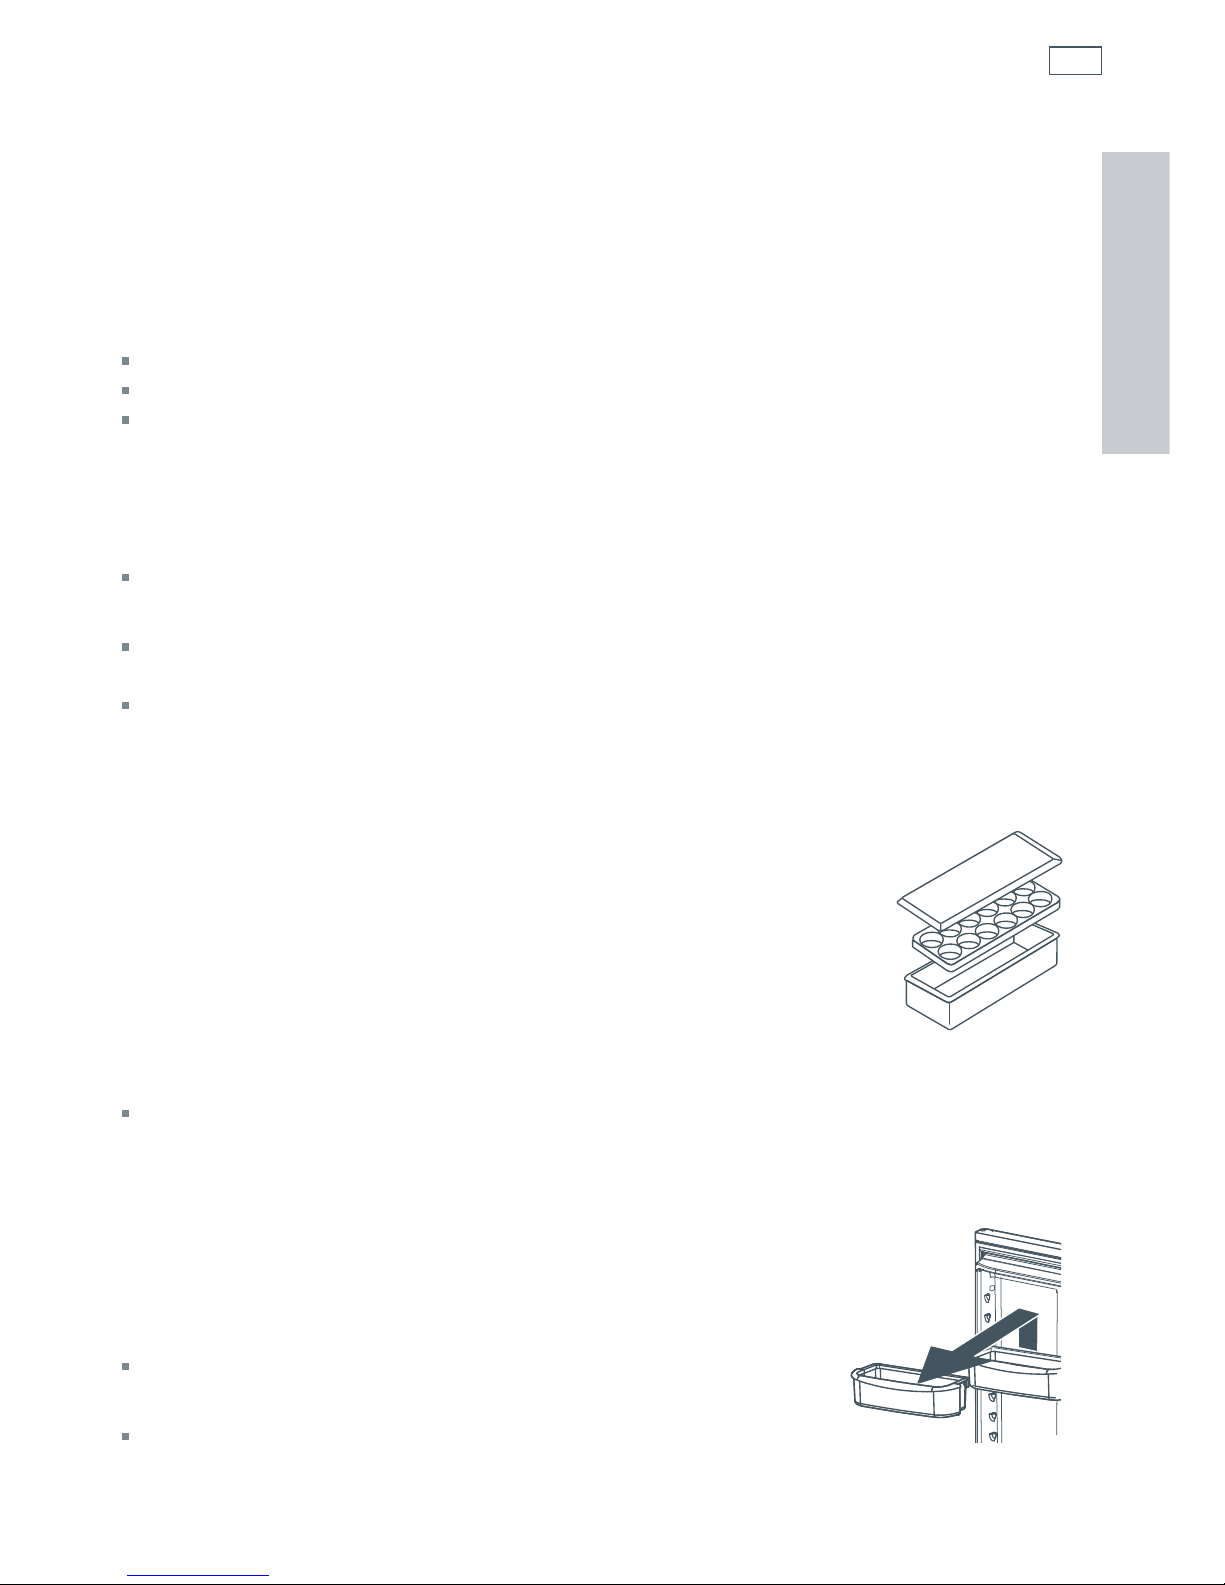
Covered storage bucket (select models)
The storage bucket has a lid and removable egg tray. When the
tray is removed the bucket will fit other items, such as a standard
egg carton.
Wine bottle holder (select models)
The wine bottle holder will hold a single bottle.
To install:
Slide the upper lip of the holder along the top left side of any shelf.
The bottle holder sits underneath the shelf.
Door buckets (for fresh food and freezer compartments)
Door buckets can be moved up or down to meet individual storage
needs.
To remove:
Lift the bucket up and pull straight out.
To install:
Place bucket in desired door liner retainer position and push down
gently until bucket stops.
Fig.10 Covered storage bucket
Fig.11 Door bucket
EN
20
Fresh food features
Dairy shelf
The dairy shelf provides con venient door storage for spreadable
items such as butter and margarine. On select models, this
compartment can be moved to several different locations to
accommodate storage needs.
To remove:
Slide dairy shelf up and pull out.
To install:
Slide assembly in and down so that the hooks are firmly seated
on the door liner.
To remove dairy door:
Press in sides of dairy door and pull out.
To install dairy door:
Slide sides of dairy door inside dairy shelf until hinge points snap
into place.
Beverage Chiller
The Beverage Chiller keeps beverages and other items colder
than the rest of the fresh food compartment. An air inlet directs
air from the freezer into the chiller.
Controls
The Beverage Chiller Control is the top dial located on the left
wall of the fresh food compartment. Turn the outer part of the
dial clockwise to increase air flow, and decrease the temperature
of the Beverage Chiller.
To remove Beverage Chiller:
Unload the Beverage Chiller.
Slide the assembly up and pull straight out.
Note: if the Beverage Chiller is installed directly under the dairy
shelf or a door bucket, the bucket or dairy shelf will need to be
removed before removing the chiller.
To install Beverage Chiller:
Align one of the air inlet holes on the side of the Beverage Chiller
with one of the hole cut-outs on the door.
Slide the assembly in and down so that the hooks are firmly
seated on the door liner.
Note: the Beverage Chiller will not operate properly if the air inlet
hole is not aligned with the control location.
Fig.13 Beverage Chiller
Fig.14 Beverage
Chiller Control
Fig.12 Dairy shelf and door
21
Freezer features
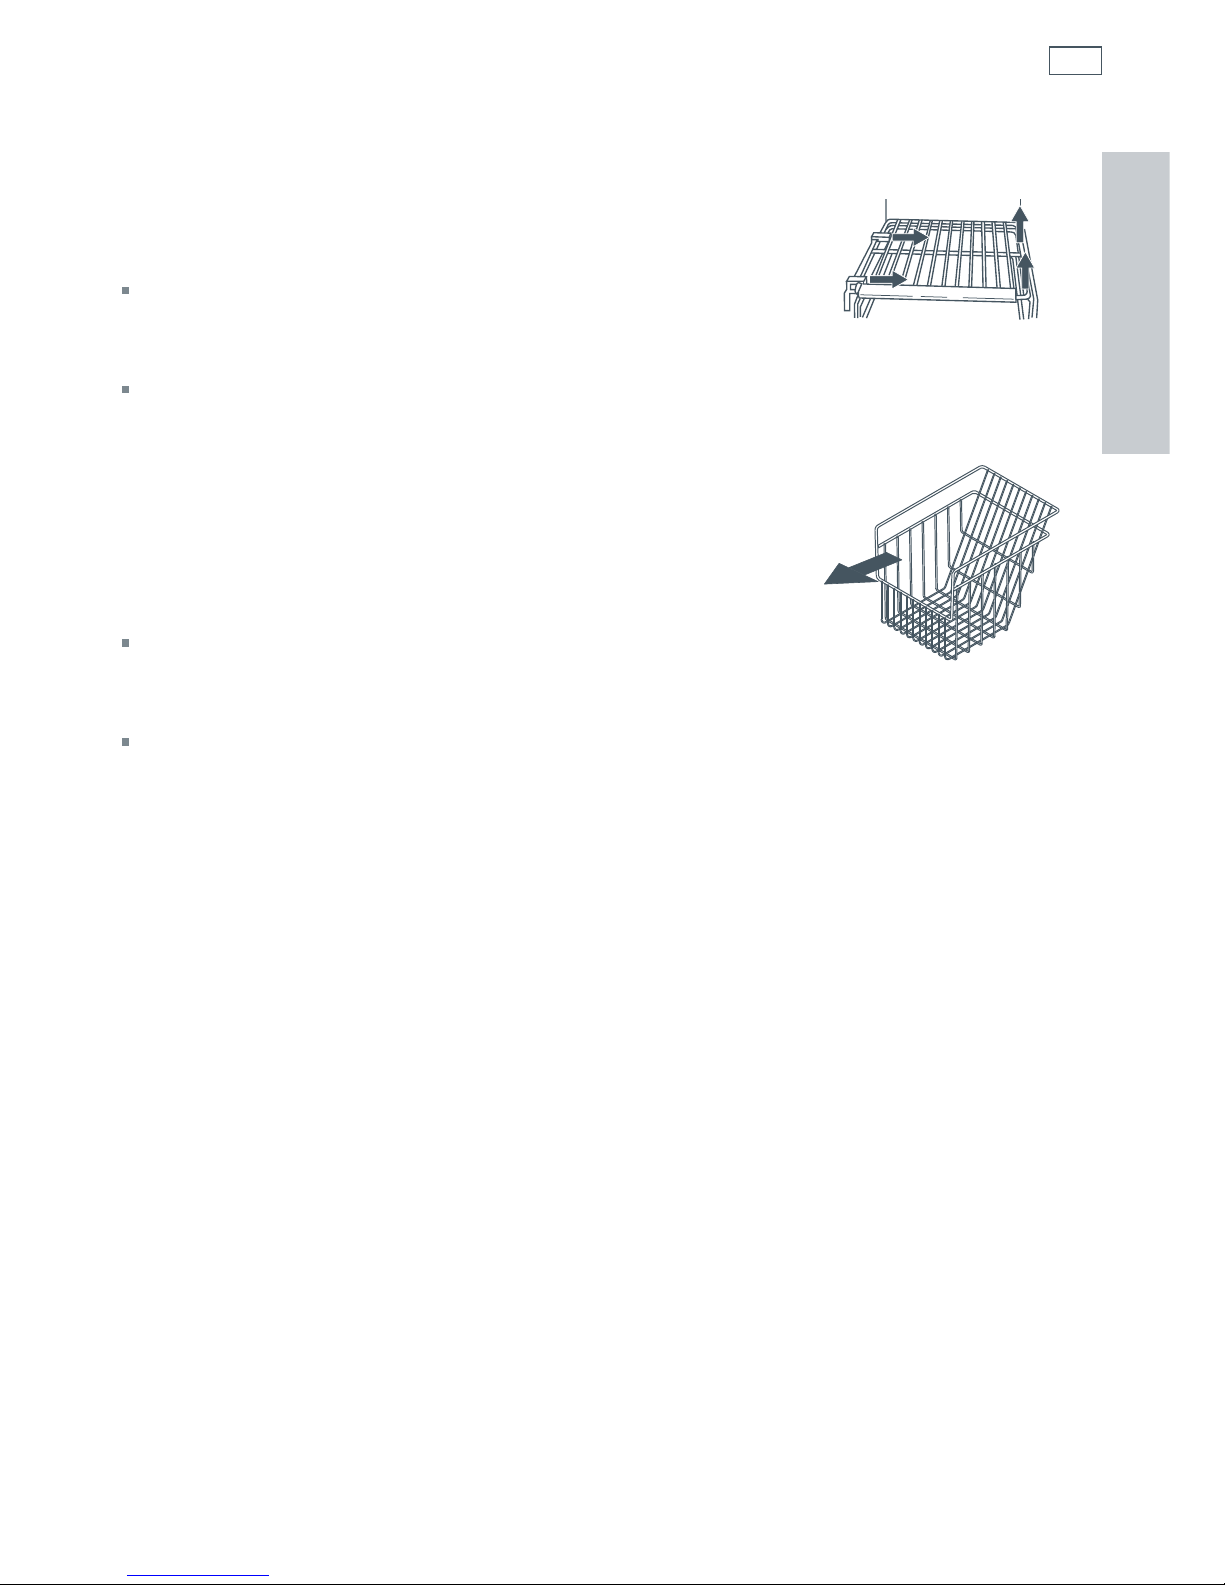
Shelves
Shelves can be removed to meet individual storage needs.
To remove shelf:
Snap right side of shelf up from cabinet railing or wall
mounting clips and slide to the right.
To install shelf:
Replace shelf in left side cabinet railing. Snap shelf into right
side cabinet railing (or wall mounting clips).
Baskets and drawers
Baskets and drawers (style may vary) slide out for easy access
to items stored at the back.
To remove:
Pull out to its full extension. Lift up front of basket or drawer
and remove.
To install:
Slide basket or drawer into cabinet railings. Lift up front of
basket or drawer, and slide to the back of refrigerator.
Ice storage bin
The ice storage bin is located below the automatic ice maker (see pages 25 and 26 for removal
and installation instructions).
Fig.15 Freezer shelf
Fig.16 Freezer drawer
EN
22
Ice and water
Your refrigerator is equipped with an ice and water system that automatically makes and
dispenses cubed and crushed ice, and filters, chills, and dispenses water.
Once your refrigerator has been plumbed in (see pages 9 and 10) and the ice maker turned on
(see page 25) you can enjoy these great features. The dispensing is controlled via the external
display.
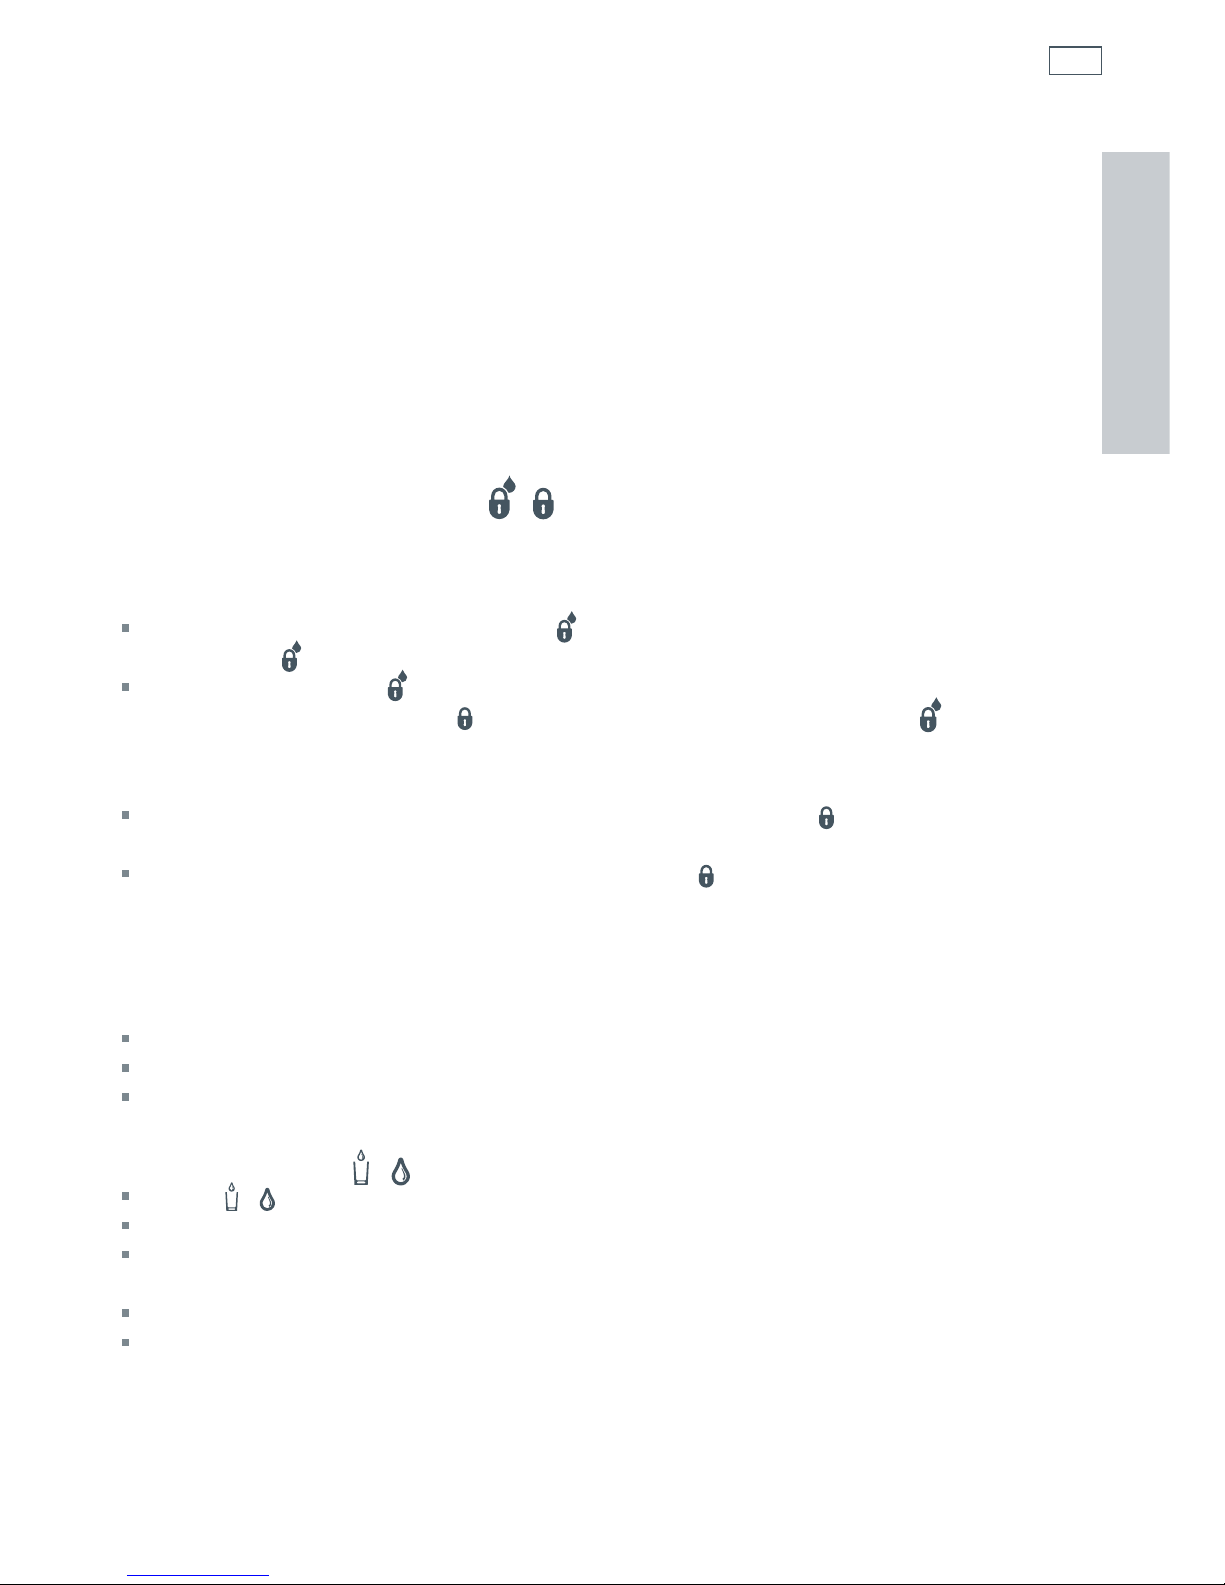
Fig.18 Ice and water control panel (RX216CT4XV2)
FRONT FILL button
Fig.17 Control panel (RX216DT7XV2)
23
Ice and water
Dispenser pad
The dispenser pad is located in the back wall of the dispensing area. When the dispenser pad is
pressed, the selection chosen on the dispenser control panel will dispense.
Removable tray
The removable tray at the bottom of the dispenser area is designed to collect small spills and
may be removed for cleaning and emptying purposes. It does not drain. Do not allow it to
overflow. If it does, remove tray and wipe up overflow.
Display and Dispenser Lock /
When the dispenser is locked, neither ice nor water can be dispensed.
RX216DT7XV2 models:
To lock the dispenser press and hold the
button for two seconds (the display will also be
locked). The
icon will be displayed on the screen.
Continuing to hold the
button for another two seconds will unlock the dispenser but the
display will still be locked. The
icon will be displayed on the screen. Holding
button for
another two seconds, unlocks both the display and dispenser.
RX216CT4XV2 models:
To lock the display (external only) and dispenser press and hold the
button for three seconds.
The green indicator light will illuminate above the button.
To unlock the display and dispenser press and hold the
button for three seconds. The green
indicator light will go out.
Caution!
To avoid personal injury or property damage, observe the following:
Do not put fingers, hands or any foreign objects into dispenser opening.
Do not use sharp objects to break ice.
Do not dispense ice directly into thin glass, fine china or delicate crystal.
To dispense water
/
Select
/ on the control panel.
Place your container against the back dispensing pad and press.
Release pressure to stop dispensing.
Or on select models:
Place container under dispensing nozzle.
Press FRONT FILL button.
EN
24
Ice and water
Front Fill (select models)
The FRONT FILL button (see page 22) is perfect for filling up sports bottles and large containers
that do not easily fit inside the dispensing cavity.
To dispense cubed / or crushed / ice
Select either
/ or /
ice on the control panel.
Place your glass or container against the dispensing pad and press (for crushed ice hold your
container as close to the chute as possible).
Slowly remove your glass when you have enough ice.
To dispense water and ice at the same time (select models)
Select either
/ or /
ice.
Place your container against the dispensing pad and press.
At the same time press FRONT FILL button to dispense water.
Slowly release the FRONT FILL button and remove your glass when you have enough ice.
Note:
The ice mode may not be changed while ice dispenser is in operation.
The dispenser will automatically lock if it is active for more than five minutes. See Dispenser Lock
(page 23) for unlocking information.
Once dispensing has stopped a small amount of water may be dispensed. This will be collected
by the drip tray. Large spills should be wiped dry.
Light
A light activates within the dispenser cavity when dispensing ice or water with the back
dispensing pad or FRONT FILL button (if fitted).
On RX216CT4XV2 models press the
button once to select the AUTO LIGHT function and the
AUTO LIGHT indicator will illuminate. This activates the dispenser light when the light sensor
detects the light levels in the room are low.

25
Automatic ice maker
Connect the ice maker to the water supply as instructed on pages 9 – 10. Proper water flow
and a level refrigerator are essential for optimal ice maker performance.
Note: energy rating guides that are posted on the refrigerator at the time of purchase do not
include optional ice maker energy usage.
Operating instructions
To start ice making
Confirm ice storage bin is securely in place.
Lower the wire arm inside the ice bin gently.
Once the freezer compartment has reached 0°F (-18°C), the
ice maker will fill with water.
Approximately three to six hours after installation the first
batch of ice will be produced.
After the initial ice batch is made, a complete batch will be
made every two to three hours.
Discard ice made in the first 12 hours of operation.
The ice maker will continue to make ice until the ice level
raises the wire arm, and stops production.
To stop ice production
Lift the wire arm inside the ice bin until a click is heard.
The ice maker will not make or dispense ice until the arm is
lowered.
To remove the ice bin
Stop ice production by raising the wire arm.
Lift the ice bin up slightly and pull forward.
To install the ice bin
Turn the auger driver behind the ice bin a half turn
counterclockwise.
Place the bin in the rails and slide back gently.
Ice making information
The first two batches of ice may contain small or irregular cubes, due to air in the supply line.
After cubes are made, it is normal for a few cubes to be joined together. They can easily be
broken apart.
If the ice is not used frequently the cubes may become cloudy, small, stick together, and
taste stale. Empty and wash the bin in lukewarm water periodically. Dry it thoroughly before
replacing it.
The ice maker may make a few sounds during its operation. Clicking, rattling, and buzzing are
all normal.
Do not store anything in the ice bin except ice made in the ice maker.
Ice and water
Fig.19 Ice maker
(inside freezer)
Fig.20 Auger driver
EN
26
Ice and water
WARNING!
Mechanical Hazard
Do not place fingers or hands on the automatic ice making mechanism
while the refrigerator is plugged in. This will help protect you from possible
injury. It will also prevent interference with moving parts of the ejector
mechanism and the heating element that releases the cubes.
Under certain rare circumstances, ice cubes may be discolored, usually
appearing with a green-bluish hue. The cause of this unusual discoloration
can be a combination of factors such as certain characteristics of local
waters, household plumbing and the accumulation of copper salts in
an inactive water supply line which feeds the ice maker. Continued
consumption of such discolored ice cubes may be injurious to health. If
such discoloration is observed, discard the ice cubes and contact your
dealer to purchase and install a water line filter.
Water damage due to improper water connection may cause mold/mildew
growth.
Clean up ice and water spills to avoid personal injury and to prevent mold/
mildew growth.
Failure to do so can result in death or injury to persons.
27
Water lter
Water filter removal and installation
WARNING!
Poisoning Hazard
To avoid serious illness or death, do not use the refrigerator where water is
unsafe or of unknown quality without adequate disinfection before or after
use of filter.
Failure to do so can result in death or injury to persons.
Important!
After installing a new water filter, always dispense water for two minutes before removing the
filter for any reason. Air trapped in system may cause water and cartridge to eject. Use caution
when removing.
The bypass cap does not filter water when fitted. Be sure to have replacement cartridge available
when filter change is required.
If water filtration system has been allowed to freeze, replace filter cartridge.
If the water system has not been used for several months, or water has an unpleasant taste or
odor, flush system by dispensing water for two to three minutes. If unpleasant taste or odor
persists, change filter cartridge.
Initial installation
The water filter is located in the upper right-hand corner of the fresh
food compartment.
1
Open filter housing by pressing the tab at the front end of the housing.
2
Remove the blue bypass cap and retain for later use.
3
Remove the sealing label from end of filter and insert into filter head.
4
Rotate gently clockwise until filter stops. Snap filter cover closed.
5
Reduce water spurts by flushing air from system.
Run water continuously for two minutes through dispenser until water
runs steady. During initial use, allow about a 1 – 2 minute delay in
water dispensing, to allow internal water tank to fill.
Additional flushing may be required in some households where
water is of poor quality.
Fig.21 Filter housing and
bypass cap
Fig.22 Filter housing
and filter
EN
28
Water lter
Replacing water filter
Important!
Air trapped in system may cause water and cartridge to eject. Use caution when removing.
1
Turn filter counterclockwise until it releases from filter head.
2
Drain water from filter into sink, and dispose in normal household trash.
3
Wipe up excess water in filter cover and continue with initial installation (page 27), steps 2
through 4.
Filter change and reset
The water filter needs to be replaced every 12 months, or after 750 gallons (2838 liters) have
been dispensed (which ever is sooner).
On RX216DT7XV2 models the filter icon
will light up red on the display screen after the filter
has been installed for 11 months or 90% of the rated water volume has been dispensed. This
is indicating that a new filter should be ordered. The
will blink when the filter needs to be
replaced.
To reset filter indicator, on RX216DT7XV2 models, access User Preferences menu (see page 15
and 16).
On RX216CT4XV2 models when it is time to replace the filter, the filter change light will turn red.
It will remain red until reset.
To reset filter indicator on RX216CT4XV2 models, press both
and buttons at the same time,
and hold for four seconds. Make sure green light flashes three times when indicator resets.
To purchase a replacement water filter cartridge (part number 13040210), contact your dealer or
call 1.888.9.FNP.USA (1.888.936.7872).
Important!
Condition of water and amount used determines the life span of water filter cartridge. If water
use is high, or if water is of poor quality, replacement may need to take place more often.
The dispenser feature may be used without a water filter cartridge. If you choose this option,
replace filter with blue bypass cap supplied.
 Loading...