

Page 1
Installation instructions
https://producthelp.fisherpaykel.com/au/Cook/Rangehoods/Slideout/HS60XW4/User_Guide_HS60XW4/02_Installation_instructions
Updated: Fri, 04 Jan 2019 03:33:26 GMT
Powered by
Please read this instruction manual carefully in order to obtain the best results from the use of the wall canopy.
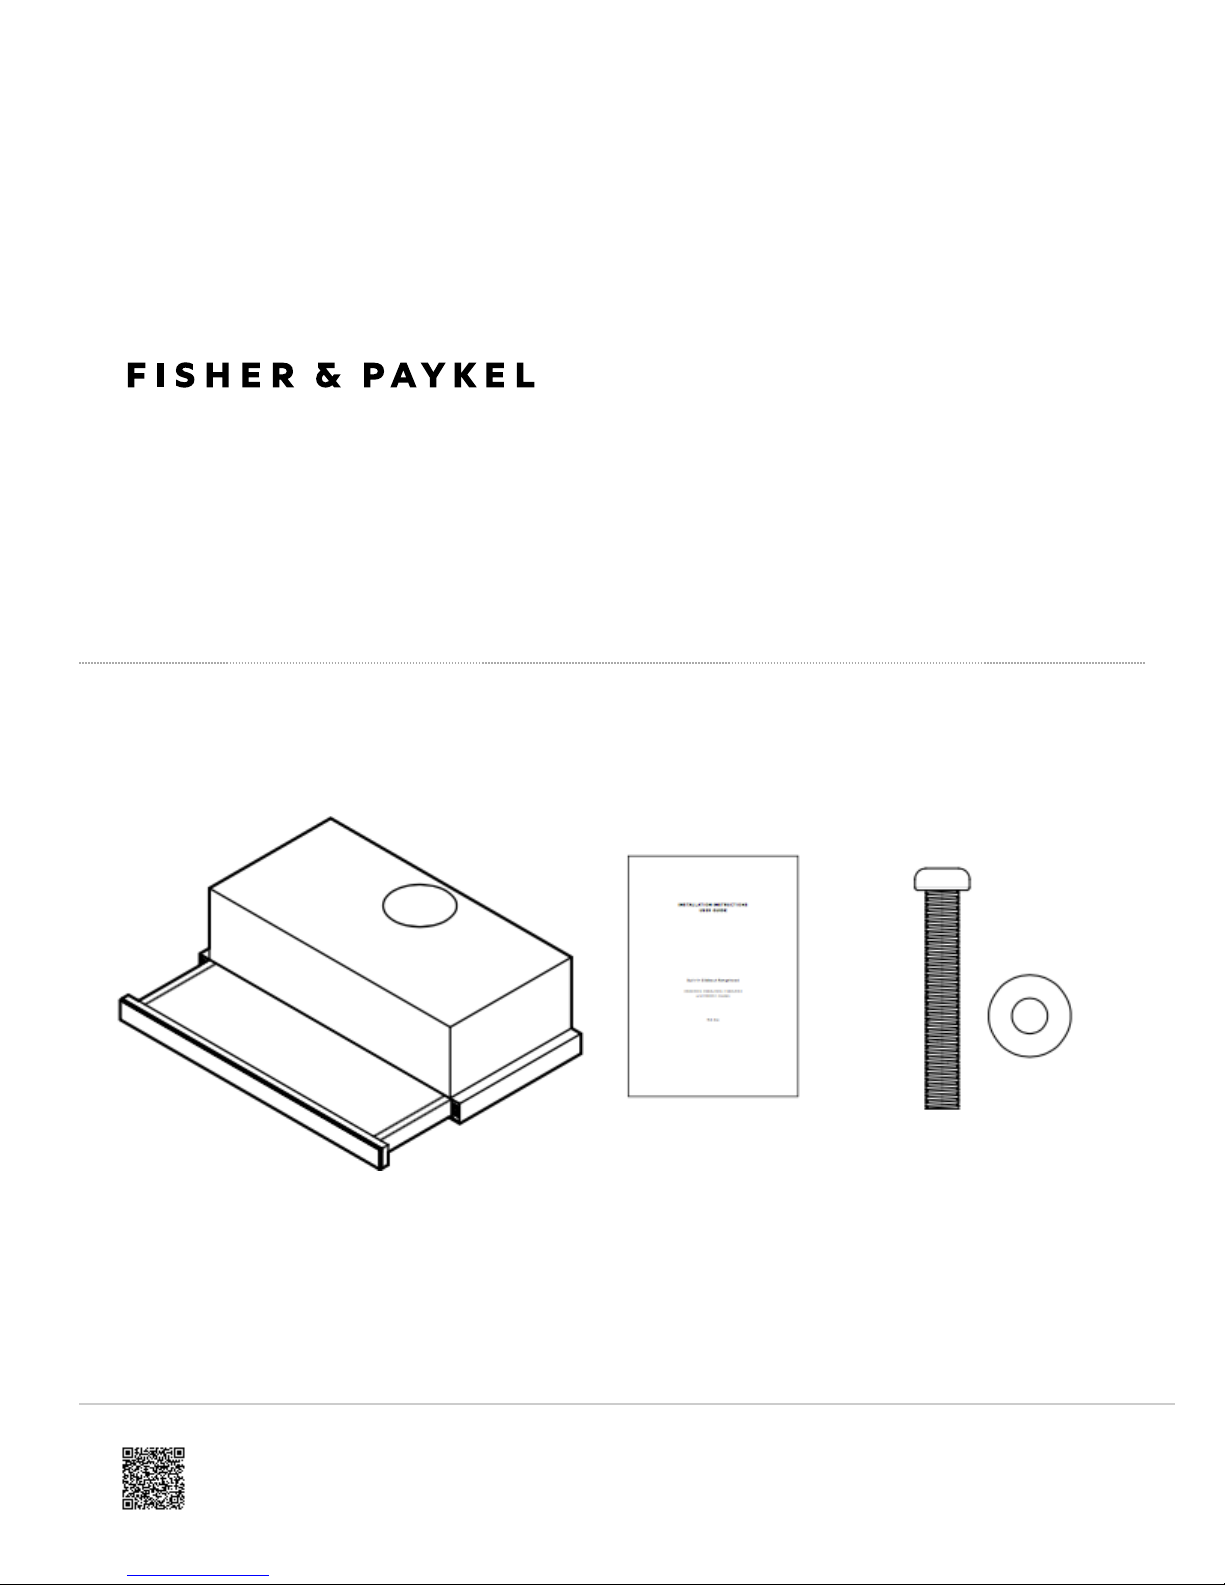
Installation instructions User
guide manual (1)
Screw M6 x 40 mm (incl. washer) (4)
Rangehood (1)
1
Page 2
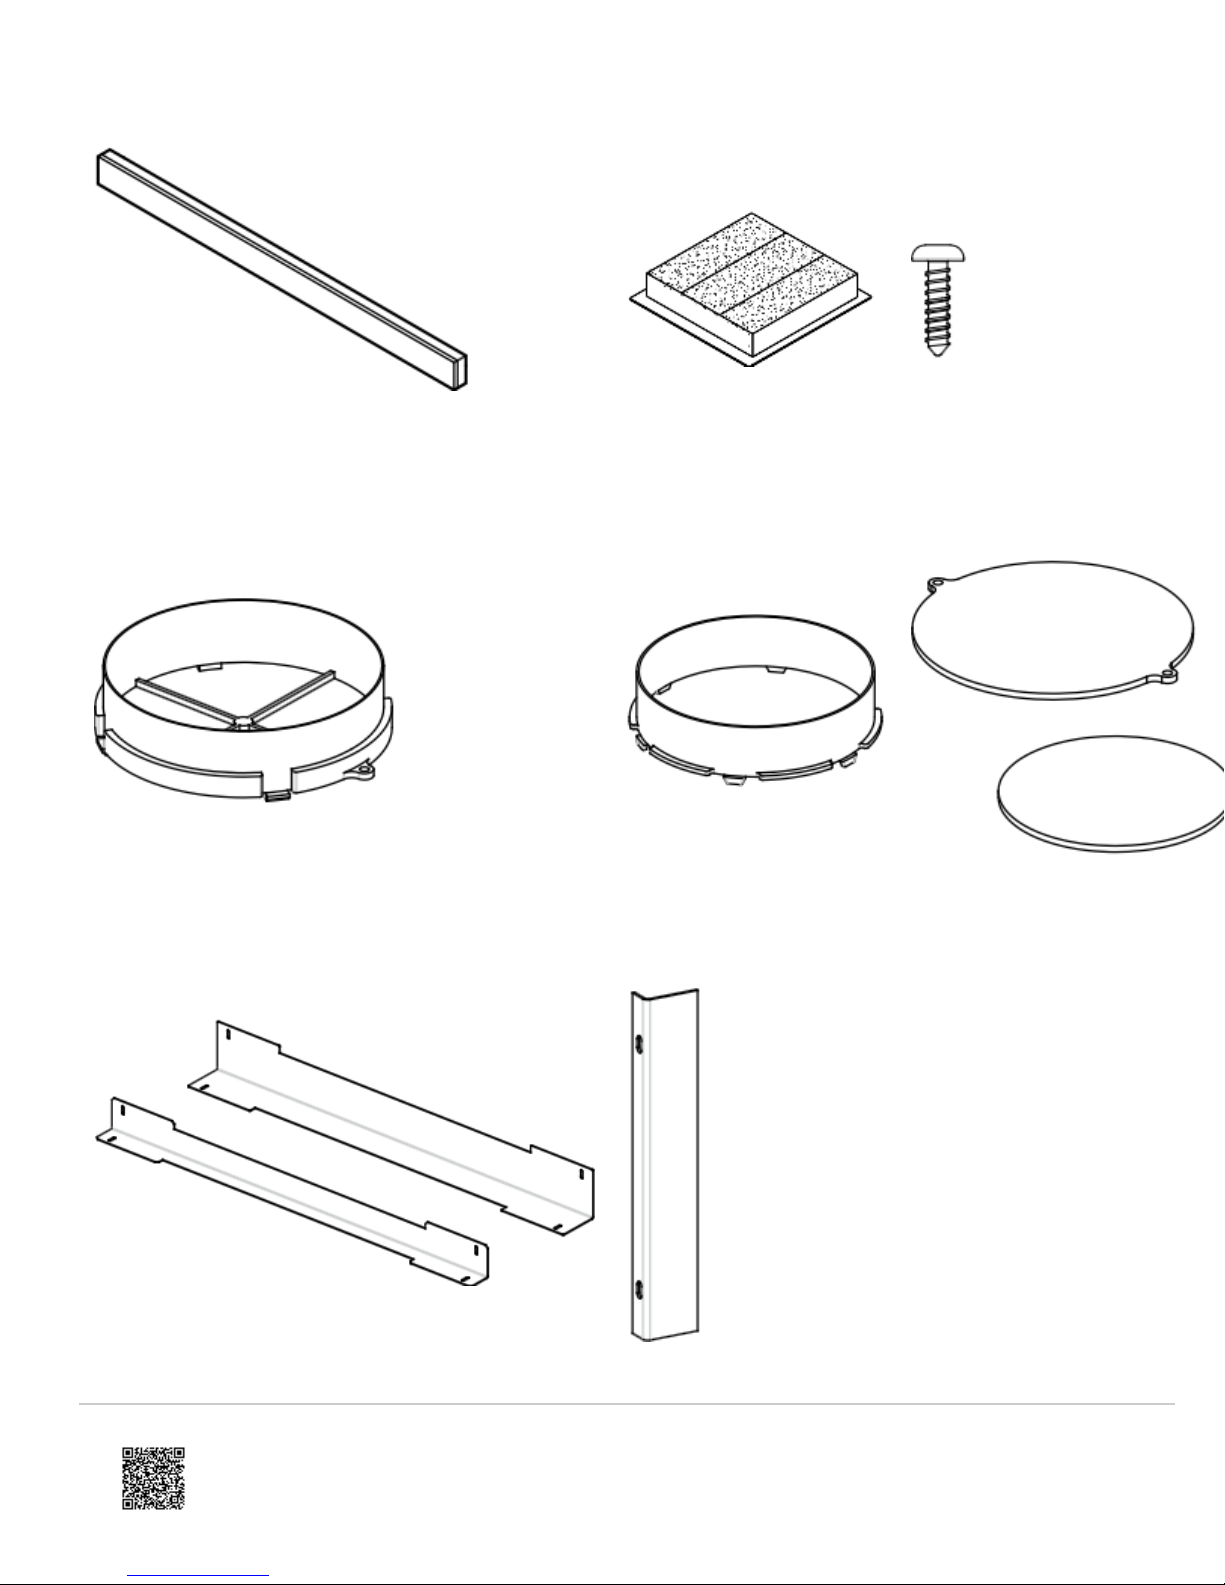
Handle (1)
https://producthelp.fisherpaykel.com/au/Cook/Rangehoods/Slideout/HS60XW4/User_Guide_HS60XW4/02_Installation_instructions
Updated: Fri, 04 Jan 2019 03:33:26 GMT
Powered by
(HS60XW4)
(HS60LXW4)
Carbon filters (2)
(HS60LRX4)
Screw 3 x 12 mm (6)
Ducting adapter – top extraction (1)
Spacer Rear (2)
Ducting adapter – rear
extraction (1)
Duct hole covers (2)
Spacer Lateral (2)
2
Page 3
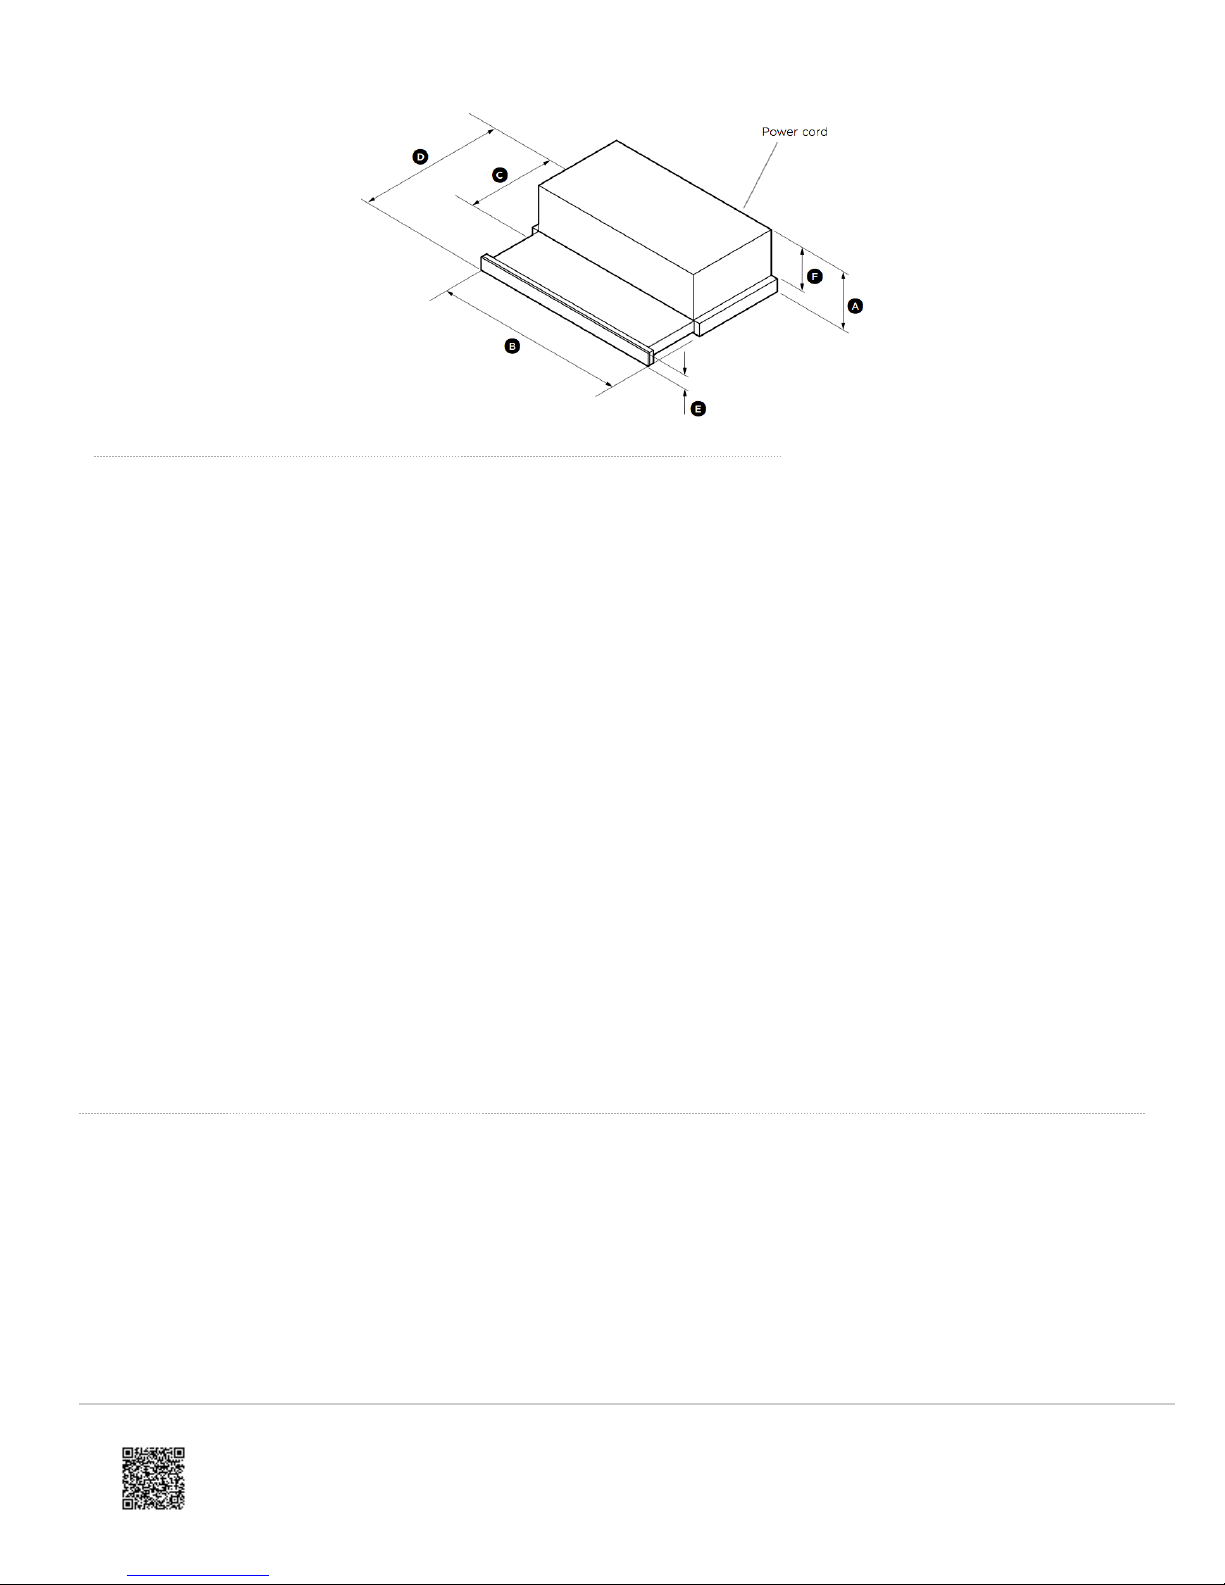
Product Dimensions
https://producthelp.fisherpaykel.com/au/Cook/Rangehoods/Slideout/HS60XW4/User_Guide_HS60XW4/02_Installation_instructions
Updated: Fri, 04 Jan 2019 03:33:26 GMT
Powered by
(HS60LRX4, HS90X4, HS60XW4, and HS60LXW4)
Property (mm) HS60LRX4 HS90X4 HS60XW4 HS60LXW4
A. Overall height of product
B. Overall width of product
C. Overall depth of chassis
D. Overall depth of chassis (fully extended)
E. Height of handle
F. Installed chassis height
Power cord length
180 180 180 180
598 898 598 598
280 280 280 280
460 460 460 460
70 40 40 40
140 140 140 140
1500 1500 1500 1500
Height of rangehood
Please read the entire instructions BEFORE installing the rangehood.
• Ascertain the desired installation height of the rangehood.
• When installing the rangehood, the lower edge of the unit must be a minimum of 600 mm above electric cooktop
surface; 650 mm above gas cooktop cooking surface; and up to a maximum of 750 mm.
• Any installation above 750 mm will compromise the extraction performance.
3
Page 4

Panel heights
https://producthelp.fisherpaykel.com/au/Cook/Rangehoods/Slideout/HS60XW4/User_Guide_HS60XW4/02_Installation_instructions
Updated: Fri, 04 Jan 2019 03:33:26 GMT
Powered by
Positioning
Minimum Clearances
Recirculated (HS60LRX4 and HS60LXW4) &
Ducted (HS60XW4, HS60LXW4, and HS90X4)
Property (mm) Recirculated Ducted
A. Height (top of cooktop to base of rangehood)
Electric cooktop
Gas cooktop
B. Height (top of cooktop to base of shelf where rangehood is
attached)
Electric cooktop
Gas cooktop
min. 600 – max.
750
min.650 – max. 750
min. 781 – max.
931
min. 831 – max.
931
min. 600 – max.
750
min.650 – max. 750
min. 781 – max.
931
min. 831 – max.
931
4
Page 5

Property (mm) Recirculated Ducted
https://producthelp.fisherpaykel.com/au/Cook/Rangehoods/Slideout/HS60XW4/User_Guide_HS60XW4/02_Installation_instructions
Updated: Fri, 04 Jan 2019 03:33:26 GMT
Powered by
min. 283
C. Depth of installation (cabinet cavity)
D. Height of installation (cabinet cavity) max. 108 max. 138
min. 283
Venting options
Attention should be given to ensure that any applicable
regulations concerning the discharge of exhaust air are
fulfilled.
Ducted
We recommend rangehoods be vented outside,
recirculating installation is recommended only when
vented installation is not possible. For optimal efficiency,
use smooth-walled ducting. Flexible ducting should only
be used as last resort; it may reduce performance and
increase noise.
• We recommend to use top extraction for venting.
• Top extraction (125 mm round ducting) and rear
extraction (100 mm round ducting) can be used in
conjunction with this model.
Ducting through roof
5
Page 6

Recirculating
https://producthelp.fisherpaykel.com/au/Cook/Rangehoods/Slideout/HS60XW4/User_Guide_HS60XW4/02_Installation_instructions
Updated: Fri, 04 Jan 2019 03:33:26 GMT
Powered by
Recirculating installation is recommended only when
vented installation is not possible.
• HS60LRX4 is designed for front recirculating
installations only.
• HS60LXW4 can be installed in front recirculating, or
can be ducted.
Ducting through cavity to side
Accessories are required.
• HS60XW4 and HS90X4 can be installed to
recirculate through cabinetry with ducting, or ducted
outside.
Front Recirculating*
6
Page 7

Failure to install the screws
https://producthelp.fisherpaykel.com/au/Cook/Rangehoods/Slideout/HS60XW4/User_Guide_HS60XW4/02_Installation_instructions
Updated: Fri, 04 Jan 2019 03:33:26 GMT
Powered by
or fixing device in
accordance with these
instructions may result in
electrical hazards.
* In recirculating mode you
must use carbon filters to
eliminate cooking smells
and tall handle (70 mm).
Fig.1 Preparing for install
Installation
1. Preparing the rangehood for installation:
• Before commencement, unpack the rangehood and
check that it functions correctly.
• Ensure the overhead cabinets are built according to
the minimum clearances table on 'Installation
instructions'.
• Before drilling any holes, check that the area behind
the surface to be drilled is clear of any electrical
cables or pipes etc.
Fig. 2 Mounting to underside of cabinetry
7
Page 8

Ducted installation
https://producthelp.fisherpaykel.com/au/Cook/Rangehoods/Slideout/HS60XW4/User_Guide_HS60XW4/02_Installation_instructions
Updated: Fri, 04 Jan 2019 03:33:26 GMT
Powered by
(HS60LXW4, HS60XW4, HS90X4)
If the rangehood is to be installed as a ducted
hood:
• Do not remove cover tape (A), See Fig.1.
This is removed for recirculating only.
• Place adaptor in top extraction.
• Place cover on rear extraction.
• Front Recirculating installation
(HS60LXW4, HS60LRX4)
If the rangehood is to be installed as a
recirculating hood:
• Remove cover tape (A), see Fig.1.
• Place covers on rear and top extraction.
• Install carbon filters see 'Cleaning and
maintenance'.
• Assemble tall handle (70 mm)
Fig. 3 Spacer Lateral
2. Mounting the rangehood
Mounting to underside of cupboard
Fix the rangehood to a shelf mounted
at the right height in your wall units, by drilling 4
holes, 7 mm in diameter, (see Fig.2) and fixing
with the 4 screws supplied. When installing the
rangehood the space between the product and
the wall shall be covered with the adjustable
lateral and rear spacer supplied (Fig.3 and Fig.4).
Fig.4 Spacer Rear
8
 Loading...