

Fisher & Paykel DD601-87225, DD601V2-87545, DS602, DS601V2-87551, DS601V2-87549 Owner’s Manual
...
CONTENTS
Introduction
2
Accessories
Important Safety Instructions
Control Functions
Primary Control Buttons
Lock
Electronic Display
Secondary Control Panel
Operating Instrudions
Usage
DishDrawer Accessories
Purpose ol- Each Insert
DishDrawer Loading
Loading Pattern for 10 Place Settings
Detergent & Rinse Agent Dispenser
Detergent Compartments
Rinse Agent Dispenser
Option Adjustment Mode
Rinse Agent Setting
Auto Power
Water Pressure
3
4
8
8
9
10
12
13
14
14
14
16
18
19
19
2O
21
21
22
22
Wash Programs
Installation of Upper Kickstrip
Care Guide
User Maintenance Instruction
Cleaning the DishDrawer
Cleaning the Drain Filter, Spray Arm,
Filter Plate & Motor Assembly
Vacation lime
Problem Solver
Fault Code Displays
DishDrawer Warranty
23
24
25
26
26
26
27
28
32
35
INTRODUCTION
Fhank you and congratu[afions for making the wise decision in pL_rchasingyour
Fisher & Paykel DishDrawer. Every care has been taken in designing and
manufacturing your appliance. We are sure that you will enjoy using your
DishDrawer and wilt soon appreciate its many benefits. We wish you many years of
safisl_/inguse.
Unique Features of Your DishDrawer
By now you wil[ bf, aware that Fisher & PaykeI's DishDrawe_ is a unique ciishwasheb
which ofl_,rs benefits no other dishwasher can.
Fhe DishDrawer takes the everyday kitchen drawer - long recognised as the most
efficient, easy to access storage system in the kitchen - and turns it into the most
advanced dishwasher in the world.
ffyou have chosen a double DishDrawer, or more than one single DishDrawer, you
will have totally separate, independently operated washing units, introducing loading
and washing possibilities that have never before been possible.
Now you can treat precious glassware to a delicate wash and give pots and pans the
heavy duty treatment- at[ at the same time.
The Clutter-Free Counter Top Becomes A Reality
Now it really is possible to keep your counter top free from c,w,ryday clutter like tall
glasses and awkward serving dishes. The double DishDrawer's spacious
configuration gives you many new ways to load your machine - and use it.
Used cleverly, two DishDrawers can even provide extra kitchen storage. Use clean
dishes directly from one drawer and load them back into the other drawer when dirty.
Design Your Own Rack System
With flexible, inlc,rchangable inserts the DishDrawer can be arranged to
accommodate the way you live and the dishes you use most oiten. Inserts art, easy to
remove so it is easy to change your layout as your daily needs change.
ffyou have two DishDrawers, you can arrange one drawer for all your lightly soiled
cups, saLtcersand fine glassware - including long-stemmed glasses- and wash them
using a delicate cycle. Set up your other drawer for your more robust, heavily-soiled
items like plates, pots and pans. Inserts can easily be removed completely to fit
awkward preparation or se_'vingdishes.
The Guilt-Free Small Load
All DishDrawer models make the small, gui[t-iree load a reality, rhe DishDrawer
minimizes water and energy consumption with each drawer using lessthan half the
water of a conventional dishwasher. By washing smaller toads more ireqL_ent[y, you
need never run out of clean dishes.
Gentler Introduction of Detergent
The DishDrawer's innovatiw, detergent dispenser thoroughly pre-mixes water with
detergent before it is introduced into the drawer, so your delicate dishes art, protected
from "detergent bum". Precise markings inside the dispenser ensure you never L_se
too mL_chor too tittle detergent for each program.
Big On the Inside
Each DishDrawer has been carefully designed to give you more L_sab[espace than
ever betore.
Each DishDrawer can accommodate 12 large dinner plates L_pto 11.4" in diameter. A
deeper drawer design means large plates can be loaded into the drawer while cups
and glasses can be sale[y stacked into the two levels.
Fisher & Paykel strongly recommends that you read the information contained in
this Use & Care Manual before using the DishDrawer.
ACCESSORIES
Each DishDrawer is st_pplied with the following:
• Basket
• Cutlery Basket
• Mega Rack
• Drain Filter Access Panel
• Plate Insert
IMPORTANT SAFETY
INSTRUCTIONS
Warning - When using your DishDrawer, follow
basic precautions, including the following:
I:or your sal_ty the information in this manual must be followed to minimize
the risk of fire or explosion or to prevent property damage, personal injury or
loss of lif_.
Please read all instructions before operating the DishDrawer.
• Use the DishDrawer only for its intended Junction as described in this Uso and
Cam manual
• Use only detergents or wetting agents recommended [or use in a dishwasher
and keep them out of reach of children.
• Do not touch the heater plate during or immediately alter use.
• Do not operatic your DishDrawer Lmless all the enclosure panels arc,properly
in place.
• Do not tamper with the controls.
• Do not abuse, sit on, stand in or on the drawer or dish rack of the DishDrawer.
• When loading items to be washed
1. Locate sharp items so that they are not likely to damage the lid seal and
2. Load sharp knives with the handles up to reduce the risk of cut type
injuries.
IMPORTANT
SAFETY
INSTRUCTIONS
To reduce the risk of injury, do not allow children to play in or on the
DishDrawer.
Under cerlain conditions hydrogen gas may be produced in a hot water heater
system that has not been used for two weeks or morn. HYDROGEN GAS IS
EXPLOSIVE. If the hot water system has not been used for such a period,
before using the dishwasher, turn on all hot water l_tucets and let the water flow
from each Jot several minutes. This will release any accumulated hydrogen
gas. Asgas is flammable, do not smoke or use an open flame during this time.
Remove the door to the washing compartment when removing an old
dishwasher from service or discarding it.
Installation
• This Disi_Drawe_ must be installed and located in accordance with the
Installation Instructions betore it is used. Ifyou did not receive an Installation
Instruction book with your DishDrawer, you can obtain one by calling toll Iree
1 888 9 FNP USA (1 888 9 367 872).
• Installation and service must be periormed by a qualified technician.
This appliance must be grounded, in the event of a malfunction or
breakdown, grounding will reduce the risk of electric shock by providing a
path of least resistance for electric current. This appliance isequipped with a
cord having an equipment - grounding conductor and a grounding plug. The
plug must be plugged into an appropriat_ outlet that is installed and grounded
in accordance with all local codes and ordinances.
WARNING - improper connection of the equipment - grounding conductor
can result in a risk of electric shock. Check with a qualified electrician or
service representative if you arc, in doubt whether the appliance is properly
grounded. Do not modiiy the plug provided with the appliance; if it will not fit
the outlet, have a proper outlet installed by a qualified electrician.
Ensure the DishDrawer is secured to the floor or adjacent joinery using the
brackets provided. Failure to do so may result in an unstable product, which
may cause damage or injury.
IMPORTANT SAFETY
I NSTRUCTIONS
Do not operate this appliance if it isdamaged, malfunctioning, partially
disassembled or has missing or broken parts, including a damaged cord or
plug.
Do not stork, or use gasoline, or other flammable vapors and liquids in the
vicinity of the DishDrawer.
Connect to a properly rak, d, prok, cted and sized power supply circuit to avoid
electrica[ overload.
Make sure that the cord is located so that it will not be stepped on, tripped over
or otherwise subject to damage or stress.
Do not install or stork, the DishDrawer where it will be expose{] to temperatures
below freezing or exposed to weather.
Do not use an extension cord or a poriab[e electrical outlet device (e.g. multi
socket outlet box) to connect the DishDrawer to the power supply.
Maintenance
• Do not repair or replace any part of the appliance or attempt any servicing
unless specifically recoiT_mended in this Use and Care Manual We
rc,commend that you cal[a Fisher & Payke[ AL_thorized Service Agent.
Keep the floor around your appliance clean and dry to reduce the possibility of
slipping.
Keep the area around / underneath your appliance iree from the accumulation
of combustible materials, such as [inh paper, ragsand chemicals.
When cleaning the underside of the filter plate,, cam must be taken on the
sharp outer edge to avoid the risk of cut type injuries.
Operational
• Under no circumstances should you open the drawer whilst the DishDrawer
is in operation. Always usethe Start/Pause button to pause and wait until you
hear the two additional beeps before opening the drawer.
IMPORTANT SAFETY
INSTRUCTIONS
The DishDrawer must be used with the motor assembly, filter pIat_,, drain filter
and spray arl_qcorrectly in place.
When disconnecting the appliance pull the plug rather than the cord or
junction of cord to avoid damage.
Household appliances are not intended to be played with by children.
Children or persons with a disability that may limit their ability to use the
appliance, should have a competent person instruct them in its use. [his
person should be satisfied that they can then use the appliance without danger
to themselves or their surroundings.
Close supervision is necessary if this appliance is used by or near childrc, n. Do
not allow children to play inside, on or with this appliance or any discarded
appliance.
The DishDrawer is designed [or washing normal household utensils. Items that
arf, contaminat_,d by gasoline, paint, steel or iron debris, corrosive, acidic or
alkaline chemicals arc, not to be washed in the DishDrawer.
If the DishDrawer is not being used Jor long periods of time, turn the power and
water supply to the DishDrawer off.
SAVE THESE INSTRUCTIONS
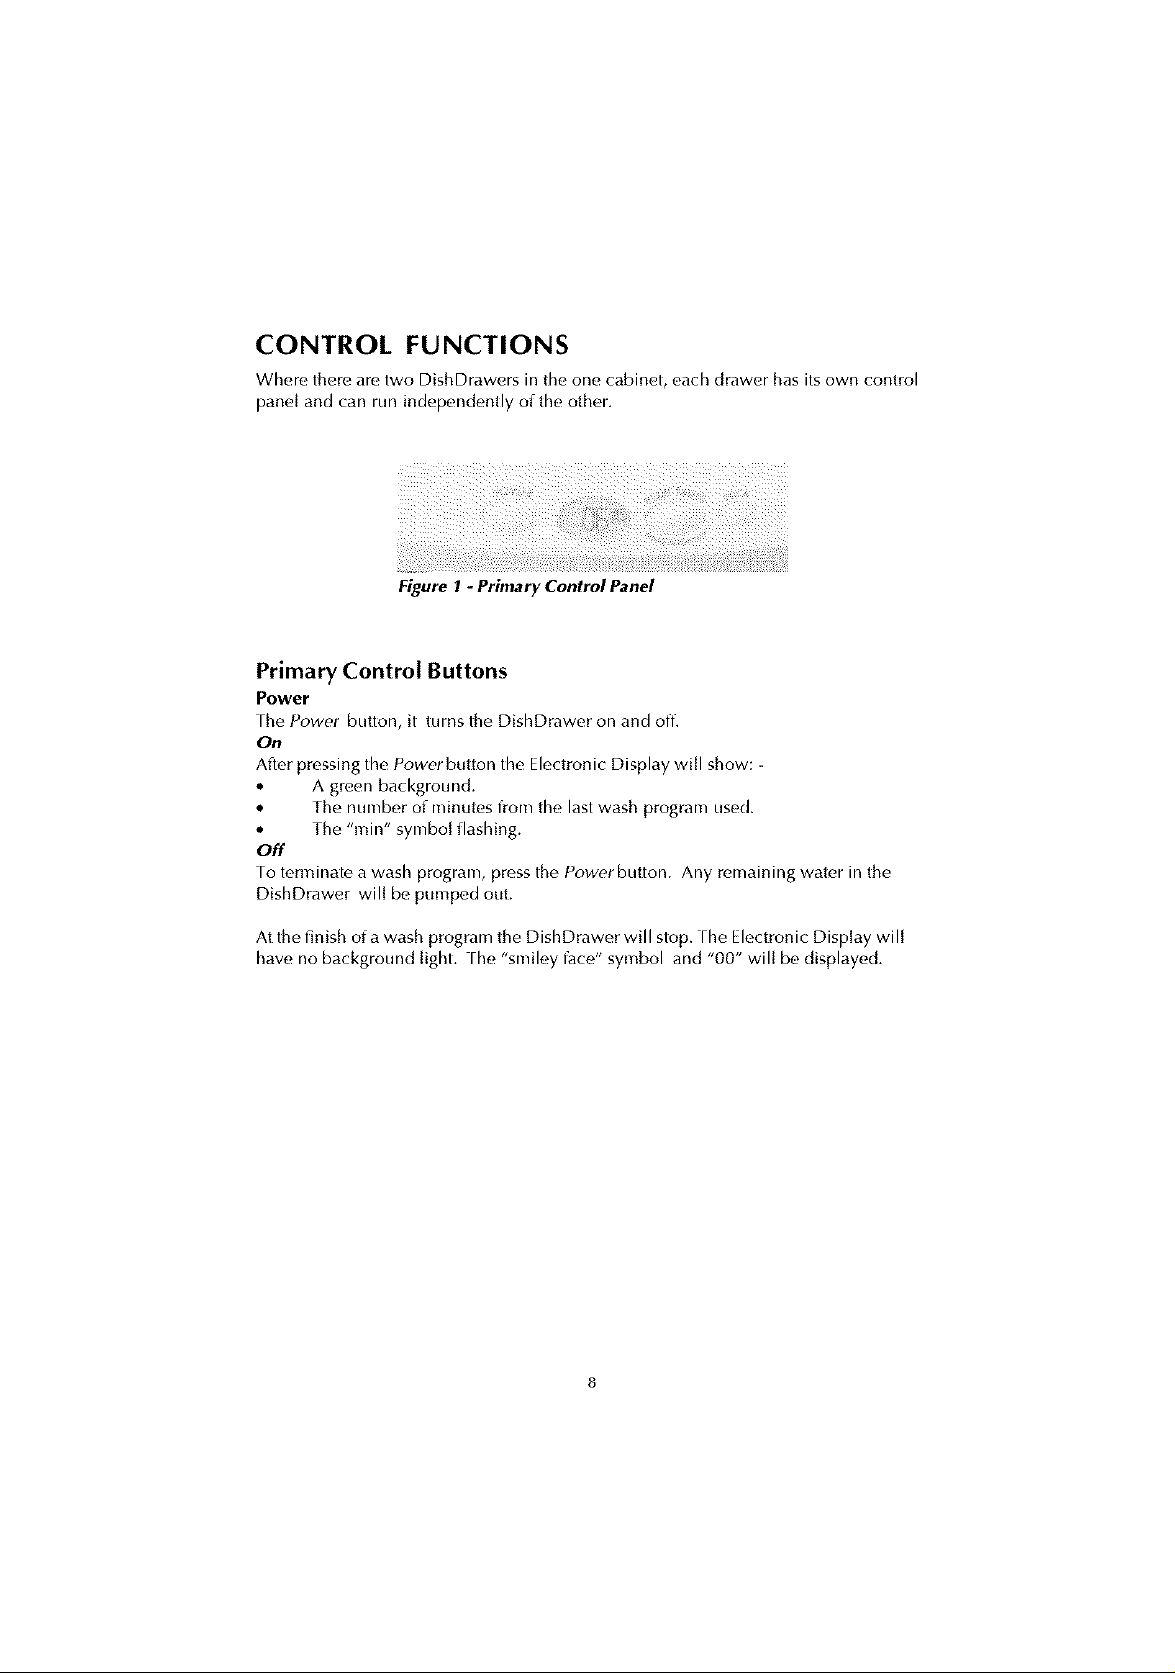
CONTROL FUNCTIONS
Where there are two DishDrawers in thf, one cabinet, each drawer has its own control
panel and can run independently of the other.
Figure 1 - Primary Control Panel
Primary Control Buttons
Power
Fhe Power button, it turns the DishDrawer on and off.
On
Alter pressing the Powerbutton the Electronic Display will show: -
• A green background.
• The number of minut(,s from the last wash program used.
Off The "rain" symbol flashing.
Foterminate a wash program, press the Powerbutton. Any remaining water in the
DishDrawer will be pumped out.
At the finish of a wash program the DishDrawer will stop. rhe Electronic Display will
have no background light, the "smiley l_tce" symbol and "00" will be displayed.
Start / Pause
This button has a number of functions. It serw,sto:
• Stari the DishDrawer, once the desired wash program has been selected.
• Interrupt the wash program while in operation.
When pausing the DishDrawer, wait until you have heard two additional
beeps before you open the drawer, allowing the lid seal to deflate.
While in the pause mode, the electronic display will be green, the "rain"
symbol will flash and the %miley lace" symbol will disappear.
• Restart the DishDrawer after being paused.
You may notice a delay alter the Start/Pause has been pressed. During this
time the lid seal will be inflating.
• One Button Start.
This starts the DishDrawer and will mn the last wash program used,
excluding Delay Start if used in the previous wash.
• Initiates the Delay Start.
NOTE:
Under no circumstances do we recommend that you open the DishDrawer while in
operation unless you have pressed the Start/Pause button. If the drawer is opened
during the wash program, thore is a possibility of getting wot, burnt, or damaging the
DishDrawer. Fhere are salk,ty mechanisms in place to stop the DishDrawer if it is
opened.
If Fault Code "U2" Appears:
The l_tult code "U2" will be displayed if the drawer is opened during operation. Fo
remove this lau[t code, press Power. Ensure the drawer is closed. The DishDrawer
will now be ready to start from the beginning of the wash program. You may have to
add more detergent in the dispenser and then press the Start/Pause button to start the
DishDrawer. The DishDrawer will not restart where itwas intem_pted alter a "U2" l_tult.
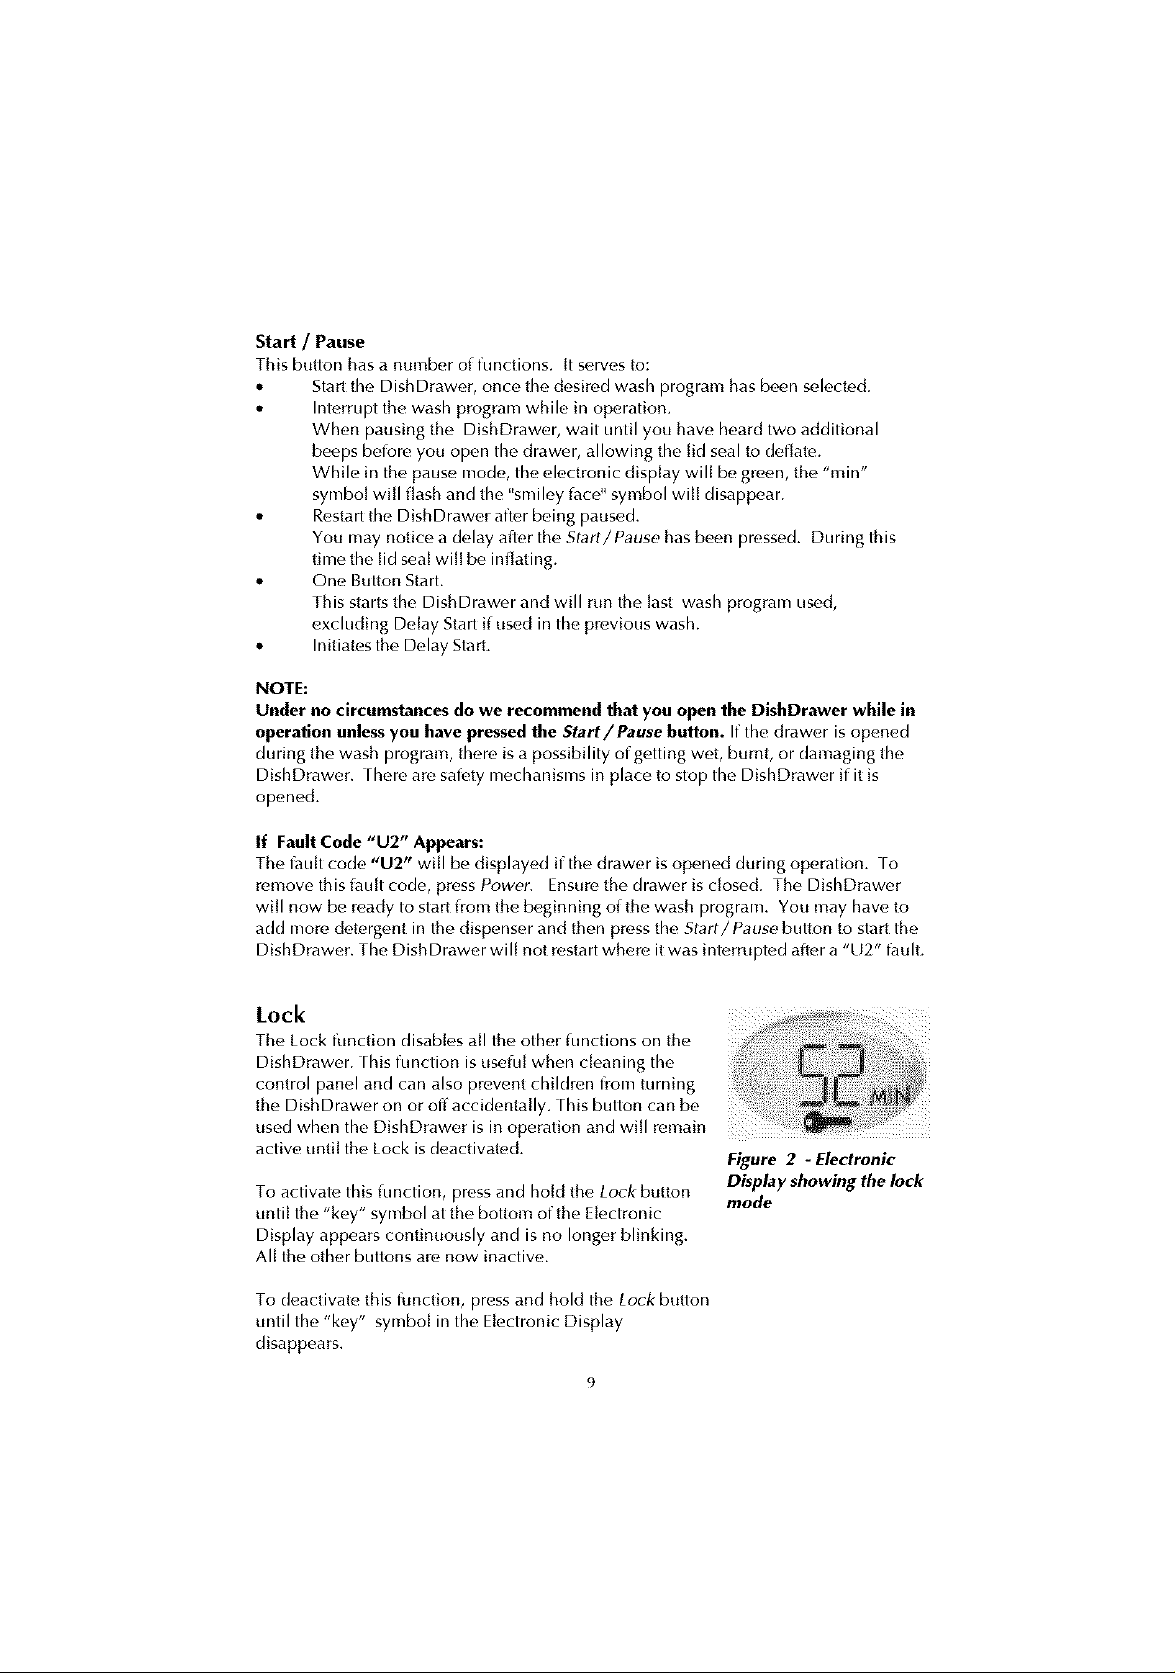
Lock
active until the Lock is deactivated.
To activate this iunction, press and hold the Lo_'kbutton
until the "key" symbol at the bottom of the Electronic
Display appears continuously and is no longer blinking.
All the other buttons are now inactive.
To deactivate this function, press and hold the Lock button
until the "key" symbol in the Electronic Display
disappears.
Figure 2 - Electronic
Display showing the lock
mode

Electronic Display
rho Electronic Display hasa nul_/ber of functions. It
shows:
• The time lot each wash program selected.
Each time you change the wash program, the
ntiiTiber in the Electronic Display will change to _!\ _
indicate, the approximate duration of each wash ,> _,_@
program, rllo ",T,in" symbol will flash until a
wash program has started.
• Time remaining in the wash program.
This is shown with the background in green.
When the wash program has started, it will count
down in one minute increments, represented
by the "rain" symbol, rhe "rain" symbol will
remain and the "smiley l_tce" symbol will flash.
• Delay Start.
An orange background is shown. [t will count
down in one hour incroments when delay start
has been selected, rhe "HRS DELAY" symbol
represents the number of hours before, the
DishDrawer starts.
• Lock has been activated.
The "key" symbol will be shown at the bottom of
the Electronic Display.
• A Fault Code.
In the unlikely event of a failure, a l_tult code is
displayed and the background is red. (For more
iniormation Refer to Section on Fault Code
Displays.)
• Water heating is in progress.
The "HE" symbol is displayed, rhis means that
water heating is in progress due to incoming
water being too cold, a drop in tc,mperature
through the DishDrawer being opened during
the wash program, or the correct wash
temperature not having been reached, rhe wash
program times on the Electronic Display are
based on inlet water temperatures at 120°F.
Figure 3 - Electronic
Display showing Time
Remaining in a wash
program
Figure 4 - Electronic
Display showing a Fault
Code
Io
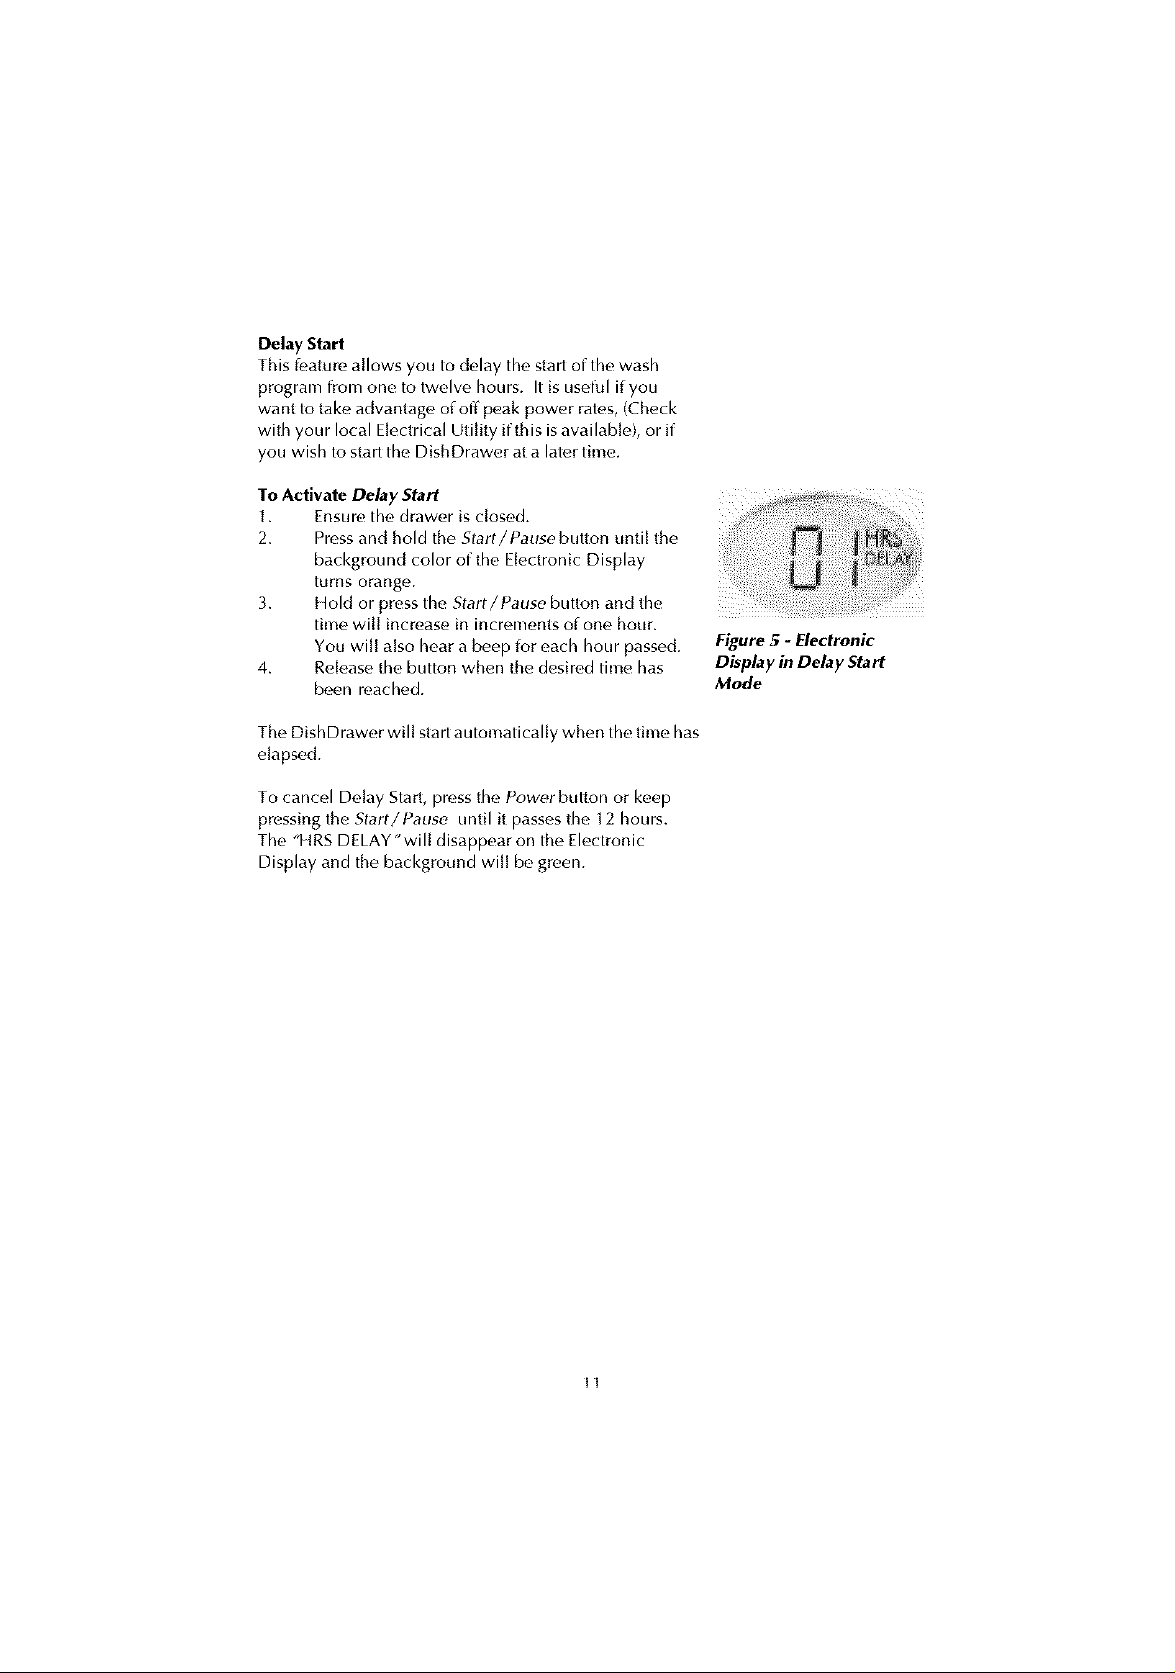
Delay Start
This [eature allows you to delay the start of the wash
program from one to twelve hours. It is useffd if you
want to take advantage of off peak power rates, (Check
with your local Electrical Utihty if this is available), or if
you wish to start the DishDrawer at a later time.
To Activate Delay Start
1. Ensure the drawer is closed.
2. Pressand hold the Start/Pause button Lmtil the
background color of the Electronic Display
turns orang_.
3. Hold or press the Start/Pause button and the
time will increase in increments of one hour.
You will also hear a beep [or each hour passed.
4. Release the button when the desired time has
been reached.
The DishDrawer wil[ start automatically when the time has
elapsed.
To cancel Delay Start, press the Powerbutton or keep
pressing the Start/Pause until it passes the 12 hours.
The "HRS DELAY'wil[ disappear on the Electronic
Display and the background will be green.
Figure 5 - Electronic
Display in Delay Start
Mode
II

Secondary Control Panel
Wash Programs
Onf, advantage of two independf, nt DishDrawers is that you can divide thf, dish loads
according to need. For example, you can wash pots or heavily soiled items on a Heavy
Plus prog_tm in one drawer while washing china or glassware on a Delicate Eco Save
program in the other drawer.
When selecting a wash program ensure the control panel inside the drawer is clean
and dry. If nob wipe with a clean dry cloth.
Program I_
Figure 6 - Secondary Control Panel
This button advances through the wash programs in sequence.
The wash program indicator light can be either red or green. Ifthe light above the
selected wash program is red, it indicates that you have selected a Plus program. Ifthe
light above the wash program is green, an Eco Save program has been chosen.
Rinse
Rinse can be used for dirty dishes that need rinsing and will be washed later. Fhe Eco
Save iunction has no eflL,ct on the Rinse program.
Heavy Wash
This wash is recommended _orheavily soiled dishes such as roasting dishes, pots and
dishes with baked on soil.
Normal Wash
This wash can be used for normal everyday dishes.
FastWash
This wash is designed ior non greasy lightly soiled dishes.
Delicate Wash
This wash is a gentle program for lightly soiled and heat sensitive crockery.
Program Modifier (Red or Green)
Plus Programs (Red)
The PlusPrograms usehigher wash temperatures and longer wash times to give enhanced
wash and dry periormance. The light above the wash program isred to indicate that this
option has been chosen.
EcoSave (Green)
EcoSave saves on enc,rgy. Itachievc,sthis by using lower wash temperatures and shorte_
times and because of this, dry performance may be compromised.
[2

OPERATING INSTRUCTIONS
1.
Ensure the filter plate and drain filter is clean and free ofiood debris. Check the
drain filter isflush with the filter plate and the spray arm is correctly on the
impeller.
2. Check there, is rinse agent in the dispenser.
3.
Remove all food scraps from the dishes.
4.
Load the dishes. Overcrowding the DishDrawer may lead to poor wash
performance. Ensure there, art, no items blocking the spray arm path.
S.
Pour detergent into the detergent dispenser, then close the dispenser door.
Use the steps on the detergent dispenser as a guide to the correct amount of
detergent to use. Where the detergent manutactu rer has made recommendations
on quantities, we suggest you ioI[ow their instruction.
6.
Select the wash program on the secondary centre[ panel. Fouch the Program
button until the desired wash program light shows on the panel. The wash
program has now been selected.
7.
Select Eco Save (Optional)
If you would like the wash program to use less energy and time, Er'oSave should
be selected by touching this button. The wash program light will be green.
8. Close the drawer.
9.
Delay Start (Optional). If you wish to delay the start time, hold the Start/Pause
button until the Electronic Display background has changed to an orange
color and the "HRS DELAY" symbol comes on. Select the delay time required
and the DishDrawer will start when the time has elapsed.
10.
Start the Wash Program. Pressthe Start/Pause button to start the DishDrawer.
To pause the DishDrawer, press the Start/Pause button and wait ior the two
additional beeps before opening, the "rain" symbol displayed in the
Electronic Display will flash, and the "smiley lace" symbol will disappear.
11.
At the end of the program, the display wil[ show no background light. The
symbols "00" and the "smiley lace" wil[ be displayed on the Electronic Display.
The DishDrawer will beep six times to let you know that it has finished. At the
end of a wash program it is normal to find some water in the drain filter area and
the drying fan will be on ior a period of time or until the drawer is opened.
While the lan continues to be on, it assists with the drying and uses negligible
amounts of energy.
In tile even t era power failure, tile DishDrawer will stop until tile supply power is
resumed. It will drain the water in the DishDrawer and restart in the same part of the
wash program it was in when the power failed.
13

USAGE
DishDrawerTM Accessories
Fhe basket is thf, basic"insert DishDrawer requires to
wash dishes, rhe inserts and racks can be added or
removed to suit your individual needs. [f you have two
DishDrawers, some of the parts are interchangab[e
between the two drawers. For example you can
combine the two Mega Racks into one drawer and wash
all cups and glasses, leaving the other drawer ior plates
and larger items.
Purpose of Each Insert
Basket
Fhis is the most basic piecf, and it isessential lot this to
be carefully placed into the DishDrawer first. [t holds
some of the inserts in place and keeps the dishes above
the spray arm so it can rotate and spray water onto the
dishes.
Drain Filter Access Panel
Fhe drain filter access pane[ is designed to give access to
the drain filter. The purpose of this insert is to prevent
objects from touching the base of the Dish Drawer and
stopping the rotation of the spray arm, but still giving
access to the drain fiher.
Figure 7 - Recommended
Positions for Inserts &
Racks
Figure 8- Basket & Drain
Filter Access Panel
Cutlery Basket
Fhe cutlery basket is removable and ideally should sit
over the opening of the drain filter in the front right hand
side of the drawer. For maximum wash performance the
ovals slots should face the middle of the drawer.
Individual pieces of cutlery, like knives or spoons, can
be placed in the oval slots [or convenience.
14
Figure 9 - Cutlery Basket

Plate Insert
The plate inseri can be installed to the left or the right
side of the basket. This insert is capable of supporiing
plates and bowls.
Mega Rack
The Mega Rack carl bf, installed to the lel_or the right
side of the basket. [f you want to wash wine glasses, this
rack should be installed on the left side. this rack is
designed to hold a combination of glasses, cups and
small platc,s. Foinstall this rack, place the outer legs of
this rack on the top of the basket, hook into the mid
section under the middle wire and clip the Mega Rack to
the side of the basket.
When correctly installed, the Mega Rack should not IE,e[
loose. It is imporiant to assemble this rack correctly to
minimize the chance of obstructing the spray arm.
Figure lO-Accessories in
the DishDrawer
Key
1. Mega Rack
2. Plate Insert
15

DISHDRAWER TM LOADING
Baskets
• Scrape off all _ood scraps and remove any bones, crusts, toothpicks and any
similar items.
• Overloading can lead to poorly washed dishes.
• Small light items should be placed soiled side down oil the basket.
• Plates, bowls and saucers can be slotted into spaces provided.
• Long kitchen utensils can be laid flat on the clip racks.
• if there are no inserts in the basket, large bowls and pots can be placed flat in
the DishDrawer.
• Ensure no items touch or protrude above the top of the drawer as you close it,
as damage to the DishDrawer and dishwarc, may occur.
• Locate sharp items so they cannot damage the lid sea[. Particular attention
must be paid to knives to ensure they do not dislodge during the wash, to
prevent injury to yourself or the DishDrawer.
Please note that the DishDrawer basket and its inserts are not designed to be lifted out
of the DishDrawer while loaded with dishes.
Figure 11 Figure 12
Examples of how we recommend you load your DishDrawer
Figure 13 Figure 14
Examples of how NOT to load your DishDrawer
X
f6
X

Cup Racks
Cups, glasses and kitchen utensils can be placed on both
sides of the cups inserts. For best wash periormance
ensurc, there art, no large items blocking the wash water
from reaching the cup racks. SeeFigurc,s 11 and 12 [or
the recommended method of loading the DishDrawer.
Wine glasses can be supported on the left hand cup
racks if used in conjunction with the Mega Rack. See
Figure 15.
Cutlery Baskets
• For best wash performance mix spoons, kniw, s
and forks within each section of the basket.
AIt_rnat(, between handles up and down to
prevent nesting and ensure water circulat(,s freely.
• We recommend that sharp utensils should have
their handles [acing up, to reduce the risk of cut
type injuries.
• Keep stainless stee[ from touching silver - mixing
these metals can stain cutlery.
Spray Arms
• Ensurc,there are no items blocking the path of the
spray arm.
• Check that no items have slipped through the
cutlery basket.
Figure 15-
Recommended Placement
for Wine Glasses
Figure 16 - Cutlery Basket
17

Recommended Loading Pattern for 10 Place Settings
Top Basket
Figure 17
Bottom Basket
Cutlery Basket
Figure 19
Detergent Quantities
We recommend the use of 5g of detergent
in the pre-rinse compartment and 10g in
the main wash compartment.
Figure 18
f8

DETERGENT AND RINSE AGENT DISPENSER
The detergent and rinse agent dispenser is located on the
inside of the DishDrawer.
Detergent Compartments
There are two compartmonts - one lor pre-wash
detergent and the other ior the main wash detergent.
The pre-wash compartment is the smaller. The size
of the compariments are a guide to detergent usage.
The main wash compariment has steps on the side,
these can be used as a guide for how much detergent
to use. The lowest step isequivalent to one teaspoon
when the detergent is level with this step, the middle
step is equivalent to two teaspoons and the top step is
eqL_ivalent to three teaspoons.
The detergent dispenser is designed for L_se with
powderod detergent, however if liquid detergents are
used we do not recommend the Delay Start iunction
be used in conjunction with it. Fablet detergents are
not suitable to be used in the DishDrawer.
To Load the Detergent Dispenser
• Press the latch down and the door will open.
• Pour detergent
- For heavily soiled items, extra detergent can be
placed in the pre-wash detergent compartment.
- No detergent is needed ior the Rinse program.
• After filling the compartment(s), close the dispenser
door Lmtil it clicks shut.
• The detergent will automatically be released into
the DishDrawer during the wash program.
Important
Only L_sedetergent recommended ior domestic
aL_tomatic dishwashers. Handwashing liquids, soap,
laundry detergents or disiniectant will damage the
DishDrawer. Never sprinkle or pour detergent
directly onto any item in the DishDrawer.
WARNING
Dishwasher detergents are strongly alkaline. They can
be dangerous if swallowed. Avoid contact with skin
and eyes. Keep children and infirm person(s) away
from the DishDrawer when the drawer is open.
19
Figure 20 - Detergent
& Rinse Agent Dispenser
Key
1. Latch
2. Rinse Agent Indicator
Light
3. Rinse Agent Ph_g
Figure 21
Detergent & RinseAgent
Dispenser
Key
1. Latch
2. Main Wash Compariment
3. PreWash Compartment

Rinse Agent Dispenser
Rir1_e agerfl gives a _lmak free sparklirlg cle,m look 1o
_lass and chinawarf,. II spc_.ds lip drying and helps
preverfl melA] from I_mishiri_
W(_ highly recomrnend Ihal you r_ularly use liquid
rin_ agent lo _ive Ih(_be_t drying resulls For besl
dryir1@rf'.sull_periodically check lhe.rimse,age.rfl
dispenser to :seeif il rle.edsf Ilir1_and fll when empty,
[ he rirlse a_enl dispenser is on lhe inside of Ihe
drawer. ]ocal_'.d undemealh lhe del_'.rgemdis/.lerlser
Figure 22 - Filling the
Rinse Agent Dispenser
[he dis/.lerlse.rholds approximahdy 17 fluid oz of
rinse a_erfl
To Load the Rinse Agent Dispenser
* hlm the.plu_ _ c,urfli'.rclo_kwise._about one eighth c,fa lure arldre.rtlc,'_-e.,
* Follr Ihe rir1_e a_er_l inlo Ihe cir, ular operlir1_,
* lak_ t;ar_ rlol Io spill rir1_ agerfl irflo lhe drawer,
* Wipe arly overflow lo preve.nl excess foaming,
* Fit lhe plug ba_k irflo lhe original position,
Rinse Agent Indicator Light
* If the rir1_ ag_r_t h_dk ator light is red_lher_ there i_ liltle m rm rir_ ag_m I_ft ir_
lhe.dis/.ler]_ser Rinse agerfl should be.added irflo lhe. dis/.ler]_er
* If the rinse a_enl window is black, there is enough rir]se agenl for lhe wash
HOw Much Rinse Agent to Use
Ih<_re_ulalor may n_d adiu_ling lo suil your waler ccmdilicms Ihe Iowesl
s_llir_ is '_' and lhe highesl is '5',
* If your dishes have. whil_ slreaks_ or Ihere is e×_ essive foam ir] Ihe DishDr,_w(_r,
reduce lhe sellir]_,
* If your dishes have w,Ii_r marks, or if fle_"ks ,Ire left on glasses after dryiri_
irlcrease lhe selling,
2O

OPTION ADJUSTMENT MODE
Afl<_.ru_singthe Dish F)r_lWeb you rtl,_y w,ml to oh,roBe sortl<_of Ih<_pr<_.:.;_loPlions 1osuil
your rmeds. [fro following sellings c,in be ch,inged:
• [_inse.A_e.nl
• Atflo Power
• w_ll_r PreSSUr< _.
Io rtl,Ike lhes{_ ch,Irlges il is necesssry 1o {_nl{arinlo lhe Oplion Ad)]_lrtlerll Mode.
To Enter Option Adjustment Mode
• Pr{ass Powe_r Io lur n Ih{_F)ish F)rsw{_ron [he (_le{ Ironic display will b{_gr{a{_n.
• PW.ss and hold IIw. Progr,_¢_tand k_:o_Saw _}tlllor]s sir_lullaneouslv for fly{.
seco_lds,
• When lira bullons h,_ve been press{_d {orr<aclly Ihe Dish F)r,]w{_rwill <_milone long
• hlelease.Iho.1"¢_,o[?tlllOrls Ihe electronic display will be red and Ihe secondary
conlrol panel lighl(s) will be or,rage. S_a below for furlher doblils
• Use Ihe bullons on lhe priming and secondary conlrol pand Io mak<_your
chang<es lo lhe pr_es{eloptions. [ h<ese are explMned below.
• Once you hav{_made Ihes{_changes, _.lrf_ssih(_.P_._w__rDtlllOrl lo r<_lum to ihe
Normal mode. [he.DishDraw{ar will sav{a lhes{a changes aulor_lalically
• [o make h_rlher changes repeal Ifw. above si(:[.ls from ihe beginning.
Rinse Agent Setting
• kni_r the Option A@lslr_l<_nl Mode ,_s e×plain<_d abov(_.
• [ h(_ currenl rinse agenl selling is shown on Ihe s{_condary conlrol panel in orang(_
]ighls
• Press ihe Progr_frl bullon lo advance ih(e selling For exartlpl<e lwo orang(e lighls
indical_ Ih<erinse ag(enl s_lling is s_elal Iwo [h<eoplions are from or_<elo fre.
• Once you hav{_seJeclf_d Ih(_ rins{_agenl selling you rf_quire_press Ihe Pow_?r
bullon Io r_lum lo Ih(_ Normal mode
R"]

Auto Power
VVhen lhe Auto Power I);alur<; is on il lurns lhe Dish [-)rawer aulomali(:a I]y 1o lhe
Normal Operating Mode whenever the drawer is opened, Auto Power lights up the
I-]ectrorfic Display arid a series of beeps are emitled when lhe DishDrawer is opened,
When Ihe DishDrawer leaves lhe I_aclor';,,,Aulo Power is programmed 1ooccur,
however this can be turned on or off asdesired
• [-rfler inlo the ()priori Adjuslmenl Mode as explained previously,
• Pressing the _ock bullon will lure the Aulo Power orl or off*
• When the "smiley face" symbol is displayed the Auto Power is on arid if the
"smiJey face" symbol is riot presenl then the Auto Power t2:ature is off,
• Press the )M;_,'orbutton to return 1o the Norma] Operating Mode,
When Auto Power is lumed ol)]. lhe Electronic Display does nol lighl up when lhe
drawer is opened and Ihere are no beeps Io It_rrl die DishDrawer on, press lhe
POWder btfltorl or the NI,_r_.Pal._so [_tfltorl to sblrl the dishwasher,
Note: If the mains power supply is turned off lhen lhe Auto Power feature will
deflauh 1oIhe faclory selting
Water Pressu re
Ihe DishDrawer is programmed al the factory to suil most water supply pressures
However, iFlhe Dish Drawer is used in very low 'wat<er pressure situalions (__4psi), il
may r_:suJl in a U1 fauh code, Should this happen then the water pressure selling
shouJd be changed,
• [-rlter into the Option Adjustmenl Mode as explained above,
• Pressing the S/at[i )NO,_{ [?tltlorl will change the water pressure settings,
• [ he electronic display will show which water pr<essur<: the DishDrawer is set to, If"
"H P" is showing on the electronic dis[.lla¥ this irldicat<:s high or standard pr<essur<:
or "l P" meaning low pressure
• Press the _Swot [_t!ttorl to return to the Normal Operaling Mode
Warning:
lnder no ( it( umstan(es do we ret:omrllerld you ( hange your waler pr<essuresetlirlg 1o
"l P" il_you have high or sbmdard water pressure, I-ailure 1ofollow this can resuh in
damage 1oyour DishDrawer or properly
22

WASH PROGRAM CHART
Detergelhl Program De_:ripliolh
Quat_|ies
Wash Pre Ma_n Pre Pre Pre Ma_n Pos| Pos| Pos| Dry_ng
Pr_ratll_ WJ_eth 1o [J_a Wa_l Wa_l Wa_l Wa_l Wash Wa_l Wa_l Wa_l Wa_l P_la_e
(_sp) (_sp) i 2 3 i 2 3
Ri_tso lo preveltt soils dr_d_tg
<ml<} dishes _"
L_
Heavy Heavily soiled tablewal'e
a_td cookware witlt dried
oI_iood residl/es
Nol'mal Dish<'-8 with nol'mal soils for
oplim{lm waslt altd dw 1 3
Sligltlly soiled, _eltlly {lsed
dishes ;_ed el/fleD"
DelicaR _ Sligh]ly soiled ]'ablewal'__,
ffasile _lassware altd
crockey
Heavy Heavily soikM ew, l'yday
disltc_ iltcludiltg cookware 1 3
tllat have Ixeei_ _sed r_'ei_tlv
Normal Normally soil{x_ disltc_ for
optimt/m el]e;gy l/se
Fas_ Vely lightly soikxt alKt l_ol_
_eas_, disltes
Delicale For i_oi_ _re_sy, lightly soiled
delicaR _ and heal' _msMve
disltwa_e
1 3
,/ ,/
3
3
./ ./ ./
./
./
./
./
./
./
3

• fhe del_er_er)lquantilies are for individual DishDrawers. Howe,-or. ifyou live it) a
soft wal_r area_you may need lessdet_rg<_rlt.
'_ If you li_-eit) a hard water area, a wal_r softer)or is recommer)ded lo improv_
waler qualily del_rg_er)leffecliv_rless_ flre_-er)lthe build uf_ of calcium deposils or)
dishes ,rod cutlery ,rod it) the r_ishDrawer
., Wash times are or)ly appro×imat_ orl the electror)ic display Wash times can be
Iorlger if w,_t_r at)d/or room t_mper,_tures are cold. I he times c,m also be Iorlger if
Ihe drawer is opened durin@ the wash program.
, i he wash times on the electror)ic display are based orl Ihe ir)lei t_mperatures al
120'F
, We re(:ommerld lhal the drawer(s) be left aiar after lhe end of the flro_ra/tl 1o
im/.lro_-edrvir)g.
• Remerllber th,_tir)sufficierlt q u,mtities of det<_rgerltwill/.lroduce poor w,_sh
per forliq,_rice where,_s e×cessi%-e ,_moiir)ls of det_r_eri[ does r)oi im/.lrov(_. _-_Jsh
resultsarid is w,_sl_fu].
• When usir)g the i-;_s_/-_ };,tv_ wash pro_ra/tl, det_rgeril should be fflaced it) the
mair) wash _omparlmenl or)ly.
• At the erld of each wash program, lhe dryin_ farl will tie or) for a shorl period of
lime or [lr)li] Ihe drawer is o_leried. While Ihe far) _or)liriues Io be on, it assisls wilh
the dryir)g ar)d uses r)egligible artlourlts of or)orgy.
INSTALLATION OF UPPER KICKSTRIP
i o prev_m injury or dama_e_ lhe upp(_r kk kslrip is desi_ri(_d 1obe released from lh(_
drawer if,my large il_m(s::,ir<_in its/.lath durff)g _]osir)g.
[o reir)slal] the upper kickstrip par)el, the followiri_ steps mt_sl be t_ridert_k(,.r)(s{_.e
Figure 21)
• [fie upper kickstrip t_bs musl fil ir)lo the sJolsorl the boKom drawer.
• Pt_sh the upper kickstri_l back so thai the di_ls or) the par)el, lock irito the bottom
drawer
labs irito lhe slols
Chassis Tuh _f B_ttom / I I"_- Do_r
Drawer
_'_._ _rKickstrip
]
]_,_-uowerKickstrip Clips
Figure 23 -Reln_l_ll_tlon #£the Upper Kick_t_l
24

CARE GUIDE
Ihe combir_afior_ of high Lf_r¢l[leralures arid dishwasher delergerfl may cause dar¢lage
1osorl_<ail<;ms if Ihey are washed irl Ihe Dishr)rawer.
I{<;member. it'ir_ ar_y doubt about arly aspecl cor_cerrfir_ B il<_.ms'washe_ irl lhe
DishDrawer, fdlow the irlslruclior_s floral the mar_ufaclurer oF the il(_.ms, or wash the
il<_.mby harld.
Glassware
Mosl everyday glassware is dishwasher sat2;. (]rysla I, very fir_e arid ar_lklue glassware
rtlay ek:h i.e. become opaque. You rtlay [ir<_.Fer1owash these il<_.rtlsby har_d.
Silverware and Cutlery
CulJery should t_e rir_sed ir_lr_ledialf:ly afteruse.1oprf:verfl l;_rrfishirlg cause._ by some
foods. Ihe Rinsc_wash prograr_l is useful Forll'lis Sil,.-erilerrts should rlol corile ir_lo
cor_lacl wilh slairlJess sle(d, for exarilple other culler.':.'. Mixir_g lhese ilems caa cause
slairfirlg. Remo,.-esilver cutlery from Ihe DishDrawer aad harld dry il ir_medial<:ly after
lhe prograril has firfished.
Aluminum
Alumir_uril car_t_e dulled by dishwsher delerge.r_l degre(_,of char_Bede[.ler_dsor_lhe
(lualily of lhe producl
Other Metals
Iror_arid cast irorl objects carl rusl ar_d sl,Iir_olher il_rlls Copper, rlewl<erarid brass
lerld 1oslair_.
Woodware
Ger_erally wooder_ ilf:rlls arf: ser_silive Io heal arid waler. Regular use irl Ihe
Dishwasher may cause del_:rioralior_ o,.-er li/ile. IFia doubb wash by haad.
Pl_tic
Sorlle i!Jaslic may _harlge shape or _olor wilh hol waler (]he._ k rllarluFa_ lurer's
ir_slruclior_s aboul washir_ B plaslk: k_;rtls. Washable [.llaslk: il<;r_ls should be weighed
dowrl so they do riot Flip over arid fi11with wal<er or Fall lhrough lhe baskel durir_g lhe
".A'as_l,
Decorated Items
Most modem chir_a [.laity;ms are Disfr._-ashe.rsafe;. Ar_lique il_;r_ls,lhose wilh a [.lall_;m
pairfl<edover the glaze, Bold rims or har_d pair_l<;_chir_a may be rllore serlsilive Io
rtlachir_e washir_B, IFir_doubt wash lhese ilems by harld.
Glued Items
( erlairl adhesi'.-esare sofl<;rle.dor dissolved ir_machir_ewashir_B, IFir_doubl wash
Blued il<;rlls by harld.
2_

USER MAINTENANCE INSTRUCTION
Cleaning the DishDrawerTM
[he. se.¢ondary ¢omro] panel and the front of lhe F)ishDrawe.r may ne.ed ".Mpin_
down from ti/ne to ti/ne, [ his (an be done with a (jean darnp( Ioth,
we do not r_ommend lhe use of lhe followin_ clearfin_ a_enls on or in your
F)ish Drawer as lhey Itlay damage il
* Plastic or _l_inJess _W.eJscourin_ pads,
* AbrasNe, solvenl house.hold cleaners, acid or alkaline ( le.aners.
* Handwashing Jkluids , soap_ laundry delergenl_ or disinfeclanls,
If a dishwasher cleaner is used, we would slron_ly recomnlend a Heavy Plus wash
program wilh d_lerBenl be used immediately to prevent damage 1o lhe Dish Drawer,
Cleaning the Drain Filter, Spray Arm,
Filter Plate and Motor Assembly
We recommend lhe drain fill_r be _ leaned whenever
there is evidence of food particles. [fie filler plal_ is
desiBne_ 1o be self cleanin_ bill food scraps may
a__umulale,
[fie spray arm and fih_r plal_ may need cleanin_
abOU[ orICe a fflofllh it1 norr_laj llse or more of[<erl,
should Ihe ne_d arise,
To Clean "Ee Drain Filter
* I it*llip lhe. drain filler a¢ce.ss panel, if filed on Ihe
bask_l,
* I ifl and remove Ihe drain filler oul of lhe
DishDrawer,
* Ernply, rinse, under clean runnin B wal_r, and
replace Ihe drain fiher inlo lhe allocaled space
[ he correc[ pJacemenl of lhe drain filler is shown
in FiBur@ 2,1,
F_gure 24 - Internal Paris
of the DishDrawer
K_y
1, Spray Arm
2. Fiber Plale
t, Drain Filler
To Clean the Spray Arm
* Rfemove Ihe bask_l carfefully, I ifl [roril lhe back
end firsl so lhal yot_ do r_ol knock lhe delerBem
and rinse a_enl dispenser,
* I ifl lhe spray arm,
* Shake any foreisn maleria] Otfl Of Ihe spray arm,
* Rirls(e Ihe spray arm under waler and wipe lhe
spray arm ,Mlh a damp c]olh
* Replace the spray arm back ohio lhe impeller,
Figure 2,1 shows Ihe correct placement of lhe spray
arril,
26

To Clean the Filter Plate
*_ Imsure Ihe F)ishDrawer iscool be.fore you _l_rl
cleanh_B
* Follow the above ir_slruclions for remo'dng lhe
drain filer arid spray arm
,_ In Ihe _e.nlf_.rof Ihe I_iherr.llalf_._Iherf _.arf_.lwo rings,
Hold Ihe cer_lo.rrin_ _lill and lurn lhe oul_.r rin_
_"outlier ckx kwise, aboul a V_turn Jhis will release
- When cle,ming lhe underside of the fiJl_r r.ll,d_, c,_re
/tlusl be l,_kerl on lhe sharp outer edge to avoid lhe
risk of (:ill lype injuries
* I{emove any soil. wash in hol soaDy waler and
rinse lhoroughly in clean water. Ihe healer plaie
can be wiFled wiih a damr.l cloih
Figure 25-
Correct Locking Posillon
of Filler PIMe wilh Motor
Assembly
* I{eplace lhe filler pl,_l_so il lies Flai in Ihe base of
lhe DishDrawer ensurin_ Ihe filler pl,d_ is fully
locked imo posilior_ with the outer riri_. 1o lock
lhe filler plale inlo posilion, ensure lhelri,mgles
(.&) ali_n with each oiher (see Fisure 25 for lhe
correct position). I he I_iherpJ,_l_must rlol be
able Io move aboul Freely
To Clean "the M_t_r Assembly
Ibis area only n_ds to be cleaned when a U3" or
%2 fauh (:ode appe,_rsoa the Iqeclronic Display.
* Follow lJ'leabove inslruclions for lhe removal oflhe
draia filler, spray arm arid filler pl,de.
Ium Ihe rolordocking rir_gamiclockwise ,rod lift out
C)rl_selhemotor assembly is lifted up, check lhe
¢a'dly for aay foreign mallo.r like bor_esor s@reds
and relTJO'_-e,
* I{eplace Ihe rtlolor assembly back irflo Ihe small
cauiiy in Ihe DishDrawer [um lhe mok_r assembly
clockwise aboul i_ OF,_lurrl lo lock irflo posilior_.
Figure 26 -
Motor Assembly
K{y
1, Impeller
2, Rotor I ocking Ring
3 Healer Plal_
Ilie ,_rrows _ orl lhe rolor Iockiag ring and motor
housing rilusi align wilh eachoiher (SeeFigure 26).
Nole: The DishDrawer must be used will] the mal_r assombly, filler platte, drain filter
m_d sp_ay arm corr_:dy in place.
Vacation Time
If the Dish Drawer is nol goin_ to be used hlr some time, we recorllmend you:
* kr_sure lJ'le baskels ,_re em/.lly
* Ieave Ihe inside of lhe DishF)rawer cle,_n.
,_ Ieave the dr,_wers ajar 1oallow air 1ocirculal_
* Iurn offbolh lhe electricity and w,ii_r su/.l/.lly to lhe DishDr,iwer
27

PROBLEM SOLVER
IFthe Dish Drawer does nol ,_ppear 1obe working properly, check lhe ch,_rt
below and correcl where possible You are reminded Ihal Us(:r faults ,_renol cm-ered
by Warrarfly. If you n_:d any assislance pleas(: _:,i11our Cuslomer (:are Cenl_r on
1 888 9 367 872.
PROBLEM
Dish Drawer will nol slarl
Dish Drawer does nol
drain
Wal_:r does rlol flow irflo
Ihe Dish Dr,_w(_r
(U'_ faull code)
POSSIBLECAUSE
Pow(:r supply nol
{ O_I_Ie{ led
Ihe drawer nol dosed
properly
I OCI( orl I{emove lhe Lock fun( lion
WHAT TO DO
(onnecl lhe power supply,
Enstm: lhe drawer is firr_fly
closed.
by holdin B down lhe Lock
btfllorl llrllil lh<: "key"
symbol disappe,_rs FromIhe
Eleclronic Displ,_y.
._at_/Paost_ bullon nol
[.lr_;ssed
Drain hos(: benl or kinked
Filler pl,flei drain fih_:r
SlrMghl_:n lhe drMn hose.
Cle,m lhe filler pJ,_leand
drain Filler. Refer to
U_er Maintenance
Instruction.
Wal(:r fauc(_l lurri(_doff I urn Ih_ W,_l_rfauc(_lon.
Inlel hos(: benl or kinked Slr,Iighl_:n lhe inlet hose.,
Wal_:r rt_,_rkson lhe dishes
InsuFficienl fins(: aF,e.nl
I<inse,_genlselling Ioo low
DishDrawer overlo,_ded
or incorrectly loaded
Ioo much del_rgerll
28
(beck il"Ihere is enough
rirls(: agerfl irl Ihe
dispenser
]_lCredSo. Iho. ri_lse d_efil
s(:lling
Enstm: lhe dishes ,_renol
nesling IoB_lher,
Decreas(: lhe ,Inlounl of
del_:rBerfl.

PROBLEM SOLVER
PROBLEM POSSIBLE CAUSE
Dishes de,rmlcom<_ c,ul Overlc, adir1_ lh<_
dearl DishDrawer
WHAT TO DO
I_rlsllre lhaldishes are riol
r_eslir_g Iog(_lher
_h_suil_bledel_rg_nl
Nol erlough del_rgerll
Sr.lrayarm ur_M_leIo robll_
Spray arm holes are
blocked
FillerplaleiDrairlfill(_r
blocked
Wash program ur]suilable
for Ihe load
Filler plale/Drairl f Ii(_rs
rlol properly inserl(_d
Del_rgerll r.llll irdo lhe
wrong del(_r_enl
Com[.larll_ler]l
U_ recommerided brands
of dishwasher del_r_er_l.
Follow our wash program
guide or lhe delerg_rll
TTIarit_/a_"It_r('f s irislr ucliori
I_rlst_r_ l_@rf,, are r10 il('.ms
blockiri_ lhe palh ol_Ihe
sprayarm.
Clearl lhe spray arm.
Clean lhe fll_r plate arid
drain filler.
I{ethr Io wash program
charl for suilable wash
program, or lhe soils were
1ooheavily bak_edon arid
may rleed soakiri_.
Refer to Sea, ion on U_er
Maintenance Ins_ruL_ion_
Delergeril must be placed
in lhe large com/.larlmer_l
Iiquid del_r_enls used
kx_essiv_*I_oodHOI
remov_doffplaices
Mega Ra_k in_orre_lly
insl,_lled
29
Ensure lhe liquid del_rgenls
are riol used wilh Delay
SIArL
S_rape all food scraps off
dishware
Refer to Se_ion on
DishDrawer Ac,t:e_sorie-_
for correcl ir_sblllalior_

PROBLEM SOLVER
PROBLEM POSSIBLE CAUSE
I_oami_ 1_( orr@CI _moUfll Of
delergenl
WHAT TO DO
See Wash Program charl or
_;or_st!]l lho. rTlarltlfa¢ lt!rfeffs
[oo much egg yolk
in wash load
Rimse.agenl :selling 1oo high
Dishes nol dry Irlcorre¢ 1]oadirlg
Rinseagenl depleled
Rirlse. ago.rll sellirlg Ioo low
An [-co Program has been
C h o5o.fl
Delergerll rlol disperlsing Del_;rgerll was wel wherl
loaded
Delo.r gerll rlol
dispensing from lhe
[.ire wash com[.larlmenl
Waler Ieaking
Iype of wash progrartl
ChoSen)
Drain hose discormecle.d
from [he wasl_ pipe
Add dele.rgenl irilo Ihe
pr@qi_lSe ¢orflparlTTleriL
Decrease rirlse, agerll
selling.
Ensure lhe disfles are nol
rleslirlg together,
Refill Ihe rinse, agerll
dispenser.
In€ mase rinse, age.hi se;ling,
Irvusing the Plus
programs, lhe wash
program Jighl should be
Red
Clean lhe dispenser arid
ensure the del_rge.rll
dis[.lerlser is dry when
pulling lhe del_rgenl irl
When using the ]-asl H:o
Saw wash program,
deterge.hi should be placed
in the main wash
com[._arlmenl only.
14_.comleclIhe drain hose
Io lhe wasw. [.ripe.
Supply irlJe[ hose.
rlol conrlecl_;d [._ro[._erlv
Other I eaks
3O
Securely recormecl lhe
;fie inlel hose..
[ um Ihe waist arm
eleclricil v 1o your
Dish Drawe.r orL (:all your
Fisher & PaykeJ Dealer or
Aulhorized Service. Age.hi,

PROBLEM SOLVER
PROBLEM
Dish Dr,_we.r Inl_rior
Shrined
POSSIBLE CAUSE
Some foods, like lornalo
b,_sed products, rn,_y
_l,_irl the. into.riot of the.
F)ishDrawer.
WHAT TO DO
Pre-rinse dishes bel_ore
placing in DishDrawer or
use. the rinse [.lrogram
after addin B lhe dishes,
which may minimize the
level of sl;dr_ing.
E×cessive Motor Noise
Foreign mailer in Ihe
rnolor asse.rnbly
Motor assemb]y_ fi]ler p]ale
arid/or spray arm is
incorreclly pJaced
Refer to Section on U_er
Maintenance In_ruc_fion
Refer to Section on U_er
Maintenance In_ruc_fion

FAULT CODE DISPLAYS
[he Heclronk Display shows when lher<; is a fauh Ihe DishDrawer will
corilirmousJv beep every secorld unlfl lhe Fowc_r bullorl is pr<;ssed.
[fie fauh code_ ar<; as follows arid we. r<;commend Ihal you check Ihe charl below lo
corr<;cl lhe fauh where possible. If lhe faull code camlol be removed by prP.ssing d_e
Power bullon, lure Ihe power off al Ihe mains supply, wail 1 O seconds and lure Ihe
DishDrawer oil a_aim We would recommerld lhe DishDrawe.r be furl orl a wash
program lo erlsure the fault has beerl compJeleJy eJir_lirlaled, Iflhe fauh code sliJJ
appears, _all your Fisher & P'aykel Authorized Service Agerll
You are reminded lhal if you call a Fisher & Paykel Aulhorized Service Agerll because
of a user faull, il is rlol cove.red bv lhe Warrarilv. Should you encotml_;r arlv problems
then we recor_lmend lhal you telephone our Fisher & gaykel Cuslomer (:are Ceriler orl
1 888 9 36:7 872.
FAULT POSSI BLE CAUSE
CODE
WHAT CAN BE DONE
U1 Fill Fauh Excessive foam, Refer to Se¢_fion on
Problem Solver.
Check lhe inlel hose is connecl<;d arid
Ihe waler faucel is lumed om
Check lhe sprav arm is placed on Ihe
impeller correcl] v, Refer to Se_ion on
User Maintenance Instru_fion.
Irlcorrecl Inslallaliorl Check Ihe ff_sl_llalion of lhe drairl
hoseB) arid erlsurfe il is supporled 1o
Ihe recommended heighl above lhe
base of Ihe Dish Drawer.
Blocked Irilel Hose Check Ihe filler in lhe irilel hose is nol
blocked.
Very low waler pressure
(£ 4 psi)
Check Ihe waler pressure sellirlg.
Refer to Section on Option
Adjustment Mode_
Filler Plale and Spray Arm
irlcorrecll v insl;_lled.
Check Ihe filler plale is properly
locked s_-ecurelv irl place arid lhe
sprav arm is cc,rrecll v on Ihe
impeller. Refer to Section on User
M_intenance Instruction_
_2

FAULT CODE DISPLAYS
FAULT POSSIBLECAUSE
CODE
WHATCAN BE DONE
lJ2
LJ3 F)r4in pump b]ocko.d
F)r4we.r Opened during wash
In(ormcl In_iallalion
In( orre.cl wal_r ilre.ssure.
selling.
F1 Flood swilch has been
a_ [ivaled
F2 Molor problem
Molor Assembly incorreclly
insb_lled
Press [he Pow_ r bt_llon 1o(;lear [he
fauh. Always press lh<+5_rl.Paus_
btfllon b<+fore op<ening [he drawter if
lhe wash is in progress
Ensure lhe molor ass(embly is flee of
foreign rtlall_r. Refer to Section on
U_r Maintenance Instruction.
(beck lhe inslallalion 1oensure [he
drain hos(e(s/: are no[ kinked
( hange [he waist pressme selling lo
"HP". Refer to Se_tion on Option
Adjustment Mode.
[tim lhO.walf:r/ailcoJ ,rod [he rTlaiflS
power off 1o [he DishDrawe.r and (:all
yore Fisher & Paykel Aulhorized
Servia e Agenl
Check lhe molor assembly for foreign
rtlal<eria].
I-xcessive foam, Referto Se_tion on
Problem Solver.
Check lhe molor ass(+rrlbly is correclly
irish+lied Care.should be [aken 1o
ensme lhe filer plale and spray arm is
_orreclly ass(embled, Refer to Sea,ion
on U+er Maintenance In_trut_ion.
F3
Waller lo.f/iperaltHf _.[_realer
lhan 175F
lemperalllre sensor has failed
Ensure [he inle[ waist supply is no[
greal+r [hart 150%.
(all yore Fisher & Paykel Aulhorized
Service Agenl,
33

FAULT CODE DISPLAYS
FAULT POSSI BLE CAUSE
CODE
WHAT CAN BE DONE
F4 F,_ull¥ l_mPeralur_a _r_or
F(_, F7, F_ Ele¢ Irorfi¢ s rtl,Ilfurlclior_
C,dl your Fisher 8.,Paykel Aulhodzed
Service Age.r_l,
(all your Fisher & Paykel Aulhorized
Service Age.rlI,
34

FULLTWO YEAR SMART CARE WARRANTY
For lwo }'ears [From [he dale. o[ForiBina] [.lur(:hase, we will provide, fi<'.e of charge, par[_
and se.rvi_ e. labor in your home 1o re.[.lair or m.pJa_e.,_nvp,_r_ _fll_te tJi_;l_tDrawer Ihal
fails because of a marlu_,i( lurir1_ detb.( 1
Ihis warranty is e×lended to lhe original purchase and any su__eedin_ owner for
producis purchased [Forordinary home use in lhe 48 mainland sl,_l_s, Haw,di and
W,_shinglorl D,C. hiAJask,_lhe warr,mly is Ihesame excepl Ihai ii is I IMI [ ED because
you musl p,_y lo shi[F_Ihe produ_:l lo lhe service shop or for Ihe service Ife_shriiciari's
lrauel cosis Io your home.
All warr,inly will be provided by a Fisher_: Paykel Aulhorized Service Agenl during
nomlal working hours
Should your appliance nmM service, during [he warr,mly period or beyond, call
TOLL FREE1 888 9 FNP USA (1 888 936 7872)
m mWrml nero wm'm'
Service Irir.ls 1o your home Io l_ach you how 1ouse lhe [Flroduclor change Ihe
s_l_up of Ihe producl or Ihe [Faull(si:caused by die user
Readyour USE & CARE ManuaL If you then h,_ve,any questions ,Iboul
op(_r,_liri_Ih(_producl, [Ffleas<econl_cl your @ealeror (:all
1 888 9 FNP USA (1 888 936 7872)
Improper insl_llalion
Ifyou hav(_,m insl_llalion problem conl_cl your dealer or insl,dler You
are responsible [Forproviding ,_dequalf_electrical, exhausting ,ind olher
connection [Facilities
Kepl,_cemenl of house [Fusesor resellingoFFcircuil breakers.
F,_ilureof lhe producl if il is misused, or used for olher lharl lhe inl_nded
[Flur[Floseor used commercially
Damage lo produci caused by accidem [Fire.floods or Acts of (]od
( orreclion of unaulhorized repairs
Normal recommended mainle.nan(e as sel out in lhe [.lrodu( is LSk & (ARE
Manual
35

IOIIWII rstmaL'llmq'l l lilt'4Lwastmstb
j WARRANTOR IS NOT RESPONSIBLE FOR CONSEQUENTIAL DAMAGESI
Someslales do nol allow die exclusion or limilalion of incidenlal or
consequential damages, _) the a[_)ve limitation r_rexchJsirm may not apply
1o you. This warranly gives you specific legal rights, and yc.u may also have
oilier righ[s which vary from sia[e Io sia[e. ]o know wha[ your legal righis
are in your sla[e, consul[ your local or sla[e consumer afi_drs officer or your
slale's Al[,u.rney General.
Warrantor: Fisher & Paykel Appliances Inc.
If further help is needed concerning this warranty write:
Fisher & PaykelAppliances Inc., 27 Huhhle
lrvlner CA 92618 r USA.
PROOF OF PURCHASE
Proof of original purchase dal_ is required lo obl_in service under warranly, All_ch
your sales receipl or cancelled check here,
Wrile down ;fie model serial number and punsh,_se,irfformaiion bel¢_w,
Model Number
Serial No.
Purchaser
Date _ Purchase / /
Dealer
Addre_
SERVICE
For your local Fisher & Paykel Authorized Service Agent,
please call 1 888 9 FNP USA (1 888 936 7872)
or contact us through our web site,
www.fisherpaykel.com
36
 Loading...