

Page 1
WHSC / WHHP SERIES
WALL SLEEVE INSTALLATION
**WARNING T O INST ALLER, SERVICE PERSONNEL AND OWNER**
Altering the product or replacing parts with non authorized factory parts voids all warranty or implied warranty
and may result in adverse operational performance and/or a possible hazardous safety condition to service
personnel and occupants. Company employees and/or contractors are not authorized to waive this warning.
Current Maintenance Program is available at www.firstco.com under "Product Information".
GENERAL
The WHSC/WHHP wall sleeve is
optional for use with WHSC and
WHHP units. These instructions give
information relative to the wall sleeve
installation only. The manufacturer
assumes no responsibility for
equipment installed in violation of any
code requirements. For other related
equipment refer to the proper
instructions.
The wall sleeve is shipped in one
package with required hardware for
installation. Material in this shipment
has been inspected at the factory and
released to the transportation agency
in good condition. When received, a
visual inspection of all cartons should
be made immediately. Any evidence
of rough handling or apparent damage
should be noted on the delivery receipt
and the material inspected in the
presence of the carrier's
representative. If damage is found a
claim should be filed against the
carrier immediately.
INSTALLATION
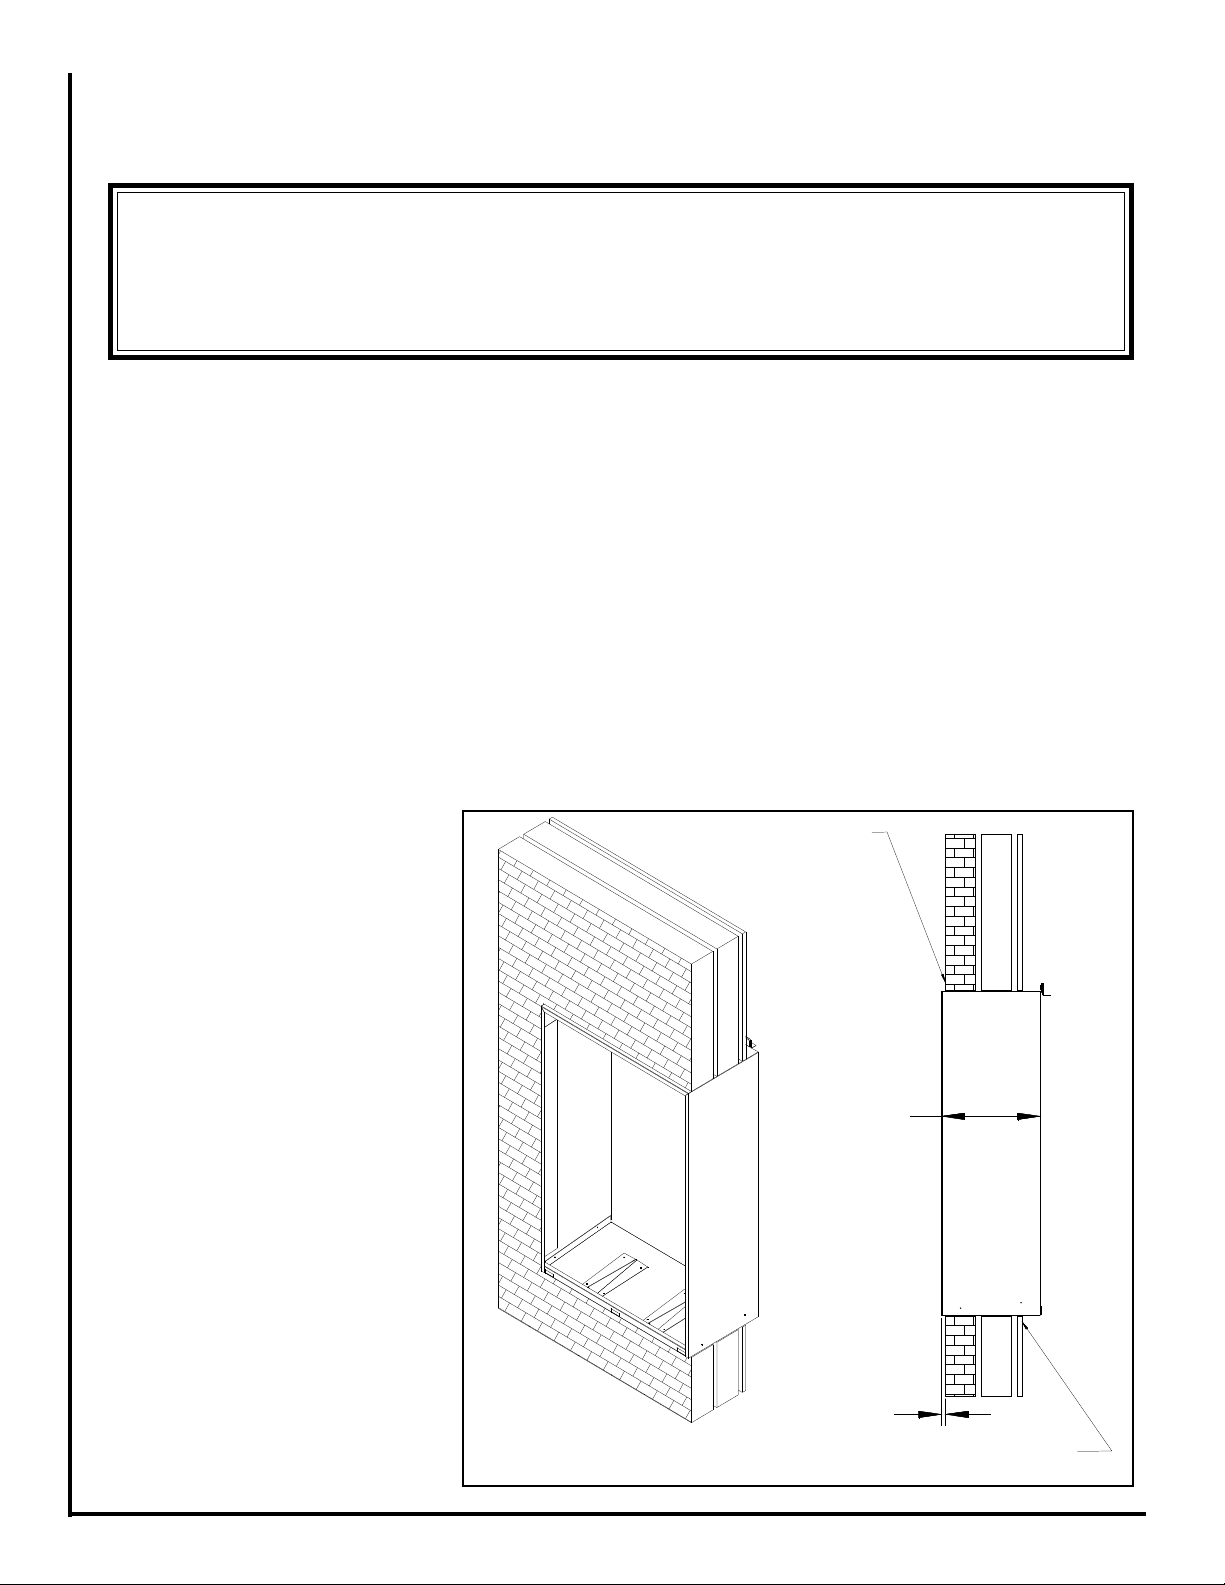
(1 ) It is recommended that the sleeve
protruded 3/8" to 1/2" beyond the
outside finished wall, (see fig. 1).
Install wall sleeve into precut
opening 27-5/8" wide x 45-3/4"
high.
Make sure wall sleeve is square
before securing.
(2) Fasten wall sleeve to wall studs,
drill holes or nail through sleeve as
required in 6 places.
SEAL AROUND SLEEVE
AND OUTSIDE WALL
WARNING - Sleeve must be
fastened to the wall studs and not
the finished wall.
(3 ) After installing wall sleeve place a
bead of silicone sealant or other
high grade non-hardening sealing
compound approved for exterior
use around the perimeter of the
wall sleeve face outside. Also
seal around the sleeves perimeter
and the finished inside wall, as
shown in (figure 1).
CAUTION - If using the optional
arichitectural grille then install it before
setting the unit using the screws holding the original coil guard. See fig. 2
SLEEVE HARDWARE
The following items are packaged in
the WHSC/WHHP Sleeve Kit:
(1) Sleeve Assembly
(1) Frame mounting angle
(2) 1/4" - Split Lock Washers
(2) 1/4" - Flat Washers
(2) 1/4" - 20 x 3/4 Hex Bolt
(4) #8 x 1/2" Lg. Screws
(2) Rubber Isolation Grommets
Figure 1
(13.0)
WALL SLEEVE
0.38
MINIMUM
SEAL AROUND SLEEVE
AND INSIDE WALL
L25901 10/13
Page 2
INSTALLING WHSC/WHHP
**MAINTENANCE UPDATES**
For a current copy of the
Maintenance Program log on
to www.firstco.com and
look under "Product Information"
INTO SLEEVE
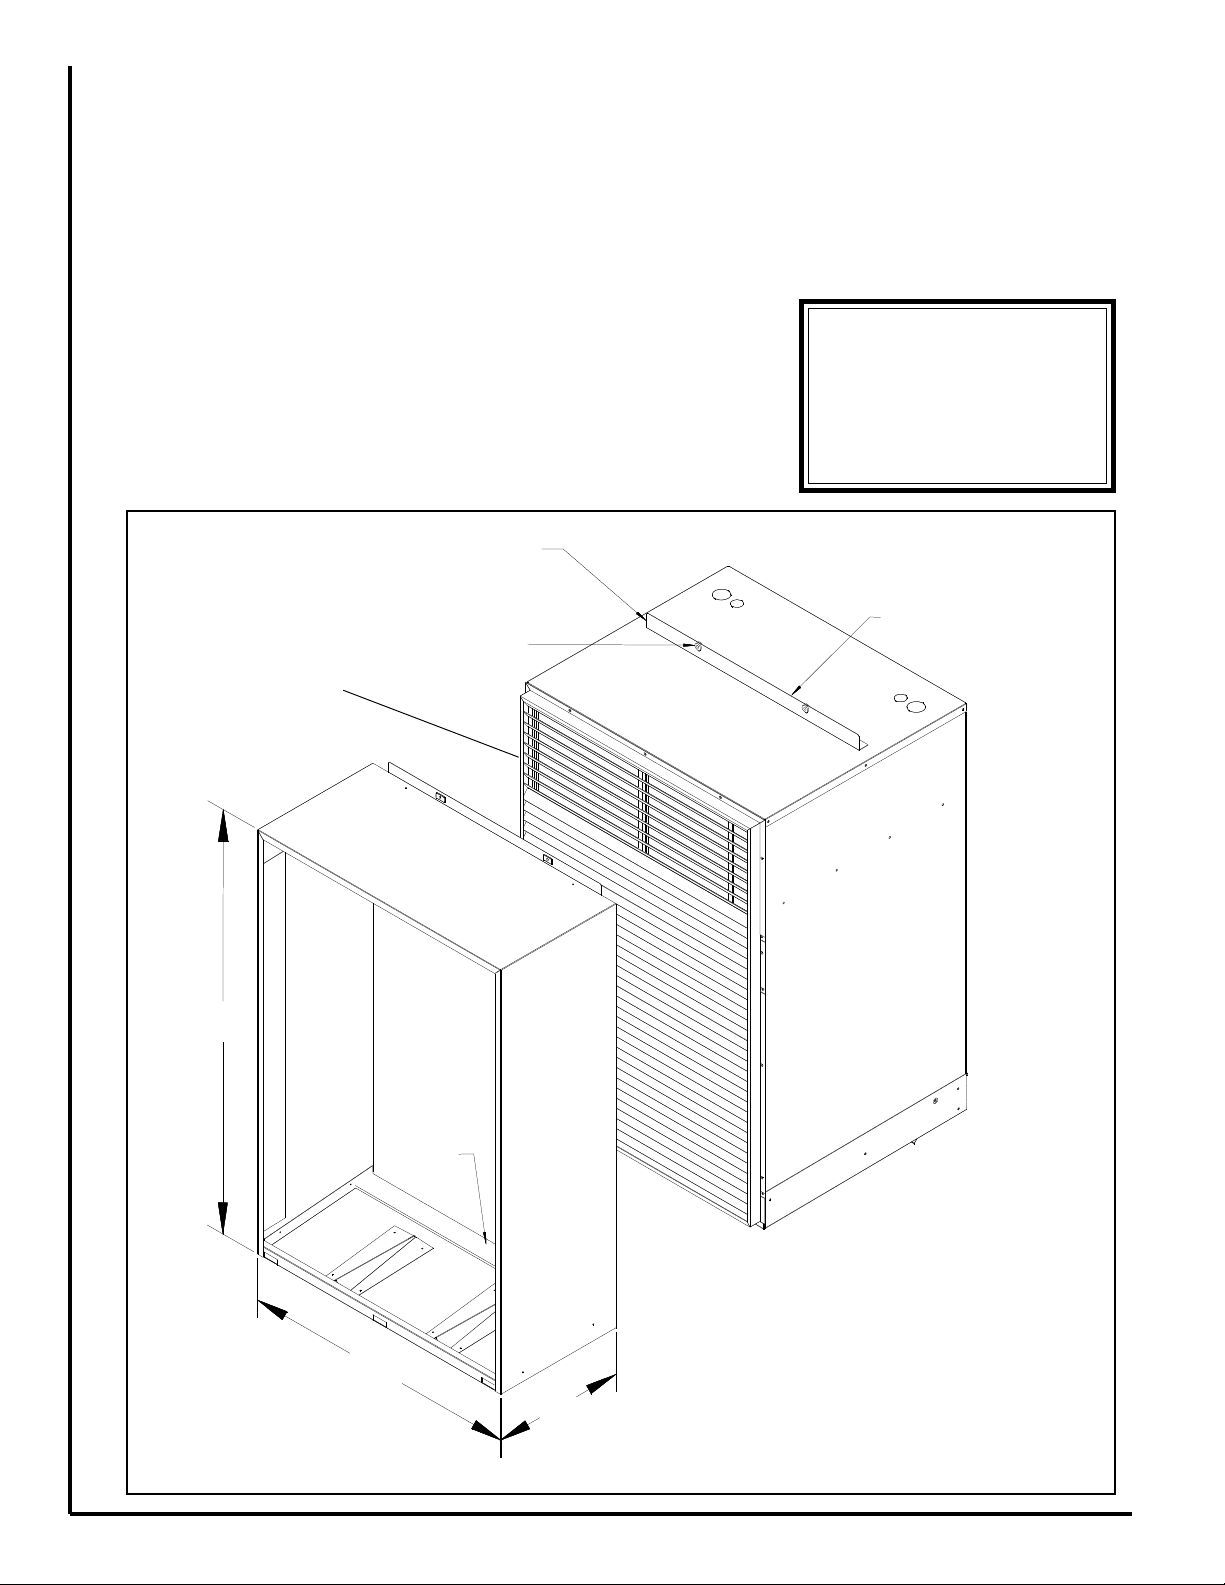
(1 ) After the sleeve is secured, install
the WHSC or WHHP unit into the
sleeve. Set the bottom edge of the
unit on the opening edge of the
sleeve. With the top of the unit
tilted slightly backwards, apply
primary force towards the bottom
of the unit while pushing forward
until the unit comes to a stop on
the sleeve face. The mounting
flange on the WHSC or WHHP
should then mate up flush with the
sleeve flange.
TOP BRACKET
ATTACH WITH FOUR
SCREWS PROVIDED
ISOLATION
ARCHITECTURAL GRILL
SHOWN HERE
USE ORIGINAL COIL
GUARD SCREWS
GROMMETS (2)
NOTE: Make sure isolation
grommets are installed on sleeve
flange (see. fig. 2).
(2) Before bolting the unit to the
sleeve apply a bead of silicone
sealant approved for exterior use
between the sleeve and the unit
top and both sides. The flange on
top of the unit may be temporarily
removed to facilitate ease of
applying sealant on top of unit.
(3 ) Using the 1/4" - 20 hex bolts and
washers, secure the unit at the
flange while the sealant is still
tacky.
NOTE: Check one last time for
complete seal around the unit and
sleeve and the sleeve and wall.
CABINET DIMPLES
BENEATH BRKT
45.5
SEAL
STRIP
Figure 2
27.5
13.0
 Loading...