

Page 1

01 02 03 04 05
Limited Warranty
This probe is warranted against defects in material and workmanship for one year from date of purchase from an authorized Fieldpiece
dealer. Fieldpiece will replace or repair the defective unit, at its option,
subject to verification of the defect.
This warranty does not apply to defects resulting from abuse,
neglect, accident, unauthorized repair, alteration, or unreasonable
use of the instrument.
Any implied warranties arising from the sale of a Fieldpiece
product, including but not limited to implied warranties of merchantability and fitness for a particular purpose, are limited to the above.
Fieldpiece shall not be liable for loss of use of the instrument or other
incidental or consequential damages, expenses, or economic loss, or
for any claim of such damage, expenses, or economic loss.
State laws vary. The above limitations or exclusions may not apply
to you.
Obtaining Service
Visit www.fieldpiece.com/rma for the latest information on
how to obtain service.
www.fieldpiece.com
© Fieldpiece Instruments, Inc 2017; v04
Quick Start
1 Install the Fieldpiece Job Link™ app on your
mobile device and sign up for an account if
you're a new user.
2 Remove the single screw from the yellow bat-
tery cover and install 2 x AAA batteries.
3 Press for 1 second to power on.
4 Open Measurements in the Job Link™ app and
favorite the probe to the tool manager.
5 View live measurements on your mobile device
up to 350 feet away.
Certifications
EN 300 328
FCC ID: 2ALHR003
RCM
WEEE
RoHS Compliant
Description
The JL3PR Job Link™ Pressure Probe sends
long range wireless pressure measurements
directly to the Fieldpiece Job Link™ mobile app.
Easily reach service ports in tight spaces
using the angled 1/4" fitting. The rubberized
protective housing is both ergonomic and
rugged for daily use.
Flip the switch to red or blue and Job Link™
app immediately knows which side of the
system you're going to place your pressure
probe.
The perfect balance of size and capability gives you exactly what you need to
diagnose systems day in and day out quickly
and confidently.
What's Included
Job Link™ Pressure Probe
2 x Replacement Gaskets
2 x AAA Batteries
Operator's Manual
1 Year Limited Warranty
FCC Statement
This equipment has been tested and found to comply with the
limits for a Class B digital device, pursuant to Part 15 of the FCC Rules.
These limits are designed to provide reasonable protection against
harmful interference in a residential installation.
This equipment generates, uses and can radiate radio frequency
energy and, if not installed and used in accordance with the instructions, may cause harmful interference to radio communications.
However, there is no guarantee that interference will not occur in a particular installation. If this equipment does cause harmful interference
to radio or television reception, which can be determined by turning
the equipment off and on, the user is encouraged to try to correct the
interference by one of the following measures:
. Reorient or relocate the receiving antenna.
. Increase the separation between the equipment and receiver.
. Consult the dealer or an experienced radio/TV technician for help.
FCC Caution: To assure continued compliance, any changes or
modifications not expressly approved by the party responsible for
compliance could void the user's authority to operate this equipment.
(Example - use only shielded interface cables when connecting to computer or peripheral devices).
This device complies with Part 15 of the FCC Rules. Operation is
subject to the following two conditions: (1) this device may not cause
harmful interference, and (2) this device must accept any interference
received, including interference that may cause undesired operation.
Fieldpiece Instruments
1636 West Collins Avenue
Orange, CA 92867
Fieldpiece
Job Link™ Pressure
Probe
OPERATOR'S
MANUAL
Model JL3PR
www.fieldpiecejoblink.com
WARNING
DO NOT APPLY MORE THAN 800 psig.
Page 2
06 07 08 09 10
Operation
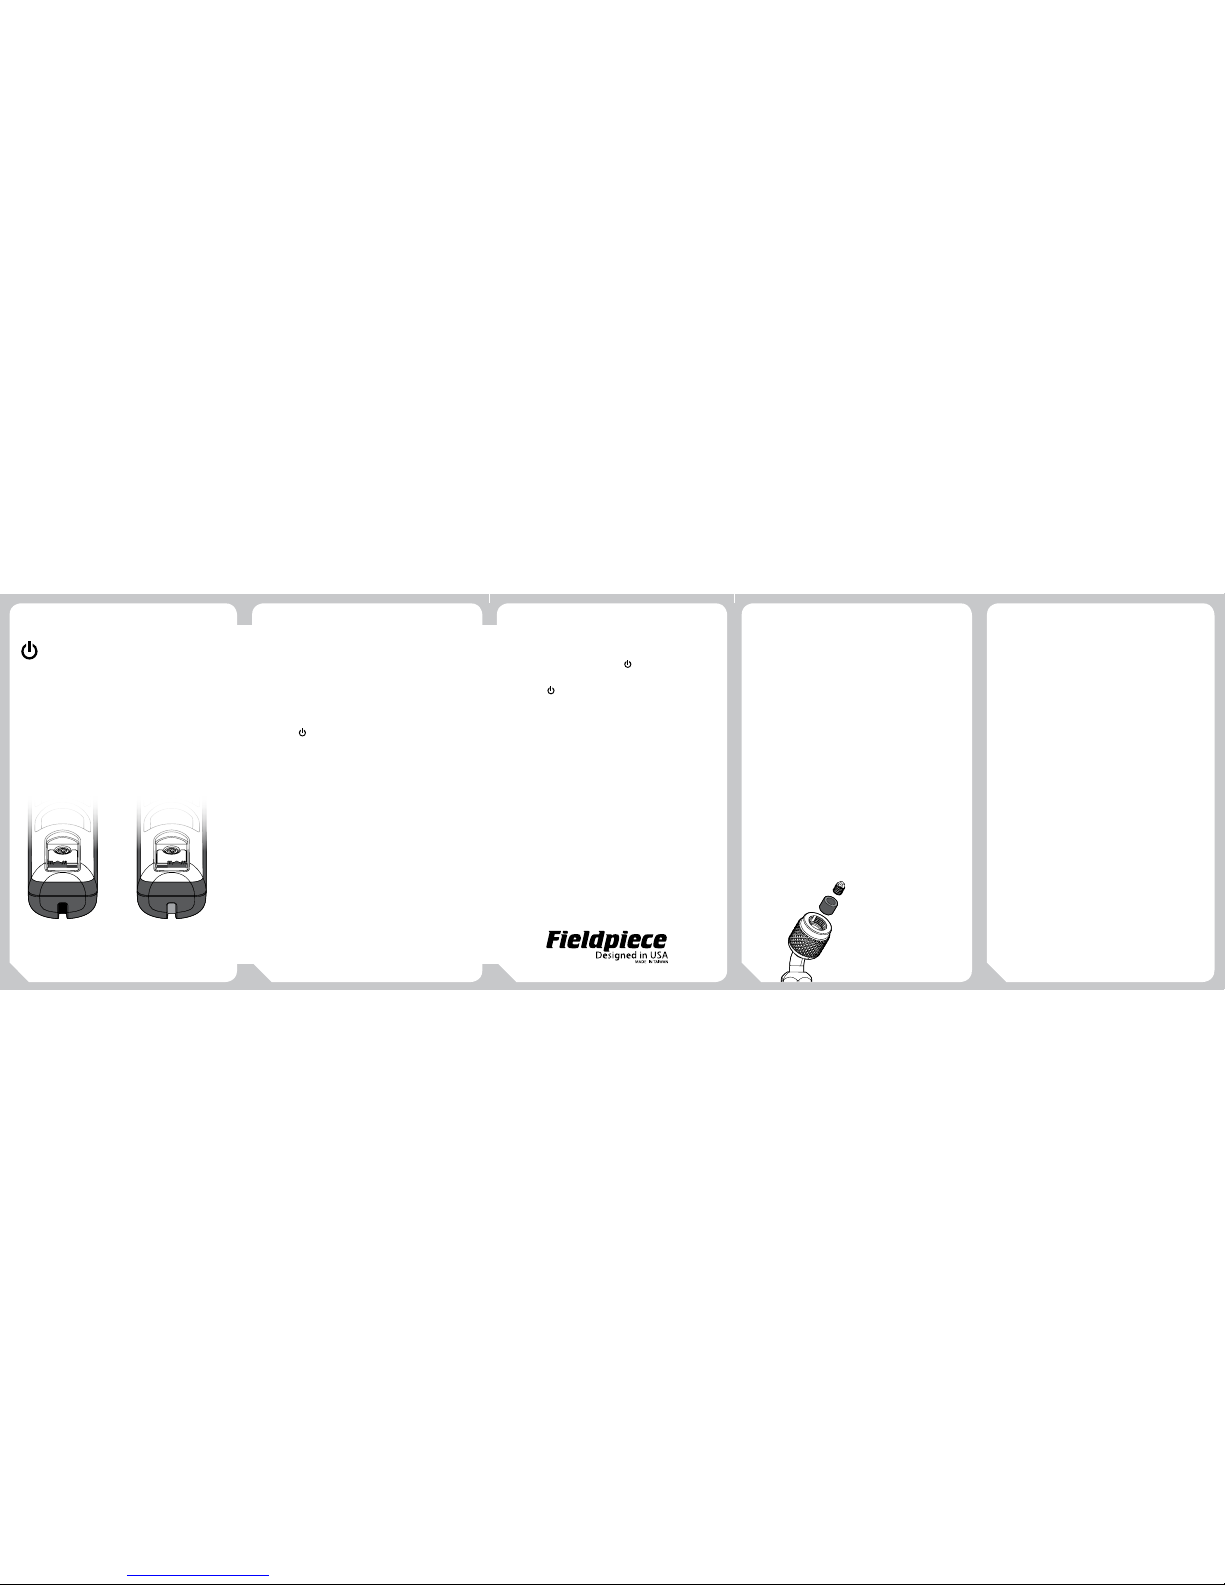
Press for 1 second to power ON/OFF.
LED Color Indications
Green slow blink: normal operation
Red slow blink: batteries need to be replaced
High or Low Side Switch
The Job Link™ app knows which side you
have selected for each probe. Select Suction
line or Liquid line and place it on the system
appropriately.
Remote Data Logging
(Data logging will be available shortly after
time of printing. Look for Job Link™ app updates.)
Use the Job Link™ app to program the JL3PR
to log measurements starting at a specific time
of day for up to 7 days. Auto power off disables.
1 Make sure JL3PR is powered OFF.
2 Open the Job Link™ app.
3 Press for 5 seconds to enter data logging
mode. The LED will shine solid green.
4 Set up the probe's data logging parameters
within the app. The LED will blink green while
the app is sending setup instructions. The
LED will slow blink blue when waiting for
programmed start time to occur.
5 Place the JL3PR on the system.
6 When the programmed start time is reached,
the LED will very slowly blink green to indicate
data logging has begun.
7 When the programmed span has finished, the
LED blinks and powers OFF.
8 Repeat steps 1-3 and use the Job Link™ app
to extract your data log from the JL3PR.
Auto Power Off (APO)
The pressure probe will automatically power
off after 2 hours. To disable APO until powered
off, while power is on tap twice. The LED will
briefly blink red. To enable APO, while power
is on tap twice. The LED will briefly shine red.
Auto Calibration
Automatically calibrate your JL3PR by ensuring the sensor is open to atmosphere when you
power ON the probe.
Maintenance
CLEANING: Clean the exterior with a damp
cloth. Do not use detergents or solvents.
BATTERIES: When the LED slow blinks Red,
the batteries must be replaced. Ensure the
power is OFF. Remove the single screw from
the yellow battery cover. Install 2 x AAA batteries. You can also monitor battery life in the Job
Link™ app tool manager.
GASKET: The black rubber gasket that seals
the pressure probe to the service port may
become worn over time potentially causing a
leak. This results from overtightening or connecting to damaged service port fittings.
1 Use needle nose pliers or a similar tool to
unscrew the Schrader valve depressor from
the gasket.
2 Remove and replace the worn gasket.
3 Screw the depressor back into the gasket.
Specifications
Minimum Device Requirement:
BLE 4.0 devices running iOS® 7.0 or AndroidTM 5.0
(Latest compatibility at www.fieldpiece.com)
Sensor Type: Relative pressure
Connector Type: Standard 1/4" NPT female flare fitting (angled)
Measurement Range:
29” HgV to 580 psig, 74 cmHgV to 0 to 4000 kPa
Accuracy:
29” HgV to 0” HgV: ±0.2” HgV; 74 cmHgV to 0 cmHgV: ±1 cmHgV
0 to 200 psig: ±1 psig; 0 to 1378 kPa: ±7 kPa
200 to 580 psig: ±2 p sig; 1378 to 4000 kPa: ±14 k Pa
Maximum Overload Pressure: 800 psig (5500 kPa)
Battery Type: 2 x AAA, NEDA 24A, IEC LR03
Battery Life: 150 hours typical alkaline. LED blinks red when bat-
tery replacement is needed.
Auto Power Off: 2 hours (APO can be disabled)
Wireless Range: 350 feet (107 meters) line of sight.
Obstructions affect distance.
Radio Frequency: 2.4 GHz
Operating Environment: 32°F to 122°F (0°C to 50°C) at <75% RH
Storage Temperature: -4°F to 140°F (-20°C to 60°C), 0 to 80% RH
(with batteries removed)
Temperature Coefficient: 0.1 x (specified accuracy) per 0.6°F
(32°F to 64°F, 82°F to 122°F), per 1°C (0°C to 18°C, 28°C to 50°C)
Weight: 0.39 lbs (177 g)
Water Resistant: Designed to IP55
Liquid Line
(High Side)
(Red)
Suction Line
(Low Side)
(Blue)
Schrader Valve Depressor
Gasket
 Loading...