

Fiberstars FLW-V OWNERS MANUAL
FLW-V Feature Light
for vinyl pools
CONTENTS
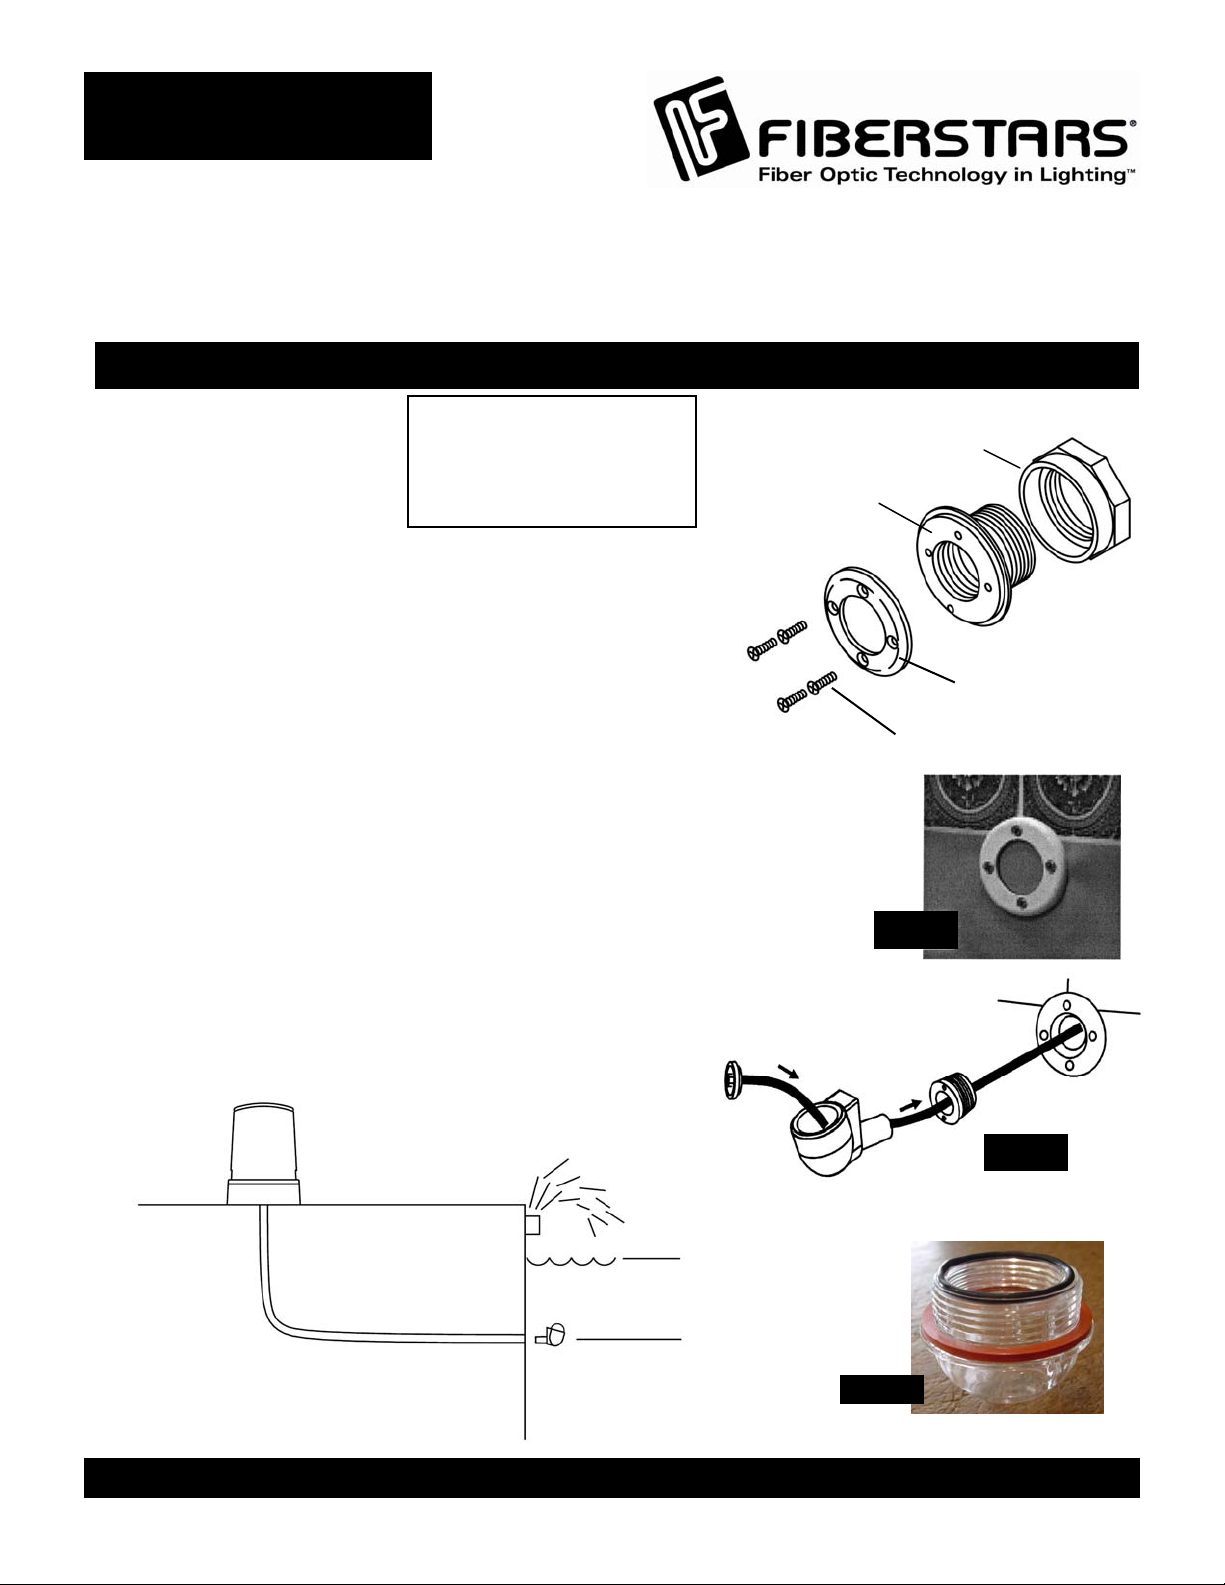
1) Feature Light fixture 1) Centering Device (A9904)
1) Broadcast Lens (B11458) 1) Centering Disc (A9787)
1) Large lens o-ring (22-15006-00)
1) Small lens o-ring (A8891)
1) LNS-2V Lens Assembly
1) Adapter Bushing
USE A FEW WRAPS OF TEFLON TAPE AROUND THE THREADS OF THE LENS!
LNS-2V Contents:
1) LENS HOUSING
1) HOUSING NUT
1) FACE PLATE
INSTRUCTIONS
1) Prepare pool wall with a 31/8” to 31/4” diameter hole (Feature Light
fixture should be 5”-7” below water level). Place the lens housing in the
hole and secure it with the housing nut.
2) Attach a 1
pipe back to the illuminator location.
3) Place the liner in the pool and begin filling the pool. When the water
level is a few inches from the bottom of the housing, place the face plate
over the liner and housing. Turn the face plate back and forth until it
“locks” in one place. Carefully drive the face plate screws into the lens
housing. The screws should be flush with the face plate, and the face
plate should seal the liner tightly to the housing (FIG A).
4) Cut out liner from the center of the face plate with a razor knife.
5) Use a few wraps of Teflon tape around the bushing and thread it into the
lens housing. Use FS-117 lens tool to tighten the bushing into the
housing. Run the fiber optic cable through the Feature Light fixture,
then through the bushing and lens housing (FIG B).
6) Place the large o-ring on the lens, making sure it seats on the flange
(FIG C). Place the small o-ring in the groove at the base of the lens and
use a few wraps of Teflon tape around the threads of the lens. Thread
the lens into the fixture and tighten it snugly. Thread the lens into the
housing, then use a FS-117 lens tightening tool to tighten the lens down
to the feature light. Do not over tighten.
7) Apply a generous amount of silicone to the stub on the Feature Light
and insert it into the bushing. Make sure the Feature Light is level.
1/2” PVC male adapter to the rear of the housing and run the
4) FACE PLATE SCREWS
LENS HOUSING
HOUSING NUT
FACE PLATE
FACE PLATE SCREWS
FIG. A
FIG. B
5” – 7” below water level
FIG. C
PM10102, Rev. D
44259 NOBEL DRIVE FREMONT, CA 94538 (800) 327-7877 FAX (510) 490-3247 WWW.FIBERSTARS.COM
 Loading...