


CPX terminal
Electronics Manual
CPX analogue
I/Omodules
I/O modules type
CPX−2AE−U−I
CPX−4AE−I
CPX−4AE−T
CPX−2AA−U−I
Sub−bases type
CPX−AB−...
Manual
526 416
en 0503b
[689 008]


Contents and general instructions
Original de. . . . . . . . . . . . . . . . . . . . . . . . . . . . . . . . . . . . . . .
Edition en 0503b. . . . . . . . . .
. . . . . . . . . . . . . . . . . . . . . . . .
Designation P.BE−CPX−AX−EN. . . . . . . . . . . . . . . . . . . . . . . . .
no. 526 416. . . . . . . . . . . . . . . . . . . . . . . . . . . . . . . . .
Order
E (Festo AG&Co.KG, D73726 Esslingen, Federal Republic of
Germany, 2005)
Internet: http://www.festo.com
E−Mail: service_international@festo.com
The reproduction, distribution and utilization of
this document
as well as the communicaton of its contents to others without
express authorization is prohibited. Offenders will be held
liable for the payment of damages. All rights reserved in the
event of the grant of a patent, utility module or design.
Festo P.BE−CPX−AX−E N en 0503b
I

Contents and general instructions
CAGE CLAMP® is a registered trade mark of WAGO Kontakttechnik GmbH,
32385Minden, Germany
TORX® is a registered trade mark of CAMCAR TEXTRON INC., Rockford,
Ill., USA
HARAX® is a registered trade mark of HARTING Deutschland GmbH,
32381Minden, Germany
SPEEDCON® is a registered trade mark of PHOENIX CONTACT GmbH & Co. KG,
32825 Blomberg, Germany
II
Festo P.BE−CPX−AX−E N en 0503b

Contents and general instructions
Contents
Designated use VII . . . . . . . . . . . . . . . . . . . . . . . . . . . . . . . . . . . . . . . . . . . . . . . . . . . . . . . .
Target group VIII . . . . . . . . . . . . . . . . . . . . . . . . . . . . . . . . . . . . . . . . .
Service VIII . . . . . . . . . . . . . . . . . . . . . . . . . . . . . . . .
Important user instructions IX . . . . . . . . . . . . . . . . .
CPX analogue I/O modules XI . . . . . . . . . . . . . . . . .
Diagnosis via the field bus XII . . . . . . . . . . . . . . . .
Structure of a CPX terminal XIII . . . . . . . . . . . . . .
. . . . . . . . . . . . . . . . . . . . . . . . . . . . . . .
. . . . . . . . . . . . . . . . . . . . . . . . . . . . .
. . . . . . . . . . . . . . . . . . . . . . . . . . . . . .
. . . . . . . . . . . . . . . . . . . . . . . . . . . . . . .
. . . . . . . . . . . . . . . . . . . . . . . . . . . . . . . .
. . . . . . . . . . . . . . . . .
1. Overview and connection technology I/O modules 1−1 . . . .
1.1 Components of an I/O module 1−4 . . . . . . . . . . . . . . . . . . . . . . . . . . . . . . .
1.2 Connections 1−5 . . . . . . . . . . . . . . . . . . . . . . . . . . . . . . . . . . . . . . . . . . . .
1.2.1 Display and connecting elements 1−7 . . . . . . . . . . . . . . . . . . . . . . . . . . .
1.2.2 Combinations of I/O modules and sub−bases 1−8 . . . . . . .
1.2.3 Connecting the cables and plugs to the sub−bases 1−9 . . . . . . . . . . . . .
1.3 Assembly 1−19 . . . . . . . . . . . . . . . . . .
1.3.1 Fitting the sub−bases 1−20 . . . . . . . . . . . . .
1.3.2 Fitting the screening/shield plates 1−23 . . . . . . . . . . . . . . . . . . . . . .
2. Analogue input module CPX−2AE−U−I 2−1 . . . . . . . . . . . . . . . . . . . . . . . . . . . . . .
2.1 Function of the analogue input modules 2−4
2.2 Fitting 2−4 . . . . . . . . . . . . . . . . . . . . .
2.3 Installation 2−5 . . . . . . . . . . . . . . .
2.3.1 DIL switch settings 2−6 . . . . . . . . . .
2.3.2 Pin assignment 2−8 . . . . . . . . . . . . . . . . . . . . .
2.3.3 Connecting the analogue intputs 2−11 . . . . . . . . . . . . . . . . . . . . . . . . . .
2.4 Instructions on commissioning 2−12 . . . . . . . . . . . . . . . . . . . . . . . . . . . . . . . . . . . .
2.4.1 Processing analogue input signals 2−12 . . . . . . .
2.4.2 General information on parametrizing 2−16 . . . . . . . . . . . . . . . . . . . . . . .
2.4.3 Parameters of the analogue
2.4.4 Module parameter Input analogue−value data format" 2−26 . . . . . . . .
2.4.5 Channel−specific module parameters Limits 2−28 . . . . . . . . . . . . . . . . .
2.4.6 Channel−specific module parameters Filter measured
2.4.7 Channel−specific module parameters Monitor of wire fracture 2−31 . .
. . . . . . . . . . . . . . . . . . . . . . . . . . . . . . . . . . .
. . . . . . . . . . . . . . . . . . . . . . . .
. . . . . . . . . . . . . . . . . . . . . . . . . . . . . . . . . . .
. . . . . . . . . . . . . . . . . . . . . . . . . . . . . . . . . . . . .
. . . . . . . . . . . . . . . . . . . . . . . . . . . .
input module type CPX−2AE−U−I 2−18 . . . . .
. . . . . . . . . . . . . . .
. . . . .
. . . . . . .
. . . . . . . . . .
. . . .
. . . . . . . . . . . . . . . . . . . .
.
. . . . . . . . . . . . . . . . . . .
value 2−31 . . . .
. . . . . . . . . . . . . . . . . . . . . . . . . . . .
Festo P.BE−CPX−AX−E N en 0503b
III

Contents and general instructions
2.5 Diagnosis 2−32 . . . . . . . . . . . . . . . . . . . . . . . . . . . . . . . . . . . . . . . . . . . . . . . . . . . . .
2.5.1 Fault messages of the analogue input modules 2−33 . . . . . . . . . . . . . . .
2.5.2 LED display 2−35 . . . . . . . . . . . . . . . . . . . . . . .
. . . . . . . . . . . . . . . . . . . . .
2.5.3 Fault treatment and parametrizing 2−37 . . . . . . . . . . . . . . . . . . . . . . . . . .
3. Analogue input module CPX−4AE−I 3−1 . . . . . . . . . . . . . . . . . . . . . . . . . . . . . . . .
3.1 Function of the analogue input modules 3−4 .
3.2 Fitting 3−4 . . . . . . . . . . . . . . . . . . . . . . .
3.3 Installation 3−5 . . . . . . . . . . . . . . . .
. . . . . . . . . . . . . . . . . . . . . . . . . . . . . . . . . . . .
3.3.1 DIL switch settings 3−6 . . . . . . . . . . . .
3.3.2 Pin assignment 3−8 . . . . . . . . . . . . . . . . . . . . . .
. . . . . . . . . . . . . . . . . . . . . . . . . . .
. . . . . . . . . . . . . . . . . . . . . . . . . . . . . . . . .
. . . . . . . . . . . . . . . . . . . . . . . . . .
. . . . . . . . . . . . . . . . . . .
3.3.3 Connecting the analogue intputs 3−11 . . . . . . . . . . . . . . . . . . . . . . . . . . .
3.4 Instructions
3.4.1 Processing analogue input signals 3−12 . . . . . . . .
on commissioning 3−12 . . . . . . . . . . . . . . . . . . . . . . . . . . . . . . . . . . . .
. . . . . . . . . . . . . . . . . .
3.4.2 General information on parametrizing 3−16 . . . . . . . . . . . . . . . . . . . . . . .
3.4.3 Parameters of the analogue input module
type CPX−4AE−I 3−18 . . . . . . .
3.4.4 Module parameter Input analogue−value data format" 3−27 . . . . . . . .
3.4.5 Channel−specific module parameters Limits 3−29 . . . . . . . . . . . . . . . . .
3.4.6 Channel−specific module parameters Filter
measured value 3−32 . . . .
3.4.7 Channel−specific module parameters Monitor of wire fracture 3−32 . .
3.5 Diagnosis 3−33 . . . . . . . . . . . . . . . . . . . . . . . . . . . . . . . . . .
. . . . . . . . . . . . . . . . . . .
3.5.1 Fault messages of the analogue input modules 3−34 . . . . . . . . . . . . . . .
3.5.2 LED display 3−36 . . . . . . .
3.5.3 Fault treatment and parametrizing 3−38 . . . . . . . . . .
4. Analogue input module CPX−4AE−T 4−1 . . . . . . . . . . . . . . . . . . . . . . .
. . . . . . . . . . . . . . . . . . . . . . . . . . . . . . . . . . . . .
. . . . . . . . . . . . . . . .
. . . . . . . . .
4.1 Function of analogue input module CPX−4AE−T 4−4 . . . . . . . . . . . . . . . . . . . . . . .
4.2 Fitting 4−4 . . . . . . . . . . . .
4.3 Installation 4−5 . . . . .
4.3.1 DIL switch settings 4−6 .
4.3.2 Pin assignment 4−8 . . . . . . . . . . .
. . . . . . . . . . . . . . . . . . . . . . . . . . . . . . . . . . . . . . . . . . . .
. . . . . . . . . . . . . . . . . . . . . . . . . . . . . . . . . . . . . . . . . . . . . . .
. . . . . . . . . . . . . . . . . . . . . . . . . . . . . . . . . . . . .
. . . . . . . . . . . . . . . . . . . . . . . . . . . . . .
4.3.3 Connecting temperature sensors to the analogue inputs 4−11 . . . . . . . .
IV
Festo P.BE−CPX−AX−E N en 0503b

Contents and general instructions
4.4 Instructions on commissioning 4−14 . . . . . . . . . . . . . . . . . . . . . . . . . . . . . . . . . . . .
4.4.1 Processing the input signals of temperature sensors 4−14 . . . . .
. . . . . .
4.4.2 General information on parametrizing 4−17 . . . . . . . . . . . . . . . . . . . . . . .
4.4.3 Parameters of the analogue input module type CPX−4AE−T 4−18 . . . . . .
4.4.4 Monitoring wire fracture/short
circuit 4−26 . . . . . . . . . . . . . . . . . . . . . . .
4.4.5 Limit value monitoring by parametrizing 4−26 . . . . . . . . . . . . . . . . . . . . .
4.4.6 Measured
4.5 Diagnosis 4−28 . . . . . . . . . . . . . . . . . . . . . . . . . . . .
value smoothing by parametrizing 4−27 . . . . . . . . . . . . . . . . .
. . . . . . . . . . . . . . . . . . . . . . . . .
4.5.1 Error messages of the analogue input modules 4−29 . . . . . . . . . . . . . . .
4.5.2 LED display 4−31 . .
4.5.3 Error treatment and parametrizing 4−33 . . . .
. . . . . . . . . . . . . . . . . . . . . . . . . . . . . . . . . . . . . . . . . .
. . . . . . . . . . . . . . . . . . . . . .
5. Analogue output module CPX−2AA−U−I 5−1 . . . . . . . . . . . . . . . . . .
. . . . . . . . . . .
5.1 Function of the analogue output modules 5−4 . . . . . . . . . . . . . . . . . . . . . . . . . . .
5.2 Fitting 5−4 . . . . . .
. . . . . . . . . . . . . . . . . . . . . . . . . . . . . . . . . . . . . . . . . . . . . . . . . .
5.3 Installation 5−5 . . . . . . . . . . . . . . . . . . . . . . . . . . . . . . . . . . . . . . . . . . . . . . . . . . . .
5.3.1 DIL switch settings 5−6 . . . . . . . . . . . . . . . . . . . . . . . . . . . . . . . . . . . . . .
5.3.2 Pin assignment 5−8 . . . . .
5.3.3 Connecting the analogue outputs 5−11 . . . . . . . . . . .
5.4 Instructions on commissioning 5−12 . . . . . . . . . . . . . . . . . . . . . . . . . . . . . . . .
. . . . . . . . . . . . . . . . . . . . . . . . . . . . . . . . . . . .
. . . . . . . . . . . . . . .
. . . .
5.4.1 Processing analogue output signals 5−12 . . . . . . . . . . . . . . . . . . . . . . . .
5.4.2 General information on parametrizing 5−15 . . . . . . . . . . . . . . .
. . . . . . . .
5.4.3 Parameter with analogue output module type CPX−2AA−U−I 5−17 . . . . .
5.4.4 Module parameter Output analogue−value data format" 5−27 . . . . . . .
5.4.5 Channel−specific module parameter Limits 5−29 . . . . . . . . . . . .
. . . . . .
5.4.6 Channel−specific module parameters Monitor wire fracture 5−31 . . . .
5.5 Diagnosis 5−32 . . . . . . . . . . . . . . . . . . . . . . . . . . . . . . . . .
. . . . . . . . . . . . . . . . . . . .
5.5.1 Fault messages of the anaolgue output modules 5−33 . . . . . . . . . . . . . .
5.5.2 LED display 5−37 . . . . . . .
5.5.3 Fault treatment and parametrizing 5−39 . . . . . . . . . .
. . . . . . . . . . . . . . . . . . . . . . . . . . . . . . . . . . . . .
. . . . . . . . . . . . . . . .
Festo P.BE−CPX−AX−E N en 0503b
V

Contents and general instructions
A. Technical appendix A−1 . . . . . . . . . . . . . . . . . . . . . . . . . . . . . . . . . . . . . . . . . . . . .
A.1 Technical specifications of analogue input module CPX−2AE−U−I A−3 . . . . . . . . .
A.2 Technical specifications of analogue input module CPX−4AE−I A−5 . . . . . . . . . . .
A.3 Technical specifications of analogue input module CPX−4AE−T
(temperature module) A−7 . . . . . . .
. . . . . . . . . . . . . . . . . . . . . . . . . . . . . . . . . . . .
A.4 Technical specifications of analogue output module CPX−2AA−U−I A−9 . . . . . . .
A.5 Technical specifications of the sub−bases A−11 . . . . . . . . . . . . . . . . . . . . . . . . . . . .
A.6 Internal structure of the CPX modules A−12 . . . . . . . . . . .
A.7 Connection examples A−14 . . . . . . . . . . . . . . . . . . . . . . . . . . . . .
. . . . . . . . . . . . . . . . . . .
. . . . . . . . . . . . . . .
A.7.1 Analogue input and output modules A−14 . . . . . . . . . . . . . . . . . . . . . . . .
A.7.2 Connecting temperature sensors to the CPX−4AE−T A−17 .
A.8 Accessories A−19 . . . . . . . . . . . . . . . . . . . . . . . . . . . . . . . . . . . . . .
. . . . . . . . . . .
. . . . . . . . . . . . . .
.
B. Index B−1 . . . . . . . . . . . . . . . . . . . . . . . . . . . . . . . . . .
. . . . . . . . . . . . . . . . . . . . . . .
VI
Festo P.BE−CPX−AX−E N en 0503b

Contents and general instructions
Designated use
The CPX analogue I/O modules described in this manual have
been designed exclusively for use in conjunction with CPX
terminals from Festo. The analogue I/O modules are only to
be used as follows:
in accordance with designated use
in faultless technical condition
without any modifications by the user.
If additional commercially−available components such as
sensors
pressures, temperatures, electrical data, torques, etc. must
not be exceeded.
Please observe the standards specified in the relevant
chapters and comply with technical regulations, as well as
with national and local regulations.
and actuators are connected, the specified limits for
Festo P.BE−CPX−AX−E N en 0503b
Warning
· In order to provide the electric power supply, use only
PELV circuits as per IEC/DIN EN 60204−1 (Protective
Extra−Low Voltage, PELV).
Take into account also the general requirements for
PELV circuits as per IEC/DIN EN 60204−1.
· Use only power packs which guarantee reliable electri
cal isolation of the operating voltage as per IEC/DIN
EN60204−1.
By the use of PELV power units, protection against electric
shock (protection against direct and indirect contact) is guar
anteed in accordance with IEC/DIN EN 60204−1 (electrical
equipment of machines, general requirements).
VII

Contents and general instructions
Target group
This manual is intended exclusively for technicians trained in
control and automation technology, who have experience in
installing, commissioning, programming and diagnosing
programmable logic controllers (PLC) and field bus systems.
Service
Please consult your local Festo repair service if you have any
technical problems.
VIII
Festo P.BE−CPX−AX−E N en 0503b

Contents and general instructions
Important user instructions
Danger categories
This manual contains instructions on the possible dangers
which may occur if the product is not used correctly. These
instructions are marked (Warning, Caution, etc.), printed on a
shaded background and marked additionally with a picto
gram. A distinction is made between the following danger
warnings:
Warning
This means that failure to observe this instruction may
result in serious personal injury or damage to property.
Caution
This means that failure to observe this instruction may
result in personal injury or damage to property.
Festo P.BE−CPX−AX−E N en 0503b
Please note
This means that failure to observe this instruction may
result in damage to property.
The following pictogram marks passages in the text which
describe activities with electrostatically sensitive compo
nents.
Electrostatically sensitive components may be damaged if
they are not handled correctly.
IX

Contents and general instructions
Marking special information
The following pictograms mark passages in the text contain
ing special information.
Pictograms
Information:
Recommendations, tips and references to other sources of
information.
Accessories:
Information on necessary or sensible accessories for the
Festo product.
Environment:
Information on environment−friendly use of Festo products.
Text markings
· The bullet indicates activities which may be carried out in
any order.
1. Figures denote activities which must be carried out in the
numerical order specified.
Hyphens indicate general activities.
X
Festo P.BE−CPX−AX−E N en 0503b

Contents and general instructions
CPX analogue I/O modules
Analogue I/O modules for CPX terminals are available as
input or output modules. This manual contains information
on the method of operation, the fitting and installation of the
following modules:
Analogue I/O modules
Type
Description Sub−bases and
designation
CPX−2AE−U−I Input module with
CPX−4AE−I Input module with
CPX−4AE−T Input module with up to
CPX−2AA−U−I Output module with
2analogue inputs,
signal range can be
selected per input
channel:
0 ... 10 V
0 ... 20 mA
4 ... 20 mA
4analogue inputs,
signal range can be
selected per input
channel:
0 ... 20 mA
4 ... 20 mA
4 analogue inputs for
registering the
temperature. Number
of inputs can be
selected with DIL
switch (2 or 4).
2analogue outputs,
signal range can be
selected per output
channel:
0 ... 10 V
0 ... 20 mA
4 ... 20 mA
manifold sub−bases
The I/O modules each
consist of the electronic
module as well as a
sub−base and a manifold
sub−base.
Sub−bases:
(Note the possible combina
tions in section 1.2.2).
CPX−AB−4−M12x2−5POL
CPX−AB−4−M12x2−5POL−R
CPX−AB−8−KL−4POL
CPX−AB−1−SUB−BU−25POL
CPX−AB−4−HARX2−4POL
Manifold sub−bases:
CPX−GE−EV
CPX−GE−EV−...
Tab.0/1: Overview of analogue I/O modules
Festo P.BE−CPX−AX−E N en 0503b
XI

Contents and general instructions
Diagnosis via the field bus
Depending on the parametrizing, CPX I/O modules register
the specific faults via the field bus.
These can be evaluated via the:
status bits (system status)
I/O diagnostic interface (system diagnosis)
module diagnosis
fault numbers.
Further information on diagnosis can be found in the CPX
system manual or in the manual for the field bus node.
XII
Festo P.BE−CPX−AX−E N en 0503b

Contents and general instructions
Structure of a CPX terminal
CPX terminals consist of electric function modules, individual
modules and components. The diagram below shows an
example:
12 3 4
1 Field bus node
2 I/O modules
3 Pneumatic interface
4 Pneumatic modules
(example CPA type 12)
Fig.0/1: Example of CPX terminal
Festo P.BE−CPX−AX−E N en 0503b
5
6
7
8
5 Interlinking block with additional power
supply
6 Manifold sub−base without supply
7 Interlinking block with system supply
8 End plate
XIII

Contents and general instructions
Version Title Electronics
Electronics
Manual
Software
package
Pneumatics
Manual
System manual"
type P.BE−CPX−SYS−...
CPX field bus node"
type P.BE−CPX−FB...
CPX I/O modules"
type P.BE−CPX−EA−...
CPX analogue I/O modules"
type P.BE−CPX−AX−...
CPX−CP interface"
type P.BE−CPX−CP−...
Handheld"
type P.BE−CPX−MMI−1−...
CPX−FEC"
Type P.BE−CPX−FEC−...
FST" Programming in Statement List and Ladder
Valve terminals with MPA
pneumatics"
type P.BE−MPA−...
Valve terminals with CPA
pneumatics"
type P.BE−CPA−...
Valve terminals with
Midi/Maxi pneumatics"
type P.BE−MIDI/MAXI−03−...
Overview of structure, components and
method of operation of CPX terminals;
installation and commissioning instructions
as well as basic principles of parametrizing
Instructions on the assembly, installation,
commissioning and diagnosis of the relevant
field bus nodes
Notes on connection types and instructions
on fitting, installing and commissioning input
and output modules of type CPX−... , the MPA
pneumatic modules, as well as MPA, CPA and
Midi/Maxi pneumatic interfaces
Notes on connection types and instructions
on fitting, installing and commissioning CPX
analogue I/O modules
Instructions on commissioning and
diagnosing CPX terminals with the CP
interface type CPX−CP−4−FB
Instructions on commissioning and
diagnosing CPX terminals with the handheld
type CPX−MMI−1
Instructions on fitting, installing,
commissioning and diagnosing for the CPX
Front End Controller.
Diagram for the FEC
Instructions on fitting, installing and
commissioning MPA pneumatics (type 32)
Instructions on fitting, installing and
commissioning CPA pneumatics (type 12)
Instructions on fitting, installing and commis
sioning Midi/Maxi pneumatics (type 03)
Tab.0/2: Manuals on the CPX terminal
XIV
Festo P.BE−CPX−AX−E N en 0503b

Contents and general instructions
The following product−specific terms and abbreviations are
used in this manual:
Term/abbreviation
AI Analogue input (input channel, 16 bits)
Analogue I/Os Analogue inputs and outputs
Analogue input module CPX input module with analogue inputs
Analogue output module CPX output module with analogue outputs
AO Analogue output (output channel, 16 bits)
CPX modules Common term for the various modules which can be incorporated in a
CPX terminal Modular electric terminal type 50
Data The CPX terminal provides settings and diagnostic information in the
DIL switch Dual−in−line switches consist of several switch elements with which set
I/O diagnostic interface The I/O diagnostic interface is a bus−independent diagnostic interface at
I/O modules Common term for the CPX modules which provide inputs and outputs
IU / II Analogue voltage / current input
OU / OI Analogue voltage / current output
Meaning
CPX terminal
form of data. Data can be read but not modified
tings can be made
I/O level, permitting access to internal data of the CPX terminal
(CPX input modules and CPX output modules)
Sub−base Replaceable upper part of housing om modules with connection design
Tab.0/3: Product−specific abbreviations part 1
Festo P.BE−CPX−AX−E N en 0503b
XV

Contents and general instructions
Term/abbreviation Meaning
Field bus node Provides the connection to specific field buses. Transmits control signals
Manifold sub−base Lower part of the housing of a module or block for linking the module
Parameter With the aid of parametrizing, the reaction of the CPX terminal or the
PLC/IPC Programmable logic controller/industrial PC
Status bits Internal inputs which supply coded common diagnostic messages
to the connected modules and monitors their ability to function
electrically with the terminal
reaction of the individual modules and I/O channels can be adapted to
each particular application. Parameters can be read and modified
Tab.0/4: Product−specific abbreviations part 2
XVI
Festo P.BE−CPX−AX−E N en 0503b

Overview and connection technology I/O modules
Chapter 1
1−1Festo P.BE−CPX−AX−E N en 0503b

1. Overview and connection technology I/O modules
Contents
1. Overview and connection technology I/O modules 1−1 . . . . . . . . . . . . . . . . . . .
1.1 Components of an I/O module 1−4 . . . . . . . . . . . .
1.2 Connections 1−5 . . . . . . . . . . . . . . . . . . . . . . . . . .
1.2.1 Display and connecting elements 1−7 . . . . . . . . . . . . . . . . . . . . .
1.2.2 Combinations of I/O modules and sub−bases 1−8 . . . . . . . . . . . . . . . . .
1.2.3 Connecting the cables and plugs to the sub−bases 1−9 . . . . . . . . . . . . .
1.3 Assembly 1−19
1.3.1 Fitting the sub−bases 1−20 . . . . . . . . . . . . . . . . . . . . . . . . . . . . . . . . . . . . .
1.3.2 Fitting the screening/shield plates 1−23 . . . .
. . . . . . . . . . . . . . . . . . . . . . . .
. . . . . . . . . . . . . . . . . . . . . . . . .
. . . . . .
. . . . . . . . . . . . . . . . . . . . . .
. . . . . . . . . . . . . . . . . . . . . . . . . . . . . . . . . . . . . . . . . . . . . . . . . . . . .
1−2
Festo P.BE−CPX−AX−E N en 0503b

1. Overview and connection technology I/O modules
Contents of this chapter This chapter provides an overview of the structure and com
ponents of CPX I/O modules.
The concept of variable connection technology with modular
sub−bases is also described.
You will also find a description of how to fit and remove elec
tronic modules and sub−bases on the manifold sub−bases of
terminal.
the CPX
Further information Special information on the analogue input modules can be
found in chapters 2 ... 4. Special information on the analogue
output modules can be found in chapter 5.
Information on fitting the complete CPX terminal, connecting
the power supply as well as general instructions on configur
ation and parametrizing can be
found in the CPX system
manual.
Information on the address assignment as well as on com
missioning can be found in the appropriate field bus node
manual or function module manual.
Festo P.BE−CPX−AX−EN en 0503b
1−3

1. Overview and connection technology I/O modules
1.1 Components of an I/O module
All I/O modules consist of three parts:
The sub−base provides the electrical connections in the
form of different sockets or terminal strips.
The electronic module contains the printed circuit board
with the electronics and the LED display of the I/O mod
ule. The electronic module is fitted into the sub−base and
is connected to
means of electric plug connectors.
The manifold sub−base as the lower part of the housing
provides the mechanical and electrical link between the
module and the CPX terminal.
this and to the manifold sub−base by
1 Sub−base with
specific
connections
2 Electronic
module
1
3 Manifold
sub−base
Fig.1/1: Components of an I/O module
1−4
2
3
Festo P.BE−CPX−AX−EN en 0503b

1. Overview and connection technology I/O modules
1.2 Connections
Individual connection requirements can be fulfilled with dif
ferent sub−bases. These sub−bases provide the required
sockets or terminal strips for connecting the sensors and
actuators, irrespective of the I/O module used.
Sub−base
Type Description
CPX−AB−4−M12x2−5POL 4 M12 sockets, 5−pin
CPX−AB−4−M12x2−5POL−R 4 M12 sockets with metal thread, 5−pin
CPX−AB−8−KL−4POL 2 terminal strips, 16−pin (4 x 4−pin)
Tab.1/1: Connection designs part 1
Protection class IP65
One functional ear th connection per socket
Screening/shielding possibility via
screening/shield plate (see Accessories",
appendixA.8)
Protection class IP65/IP67
One functional ear th connection per socket
Screening/shielding possibility via metal
thread
Enables M12 connectors and SPEEDCON
plug connectors to be used.
Protection class IP20
Protection class IP65/IP67 with cover
AK−8KL and screw connector set VG−K−M9
All cores can be laid individually in
spring−clip terminals
Connections are in groups of 4, one
functional earth connection per group
Festo P.BE−CPX−AX−EN en 0503b
1−5

1. Overview and connection technology I/O modules
Sub−base Type Description
CPX−AB−1−SUB−BU−25POL 1 Sub−D socket, 25−pin
CPX−AB−4−HARX2−4POL
(in the case of CPX ana
logue modules can only be
used for module 4AE−T)
Tab.1/2: Connection designs part 2
Protection class IP20
With plug type SD−SUB−D−ST25: IP65
(see Accessories", appendix A.8)
4 HARAX connections, 4−pin
Protection class IP65/IP67 with the
designated plugs
Insulation−piercing connection
1−6
Festo P.BE−CPX−AX−EN en 0503b

1. Overview and connection technology I/O modules
1.2.1 Display and connecting elements
On all input and output modules the status LEDs can be seen
through the transparent cover of the sub−base.
The analogue I/O modules have the following display and
connecting elements:
1 Type plate of
sub−base
2 Identification of
module (e.g. 2AO =
2analogue outputs
type CPX−2AA−U−I)
6
5
3 Electrical connections
(example)
4 Inscription fields for
addresses
5 Error LED (red)
Module fault
6 Channel−related error
LEDs (only CPX−4AE−T)
4
Fig.1/2: Display and connecting elements
Use identity labels type IBS 6x10 for marking the addresses.
1
2
AO
2
3
Festo P.BE−CPX−AX−EN en 0503b
1−7

1. Overview and connection technology I/O modules
1.2.2 Combinations of I/O modules and sub−bases
The permitted combinations of analogue I/O modules and
sub−bases are shown in the following table.
Sub−base type
CPX−AB−4−M12x2−5POL
(4 M12 sockets, 5−pin)
CPX−AB−4−M12x2−5POL−R
(4 M12 sockets with metal
thread, 5−pin)
CPX−AB−8−M8−3POL
(8 M8 sockets, 3−pin)
CPX−AB−8−M8−4POL
(8 M8 sockets, 4−pin)
CPX−AB−8−KL−4POL
(2 terminal strips, 16−pin)
CPX−AB−1−SUB−BU−25POL
(1 Sub−D socket, 25−pin)
CPX−AB−4−HARX2−4POL
(4 M12 sockets in
insulation−piercing
technology, 4−pin)
CPX−AB−4−M12−8POL
(4 M12 sockets, 8−pin)
Input module Output
module
CPX−2AE−U−I
(2 analogue
inputs)
CPX−4AE−I
(4 analogue
inputs)
CPX−4AE−T
(temperature
registering)
CPX−2AA−U−I
(2 analogue
outputs)
· · · ·
· · · ·
· · · ·
· · ·
·
Can be combined
·
Cannot be combined
Tab.1/3: Combinations of I/O modules and sub−bases
1−8
Festo P.BE−CPX−AX−EN en 0503b

1. Overview and connection technology I/O modules
1.2.3 Connecting the cables and plugs to the sub−bases
Sensors and actuators must be connected to the CPX I/O
modules only at the sub−bases. In this way, e.g. when an elec
tronic module is replaced, the plugs and cables remain fitted
in the sub−base.
Warning
Sudden unexpected movement of the connected actuators
and uncontrolled movements of loose tubing can cause
injury to human beings or damage to property.
Before carrying out installation and maintenance work,
switch off the following:
the compressed air supply
the operating and load voltage supplies.
Festo P.BE−CPX−AX−EN en 0503b
The protection class of the I/O modules depends
on the
sub−base, as well as on the plugs and protective caps used.
Instructions can be found on the following pages and in
appendix A.5.
Use plugs and cables from the Festo range for connecting
sensors and actuators (see appendix A.8).
If you wish to use your own cables, use only screened/
shielded cables
for transmitting analogue signals.
Caution
Long signal cables reduce the immunity to interference.
Do not exceed the maximum permitted I/O signal cable
length of 30 m.
1−9

1. Overview and connection technology I/O modules
Screening/shielding
Note
For transmitting analogue signals:
· Connect the cable screening/shield to FE.
Use only screened/shielded cables and plugs with
metallic housing.
· Observe the instructions on the following pages for
connecting the cable screening/shield depending on the
connections.
In this way, you will avoid interference caused by electromag
netic influences.
The following variants are permitted for connecting the cable
screening/shield:
screening/shield connection on the FE pin of the I/O plug
without connection to further potentials
1−10
screening/shield connection
to an external FE connection
without connection to the FE pin of the I/O plug.
Recommendation:
· Connect the cable screening/shield to both sides of the
FE with sufficient potential equalization.
· If the cable screening/shield is connected only to one
side of the FE, it should be connected to the signal
receiver side":
analogue inputs (CPX−2AE−U−I):
Connect the cable screening/shield on the CPX side.
analogue outputs (CPX−2AA−U−I):
Connect the cable screening/shield on the actuator
side.
Festo P.BE−CPX−AX−EN en 0503b

1. Overview and connection technology I/O modules
Sub−base CPX−AB−4−M12x2−5POL(−R)
Note
In order that the completely fitted modules with sub−base
CPX−AB−4−M12x2−5POL(−R) comply with protection class
IP65:
· use plugs and cables specified from the Festo range for
connecting sensors and actuators (see appendix A.8).
· Tighten the union nuts of the plugs at first by hand.
· Seal unused sockets with protective caps type ISK−M12
(Accessories).
The sub−base with metal thread (CPX−AB−4−M12x2−5POL−R)
enables fast locking systems e. g. SPEEDCON from Phoenix
Contact to be used.
· When using fast locking systems follow the manufac
turer’s instructions in order to comply with protection
class IP65/IP67.
Festo P.BE−CPX−AX−EN en 0503b
Screening/shield
On plugs without metal housing:
· Connect the cable screening/shield to pin 5
(functional earth FE).
On plugs with metal housing:
· Use the sub−base with metal thread
(type CPX−AB−4−M12x2−5POL−R). The metal thread of
this sub−base is connected internally to pin 5 (FE).
or
· Connect the cable screening/shield via the plug
housing and the screening plate (see below) to FE.
1−11

1. Overview and connection technology I/O modules
Screening plate type CPX−AB−S−4−12
Sub−base CPX−AB−4−M12x2−5POL (without metal thread) can
be combined with a screening/shield plate. Depending on
what you have ordered, this may already be fitted on the sub−
base.
Instructions on subsequent fitting of the screening/shield
plate can be found in section 1.3.2.
The electromagnetic compatibility can
be improved with
screening/shield plates, e.g. in environments heavily sub
jected to interference or for analogue signals. For this pur
pose the screening/shield plates must be earthed at the flat
contact intended for this purpose as per DIN 46244 B2,8−1
(2.8 x 1 mm).
· Connect the earth cable of the screening/shield plate
with low impedance to the functional earth connection
(FE) as per Fig.1/3.
Screening/shield plates lying next to each other are
connected together by spring clips and must not be
connected individually to FE.
If the intended plugs are used (see Accessories", appendix
A.8), the plug housing
will be connected to functional earth
via the screening/shield plate by means of the spring con
tacts.
· Before fitting the plugs screw the spring contacts as far as
possible onto the thread of the plug.
1−12
Festo P.BE−CPX−AX−EN en 0503b

1. Overview and connection technology I/O modules
1 Plugs
2 Spring contact
3 Screening/
shield plate
4 Functional earth
connection (FE)
with blade
connector as per
DIN46245 B2,8−1
Fig.1/3: Connecting the screening/shield plate
Note
In order to comply with protection class IP65/IP67:
· Do not use the spring contacts if you have sealed
unused sockets with protective caps.
1
2
3
4
Festo P.BE−CPX−AX−EN en 0503b
1−13

1. Overview and connection technology I/O modules
Sub−base CPX−AB−8−KL−4POL
The completely fitted sub−base CPX−AB−8−KL−4POL complies
with protection class IP20.
Screening/shield
· Use a cable as short as possible to connect the cable
screening/shield to the FE terminal of the sub−base. Use
suitable core end sleeves for the connection.
Specification of the cable terminals
cable cross−sectional area: 0.08 ... 1.5 mm
max. current: 1.5 A
insulation removed: 5 ... 6 mm
2
1−14
Permitted copper conductors
single wire, multi−wire, fine wire, also with zinc−plated
individual cores
fine wire strands compressed
fine wire with core end sleeves
(sealed against gas, crimped on)
*)
fine wire with pin cable socket
(sealed against gas, crimped on)
*)
If necessary, use next smaller cross−sectional area
*)
Festo P.BE−CPX−AX−EN en 0503b

1. Overview and connection technology I/O modules
Fitting and removing the cables
Note
· To ensure reliable contact, connect only one conductor
per spring terminal.
· Insert only cables into the terminal opening. The ter
minal will be damaged if a screwdriver is inserted into
the opening.
When connecting and disconnecting the cables:
1. Press the screwdriver with a light rotary movement in the
direction of the centre part into the unlocking opening
(see Fig.1/4).
The cable terminal will then be
unlocked.
1 Screwdriver, blade
2.5 x 0.4 mm
1
2 Unlocking opening
(inside)
3
3 Cable
4 Terminal opening for
inserting the conduc
tors (outside)
5 Terminal strips
45
Fig.1/4: Connecting the terminal strips
Festo P.BE−CPX−AX−EN en 0503b
1
2
3
4
5
2
1−15

1. Overview and connection technology I/O modules
2. When the terminal is unlocked you can insert or pull out
the ends of the cable through the opening.
3. Remove the screwdriver from the unlocking opening. The
cable will then be securely locked.
You will then comply with protection class IP65/IP67
In order that sub−base CPX−AB−8−KL−4POL
protection class IP65/IP67, use cover type AK−8KL and the
screw connector set type VG−K−M9 from Festo. Note the rel
evant fitting instructions.
1 Cover AK−8KL
2 Screw connector
set VG−K−M9
1
complies with
2
Fig.1/5: Cover and screw connector set for sub−base CPX−AB−8−KL−4POL (for complying
with protection class IP65/IP67)
Sub−base CPX−AB−1−SUB−BU−25POL
The completely fitted sub−base CPX−AB−1−SUB−BU−25POL
complies with protection class IP20.
In order that sub−base CPX−AB−1−SUB−BU−25POL complies
with protection class IP65/IP67, use plug type
SD−SUB−D−ST25 from Festo.
1−16
Festo P.BE−CPX−AX−EN en 0503b

1. Overview and connection technology I/O modules
When fitting the plug onto the sub−base, observe the
maximum tightening torque of 0.5 Nm.
Screening/shield
· Use a cable as short as possible to connect the cable
screening/shield to the FE pin of the Festo sub−D plug.
If other screened plugs are used, the metal flange
(housing) of the sub−D plug can also be used for
connecting the cable screening/shield.
Festo P.BE−CPX−AX−EN en 0503b
1−17

1. Overview and connection technology I/O modules
Sub−base CPX−AB−4−HARX2−4POL
Note
In order that completely fitted modules with sub−base
CPX−AB−4−HARX2−4POL comply with protection class
IP65/IP67:
· Use plugs type SEA−GS−HAR−4POL from the Festo range
(consisting of union nut, strain relief and splicing ring)
for connecting sensors and actuators.
· Tighten the union nuts of the plugs at first by hand.
· Seal the unused connecting sockets with protective
caps from Harting (see Accessories", appendixA.8).
Specifications of the cables for the sub−base
CPX−AB−4−HARX2−4POL
cable cross−sectional area: 0.25 ... 0.5 mm
2
1−18
strand cross−section: up to 0.1 mm
insulation material: PVC/PUR/PE
insulation thickness: max. 1.6 mm
core diameter: 1.2 ... 1.6 mm
cable outer diameter: 4.0 ... 5.1 mm
Festo P.BE−CPX−AX−EN en 0503b

1. Overview and connection technology I/O modules
Assembly
1 Cut the cable to
length and remove
the coating. Push the
union nut and seal
onto the end of the
cable.
2 Insert the ends of the
core into the ap
propriate slots of the
splicing ring.
4
3 Place the seal and
the splicing ring
together and cut off
the projecting core
ends flush with the
splicing ring.
1
3
2
1
2
3
4 Insert the pre−fitted
splicing seal element
into the contact sup
port in the sub−base.
Screw in the union
nut as far as possible.
Fig.1/6: Connecting the cables to sub−base CPX−AB
Dismantling
· Loosen the screw connector and remove the cores by
pulling them out of the contacts.
The cores can be connected up to 10 times if the contact
ends are cut away each time (if the same core diameter is
used). Cut off the cable ends used and repeat steps 2 to 4.
Festo P.BE−CPX−AX−EN en 0503b
4
1−19

1. Overview and connection technology I/O modules
1.3 Assembly
Warning
Sudden unexpected movement of the connected actuators
and uncontrolled movements of loose tubing can cause
injury to human beings or damage to property.
Before carrying out installation and maintenance work,
switch off the following:
the compressed air supply
the operating and load voltage supplies.
Caution
Modules may be damaged if they are not handled
correctly.
· Do not therefore touch the contacts of the components.
· Observe the regulations for handling electrostatically
sensitive components.
· Discharge yourself electrostatically before fitting or re
moving components in order to protect the components
against discharges of static electricity.
1−20
Before the CPX terminal can be extended or converted, it
must first be unscrewed and dismantled. Instructions on this
can be found in the CPX system manual.
The CPX terminal does not need to
be dismantled when sub−
bases or electronic modules are fitted or removed. This also
applies to the plugs and cables on the sub−base.
Festo P.BE−CPX−AX−EN en 0503b

1. Overview and connection technology I/O modules
1.3.1 Fitting the sub−bases
Note
Handle all modules and components of the CPX terminal
with great care. Please note especially the following:
· Screws must be fitted accurately (otherwise threads will
be damaged).
Screws must be fastened at first only by hand. Place the
screws so that the self−cutting threads are used.
· The specified torques must be observed.
· Screw connections must be fitted free of offset and
mechanical tension.
· Check the seals for damage (IP65).
· Connecting surfaces must be clean (sealing effect, avoid
leakage and contact faults).
The screw connection between the sub−base and the mani
fold is designed for at least 10 fitting/removal cycles under
observance of the instructions.
Observe also the installation instructions supplied with
modules and components ordered at a later stage.
Festo P.BE−CPX−AX−EN en 0503b
CPX terminals are supplied
from the factory completely fitted.
It may be necessary to fit or remove the sub−bases for the
following reasons:
for replacing the connections
to simplify fitting the sensor plugs or cables.
It may be necessary to fit or remove the electronic modules
for the following reasons:
for modifying the function of the I/O module
(e. g. CPX−2AE−U−I instead of CPX−2AA−U−I).
for replacing defective electronic modules.
1−21

1. Overview and connection technology I/O modules
Dismantling Dismantle the sub−base as follows (see Fig.1/7):
1. Loosen the 4 screws in the relevant sub−base with a Torx
screwdriver size T10.
2. Pull the sub−base carefully and without tilting away from
the electrical plug connection of the electronic module.
Only in cases where the electronic module is to be removed:
· Pull the electronic module carefully and without tilting
away from the contact rails of the manifold sub−base.
1 Sub−base
2 Screws
1
3 Electrical plug
connector
4 Electronic
module
5 Contact rails
3
6 Manifold
sub−base
Fig.1/7: Fitting/removing the I/O module
2
4
5
6
1−22
Festo P.BE−CPX−AX−EN en 0503b

1. Overview and connection technology I/O modules
Fitting Fit the modules as follows (see Fig.1/7):
Note
· Please observe the instructions on combining I/O mod
ules and sub−bases in section 1.2.2.
· Please observe the instructions on combining and
arranging modules on the CPX terminal in the CPX
system manual.
Only in cases where the electronic module has been
removed:
· Place the electronic module in the manifold sub−base.
Make sure that the grooves with the contact terminals on
the bottom of the electronic module lie above the contact
rails. Then push the electronic module carefully and with
out tilting as far as possible into the manifold sub−base.
Festo P.BE−CPX−AX−EN en 0503b
Fitting the sub−base:
1. Align the sub−base over
the manifold sub−base with the
electronic module. Make sure that the plug connectors of
the sub−base lie exactly over the connectors of the elec
tronic module. Then push the sub−base carefully and
without tilting onto the manifold sub−base.
2. Tighten the screws at first only by hand. Place the screws
so that the self−cutting
threads can be used.
Tighten the screws with a Torx screwdriver size T10 with
torque 0.9 ... 1.1 Nm.
1−23

1. Overview and connection technology I/O modules
1.3.2 Fitting the screening/shield plates
A screening/shield plate type CPX−AB−S−4−12 can be fitted on
sub−base CPX−AB−4−M12x5−5POL. The sub−base must be
removed before the terminal is fitted or dismantled.
Fitting Fit the screening/shield plate as follows (see Fig.1/8):
1. Dismantle the sub−base (see section 1.3.1).
2. Snap the spring clips of the screening/shield plate from
above into the appropriate recesses on the dismantled
sub−base.
3. Fit the sub−base
Instructions on earthing the screening/shield plate can be
found in section 1.2.3.
Dismantling The screening/shield plate should be removed in the
opposite sequence to the fitting procedure.
1−24
Festo P.BE−CPX−AX−EN en 0503b

1. Overview and connection technology I/O modules
1 Spring contact
2 Screening/
shield plate
3 Spring clip
4 Sub−base type
CPX−AB−4−M12x2−
5POL
5 CPX Terminal
1
2
3
4
5
Fig.1/8: Fitting screening/shield plate type CPX−AB−S−4−12
Festo P.BE−CPX−AX−EN en 0503b
1−25

1. Overview and connection technology I/O modules
1−26
Festo P.BE−CPX−AX−EN en 0503b

Analogue input module CPX−2AE−U−I
Chapter 2
2−1Festo P.BE−CPX−AX−E N en 0503b

2. Analogue input module CPX−2AE−U−I
Contents
2. Analogue input module CPX−2AE−U−I 2−1 . . . . . . . . . . . . . . . . . . . . . . . . . . . . . .
2.1 Function of the analogue input modules 2−4 . . . .
2.2 Fitting 2−4 . . . . . . . . . . . . . . . . . . . . . . . . .
2.3 Installation 2−5 . . . . . . . . . . . . . . . . . . .
2.3.1 DIL switch settings 2−6 . . . . . . . . . . . . . .
2.3.2 Pin assignment 2−8 . . . . . . . . . . . . . . . . . . . . . . . . .
2.3.3 Connecting the analogue intputs 2−11 . . . . . . . . . . . . . . . . . . . . . . . . . . .
2.4 Instructions on commissioning 2−12
2.4.1 Processing analogue input signals 2−12 . . . . . . . . . . .
2.4.2 General information on parametrizing 2−16 . . . . . . . . . . . . . . . . . . . . . . .
2.4.3 Parameters of the analogue input module type CPX−2AE−U−I 2−18
2.4.4 Module parameter Input analogue−value data format" 2−26 . . . . . . . .
2.4.5 Channel−specific module parameters Limits 2−28 . . . . . . . . . . . . . . . . .
2.4.6 Channel−specific module parameters Filter measured value 2−31 . . .
2.4.7 Channel−specific module parameters Monitor of wire fracture 2−31 . .
2.5 Diagnosis 2−32 . . . . . . . . . . . . . . . . . . . . . . . . . . . . . . . . . . . . . .
2.5.1 Fault messages of the analogue input modules 2−33 . . . . . . . . . . . . . . .
2.5.2 LED display 2−35 . . . . . . . . . . . .
2.5.3 Fault treatment and parametrizing 2−37 . . . . . . . . . . . . . .
. . . . . . . . . . . . . . . . . . . . . . . . . . . . . . . . .
. . . . . . . . . . . . . . . . . . . . . . . . . . . . . . . . . . . .
. . . . . . . . . . . . . . . . . . . . . . . . . . . . . . . .
. . . . . . . . . . . . . . . . . . . . . . . .
. . . . . . . . . . . . . . . . . . . . . . . . . . . . . . .
. . . . . . . . . . . . . . . . . . . . . . . .
. . . . . . . . . . . . . . . .
. . . . . . . . . . . . . . .
. . . . .
.
. . . . . . . . . . . . . . .
. . . . . . . . . . . .
2−2
Festo P.BE−CPX−AX−E N en 0503b

2. Analogue input module CPX−2AE−U−I
Contents of this chapter This chapter describes the analogue input module CPX−2AE−U−I.
Analogue input modules provide analogue voltage inputs or
current inputs in a CPX terminal and can be adapted to spe
cific applications by means of different sub−bases.
Further information An overview of the modular structure of a CPX terminal, the
modular connections as
well as the display and connecting
elements can be found in chapter 1.
Information on mounting the complete CPX terminal, con
necting the power supply as well as general instructions on
configuration and parametrizing can be found in the CPX sys
tem manual.
Information on the address assignment as well as on com
missioning
can be found in the appropriate field bus node
manual or function module manual.
Festo P.BE−CPX−AX−EN en 0503b
2−3

2. Analogue input module CPX−2AE−U−I
2.1 Function of the analogue input modules
Analogue input modules provide analogue voltage inputs or
current inputs for connecting sensors and enable the regis
tering and processing of analogue current and voltage sig
nals. At present the following type is available:
2.2 Fitting
Type
CPX−2AE−U−I This type provides 2 analogue
Description
inputs (input channels) with
scalable value ranges. The input
signal range can be configured
channel by channel, either
electrically isolated or non−floating:
0...10 V
0...20 mA
4...20 mA
Sensor supply 24 V / 0.7 A per
module.
Tab.2/1: Overview of analogue input modules 2AE−U−I
See section 1.3.
2−4
Festo P.BE−CPX−AX−EN en 0503b

2. Analogue input module CPX−2AE−U−I
2.3 Installation
Warning
Undesired movement of the connected actuators and
uncontrolled movements of loose tubing can cause injury
to human beings or damage to property.
Before carrying out installation and maintenance work,
switch off the following:
the compressed air supply
the operating and load voltage supplies.
In the following sections you will find the pin
assignments of
the analogue input modules for the different sub−bases.
Instructions on connecting the cables and plugs to the sub−
bases can be found in section 1.2.3.
Note in particular the instructions on connecting the cable
screening to functional earth (FE).
Power supply
The 24 V sensor supply for the inputs as well as the power
supply for the electronics of the input modules is provided
via the operating voltage supply for the electronics/sensors
EL/SEN
).
(V
The sensors can also be supplied externally (electrical isola
tion, see section 2.3.3, Fig.2/2).
Festo P.BE−CPX−AX−EN en 0503b
2−5

2. Analogue input module CPX−2AE−U−I
2.3.1 DIL switch settings
2 DIL switches are available for configuring the analogue
input modules. These are located on the top of the electronic
module.
1 DIL switch 0:
Signal range of
analogue input 0
2
AI
2 DIL switch 1:
Signal range of
analogue input 1
ON
12
ON
12
Fig.2/1: DIL switches in the electronic module
(further information on 1 and 2 see following pages)
Proceed as follows:
1. Switch off the power supply.
2. Remove if necessary the fitted sub−base (see Fitting"
section 1.3).
3. Set the DIL switch elements in accordance with the
instructions on the following pages.
4. Refit if necessary the sub−base (see Fitting"
tightening torque 0.9 ... 1.1Nm).
1
2
section 1.3,
2−6
Festo P.BE−CPX−AX−EN en 0503b

2. Analogue input module CPX−2AE−U−I
Setting the input signal range
You can set the signal range of the relevant analogue input
with the 2−element DIL switches 0 and 1.
Signal
range
0 ... 10 V
0 ... 20 mA 0.1: OFF
4 ... 20 mA 0.1: ON
1)
DIL switch 0 for input channel 0
DIL switch 1 for input channel 1
2)
Default (factory setting)
Setting the DIL switches
Setting DIL switch 0 DIL switch 1
0.1: OFF
0.2: OFF
0.1: ON
0.2: OFF
0.2: ON
0.2: ON
1)
2)
2)
1.1: OFF
1.2: OFF
1.1: ON
1.2: OFF
1.1: OFF
1.2: ON
1.1: ON
1.2: ON
2)
2)
Tab.2/2: DIL switches of the analogue input module
2AE−U−I
Please note
The setting of the signal range with the DIL switches can
be modified by parametrizing (see section 2.4). Parame
trizing has precedence over the DIL switch setting.
Festo P.BE−CPX−AX−EN en 0503b
2−7

2. Analogue input module CPX−2AE−U−I
2.3.2 Pin assignment
Pin assignment of CPX−2AE−U−I with sub−base
CPX−AB−4−M12x2−5POL(−R)
Analogue input module type CPX−2AE−U−I with sub−base CPX−AB−4−M12x2−5POL(−R)
Sub−base Pin assignment X1, X2 (input I..0) Pin assignment X3, X4 (input I..1)
X1
X2
1)
Socket X1:
4
1: 24 V
5
2: IU0+
3: 0 V
1
4: IU0−
5: FE (screening)
1)
Socket X2:
2
1: 24 V
2: II0+
3: 0 V
3
4: II0−
5: FE (screening)
SEN
SEN
SEN
SEN
Socket X3:
4
1: 24 V
3
2)
1
5
2)
5
1
2
X3
X4
2
3
4
SEN
2: IU1+
3: 0 V
SEN
4: IU1−
5: FE (screening)
Socket X4:
1: 24 V
SEN
2: II1+
3: 0 V
SEN
4: II1−
5: FE (screening)
Voltage inputs
2
AI
3
2
Current inputs
1
5
4
IUx+ = Positive voltage input signal
IUx− = Negative voltage input signal
IIx+ = Positive current input signal
IIx− = Negative current input signal
FE = Functional earth
1)
Assignment depends on the DIL switch setting and on parametrizing (see section 2.3.1), a total of
2 input channels are available per module (I..0 and I..1, connection X1 or X2 as well as
connection X3 or X4).
2)
With CPX−AB−4−M12x2−5POL−R the metal thread is connected to FE
Tab.2/3: Pin assignment of analogue input module type CPX−2AE−U−I with sub−base
CPX−AB−4−M12x2−5POL(−R)
2)
2)
CPX−AB−4−M12x2−5POL−R The metal thread (...−R") of this sub−base is connected
internally with pin 5 (Functional earth FE).
2−8
Festo P.BE−CPX−AX−EN en 0503b

2. Analogue input module CPX−2AE−U−I
3
2
Pin assignment of CPX−2AE−U−I with sub−base
CPX−AB−8−KL−4POL
Analogue input module type CPX−2AE−U−I with sub−base CPX−AB−8−KL−4POL
Sub−base Pin assignment X1 ... X4
(input I..0)
Pin assignment X5 ... X8
(input I..1)
1)
.0
X1.0: 24 V
X1.1: 0 V
.1
X1.2: IU0−
.2
X1.3: FE (screening)
.3
.0
X2.0: n.c.
X2.1: n.c.
.1
X2.2: IU0+
.2
X2.3: FE (screening)
.3
1)
.0
X3.0: 24 V
.1
X3.1: 0 V
.2
X3.2: II0−
.3
X3.3: FE (screening)
.0
X4.0: n.c.
.1
X4.1: n.c.
.2
X4.2: II0+
.3
X4.3: FE (screening)
SEN
SEN
SEN
SEN
.0
.1
.2
.3
.0
.1
.2
.3
.0
.1
.2
.3
.0
.1
.2
.3
X5.0: 24 V
X5
X5.1: 0 V
X5.2: IU1−
X5.3: FE (screening)
X6.0: n.c.
X6.1: n.c.
X6
X6.2: IU1+
X6.3: FE (screening)
X7.0: 24 V
X7.1: 0 V
X7
X7.2: II1−
X7.3: FE (screening)
X8.0: n.c.
X8.1: n.c.
X8.2: II1+
X8
X8.3: FE (screening)
2
AI
X1
X2
X3
X4 X8
Voltage inputs
X1
.0
X5
.1
.2
.3
.0
.1
X6
.2
.3
.0
.1
.2
.
.3
.0
.1
.2
.
.3
X2
X7
Current inputs
X3
X4
IUx+ = Positive voltage input signal
IUx− = Negative voltage input signal
IIx+ = Positive current input signal
IIx− = Negative current input signal
n.c. = Not connected
1)
Assignment depends on the DIL switch setting and on parametrizing (see section 2.3.1), a total of
FE = Functional earth
2 input channels are available per module (I..0 and I..1, connection X1/X2 or X3/X4 as well as
connection X5/X6 or X7/X8).
SEN
SEN
SEN
SEN
Tab.2/4: Pin assignment of analogue input module type CPX−2AE−U−I with sub−base
CPX−AB−8−KL−4POL
Festo P.BE−CPX−AX−EN en 0503b
2−9

2. Analogue input module CPX−2AE−U−I
Pin assignment of CPX−2AE−U−I with sub−base
CPX−AB−1−SUB−BU−25POL
Analogue input module type CPX−2AE−U−I with sub−base CPX−AB−1−SUB−BU−25POL
Sub−base Pin assignment
1)
1: IU0−
13
2
AI
25
24
23
22
21
20
19
18
17
16
15
14
12
11
10
9
8
7
6
5
4
3
2
1
2: IU0+
3: II0−
4: II0+
5: n.c.
6: n.c.
7: n.c.
8: n.c.
9: 24 V
10: 24 V
11: 0 V
12: 0 V
13: FE
SEN
SEN
SEN
SEN
14: IU1−
15: IU1+
16: II1−
17: II1+
18: 24 V
SEN
19: n.c.
20: 24 V
SEN
21: n.c.
22: 0 V
SEN
23: 0 V
SEN
24: 0 V
SEN
25: FE
Housing: FE (screening)
Pin 1/2, 14/15 = Voltage inputs
Pin 3/4, 16/17 = Current inputs
IUx+ = Positive voltage input signal
IUx− = Negative voltage input signal
IIx+ = Positive current input signal
IIx− = Negative current input signal
n.c. = Not connected
FE = Functional earth
1)
Assignment depends on the DIL switch setting and on parametrizing (see section 2.3.1), a total of
2 input channels are available per module (I..0 and I..1)
Tab.2/5: Pin assignment of analogue input module type CPX−2AE−U−I with sub−base
CPX−AB−1−SUB−BU−25POL
2−10
Festo P.BE−CPX−AX−EN en 0503b

2. Analogue input module CPX−2AE−U−I
2.3.3 Connecting the analogue intputs
Only screened cables are usually permitted for the trans
mission of analogue signals (see section 1.2.3).
1 Without electrical
24VIUx+ IUx− FE0V
24VIIx+ I Ix− FE0V
isolation:
The sensors are
supplied via the
CPX module
2 With electrical
0...10
V
24VIUx+ IUx− FE0V
0...20
mA
24VIIx+ I Ix− FE0V
4...20
mA
24V
IIx+ I Ix− FE0V
isolation:
If an external sensor
supply is used
0...10
V
0/4...20
mA
External
sensor
supply
Fig.2/2: Examples of analogue input connections (screening connection on FE pin)
1
2
Festo P.BE−CPX−AX−EN en 0503b
Please note
Make sure that cables which are not used, but which are
connected to the sub−base, are short−circuited by voltage
inputs at the unused end of the cable.
Further connection examples can be found in appendix A.7.1.
2−11

2. Analogue input module CPX−2AE−U−I
2.4 Instructions on commissioning
2.4.1 Processing analogue input signals
The analogue values are transmitted from the CPX terminal to
the control system as input words (2 bytes, 16 bits). Each
analogue input module occupies 2 input words for this pro
cedure in the address range.
The position of the input words in the address range depends
on the field bus used (see
Parametrizing The data format as well as the limit values and, where appli
cable, also the scaling of the analogue input signals can be
adapted by parametrizing. Instructions on this can be found
in the sections 2.4.2 and 2.4.3.
manual for the field bus node).
2−12
The reaction with the default settings is described below.
Festo P.BE−CPX−AX−EN en 0503b

2. Analogue input module CPX−2AE−U−I
Reaction with the default settings
The module parameter Input analogue−value data format"
possesses the default setting VZ + 12 bits right−justified"
(compatible with valve terminal type 03). With this setting the
analogue values will be saved in the input word as follows:
Data format VZ + 12 bits right−justified" (compati
D15 D14 D13 D12 D11 D10 D9 D8 D7 D6 D5 D4 D3 D2 D1 D0
VZ 0 0 0 B11
Abbreviations used:
VZ: Sign (with data format VZ + 12 bits right−justified" always = 0, i.e. a positive value)
B0 ... B11: Input value
D0 ... D15: 16 bits input data field
MSB/LSB: Most significant bit / least significant bit
B10 B9 B8 B7 B6 B5 B4 B3 B2 B1 B0
MSB
ble with valve terminal type 03)
Tab.2/6: Data format VZ + 12 bits right−justified"
The channel−specific parameters Lower limit" and Upper
limit" possess the following default settings:
Lower limit = 0
Upper limit = 4095
These correspond to the scaling end values (data range) of
the default data format.
LSB
Festo P.BE−CPX−AX−EN en 0503b
2−13

2. Analogue input module CPX−2AE−U−I
The following diagram shows the processing of the analogue
input signals with the default data format VZ + 12 bits right−
justified". The example shows a sensor which converts the
range of the physical measuring variables from 0...6 bar lin
ear into the analogue signals 0...10 V, 0...20 mA or 4...20 mA.
1 Lower limit of rated
range
2 Measured value
(example)
3 Upper limit of rated
range
4 Physical measuring
variables
5 Assigned analogue
signal
4
5
6
13
06 bar
0 V
0 mA
4 mA
0 4095
2389
2
3.5 bar
5.833 V
11.66 mA
9.33 mA
7
6 Digital value range
after A−D conversion
(linear scaling)
7 Digital input value
(example)
Fig.2/3: Example of default data format VZ + 12 bits right−justified"
10 V
20 mA
20 mA
2−14
Festo P.BE−CPX−AX−EN en 0503b

2. Analogue input module CPX−2AE−U−I
The assignment of analogue input signal ranges to the digital
value range is shown in the table below.
Analogue input signal range
0 ... 10 V 0 ... 20 mA 4 ... 20 mA Ranges Digital values
> 9.9975 V > 19.995 mA > 19.995 mA Rated range
9.9975 V 19.995 mA 19.995 mA Upper limit 4095
... ... ... Rated range
0 V 0 mA 4 mA Lower limit of
< 0 V < 0 mA < 4 mA Less than rated
Digital data preparation
exceeded
rated range
range
Limiting to the upper
scaling end value
Linear value range
Limiting to the lower
scaling end value
4095
1...4094
0
0
Tab.2/7: Scaling end values of the analogue input modules with default settings
Festo P.BE−CPX−AX−EN en 0503b
2−15

2. Analogue input module CPX−2AE−U−I
2.4.2 General information on parametrizing
The reaction of the analogue input modules can be
parametrized.
Further information on parametrizing can be found in the
system manual or in the manual for the field bus node.
Due in some cases to necessary calculations, modified para
meters are not valid until they have been thoroughly checked
and saved. Until then, as
the previous settings apply.
Depending on the parameter, no valid analogue values are
available for up to max. 30 ms after a value modification.
Special instructions on avoiding parametrizing
faults
In order to avoid parametrizing faults, note the sequence
described below when modifying the following parameters:
in the case of invalid parameters,
2−16
Input analogue−value data format
Lower limit channel x
Upper limit channel x
Festo P.BE−CPX−AX−EN en 0503b

2. Analogue input module CPX−2AE−U−I
Sequence for first or startup parametrizing (CPX terminal in
delivery status, monitoring of parametrizing faults active):
1. First set the desired data format (parameter Input
analogue−value data format").
2. Then set the upper and lower limits for both channels:
If the new upper limit value is positive, set first the
upper limit; then the lower limit.
If the new upper limit is negative (only in the case of
data format VZ + 15 bits linear scaled"), set first the
lower limit, then the upper limit.
Sequence for modifying the parametrizing:
1. Activate, if applicable, the monitoring of parametrizing
faults (module parameter Monitoring CPX module
monitoring parametrizing faults" and channel−specific
module
parametrizing faults").
parameter Monitoring channel x monitoring
Festo P.BE−CPX−AX−EN en 0503b
2. Set the lower limit to 0 and the upper limit to 4095 for
both channels.
3. Then set the desired data format (parameter Input
analogue−value data format").
4. If required, then set the upper and lower limits for both
channels:
If the new upper limit value is positive, set
first the
upper limit; then the lower limit.
If the new upper limit is negative (only in the case of
data format VZ + 15 bits linear scaled"), set first the
lower limit, then the upper limit.
2−17

2. Analogue input module CPX−2AE−U−I
2.4.3 Parameters of the analogue input module type CPX−2AE−U−I
The tables below give an overview of the module parameters
of the analogue input modules.
Function number
4828 + m * 64 + 0 Monitoring the CPX module
4828 + m * 64 + 1 Behaviour after short circuit/overload
4828 + m * 64 + 2 Reserved
4828 + m * 64 + 3 Input analogue−value data format
1)
m = module number (counting from left to right, beginning with 0)
1)
Module parameters
Tab.2/8: Overview module parameters
Function number
4828 + m * 64 + 6/7 Monitoring channel 0, 1
4828 + m * 64 + 8 Signal range channel 0, 1
4828 + m * 64 + 9 Filter measured value channel 0, 1
4828 + m * 64 + 10/11 Lower limit channel 0
4828 + m * 64 + 12/13 Lower limit channel 1
4828 + m * 64 + 14/15 Upper limit channel 0
4828 + m * 64 + 16/17 Upper limit channel 1
2)
1)
m = module number (counting from left to right, beginning with 0)
2)
Access is protocol−specific (see manual for field bus node)
1)
Channel−specific module parameters
Force channel x (see also CPX system manual)
Tab.2/9: Overview channel−specific module parameters
2−18
Festo P.BE−CPX−AX−EN en 0503b

2. Analogue input module CPX−2AE−U−I
Description of the parameters
Module parameters: Monitoring the CPX module
Function no. 4828 + m * 64 + 0 m = module number (0 ... 47)
Description With the analogue input modules, monitoring of individual faults can be acti
Bit Bit 0: monitoring short circuit/overload in the sensor supply
Values 1 = active (presetting); 0 = inactive
Remark Monitoring short circuit at sensors:
vated or deactivated (suppressed) independently of each other. Active monitor
ing causes the following: The fault is:
sent to the CPX field bus node
displayed by the module common error LED.
Bit 1...6: reserved
Bit 7: monitoring parametrizing faults
Monitoring can also be set for the complete CPX terminal (see CPX system
manual, system parameter Monitoring").
Monitoring parametrizing faults:
Some parameters are checked for non−permitted values during parametrizing:
Data format
Filter measured value
Lower limit
Upper limit
The setting of the module parameter Monitoring parametrizing faults" is only
effective for
parameter Monitoring parametrizing faults" is set to active".
channel−specific parametrizings if the corresponding channel
Tab.2/10: Monitoring the CPX module
Festo P.BE−CPX−AX−EN en 0503b
2−19

2. Analogue input module CPX−2AE−U−I
Module parameters: Behaviour after short circuit/overload
Function no. 4828 + m * 64 + 1 m = module number (0 ... 47)
Description Determines after a short circuit in the sensor supply whether the power is to
Bit Bit 0: behaviour after short circuit/overload in the sensor supply
Values 0 = leave voltage/current switched off
Remark With the setting Leave voltage switched off", Power off/on is necessary for
remain switched off or whether it is to be switched on again automatically.
1 = switch voltage on again (presetting)
Bit 2...7: reserved
switching the power on again. Ascertain the setting which is necessary for
reliable operation of your machine or system. Further information can be found
in section 2.5.1.
Tab.2/11: Behaviour after short circuit/overload
Module parameters: Input analogue−value data format
Function no. 4828 + m * 64 + 3 m = module number (0 ... 47)
Description Determines the format in which the analogue input signals are provided by the
Bit Bit 0, 1: input analogue−value data format
Values Bit 1 Bit 0
CPX terminal.
Bit 2...7: reserved (= 0)
00VZ + 15 bits linear scaled
01VZ + 12 bits right−justified (compatible with valve terminal
type 03, presetting)
10VZ + 15 bits left−justified (Simatic S7)
11VZ + 12 bits left−justified + diagnosis (Simatic S5)
(VZ = sign)
Remark The reserved bits 2...7 must always be 0. If one or several bits are set to 1"
during parametrizing, the parametrizing carried out is invalid and therefore not
effective. If the module parameter Monitoring parametrizing faults" is set to
active", the relevant fault will be displayed.
Further information on this parameter can be
found in section 2.4.4.
Tab.2/12: Input analogue−value data format
2−20
Festo P.BE−CPX−AX−EN en 0503b

2. Analogue input module CPX−2AE−U−I
Channel parameters: Monitoring channel x
Function no. 4828 + m * 64 + 6 (channel 0) m = module number (0 ... 47)
Description For the individual channels of the analogue input modules, monitoring of indi
Bit Bit 0: monitoring lower limit (or less than rated range)
Values 1 = active; 0 = inactive
Remark Monitoring the upper/lower limit:
4828 + m * 64 + 7 (channel 1)
vidual faults can be activated or deactivated (suppressed) independently of each
other. Active monitoring causes the following: The fault is:
sent to the CPX field bus node
displayed by the module common error LED.
Further infomation on these monitorings can be
the relevant fault in section 2.5.1.
Bit 1: monitoring upper limit (or rated range exceeded)
Bit 2: monitoring wire fracture
Bit 3...6: reserved
Bit 7: monitoring parametrizing faults
Presetting bit 0...2: 0 (inactive)
Presetting bit 7: 1 (active)
Monitoring the input signals for less than or exceeding the rated range or
monitoring the range limits defined with the parameters Lower limit ..." as
well as Upper limit ..." (depending on the data format used, see sections
2.4.4 and 2.4.5).
Monitoring wire fracture:
Only effective for the signal range
current (I
Monitoring parametrizing faults:
Some channel−specific parameters are checked for non−permitted values
during parametrizing:
Filter measured value
Lower limit
Upper limit
The setting of the channel parameter Monitoring parametrizing faults" is only
effective if the module parameter Monitoring parametrizing faults" is set to
active".
< 2.0mA) counts as a wire fracture.
IN
4...20 mA. A drop below the minimum input
found under the description of
Tab.2/13: Monitoring channel x
Festo P.BE−CPX−AX−EN en 0503b
2−21

2. Analogue input module CPX−2AE−U−I
Channel parameters: Signal range channel x
Function no. 4828 + m * 64 + 8 m = module number (0 ... 47)
Description For the individual channels of the analogue input modules, the signal ranges of
Bit Bit 0/1: setting of DIL switch 0 for channel 0 (read only)
Values Channel 0 Channel 1
Remark Bits 0/1 as well as 4/5 represent the status of the DIL switches for setting the
the analogue inputs can be set independently of each other.
switch 0.1 = bit 0
Bit 2/3: signal range channel 0 (AI0)
Bit 4/5: setting of DIL switch 1 for channel 1 (read only)
Bit 6/7: signal range channel 1 (AI1)
Bit 3 Bit 2 Bit 7 Bit 6
0 0 0 0 Using the setting of the DIL switches (presetting)
0 1 0 1 0...10 V
1 0 1 0 0...20 mA
1 1 1 1 4...20 mA
signal range.
With bits 2/3 and 6/7 other signal ranges can be parametrized irrespective of
the DIL switch setting.
Modified parameter settings have precedence over the DIL switch settings.
The setting of the DIL switches is carried
bit 6/7 = 0).
switch 0.2 = bit 1
switch 1.1 = bit 4
switch 1.2 = bit 5
out with the presetting (bit 2/3 = 0;
Tab.2/14: Signal range channel x
2−22
Festo P.BE−CPX−AX−EN en 0503b

2. Analogue input module CPX−2AE−U−I
Channel parameters: Filter measured value channel x
Function no. 4828 + m * 64 + 9 m = module number (0 ... 47)
Description For the individual channels of the analogue input modules, the filter for
Bit Bit 0, 1: filter measured value channel 0
Values Channel 0 Channel 1
Remark Faults can be suppressed with the Filter measured value (see section 2.5.1).
measured values can be set independently of each other.
Bit 2, 3: reserved (= 0)
Bit 4, 5: filter measured value channel 1
Bit 6, 7: reserved (= 0)
Bit 1 Bit 0 Bit 5 Bit 4
00 00 No filter measured value (presetting)
0 1 0 1 Filter measured value over 2 values
1 0 1 0 Filter measured value over 4 values
1 1 1 1 Filter measured value over 8 values
The reserved bits 2, 3 and 6, 7 must always be 0. If these bits are set to 1"
during parametrizing, the parametrizing carried out is invalid and therefore not
effective.
If the module parameter Monitoring parametrizing faults" as well as
relevant channel parameter Monitoring parametrizing faults" is set to active",
the relevant fault will be displayed.
the
Tab.2/15: Filter measured value channel x
Festo P.BE−CPX−AX−EN en 0503b
2−23

2. Analogue input module CPX−2AE−U−I
Channel parameters: Lower limit channel x / Upper limit channel x
Function no. Lower limit: m = module number (0 ... 47)
Description A lower as well as an upper limit value can be set for the individual channels of
Bit Bit 0...7: high byte or low byte of the limit value
Values Presettings:
Remark If the input value is less than the parametrized lower limit or exceeds the
4828 + m * 64 + 10 (channel 0, low byte)
4828 + m * 64 + 11 (channel 0, high byte)
4828 + m * 64 + 12 (channel 1, low byte)
4828 + m * 64 + 13 (channel 1, high byte)
limit:
Upper
4828 + m * 64 + 14 (channel 0, low byte)
4828 + m * 64 + 15 (channel 0, high byte)
4828 + m * 64 + 16 (channel 1, low byte)
4828 + m * 64 + 17 (channel 1, high byte)
the analogue input modules (see section 2.4.5).
With data format VZ + 15 bits linear scaled", the limits have the function of
scaling end values.
Lower limit = 0 (low byte = 0; high byte: 0)
Upper limit = 4095 (low byte = 255; high byte: 15)
Low byte: 0...255
High byte: 0...15
parametrized upper limit, an appropriate fault is displayed (providing the
relevant channel parameter Monitoring channel x monitoring lower limit" or
Monitoring channel x monitoring upper limit" is active).
The upper limit must always be more than
Modifications to the limits must be made in steps of 16 bits.
the lower limit.
Permitted limits:
The limits are checked for validity during parametrizing. Invalid parametrizings
are not accepted the module uses the previous (last valid) parametrizings.
The permitted values depend on the parametrized data format (see section
2.4.5). If the
relevant channel parameter Monitoring parametrizing faults" is set to active",
the relevant fault will be displayed.
module parameter Monitoring parametrizing faults" as well as the
Tab.2/16: Lower and upper limits channel x
2−24
Festo P.BE−CPX−AX−EN en 0503b

2. Analogue input module CPX−2AE−U−I
Module parameters: Force channel x
Function no. Access to these module parameters is made via protocol−specific functions
Description The Force function permits the manipulation of analogue values irrespective of
Values Force mode inputs channel x0 = blocked (presetting)
Remark The enabling of the Force function with the parameter Force mode outputs
(see the manual for the field bus node).
the actual input value (see also CPX system manual). This can be accomplished
with the following parameters:
Force mode inputs channel x
Force state inputs channel x
1 = Force state
Force state inputs channel x0 = reset value (presetting)
channel x" depends on the field bus protocol and is accomplished:
by an individual parameter setting or bit (e.g. CPX−FB11),
by setting all parameter bits of the relevant word (e.g. CPX−FB6) to blocked"
or Force state".
For parametrizing the Force state,
dingly mapped in the parameter bits Force state inputs channel x".
The enabling of the Force function for the complete CPX terminal is made by
means of the system parameter Force mode" (see CPX system manual).
1 = set value
the desired input word must be correspon
Tab.2/17: Force channel x (channel−specific)
Festo P.BE−CPX−AX−EN en 0503b
2−25

2. Analogue input module CPX−2AE−U−I
2.4.4 Module parameter Input analogue−value data format"
The parametrized data format determines how the analogue
values are transferred by the CPX terminal to the control sys
tem. The setting applies to all analogue input channels. Irre
spective of the data format the data width is always 16bits
(2bytes, 1word).
Supported data formats of the analogue
VZ + 15 bits linear scaled
D15 D14 D13 D12 D11 D10 D9 D8 D7 D6 D5 D4 D3 D2 D1 D0
VZ B14
VZ + 12 bits right−justified (compatible with valve terminal type 03, presetting)
D15 D14 D13 D12 D11 D10 D9 D8 D7 D6 D5 D4 D3 D2 D1 D0
VZ 0 0 0 B11
VZ + 15 bits left−justified (compatible with Simatic S7)
D15 D14 D13 D12 D11 D10 D9 D8 D7 D6 D5 D4 D3 D2 D1 D0
VZ B11
VZ + 12 bits left−justified + diagnosis (compatible with Simatic S5)
D15 D14 D13 D12 D11 D10 D9 D8 D7 D6 D5 D4 D3 D2 D1 D0
VZ B11
Abbreviations used:
VZ: Sign (0 = positive value, 1 = negative value)
B0 ... B14: Input value
D0 ... D15: 16 bits input data field
MSB/LSB: Most significant bit / least significant bit
F: Wire fracture monitoring with signal range 4...20 mA: F = 1 wire fracture exists
x: Not relevant
B13 B12 B11 B10 B9 B8 B7 B6 B5 B4 B3 B2 B1 B0
MSB
B10 B9 B8 B7 B6 B5 B4 B3 B2 B1 B0
MSB
B10 B9 B8 B7 B6 B5 B4 B3 B2 B1 B0
MSB
B10 B9 B8 B7 B6 B5 B4 B3 B2 B1 B0
MSB
input modules
LSB
LSB
x x x
LSB
0 F 0
LSB
F = 0 no wire fracture exists
Tab.2/18: Supported data formats of the analogue input modules
2−26
Festo P.BE−CPX−AX−EN en 0503b

2. Analogue input module CPX−2AE−U−I
Data format VZ + 15 bits linear scaled"
The 12−bit digital values, which exist after the A−D conversion
of the analogue input signals, are linearly scaled to the data
range defined by the scaling end values (limit values) and
output in the input word (see section 2.4.5, Fig.2/5).
Data format VZ + 12 bits right−justified"
The 12−bit digital values, which exist after the A−D conversion
of the analogue input signals, are output unmodified in the
input word (see also example in section 2.4.1, Fig.2/3).
Data format VZ + 15 bits left−justified" and
data format VZ + 12 bits left−justified + diagnosis"
The 12−bit digital values, which exist after the A−D conversion
of the analogue input signals, plus the preceding sign bit are
arranged left−justified in the data format. The three zeros at
the end cause the output data word to correspond to the
12−bit digital value after A−D conversion multiplied by 8
(providing there
is no wire fracture diagnosis).
The following diagram shows an example of the data format
VZ + 15 bits left−justified":
1 Analogue input
values
2 Digital signals after
A−D conversion
3 Available digital
signals scaled to the
end value of the data
range
Fig.2/4: Example of data format VZ + 15 bits left−justified"
Festo P.BE−CPX−AX−EN en 0503b
1
0 V
0 mA
4 mA
2
0
3
0
10 V
20 mA
20 mA
4095
32760
2−27

2. Analogue input module CPX−2AE−U−I
2.4.5 Channel−specific module parameters Limits
You can determine limits with the channel−specific para
meters Lower limit" and Upper limit". The meaning of the
limit parameters depends on the parametrized data format of
the module.
With data format VZ + 15 bits linear scaled", the limits have
the function of defining the scaling end values of the data
range. This
values.
If the input data lie outside this data range, a diagnostic
message can be generated with appropriate parametrizing.
With other data formats the data range is already defined by
the scaling end values. In this case, the limits permit data
monitoring even within the
results in an additional scaling of the analogue
data range.
Data format
VZ + 15 bits
linear scaled
VZ + 12 bits
right−justified
VZ + 15 bits
left−justified
VZ + 12 bits left−
justified + diagnosis
1)
VZ = Sign
As the analogue inputs with the Fixed value" data formats VZ + 12 bits right−justified",
VZ + 15 bits left−justified" and VZ + 12 bits left−justified + diagnosis" generate only positive
signals, the sign bit with these formats is always 0.
2)
The lower limit/scaling end value must always be less than the upper limit/scaling end value.
3)
If the max. voltage or current values are exceeded, values greater than 4095 will also be output.
1)
Data range Limits/scaling end values
−30000... +30000 Lower scaling end value:
0...4095 Lower limit:
0...32760 Lower limit:
0...32760 Lower limit:
3)
−30000... +29999
0...4094
0...32759
0...32752
2)
Upper scaling end value:
−29999... +30000
Upper limit:
1...4095
Upper limit:
1...32760
Upper limit:
1...32760
Tab.2/19: Limits or scaling end values of the analogue input modules
2−28
Festo P.BE−CPX−AX−EN en 0503b

2. Analogue input module CPX−2AE−U−I
Scaling end values with data format VZ + 15 bits
linear scaled"
The following diagram shows an example of the data format
VZ + 15 bits linear scaled" with the scaling end values:
Lower limit = 0
Upper limit = 6000
The example shows a sensor which converts the range of the
physical measuring variables from 0...6 bar linear into the
analogue signals 0...10 V or
0...20 mA.
1 Physical measuring
variables
2 Digital signals after
A−D conversion
(resolution: 12 bits)
3 Available digital
signals after scaling
by the scaling end
values
Fig.2/5: Example scaling data format VZ + 15 bits linear scaled"
1 Digital input signal
after scaling
2 Limits
3 Less than or
exceeding the limits
Fig.2/6: Limit monitoring with data format VZ + 15 bits linear scaled"
1
0
2
0
4095
3
0
The scaling end values in this data format are identical with
the limits for less than or exceeding the rated range:
2
1
0 6.000
3
6 bar
6000
2
Festo P.BE−CPX−AX−EN en 0503b
2−29

2. Analogue input module CPX−2AE−U−I
Limits with the Fixed value" data formats
The following diagram shows an example of the data format
VZ + 12 bits right−justified" with the scaling end values:
Lower limit = 500
Upper limit = 3500
The principle of the limits also applies to the data formats
VZ + 15 bits left−justified" and VZ + 12 bits left−justified +
diagnosis".
1 End values of the
data range
12 3
2 Lower limit
3 Upper limit
4 Less than or
exceeding the limits
Fig.2/7: Monitoring of limits with the Fixed value" data formats
1
40950 500 3500
4
2−30
Festo P.BE−CPX−AX−EN en 0503b

2. Analogue input module CPX−2AE−U−I
2.4.6 Channel−specific module parameters Filter measured value
In order to suppress faults, the input data can be filtered digi
tally, whereby the degree of filtering can be set by means of
parametrizing.
Filtering is carried out as follows:
by forming the sum of n values,
by subtracting an average value,
by adding the current input value.
The following applies here: the
greater n, the more the signal
will be filtered.
2.4.7 Channel−specific module parameters Monitor of wire fracture
A wire fracture monitoring (open loop) can be activated with
appropriate parametrizing for the signal range 4...20 mA.
The criterion for a wire fracture is software monitoring to
ensure that the value does not drop below the lower limit
Ţ 2.0 mA). If the value drops below the lower limit, the
(I
IN
module will send an appropriate fault message to the field
bus node
.
Festo P.BE−CPX−AX−EN en 0503b
2−31

2. Analogue input module CPX−2AE−U−I
2.5 Diagnosis
Specific faults of the analogue input modules are registered
or suppressed depending on the module parametrizing.
The faults are shown on−the−spot by means of the Error LED
and, if necessary, can be evaluated with the handheld (in
preparation).
Depending on the module parametrizing the faults are regis
tered by the field bus node, where
according to the field bus protocol used.
Representation of the faults in the various field bus nodes
depends on the field bus protocol (see manual for the field
bus node).
they can be evaluated
2−32
Festo P.BE−CPX−AX−EN en 0503b

2. Analogue input module CPX−2AE−U−I
2.5.1 Fault messages of the analogue input modules
An analogue input module can register the following faults:
Fault
Description Fault treatment
number
2 Fault short circuit/overload
Short circuit/overload in sensor supply
).
(V
EL/SEN
(See Parameters" Monitoring the
CPX module monitoring short circuit/
overload at sensor")
3 Wire fracture at current input
Only with voltage inputs with signal range
4...20 mA:
The input currennt I
(See parameter Monitoring channel x
IN
monitoring of wire fracture")
9 Less than the rated range
Lower limit exceeded.
(See parameter Lower limit channel x
low byte/high byte" or Monitoring
channel x monitoring below rated
range")
1)
The module displays the relevant fault depending on the parametrizing. The analogue input
signals, however, will be processed further.
1)
1)
is less than 2.0 mA.
1)
1. Eliminate short circuit/overload or
check connected sensors
2. Depending on parametrization (Para
meters Behaviour after short circuit/
overload"):
· Setting Switch on voltage again":
Power supply for sensors will be
switched on again automatically
when short circuit is eliminated.
· Setting Leave voltage switched off":
Power off/on necessary
or
Modify parameter Behaviour
after short circuit/overload" to
Leave voltage switched off".
· Check and, if necessary, replace the
cable and connected sensors.
· Check signal range of input.
· Check input signal present.
· Check parametrized limit.
· If necessary, deactivate monitoring.
Tab.2/20: Fault messages of the input modules part 1
Festo P.BE−CPX−AX−EN en 0503b
2−33

2. Analogue input module CPX−2AE−U−I
Fault
Description Fault treatment
number
10 Rated range exceeded
Upper limit exceeded.
(See parameter Upper limit channel x
low byte/high byte" or Monitoring
channel x monitoring rated range
exceeded")
15 Module/channel failed
General fault, module faulty.
Fault in parametrizing
A fault has occurred in the setting of the
relevant parameter.
21
23
24
25
Parameter data format
Parameter measured value smoothing
Parameter lower limit
Parameter upper limit
(See parameter Monitoring the CPX
module monitoring parametrizing fault"
or Monitoring channel x monitoring
parametrizing fault")
1)
The module displays the relevant fault depending on the parametrizing. The analogue input
signals, however, will be processed further.
2)
Processing of the analogue input signals will be stopped.
3)
The parameters entered will be ignored, the module operates with the last valid parameters.
1)
2)
1) 3)
· Check signal range of input.
· Check input signal present.
· Check parametrized limit.
· If necessary, deactivate monitoring.
· Power off/on necessary
· If this fault occurs again: check and, if
necessary, replace the analogue input
module.
Evaluation of the analogue input signals
has stopped.
· Check the parametrizing undertaken
and, if necessary, undertake the
parametrizing again with the correct
parameters (valid parameters see
section 2.4.3).
The analogue input module will be
operated further with the last valid
parametrizing.
Tab.2/21: Fault messages of the input modules part 2
Please note
Please note the following when using the input modules:
If there is a short circuit, all sensor supplies of the
module will be switched off together.
If not parametrized otherwise, the sensor supply voltage
will be switched on again automatically when the short
circuit is eliminated.
2−34
Festo P.BE−CPX−AX−EN en 0503b

2. Analogue input module CPX−2AE−U−I
2.5.2 LED display
There is an LED under the transparent cover of the module for
diagnosing the input modules.
1 Error LED (red)
CPX−2AE−U−I
2
AI
Fig.2/8: LED display of the analogue input modules
1
Festo P.BE−CPX−AX−EN en 0503b
2−35

2. Analogue input module CPX−2AE−U−I
Upper limit exceeded
10
Error LED
The red error LED indicates a module fault depending on the
parametrizing (short circuit or overload of the sensor supply,
wire fracture or parametrizing fault).
Error LED
(red)
LED is out
LED lights up
LED flashes
1)
The number of flash pulses indicates the input channel concerned.
1 flash = channel 0 (or both channels)
2 flashes = channel 1
Sequence Status Fault
number
ON
OFF
ON
OFF
ON
OFF
1 flash
ON
OFF
2 flashes
Faultless operation None
Fault short circuit/overload
Short circuit/overload in sensor
supply (V
or
EL/SEN
).
Module defective
Wire fracture at current input
< 2.0 mA
I
IN
1)
or
Lower limit exceeded
Input signal is less than the
parametrized limit
or
Upper limit exceeded
Input signal is greater than the
parametrized limit
or
1)
Fault in parametrizing
Parameter data format
Parameter filter measured value
Parameter lower limit
Parameter upper limit
2
15
3
9
10
21
23
24
25
Fault
treatment
See section
2.5.1, Tab.2/21
Check and, if
necessary,
replace compo
nent
See section
2.5.1, Tab.2/21
Tab.2/22: Error LED of analogue input modules
2−36
Festo P.BE−CPX−AX−EN en 0503b

2. Analogue input module CPX−2AE−U−I
2.5.3 Fault treatment and parametrizing
The following diagrams show the fault treatment in the ana
logue input modules. Further registering and display of the
fault can be suppressed as desired with the appropriate
module parameter, represented in the diagram as a switch.
A description of the parameter can be found in section 2.4.3.
Fault message
to field bus node
01
Monitoring
Short circuit
at sensors
Fault no. 2
Short circuit/
overload in
sensor supply
2
Fault no. 15
Module
defective
Module
error LED
Fault message
to field bus node
01
Monitoring
Wire fracture
channel 0
Fault no. 3
Wire fracture at
current input
channel 0
Fault no. 3
Wire fracture at
current input
channel 1
31
Module
error LED
01
Monitoring
Wire fracture
channel 1
1 Module parameters (switch position represented = default setting)
2 Module−specific faults
3 Channel−specific faults
Fig.2/9: Principle of fault treatment and parametrizing of the analogue input modules
part 1
Festo P.BE−CPX−AX−EN en 0503b
2−37

2. Analogue input module CPX−2AE−U−I
Fault message
to field bus node
01
Monitoring
Lower limit
channel 1
01
Monitoring
Lower limit
channel 0
Fault no. 9
Lower limit
exceeded
channel 0
2
Fault no. 9
Lower limit
exceeded
channel 1
Module
error LED
01
Fault no. 10
Upper limit
exceeded
channel 0
01 01
Monitoring
Upper limit
channel 1
Monitoring
Upper limit
channel 0
01
Fault no. 10
Upper limit
exceeded
channel 1
Monitoring
Parametrizing
fault channel 0
Fault no.
21...25
Parametrizing
fault channel 0
Monitoring
Parametrizing
fault
01
Monitoring
Parametrizing
fault channel 1
Fault no.
21...25
Parametrizing
fault channel 1
1
1 Module parameters (switch position represented = default setting)
2 Channel−specific faults
Fig.2/10: Principle of fault treatment and parametrizing of the analogue input modules
part 2
2−38
Festo P.BE−CPX−AX−EN en 0503b

Analogue input module CPX−4AE−I
Chapter 3
3−1Festo P.BE−CPX−AX−E N en 0503b

3. Analogue input module CPX−4AE−I
Contents
3. Analogue input module CPX−4AE−I 3−1 . . . . . . . . . . . . . . . . . . . . . . . . . . . . . . . .
3.1 Function of the analogue input modules 3−4 . .
3.2 Fitting 3−4 . . . . . . . . . . . . . . . . . . . . . . .
3.3 Installation 3−5 . . . . . . . . . . . . . . . . .
3.3.1 DIL switch settings 3−6 . . . . . . . . . . . .
3.3.2 Pin assignment 3−8 . . . . . . . . . . . . . . . . . . . . . . .
3.3.3 Connecting the analogue intputs 3−11 . . . . . . . . . . . . . . . . . . . . . . . . . . .
3.4 Instructions
3.4.1 Processing analogue input signals 3−12 . . . . . . . . .
3.4.2 General information on parametrizing 3−16 . . . . . . . . . . . . . . . . . . . . . . .
3.4.3 Parameters of the analogue input module
3.4.4 Module parameter Input analogue−value data format" 3−27 . . . . . . . .
3.4.5 Channel−specific module parameters Limits 3−29 . . . . . . . . . . . . . . . . .
3.4.6 Channel−specific module parameters Filter measured
3.4.7 Channel−specific module parameters Monitor of wire fracture 3−32 . .
3.5 Diagnosis 3−33 . . . . . . . . . . . . . . . . . . . . . . . . . . . . . . . . . .
3.5.1 Fault messages of the analogue input modules 3−34 . . . . . . . . . . . . . . .
3.5.2 LED display 3−36 . . . . . . . .
3.5.3 Fault treatment and parametrizing 3−38 . . . . . . . . . .
on commissioning 3−12 . . . . . . . . . . . . . . . . . . . . . . . . . . . . . . . . . . . .
. . . . . . . . . . . . . . . . . . . . . . . . . . . . . . . . .
. . . . . . . . . . . . . . . . . . . . . . . . . . . . . . . . . . .
. . . . . . . . . . . . . . . . . . . . . . . . . . . . . . . . . . . .
. . . . . . . . . . . . . . . . . . . . . . . . . .
. . . . . . . . . . . . . . . . . . . . . . . . . .
. . . . . . . . . . . . . . . . . .
. . . . . . . . . . . . . . . . .
type CPX−4AE−I 3−18 . . . . . . .
value 3−32 . . . .
. . . . . . . . . . . . . . . . . . .
. . . . . . . . . . . . . . . .
3−2
Festo P.BE−CPX−AX−E N en 0503b

3. Analogue input module CPX−4AE−I
Contents of this chapterThis chapter describes the analogue input module CPX−4AE−I.
Analogue input modules provide analogue voltage inputs or
current inputs in a CPX
terminal and can be adapted to spe
cific applications by means of different sub−bases.
Further information An overview of the modular structure o
modular connections as well as the display and connecting
elements can be found in chapter 1.
Information on mounting the complete CPX term
ing the power supply as well as general instructions on con
figuration and parametrizing can be found in the CPX system
manual.
Information
on the address assignment as well as on commis
sioning can be found in the appropriate field bus node man
ual or function module manual.
f a CPX terminal, the
inal, connect
Festo P. BE−CPX−A X−EN en 0503b
3−3
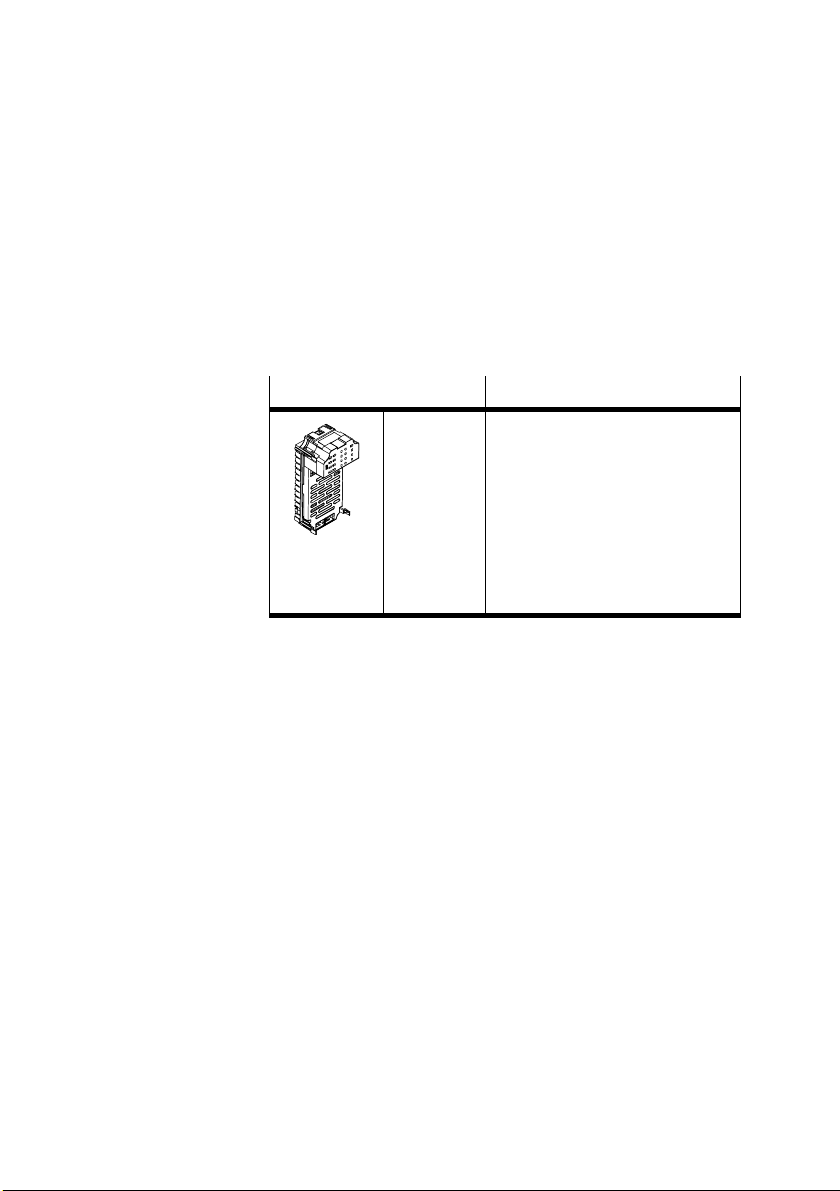
3. Analogue input module CPX−4AE−I
3.1 Function of the analogue input modules
Analogue input modules provide analogue voltage inputs or
current inputs for connecting sensors and enable the register
ing and processing of analogue current a
At present the following type is available:
nd voltage signals.
3.2 Fitting
Type
CPX−4AE−I This type provides 4 analogue
Description
inputs (input channels) with
scalable value ranges. The input
signal range can be configured
channel by channel, either
electrically isolated or non−floating:
0...20 mA
4...20 mA
Sensor supply 24 V / 0.7 A per
module.
Tab.3/1: Overview of analogue input modules CPX−4AE−I
See section 1.3.
3−4
Festo P. BE−CPX−AX−EN en 0503b

3. Analogue input module CPX−4AE−I
3.3 Installation
Warning
Undesired movement of the connected actuators and
uncontrolled movements of loose tubing can cause injury
to human beings or damage
Before carrying out installation and maintenance work,
switch off the following:
the compressed air supply
the operating and load voltage supp
In the following sections you will find the pin assignments of
the analogue input modules for the different sub−bases.
to property.
lies.
Festo P. BE−CPX−A X−EN en 0503b
Instructions on connecting the
cables and plugs to the sub−
bases can be found in section 1.2.3.
Note in particular the instructions on connecting the cable
screening to functi
onal earth (FE).
Power supply
The 24 V sensor supply for the inputs as well as the power
supply for the electronics of the input modules is provided via
the operating voltage
(V
EL/SEN
).
The sensors can also be supplied externally (electrical isola
tion, see section 3.3.3, Fig.3/2).
supply for the electronics/sensors
3−5

3. Analogue input module CPX−4AE−I
3.3.1 DIL switch settings
2 DIL switches are available for configuring the analogue
input modules. These are located on the top of the electronic
module.
1 DIL switch 0:
Signal range of
analogue input
0,1
AI–I
4
2 DIL switch 1:
Signal range of
analogue input
2,3
12
12
ON
ON
1
2
Fig.3/1: DIL switches in the electronic module
(further information on 1 and 2 see following pages)
Proceed as follows:
1. Switch off the power supply.
move if necessary the fitted sub−base (see Fitting"
2. Re
section 1.3).
3. Set the DIL switch elements in accordance with the
instructions on the following pages.
4. Refit
if necessary the sub−base (see Fitting" section 1.3,
tightening torque 0.9 ... 1.1Nm).
3−6
Festo P. BE−CPX−AX−EN en 0503b

3. Analogue input module CPX−4AE−I
Setting the input signal range
On the 4AE−I module each channel has a DIL switch element
for setting the signal range.
DIL switch 0: channels 0 and 1
switch 1: channels 2 and 3
DIL
Channel
Signal range
0 ... 20 mA 4 ... 20 mA
0 DIL
1 DIL
2 DIL
3 DIL
1)
Default (factory setting)
0.1: OFF
0.2: OFF
1.1: OFF
1.2: OFF
1)
1)
1)
1)
DIL
0.1: ON
DIL
0.2: ON
DIL
1.1: ON
DIL
1.2: ON
Tab.3/2: DIL switches of the analogue input module 4AE−I
Please note
The setting of the signal range with the DI L switches can be
modified by parametrizing (see section 3.4). Parametrizing
has precedence over
the DIL switch setting.
Festo P. BE−CPX−A X−EN en 0503b
3−7

3. Analogue input module CPX−4AE−I
3.3.2 Pin assignment
Pin assign ment of CPX−4AE−I with sub−base
CPX−AB−4−M12x2−5POL(−R)
Analogue input module type CPX−4AE−I with sub−base CPX−AB−4−M12x2−5POL(−R)
Sub−base Pin assignment X1, X2
(input II0, II1)
Pin assignment X3, X4
(input II2, II3)
4
5
1
2
3
Socket X1:
1: 24 V
SEN
2: II0+
3: 0 V
SEN
4: II0−
5: FE (screening)
Socket X2:
1: 24 V
SEN
2: II1+
3: 0 V
SEN
4: II1−
5: FE (screening)
X3
3
2
1)
X4
1
5
4
1)
X1
4
AI−I
3
2
X2
1
5
4
4
5
1
2
3
Socket X3:
1: 24 V
SEN
2: II2+
3: 0 V
SEN
4: II2−
5: FE (screening)
Socket X4:
1: 24 V
SEN
2: II3+
3: 0 V
SEN
4: II3−
5: FE (screening)
IIx+ = Positive current input signal
IIx−= Negative current input signal
FE = Functional earth
1)
With CPX−AB−4−M12x2−5POL−R the metal thread is connected to FE
Tab.3/3: Pin assignment of analogue input module type CPX−4AE−I with sub−base
CPX−AB−4−M12x2−5POL(−R)
CPX−AB−4−M12x2−5POL−R The metal thread (...−R") of this sub−base is
connected
internally with pin 5 (Functional earth FE).
1)
1)
3−8
Festo P. BE−CPX−AX−EN en 0503b

3. Analogue input module CPX−4AE−I
.3
Pin assign ment of CPX−4AE−I with sub−base
CPX−AB−8−KL−4POL
Analogue input module type CPX−4AE−I with sub−base CPX−AB−8−KL−4POL
Sub−base Pin assignment X1 ... X4
(input II0, II1)
Pin assignment X5 ... X8
(input II2, II3)
.0
X1
4
AI−I
.0
X1
X2
X3
X4
X5
.1
.2
.3
.0
.1
.2
.3
.0
.1
.2
.3
.0
.1
.2
.3
X2
X6
X7
X3
X8
X4
X1.0: 24 V
X1.1: 0 V
.1
X1.2: II0−
.2
X1.3: FE (screening)
.3
.0
X2.0: n.c.
X2.1: n.c.
.1
X2.2: II0+
.2
X2.3: FE (screening)
.3
.0
X3.0: 24 V
.1
X3.1: 0 V
.2
X3.2: II1−
.3
X3.3: FE (screening)
.0
X4.0: n.c.
.1
X4.1: n.c.
.2
X4.2: II1+
.3
X4.3: FE (screening)
SEN
SEN
SEN
SEN
.0
.1
.2
.3
.0
.1
.2
.3
.0
.1
.2
.3
.0
.1
.2
.3
X5.0: 24 V
X5
X5.1: 0 V
X5.2: II2−
X5.3: FE (screening)
X6.0: n.c.
X6.1: n.c.
X6
X6.2: II2+
X6.3: FE (screening)
X7.0: 24 V
X7.1: 0 V
X7
X7.2: II3−
X7.3: FE (screening)
X8.0: n.c.
X8.1: n.c.
X8.2: II3+
X8
X8.3: FE (screening)
SEN
SEN
SEN
SEN
IIx+ = Positive current input signal
IIx−= Negative current input signal
n.c.= Not connected
FE = Functional earth
Tab.3/4:Pin assignment of analogue input module type CPX−4AE−I with sub−base
CPX−AB−8−KL−4POL
Festo P. BE−CPX−A X−EN en 0503b
3−9

3. Analogue input module CPX−4AE−I
Pin assign ment of CPX−4AE−I with sub−base
CPX−AB−1−SUB−B U− 25POL
Analogue input module type CPX−4AE−I with sub−base CPX−AB−1−SUB−BU−25POL
Sub−base Pin assignment
AI−I
1: II0−
13
4
25
24
23
22
21
20
19
18
17
16
15
14
12
11
10
9
8
7
6
5
4
3
2
1
2: II0+
3: II1−
4:II1+
5: n.c.
6: n.c.
7: n.c.
8: n.c.
9: 24 V
10: 24 V
11: 0 V
12: 0 V
13: FE
SEN
SEN
SEN
SEN
14: II2−
15: II2+
16: II3−
17: II3+
18: 24 V
SEN
19: n.c.
20: 24 V
SEN
21: n.c.
22: 0 V
SEN
23: 0 V
SEN
24:0 V
SEN
25: FE
Housing: FE (screening)
IIx+ = Positive current input signal
IIx−= Negative current input signal
n.c.= Not connected
FE = Functional earth
Tab.3/5: Pin assignment of analogue input module type CPX−4AE−I with sub−base
CPX−AB−1−SU B−B U−25POL
3−10
Festo P. BE−CPX−AX−EN en 0503b

3. Analogue input module CPX−4AE−I
3.3.3 Connecting the analogue intputs
Only screened cables are usually permitted for the
transmission of analogue signals (see section 1.2.3).
1 Without electrical
isolation:
24VIIx+ IIx− FE0V
1
The sensors are
supplied via the
CPX module
2 With electrical
0/4...20
mA
24VIIx+ IIx− FE0V
0/4...20
mA
24V
IIx+ IIx− FE0V
isolation:
If an external sensor
2
supply is used
0/4...20
mA
External
sensor
supply
Fig.3/2: Examples of analogue input connections (screening connection on FE pin)
Festo P. BE−CPX−A X−EN en 0503b
Further connection examples can be found in appendix A.7.1.
3−11

3. Analogue input module CPX−4AE−I
3.4 Instructions on commissioning
3.4.1 Processing analogue input signals
The analogue values are transmitted from the CPX terminal to
the control system as input words (2 bytes, 16 bits). Each
analogue 4−input module occupies 4 input words for this pro
cedure in the address range (4 inputs, 64 bits).
The position of the input words in the address range depends
on the field bus
Parametrizing The data format as well as the limit values and, where appli
cable, also the scaling of the a
adapted by parametrizing. Instructions on this can be found
in the sections 3.4.2 and 3.4.3.
used (see manual for the field bus node).
nalogue input signals can be
3−12
The reaction with the
default settings is described below.
Festo P. BE−CPX−AX−EN en 0503b

3. Analogue input module CPX−4AE−I
Reaction with the default settings
The module parameter Input analogue−value data format"
possesses the default setting VZ + 12 bits right−justified"
(compatible with valve terminal type 03). With th
analogue values will be saved in the input word as follows:
is setting the
Data format VZ + 12 bits right−justified" (compatible with valve terminal type
D15 D14 D13 D12 D11 D10 D9 D8 D7 D6 D5 D4 D3 D2 D1 D0
VZ 0 0 0 B11
Abbreviations used:
VZ: Sign (with data format VZ + 12 bits right−justified" always = 0, i.e. a positive value)
B0 ... B11: Input value
D0 ... D15: 16 bits input data field
MSB/LSB: Most significant bit / least significant bit
B10 B9 B8 B7 B6 B5 B4 B3 B2 B1 B0
MSB
03)
Tab.3/6: Data format VZ + 12 bits right−justified"
The channel−specific parameters Lower limit" and Upper
limit" possess the following default settings:
Lower lim
it = 0
Upper limit = 4095
These correspond to the scaling end values (data range) of
the default data format.
LSB
Festo P. BE−CPX−A X−EN en 0503b
3−13

3. Analogue input module CPX−4AE−I
The following diagram shows the processing of the analogue
input signals with the default data format VZ + 12 bits right−
justified". The example shows
range of the physical measuring variables from 0...6 bar lin
ear into the analogue signals 0...20 mA or 4...20 mA.
a sensor which converts the
1 Lower limit of rated
range
2 Measured value
(example)
3 Upper limit of rated
range
4 Physical measuring
variables
5 Assigned analogue
signal
4
5
6
13
06 bar
0 mA
4 mA
0 4095
2389
2
3.5 bar
11.66 mA
9.33 mA
7
6 Digital value range
after A−D conversion
(linear scaling)
7 Digital input value
(example)
Fig.3/3: Example of default data format VZ + 12 bits right−justified"
20 mA
20 mA
3−14
Festo P. BE−CPX−AX−EN en 0503b

3. Analogue input module CPX−4AE−I
The assignment of analogue input signal ranges to the digital
value range is shown in the table below.
Analogue input signal range
0 ... 20 mA 4 ... 20 mA Ranges Digital values
> 19.995 mA > 19.995 mA Rated range
19.995 mA 19.995 mA Upper limit 4095
... ... Rated range
0 mA 4 mA Lower limit of
< 0 mA < 4 mA Less than rated
Digital data preparation
exceeded
rated range
range
Limiting to the upper
scaling end value
Linear value range
Limiting to the lower
scaling end value
4095
1...4094
0
0
Tab.3/7: Scaling end values of the analogue input modules with default settings
Festo P. BE−CPX−A X−EN en 0503b
3−15

3. Analogue input module CPX−4AE−I
3.4.2 General information on parametrizing
The reaction of the analogue input modules can be
parametrized.
Further information on parametrizing can be found in the
system manual or in
Due in some cases to necessary calculations, modified para
meters are not valid until they have been thoroughly ch
and saved. Until then, as in the case of invalid parameters,
the previous settings apply.
the manual for the field bus node.
ecked
Depending on the parameter, no valid an
available for up to max. 30 ms after a value modification.
alogue values are
Special instructions on avoiding parametrizing
faults
In order to avoid parametrizing faults, note the sequence
described below when modifying the following parameters:
Input analogue−value data form
Lower limit channel x
Upper limit channel x
at
3−16
Festo P. BE−CPX−AX−EN en 0503b

3. Analogue input module CPX−4AE−I
Sequence for first or startup parametrizing (CPX terminal in
delivery status, monitoring of parametrizing faults active):
1. First set the desired data f
ormat (parameter Input
analogue−value data format").
2. Then set the upper and lower limits for both channels:
If the new upper limit value is positive,
set first the
upper limit; then the lower limit.
If the new upper limit is negative (only in the case of
data format VZ + 15 bits linear
scaled"), set first the
lower limit, then the upper limit.
Sequence for modifying the parametrizing:
1. Activate, if applicable, the monitoring of pa
rametrizing
faults (module parameter Monitoring CPX module
monitoring parametrizing faults" and channel−specific
module parameter Monitoring channel x monitoring
pa
rametrizing faults").
2. Set the lower limit to 0 and the upper limit to 4095 for
both channels.
3. Then set the desired data format (parameter I
nput
analogue−value data format").
4.If required, then set the upper and lower limits for both
channels:
Festo P. BE−CPX−A X−EN en 0503b
If the new upper limit value is positive, set
first the
upper limit; then the lower limit.
If the new upper limit is negative (only in the case of
data format VZ + 15 bits linear scale
d"), set first the
lower limit, then the upper limit.
3−17

3. Analogue input module CPX−4AE−I
3.4.3 Parameters of the analogue input module type CPX−4AE−I
The tables below give an overview of the module parameters
of the analogue input modules.
Function number
4828 + m * 64 + 0 Monitoring the CPX module
4828 + m * 64 + 1 Behaviour after short circuit/overload
4828 + m * 64 + 2 Reserved
4828 + m * 64 + 3 Input analogue−value data format
1)
m = module number (counting from left to right, beginning with 0)
1)
Module parameters
Tab.3/8: Overview module parameters
Function number
4828 + m * 64 + 6...9 Monitoring channel 0...3
4828 + m * 64 + 10 Signal range channel 0...3
4828 + m * 64 + 11 Filter measured value channel 0...3
4828 + m * 64 + 12/13 Lower limit channel 0
4828 + m * 64 + 14/15 Lower limit channel 1
4828 + m * 64 + 16/17 Lower limit channel 2
4828 + m * 64 + 18/19 Lower limit channel 3
4828 + m * 64 + 20/21 Upper limit channel 0
4828 + m * 64 + 22/23 Upper limit channel 1
1)
Channel−specific module parameters
4828 + m * 64 + 24/25 Upper limit channel 2
4828 + m * 64 + 26/27 Upper limit channel 3
2)
1)
m = module number (counting from left to right, beginning with 0)
2)
Access is protocol−specific (see manual for field bus node)
Force channel x (see also CPX system manual)
Tab.3/9: Overview channel−specific module parameters
3−18
Festo P. BE−CPX−AX−EN en 0503b
 Loading...