

Page 1
English
Page 2
SAFETY MEASURES
We request that you read the instruction manual and recommendations set forward therein.
• In order to avoid an electric shock, never open the housing. Damage to the warranty seal shall
void the warranty.
• Do not attempt to disassemble car DVR and drop from high place.
• Keep the car DVR away from water and other liquids.
• After prolonged use, it is normal that the unit temperature will rise.
• The best working temperature range is: -10 – 55 .℃
• Please use the accessories provided by the manufacturer.
• The device supports maximum 32GB TF cards, please use 8GB (Class 10) or above.
DOWNLOADABLE SOFTWARE
Ferguson has taken every effort to provide users with software updates in order to ensure that the
parameters of the device are up to date. Ferguson reserves itself the right to amend, change or modify
the software used in the device as it shall choose and without prior notification. The latest version of the
software is available on the website http://www.ferguson-digital.eu
ABOUT THE INSTRUCTION MANUAL
Ferguson Sp. z o.o. has made every effort to provide the most current information about its products.
Ferguson Sp. z o.o. does not grant any guarantee as to the contents of the present instruction manual
and disclaims any implied guarantees concerning market value or suitability for specific purposes. The
information contained herein is an instruction intended to enable the correct usage and maintenance of
the receiver. Ferguson Sp. z o.o. reserves itself the right to introduce amendments, changes or
translations of the instruction manual without prior notification thereof. For this reason, we recommend
you regularly visit our website in order to obtain the latest information.
MARKINGS AND SIGNS APPLIED TO THE DEVICE
Risk of electric shock - do not open. This
notice warns the user not to open the
receiver housing. The housing may be
opened solely by authorized service
technicians.
CE logo.
The logo informs that the receiver conforms
to the terms and conditions of Directive
2004/108/EC concerning observance by
Member States of provisions regulating
electromagnetic compatibility, and to the
terms and conditions of Directives
2006/95/EC concerning observance by
Member States of provisions regulating low
voltage electricity and safety with relation to
the handling and operation of electrical
equipment.
When this crossed-out wheeled bin
symbol is attached to a product it means
that the product is covered by the
European Directive 2002/96/EC. Please
inform yourself about the local separate
collection system for electrical and
electronic products.
Please act according to your local rules
and do not dispose of your old products
with your normal household waste.
Correct disposal of your old product helps
to prevent potential negative
consequences for the environment and
human health.
Your product contains batteries covered by
the European Directive 2006/66/EC, which
cannot be disposed with normal household
waste. Please inform yourself about the local
rules on separate collection of batteries
because correct disposal helps to prevent
negative consequences for the environmental
and human health.
Your product is designed and
manufactured with high quality materials
and components, which can be recycled
and reused.
When this logo is attached to a product, it
means a financial contribution has been paid
to the associated national recovery and
recycling system.
2
Page 3
1. General information about the car DVR
1.1 CAR DVR
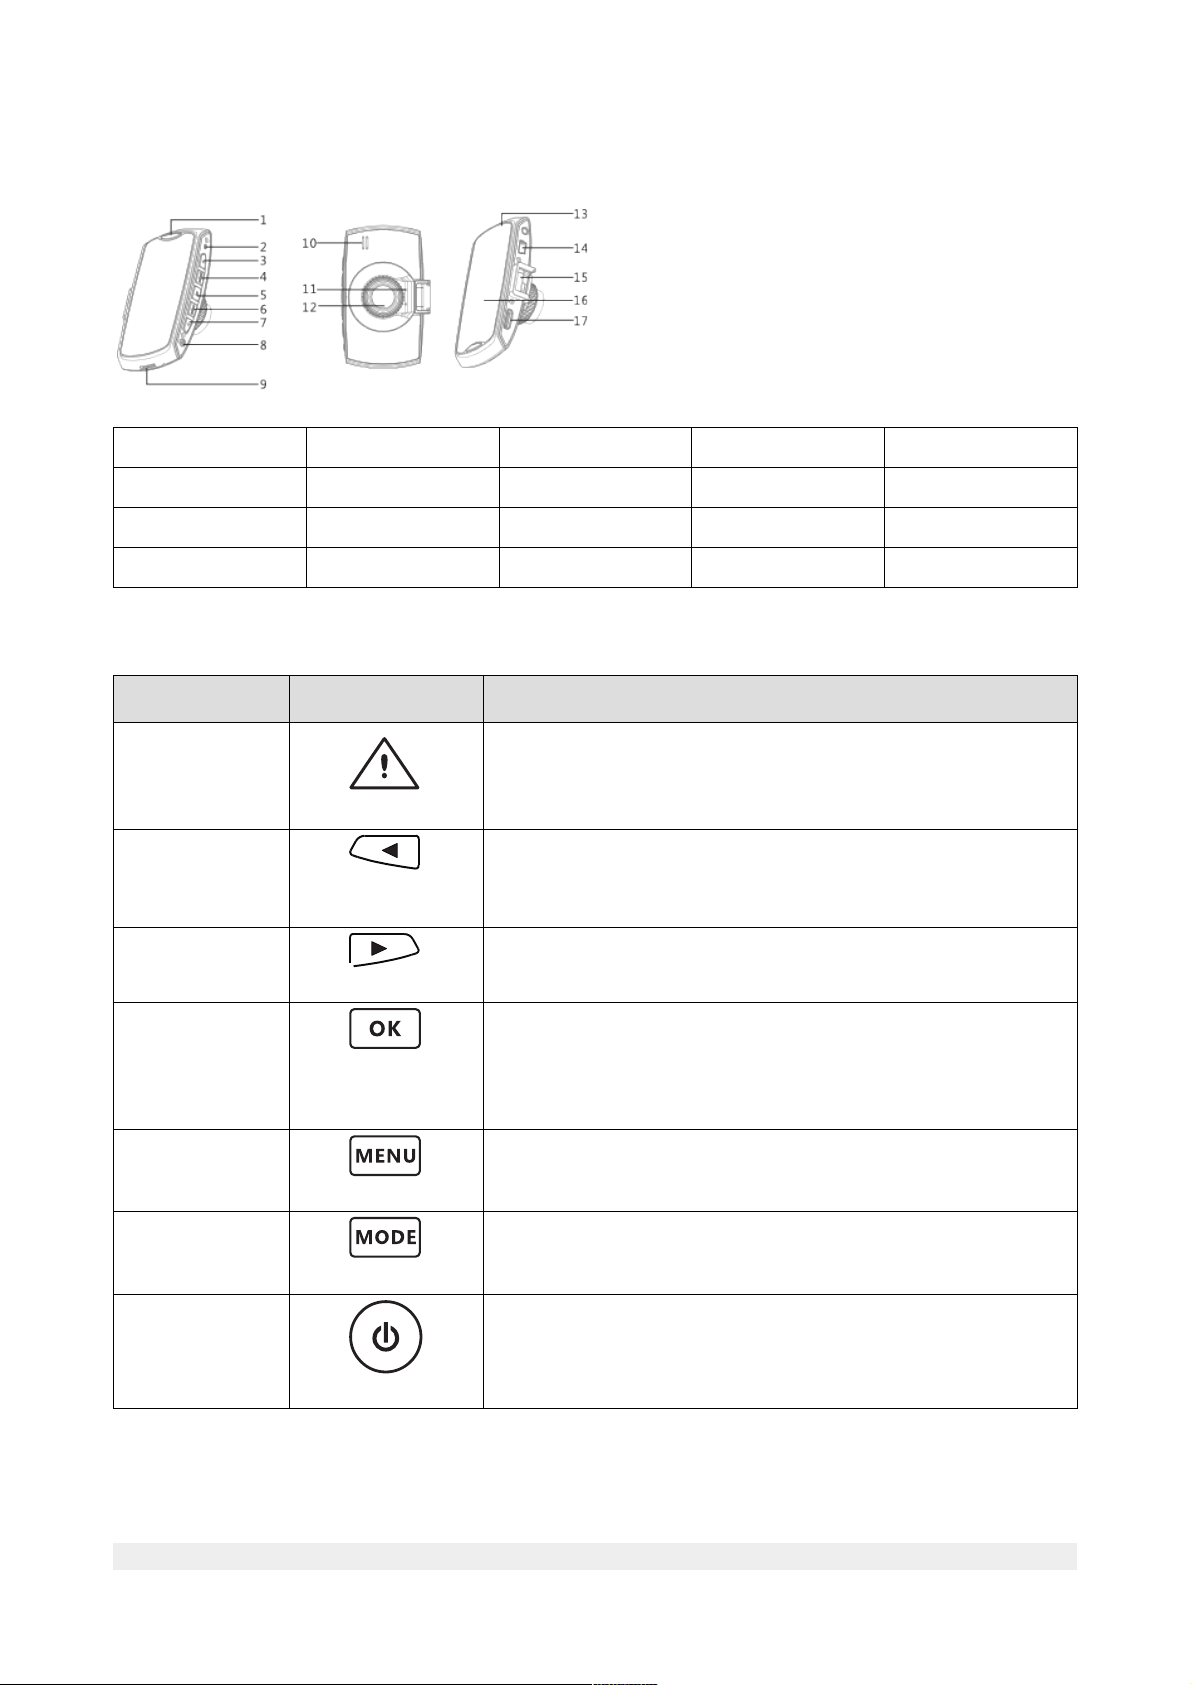
1.SOS ButtonSOS Button 5.OK Button 9.TF Card Slot 13.Status Light 17.Micro HDMI Interface
2.Reset Button 6.MENU Button 10.Speaker 14.USB Interface
3.Right Button 7.Left Button 11.Mic 15.Car Mount Interface
4.MODE Button 8.Power Button 12.Lens 16.Display
1.2 Icons and functions
Name Icon Function description
SOS Button ● Protect/cancel current file or adjacent files
Left Button ● Up/Left option
● Long press backward video
● short press mute
Right Button ● Down/Right option
● Long press forward video
OK Button ● Start/Stop Recording
● Shooting
● Enter setting
● Play/Stop video
MENU Button ● Enter/Back Menu
● Back
MODE Button ● Video/Time-Lapse/Picture/Playback mode switch
Power Button ● Turn on/Turn off power
● Turn on/ Turn off panel
3
Page 4

1.3 Battery charging
a) After connecting the car charger to the device, the car DVR will turn on automatically and
start recording, a following icon will be showed on display in the right corner, charge
lamp will turn into red.
b) The indicator will turn off, when charging is finished.
1.4 Installing the TF card
Turn on the device (without TF card). The icon (on the left corner) will disappear, when TF
card is inserted.
This car DVR supports maximum 32G TF card, please use 8G (Class 10) or above.
1.5 Turning on/off car DVR
a) Press long button or connect the USB cable to turn on the car DVR .
b) Press long button (3s) or disconnect the USB cable to turn off the car DVR.
2. Car DVR settings
2.1 System settings
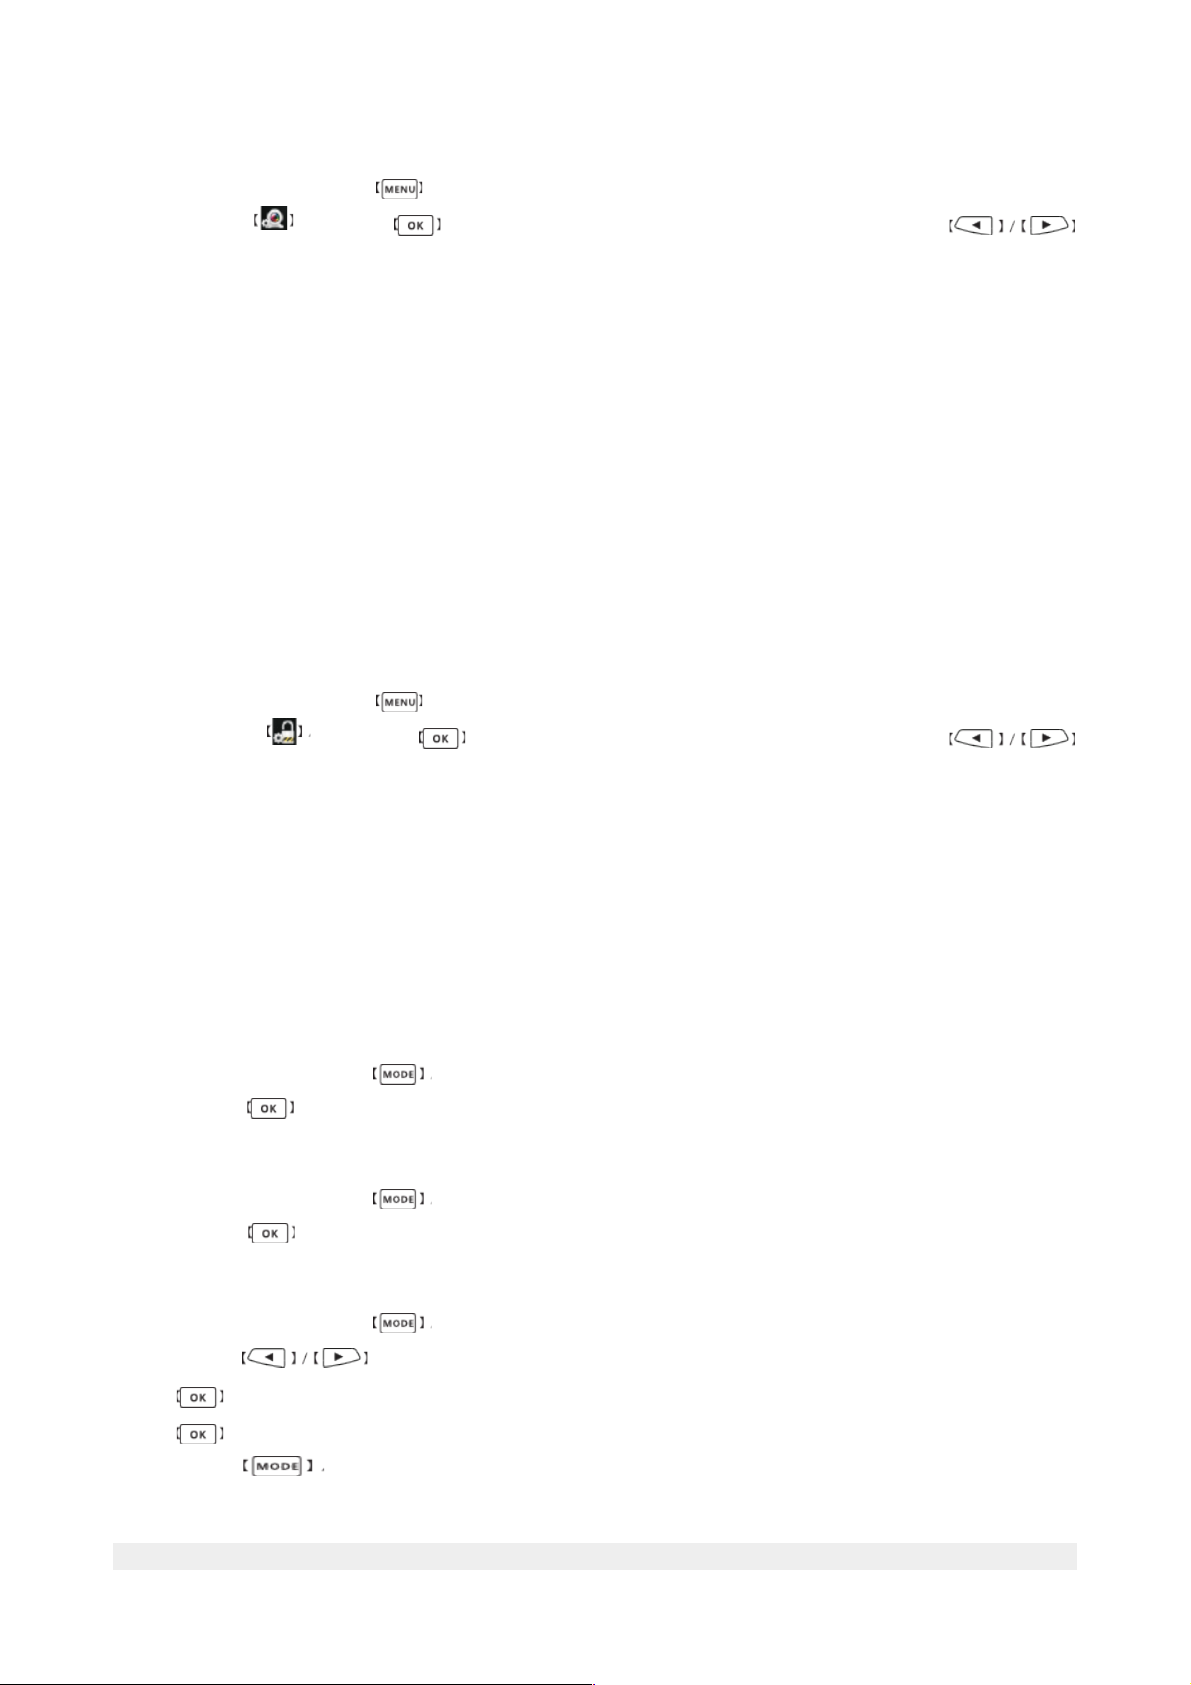
In preview window press button to enter the Main Menu.
Press button to enter the Setting Menu. Now you are available to set functions.
Press button to choose one of available functions. Press button to confirm
the settings.
• Delay power off time: When external power is cut off, the car DVR can turn off in:
3s/10s/1min. You can choose also never turn off.
• LCD turn off: During battery charging the car DVR panel can automatically turn off
in:10s/30s/1min/never turn off.
• Stamp: Mark the movies and images with current data and time information.
• G-sensor sensitivity: G-sensor sensitivity could be chosen from high/middle/low/turn
off.
• Language: Language settings. Available languages: Polish, English and German.
• Time and date: Car DVR time and date settings.
• Format: Format the TF Card (if TF card is inserted in car DVR), please note that this
action will delete all data and files.
• Default setting: Resets all settings to factory setting.
• Firmware version: Car DVR software version.
2.2 Photo settings
In preview window press button to enter the Main Menu.
Please choose and press button to enter the Photo settings. Press
button to choose one of available functions. Available settings:
• Photo resolution: 16MP (4608×3456), 5MP (2592×1944) and 3MP (2048×1536).
• Quality: High/Middle/Low.
4
Page 5
2.3 Video Setting
In preview window press button to enter the Main Menu.
Please choose and press button to enter the Video settings. Press button
to choose one of available functions. Available settings:
• Video resolution: Super HD (2304x1296, 30fps), FHD30 (1920×1080, 30fps), HD30
(1280×720, 30fps), WVGA30 (848×480, 30fps).
• Time lapse: 1s, 5s, 10s, 30s and 1min. per frame.
• Mute: Turns off voice recording. ON/OFF
• Time split: The recording will be splitted in 1, 3 or 5 minutes parts. When the setting is
off, video will be splitted into 1GB parts automatically.
• Record overwrite: When the TF Card is full, the new video will overwrite the previous
video files. Available settings: on/off.
• Motion detection: Turns on the device when motion will be detected.
• WDR Image-intensification: wide dynamic range function. It makes the video brighter,
especially in dark places.
2.3 Security settings
In preview window press button to enter the Main Menu.
Please choose and press button to enter the Security settings. Press
button to choose one of available functions. Available settings:
• Playback in password: Passoword settings (revise passwords functions, set a new
pasword, set a default passwords 0000).
• Fatigue driving warning: Fatigue driving warning. When turned on, it displays a pop-
up warning and confirms it additional with a voice warning in case that the device is
turned on longer then 4 hours.
3. How to use your car DVR?
3.1 Video/Time lapse
The turned on option shorts a longer video into a few minutes one.
In preview window press button and go to the Video/Time Lapse mode.
Please press button to start/stop recording.
3.2 Photo
In preview window press button and go to the Photo mode.
Please press button to take a photo.
3.3 Playback
In preview window press button and go to the Playback mode.
Please press buttons to choose the videos or images.
Press button to enter the Thumbnail mode.
Press button to start the playback.
Please press button to go back to the Thumbnail mode.
5
Page 6

3.4 Playback in encryption
In the Security settings window press button to choose the Playback in
password option.
Press button to confirm. Press button to choose the number and confirm the
choose with button.
In this menu you can also turn off this function or set a new password.
In case you forget the changed password, you can set back the default one 0000 by creating a
pwd.txt file on the TF card.
3.5 One Key Mute
In the Video mode short press button. The action will be confirmed with Icon.
To turn off the mute function press short button again.
3.6 Emergency files protection function
If the G-sensor function is on, the device will record any kind of sudden acceleration. The
Emergency Files protection function will auto trigger. During video shooting press
button to protect current video files or adjacent files. After auto protection triggered, the
screen will display the protection icon, the corresponing file will display locking icon reminder,
when you review playback file.
3.7 Motion detection
If the motion detection opticon is on, please press button, your car DVR will start
detecting any kind of motion automatically. The recording will stop, when the object stops
moving the next 10 seconds.
3.8 Car DVR connect with computer
Connect your car DVR to computer via USB cable. The car DVR will turn on. The connection will
be confirmed with the icon. Now you can copy the files from the car DVR to PC.
3.9 Connect with TV
Connect the car DVR with your TV via HDMI cable. User can review the videos on the TV. The
navigation through menu settings will be managed over car DVR display.
3.10 Car DVR and car mount
Use the car mount to fix car DVR to the front of your car window.
a) Fixing: Connect the car mount with car DVR. Fix the car mount to the car window and lock it
with switch knob.
b) Disconnecting: Unlock the car mount from the car window using the switch knob.
6
Page 7

Tech. Specification/Technische Eigenschaften/Specyfikacja techniczna
Specification
DSP Amba A7L50
Sensor 3Mega CMOS sensor (AR0330CS)
LCD 2.7" High definition panel
Lens 135° wide angle lens 6G
F.No 2.0
Memory (external only) supports SDHC TF card
Speaker Built-in
Microphone Built-in
USB High speed USB2.0 MiniB
G-sensor yes H/M/L level optional
WDR yes
Video output Mini HDMI
Photo
Output pixel 3 MP
Shutter Electronic
Exposure control Auto
Image Resolution (Max) 4608x3456 (16MP)
File format JPEG
Video/Audio
Video mode Continuous/ Time Lapse (1s, 5s, 10s, 30s, 1min)
Video resolution SHD:2304x1296 (30fps)
FHD:1920X1080 (30fps)
HD:1280X720 (30fps)
WVGA:848x480 (30fps)
video (compression) format MP4 (H.264)
Audio format ADPCM
G-sensor yes H/M/L level
Power supply
DC Supply Car charger 5V/1A
Battery 120mAh Build in
Recharging time around 0.5 hours
Power ON/OFF AUTO (Car charger), Manual (Power key)
Recharging way adapter/USB/car charger
Housing
Size (mm) 87*49*14 Exlude lens hight
Weight 0,062 kg
7
 Loading...