

Page 1
TECHNICAL DATA
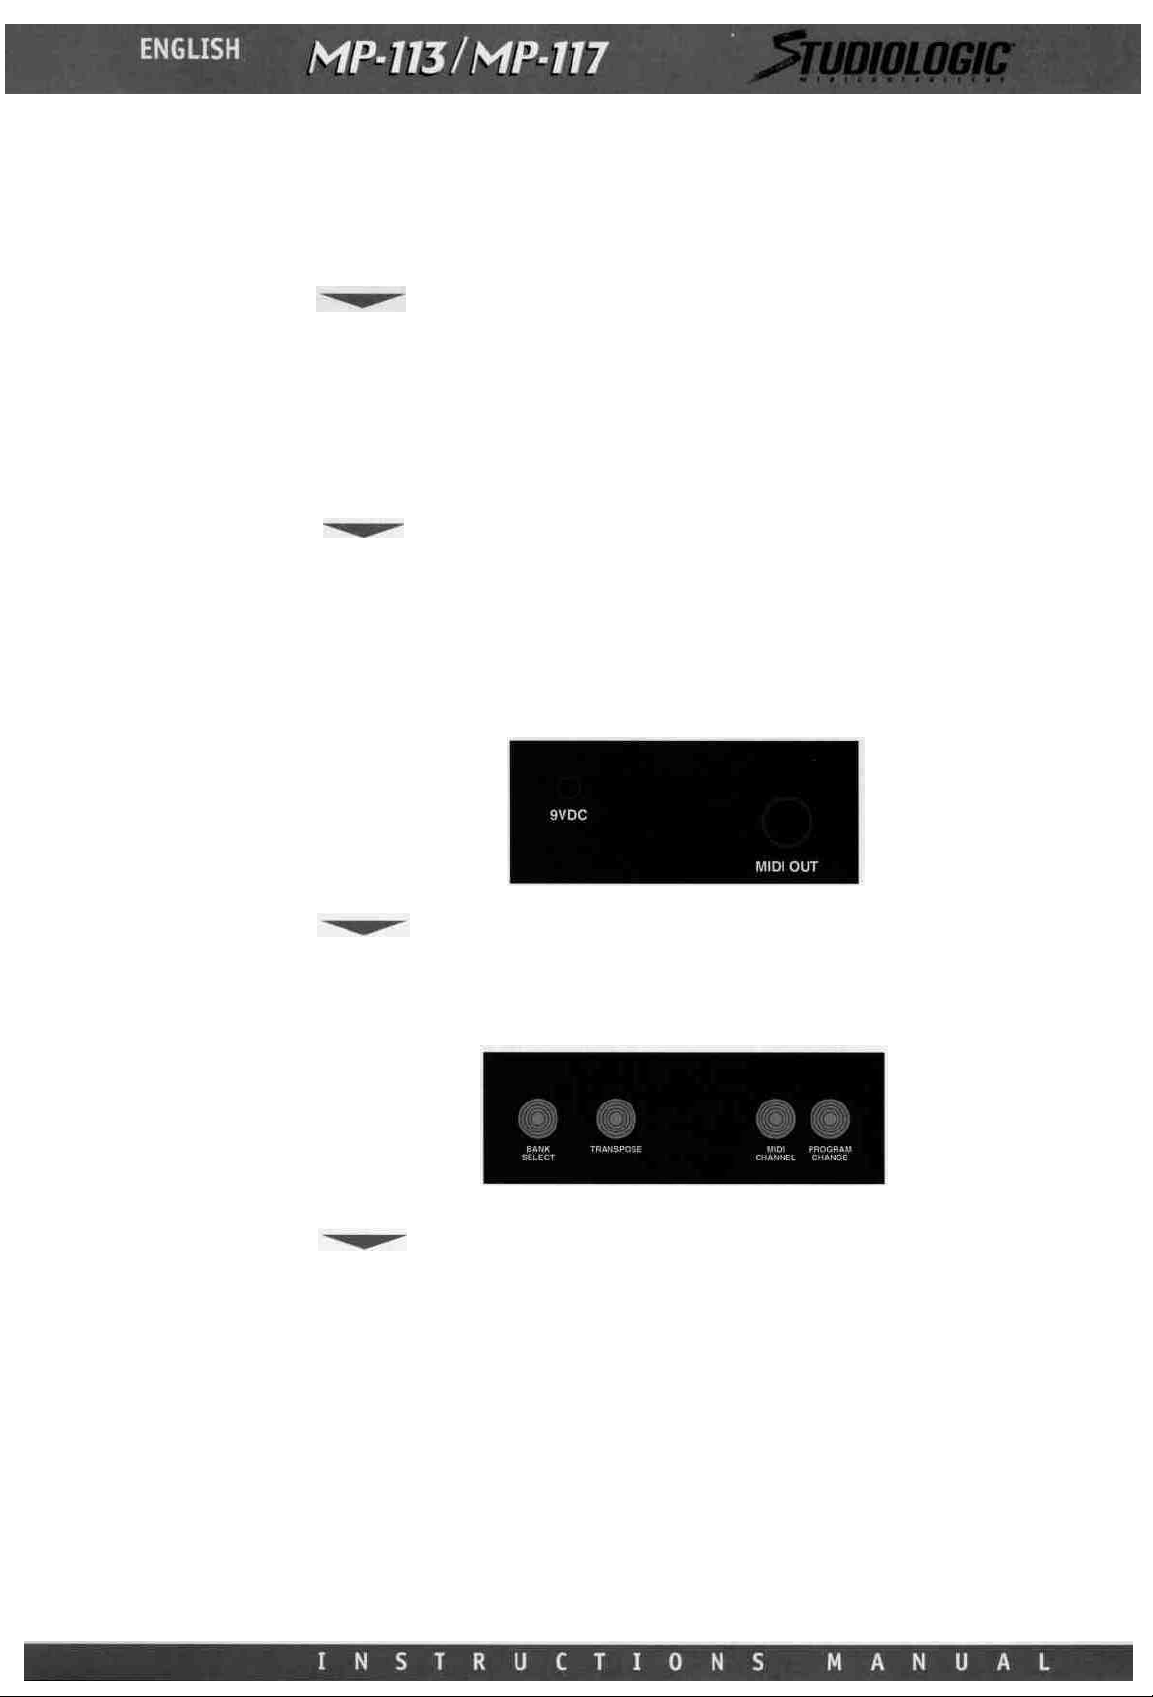
CONNECTIONS
Welcome to the world of
the MIDI MP-113/MP-117 is a MIDI Pedalboard controller with a simple yet versatile
software.Studio
sing MIDI events by foot, both for playing traditional bass lines and for triggering other
MIDI effects and devices.
The MP-113/MP-117 pedalboard is composed of:
•Pedalboard with 13 (MP-113) or 17 (MP-117) dynamic keys
• Top panel with the following buttons: MIDI channel. Program Change, Bank Select and
Transpose ^
• 1 zone
• Numerical keypad corresponding to the pedals starting from the first low C.
•
Rear
1)
2) Connect MIDI cable/s to the MIDI input on your sound sources.
3) Connect the DC feeding cable to the MIDI pedalboard. The default channel is MIDI no.l.
with
panel: 1 output
Connect
corresponds
that has a rating of 9V DC with a positive polarity and has a minimum current of 200 mA.
the
STUDIO
full
extension
MIDI,
AC
adapter cable
to
the correct voltage
LOGIC
MIDICONTROLLERS.
and stage musicians alike
DC
feeding
to
input, 1 signaling
the
power
input
output.
The
will
appreciate
led.
jack.
Make
sure
MP-113/MP-117
the
that
will
added
the
accept
flexibility
AC
adapter
an
of
acces-
adapter
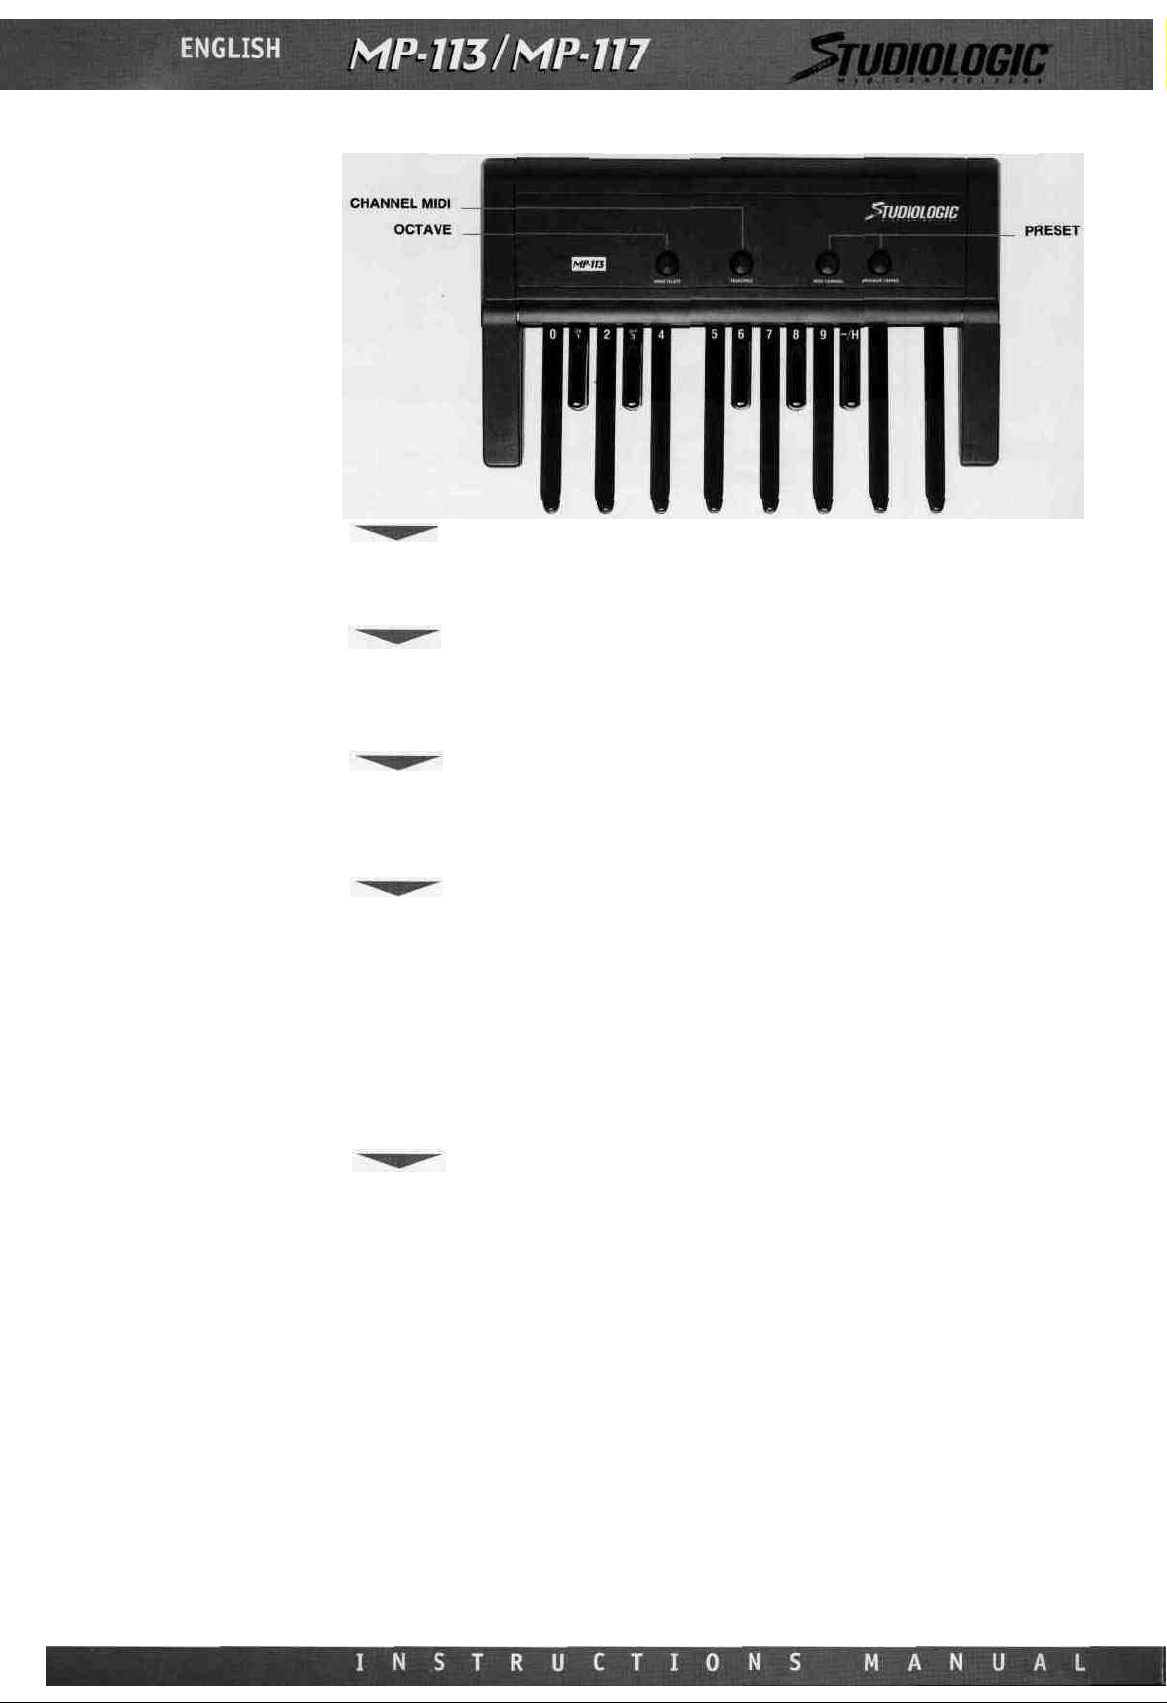
TOP PANEL
MIDI
FUNCTIONS
The figure shows the control panel on top of the pedalboard, with four function buttons.
To assign values and adjust parameters, use the numerical keypad located on the PEDAL-
BOARD
octave. Starting from
You should bear in mind the main functions of your Pedalboard.
A few seconds after switching on, the instrument is ready to send the desired MIDI data
and
the
keyboard
Operations must be carried out sequentially. To assign values to commands, hold the specific button, enter the number on the keypad and then release the button. If there are any
keys
pressed
Sustain pedal is down. On the contrary, if you press any key no sound is produced, since
the function keys on the central octave are enabled.
When
you switch on your instrument,
•VOLUME = VALUE 127
on
will
the
keyboard,
the
be
sending on
LOW
no
command
C,
you
MIDI
channel no. 1.
will
it
will
send
will
have
be
accepted.
the
the
following
The
following
pattern:
same
data:
happens when
the
•PITCH BEND = VALUE 64
Page 2
PROGRAMMING
MIDI
CHANNEL
PROGRAM CHANGE
BANK SELECT
TRANSPOSE
When
you switch
Any
modification
To
change
on
MIDI
channel, hold
your
PEDALBOARD
will
be
carried
MP-113/MP-117,
out
in
real
the
MIDI
CHANNEL
time,
it
will
as
described
button
send on
and
enter
MIDI
below:
the
Channel
no.
1.
channel number by
depressing the appropriate numerical keypad (central octave). This function key must be
released after the numerical keys. At this point the keyboard is sending on that channel.
To assign the PROGRAM CHANGE, whose numerical value corresponds to the sound code of
MIDI
modulus, hold
gh 128). After releasing
the
PROGRAM
the
CHANGE
function
key,
button
the
modulus'
and enter
sound
the
desired number
will
be changed.
(1
throu-
This function allows you to change the sound bank on your expander or MIDI keyboard.
Hold the Bank Select button. The reception protocol depends on the type and make of the
MIDI
modulus you use. Therefore,
if
the
Bank
Change
requires only Control 32, you
will
have to enter the desired number on the keypad. Instead, some moduli require a more complete protocol (Control 32 + Control 0). In this case, enter the number for Control 32 and
then press H (higher part of Bank Change Byte). Then, enter the desired number for Control 0.
After releasing
this
function
key,
the
bank
selection
will
be sent.
CAUTION: After receiving the Bank Select command, some moduli store the newly selected
bank, while others keep storing the previous sound. To avoid this problem, after sending
the
new
Bank
Select command you
When
the
device is switched on
first
low C corresponds
to
the C under
for
will
the
also
first
the
have
time,
line
of
to
the
the
send
bass
the
selected
Transpose
clef.
value
Program
is = 0,
that
Change.
is
the
To make a transposition, do the following operations. If you wish to raise the tone by 4
semitones, press Transpose, enter 4 on the keypad, an then release the button. On the contrary,
to
lower
the
tone
by
an
octave,
press
Transpose
and
then
press
the
black key
(B
flat)
marked with (-). Finally, enter 12 on the keypad.
To sum up: To effect positive Transposes, enter the number of the desired semitones, while
for negative
Transposes
digit
(-)
and
then
the
number of semitones.
N.B.: The Pedalboard accepts a maximum of +/- 24 semitones, therefore +/- 2 octaves.
 Loading...