

Page 1

HDP5000 CUPS Driver User Guide
Linux & MAC OS
© 2009 HID Global Corporation. All rights reserved.
Document Number L001389 Rev.1.1
Fargo HDP5000 CUPS Driver User Guide for Linux and MAC
Page 2

HDP5000 CUPS User Guide Linux & Mac OS
User Guide (Rev 1.1), property of HID/Fargo
Electronics, Incorporated
© 2009 HID Global Corporation. All rights reserved.
Exclusive permission is granted to authorized resellers of HID Global products to reproduce
and distribute this copyrighted document to authorized HID Global customers, who have
signed a “no disclosure agreement” regarding the restricted, proprietary use of said
document.
The revision number for this document will be updated to reflect changes, corrections,
updates and enhancements to this document.
Revision Control Number Date Document Title
Revision 1.1 October 2009 HDP5000 CUPS User Guide Linux & Mac OS
Added webpage link for driver setup
Updated driver install instruction
MAC Ethernet setup
Revision 1.0 August 2009 HDP5000 CUPS User Guide Linux & Mac OS
These reference documents were thoroughly reviewed to provide HID Global with
professional and international standards, requirements, guidelines and models for our
technical, training and user documentation. At all times, the Copyright Protection Notice for
each document was adhered to within our HID Global documentation process. This
reference to other documents does not imply that HID Global is an ISO-certified company at
this time.
ANSI/ISO/ASQ Q9001-2000 American National Standard, (sub-title) Quality Management
Systems - Requirements (published by the American Society of Quality, Quality Press, P.O.
Box 3005, Milwaukee, Wisconsin 53201-3005)
The ASQ ISO 9000:2000 Handbook (editors, Charles A. Cianfrani, Joseph J. Tsiakals and
John E. West; Second Edition; published by the American Society of Quality, Quality Press,
600 N. Plankinton Avenue, Milwaukee, Wisconsin 53203)
Juran's Quality Handbook (editors, Joseph M. Juran and A. Blanton Godfrey; Fifth Edition,
McGraw-Hill)
Any questions regarding changes, corrections, updates or enhancements to this document
should be forwarded to:
Fargo Electronics, Incorporated
Support Services
6533 Flying Cloud Drive
Eden Prairie, MN 55344 (USA)
(866)607-7339 Ext #6
FAX: (952) 946-8492
www.hidglobal.com
HDP5000 Cups (Linux & MAC OS) User Guide Rev1.1
2
Page 3

Table of Contents
Supported Distributions CUPS 5
Installation Procedure for the CUPS Driver on Linux OS 6
Installation Procedure for MAC OS X Driver 7
HID/Fargo Printer Driver Setup 11
Selecting the Card Size 11
Selecting the Supported Ribbon Types 12
Selecting the Disable Printing Option 13
Selecting the Print Both Sides Option 13
Selecting the Split 1 set of Ribbon Panels Options 13
Using the Image Color Capabilities 14
Selecting the Color Matching Options 14
Selecting Resin Dither: 15
Following the Dye-Sub Intensity Procedure 15
Following the Resin Heat Front Procedure 16
Following the Resin Heat Back Procedure 16
Image Transfer Options 17
Selecting the Horizontal Option 17
Selecting the Vertical Option 17
Transfer Temperature 18
Transfer Dwell Time 18
K-Panel Options 19
Selecting the Front K-Panel Area 19
Selecting the Back K-Panel Options 19
Selecting the K-Panel Only Front Options 20
Selecting the K-Panel Only Back Options 20
Lamination Options 21
Lamination Position and Speed: 21
Lamination Side: 21
Lamination Film Types Per Cartridge 22
Lamination Transfer Temperatures per Cartridge 23
Magnetic Encoding Options 24
Setting the Encoding Mode 24
Setting the Coercivity 25
Sending ISO Magnetic Encoding Information 26
Sending JIS II Magnetic Encoding Information 27
Sending RAW Magnetic Encoding Information 27
Reviewing the URL Encoding Reference 27
Reviewing the ASCII Code and Character Table 28
Using the Command Line Option Setup for CUPS 29
Adding a USB Printer 29
Example output from lshal 30
Adding a Network Printer 31
Determining the Printer IP Address 32
Probing for Fargo Network Printers on the Network 33
Reviewing the File Listing 33
Printing a Sample Card 34
Entering the Print Only Command 34
Entering the Print with Mag Encoding Command 34
Managing Printer from the Cups Web Interface. 34
Printer-Specific Options 34
HDP5000 Cups (Linux & MAC OS) User Guide Rev1.1
3
Page 4

Setting Printer Options 35
Canceling Print jobs from Command Line 35
General Printing Options for CUPS 35
Ethernet Installation Procedure for the MAC Driver 36
Printer Maintenance Options for Linux and Mac 40
Performing a Ribbon Sensor Calibration 40
Performing a Film Sensor Calibration 41
Performing a Lamination Sensor Calibration 42
Cleaning the Printer 43
Printing a Test Card 44
HDP5000 Cups (Linux & MAC OS) User Guide Rev1.1
4
Page 5

Supported Distributions CUPS
The Common Unix Printing System (CUPS), a modular printing system for Unix-like
computer operating systems, allows a computer to act as a print server. A computer running
CUPS is a host that can accept print jobs from client computers, process them, and send them
to the appropriate printer.
Linux 32-bit - Ubuntu 7.10, Fedora Core 7 & 8, Red Hat Enterprise 5, openSuse 10.3,
NovelSuse 9.
MAC OS X Version 10.4 -10.5
File structure
CUPS service name & path /etc/init.d/cupsys
CUPS PPD model path /usr/share/ppd/custom
CUPS filter path /usr/lib/cups/filter
CUPS config path /etc/cups
LOG directory /var/log
HDP5000 Cups (Linux & MAC OS) User Guide Rev1.1
5
Page 6

Installation Procedure for the CUPS Driver on Linux OS
Note: On some Linux Distributions, it may be necessary to disable SELinux (security
enhanced Linux) capabilities in order to install or use the CUPS Driver.
Refer to the SELinux web site at: www.nsa.gov/selinux/
specific distribution for more information.
Step Procedure
1 Unpack the driver tar-ball by running the following command as root from the
directory the file was downloaded to:
# tar -xzvPf fargoHDP5000-1.0.0.4-1.tgz
(Note: If an existing driver was already present on the system, it may be
necessary to restart CUPS to allow the file changes to take effect.)
or the documentation for your
HDP5000 Cups (Linux & MAC OS) User Guide Rev1.1
6
Page 7
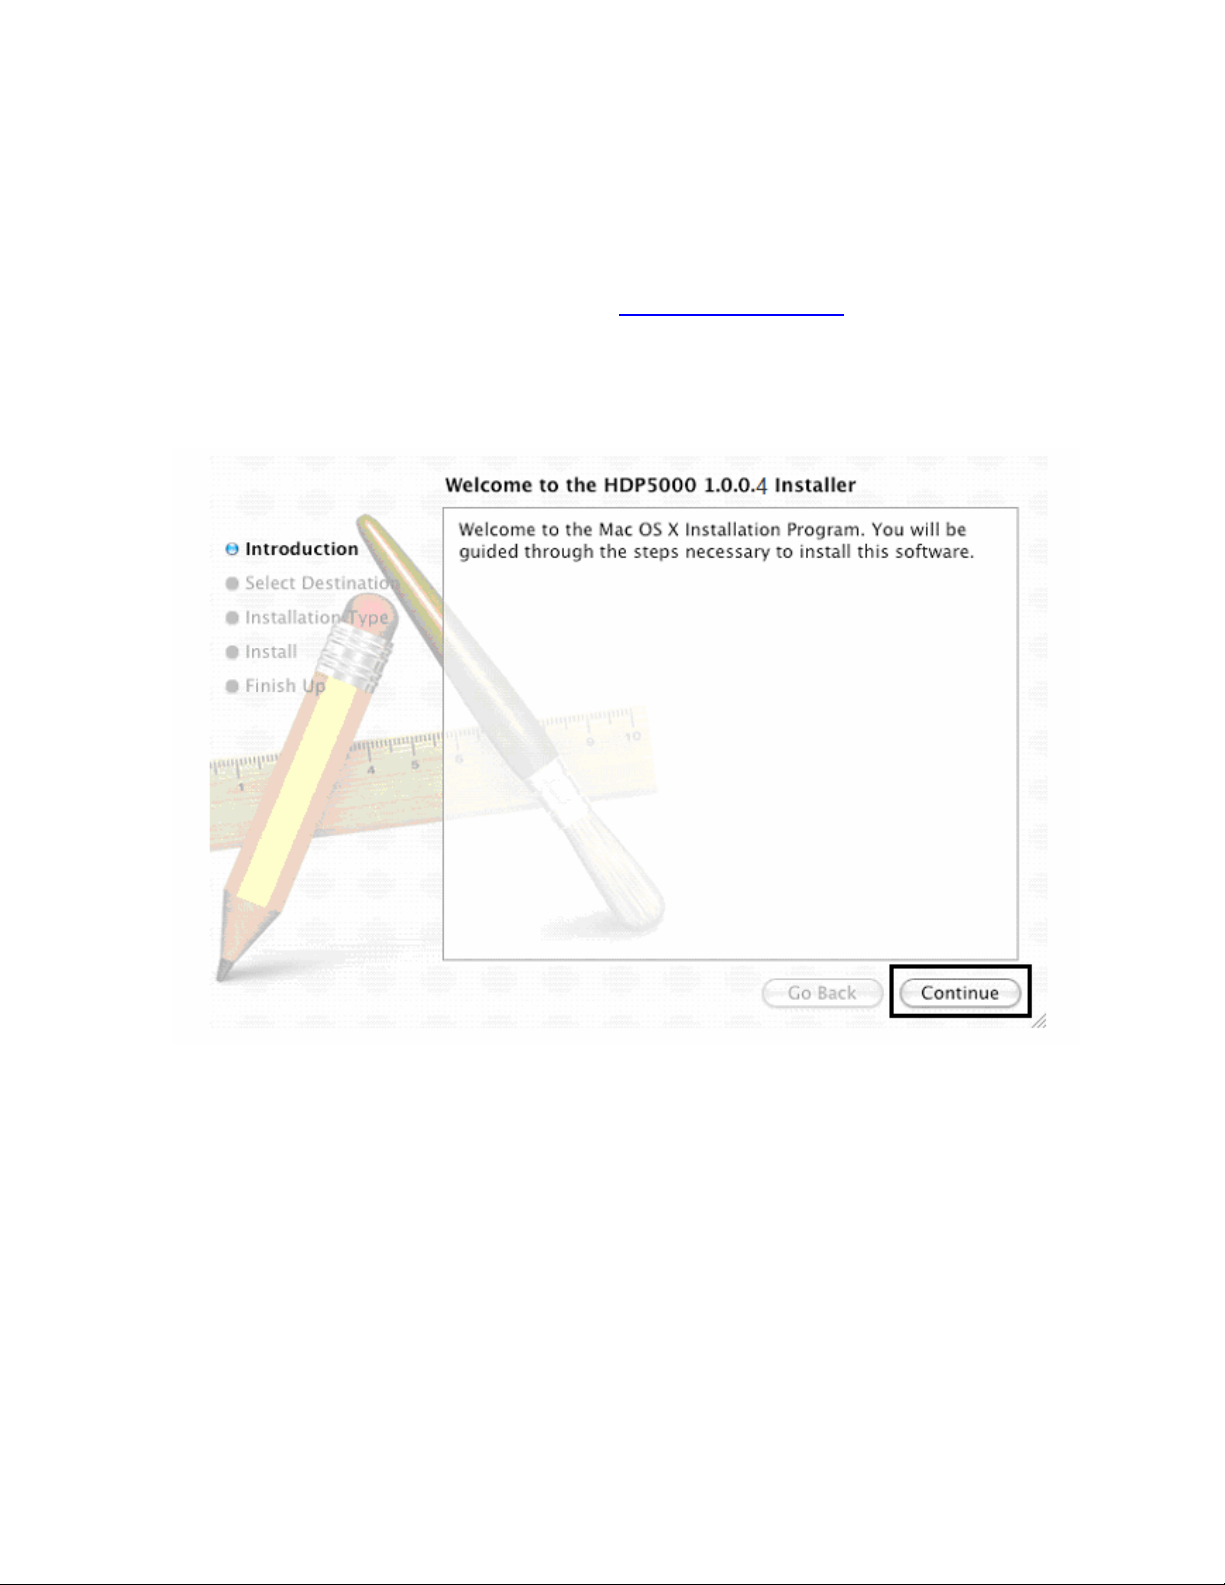
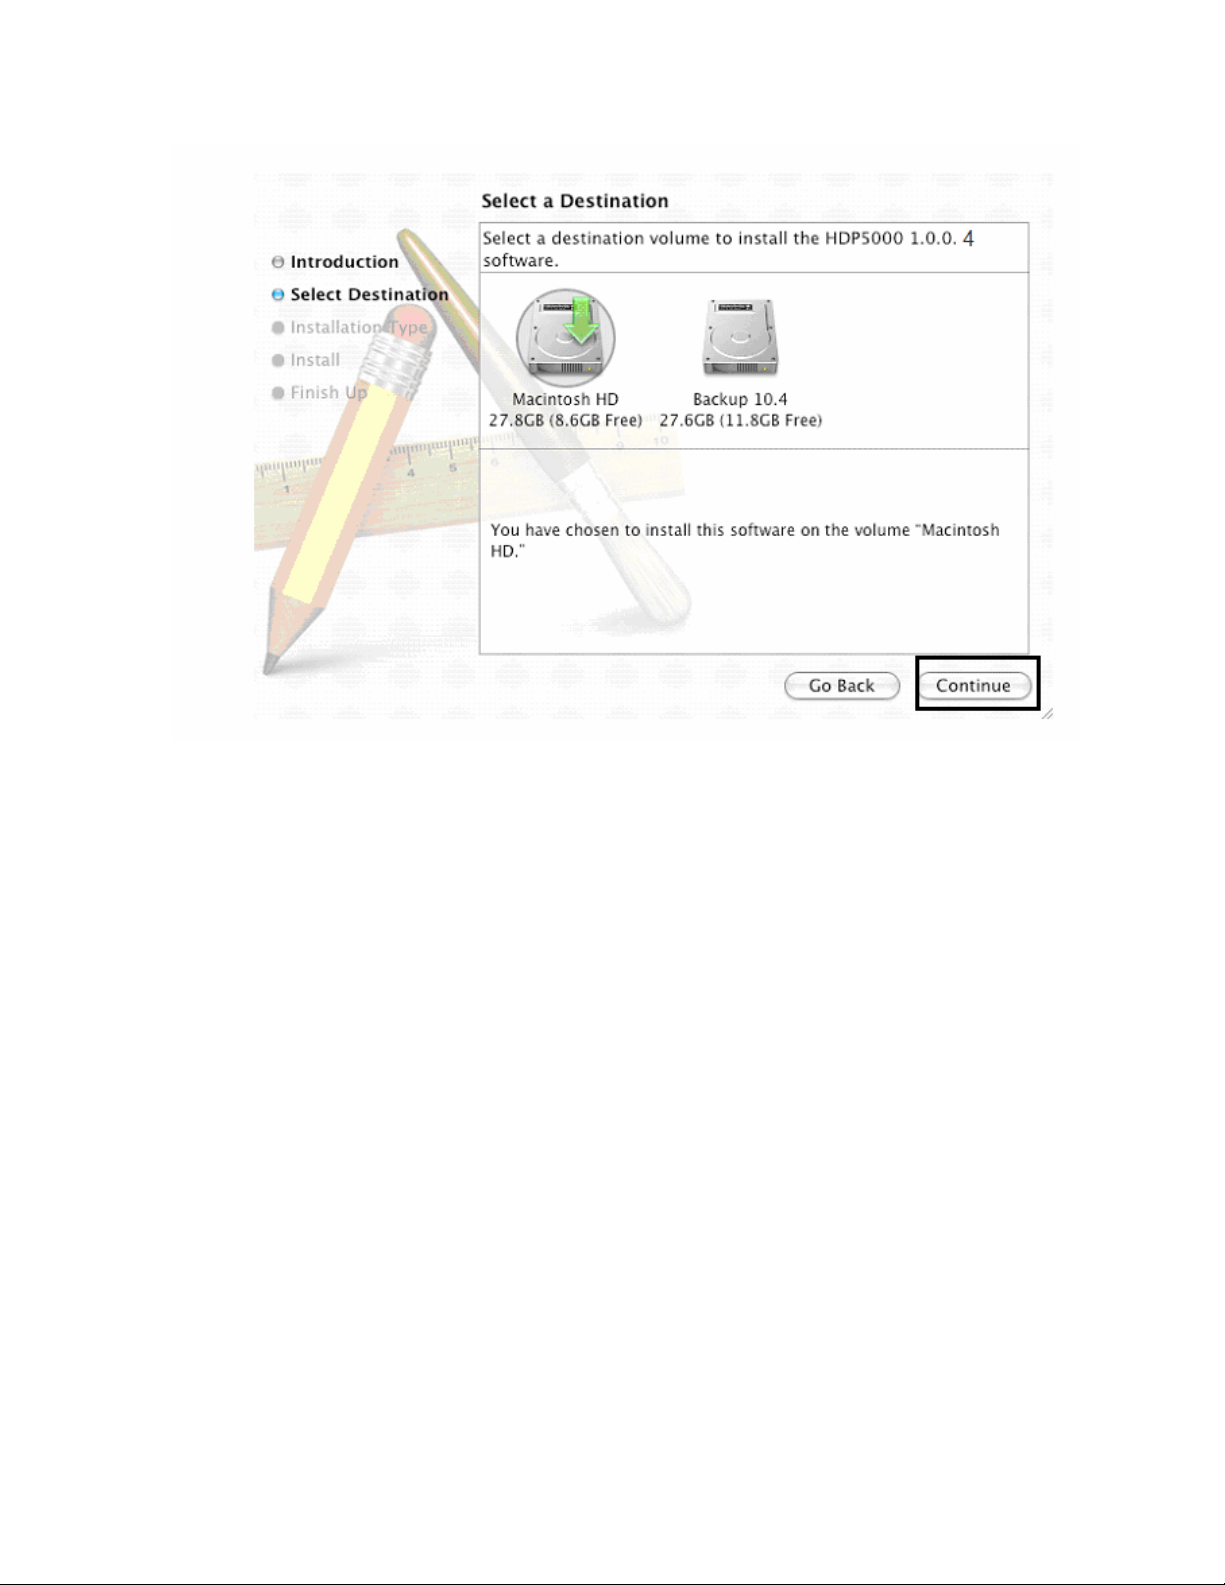
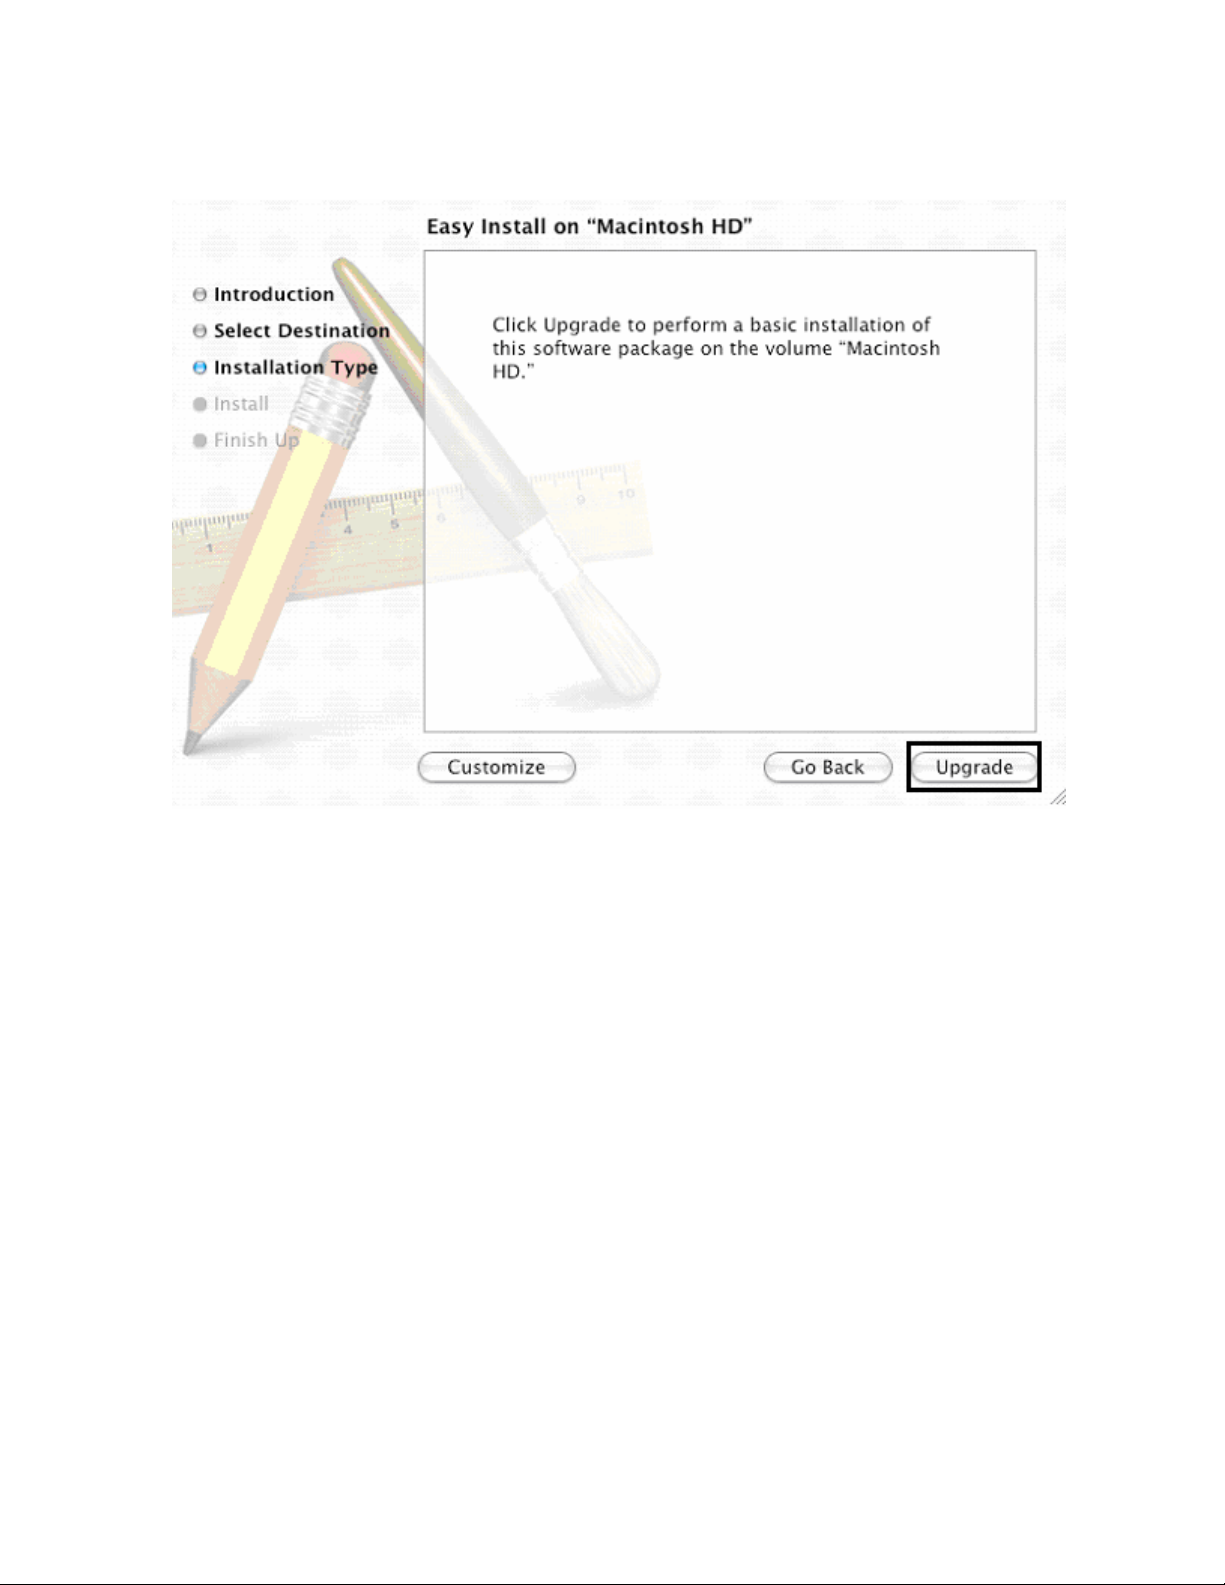
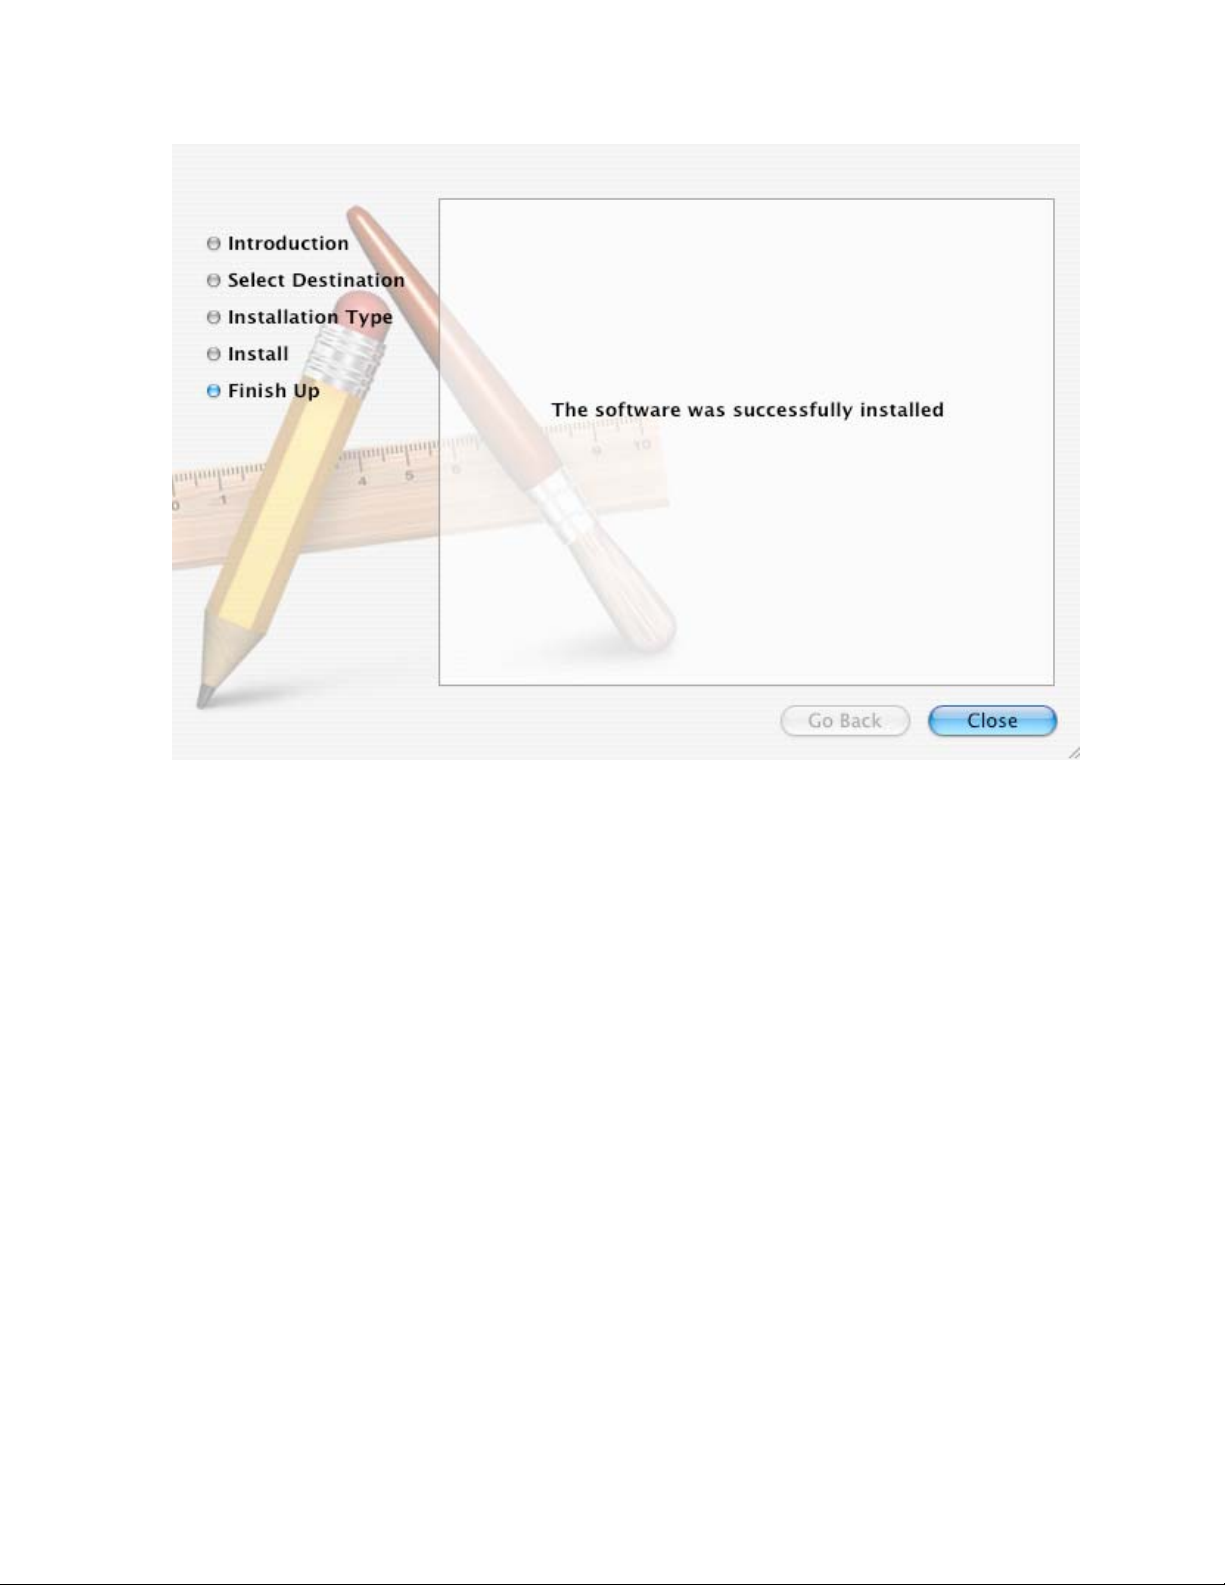
Installation Procedure for MAC OS X Driver
Download the Mac Printer Driver from www.fargosupport.com to the desktop. (This
will be in Zip format)
Unzip the folder
Double-click on the HDP5000V1.0.0.4 PKG folder to start the installation
HDP5000 Cups (Linux & MAC OS) User Guide Rev1.1
7
Page 8
HDP5000 Cups (Linux & MAC OS) User Guide Rev1.1
8
Page 9
HDP5000 Cups (Linux & MAC OS) User Guide Rev1.1
9
Page 10
HDP5000 Cups (Linux & MAC OS) User Guide Rev1.1
10
Page 11
HID/Fargo Printer Driver Setup
Once the CUPS and MAC driver are installed the printer options are
setup as shown below.
Go to webpage http://localhost:631
In order to access the Set Printer Driver options shown below.
(NOTE: Click here for Ethernet setup. Ethernet Installation Procedure for the MAC
Driver )
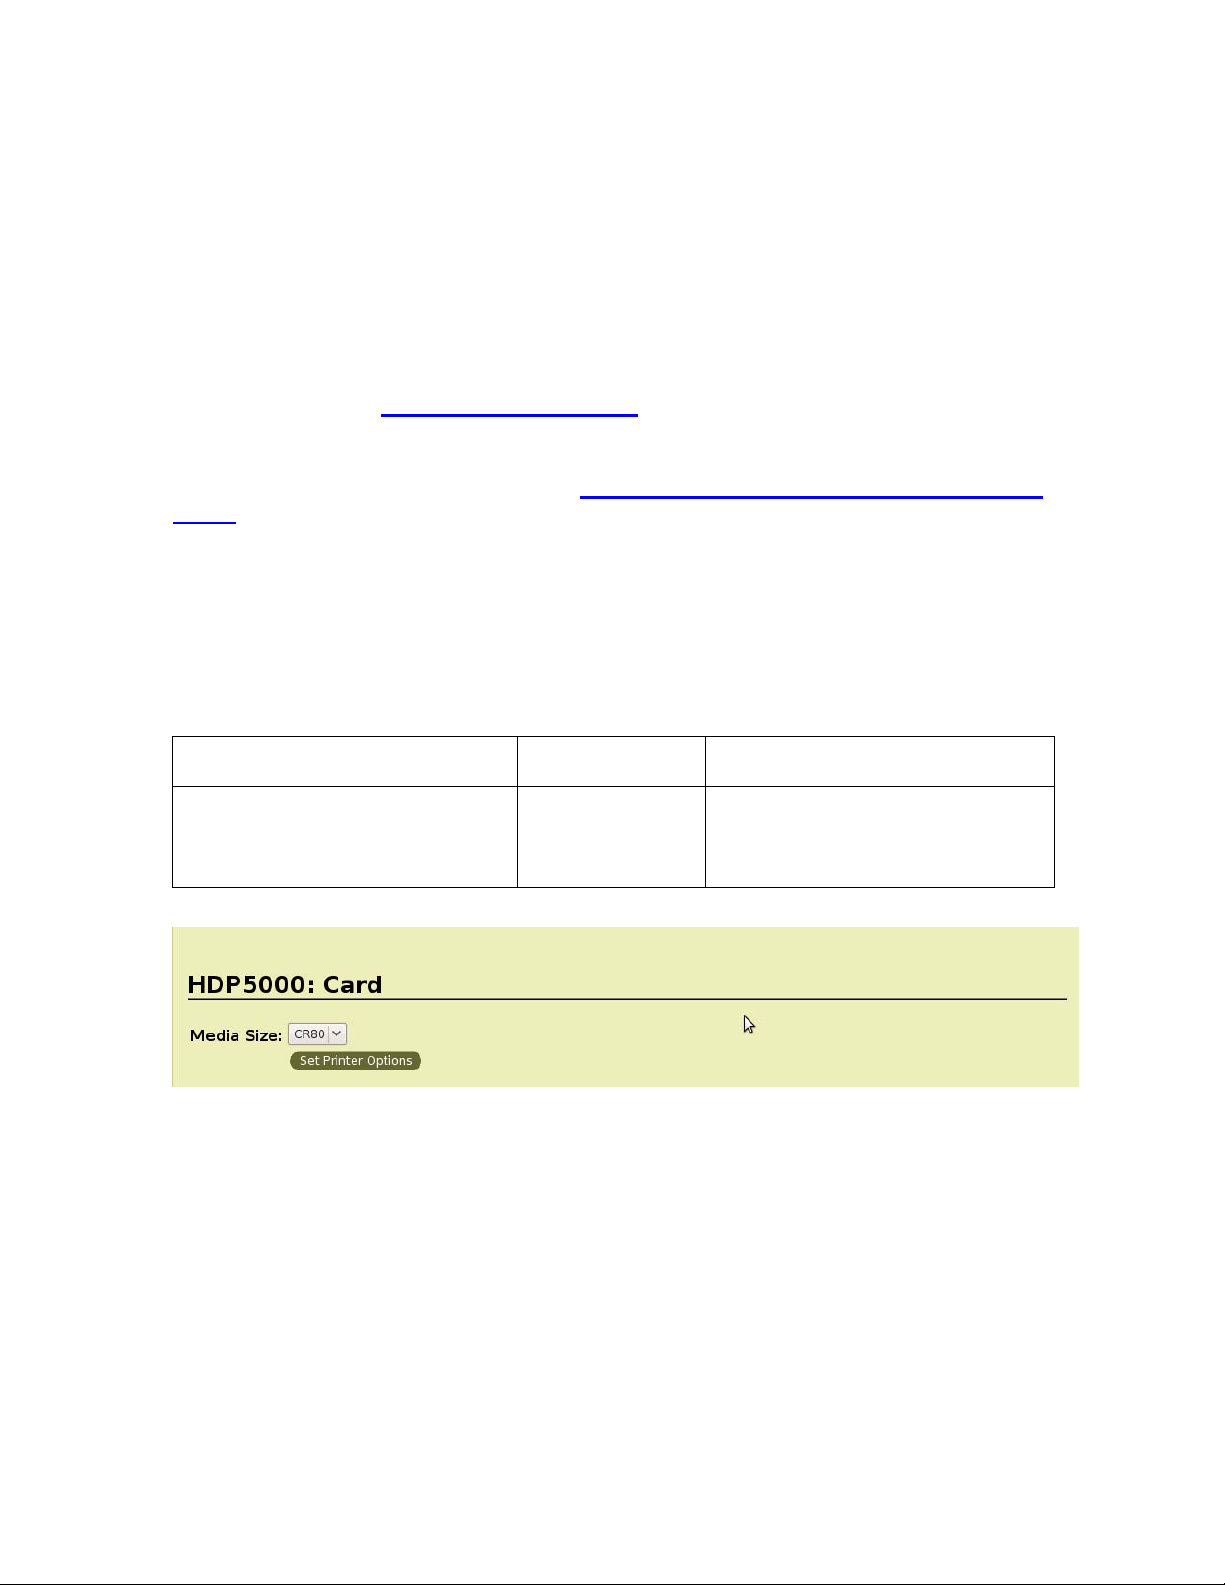
Selecting the Card Size
Card Options available include the Card Size only
Card Type, Orientation and Copies options are not supported. These
options are supported in the application used to print.
Command Line Usage CUPS option Description
PageSize = CR80 Media Size =
CR80
Sets the Page Size for the print
job to CR-80 (3.375"L x 2.125"W
/ 85.6mmL x 54mmW).
HDP5000 Cups (Linux & MAC OS) User Guide Rev1.1
11
Page 12
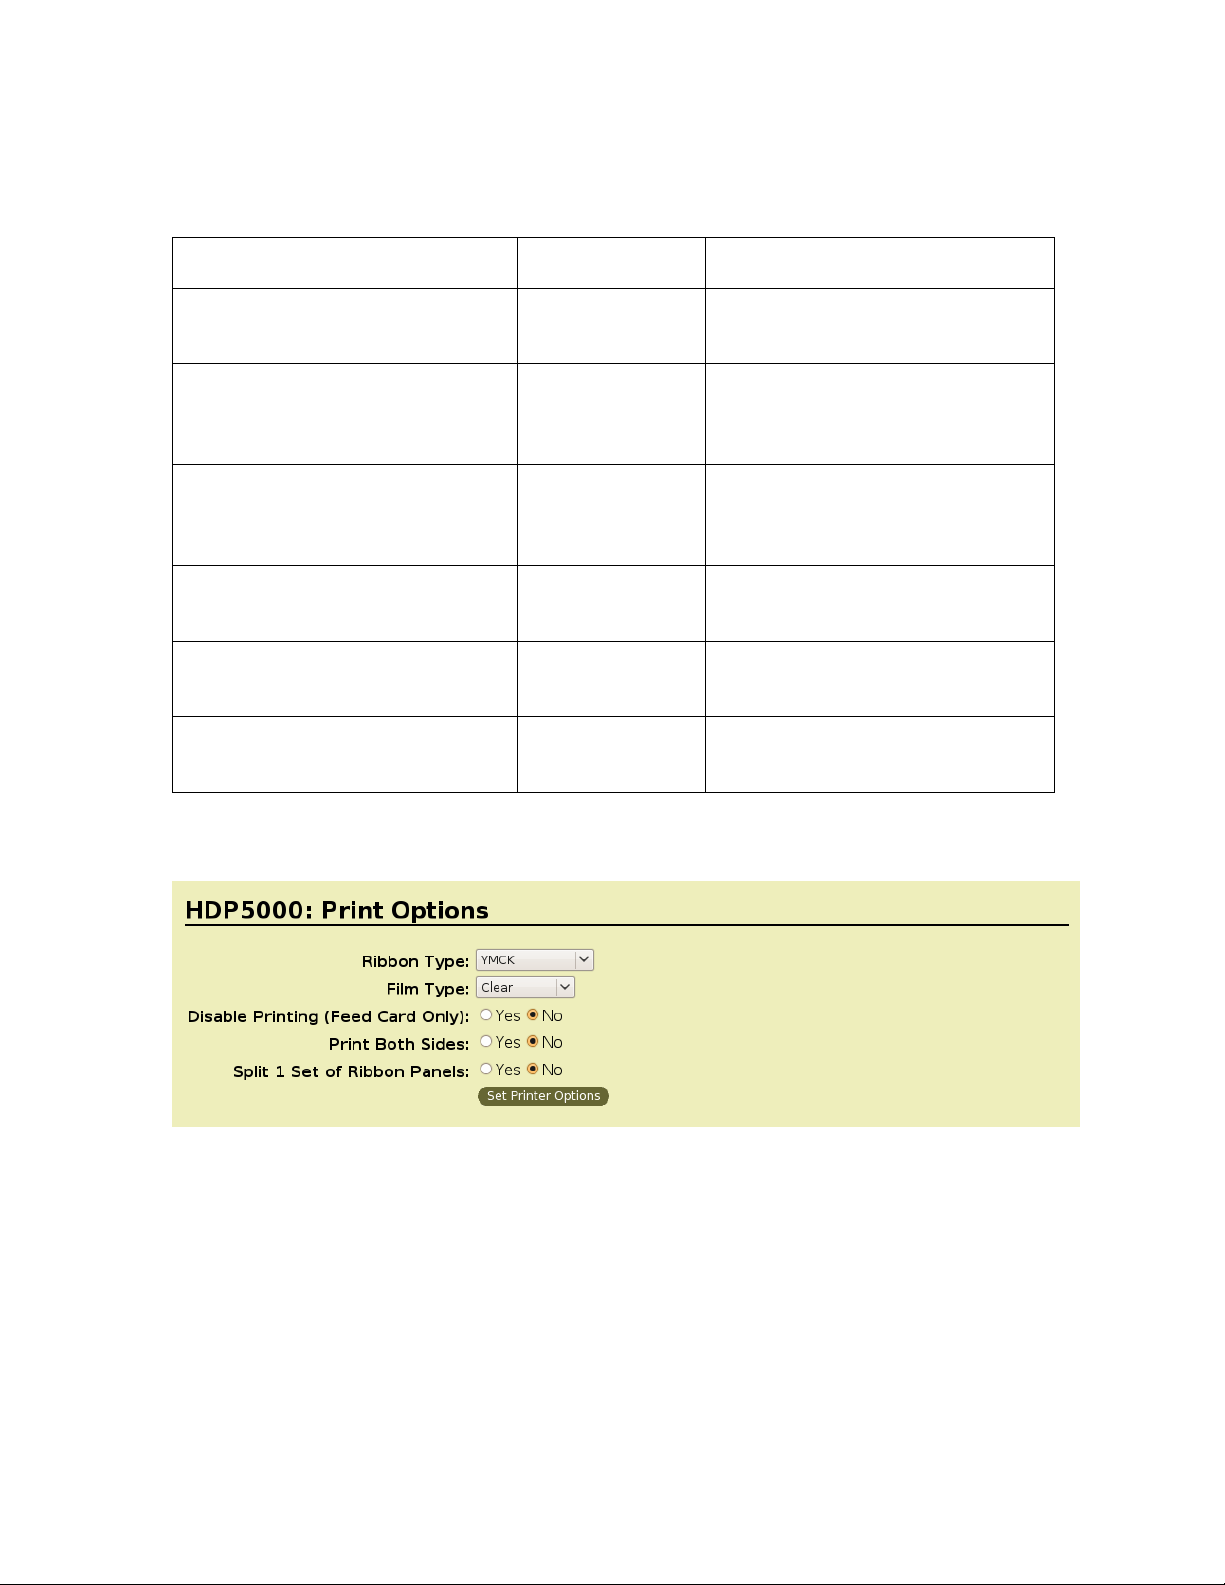
Selecting the Supported Ribbon Types
Command Line Usage CUPS option Description
Ribbon = YMC Ribbon Type =
YMC
Ribbon = YMCK Ribbon Type =
YMCK
Ribbon = YMCKK Ribbon Type =
YMCKK
Ribbon = YMCKH Ribbon Type =
YMCKH
Ribbon = K Ribbon Type = K Sets the Ribbon type for the print
Ribbon = PremiumResin Ribbon Type =
Premium Resin
Sets the Ribbon type for the print
job to YMC – Full Color
Sets the Ribbon type for the print
job to YMCK – Full Color/ Resin
Black.
Sets the Ribbon type for the print
job to YMCKK – Full Color/Two
Resin Black.
Sets the ribbon type for the print
job to YMCKH – Heat seal.
job to Premium Resin.
Sets the Ribbon type for the print
job to Premium Resin.
HDP5000 Cups (Linux & MAC OS) User Guide Rev1.1
12
Page 13

Selecting the Disable Printing Option
Command Line
Usage
DisablePrinting = True Disable Printing
DisablePrinting =
False
CUPS option Description
Select it to encode or re-encode cards to
= Yes
Disable Printing
= No
save time and avoid the use of printing
supplies.
Select it to perform full printing and
encoding operations.
Selecting the Print Both Sides Option
Command Line
Usage
PrintBothSides = True Print Both Sides
PrintBothSides = False Print Both Sides
CUPS option Description
If the Printer is equipped with a Flipper
= Yes
= No
Module, it will print the second page of a
print job on the back side of a card
If the print job has multiple pages, it will
print on separate cards.
Selecting the Split 1 set of Ribbon Panels Options
Requires PrintBothSides = True and the Print Back Side option must be set to one of the
“Print Only” values
Command Line Usage CUPS option Description
SplitRibbon = True Split 1 set of Ribbon
Panels = Yes
SplitRibbon = False Split 1 set of Ribbon
Panels = No
Select this option to
automatically print full-color
on the front of a card and
resin black on the back of a
card.
Each side of the card will
use a full set of Ribbon
panels regardless of the
Ribbon configuration.
HDP5000 Cups (Linux & MAC OS) User Guide Rev1.1
13
Page 14
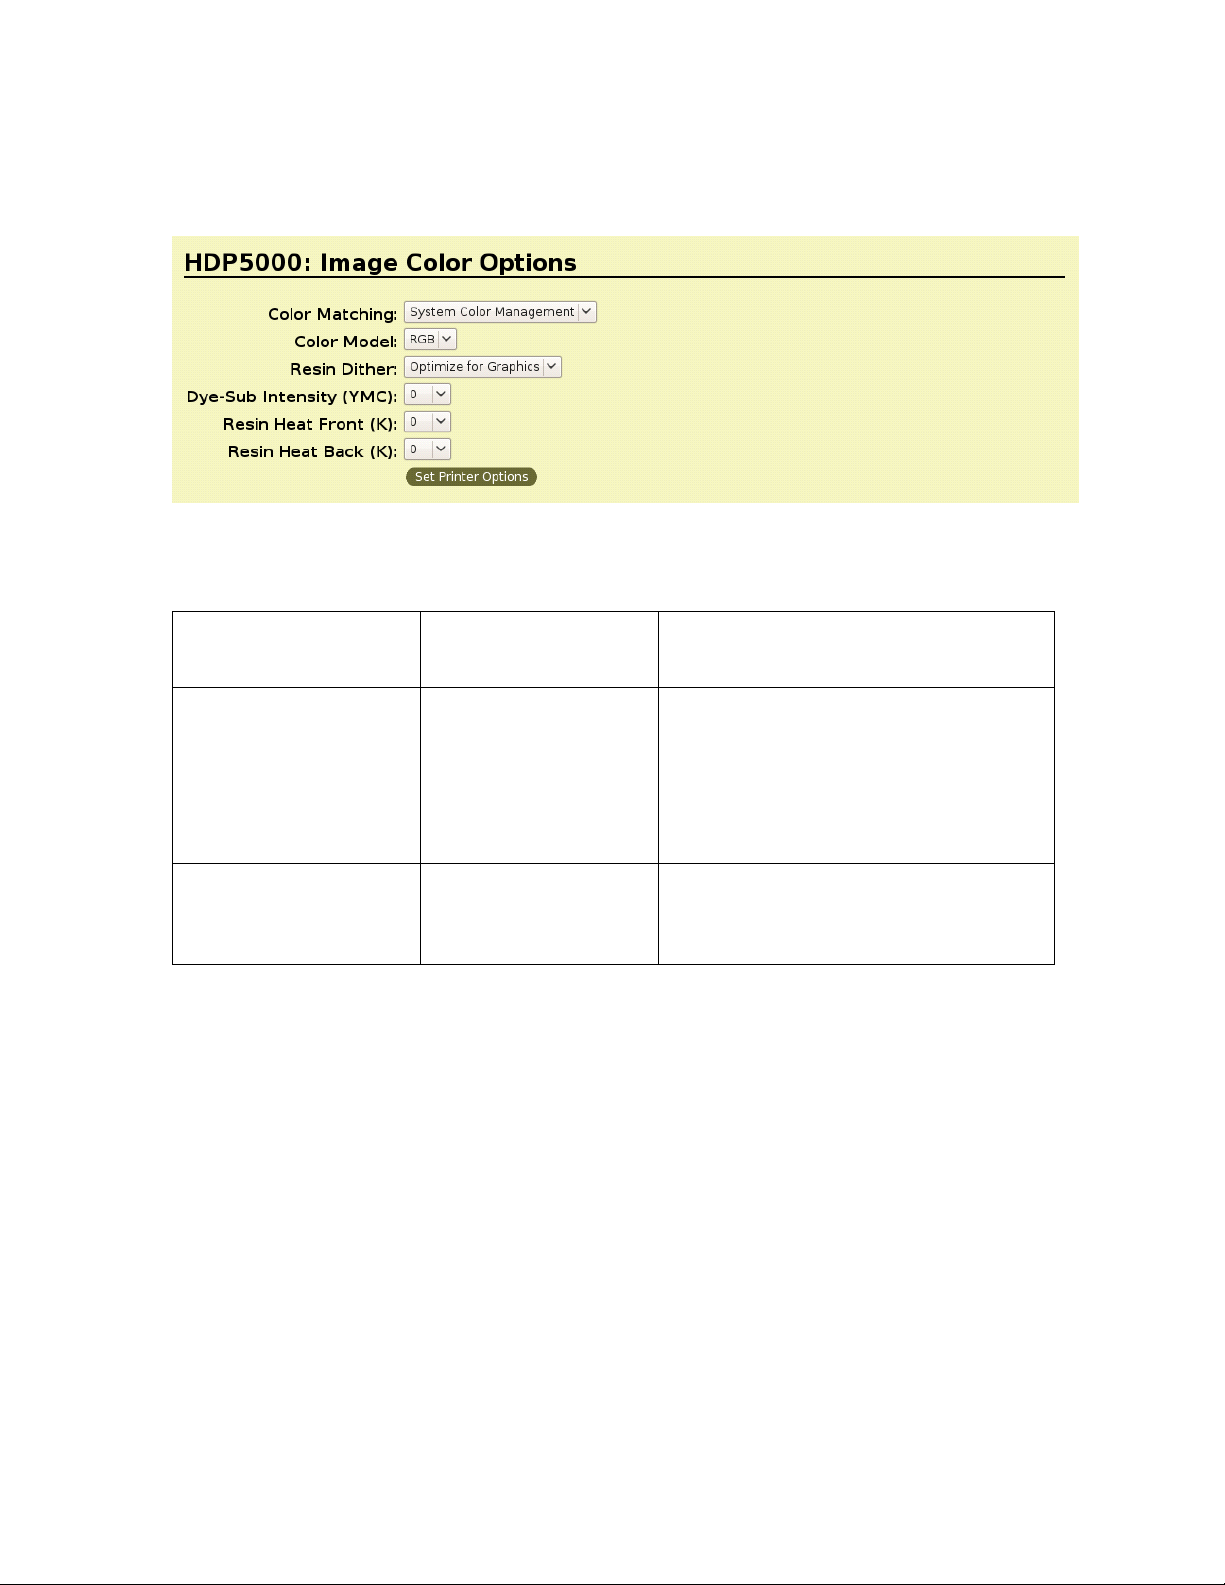
Using the Image Color Capabilities
Selecting the Color Matching Options
Command Line
Usage
ColorMatching =
System
ColorMatching = None Color Matching =
CUPS Option Description
Color Matching =
System Color
Management
None
This provides a closer match to the
RGB color specifications. (Note: This
option shifts colors to a different color
model so the colors in the image will
more closely match how they appear
on the monitor.)
Select None for print speed versus
print color or for use of third party
color matching software.
HDP5000 Cups (Linux & MAC OS) User Guide Rev1.1
14
Page 15

Selecting Resin Dither:
Select the appropriate dither method according to the type of image to be printed. (Note:
This option only affects those objects printed on the backside of a card with the resin black
Panel of a YMCK or YMCKK Print Ribbon. This is only enabled when using at least one K
panel and dual sided enabled, splitting one set of panels.)
Command Line
Usage
ResinDither = graphics Resin Dither =
ResinDither = photo Resin Dither =
CUPS Option Description
This is a lower quality print.
Optomized for
Graphics
This is a higher quality print.
Optomized for Photos
Following the Dye-Sub Intensity Procedure
Command Line
Usage
DyeSubIntensity=0
<-50 to 50>
CUPS option Description
Dye-Sub Intensity (YMC) = 0 1. Adjust the Dye-Sub Intensity
value higher to use more heat
when transferring dye-sub
colors to the card. (Note: This
will produce a darker, more
saturated image.)
HDP5000 Cups (Linux & MAC OS) User Guide Rev1.1
2. Adjust the dye-sub Intensity
value lower to use less heat
when transferring dye-sub
colors to the card. (Note: This
will produce a lighter print.)
15
Page 16

Following the Resin Heat Front Procedure
Command Line
Usage
ResinHeatFront=0
<-50 to 50>
CUPS option Description
Resin Heat Front (K) = 0 1. Adjust the Resin Heat Front
2. Adjust the Resin Heat Front
Following the Resin Heat Back Procedure
Command Line
Usage
ResinHeatBack =
0
<-50 to 50>
CUPS option Description
Resin Heat Back (K) = 0 1. Adjust the Resin Heat Back value
higher to use more heat and
increase the transfer of resin to a
card.
value higher to use more heat
to transfer resin to a card.
value lower to reduce the
amount of heat (used to
transfer resin to the card).
2. Adjust the Resin Heat Back value
lower to reduce the amount of heat
used and reduce the transfer of
resin to the card.
HDP5000 Cups (Linux & MAC OS) User Guide Rev1.1
16
Page 17

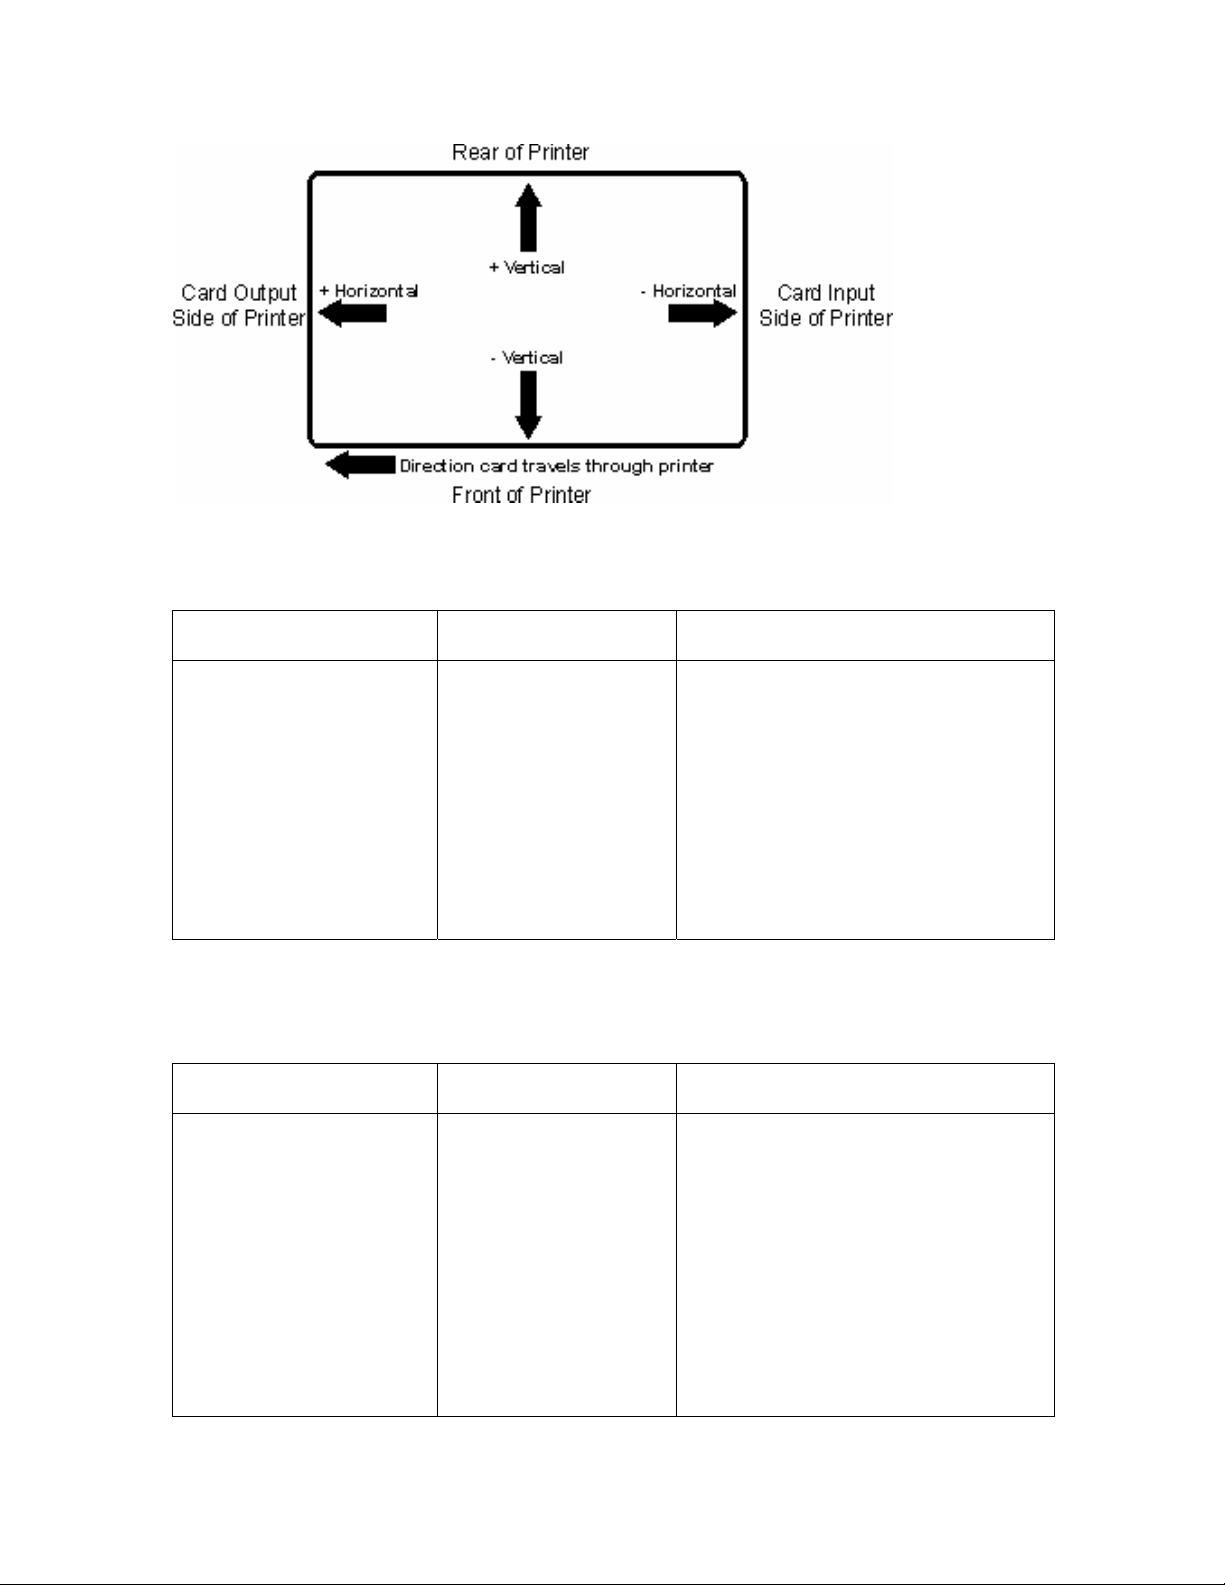
Image Transfer Options
Selecting the Horizontal Option
Note: Over adjusting the Horizontal offset may result in ribbon breaking.
Command Line Usage CUPS option Description
HOffset=0
<-100 to 100>
Horizontal Offset = 0 Use the Horizontal adjustment to
move the image toward the card
output side of the Printer (if a
positive number is entered) and
toward the card input side of the
Printer (if a negative number is
entered).
Selecting the Vertical Option
Command Line Usage CUPS option Description
VOffset=0
<-100 to 100>
Vertival Offset = 0 Use the Vertical adjustment to move
the image toward the front of the
Printer (if a positive number is
entered) and toward the rear of the
Printer (if a negative number is
entered).
HDP5000 Cups (Linux & MAC OS) User Guide Rev1.1
17
Page 18
Transfer Temperature
Command Line Usage CUPS option Description
TransferHeat =0
<150 to 190>
Transfer Heat = 0
<150 to 190>
Transfer Temperature Sets
temperature for InTM transfer in
Celsius Lower
limit = 150.0 Celsius, Upper limit =
190.0 Celsius
• UltraCard III - Composite: Default
= 175.0 Celsius
• UltraCard- PVC: Default = 175.0
Celsius
• Custom: Default = 175.0 Celsius
Transfer Dwell Time
Command Line Usage CUPS option Description
TransferDwell =20
<10 to 30>
Transfer Dwell = 20
<1.0 to 3.0>
Transfer Dwell Time Sets dwell time
for InTM transfer in seconds per
inch
Lower limit = 1.0 seconds per inch,
Upper limit = 3.0 seconds per inch
• UltraCard III - Composite: Default
= 2.0 seconds per inch
• UltraCard - PVC: Default = 2.0
seconds per inch
HDP5000 Cups (Linux & MAC OS) User Guide Rev1.1
• Custom: Default = 2.0 seconds
per inch
18
Page 19

K-Panel Options
Selecting the Front K-Panel Area
Command Line Usage CUPS option Description
KPanelAreaFront = None Front K-Panel Area =
None
KPanelAreaFront = FullCard Front K-Panel Area =
Full Card
Select None to have any
graphics objects that are
black in color to be printed
using composite colors
(YMC)
Select Full card to print any
black graphic objects on the
card in resin. Note: If using a
YMCK Ribbon, Split 1 Set of
Ribbon Panels must be set
to No.
Selecting the Back K-Panel Options
Command Line Usage CUPS Options Description
KPanelAreaBack = None Back K-Panel Area =
None
Select None to have any
graphics objects that are
black in color to be printed
using composite colors
(YMC)
KPanelAreaBack = FullCard Back K-Panel Area = Full
Card
HDP5000 Cups (Linux & MAC OS) User Guide Rev1.1
Select Full card to print any
black graphic objects on the
card in resin. (Note: If using
a YMCK Ribbon, Split 1 Set
of Ribbon Panels must be
set to No. It requires Print
Both Sides be set to True.)
19
Page 20

Selecting the K-Panel Only Front Options
Command Line Usage CUPS Options Description
KPanelOnlyFront = True K-Panel Only Front =
Yes
KPanelOnlyFront = False K-Panel Only Front = No Select K-Panel Only Front
Select K-Panel Only Front if
printing resin black onto a
white background in order to
maximize the sharpness of
printed text and bar codes.
to have all black printed with
the Yellow (Y), Magenta (M)
and Cyan (C) Ribbon panels
directly beneath the resin
black (K) panel.)
Selecting the K-Panel Only Back Options
Command Line
Usage
KPanelOnlyBack =
True
CUPS Options Description
K-Panel Only Back = Yes Select K-Panel Only Back if
printing resin black onto a
white background to maximize
the sharpness of printed text
and bar codes.
KPanelOnlyBack =
False
K-Panel Only Back = No Select K-Panel Only Back to
HDP5000 Cups (Linux & MAC OS) User Guide Rev1.1
have all black printed with the
Yellow (Y), Magenta (M) and
Cyan (C) Ribbon panels
directly beneath the resin
black (K) panel.)
20
Page 21
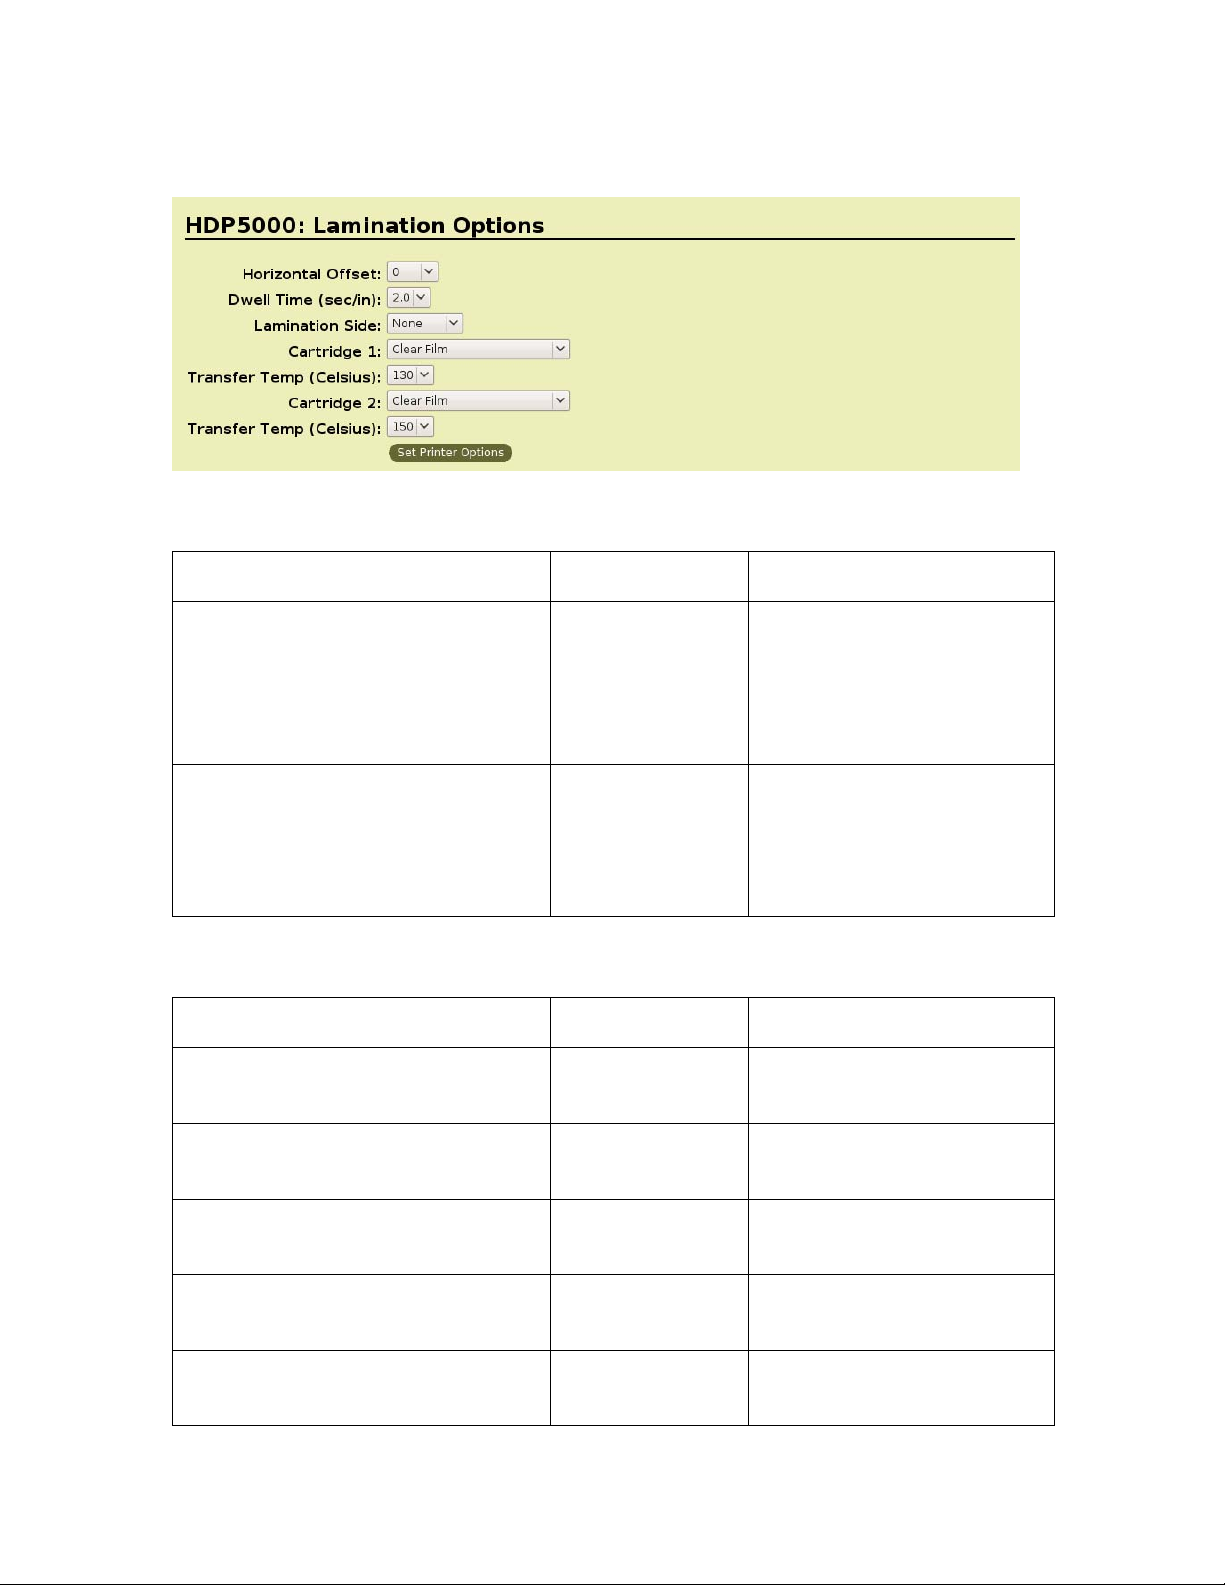
Lamination Options
Lamination Position and Speed:
Command Line Usage CUPS Options Description
LaminationPosition = <-100 to
+100>
LaminationSpeed = < 8 to 55> Lamination
Lamination
Position = < -100
to +100>
Speed = <0.8 to
5.5> Is a value
from 8 to 55
divided by 10.
Horizontal Offset:
To move the overlaminate
more toward the card output
side of the Printer, enter a
positive number
Dwell Time:
Controls the throughput
speed of the cards.
Lamination Side:
Command Line Usage CUPS Options Description
LaminationSide = 0 Lamination Side
= None
LaminationSide = 1 Lamination Side
= Front
No Lamination will be done.
Only front of card will be
laminated.
LaminationSide = 2 Lamination Side
= Back
LaminationSide = 3 Lamination Side
= Both
LaminationSide = 4 Lamination Side
= Opposite
HDP5000 Cups (Linux & MAC OS) User Guide Rev1.1
Only back of card will be
laminated
Both sides of card will be
laminated.
Will flip the card again before
laminating.
21
Page 22

Lamination Film Types Per Cartridge
Command Line Usage CUPS Options Description
LaminationType1 = 0 Lamination Film
type for cartridge
1 = Clear Film
LaminationType1 = 1 Lamination Film
type for cartridge
1 = 0.6 Polygard
LaminationType1 = 2 Lamination Film
type for cartridge
1 = 1.0 Polyguard
LaminationType1 = 3 Lamination Film
type for cartridge
1 = Polyguard
Alternating Patch
LaminationType1 = 4 Lamination Film
type for cartridge
1 = Registered
Film
LaminationType1 = 5 Lamination Film
type for cartridge
1 = Holographic
Film
Indicates that clear film is
being used in cartridge 1.
Indicates that 0.6
Polyguard is being used in
cartridge 1.
Indicates that 1.0
Polyguard is being used in
cartridge 1.
Indicates that Polyguard
Alternating Patch is being
used in cartridge 1.
Indicates that Registered
Film is being used in
cartridge 1.
Indicates that Holographic
Film is being used in
cartridge 1.
LaminationType1 = 6 Lamination Film
type for cartridge
1 = None
LaminationType2 = 0 Lamination Film
type for cartridge
2 = Clear Film
LaminationType2 = 1 Lamination Film
type for cartridge
2 = 0.6 Polygard
LaminationType2 = 2 Lamination Film
type for cartridge
2 = 1.0 Polyguard
HDP5000 Cups (Linux & MAC OS) User Guide Rev1.1
Indicates that no film is
being used in cartridge 1.
Indicates that clear film is
being used in cartridge 2.
Indicates that 0.6
Polyguard is being used in
cartridge 2.
Indicates that 1.0
Polyguard is being used in
cartridge 2.
22
Page 23

LaminationType2 = 3 Lamination Film
type for cartridge
2 = Polyguard
Alternating Patch
Indicates that Polyguard
Alternating Patch is being
used in cartridge 2.
LaminationType2 = 4 Lamination Film
type for cartridge
2 = Registered
Film
LaminationType2 = 5 Lamination Film
type for cartridge
2 = Holographic
Film
LaminationType2 = 6 Lamination Film
type for cartridge
2 = None
Indicates that Registered
Film is being used in
cartridge 2.
Indicates that Holographic
Film is being used in
cartridge 2.
Indicates that no film is
being used in cartridge 2.
Lamination Transfer Temperatures per Cartridge
Command Line Usage CUPS Options Description
LaminationTransferTemp1 = <500 to
1700>
Transfer Temp
(Celsius) = <50 to
170 C>
Sets the transfer
temperature in Celsius for
cartridge number 1.
LaminationTransferTemp2 = <500 to
1700>
HDP5000 Cups (Linux & MAC OS) User Guide Rev1.1
Transfer Temp
(Celsius) = <50 to
170 C>
Sets the transfer
temperature in Celsius for
cartridge number 2.
23
Page 24

Magnetic Encoding Options
Setting the Encoding Mode
Command Line Usage CUPS option Description
MagEncodingMode1 =
ISO
MagEncodingMode1 =
JIS2
MagEncodingMode1 =
Raw
MagEncodingMode2 =
ISO
MagEncodingMode2 =
JIS2
Magnetic Stripe
Encoding Mode
= ISO
Magnetic Stripe
Encoding Mode
= JIS II
Magnetic Stripe
Encoding Mode
= Raw
Magnetic Stripe
Encoding Mode
= ISO
Magnetic Stripe
Encoding Mode
= JIS II
Sets the Encoding Mode for the Print
job to ISO. See Sending ISO Magnetic
Encoding Information for additional
information.
Sets the Encoding Mode for the Print
job to JIS II. See Sending JIS II
Magnetic Encoding Information for
additional information.
Sets the Encoding Mode for the Print
job to RAW. See Sending ISO
Magnetic Encoding Information for
additional information.
Sets the Encoding Mode for the Print
job to ISO. See Sending ISO Magnetic
Encoding Information for additional
information.
Sets the Encoding Mode for the Print
job to JIS II. See Sending JIS II
Magnetic Encoding Information for
additional information.
MagEncodingMode2 =
Raw
HDP5000 Cups (Linux & MAC OS) User Guide Rev1.1
Magnetic Stripe
Encoding Mode
= Raw
Sets the Encoding Mode for the Print
job to RAW. See Sending ISO
Magnetic Encoding Information for
24
Page 25

additional information.
MagEncodingMode3 =
ISO
MagEncodingMode3 =
JIS2
MagEncodingMode3 =
Raw
Magnetic Stripe
Encoding Mode
= ISO
Magnetic Stripe
Encoding Mode
= JIS II
Magnetic Stripe
Encoding Mode
= Raw
Sets the Encoding Mode for the Print
job to ISO. See Sending ISO Magnetic
Encoding Information for additional
information.
Sets the Encoding Mode for the Print
job to JIS II. See Sending JIS II
Magnetic Encoding Information for
additional information.
Sets the Encoding Mode for the Print
job to RAW. See Sending ISO
Magnetic Encoding Information for
additional information.
Setting the Coercivity
Command Line Usage CUPS option Description
Coercivity = High Coercivity = High Sets the coercivity for magnetic
encoding to 2750 Oersted
Coercivity = Low Coercivity = Low Sets the coercivity for magnetic
encoding to 300 Oersted
HDP5000 Cups (Linux & MAC OS) User Guide Rev1.1
25
Page 26

Sending ISO Magnetic Encoding Information
The CUPS Driver uses URL Encoding when defining data to be encoding to the Magnetic
Stripe. Any special characters (such as start and end sentinels) must be described with URL
encoding to be recognized. See the URL Encoding Reference Reviewing the URL Encoding
Reference for additional information..
• The first character of this data string must be the track's specific Start Sentinel (SS) and
the last character must be the specific End Sentinel (ES).
• The characters or data in between the SS and ES can include all of the valid characters
specific to each track.
• The number of these characters, however, is limited by each track's maximum character
capacity.
When segmenting track data, the appropriate Field Separator (FS) must be used. The table
below shows the SS, ES, FS and the valid characters defined for each track.
Track Start
Sentinel
Track 1 % ? ^ ASCII 32-95 78
Track 2 ; ? = ASCII 48-63 39
Track 3 ; ? = ASCII 48-63 109
End
Sentinel
Field
Separator
Valid Characters Maximum
Number of
Characters
HDP5000 Cups (Linux & MAC OS) User Guide Rev1.1
26
Page 27

Sending JIS II Magnetic Encoding Information
The CUPS Driver uses URL Encoding when defining data to be encoding to the Magnetic
Stripe. Any special characters (such as start and end sentinels) must be described with URL
ncoding to be recognized. See the URL Encoding Reference below. e
Sending RAW Magnetic Encoding Information
The CUPS Driver uses URL Encoding when defining data to be encoding to the Magnetic
Stripe. Any special characters (such as start and end sentinels) must be described with URL
encoding to be recognized.
Reviewing the URL Encoding Reference
! * ' ( ) ; : @
%21 %2A %27 %28 %29 %3B %3A %40
= + $ , / ? % #
%3D %2B %24 %2C %2F %3F %25 %23
&
%26
HDP5000 Cups (Linux & MAC OS) User Guide Rev1.1
27
Page 28

Reviewing the ASCII Code and Character Table
ASCII Code Character ASCII Code Character ASCII
Code
32 space 56 8 80 P
33 ! 57 9 81 Q
34 “ 58 : 82 R
35 # 59 ; 83 S
36 $ 60 < 84 T
37 % 61 = 85 U
38 & 62 > 86 V
39 ' 63 ? 87 W
40 ( 64 @ 88 X
41 ) 65 A 89 Y
42 * 66 B 90 Z
Character
43 + 67 C 91 [
44 ' 68 D 92 \
45 - 69 E 93 ]
46 . 70 F 94 ^
47 / 71 G 95 _
48 0 72 H
49 1 73 I
50 2 74 J
51 3 75 K
52 4 76 L
53 5 77 M
54 6 78 N
55 7 79 O
HDP5000 Cups (Linux & MAC OS) User Guide Rev1.1
28
Page 29

Using the Command Line Option Setup for CUPS
Adding a USB Printer
The primary CUPS interface can be accessed on the local computer using a web
browser. The address for the CUPS interface is: http://localhost:631/
Step Procedure
1 Attach Power and USB to the printer.
2 From a Terminal window, run lshal to retrieve the list of devices.
3 Refer to the Example Output for lshal below for a sample of output to look for to identify
the printer. Record the Device URI to be able to add the printer.
Example Device URI:
/org/freedesktop/Hal/devices/usb_device_9b0_2110_A8010217_if0_printer_A8010217
4 Choose Add Printer. (Note: If you are asked for a username and password, enter your
login username and password or the “root” username and password.)
5 a. Enter a Name, Location and Description for the Printer.
b. Click Continue.
6 a. If an entry exists in the dropdown, select the HAL Printing backend option
OR
b. Select Internet Printing protocol (ipp)
c. Click Continue.
7 a. Enter the Device URI recorded previously using the HAL printer Backend
Example:
hal:///org/freedesktop/Hal/devices/usb_device_9b0_2110_A8010217_if0_printer_A8010217
b. Click Continue.
8 a. Select Fargo Electronics from the Make list.
b. Click Continue.
Note: If Fargo Electronics is not listed in the Make list, it may be necessary to restart
CUPS and begin the process to add the printer again.
9 a. Select HDP5000 (en) from the Model list.
b. Click Add Printer.
HDP5000 Cups (Linux & MAC OS) User Guide Rev1.1
29
Page 30

10 After installation is complete, it may be necessary to specify the page scaling options for
the Print Queue.
Example output from lshal
udi = '/org/freedesktop/Hal/devices/usb_device_9b0_2110_A8010217_if0_printer_A8010217'
info.addons = {'hal_lpadmin --add'} (string list)
info.callouts.remove = {'hal_lpadmin --remove'} (string list)
info.capabilities = {'printer'} (string list)
info.category = 'printer' (string)
info.interfaces = {'org.freedesktop.Hal.Device.Printer'} (string list)
info.parent = '/org/freedesktop/Hal/devices/usb_device_9b0_2110_A8010217_if0' (string)
info.product = 'HDP5000' (string)
info.udi =
'/org/freedesktop/Hal/devices/usb_device_9b0_2110_A8010217_if0_printer_A8010217'
(string)
info.vendor = 'Fargo Electronics Inc ' (string)
linux.device_file = '/dev/usb/lp0' (string)
linux.hotplug_type = 2 (0x2) (int)
linux.subsystem = 'usb' (string)
linux.sysfs_path = '/sys/devices/pci0000:00/0000:00:1d.1/usb6/6-1/6-1:1.0/usb/lp0' (string)
printer.commandset = {'NONE'} (string list)
printer.description = 'HDP5000 Card Printer' (string)
printer.device = '/dev/usb/lp0' (string)
printer.originating_device =
'/org/freedesktop/Hal/devices/usb_device_9b0_2110_A8010217_if0' (string)
printer.product = 'HDP5000' (string)
printer.serial = 'A8010217' (string)
HDP5000 Cups (Linux & MAC OS) User Guide Rev1.1
30
Page 31

printer.vendor = 'Fargo Electronics Inc ' (string)
Adding a Network Printer
The primary CUPS interface can be accessed on the local computer using a web browser.
The address for the CUPS interface is: http://localhost:631/
Step Procedure
1 Choose Add Printer (Note: If you are asked for a username and password,
enter your login username and password or the “root” username and
password.
2 a. Enter a Name, Location and Description for the Printer.
b. Click Continue.
3 a. Select Internet Printing protocol (ipp) from the device list.
b. Click Continue.
4 a. Specify the Device URI, which is socket://[Hostname], where [Hostname]
is the IP address or DNS name for the Printer.
b. Click Continue. See Determining the Printer IP Address
information.
5 a. Select Fargo Electronics from the Make List.
b. Click Continue..
6 Select appropriate printer mondel (en) from the Model list. Click Add Printer.
7 After installation is complete, it may be necessary to specify the page scaling
options for the print Queue.
8 Run the following command as root: (Where HDP5000 is the name of the
print queue created):
# lpoptions -p HDP5000 -o scaling=100
for additional
HDP5000 Cups (Linux & MAC OS) User Guide Rev1.1
31
Page 32
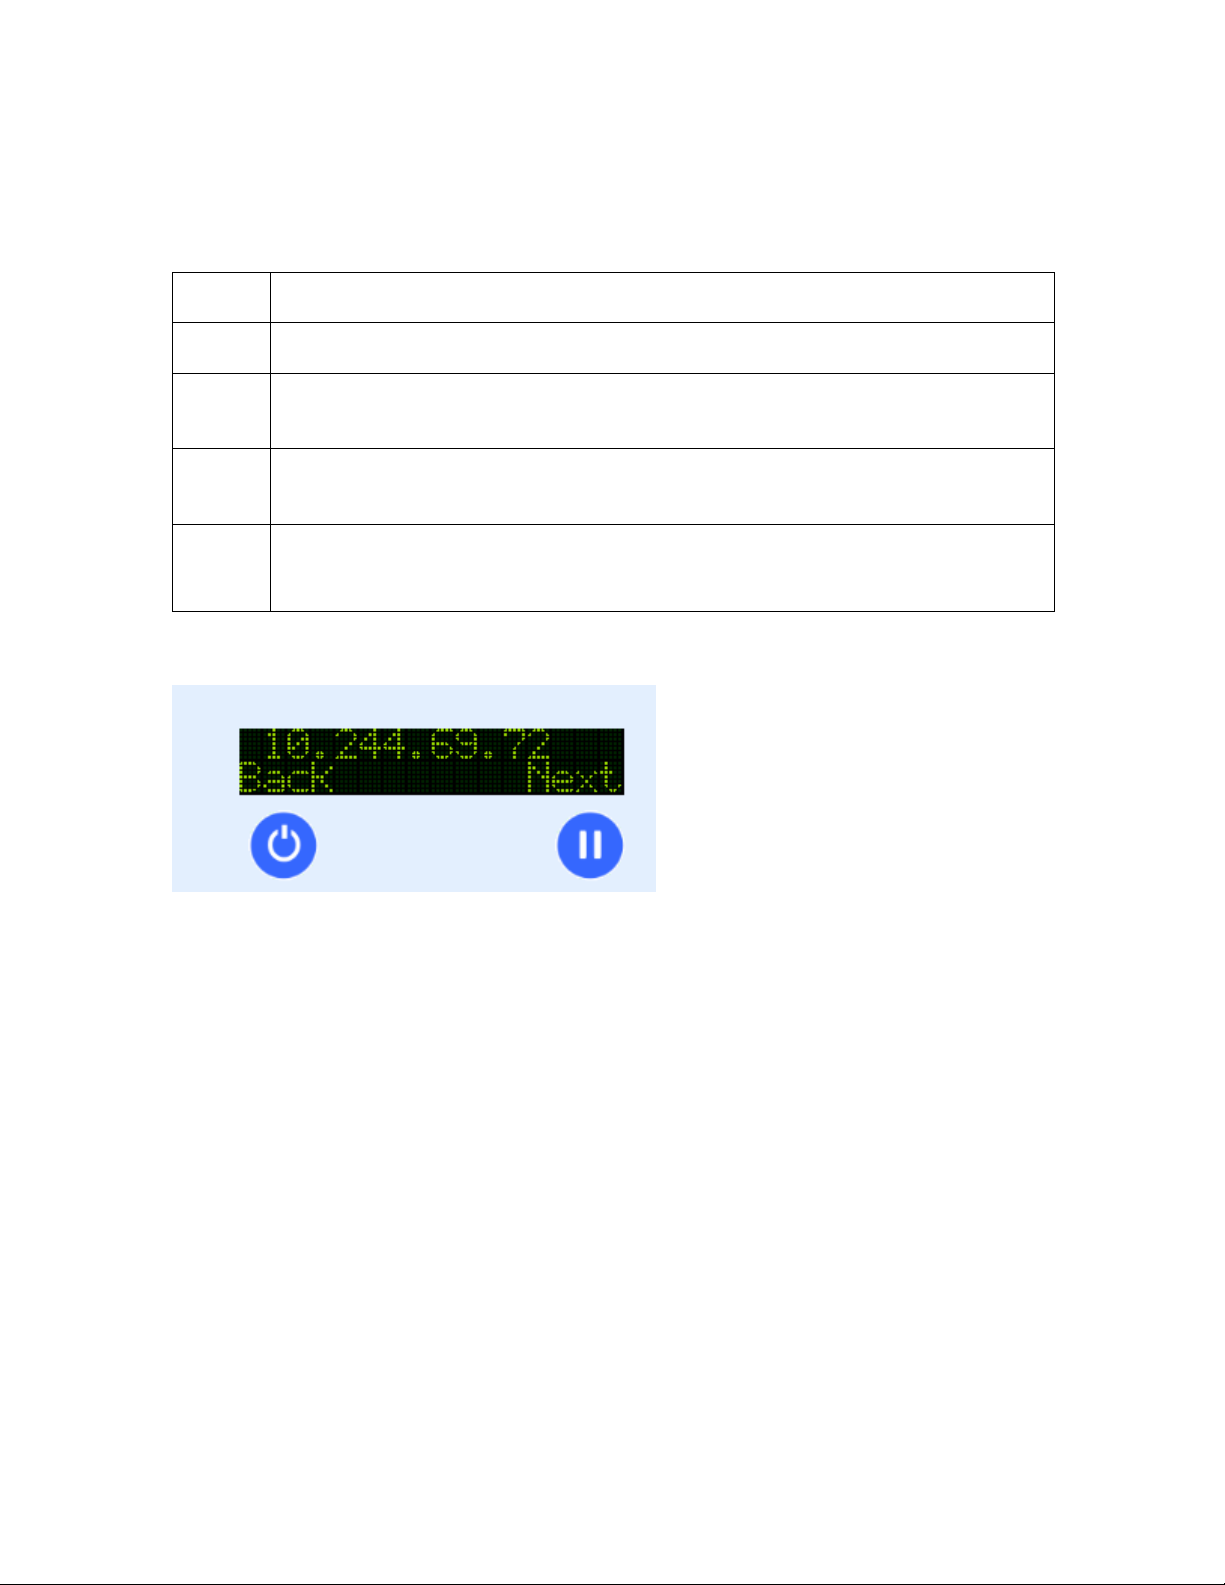
Determining the Printer IP Address
Use this procedure to determine the IP address of a Printer.
Step Procedure
1 Apply power to the Printer.
2 Ensure that the Printer is connected to the network via the RJ45 jack on the
back of the Printer.
3 Wait up to one minute for the Printer to allow the Printer to obtain an IP
address from DHCP.
4 Press Info
Then hit Next until you get to the IP: prompt.
Display: IP Address Card
HDP5000 Cups (Linux & MAC OS) User Guide Rev1.1
32
Page 33

Probing for Fargo Network Printers on the Network
The fargo-netprobe program installed with the driver can be used to probe
for Fargo printers on the local subnetwork. This program must be run as root:
# fargo-netprobe
192.168.1.127
Reviewing the File Listing
/usr/share/cups/profiles/sRGB.icm Reference Color Profile
/usr/share/cups/profiles/HDP5000CLR.icm Printer Specific Color Profile
/usr/share/cups/model/HDP5000.ppd PPD File for the HDP5000 Card
Printer
/usr/lib/cups/filter/rastertofargoHDP5000 Raster Filter for the HDP5000 Card
Printer
/usr/share/fargo/HDP5000/HDP5000Tst.prn Test Print file
/usr/ share/fargo/HDP5000
/RibbonCalibration.prn
/usr/ share/fargo/HDP5000/CleanPrinter.prn Clean Printer File
/usr/ share/fargo/HDP5000/FilmCalibration.prn Film Sensor Calibration File
/usr/
share/fargo/HDP5000/LaminatorCalibration.prn
Ribbon Sensor Calibration File
Lamination Sensor Calibration File
HDP5000 Cups (Linux & MAC OS) User Guide Rev1.1
33
Page 34

Printing a Sample Card
Entering the Print Only Command
Using the Fargo Card Printer
---------------------------To test the functionality of the printer, you can type the following command
to print a sample card (root privileges not necessary):
$ lpr samplecard.jpg
Entering the Print with Mag Encoding Command
Run the following command:
# lp –d [PrintQueueName] –o “Magtrack1=%25MAGTEST1%3F
Magtrack2=%3B1234567890%3F Magtrack3=%3B1234567890%3F” [filename]
Managing Printer from the Cups Web Interface.
The Web printer management interface is located at:
http://localhost:631/printers
From there you can perform all printer management tasks with a few simple mouse clicks.
Printer-Specific Options
Each printer has its own options that are based on the options in the PPD (driver) file. The
lpoptions command provides a way to see a list of the available options:
lpoptions –p HDP5000 -l ENTER
Each option starts with the option name, a slash, the human readable text for that option, and a
colon. This is followed by a list of values for that option. The asterisk (*) in from of the
value indicates that this is the default setting.
The options themselves follow the colon:
To see a list of available printers
lpstat –p –d ENTER
HDP5000 Cups (Linux & MAC OS) User Guide Rev1.1
34
Page 35

Setting Printer Options
For many types of files, the default printer options may be sufficient for your needs.
However, at times you may need to change the options for a particular file you are printing.
Cups provides both they System V (lp) and Berkeley (lpr) printing commands.
The lp and lpr commands allow you to pass printer options using the –o options:
lpoptions –o landscape –o scaling=75 –o media=A4 filename.jpg ENTER
lpoptions –p HDP5000 –o PageSize=CR79 (printer specific) ENTER
Canceling Print jobs from Command Line
Use the lpstat command to show jobs and the printers:
lpstat –o –p ENTER
The cancel and lprm commands cancel a print job:
cancel job_id ENTER
lprm job_id ENTER
General Printing Options for CUPS
• brightness Sets the overall brightness of the output
• gamma Sets the overall gamma correction of the output
• job-sheets Chooses the banner pages to use for the job
• landscape Prints in landscape orientation
• media Sets the media size, source and /or type
• number-up Sets the number of document pages to print on each sheet of paper
• page-ranges Prints the selected pages in the document
• page-set Prints all, even, or odd pages in the document
• sides Prints single- or double-sided
HDP5000 Cups (Linux & MAC OS) User Guide Rev1.1
35
Page 36

Ethernet Installation Procedure for the CUPS Driver
Step Procedure
1
2
On the home page click the add printer button.
On the Add Printer page
Enter a name for the printer. The name cannot contain any spaces.
Enter a description of the printer’s location.
Enter a description of the printer.
3
HDP5000 Cups (Linux & MAC OS) User Guide Rev1.1
On the Device for (printer name) page, select “Internet Printing Protocol (ipp)”
36
Page 37

4
On the Device URI for (printer name) page enter the IP address of the printer in
the format of socket://aaa.bbb.ccc.ddd:9100 where aaa.bbb.ccc.ddd is the IP
address shown on the printer LCD display
5
HDP5000 Cups (Linux & MAC OS) User Guide Rev1.1
On the Make/Manufacturer page, select Fargo Electronics from the Make: list
37
Page 38

6
7
On the Model/Driver page select HDP5000 from the Model: list and click the Add
Printer button
Refer to the users guide to set up the print options. When you have completed
setting up the options click on the Set Printer Options to save your changes.
HDP5000 Cups (Linux & MAC OS) User Guide Rev1.1
38
Page 39
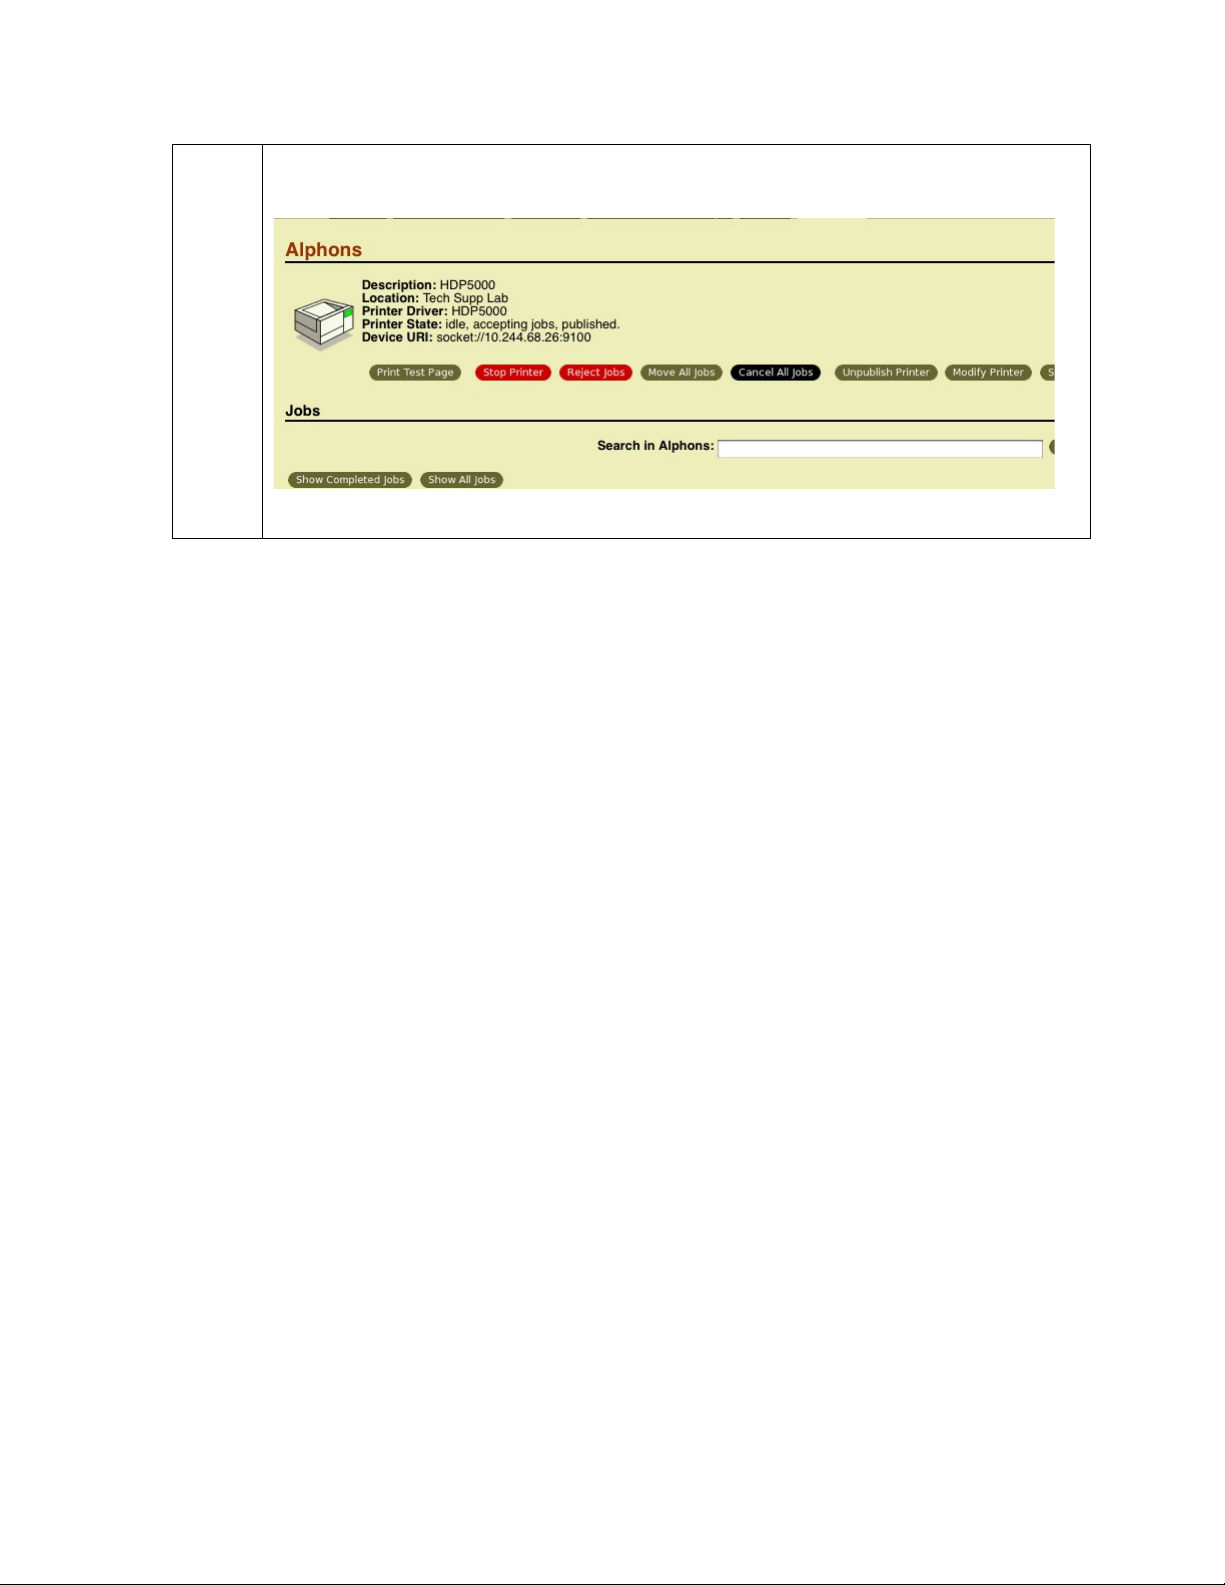
8
Click the Print Test Page button to confirm printer operation.
HDP5000 Cups (Linux & MAC OS) User Guide Rev1.1
39
Page 40

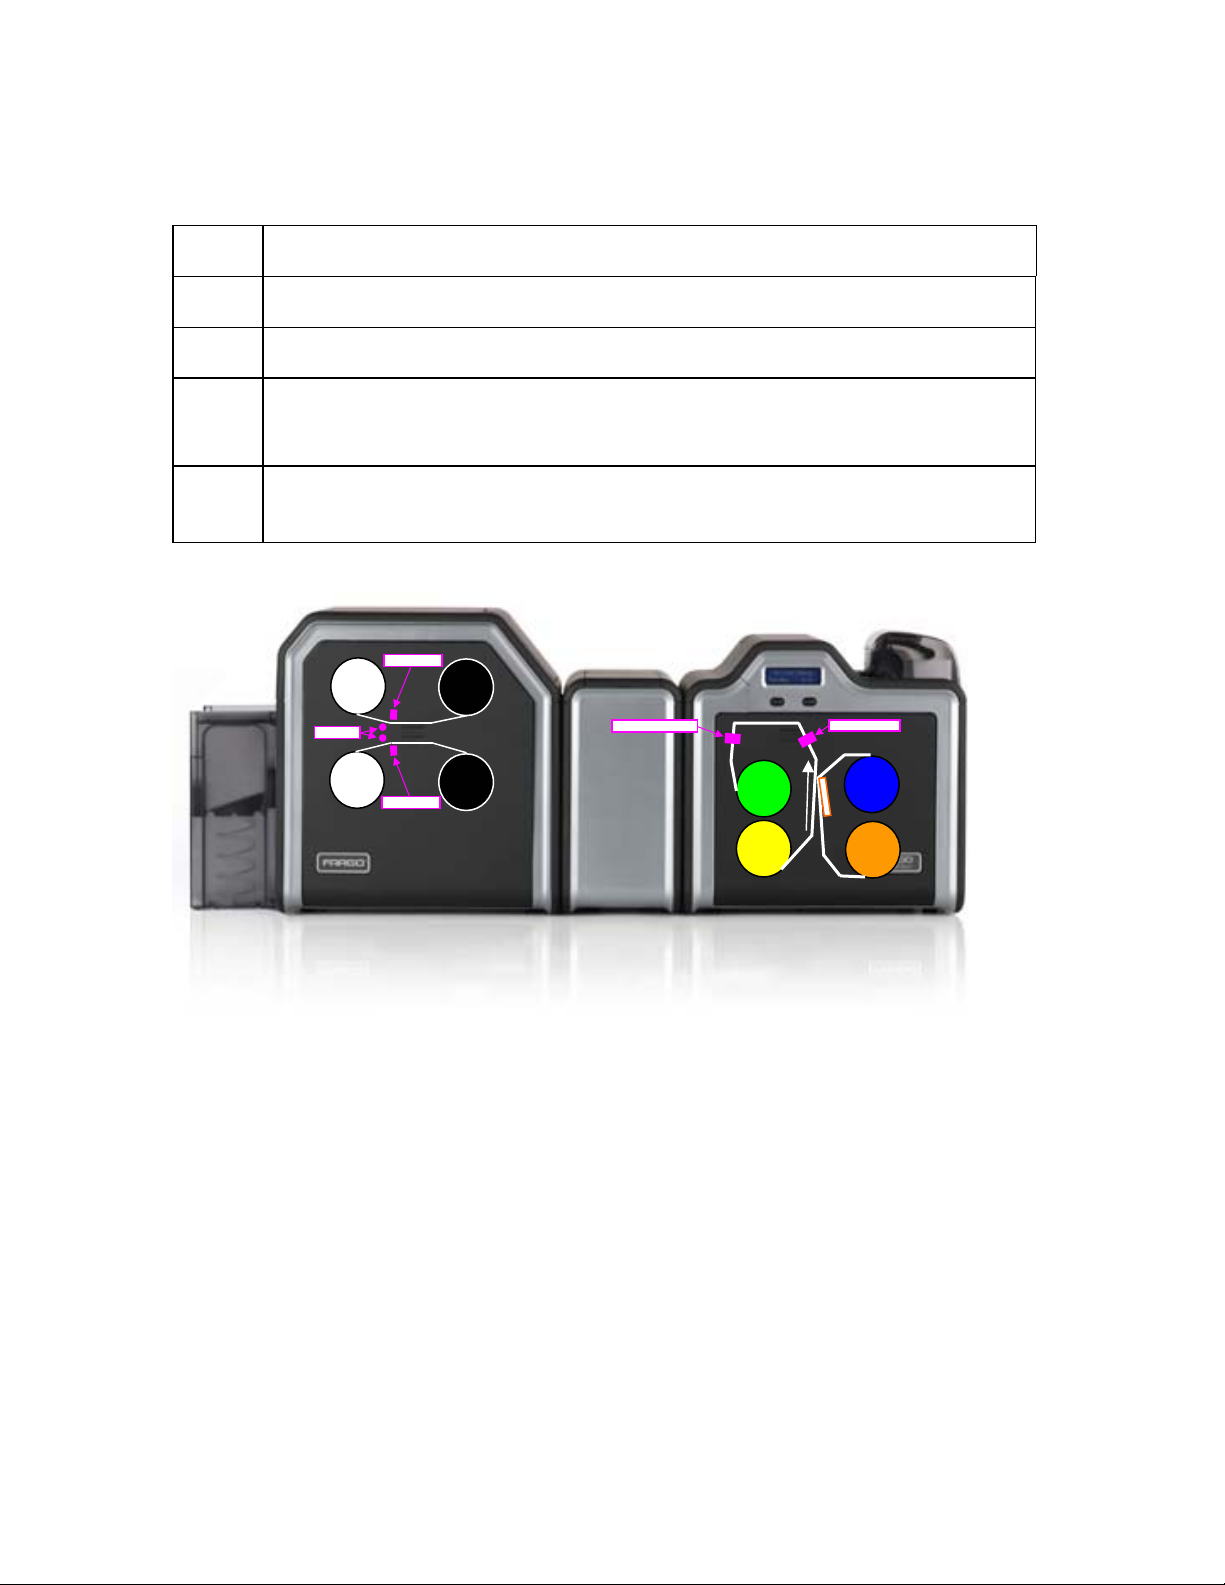
Printer Maintenance Options for Linux and Mac
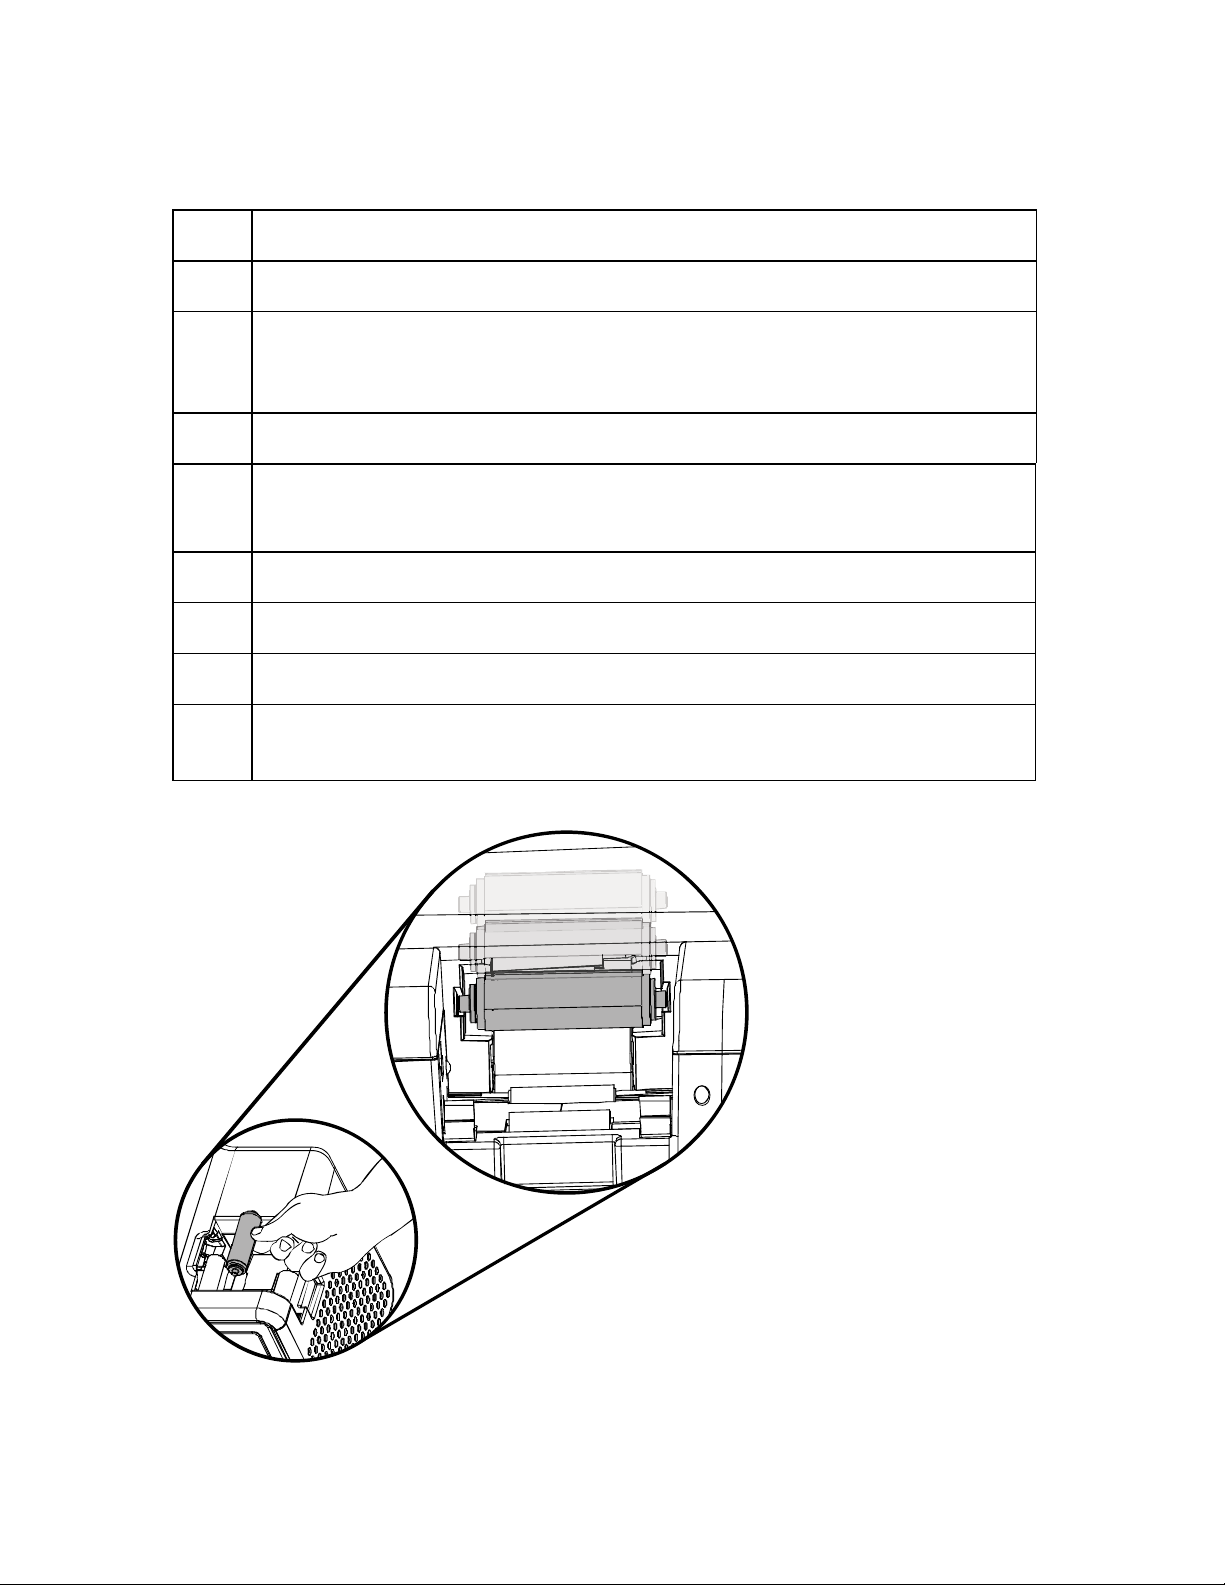
Performing a Ribbon Sensor Calibration
Step Description
1 Ensure that the ribbon cartridge is removed.
2 Ensure the Printer’s cover is closed.
3 From a terminal window enter:
fargo-sendprn “/usr/share/fargo/HDP5000/RibbonCalibration.prn”
4 The Printer’s LCD will display CALIBRATE PASSED. Click on the OK
button on the LCD display to complete the procedure.
La
La
La
La
Fil
Fil
Ri
Printing
Directio
n
Ri
HDP5000 Cups (Linux & MAC OS) User Guide Rev1.1
40
Page 41
Performing a Film Sensor Calibration
Step Description
1 Ensure the film cartridge is installed.
2 Ensure the printer cover is closed.
3 From a terminal window enter:
fargo-sendprn “/usr/share/fargo/HDP5000/FilmCalibration.prn”
4 The Printer’s LCD will display CALIBRATE PASSED. Click on the OK button
on the LCD display to complete the procedure.
La
La
La
La
Fil
Fil
Ri
Printing
Directio
n
Ri
HDP5000 Cups (Linux & MAC OS) User Guide Rev1.1
41
Page 42

Performing a Lamination Sensor Calibration
Step Description
1 Ensure that the cartridges are out of the Laminator.
2 Ensure the Laminator cover is closed.
3 From a terminal window enter:
fargo-sendprn “/usr/share/fargo/HDP5000/LaminatorCalibration.prn”
4 The Printer’s LCD will display CALIBRATE PASSED. Click on the OK
button on the LCD display to complete the procedure.
Please note that the laminator will only complete the calibration sequence
when it has reached operating temperature.
La
La
La
La
Fil
Fil
Ri
Printing
Directio
n
Ri
HDP5000 Cups (Linux & MAC OS) User Guide Rev1.1
42
Page 43
Cleaning the Printer
Step Description
1 Remove Card, Film and Laminate cartridges and close the covers.
2 Remove the paper backing from both sides of the Cleaning Card. *Note: (DO
NOT remove left liner if a magnetic encoding module is installed in your
printer)
3 Insert the Cleaning Card into the Card Hopper’s infeed rollers.
4 From a terminal window enter:
fargo-sendprn “/usr/share/fargo/HDP5000/CleanPrinter.prn”
5 Guide the Cleaning Card into the printer if necessary.
6 When the Cleaning routine is complete, the Cleaning Card will exit the Printer.
7 Reinstall the Card, Film and Laminate cartridges.
Note: The Cleaning routine will begin after all current print jobs have
completed.
HDP5000 Cups (Linux & MAC OS) User Guide Rev1.1
43
Page 44

Printing a Test Card
Step Description
1 Ensure that the cards are in the hopper.
2 Ensure that YMCK ribbon is installed in the printer.
3 From a terminal window enter:
lpr -l “/usr/share/fargo/HDP5000/HDP5000Tst.prn”
4 The test card should print.
HDP5000 Cups (Linux & MAC OS) User Guide Rev1.1
44
 Loading...