

Farallon Communications NetopiaTM User Manual

Netopia ISDN PC Card
User’s Guide for Windows
F
arall
on

Copyright © 1997 Farallon Communications, Inc. v.597
All rights reserved. Printed in the U.S.A.
This manual and any associated artwork, software, and product designs are copyrighted with all
rights reserved. Under the copyright laws this manual, artwork, software, and product designs
may not be copied, in whole or part, without the written consent of Farallon Communications.
Under the law, copying includes translation to another language or format.
Farallon Communications, Inc.
2470 Mariner Square Loop
Alameda, CA 94501-1010
U.S.A.
For additional copies of this user’s guide, order Farallon part number 6120297-00-01.

Contents
Chapter 1 — About the Netopia ISDN PC Card...............................5
Chapter 2 — Installation...............................................................7
Step 1: Inserting the PC Card.........................................................7
Step 2: Connecting your equipment................................................8
U Interface.................................................................................8
S/T Interface.............................................................................9
Connecting your interface to the PC Card ...................................10
Step 3: Configuring the PC Card...................................................10
Windows 95.............................................................................11
Windows NT 4.0.......................................................................12
Windows NT 3.51.....................................................................15
Windows 3.x and DOS ..............................................................16
3
Chapter 3 — Windows Configuration Tool....................................17
Using Setup Wizard.....................................................................17
Profile configuration.....................................................................20
Updating firmware.......................................................................23
Chapter 4 — VT100 Configuration Tool .......................................25
VT100 Configuration Tool activation..............................................25
Profile configuration.....................................................................28

4 Contents
Chapter 5 — Operation...............................................................31
Making a connection ...................................................................31
Dialing with Multilink PPP.............................................................42
Using other communications applications .....................................44
Data compression.......................................................................45
Netopia ISDN PC Card LEDs.........................................................45
Chapter 6 — Troubleshooting .....................................................47
Solutions to common problems....................................................50
Appendix A —Technical Specifications........................................53
Windows 95.............................................................................32
Windows NT 4.0.......................................................................34
Windows NT 3.51.....................................................................37
Windows 3.x............................................................................39
DOS........................................................................................41
About PPP authentication protocols ...........................................43
Dialing with AT commands........................................................44
Regulatory notices....................................................................56
Appendix B —AT Commands.......................................................59
AT command result codes............................................................62
Technical Support.......................................................................63
How to reach us..........................................................................63
Warranty

Chapter 1
About the Netopia ISDN PC Card
Congratulations on your purchase of the Farallon Netopia ISDN
PC Card! The Netopia ISDN PC Card provides easy and affordable
high-speed Basic Rate ISDN connection to the Internet or to your
office local area network (LAN).
5
Internet access.
tions over an ISDN line at speeds of up to 512 kilobits per second.
With this speed, it’s easier and more cost-effective to access online
services or browse the World Wide Web and download high-resolution
graphics, video clips, interactive games, or music.
Work-at-home access.
commuter with fast access to network resources back at the office.
You can access applications such as email, or download data from a
remote database, in a fraction of the time it would take with a conventional analog modem.
Ease of use.
computer or any computer equipped with a PC Card (PCMCIA) slot.
Advanced PC Card technology emulates the computer’s COM port,
complementing your communications application without the need for
additional device drivers, and providing higher throughput than external serial ISDN devices. Netopia configuration software makes it easy
to set up and use the PC Card.
The Netopia ISDN PC Card is available in S/T and U interface versions. The U version offers an integrated-NT1 (Network Termination
device) so that no other equipment is required.
The Netopia ISDN PC Card allows Internet connec-
The Netopia ISDN PC Card provides the tele-
The Netopia ISDN PC Card can be installed in a notebook

6 Chapter 1
Your plug and play ISDN solution.
Once your telephone company has
installed your ISDN line, you can insert the Netopia ISDN PC Card into
your PC Card slot and enter appropriate parameters to configure and
use the card. A connection to your office LAN or the Internet can be
established over your ISDN line with a remote access client application. You can use client applications that are included with your operating system or supplied by your network administrator or Internet
Service Provider.
Up and Running, Guaranteed.
Farallon Customer Service offers world
class technical support and unique service programs that can help
you get connected and stay connected. With our
Guaranteed!
program for North America, Farallon will provision your
Up & Running,
ISDN line and help you configure your PC Card. See the Technical
Support section at the back of this user’s guide for contact
information.
Netopia ISDN PC Card requirements.
To use the Netopia ISDN PC
Card, you will need the following:
■
ISDN Basic Rate line installed by your telephone company
(For more information about ordering ISDN in North America, see
the README.TXT file on Netopia ISDN PC Card Disk 1, or look into
Farallon’s
■
A Type II PC Card slot in your computer
■
One of the following operating systems: Windows 95, Windows NT
Up & Running, Guaranteed!
program.)
(version 4.0 or 3.51), Windows 3.x, or DOS (DOS requires a
VT100-compatible terminal emulation program)
■
Remote access client software (supplied as part of your operating
system, or by your network administrator or Internet Service Provider)
Chapter 2
Installation
This chapter covers the three basic steps for installing your Netopia
ISDN PC Card: (1) inserting the PC Card into your computer’s slot;
(2) connecting your equipment; and (3) configuring the PC Card.
7
TEP
S
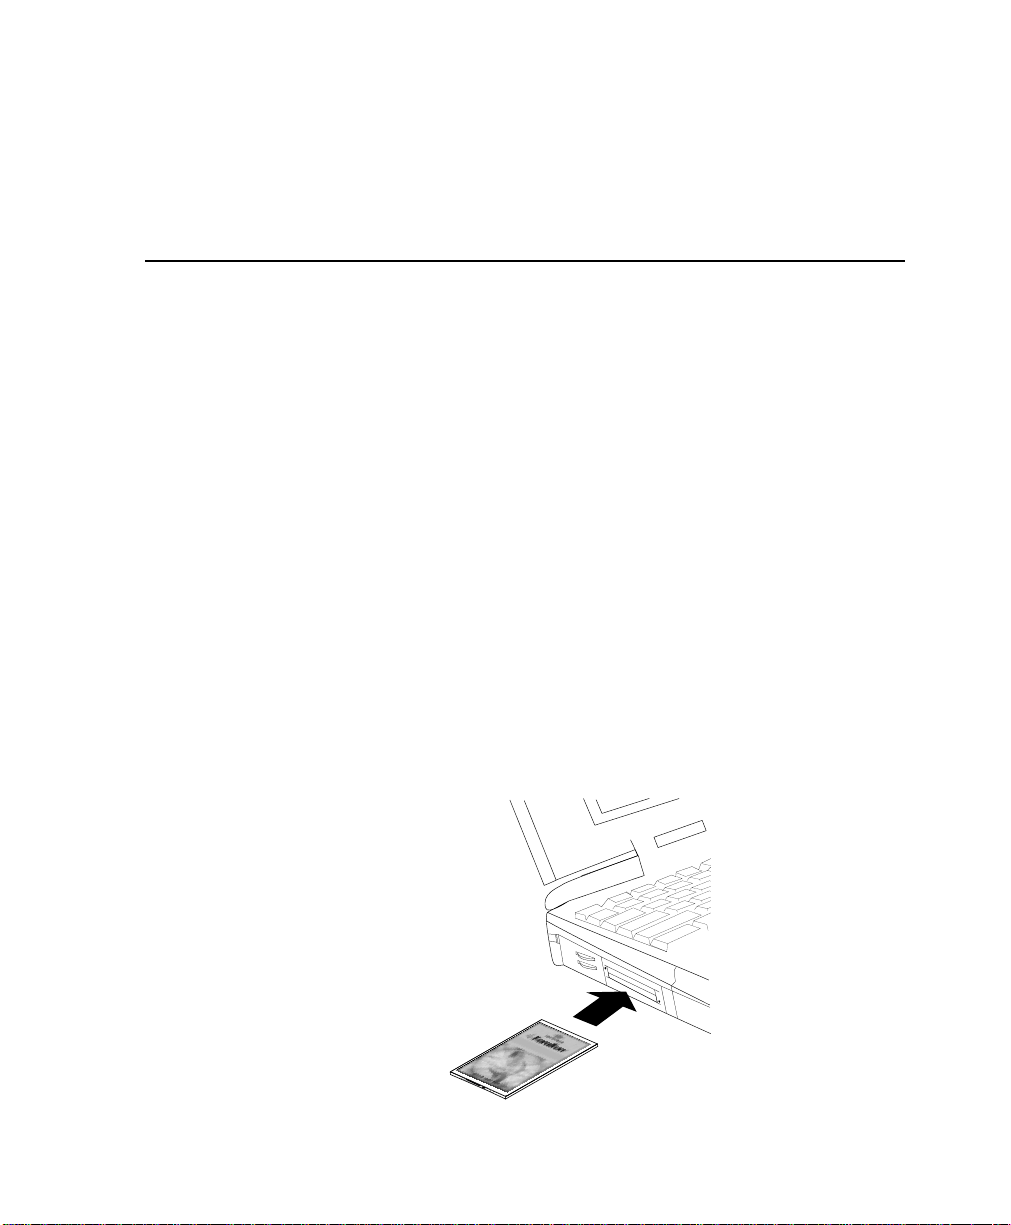
Hold the Netopia ISDN PC Card with the colored label facing up and
the arrow pointing toward the PC Card slot on your computer. Slide the
PC Card into the slot until it is firmly seated.
NSERTING THE
1: I
PC C
ATTACH CABLE HERE
Inserting the Netopia ISDN PC Card
ARD
8 Chapter 2
TEP
S
Depending on the product you purchased, the Netopia ISDN PC Card
with U interface or the Netopia ISDN PC Card with S/T interface, the
appropriate equipment is provided. Y our geographical location typically
dictates the ISDN interface type to use. The following table
summarizes the interface and equipment used by geographical region:
Region Interface Provided Equipment
North America U interface Integrated-NT1 (ISDN U interface
Outside North
America (except
Australia)
Australia S/T interface ISDN S/T interface connector,
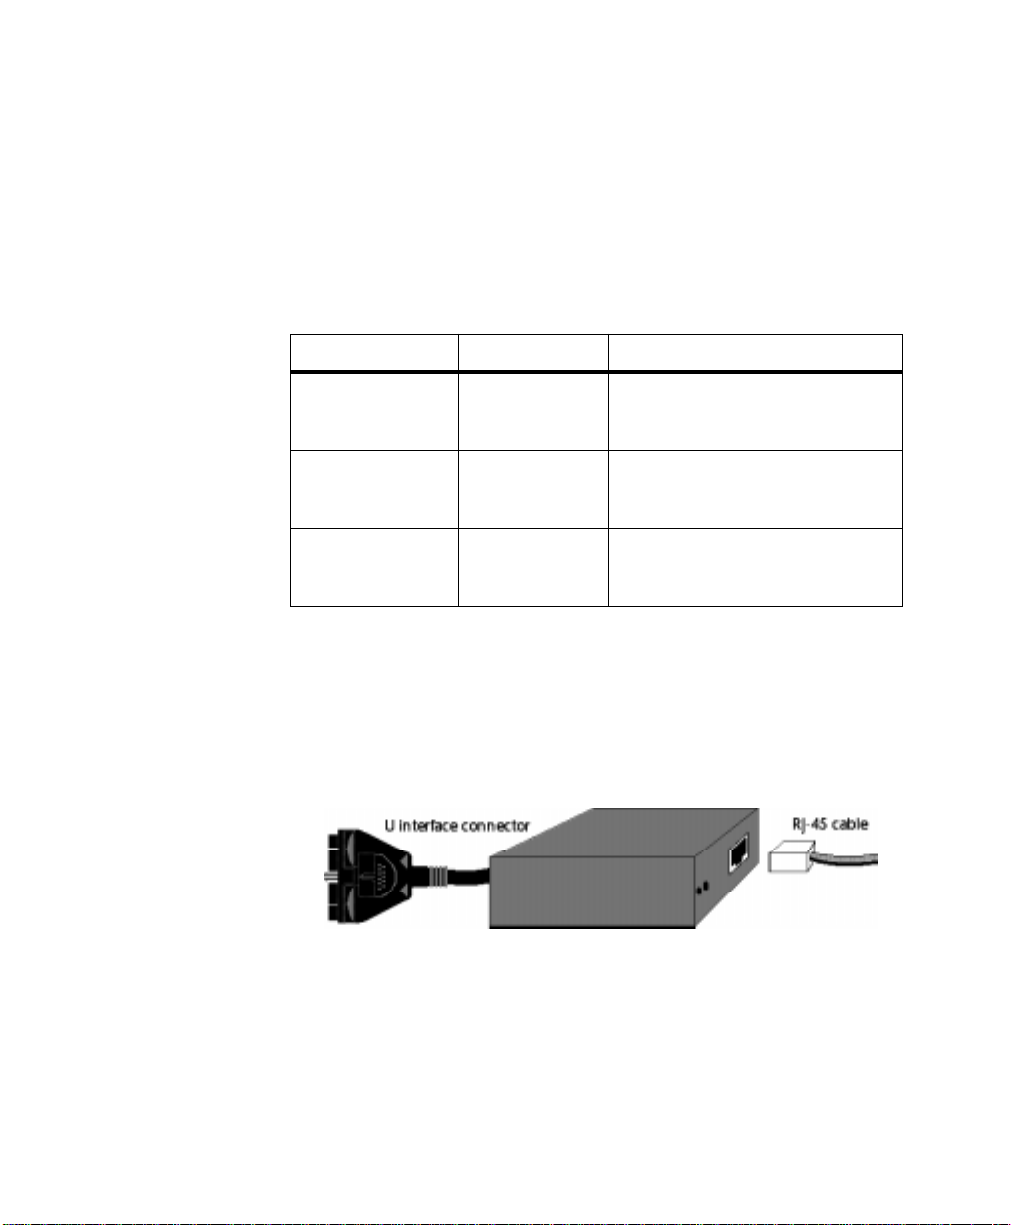
U I
NTERFACE
The U interface is used in North America where an external NT1 is
required to make an ISDN connection. Plug the RJ-45 cable into your
ISDN wall jack. Then connect the cable to the RJ-45 port on the
U interface connector.
ONNECTING YOUR EQUIPMENT
2: C
S/T interface ISDN S/T interface connector and
connector) and RJ-45 to RJ-45
cable
RJ-45 to RJ-45 cable
RJ-45 to RJ-45 cable, and
terminating resistor
Connecting the U interface connector and RJ-45 cable
Installation 9
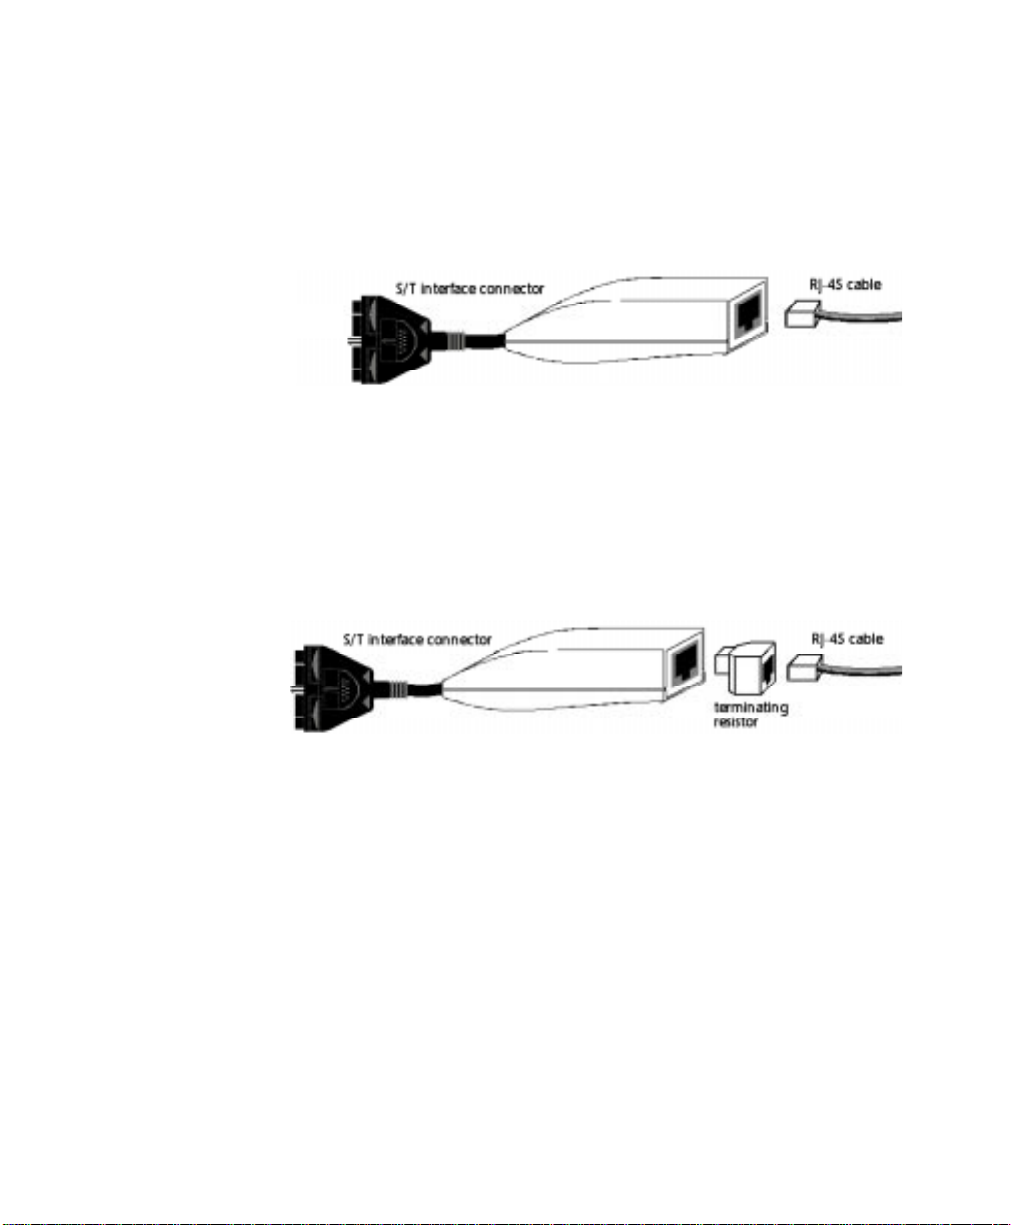
S/T I
NTERFACE
Outside of North America, ISDN connections are made using the S/T
interface. Plug the RJ-45 cable into your ISDN wall jack. Then connect
the cable to the RJ-45 port on the S/T interface connector.
Connecting the S/T interface connector and RJ-45 cable
In Australia, a different S/T interface is used, and a terminating
resistor may be required. The illustration below shows how the
Australian ISDN S/T interface connector, the terminating resistor, and
the RJ-45 cable connect together. For more information about
terminating resistors, see the README.TXT file on the Netopia ISDN
PC Card Disk 1.
Connecting the S/T interface connector, terminating resistor, and RJ-45 cable
10 Chapter 2
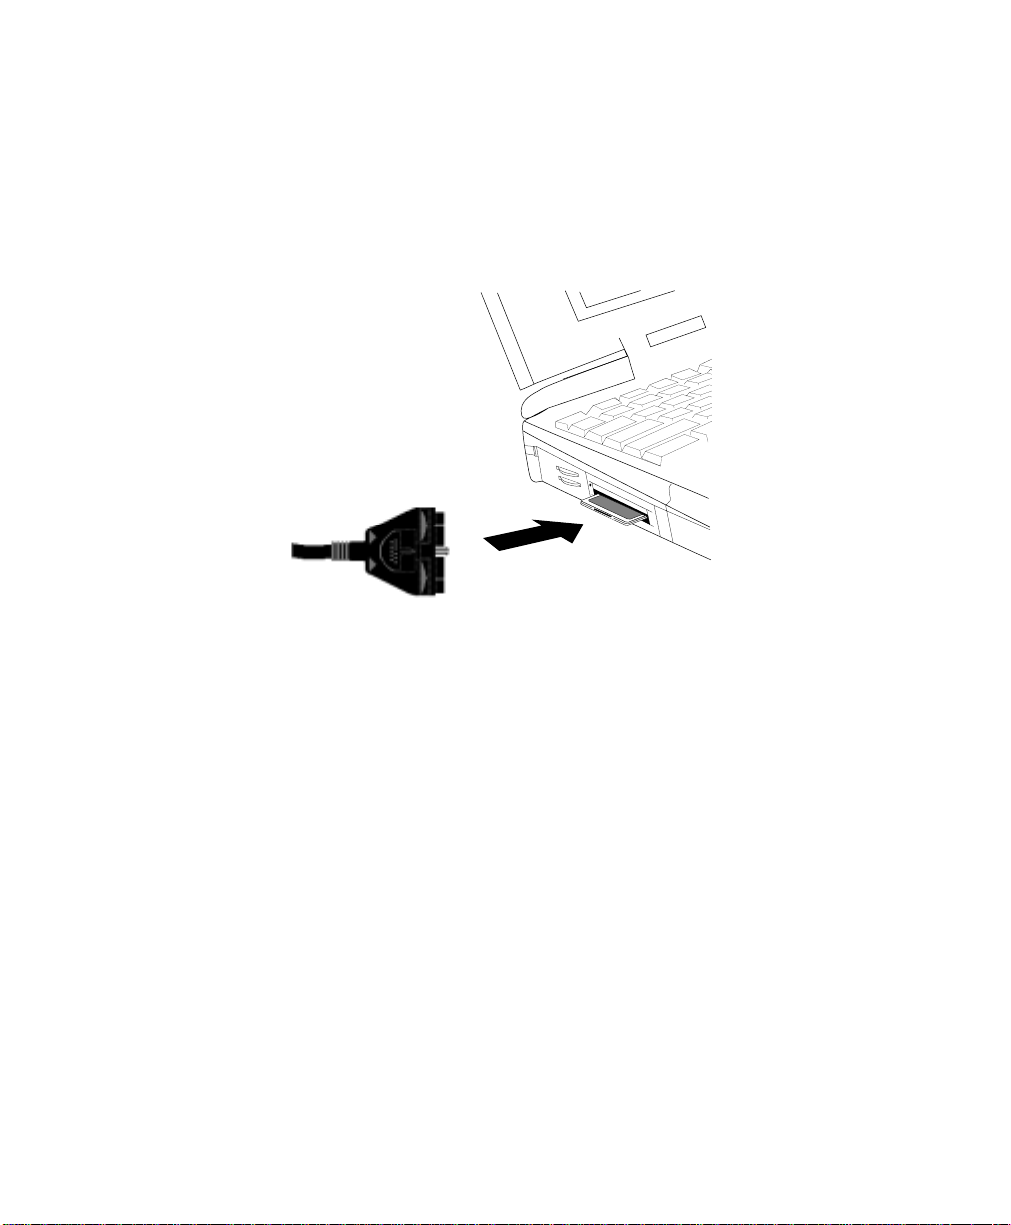
C
ONNECTING YOUR INTERFACE TO THE
To connect your interface to the PC Card, position the connector with
the embossed arrows toward the card. Push it straight into the port
on the card. Then push the locking tab on the connector toward your
computer.
Attaching the interface connector to the PC Card
S
TEP
3: C
ONFIGURING THE
PC C
PC C
ARD
ARD
To configure the Netopia ISDN PC Card for your computer, refer to the
section below which corresponds to your platform.
Installation 11
W
INDOWS
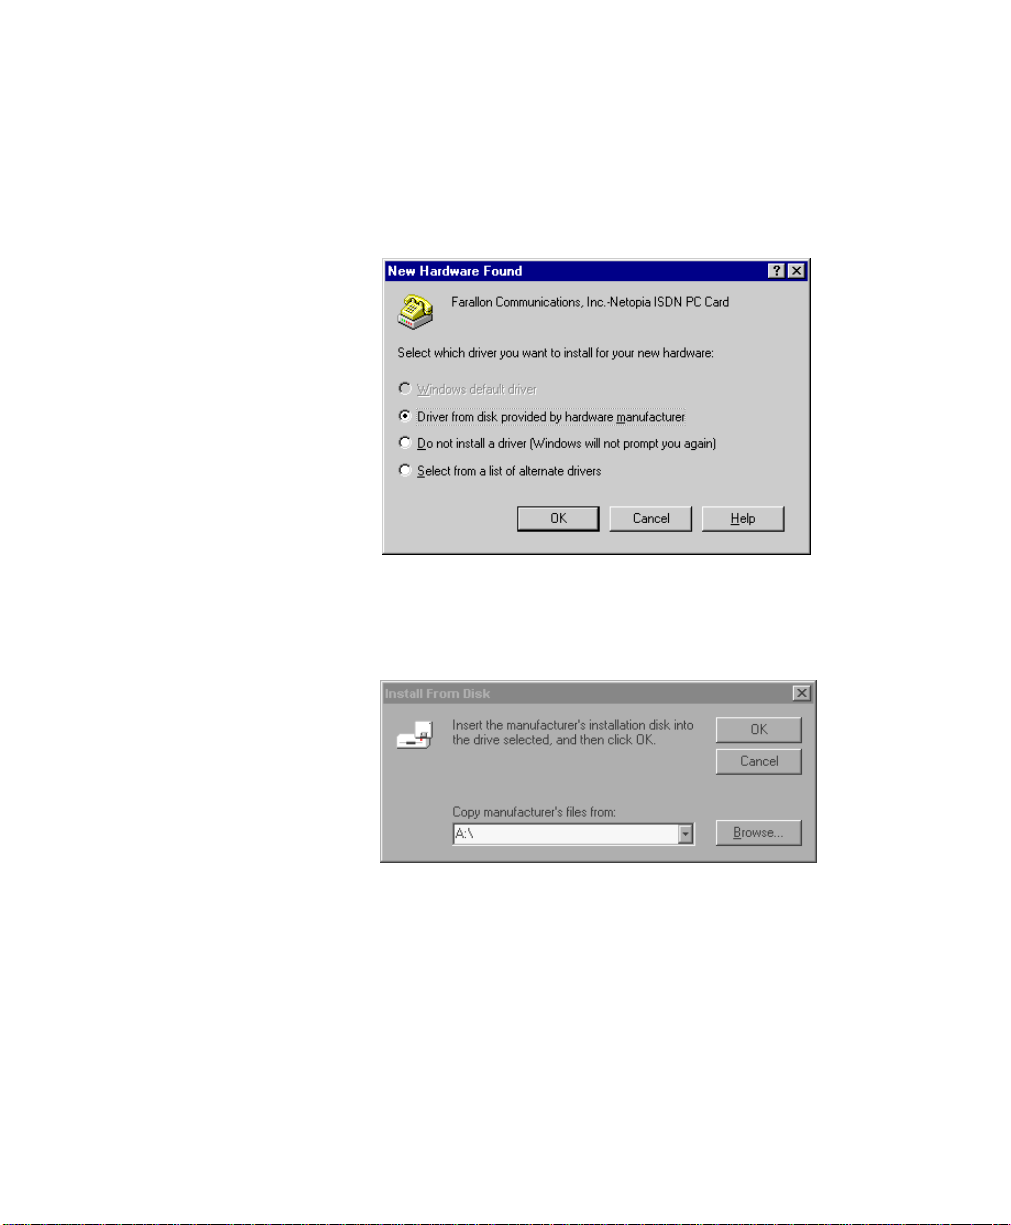
1. The first time you insert the Netopia ISDN PC Card, the New Hard-
2. Be sure that “Driver from disk provided by hardware manufac-
95
ware Found screen appears:
turer” is selected, and click OK. The Install From Disk screen
appears:
3. Insert the Netopia ISDN PC Card Disk 1, then click OK.
4. Go to Chapter 3, “Windows Configuration T ool,” and continue from
there.
12 Chapter 2
W
INDOWS
NT 4.0
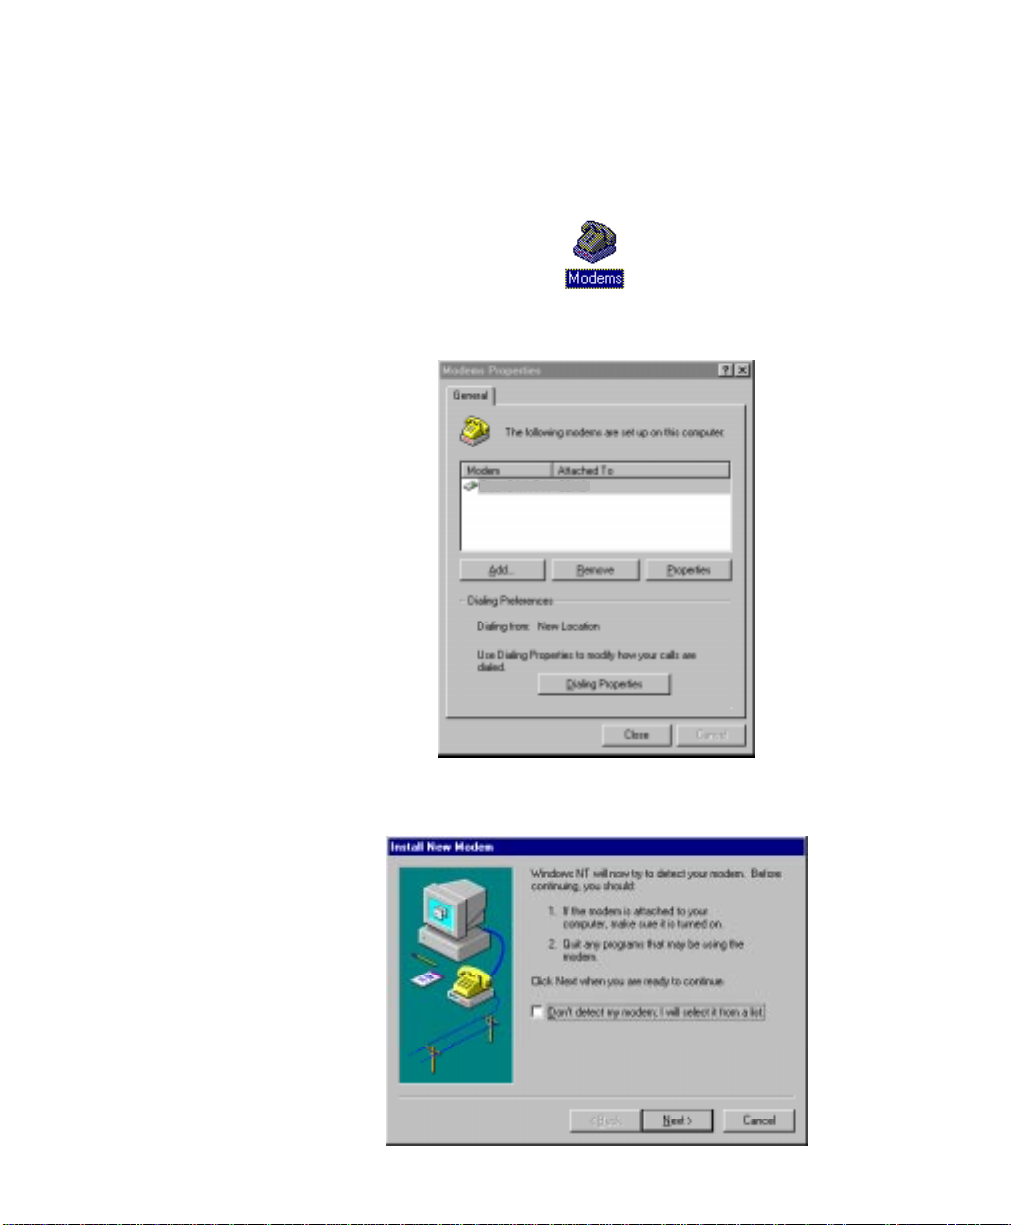
1. Open the Control Panel and select Modems.
2. Click Add in the Modems Properties screen.
Netopia COM2
3. Select “Don’t detect my modem”, then click Next.
x
Installation 13
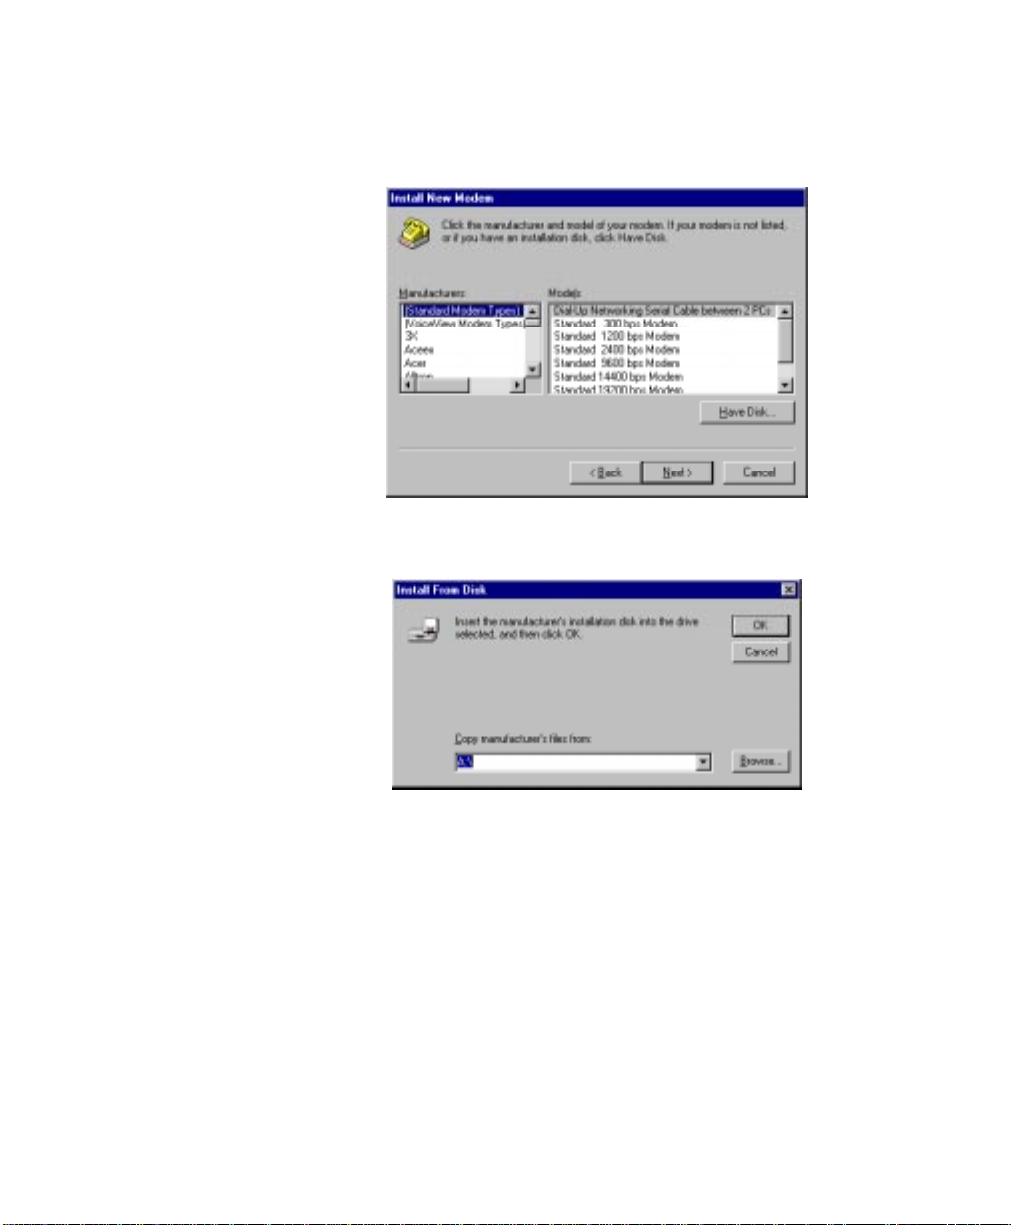
4. Select Have Disk.
5. Insert Netopia ISDN PC Card Disk 1, then click OK.
The Netopia .INF file will be installed.
14 Chapter 2
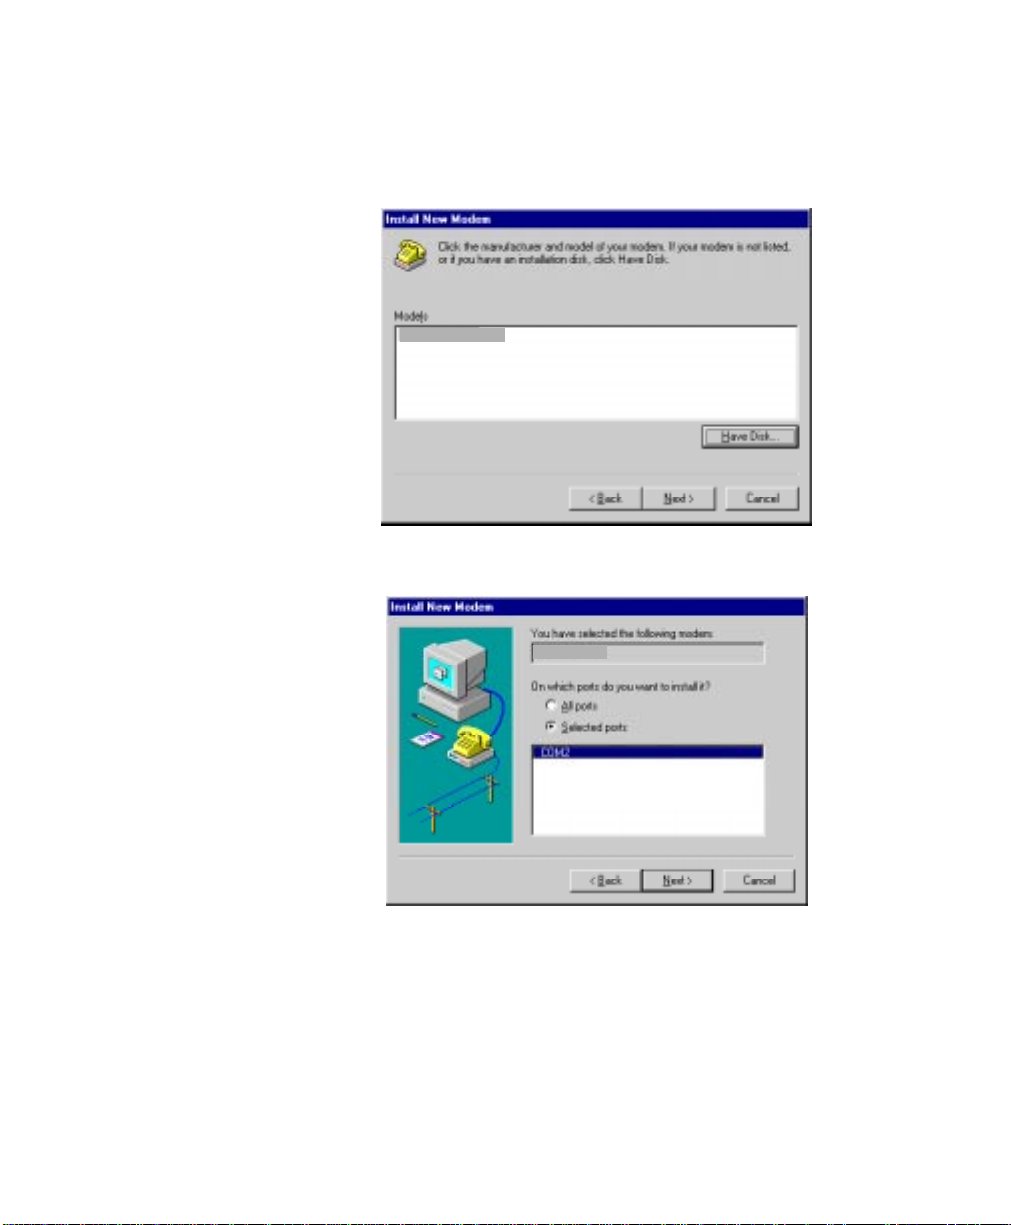
6. The Netopia ISDN PC Card will be detected. Select Netopia ISDN
7. Select COM Port, then click Next.
PC Card, then click Next.
Netopia ISDN PC Card
Netopia ISDN PC Card
8. Click Finish.
9. Go to Chapter 3, “Windows Configuration T ool,” and continue from
there.
Installation 15
W
INDOWS
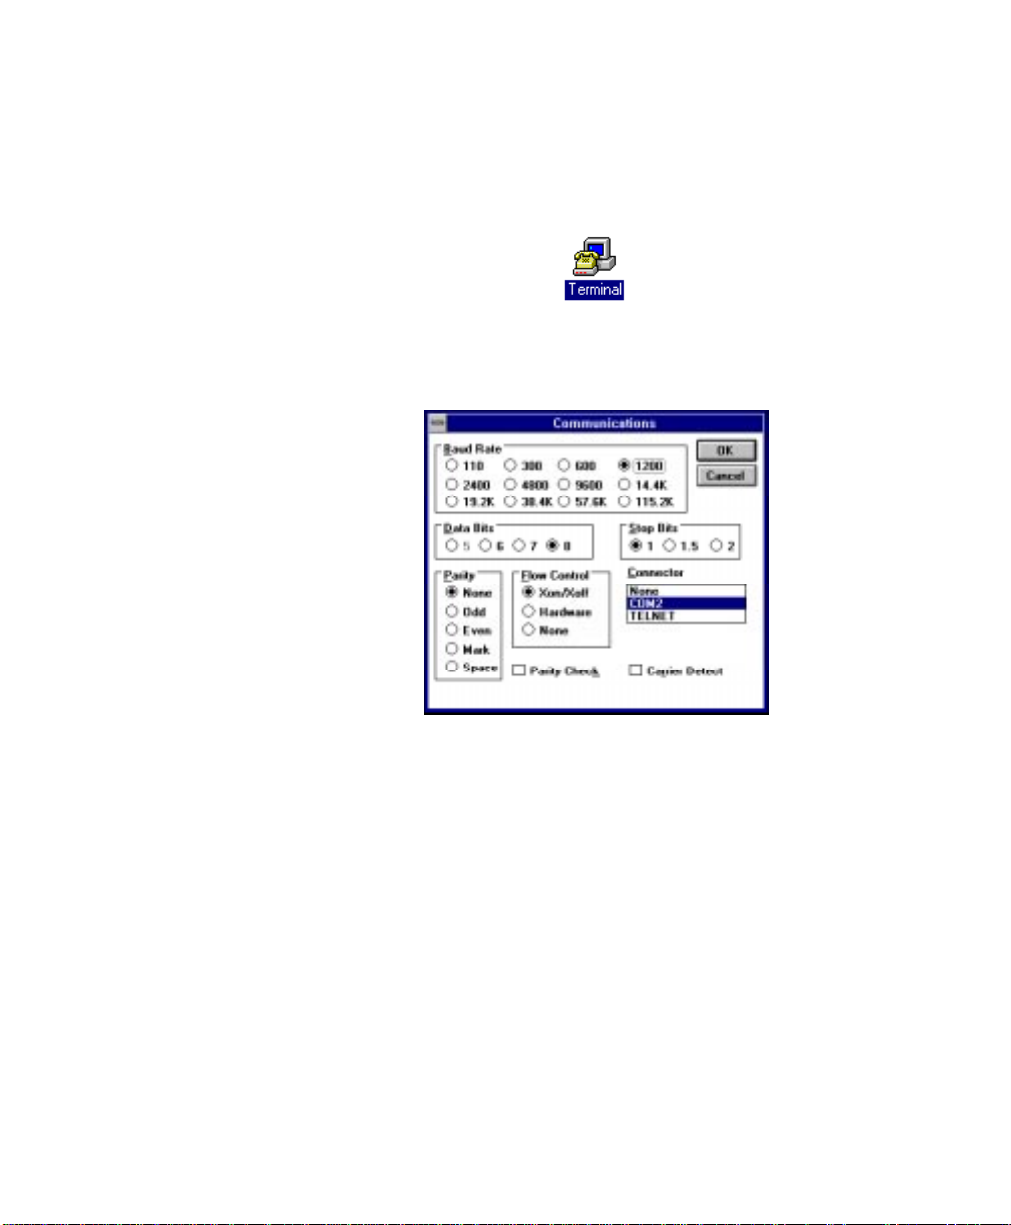
1. Open the Accessories and select Terminal.
2. From the Settings menu, select Communications, and the follow-
NT 3.51
ing screen will appear:
3. Select a COM port from the Connector list and click OK.
4. Type the following command:
ATI8
If the response “Farallon Communications, Inc. Netopia ISDN PC
Card” is returned, then the correct COM port for the Netopia ISDN
PC Card has been selected.
If no response is returned, repeat steps 3 and 4 with another
COM port until “Farallon Communications, Inc. Netopia ISDN PC
Card” is returned.
5. Go to Chapter 3, “Windows Configuration T ool,” and continue from
there.

16 Chapter 2
W
INDOWS
3.X
AND
DOS
1. Make sure that a Card Services software is installed on your com-
puter. This section uses CardSoft as an example, so the commands you enter may differ from those used here. Refer to your
vendor’s documentation for the correct commands, if needed.
2. Enter the following command at the prompt:
C:\CARDINFO
If the Netopia ISDN PC Card is detected, the following message is
returned:
Slot 0:
Card Type = Modem (COM2)
Manufacturer = Farallon Communications, Inc.
Product Name = Netopia ISDN PC Card
Slot 1:
Slot 1 is empty
3. Enter the following command at the prompt:
C:\TELIX
4. Press Alt+P to open the Port Configuration screen. Configure the
COM port that was returned when the Netopia ISDN PC Card was
detected. Set the Speed to 115200, then press Enter to save
your changes and exit the screen.
5. Go to Chapter 4, “VT100 Configuration Tool,” and continue from
there.

Chapter 3
Windows Configuration Tool
For Windows 95, Windows NT 4.0, and Windows NT 3.51, the
Netopia ISDN PC Card Windows Configuration Tool provides an
easy-to-use interface for completing your PC Card configuration.
The Windows Configuration Tool allows you to view the PC Card
version and firmware properties, configure dialing and communication information, and download updated versions of the firmware. This chapter covers how to install and run the Windows
Configuration Tool. The first step is to use the Setup Wizard.
17
U
SING THE SETUP WIZARD
The Setup Wizard provides an easy method of installing the Windows Configuration Tool and all the program files used by the
Netopia ISDN PC Card. To use the Setup Wizard, follow the steps
below.
1. Insert the Netopia ISDN PC Card Disk 1 and type the following
in the Run applet from the Start menu or File menu:
A:\SETUP
18 Chapter 3
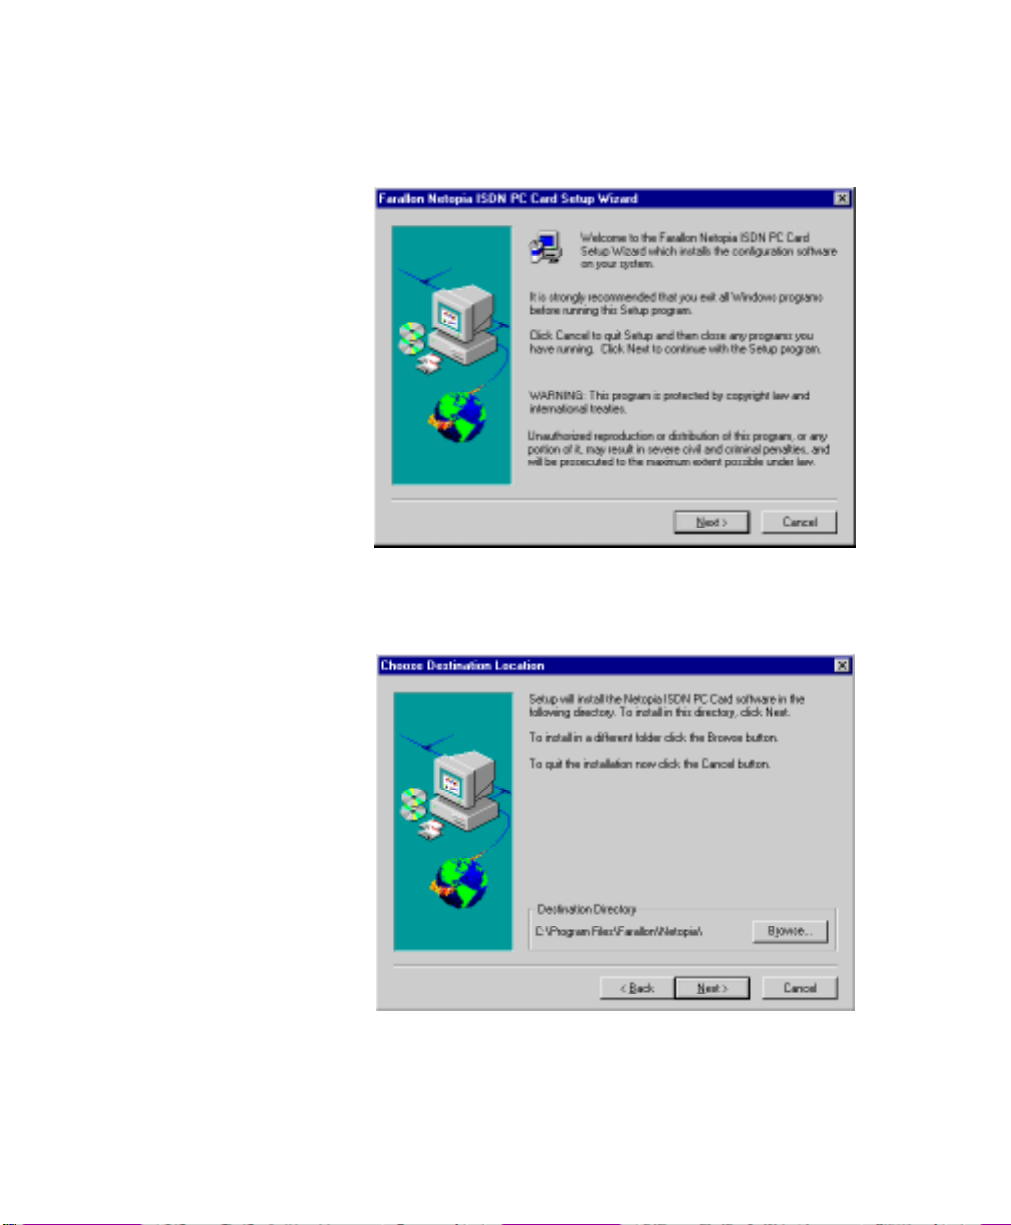
2. Click Next in the window that appears:
3. Specify where the Netopia ISDN PC Card software is to be
installed.
4. Click Next. The Setup Wizard will install all files and create a
Netopia ISDN PC Card program directory. Follow the on-screen
instructions for inserting the other disks.
Windows Configuration Tool 19
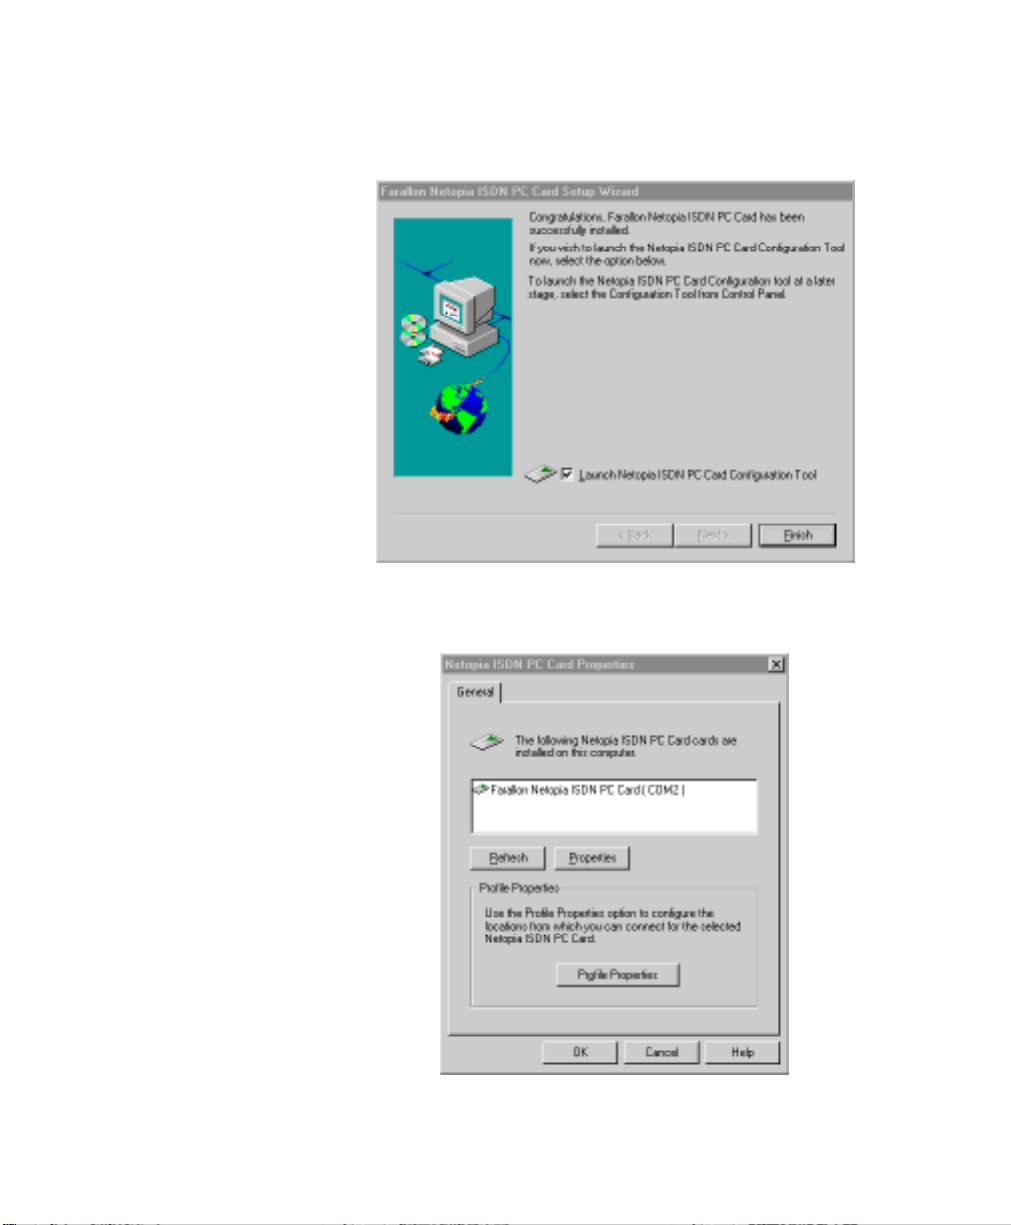
5. When the window below appears on your screen, click Finish.
6. The Netopia ISDN PC Card Configuration Tool launches and
the Properties window appears:
7. Complete your PC Card configuration by continuing with the
“Profile Configuration” section on the next page.
20 Chapter 3
PROFILE CONFIGURATION
Netopia ISDN PC Card configuration settings are saved into profiles. Your Netopia ISDN PC Card is already equipped with a factory profile which requires only your ISDN information to establish
a connection. Using the factory profile as a basis, you can create
your own profile. Up to three user-defined profiles can be created
for different connection scenarios, but only one profile may be
active at one time.
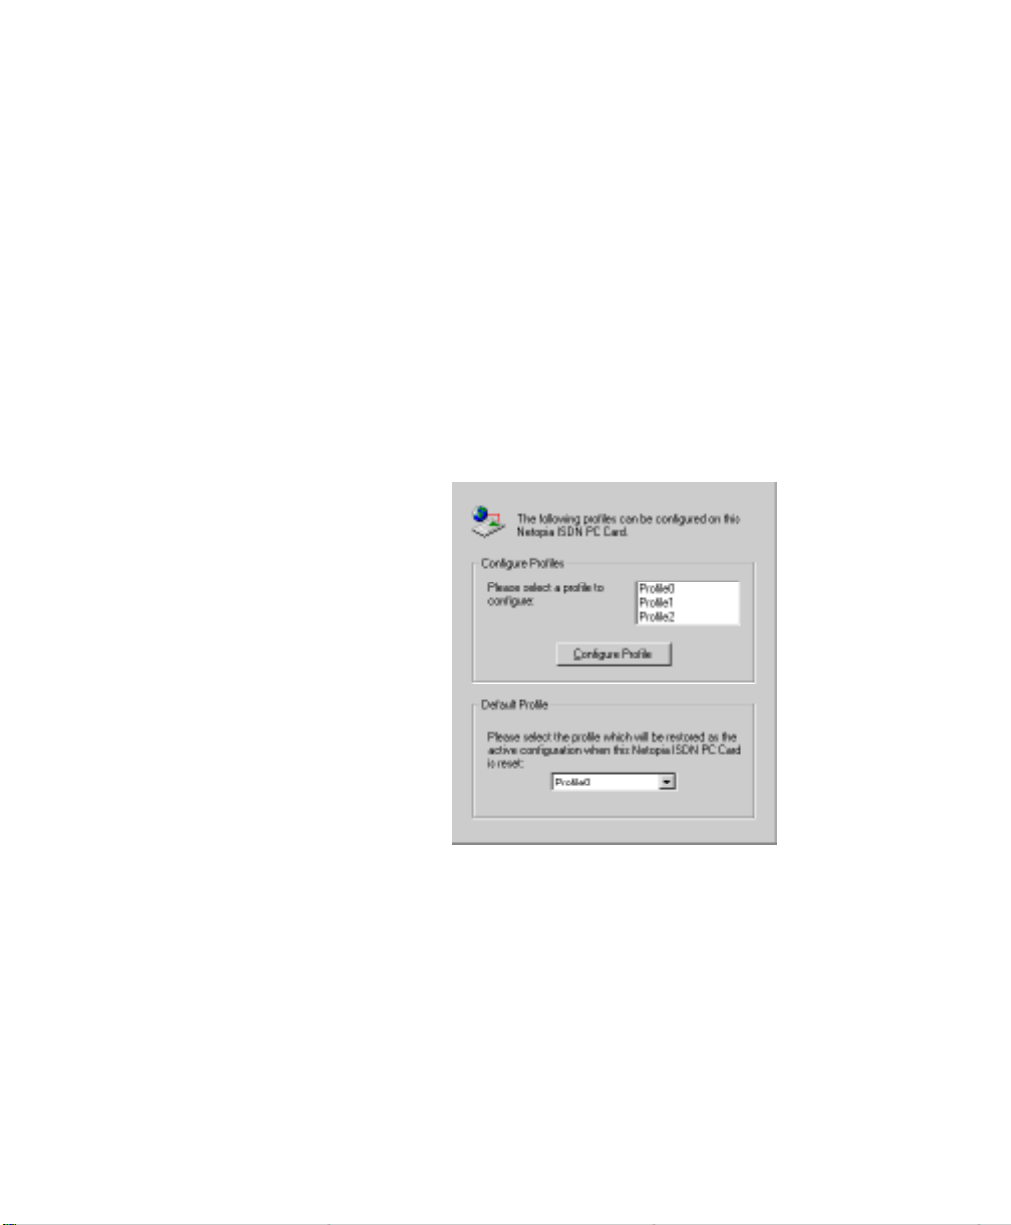
To configure a profile, follow the steps below.
1. In the Netopia ISDN PC Card Properties screen, click Profile
Properties. The Profiles window appears:
2. Select a profile from the list, then click Configure Profile.
3. The Profile Configuration window appears. The North American and International firmware versions each have their own
screen. If your current geographic location differs from the
firmware loaded in your Netopia ISDN PC Card, refer to the
“Updating firmware” section later in this chapter.
 Loading...