

Faber GV60TT/10 User Manual
NL-ENG-DE-FR-IT-ES-PT-NO-DK - 40011515-0115
GV60TT/10
User Manual
Aspect Premium L RD/ST/C
Aspect (Premium) XL RD/ST
Bright
Clear
Duet (Premium) M–L-XL
Triple (Premium) M-L-XL
Relaxed (Premium) M-L-XL
Farum
Fyn 450
Fyn 600
Hestia
Honest
Jelling
Odense
Respect Premium IC-OC
Skive
Solution Premium
Straight
Spectra Frameless
Glance
Concept I-450
Concept III-700
Registration plate/Typenschild/ Type de plaque
DE: Seriennummer
FR: numéro de série
NL: Serienummer
ENG: Serial number
DE: Seriennummer
FR: Numéro de série
IT: Numero di serie
ES: Número de serie
PT: Número de série
NO: Serienummer
DK: Serienummer
1 < < < <
1.1
1.2
1.3
1.4
1.5
1.6
G
2 < < < <
1.7
1.8
1.9
2.0
2.1
2.2
2.3
2.4
2.4.1
2.4.2
2.4
2.5
2.6
DC 6V
connection
Reset
3 < < < <

1. Gebruikershandleiding NL
2. User manual ENG
3. Bedienungsvorschrift DE
4. Manuel de l'utilisateur FR
5. Modalità d'usol IT
6. Manuel del usario ES
7. Manuel de instruções PT
8. Brukerveiledning NO
9. Brugervejledning DK
4 < < < <

NL
1 Gebruikershandleiding NL
De haard mag alleen door een
gekwalificeerde installateur/dealer worden
geïnstalleerd.
Bij de installatie moet aan het bouwbesluit
worden voldaan. Raadpleeg ook de installatieinstructies.
Let op: Aangezien een haard een warmtebron
is, ontstaat hete luchtcirculatie. Daarom is
het van belang dat u de haard niet te snel na
een verbouwing stookt. Door de natuurlijke
luchtcirculatie worden vocht en nog niet
uitgeharde vluchtige bestanddelen uit verf,
bouwmaterialen en vloerbedekking en
dergelijke meegenomen in deze
luchtcirculatie. Deze bestanddelen kunnen
zich op koude oppervlakten als roet afzetten.
Het moment waarop u de haard voor het eerst
kunt gaan gebruiken is van diverse
omstandigheden afhankelijk. Raadpleeg
hieromtrent uw installateur.
1.1 Reiniging en onderhoud
Jaarlijks zal het toestel moeten
worden gereinigd en gecontroleerd op
een juiste werking door een
installateur.
De buitenkant van de haard kan
worden gereinigd met een schone
vochtige doek.
1.1.1 Reiniging van het glas
Demonteer het glas zoals beschreven in de
installatievoorschriften en verwijder de
aanslag met een schone droge doek. Indien
noodzakelijk kan speciale reiniger voor
keramische kookplaten worden gebruikt.
Let op:
voorkom vingerafdrukken op het glas. Deze
kunnen inbranden en zijn dan niet meer
verwijderbaar.
ontsteken. Als dit herhaaldelijk
voorkomt, raadpleeg dan uw
installateur.
De haard mag niet worden gebruikt
wanneer: het glas beschadigd of
verwijderd is of wanneer de
verbrandingskamer geopend is.
Plaats geen brandbare materialen in de
verbrandingskamer.
Verander nooit de opstelling van de
houtset en voeg nooit meer
decoratiemateriaal, carrara-kiezels of
grijze splitstenen toe dan wat met de
haard is meegeleverd. Indien de haard is
ingeschakeld, moet de waakvlam altijd
zichtbaar zijn!
Plaats geen gordijnen, kleren, wasgoed,
meubels of andere brandbare materialen
in de nabijheid van het toestel. De
minimale veilige afstand bedraagt 1
meter.
Laat kinderen alleen onder toezicht de
afstandsbediening gebruiken.
Het is aan te bevelen altijd een
afschermrooster voor de haard te
plaatsen als er kinderen, bejaarden of
mindervalide in dezelfde ruimte als de
haard aanwezig zijn.
1.3 Eerste keer ingebruikname van de
haard
Verwijder voor het stoken alle stickers,
beschermfolie en eventuele rubberen
beschermstrippen van het glas.
Zorg voor voldoende ventilatie van de ruimte
tijdens het voor de eerste keer
ingebruikstellen van de haard. Stook de haard
enige uren op de hoogste stand zodat de lak
de kans krijgt om uit te harden en eventuele
vrijkomende dampen veilig worden
afgevoerd. Houd kinderen en huisdieren
buiten deze ruimte tijdens dit proces!
1.4 Afstandsbediening algemeen
1.2 Veiligheidsaanwijzingen voor de
gebruiker
Het toestel is ontworpen voor sfeer- en
verwarmingsdoeleinden. Dit houdt in dat
alle oppervlaktes, inclusief het glas, zeer
heet kunnen worden (heter dan 100°C).
Een uitzondering hierop vormen de
onderzijde van de haard en de
bedieningsknoppen.
Indien de haard uitgezet is wacht dan
minimaal drie minuten alvorens de haard
opnieuw te ontsteken.
Indien de haard door een onbekende
oorzaak uitgegaan is wacht dan 15
minuten alvorens de haard opnieuw te
5 < < < <
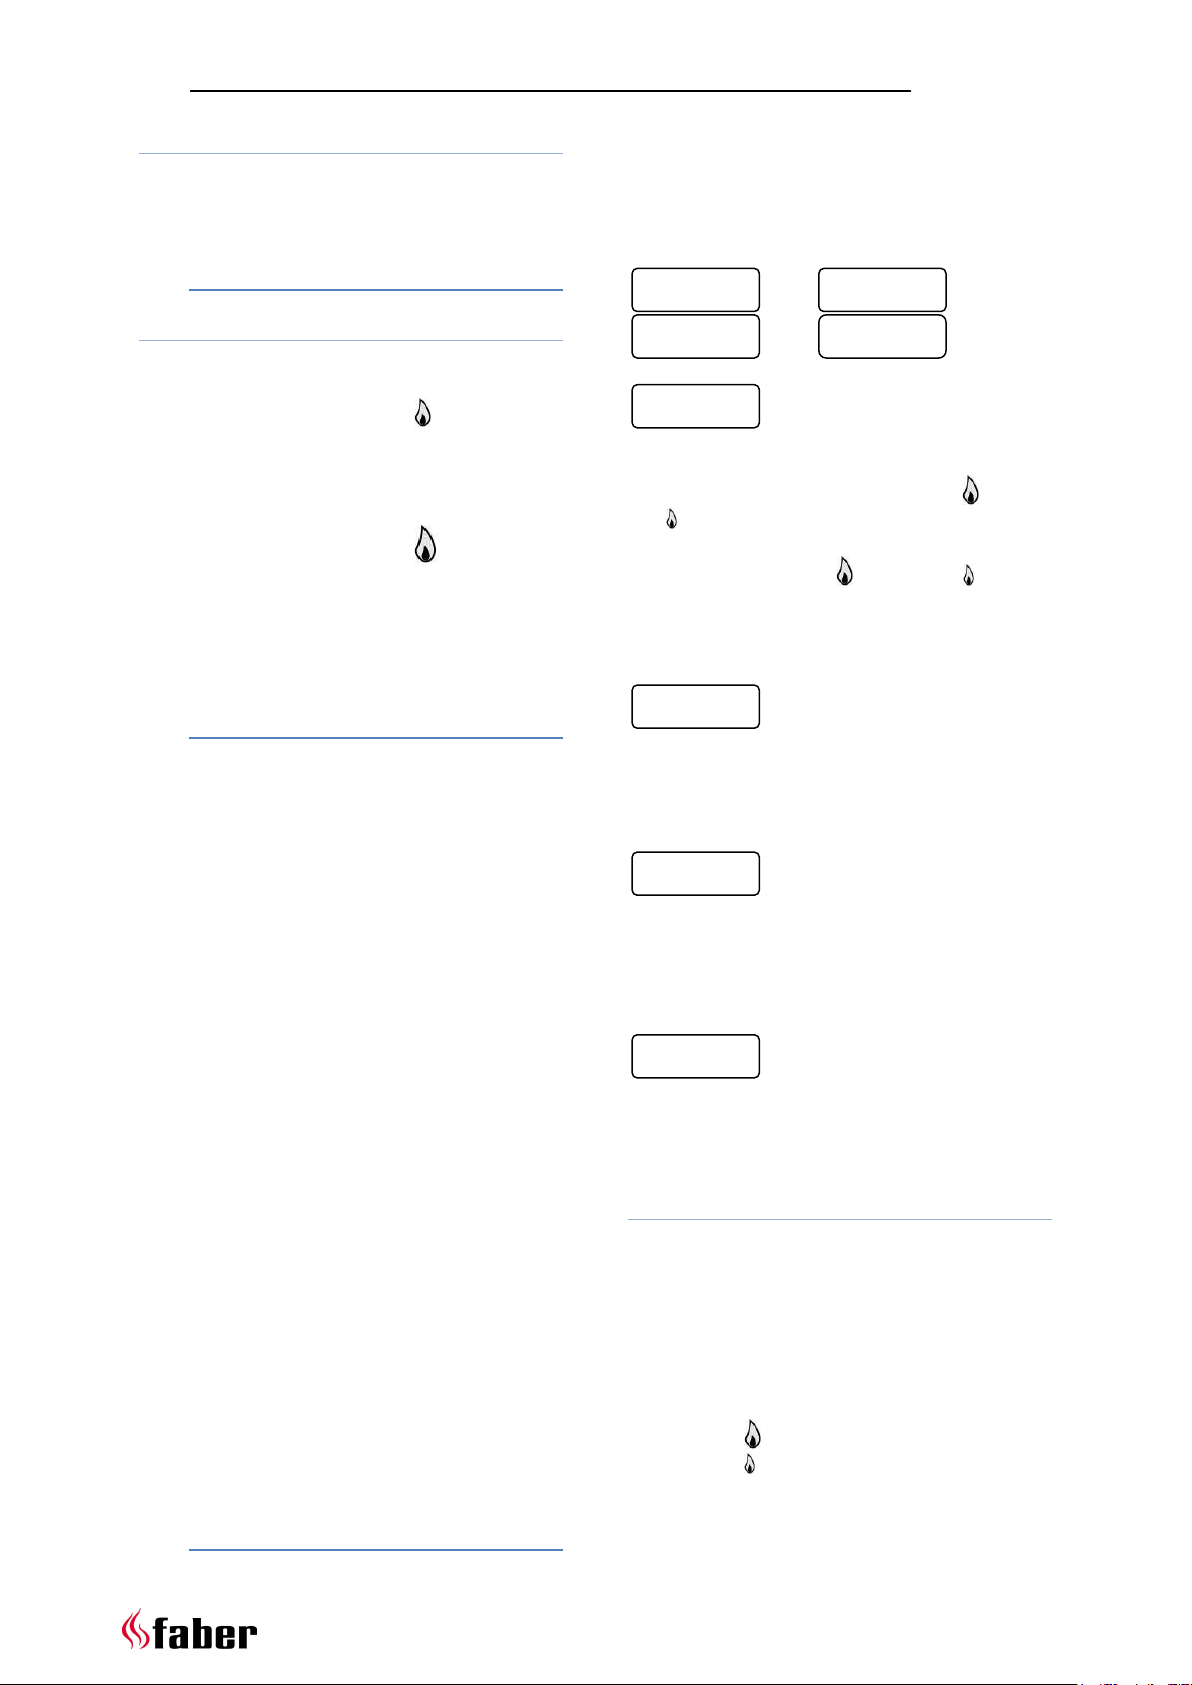
Het toestel is voorzien van een
afstandsbedieningset, deze bestaat uit de
afstandsbediening (fig. 1.1) en de ontvanger
(fig. 1.2). De ontvanger, evenals het
gasregelblok (fig. 1.3), bevinden zich achter:
een bedieningsluik in de boezem, een lade
aan de onderzijde of achter een kader.
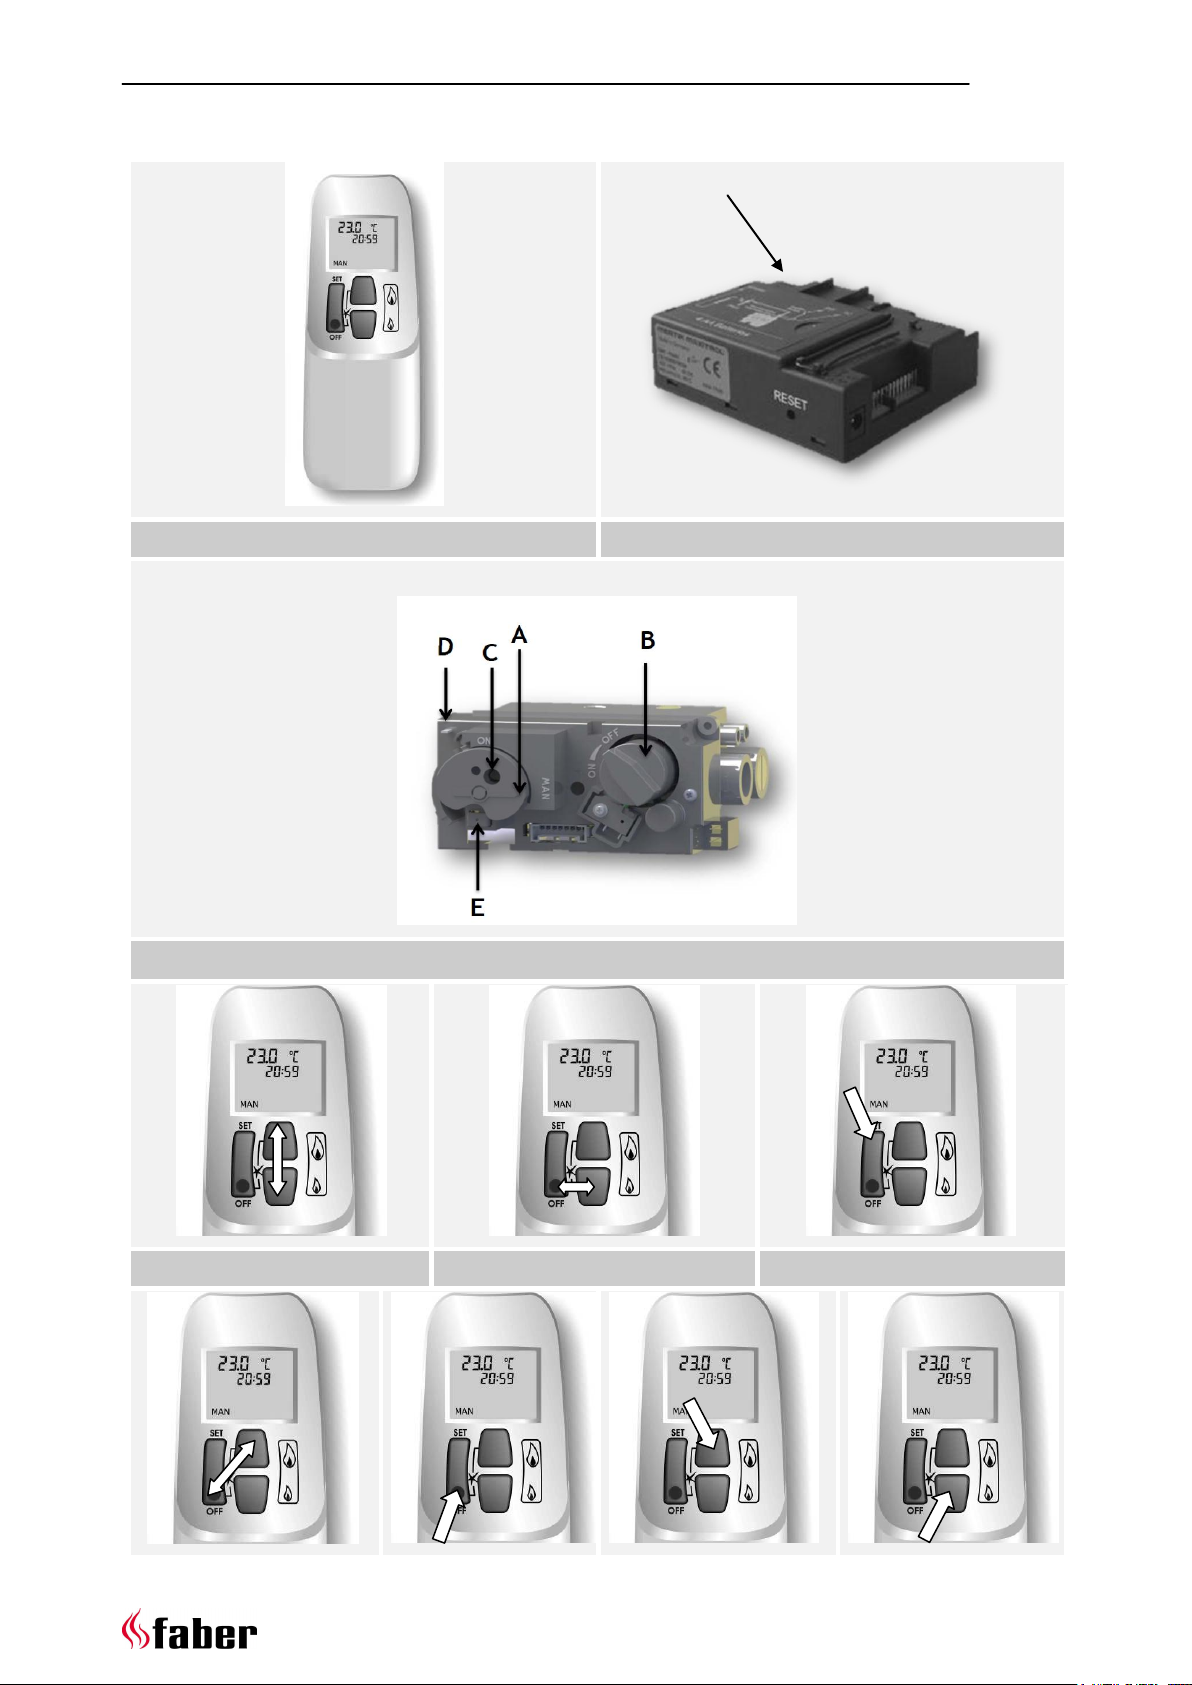
De afstandsbediening is voorzien van
3 knoppen (fig.1.1). Hiermee kunnen
alle functies van de haard worden
bediend.
Bij een goede ontvangst geeft de
ontvanger een geluidssignaal.
Met behulp van de draaiknop B
(fig. 1.3) kan zonder gebruik te
NL
maken van de afstandsbediening de
vlamhoogte worden ingesteld.
De draaischijf A (fig. 1.3) dient altijd
op de ON positie te staan. De MAN
positie is alleen bedoeld voor service
doeleinden.
Bij gebruik van de thermostaat/timer functie,
dient de bijgeleverde wandhouder
(fig. 2.4/2.5/2.6) binnen 4 meter van de
haard te worden geplaatst.
1.4.1 Adapter/batterijen
Hoewel een netadapter wordt bijgeleverd,
kan de ontvanger ook met batterijen worden
gevoed. Gebruik van beide is ook mogelijk bij
stroom uitval zal dan automatich
overgeschakeld worden naar batterijen.
Let op:
kontroleer jaarlijks de batterijen !
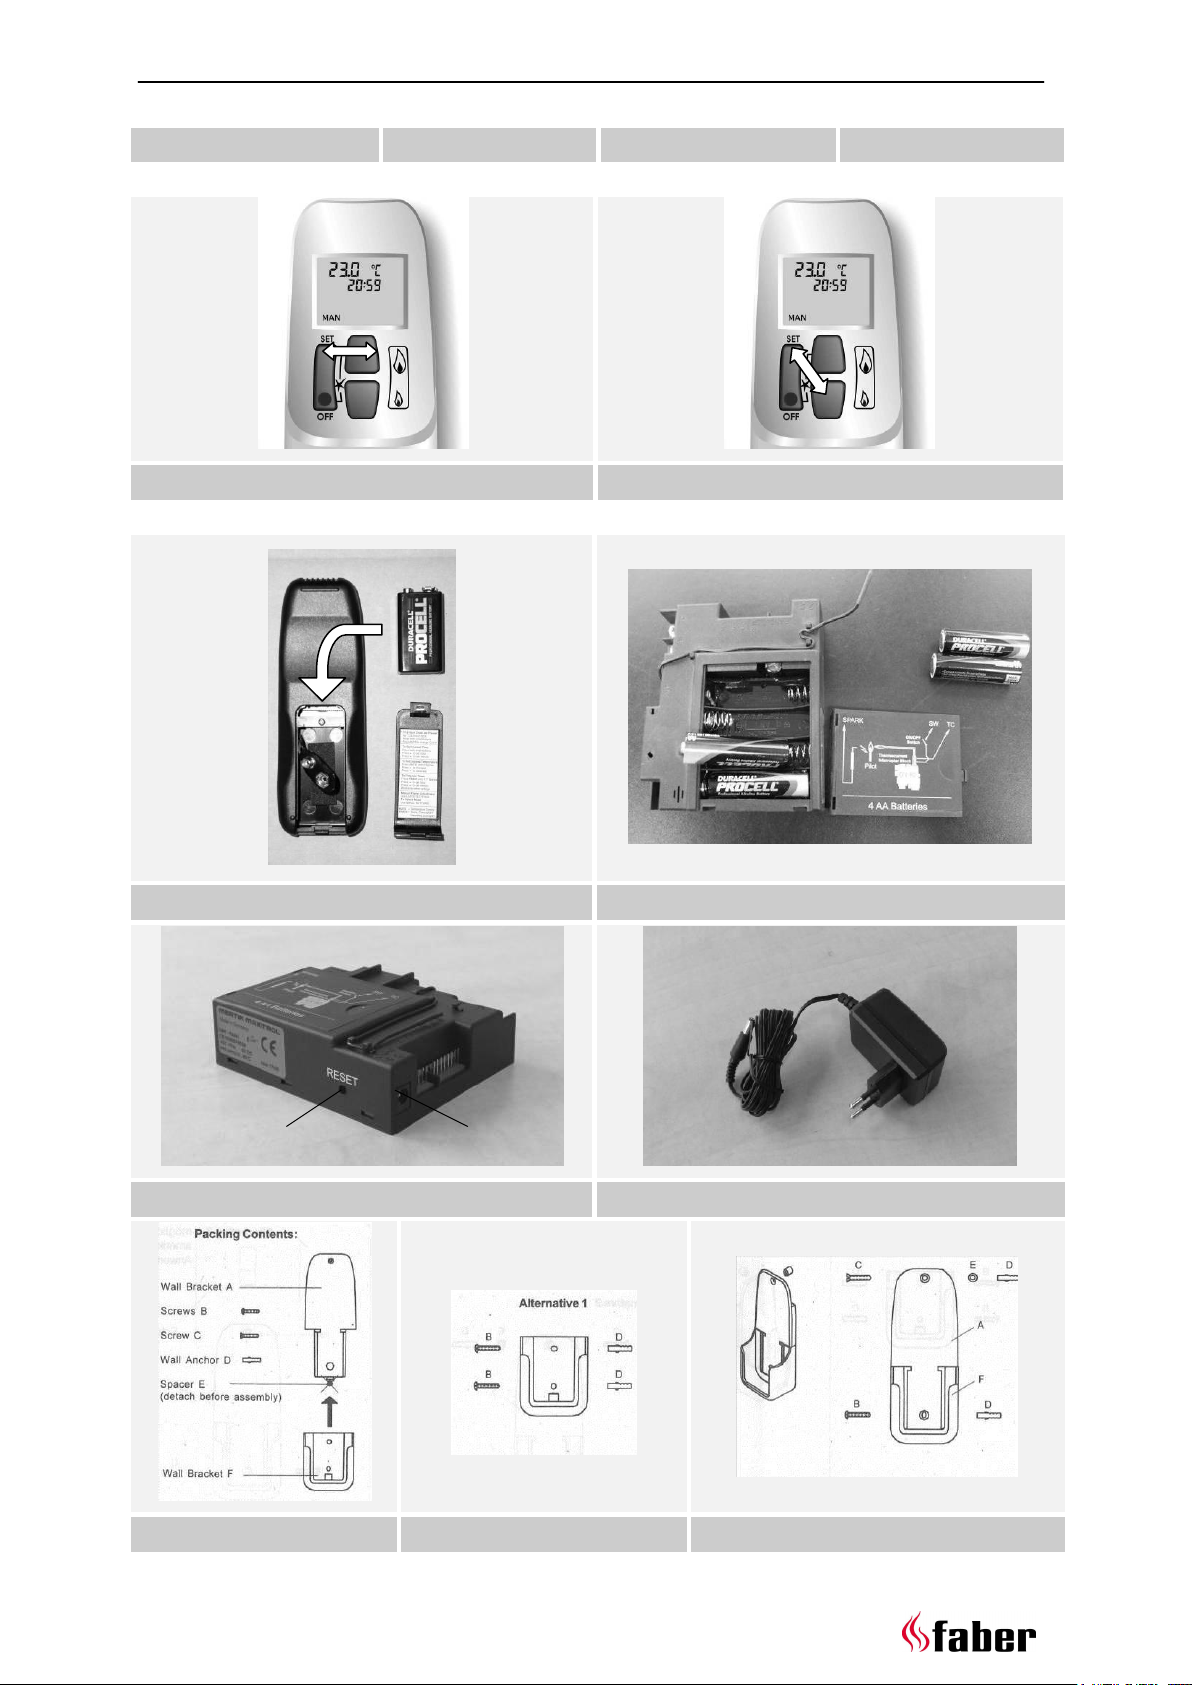
1.4.2 Plaatsen van de batterijen in de
afstandsbediening
Verwijder het deksel op de
achterzijde van de afstandsbediening
(fig. 2.3).
Plaats een 9Volt MN1604/6LR61
Alkaline long live batterij.
Sluit het deksel.
1.4.3 Plaatsen van de batterijen in de
ontvanger
Neem de ontvanger (fig. 1.2) uit de
gasbloksteun.
Verwijder het deksel van de
ontvanger.
Plaats 4 stuks 1,5Volt AA/LR6 Alkaline
long live batterijen (fig. 2.4).
Sluit het deksel en plaats de
ontvangerset terug.
1.4.4 Vervangen van lege batterijen
Handset:
rechts in de boven hoek geeft simbool
battery de kwaliteit van de batterij
aan.
Na het vervangen van de batterij in
de handset zijn de waarden van de
thermostaat en timer functie weer op
de fabrieksinstelling gezet (zie par.
1.8).
Ontvanger:
3 korte geluidssignalen zijn hoorbaar
als de motor draait ter indicatie dat
de batterijen van de ontvanger bijna
leeg zijn.
Bij een erg lage batterijspanning
schakelt de afstandsbediening het
toestel volledig uit. Dit zal niet
gebeuren als de spanning onderbroken
wordt.
Het kan zijn dat na het vervangen van
de batterijen de zendcode opnieuw
ingelezen moet worden (zie hiervoor
par. 1.5.2).
1.5 Instellen van de
afstandsbediening.
1.5.1 Tijdsinstelling:
Druk de - en de -knop gelijktijdig
in (fig. 1.4).
De display knippert nu.
Druk de -knop in om de uren in te
stellen (fig. 1.9).
Druk de -knop in om de minuten in
te stellen (fig. 2.0).
Wacht of druk de OFF- knop in om
deze functie te beëindigen (fig. 1.8).
1.5.2 Zendcode afstandsbediening
instellen:
Druk met een puntvormig voorwerp
de resetknop van de ontvanger in (fig.
2.4.1), totdat het tweede signaal
hoorbaar is. Druk nu binnen 20
seconden de -knop van de
afstandsbediening in (fig. 2.0), Als er
een signaal hoorbaar is, is de
zendcode ingesteld.
1.5.3 Temperatuur/klok aanduiding
(standaard °C/24uurs):
Het wijzigen van de temperatuuraanduiding
op de display van°C/24uurs naar
°F/12uurs en omgekeerd gaat op de volgende
manier:
Druk de OFF- en de -knop (kleine
vlam) gelijktijdig in totdat de
aanduiding wijzigt (fig. 1.5).
1.6 Basisfuncties afstandsbediening.
1.6.1 Aanzetten van de haard
Druk de OFF- en de -knop
gelijktijdig in, tot dat een signaal
hoorbaar is (fig. 1.7).
o De opstartprocedure start nu.
Gedurende deze periode
geeft de ontvanger een
repeterend geluidssignaal.
o De haard gaat nu automatisch
op volstand branden.
6 < < < <
NL
TIMER
TEMP
MAN
TEMP
TEMP
TEMP
TIMER
MAN
1.6.2 Regelen van de vlamhoogte
De -knop ingedrukt houden om de
vlamhoogte stapsgewijs te verhogen
(fig. 1.9).
Door twee keer kort achter elkaar
de -knop in te drukken schakeld de
haard door naar de hoogste stand
De -knop ingedrukt houden om de
vlamhoogte stapsgewijs te verlagen
en/of terug te schakelen naar
waakvlam stand (fig. 2.0).
Door twee keer kort achter elkaar
de -knop in te drukken schakeld de
haard door naar de laagste stand.
1.6.3 Uitzetten van de haard
Druk de OFF-knop in en de haard
schakelt volledig uit (fig. 1.8).
1.7 Voor toestellen met Stepbrander
1.7.1 Regelen van de Stepbrander
Let op: na de opstartprocedure duurt het 45
sec. voordat de stepbrander geschakeld kan
worden.
Druk de SET en de -knop (kleine
vlam) gelijktijdig in en het vuurbeeld
zal zich in het midden van de brander
concentreren (fig. 2.2).
Regelen van de vlamhoogte (zie par.
1.6.2).
Druk de SET en de -knop (grote
vlam) gelijktijdig in, en het vuurbeeld
zal zich verdelen over de hele lengte
van de brander. (In het display
verschijnt het “AUX” symbool, fig.
2.1)
Regelen van de vlamhoogte (zie par.
1.6.2).
Nachttemperatuur (toestel schakelt niet in)
Timer P1 6:00 (opstaan)
P1 8:00 (vertrek)
P2 16:00 (thuiskomst)
P2 22:00 (nacht)
Voorbeeldinstelling één schakelperiode:
Dagtemperatuur 21°
Nachttemperatuur (toestel schakelt niet in)
Timer P1 8:00 (opstaan)
P1 22:00 (nacht)
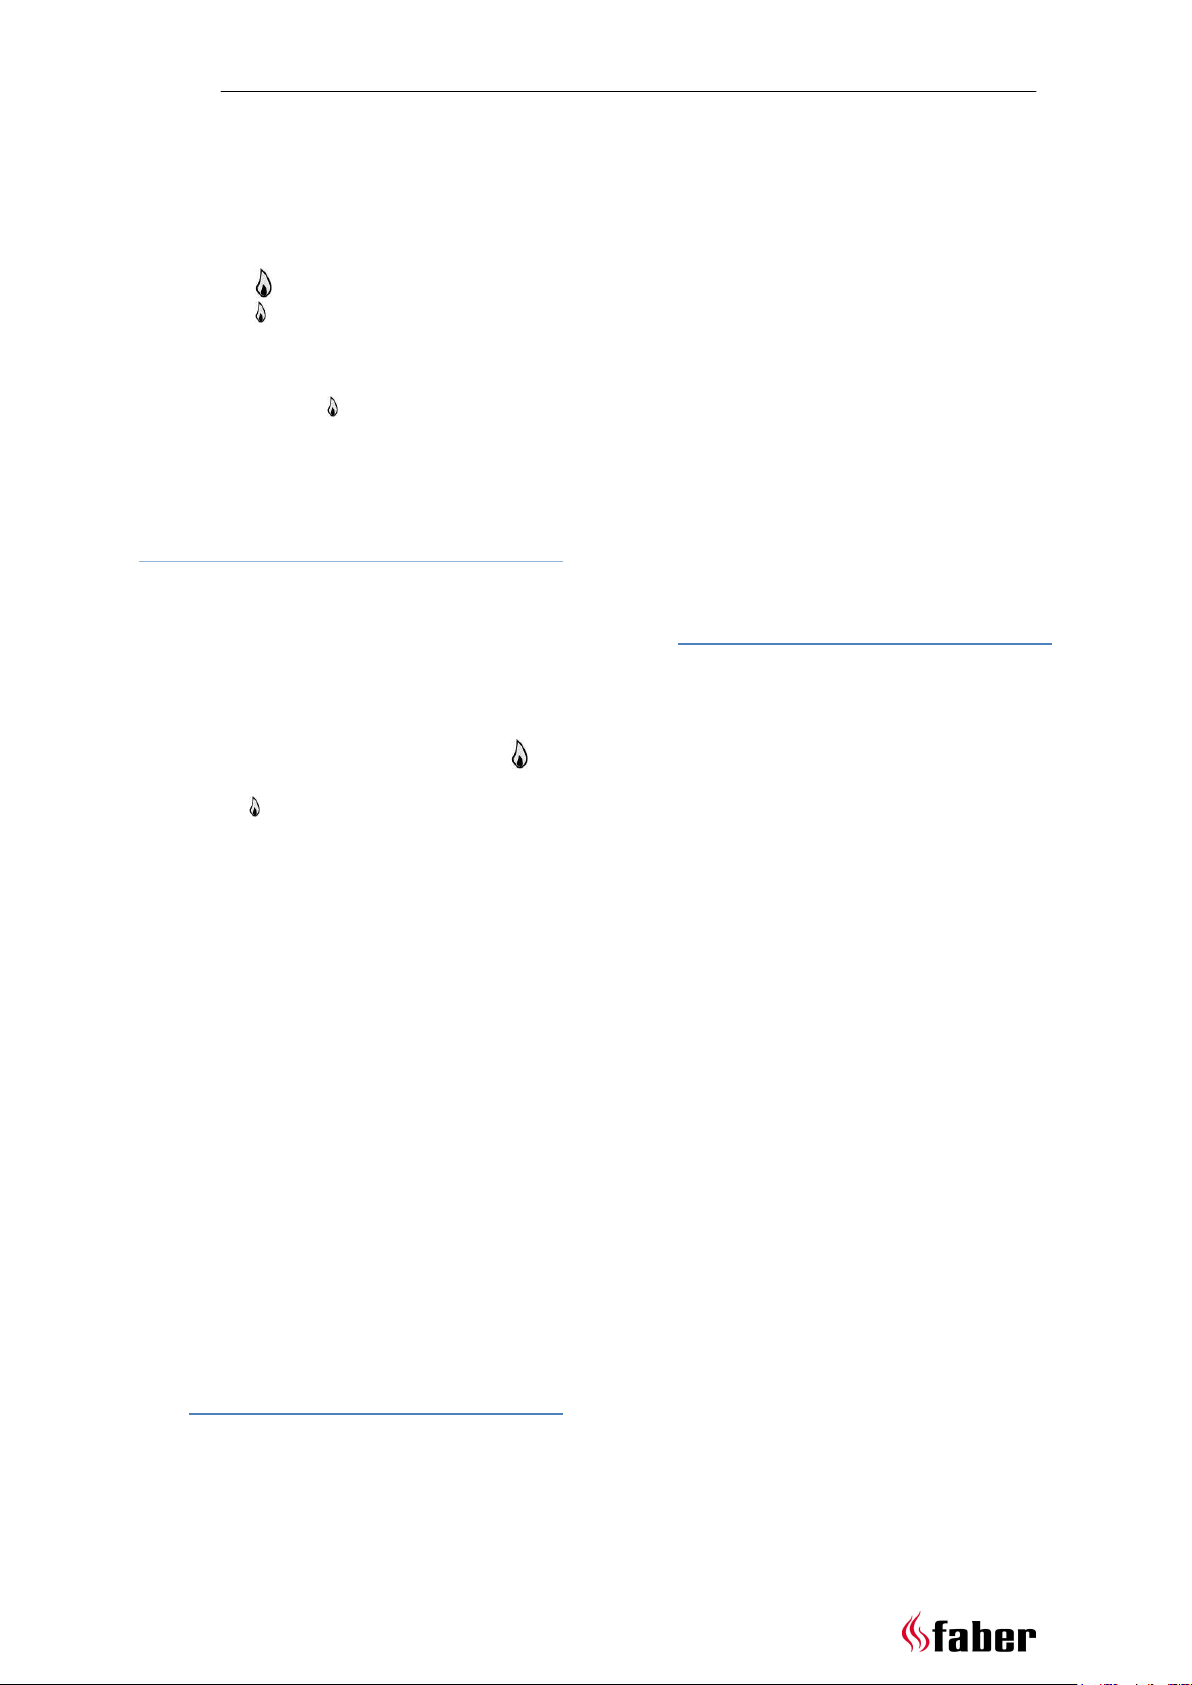
1.9 Uitgebreide functies
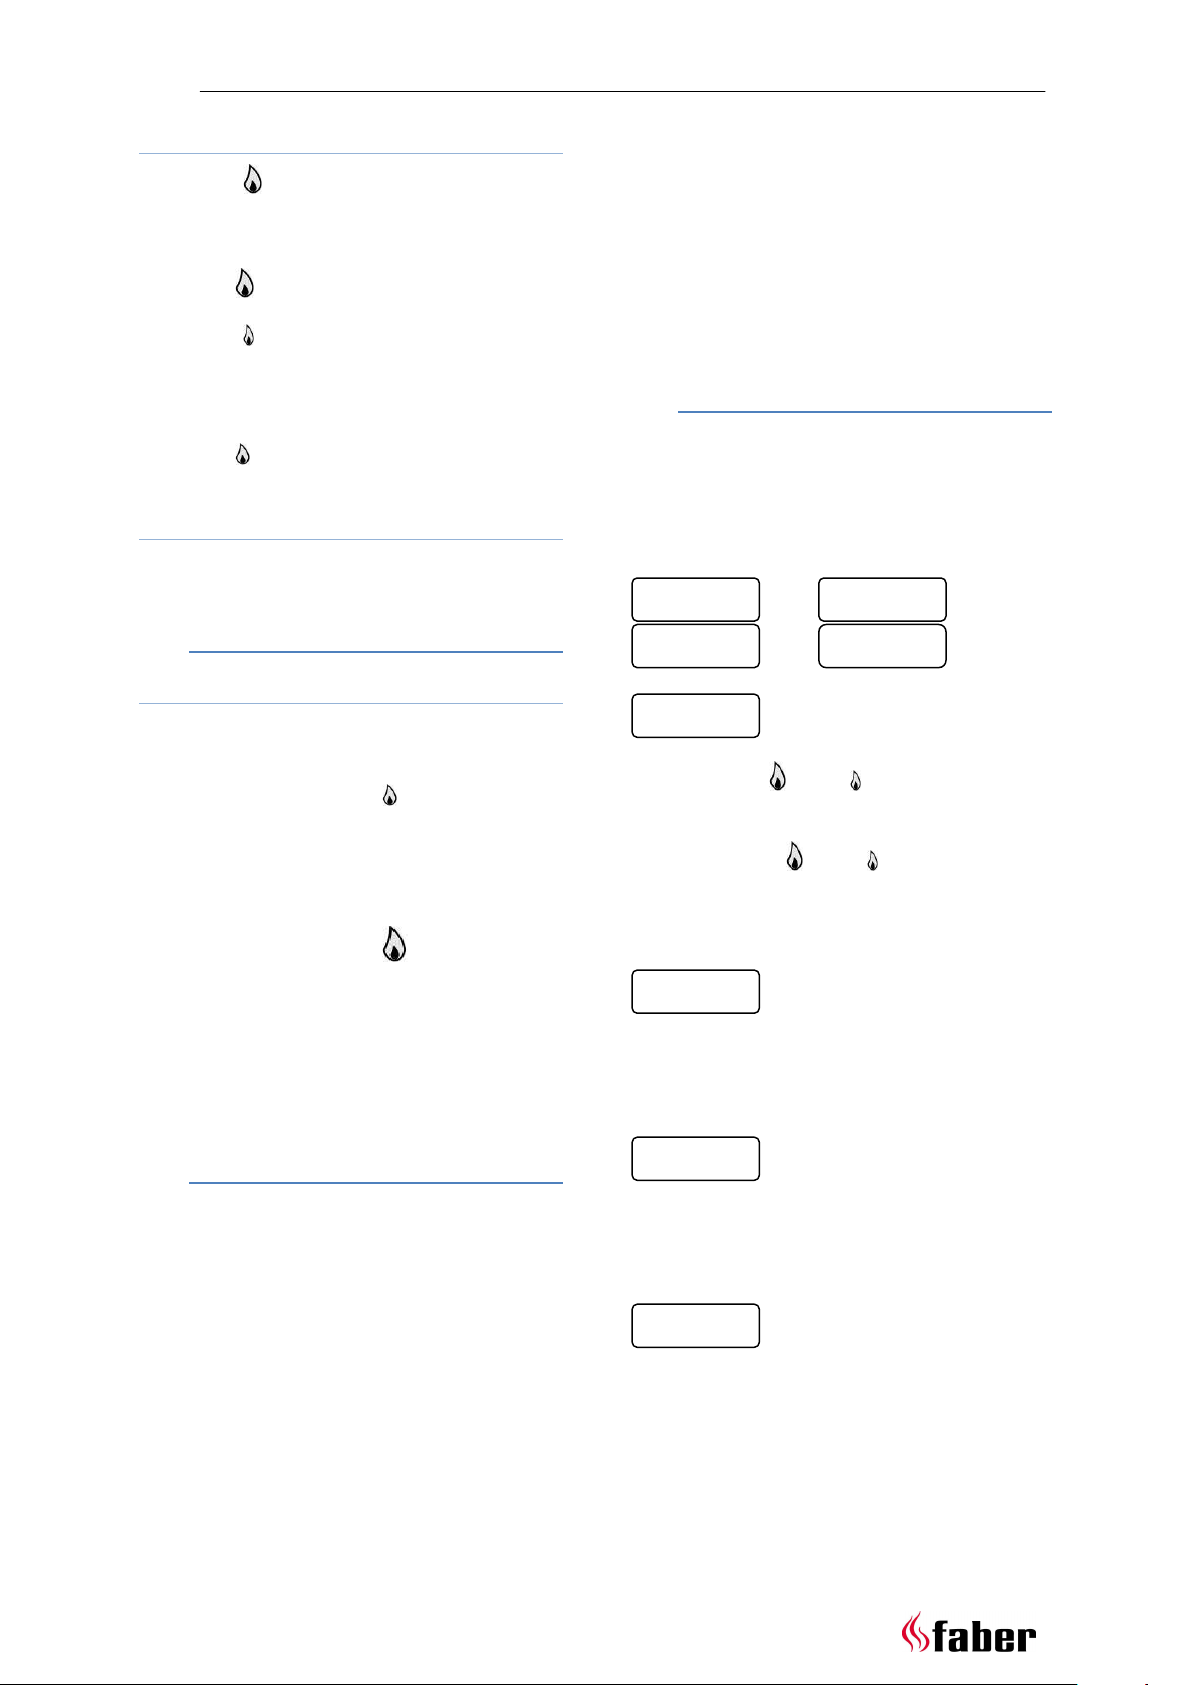
De display op de afstandsbediening laat altijd
één van onderstaande functie zien:
Door kort op de SET-knop (fig. 1.6) te
drukken kunnen stapsgewijs de verschillende
functies worden doorlopen.
Handbediening
Als de aanduiding MAN in beeld staat kan de
haard, door de - of de -knop (fig. 1.9 of
2.0) in te drukken, hoger of lager worden
geregeld (zie par. 1.6.2 en 1.6.3).
LET OP: Door de - of de -knop (fig. 1.9 of
2.0) in te drukken wordt de handbediening
ingeschakeld en de actieve thermostaat en/of
timer programma’s uitgeschakeld.
Dagtemperatuur
Als de aanduiding voor de dagtemperatuur in
beeld staat, regelt de thermostaat de
omgevingstemperatuur naar de ingestelde
dagtemperatuur.
1.8 Thermostaat en timer functie
In de thermostaat functie zijn de volgende
instellingen mogelijk:
Dag temperatuur (TEMP)
Nacht temperatuur (TEMP)
Indien de thermostaat functie wordt gebruikt,
moet de afstandsbediening in de wandhouder (fig. 2.4/2.5/2.6) worden geplaatst,
deze moet binnen 4 meter van de haard in
dezelfde ruimte worden gemonteerd.
De timer functie (TIMER) kan de thermostaat
gedurende een etmaal één of twee maal op
dagtemperatuur en één of twee maal op
nachttemperatuur laten functioneren.
Fabrieksinstellingen thermostaat en timer:
Dagtemperatuur 23°
7 < < < <
Nachttemperatuur
Als de aanduiding voor de nachttemperatuur
in beeld staat, regelt de thermostaat de
omgevingstemperatuur naar de ingestelde
nachttemperatuur.
Timer functie
In deze “klokthermostaat” functie wordt de
tijdsduur van de dag en nachttemperatuur
geregeld binnen een dag.
NL
1.9.1 Dag- en nachttemperatuur
instellen
Ga met de SET-knop (fig. 1.6)
stapsgewijs naar TEMP.
Druk nu de SET-knop (fig. 1.6)
langdurig in tot dat de
temperatuuraanduiding in het scherm
gaat knipperen.
Stel de dagtemperatuur naar wens
hoger in met de -knop (fig. 1.9) of
lager met de -knop (fig. 2.0).
Druk nogmaals de SET–knop (fig. 1.6)
in, nu verschijnt TEMP in beeld.
Druk nu de SET-knop (fig. 1.6)
langdurig in totdat de
temperatuuraanduiding in het scherm
gaat knipperen.
Stel de nachttemperatuur naar wens
hoger in met de -knop (fig. 1.9) of
lager met de -knop (fig. 2.0).
Let op! De laagste temperatuur die
ingesteld kan worden is 5 ºC. Indien
men de haard `s nachts niet wil laten
inschakelen, druk dan net zolang de
-knop (fig. 2.0) in totdat - - in beeld
verschijnt.
Sla de instellingen op door het
indrukken van de OFF- toets (fig.
1.8) of wacht tien seconden.
1.9.2 Timer instellen
Ga met de SET-knop (fig. 1.6)
stapsgewijs naar TIMER.
Druk nu de SET-knop (fig. 1.6)
langdurig in totdat de tijdsaanduiding
in het scherm gaat knipperen en P1
zichtbaar is.
Stel de ingangstijd P1 (opstaan) van
de dagtemperatuur in met de -knop
(fig. 1.9) voor de uren en met de -
knop (fig. 2.0) voor de minuten.
Druk nogmaals de SET–knop (fig. 1.6)
in. Nu verschijnt P1 (vertrek) in
beeld en de tijdsaanduiding in het
scherm gaat knipperen. Stel nu de
ingangstijd in.
Voor het instellen van de 2e periode
druk op de SET–knop (fig. 1.6) en P2
(thuiskomst) verschijnt in beeld, de
tijdsaanduiding in het scherm gaat
knipperen. Stel nu de ingangstijd in.
o Indien een 2e instelperiode
niet gewenst is, sla de
instellingen op door het
indrukken van de OFF-knop
(fig. 1.8) of wacht tien
seconden.
Druk nogmaals de SET–knop (fig. 1.6)
in. Nu verschijnt P2 (nacht) in
beeld en de tijdsaanduiding in het
scherm gaat knipperen. Stel nu de
ingangstijd in.
Sla de instellingen op door het
indrukken van de OFF-knop (fig. 1.8)
of wacht tien seconden
1.10 Controlepunten bij storing
Indien de afstandsbediening of de haard niet
goed functioneert, eerst de volgende punten
controleren.
1. Staat knop A op ON? (fig. 1.3).
2. Controleer de batterij- en/of
netspanning van de adapter (par.
1.4.4).
3. Controleer of de ontvanger reageert
op de afstandsbediening.
Indien nodig de ontvanger resetten of
een nieuwe zendcode instellen.
Voor het resetten druk kort op de
resetknop van de ontvanger (fig.
2.4.1), voor zendcode instellen zie
par. 1.5.2.
4. Mocht per ongeluk een tweedemaal
de opstartprocedure zijn gestart, dan
is er een wachttijd van 45 sec.
voordat de stepbrander geschakeld
kan worden.
Functioneert de afstandsbediening of de
haard nog niet goed na deze controles, dan
verwijzen wij u door naar uw installateur.
8 < < < <

NL
1.10.1 Handmatig ontsteken (door de
installateur)
Deze handeling is alleen bedoeld voor
servicedoeleinden.
Ga hiervoor als volgt te werk:
1. Verwijder de ontsteekkabel van de
ontvanger (fig. 1.2-G) en plaats deze
op het gasblok (fig.1.3-D).
2. Verdraai de draaiknop B rechtsom
met de pijl naar de OFF stand
(fig. 1.3).
3. Verdraai de draaischijf A rechtsom
met de pijl in de MAN stand (fig. 1.3).
Nu is het waakvlamventiel C en de
piëzo-ontsteking E toegankelijk.
4. Druk met een schroevendraaier het
waakvlamventiel C volledig in en
houdt het ventiel ingedrukt, druk
gelijktijdig enkele malen op de piëzoontsteking E (fig. 1.3) de waakvlam
zal nu ontsteken.
5. Als de waakvlam brandt wacht dan
ca. 20 sec. voordat men het
waakvlamventiel los laat.
6. Draai nu de draaischijf A linksom
met de pijl op de ON stand (fig.1.3 ).
7. Men kan nu de vlamhoogte regelen
door de draaiknop B linksom
voorbij de ON stand te draaien. Dit
geeft een ratelend geluid! (fig.1.3 ).
8. De stepbrander kan niet handmatig
geschakeld worden.
9 < < < <

ENG
2 User manual ENG
The hearth can only be installed by a Gas Safe
registered gas fitter/dealer. The
requirements in the Building Regulations
concerning installation will have to be met.
Also consult the installation instructions.
Note: Because the hearth is a source of heat,
air circulation will arise. That is why it is
important that you do not use the hearth
shortly after a renovation. By natural air
circulation moisture and volatile components
from paint, building materials, floor coverings
etc. that haven’t set yet, are sucked up.
These components can be deposited on cold
surfaces as soot. The first time you should use
the hearth depends on various circumstances.
Consult your gas fitter on this matter.
2.1 Cleaning and Maintenance
The appliance will have to be cleaned
and serviced and the proper
functioning checked by a gas fitter.
The outside frame of the hearth can
be cleaned with a clean damp cloth.
2.1.1 Cleaning the glass
Dismount the glass according to the
description in the installation
instructions.
Remove the deposit with a clean dry
cloth. If necessary, a special ceramic
cleaning agent can be used.
Note: prevent the making of finger marks on
the glass. These cannot be removed once the
fire has burnt them into the glass!
2.2 Safety Instructions for the user
The appliance has been designed for
atmospheric and heating purposes. This
means that all surfaces of the hearth,
including the glass, can become very hot
(hotter than 100°C). An exception to this
are the bottom of the hearth and the
controls.
If the hearth has been switched off, wait
for at least three minutes before reigniting it again.
If the hearth switches off with no
known cause, wait for at least
15 minutes before re-igniting the
hearth again. If this happens
repeatedly, get in touch with your gas
fitter.
The hearth should not be used if:
The glass is damaged or has been
removed.
If the combustion chamber is open.
Don’t place any inflammable materials in
the combustion chamber.
Never change the position of the wood
set and never add more decorative
materials, carrara pebbles or grey stones
than have been supplied with the hearth.
If the hearth is switched on, the pilot
flame should always be visible!
Don’t place any curtains, clothes,
laundry, furniture or other inflammable
materials in the neighbourhood of the
appliance. The minimum safe distance is
1 meter.
Don’t allow children to use the remote
control unit without adult supervision.
We recommend you always put a fire
screen before the hearth if there are
children, old people or persons with
limited mobility present in the same
room.
2.3 First time the fire is operated
Before ignition, remove all stickers,
protective wrappings and, if present, rubber
protective padding from the glass.
Make sure the room is properly ventilated the
first time the hearth is switched on. Burn the
hearth at the highest position for some hours
so that the lacquer coating will have an
opportunity to set and possible vapours
released can be safely removed by
ventilation. Keep children and pets outside
the room during this process!
2.4 Remote control unit – general
remarks
The appliance has been supplied with a
remote control set; this consists of the
remote control unit (fig. 1.1) and the
receiver(fig. 1.2). The receiver as well as the
gas control block (fig.1.3 )are located behind:
a panel in the chimney breast, a drawer
underneath the hearth or behind a frame.
The remote control has been provided
with 3 keys (fig.1.1). All functions of
the hearth can be operated with
these keys.
If the transmission is successful, the
receiver will emit a sound signal.
With the help of the switch knob B
(fig.1.3 )the flame height can be
regulated without operating the
remote control unit.
The dial A (fig.1.3 )should always be
on the ON position. The MAN position
is only intended for service purposes.
When using the thermostat / timer function,
the wall bracket supplied (fig. 2.4/2.5/2.6)
10 < < < <
ENG
should always be placed within 4 metres of
the hearth.
2.4.1 Adapter/batteries
Although a net adapter is supplied, the
receiver can also run on batteries. In case you
use an adapter, don’t use batteries as well!
2.4.2 Placing the batteries in the remote
control unit
Remove the lid at the back of the
remote control unit. (fig. 2.1)
Place a 9Volt MN1604/6LR61 Alkaline
long life battery.
Close the lid.
2.4.3 Placing the batteries in the
receiver
Take the receiver (fig. 1.2) out of the
gas block support.
Remove the lid of the receiver.
Place 4 times 1,5Volt AA/LR6 Alkaline
long life batteries (fig. 2.2).
Close the lid and replace the receiver
set in the gas block support.
2.4.4 Replacing empty batteries
Press the -key to set the hours (fig.
1. 9)
Press the -key to set the minutes
(fig. 2.0)
Wait or press the OFF- key to
terminate this function (fig. 1.8).
2.5.2 Setting the transmitter code on
the remote control unit:
Press the reset button of the receiver
with a pointed object (fig. 2.4.1),
until the second signal is audible. Now
press the -key on the remote control
unit (fig. 2.0), within 20 seconds. If a
sound signal is audible, the
transmitter code has been set.
2.5.3 Temperature/clock setting
(standard °C/24hours):
The alteration of the temperature
indication on the display screen from
°C/24hours to °F/12hours and the
other way around is done in the
following manner:
Press the OFF-key and the -key
(small flame) simultaneously until
the indication is modified (fig. 1.5).
Handset: if the indication BATT
appears in the top left corner of the
display screen, the batteries of the
remote control unit need to be
replaced.
After replacing the battery in the
handset, the settings of the
thermostat and timer function have
been reset to the factory settings
(see paragraph 2.8).
Receiver: 3 short sound signals will
be heard when the engine is on to
indicate that the batteries of the
receiver are nearly run down.
When the battery supply is very low,
the remote control unit will switch off
the appliance completely. This will
not happen if the supply is
interrupted.
It is possible that the transmitter
code will have to be set again after
replacing the batteries, see paragraph
5.2 for instructions.
2.5 Setting the controls on the
remote control unit.
2.5.1 Time setting:
Press the - and the -key
simultaneously (fig. 1.4)
The display screen will blink now
2.6 Basic functions of the remote
control unit
2.6.1 Switching on the fire
Press the OFF- key and the -key
simultaneously, until a sound signal is
audible (fig. 1.7).
The start-up procedure will be
executed now. During this period the
receiver will emit a repetitive sound
signal.
The fire will start burning at the
highest position automatically now.
2.6.2 Adjusting the flame height
By twice in rapid succession pressing
the big flame button, will set the fire
to the highest position.
Keep the -key pushed in to increase
the flame height step by step.
(fig. 1.9)
By twice in rapid succession pressing
the small flame button will set the
fire to the lowest position.
Keep the -key pushed in to lower the
flame height step by step and/or to
switch back to the pilot light.
(fig. 2.0)
11 < < < <
ENG
TIMER
TEMP
MAN
TEMP
TEMP
TEMP
TIMER
MAN
2.6.3 Switching off the fire
Press the OFF-key and the fire will be
switched off completely. (fig. 1.8)
2.7 Only for appliance with step
burner
2.7.1 Switch the Step burner
Note: the step burner will not operate for
45 sec. after the start-up procedure.
Press the SET and the -key (small
flame) simultaneously and the flame
picture will concentrate in the middle
of the burner. (fig. 2.2).
Adjusting the flame height see 2.6.2
Press the SET and the -key (large
flame) simultaneously and the flame
picture will divide over the complete
length of the burner. (fig. 2.1) the
AUX symbol appears in the display
Adjusting the flame height see 2.6.2
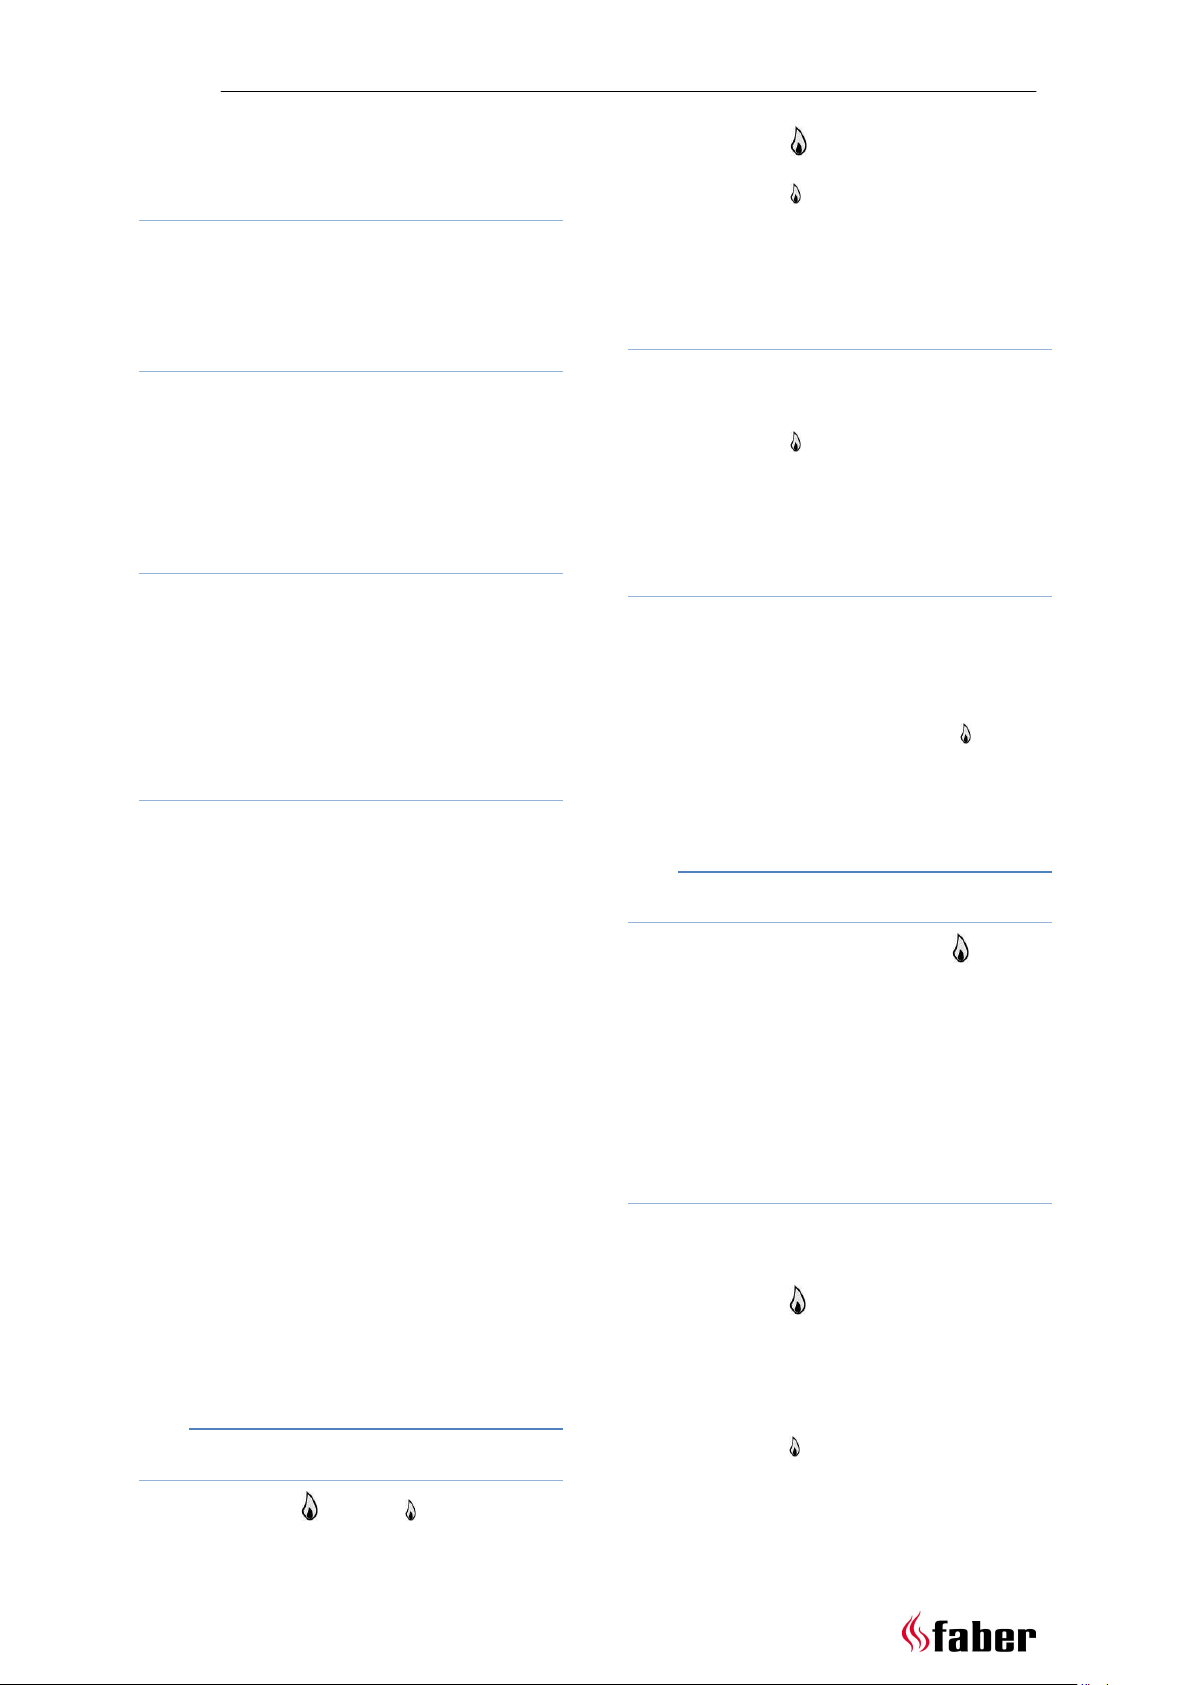
The display screen on the remote control unit
always shows one of the functions below:
By pressing the the SET-key (fig. 1.6) briefly,
the various functions can be shown
consecutively.
manual operation.
If the indication MAN is shown in the display
screen, the hearth can adjusted to a higher or
lower flame position by pressing the -key or
the -key (fig. 1.9 of 2.0), see paragraphs. 6.2
en 6.3.
NOTE: By pressing the - key or the -key
(fig. 1.9 of 2.0), the manual operation is
switched on and the active thermostat and/or
timer programmes are switched off.
2.8 Thermostat and Timer Function
The following settings are possible in the
thermostat function:
Day temperature (TEMP)
Night temperature (TEMP)
If the thermostat function is used, the remote
control unit should be placed in the wall
bracket (fig. 2.4/2.5/2.6), this should be
mounted within 4 metres of the hearth in the
same room.
The timer function (TIMER) can make the
thermostat function once or twice on day
temperature and one or twice on night
temperature during a period of 24 hours.
Factory settings thermostat and timer:
Day temperature 23°
Night temperature (appliance doesn’t switch
on)
Timer P1 6:00 (getting up)
P1 8:00 (departure)
P2 16:00 (homecoming)
P2 22:00 (night)
Example setting one switch period:
Day temperature 21°
Night temperature (appliance doesn’t
switch on)
Timer P1 8:00 (getting up)
P1 22:00 (night)
2.9 Additional functions
Day temperature
If the indication for day temperature is shown
in the display screen, the thermostat will
make sure the environmental temperature
agrees with the settings for day temperature.
Night temperature
If the indication for night temperature is
shown in the display screen, the thermostat
will make sure the environmental
temperature agrees with the settings for night
temperature.
Timer function
In this “clock thermostat” function the
duration of the periods for day and night
temperatures is set within 24 hours.
2.9.1 Setting day and night
temperatures
Move the SET-key (fig. 1.6) step by
step to TEMP.
Now keep the SET-key (fig. 1.6)
pushed in for a long time until the
temperature indication in the display
screen starts to blink.
In accordance with your wishes,
increase the Day temperature with
the -key (fig. 1.9) or lower it with
the -key (fig. 2.0).
Press the SET–key (fig. 1.6) again,
now TEMP appears in the display
screen.
12 < < < <
ENG
Now keep the SET-key (fig. 1.6)
pushed in for a long time until the
temperature indication in the display
screen starts to blink.
In accordance with your wishes,
increase the Night temperature with
the -key (fig. 1.9) or lower it with
the -key (fig. 2.0).
Note! The lowest temperature that
can be set is 5 ºC. If you don’t want
the hearth to switch on at night, keep
pressing the -key (fig. 2.0) until the
sign - - appears in the display screen.
Save the settings by pressing the
OFF- key (fig. 1.8) or wait for ten
seconds.
2.9.2 Programming the timer setting
Move the SET-key (fig. 1.6) step by
step to TIMER.
Now keep the SET-key (fig. 1.6)
pushed in for a long time until the
time indication in the display screen
starts to blink and P1 is visible.
Set the starting time P1 (getting up)
of the day temperature with the key (fig. 1.9) for the hours and with
the -key (fig. 2.0) for the minutes.
Now press the SET-key (fig. 1.6)
again, now P1 (departure) will
appear in the display screen and the
time indication will start to blink and
now set the starting time.
For setting the 2nd period, press the
SET–key (fig. 1.6) and P2
(homecoming) will appear in the
display screen, the time indication
will start to blink and now set the
starting time.
o If a 2nd period setting is not
desired, save the settings by
pressing the OFF- key (fig.
1.8) or wait for ten seconds.
Press the SET–key (fig. 1.6) again,
now P2 (night) appears in the
display screen, the time indication
will start to blink and now set the
starting time.
Save the settings by pressing the OFF-
key (fig. 1.8) or wait for ten seconds.
2.10 Checkpoints in case of
malfunction
2. Check the battery- and/or mains
voltage of the adapter. (paragraph.
2.4.4)
3. Check whether the receiver responds
to the remote control unit.
If necessary, reset the receiver or set
a new transmitter code.
Before resetting, briefly press the
reset button on the receiver
(fig. 2.3.1), for setting the
transmitter code: see paragraph
2.5.2.
4. If unintentional the start-process
started when the fire is in operation,
the step-burner will not operate for
45 sec.
If the remote control unit or the hearth itself
does not function properly after all these
checks, we refer you to your gas fitter.
2.11 Manual ignition (by the gas fitter)
This action is intended for service purposes
only.
Take the following steps:
1. Remove the ignition cable of the
receiver (fig. 1.2-G) and place this on
the gas block. (fig.1.3-D)
2. Twist the knob B to the right with
the arrow to the OFF position.
(fig.1.3)
3. Twist the dial A to the right with
the arrow in the MAN position
(fig.1.3). Now the pilot light valve C
and the piezo-ignition E are
accessible.
4. Use a screwdriver to keep the pilot
light valve C pressed in,
simultaneously press the piezoignition E (fig.1.3 ) briefly a few
times, the pilot light will ignite now.
5. If the pilot light is burning, wait for
approx. 20 seconds before releasing
the pilot light valve.
6. Now twist the dial A to the left
with the arrow to the ON position.
(fig.1.3 )
7. Now the flame height can be adjusted
by twisting the knob B to the left
past the ON position.(this causes a
rattling sound!) (fig.1.3 )
8. The step-burner can not be switched
manual
If the remote control unit of the hearth does
not function properly, check the following
points first:
1. Is knob A set to position ON.
(fig. 1.3)?
13 < < < <

DE
3 Bedienungsvorschrift DE
Das Gerät darf nur von einem qualifizierten
Installateur/Händler installiert werden. Der
Anschluss muss die lokalen Bauverordnungen
erfüllen. Lesen Sie auch die
Installationsanweisungen.
Achtung: Da ein Kamin eine Wärmequelle ist,
entsteht warme Luftzirkulation. Deshalb ist es
ratsam, den Kamin nicht gleich nach dem
Umbau zu heizen. Durch die natürliche
Luftzirkulation werden Feuchtigkeit und noch
nicht ausgehärtete flüchtige Bestandteile aus
Farbe, Baustoffen und Bodenbelägen etc. in
diese Luftzirkulation mit aufgenommen. Diese
Bestandteile können sich auf kalten Flächen
als Ruβ ablagern. Wann Sie den Kamin zum
ersten Mal in Gebrauch nehmen können,
hängt von mehreren Faktoren ab. Fragen Sie
hierzu ihren Installateur.
3.1 Reinigung und Zwarting
Das Gerät muss jährlich von einem
Installateur gereinigt und auf
einwandfreie Funktion geprüft
werden.
Die Außenseite des Kamins kann mit
einem sauberen feuchten Tuch
gereinigt werden.
3.1.1 Reinigung des Glases
Demontieren Sie das Glasfenster wie
in der Installationsvorschrift
angegeben.
Entfernen Sie Ablagerungen mit einem
sauberen trockenen Tuch. Wenn
nötig, kann ein Spezialreiniger für
keramische Kochplatten verwendet
werden.
Achtung: Vermeiden Sie Fingerabdrücke auf
dem Glas! Diese können einbrennen und sind
dann nicht mehr zu entfernen!
vorkommt, nehmen Sie dann Kontakt
mit Ihrem Installateur auf.
Der Kamin darf nicht benutzt werden:
wenn das Glas beschädigt ist oder
entfernt wurde, wenn die Brennkammer
geöffnet ist.
Es darf kein brennbares Material in die
Brennkammer gelegt werden.
Verändern Sie niemals die Aufstellung
des Holzsets und fügen Sie nie mehr
Dekorationsmaterial, Carrara-Kiesel oder
grauen Stein Split zu, als mit dem Kamin
geliefert wurde. Wenn der Kamin
eingeschaltet ist, muss die Zündflamme
immer sichtbar sein!
Platzieren Sie keine Gardinen, Kleidung,
Wäsche, Möbel oder anderes brennbares
Material in die Nähe des Gerätes. Der
Mindestsicherheitsabstand beträgt 1m.
Kinder dürfen die Fernbedienung nur
unter Aufsicht benutzen.
Wir empfehlen Ihnen, immer ein
Schutzgitter vor dem Kamin anzubringen,
wenn sich Kinder, Senioren oder
Behinderte im gleichen Raum des Kamins
aufhalten.
3.3 Erste Ingebrauchnahme des
Kamins
Entfernen Sie vor dem Heizen vom Glas
Aufkleber, Schutzfolie und eventuelle
Schutzleisten.
Achten Sie auf genügend Raumventilation,
wenn Sie den Kamin zum ersten Mal heizen.
Heizen Sie den Kamin einige Stunden lang auf
höchster Stufe, sodass der Lack aushärten
kann und eventuell austretende Dämpfe
sicher abgeleitet werden. Während dieses
Vorgangs Haustiere und Kinder nicht in den
Raum lassen!
3.4 Fernbedienung Allgemeines
3.2 Sicherheitshinweise für den
Benutzer
Das Gerät ist für Zier- und Heizzwecke
konzipiert. Alle Oberflächen, inklusive
Glas, können deshalb sehr heiß werden
(über 100°C). Eine Ausnahme hiervon
bilden die Unterseite des Kamins und die
Bedienungsknöpfe.
Warten Sie nach dem Abschalten des
Kamins mindestens drei Minuten, bevor
Sie ihn erneut anzünden.
Wenn der Kamin aus unbekannter
Ursache ausgegangen ist, warten Sie
dann 15 Minuten, bevor Sie ihn wieder
anzünden. Wenn dies wiederholt
Das Gerät ist mit einem Fernbedienungsset
ausgestattet, bestehend aus der
Fernbedienung (Abb. 1.1) und dem Empfänger
(Abb. 1.2). Sowohl der Empfänger als auch
der Gasregelblock (Abb. 1.3) befinden sich an
der Rückseite: eine Bedienungsluke im
Rauchfang, eine Lade an der Unterseite oder
hinten einen Rahmen.
Die Fernbedienung hat 3 Tasten (Abb.
1.1). Damit können alle Funktionen
des Kamins bedient werden.
Bei gutem Empfang gibt der
Empfänger einen Signalton ab.
Mit dem Drehknopf B (Abb. 1.3) kann
die Flammenhöhe auch ohne
Fernbedienung eingestellt werden.
14 < < < <
 Loading...