

EZWatch EZWatchIP 4.0 User Manual

How to Remotely View Security Cameras Using the Internet
Introduction:
The ability to remotely view security cameras is one of the most useful features of your EZWatch Pro system. It
provides the ability to check on your home or business with any computer or lap top which has an internet
connection. The remote viewing feature also allows you to remotely review and download the recorded clips as
well as view and control security cameras.
The following is intended as a basic guide to help you understand what is required to remotely view your
security cameras through your EZWatch Pro DVR/Camera Server. For clarification, the term “DVR/Camera
Server” is used to describe a computer which has the EZWatch Pro software installed and the security cameras
connected to it. “DVR” stands for Digital Video Recorder. It is the main computer or server.
To accomplish remote viewing, the remote or off-site PC uses the internet to connect to the DVR. The DVR acts
as the video server to feed the cameras video to the remote PC.
On Site:
First, the security cameras should be connected to the EZWatch Pro DVR. The DVR must be turned on and
running the EZWatch Pro software. The DVR must have an internet connection, broadband (DSL or Cable) is
required for our version 4.0 software to function. The DVR will require a static IP address (provided by your
internet provider) or you can use our EZWatch IP service which eliminates the need for a static IP address. On
page (2) you will find detailed information about choosing to use our EZWatch IP Service or pay your internet
provider for a static IP.
Remote Computer:
The remote computer can be a standard PC or a laptop with DSL, Cable or Dial Up Internet access. We highly
recommend using DSL or Cable internet connections, especially if you are going to remotely view four or more
security cameras. Dial-Up access is acceptable if you are only working with one or two cameras.
Remote Access:
You have two options for remotely viewing your cameras using the internet. You can access the DVR/Server by
using Internet Explorer or loading the Remote View software on to the remote PC. The Remote View software is
found on the CD which came with your EZWatch Pro DVR.
Internet Explorer allows you to remotely use the most common functions of the DVR such as viewing cameras
and playing back the recorded video clips. For systems not using Internet Explorer for viewing web pages, or
systems which restrict the installation of Active X controls, the Remote View software is available as an
alternative method of connecting and viewing the cameras remotely.
Internet Access, Viewing Cameras & How it Works
The emergence of high speed internet service in the late 90's brought about the use of static and dynamic IP
addresses. These addresses allow users to connect to the internet through Internet Service Providers (ISP).
The addresses work just like the mailing address for your home or business. It is the internet address your
computer uses while it is connected to the internet.
Both static and dynamic addresses work in similar ways. They both allow you access to the internet. But static
addresses never change. Every time you access the internet you have the same address or IP. Dynamic
addresses can change each time you connect to the internet. Because of this, dynamic addresses cause a
problem when tying to link to the same computer multiple times through the internet. The address or IP for the
computer you are trying to access can randomly change making it impossible for the remote computer to find
the other computer through the internet. All internet providers will issue Dynamic IP address to their customers.
Static IP addresses are considered an additional service and cost an additional monthly fee. Because of this
you must choose to pay your internet provider for a static IP address or sign up for our EZWatch IP service
which eliminates the need to pay for a static IP. We highly recommend using the EZWatch IP service because it
usually saves you money and it allows our support technicians to proved complete trouble shooting support.
EZWatch IP Service:
The high cost of static IP addresses and their limited availability is why we have created our EZWatch IP
service. This service eliminates the need for static IP addresses. It only requires a normal internet connection at
both computers and the service greatly simplifies the set up process. EZWatch IP continuously monitors the IP
address of the DVR and when you want to remotely view your cameras the service automatically redirects you
to the IP address the DVR/Camera Server is currently using. The cost of our service is a 1-time charge of
$99.00, usually a fraction of the costs of static IPs.
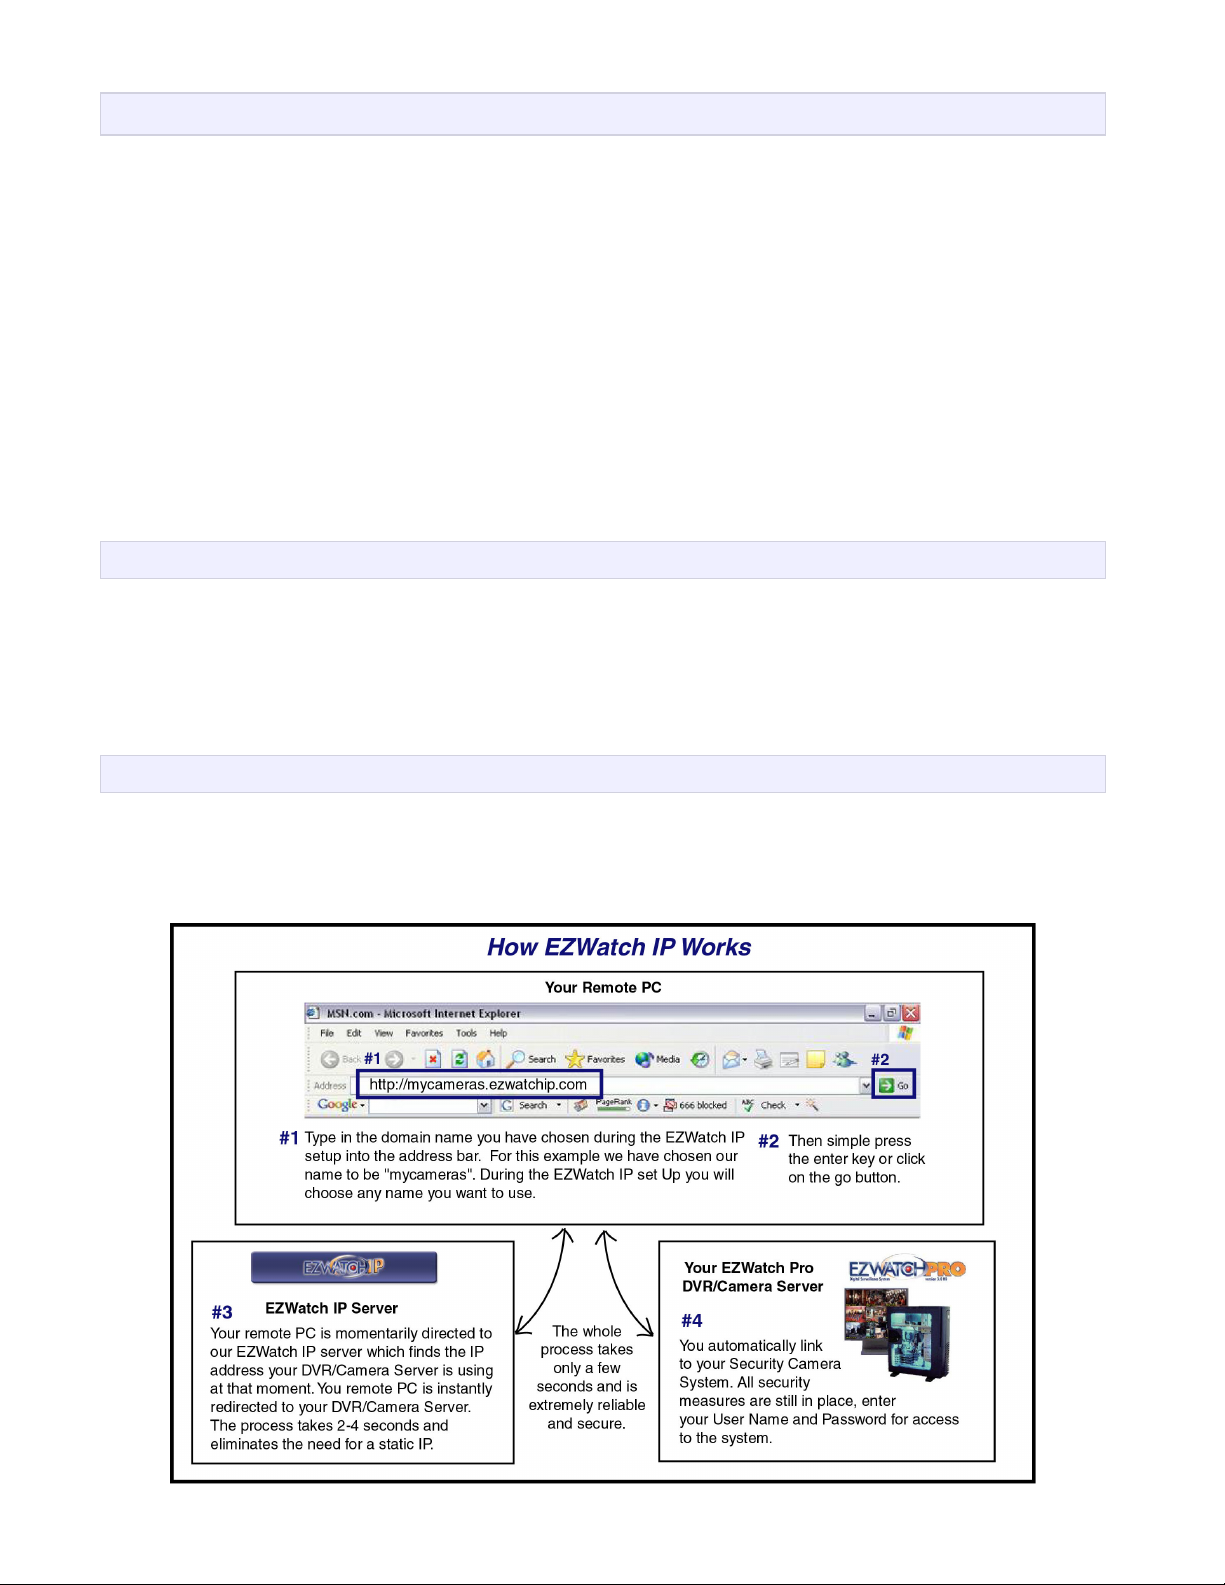
How EZWatch IP Works:
The EZWatch IP service allows you to custom create a domain name on our server. You simply type that
domain name into the address bar on your web browser and the EZWatch IP service automatically redirects
you to your DVR/Server anytime you want to log into your system to view and control security cameras. This
service greatly simplifies the remote viewing set up.
Setting Up Internet Access Using EZWatch IP Service
Step #1:
First make sure the EZWatch Pro DVR/Camera Server has a connection to the internet. This can be DSL,
Cable or Dial Up. Make sure you are able to surf the web before moving to step 2.
Step #2:
Using the DVR/Camera Server, log on to our EZWatch IP web site at www.ezwatchip.com. Click on the Sign Up
tab and enter in your information following the steps. After you have entered all your information, click on the
download link and save the EZWatch IP Setup program to your computer. Be sure to remember where you
saved this program so that you can find it when you are ready to run the installation.
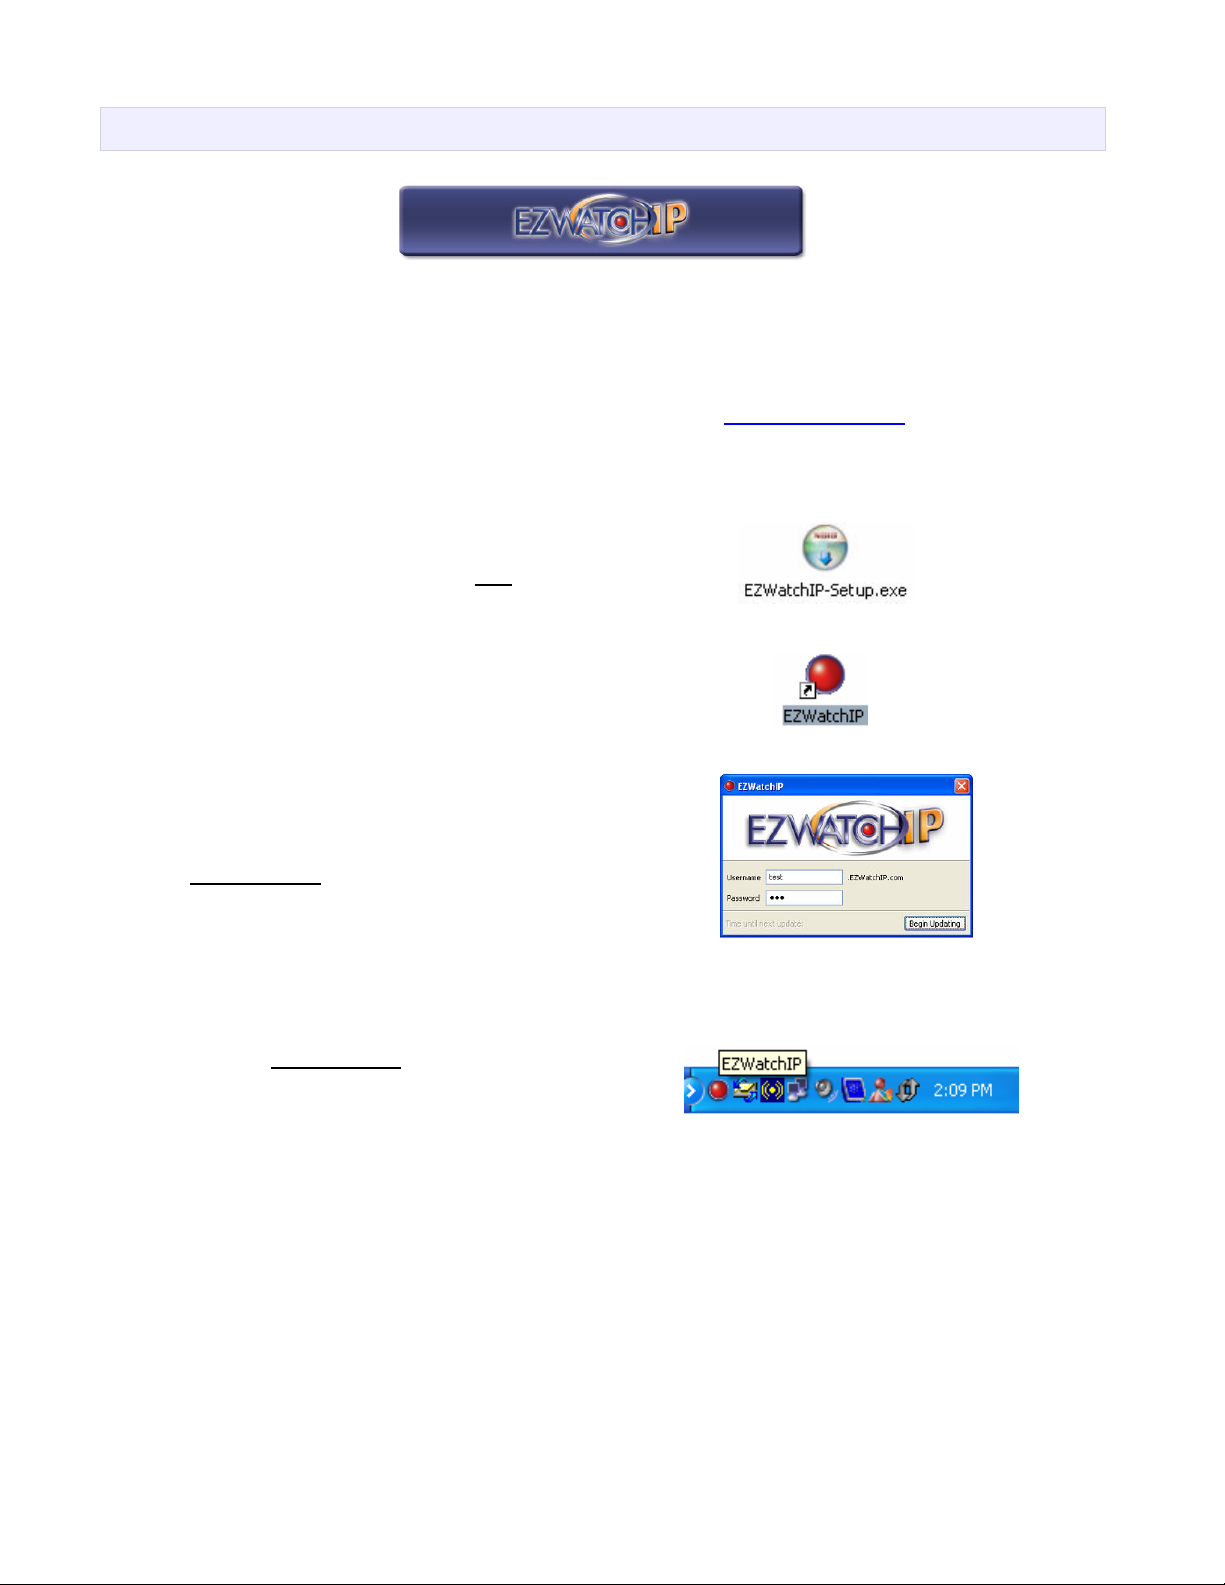
Step #3:
Once the software download is complete. Click on the
EZWatchIP-Setup.exe icon and click on Run to install the
EZWatchIP software.
Follow the steps indicated. After you have completed the
installation, if the program doesn’t automatically open the
sign on screen, then click on the Red EZWatchIP icon on
your desk top.
This will open the log in screen where you will enter the
user name and password you created when you signed up
for the service. After you enter your information simply
click the Begin Update button and you are finished. This
will send the first communication to our IP server and
activate your account.
If you encountered any problems up to this point please call our tech support personnel for help 1-866-241-
3400.
After you click the Begin Update button the login in screen
will disappear and our round red EZWatch IP icon will
appear in your task bar. This icon indicates the service is
operating.
The EZWatchIP program will check every 30 minutes to see if your Public IP Address has changed. If it has, it
will send the new address to our system so that the domain name you created (test.ezwatchip.com for example)
will now be changed and allow you to access your system remotely.
Step #4:
Now that you have your EZWatchIP service up and running the next step is to configure the DVR so that you
can access it remotely. Following the steps on the next page will guide you through opening your ports on your
router or modem so that you can now use the system. Just remember when you go to your remote location(s)
when it asks you to enter your IP address you will instead enter your domain name you have created with
EZWatchIP.
 Loading...