

Page 1
Model SL355
Noise Dosimeter/Datalogger
Software Help Guide
Page 2

Software Introduction
The SL355 Noise Dosimeter software allows for setup and retrieval of recorded data in the
Noise Dosimeter.
A total of 20 sessions can be recorded and a total of 14,400 memory locations.
System Requirements:
Windows XP, Windows Vista, Windows 7, Windows 8
Minimum Hardware Requirements:
PC Desktop or NoteBook Computer with Pentium 90MHz minimum 32 MB RAM,
USB Port, 4 MB hard disk space to install Datalogger software and USB driver.
Recommended display resolution 1024 x 768 with High Color (16 bit)
Allrightsreservedincludingtherightofreproductioninwholeorinpartinanyform
Copyright©2013FLIRSystems,Inc.
ISO‐9001Certified
www.extech.com
2 SL355-EN V1.4 9/13
Page 3
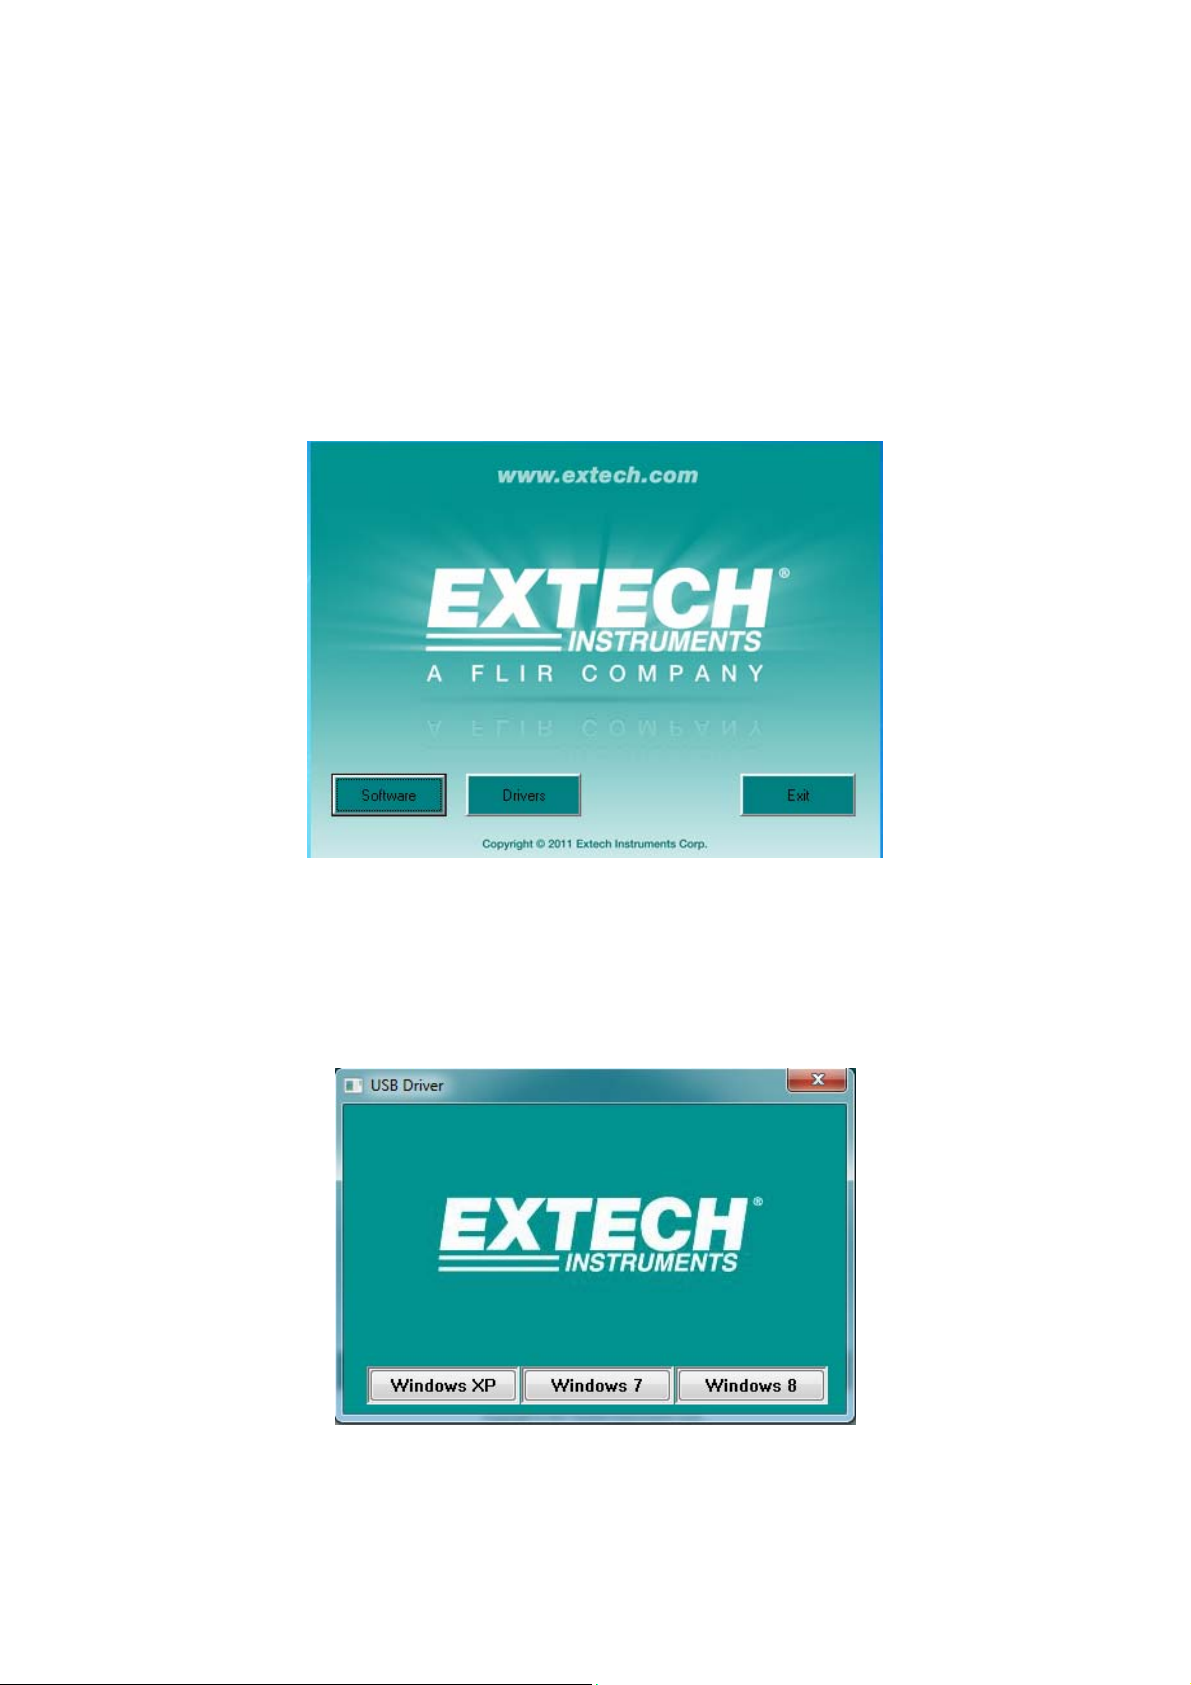
Install Datalogger Software
Install the supplied Windows PC Datalogger Software by placing the supplied program disk in
the PC CD-ROM drive. If the installation program does not automatically open and provide
on-screen prompts, double click the SL355.EXE file included on the program disk.
Follow the on-screen prompts to complete the installation. If you have a problem running
EXTECH.exe, run SETUP.exe in the Software folder.
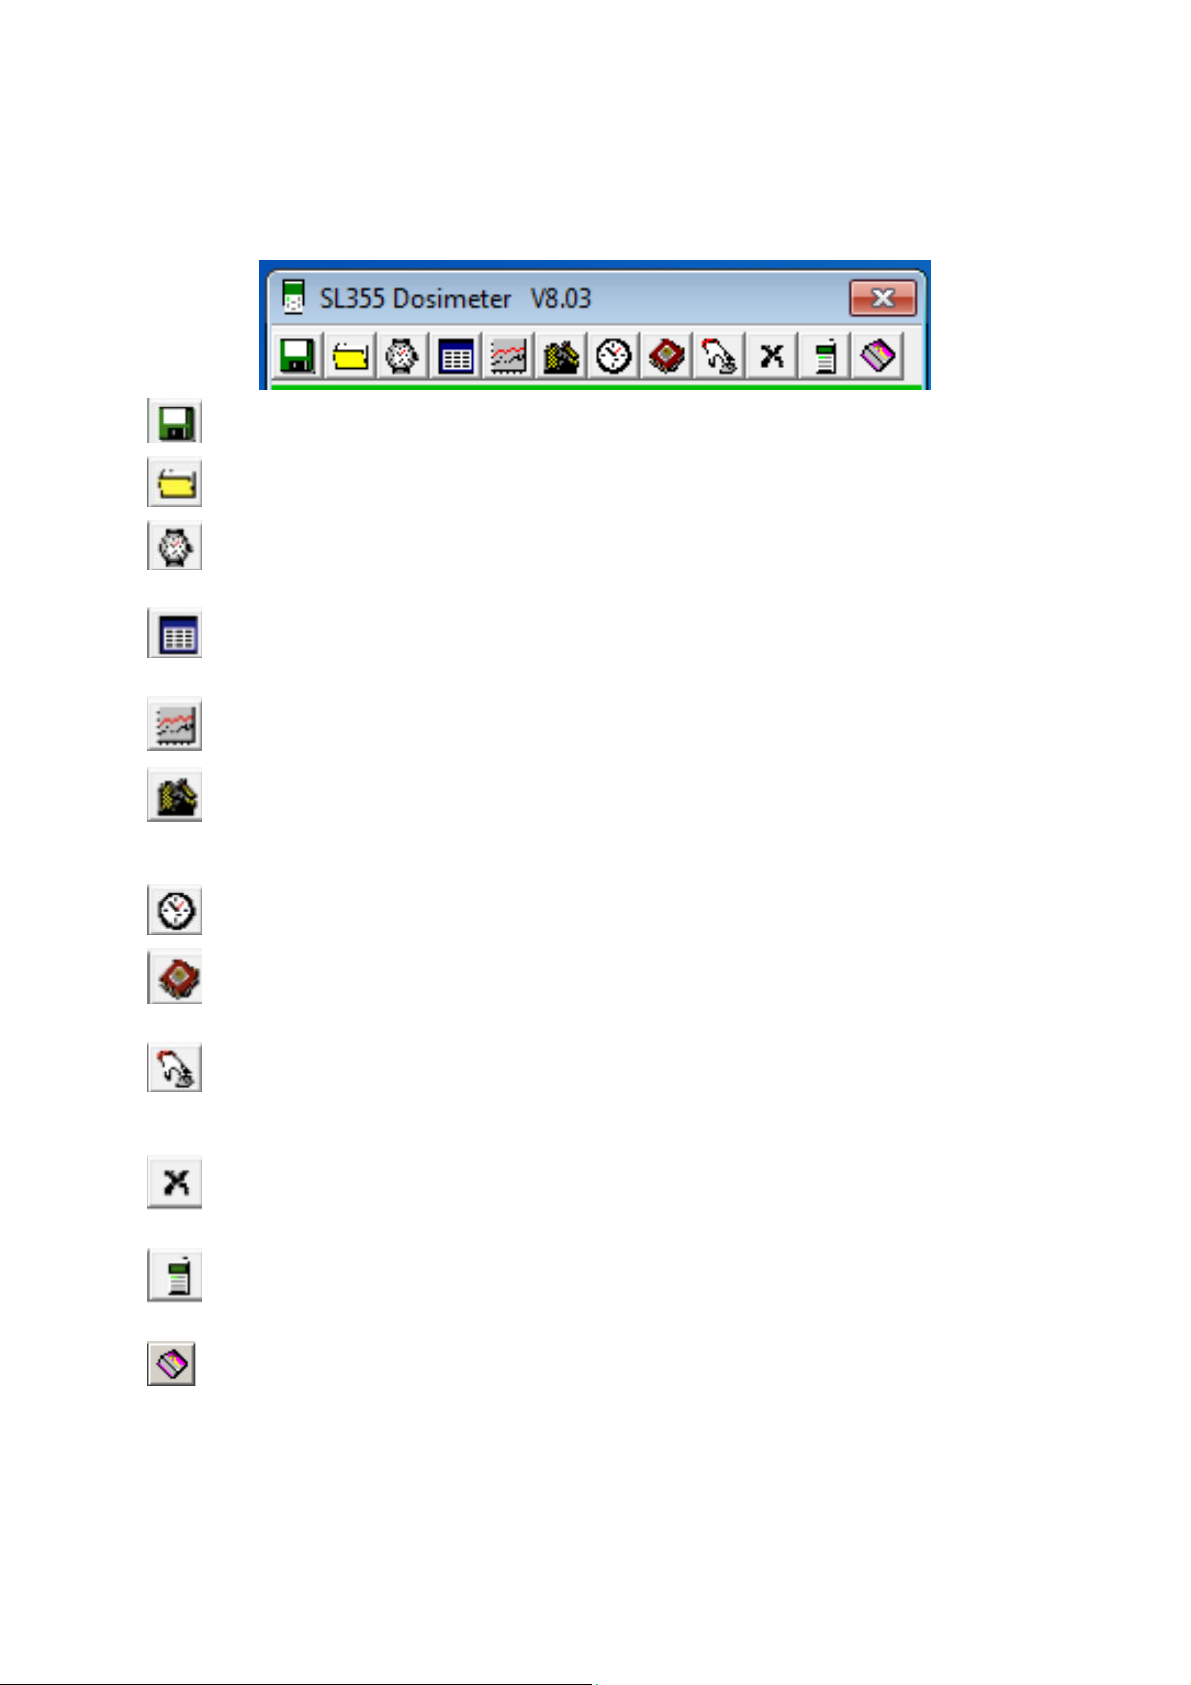
Install USB Driver
Follow the on-screen prompts to complete the driver installation.
3 SL355-EN V1.4 9/13
Page 4
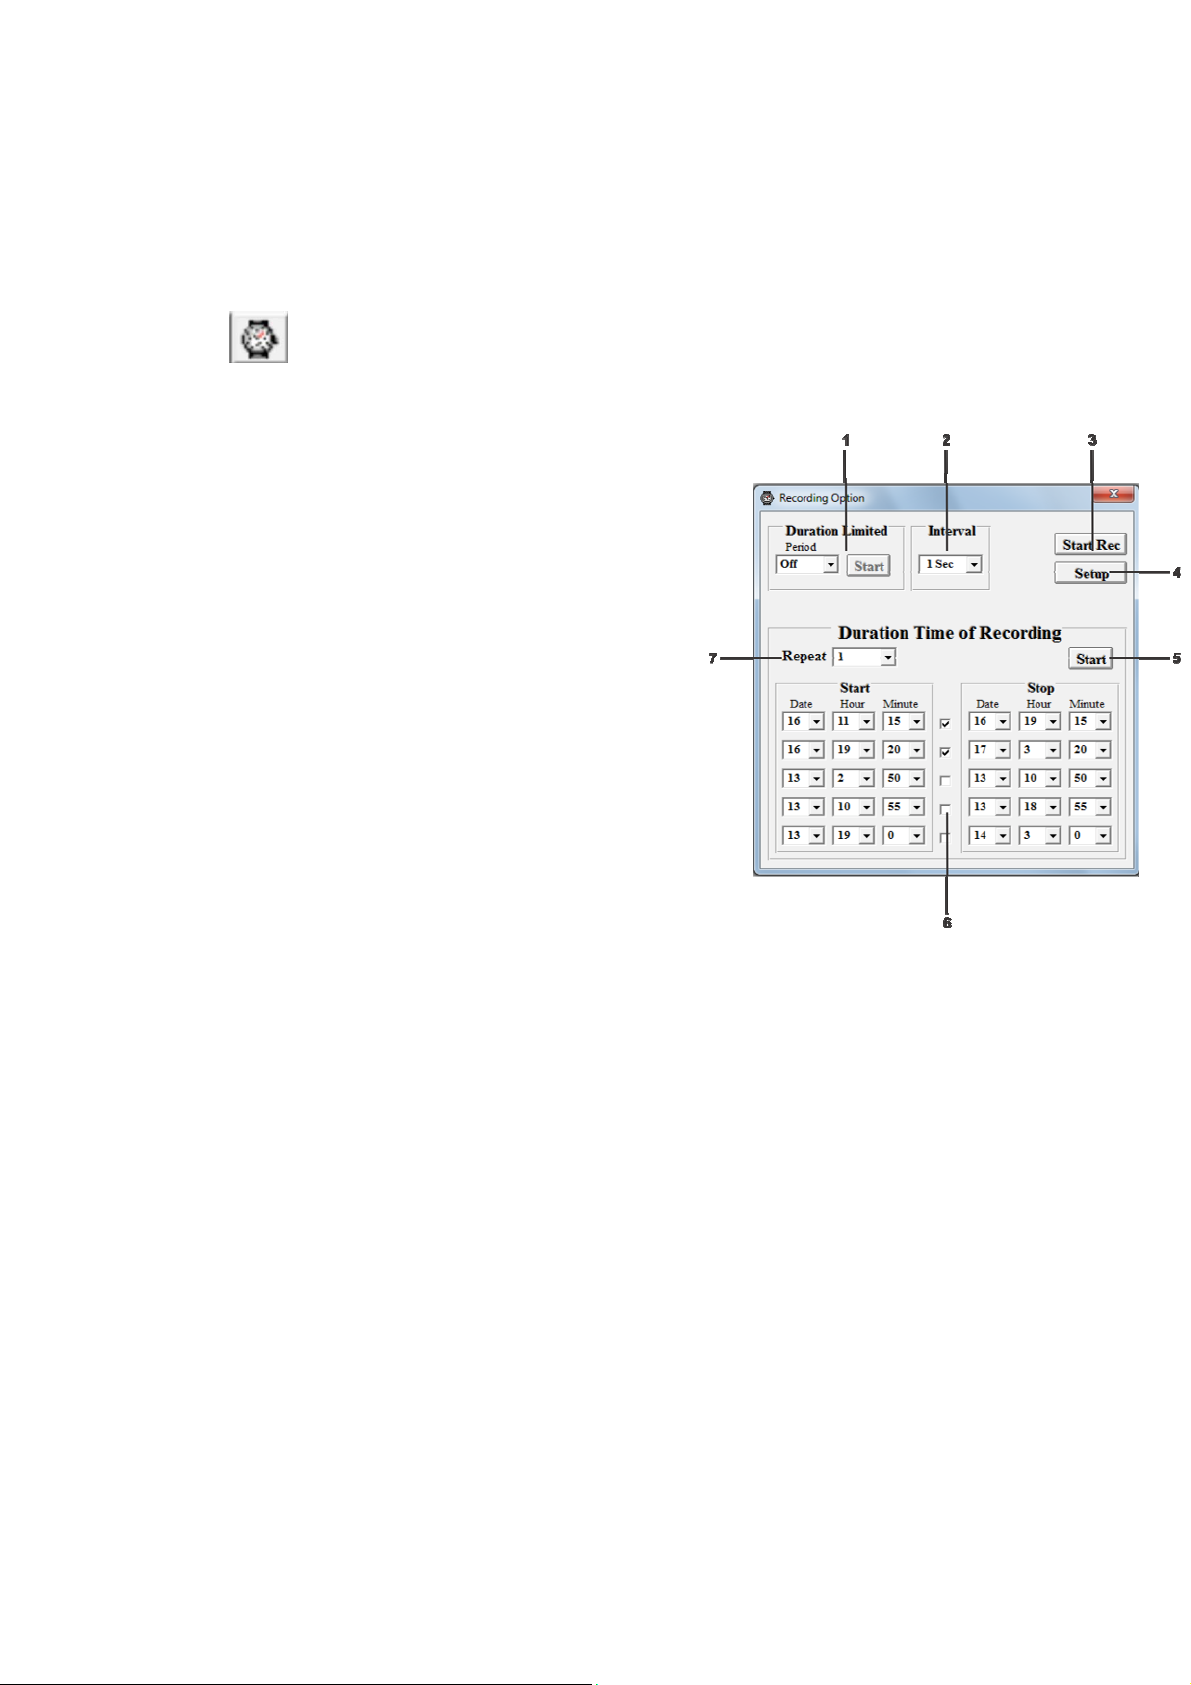
Main Menu
Save As Saves the most recent .dosi file.
Open File Opens previously saved .dosi files.
Recording Options Allows the user to set up recording sessions
List Display (Real Time) Initiates a real time recording of data in a list
and the associated parameters.
format.
Graphic Display (Real Time) Initiates a real time recording of data as a graph.
Recording Setup Set the parameters of the meter for the Dose
recording session(s) set up in the Recording
Options window.
Set Meter Time Sync the Dosimeter clock to the PC clock.
Data Logger Downloads recorded datalog sessions for
viewing and saving.
Control Panel Initiates a Graphical User Interface that allows
the user to control the connected Dosimeter via
the PC.
Erase Datalogger Erases all datalogged sessions stored in the
Dosimeter’s memory.
Meter Setup Set the current parameters of the Dosimeter for
any Real time recording session(s).
Help Menu Displays SW Help Guide in 6 different
languages.
4 SL355-EN V1.4 9/13
Page 5
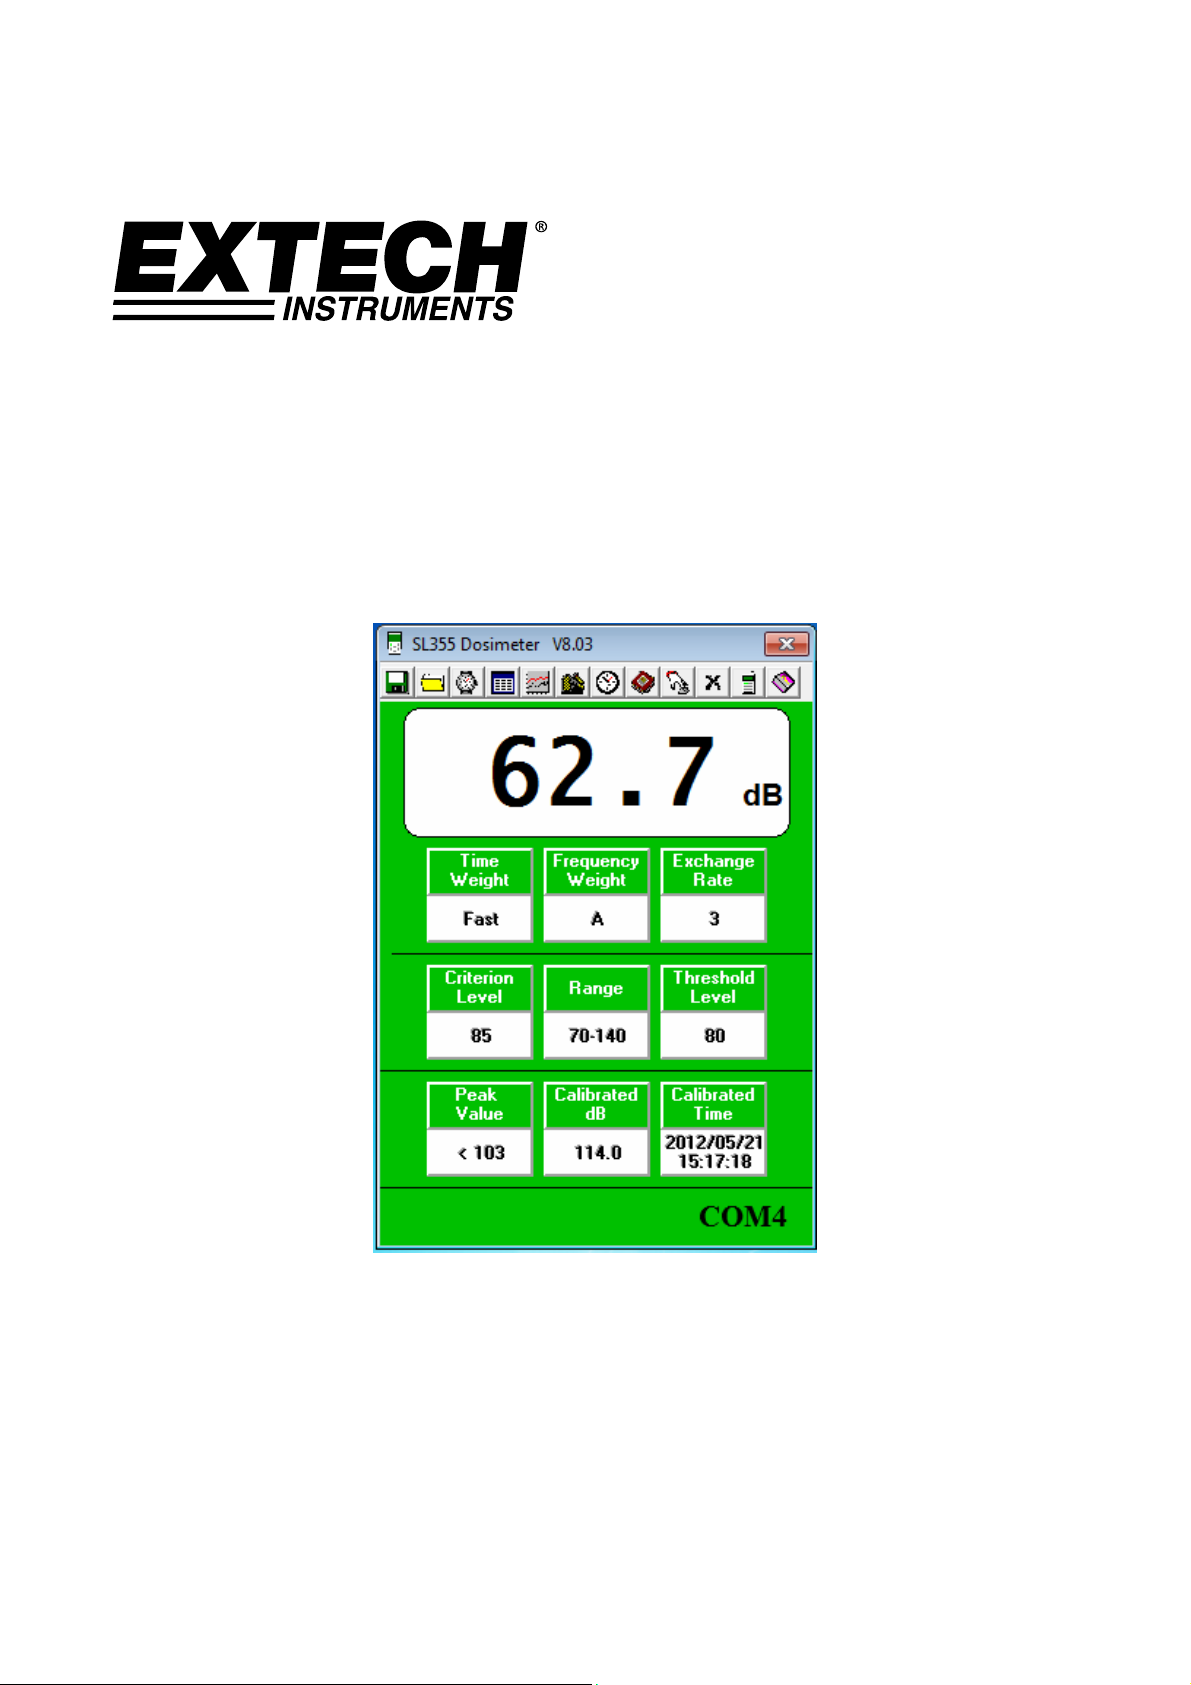
Dosimeter Operation
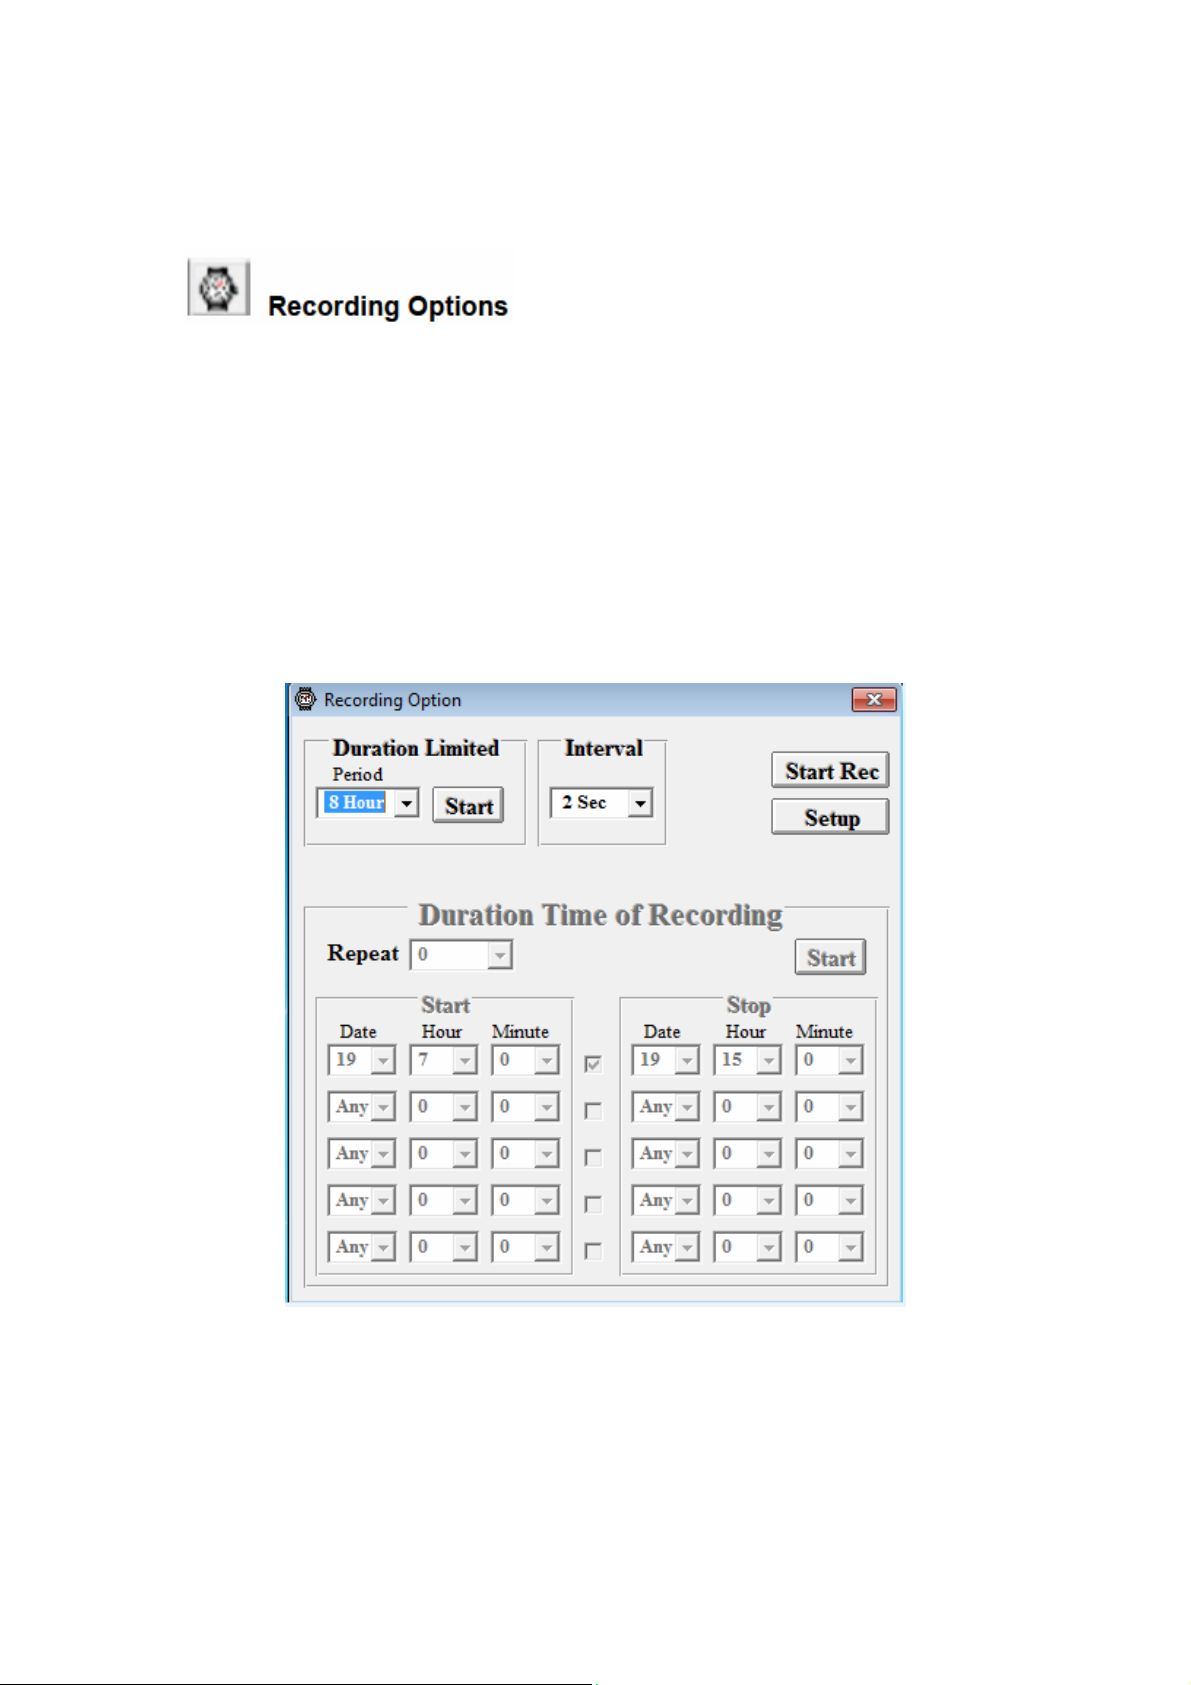
Recording Options
Click on the icon found on the menu bar. The Recording Options setup window will appear as
shown below. Time parameters for dosimeter noise surveys are set in this window. Noise survey
parameters must be set in the Recording Setup window prior to starting the survey.
1. Duration Limited Allows for the user to record a
session immediately.
• Period Changes the length of time
desired for the recording.
• Start Starts the Duration limited
recording session.
2. Interval Sets the sampling rate for
both the Duration Limited
options as well as the Duration
Time of Recording options.
3. Start Rec Begins an untimed recording
session that will continue until
all memory is full.
4. Setup Saves the Recording Options
settings into the SL355 meter.
5. Start Begins the Duration Time of
Recording session.
6. Start/Stop Sets Start and Stop time parameters for recording future sessions.
Parameters include the desired date, hour, and minute of these
sessions.
7. Repeat If desired, the user can repeat the sessions outlined in the Duration
Time of Recording section. (set to 1 for one session).
Note: a step by step setup of the SL355 meter for an 8 or 12 hour Dose survey is provided
under the heading How to set up the SL355 for an 8 or 12 hour DOSE Survey.
Note: Sample rates less than 1 minute will display each recorded sound level as well as the
total calculated Dose and TWA. Sample rates of 1 minute or greater will display your
recorded data as a running Dose and TWA list.
5 SL355-EN V1.4 9/13
Page 6

Real Time List Display
Click on the icon found on the menu bar. The Real Time List Display window will appear as
shown below:
1. Save Stores the current list’s data.
2. Recorded Data List Displays each sample with its number,
date and time of its recording, and its
recorded decibel level.
Real Time Graphic Display
Click on the icon found on the menu bar. The Real Time Graphic Display window will appear
as shown below:
1. Limit Alter parameters of the graph;
such as maximum and minimum
decibel levels displayed as well
as the number of samples
displayed.
2. Print Prints the displayed graph.
3. Recorded Data Graph Displays the recording session’s
data as a graph.
Limit Parameters:
6 SL355-EN V1.4 9/13
Page 7

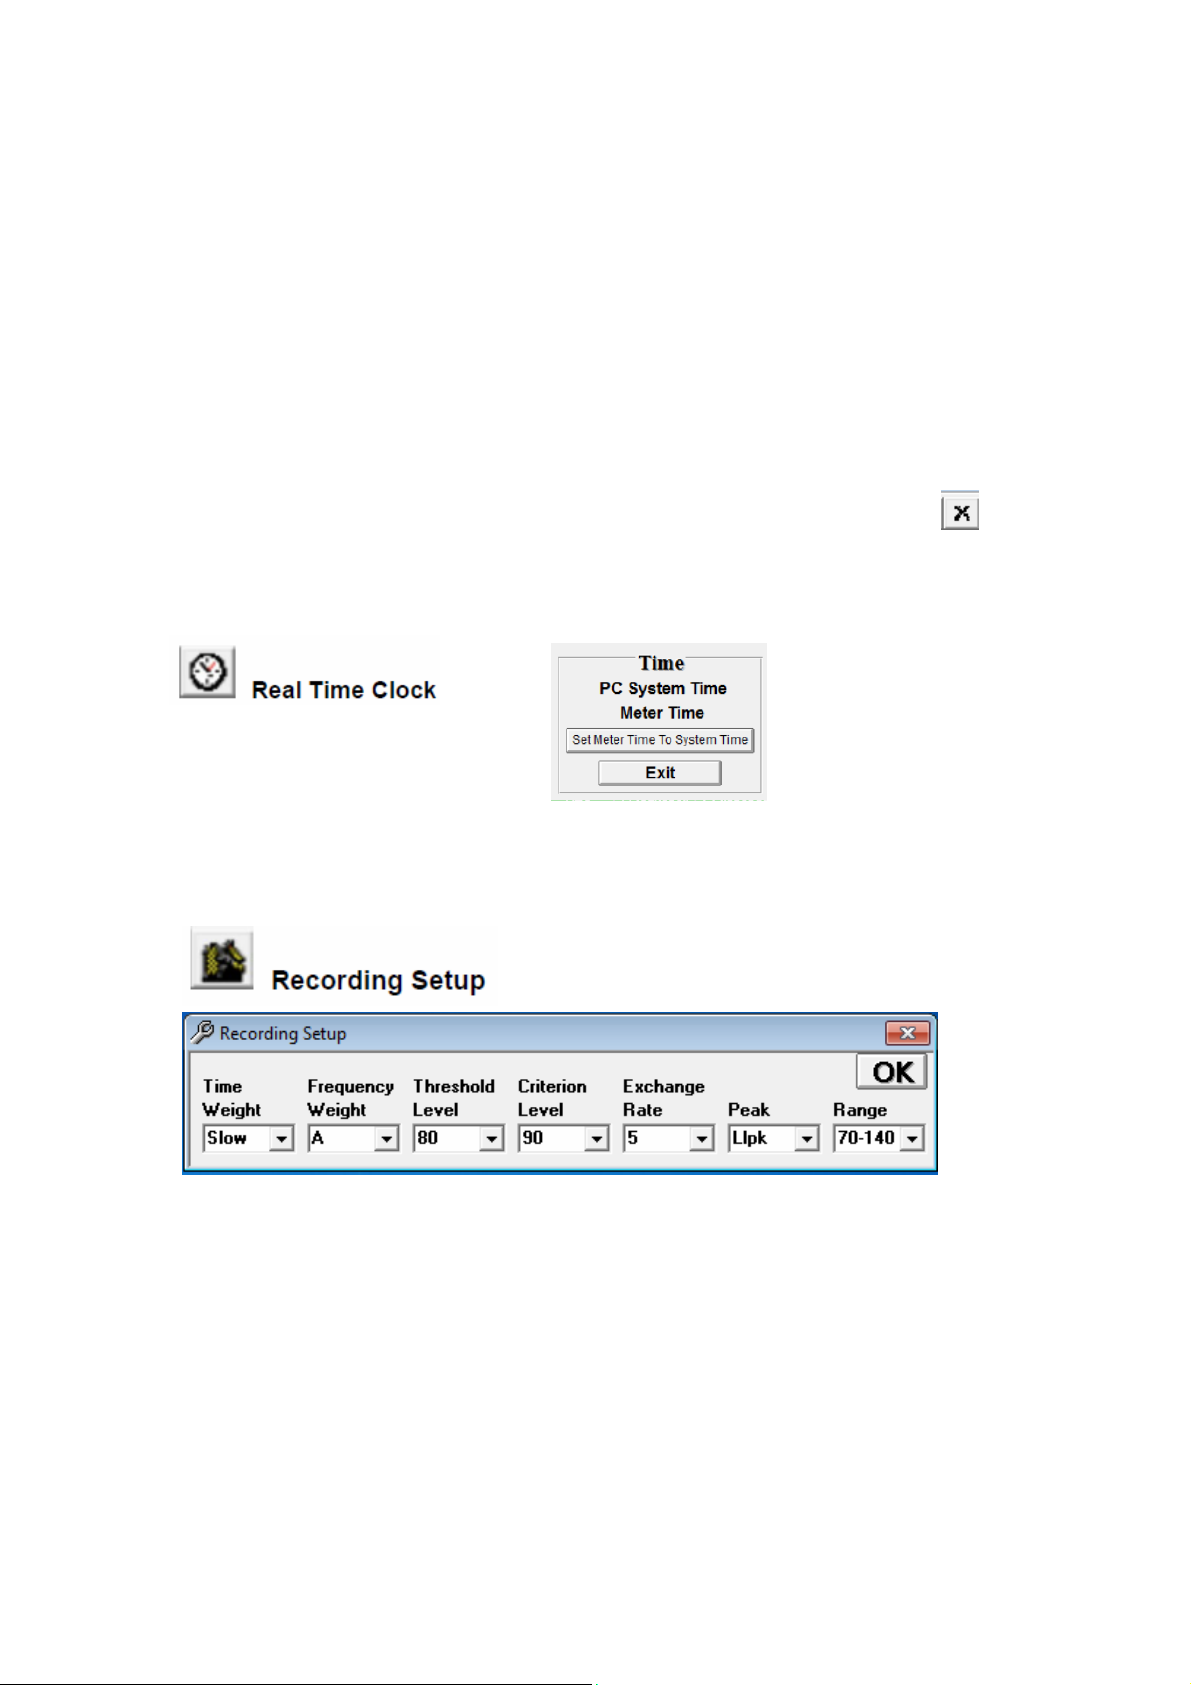
Recording Setup (Dose recording)
Click on the icon found on the m enu bar. The Dose Recording Setup window will appear as
shown below. Set the appropriate dosimeter noise survey parameters according to the standards
required for compliance. Refer to OSHA or other local standards for proper settings.
Figure is set for a typical OSHA Dose noise survey for the USA.
Time Weight: Set to Fast or Slow. Typical human noise surveys are performed in Slow response.
Frequency Weight: Set to A or C weighting. The Human ear setting is A weighted.
Threshold Level: This noise level and above are factored into the Dose calculation.
Criterion Level: Permissible exposure limit (PEL) used in noise dose measurements.
Exchange Rate: The amount by which the permitted sound level may increase if the exposure time is
halved. Set by local regulations.
Peak: Maximum peak pressure level value
Range: Range setting of the dosimeter. Either 60-130dB or 70-140dB
Note: a step by step setup of the SL355 meter for an 8 or 12 hour Dose survey is provided under the
heading How to set up the SL355 for an 8 or 12 hour DOSE Survey.
Real Time Clock
Click on the icon found on the me nu bar. The Real Time Clock window will appear as shown
below. Exit closes this window.
Click on PC System Time to view the PC’s current date and Time
Click on Meter Time to view the Dosimeter’s current Date and Time.
Click on “Set Meter Time To System Time” to set the Dosimeter time and date to match the PC.
7 SL355-EN V1.4 9/13
Page 8

Data Logger
Click on the icon found on the menu bar. The Data Logger window will appear as shown below.
Any data recorded in the SL355 memory will be downloaded to the PC.
1. Size Displays the total amount of memory
the Dosimeter can hold.
2. Remained Displays the remaining amount of
memory left in the Dosimeter.
3. Download Progress Displays how much of the saved
data has been downloaded; this box
will be partially red if the data has
not finished downloading.
4. Recorded Data Set List Displays each set’s number, date
and time, sampling rate, and number of
samples recorded. A data set can be
reviewed by double-clicking on it; the
resulting window is shown below.
8 SL355-EN V1.4 9/13
Page 9

Control Panel
Click on the icon found on the me nu bar. The Control Panel Graphic Use r Interface window
will appear as shown; this display has the same functionality as buttons on the Dosimeter itself.
Current Meter Setup (Real-Time recording)
Click on the icon found on the menu bar. The Current Meter Setup window will appear as
shown below; descriptions of each field can be found under the Recording Setup window described
above—both sets of parameters are the same. The Current Meter Setup is used to change the
meter’s current parameters as needed to record real-time data sessions to the PC.
9 SL355-EN V1.4 9/13
Page 10
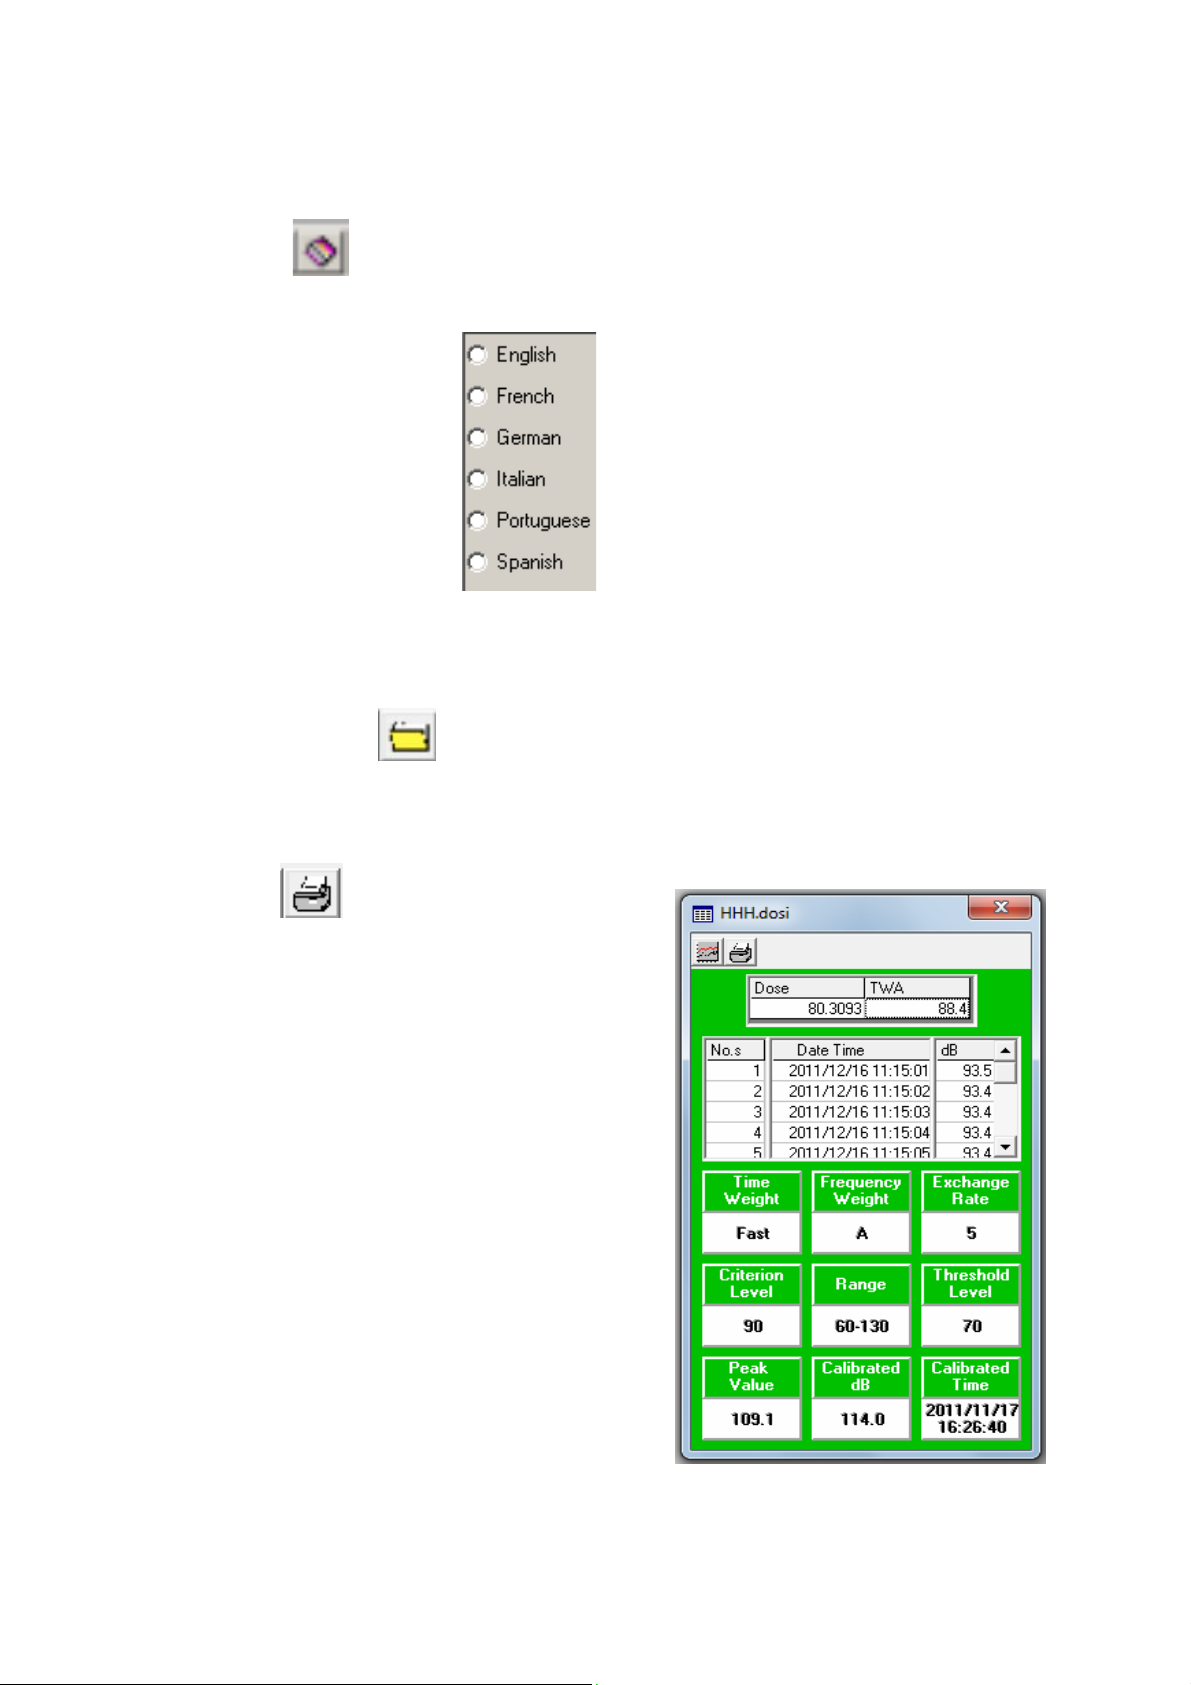
Help Menu
Click on the icon to access the SW Help Guide. Select the desired language from the pulldown menu to view the appropriate Help Guide.
Graphic Display of Saved Data
After saving a data set, the information can be viewed as a graph after recalling the saved file. First,
Click on the Open File icon
This window displays the set’s Dose % and TWA (Time Weighted Average), the recorded data
(similar to the List Display seen before), as well as the settings used by the meter during the
recording session.
Click on the icon
to print the set’s data as a list.
and after the file loads the following screen will appear
10 SL355-EN V1.4 9/13
Page 11

Click on the icon to view the graphic representation of the data set:
1. Graph Window Displays graphic representation of data set.
2. Graph Range Modify graph limits.
• Sample Number Modify the number of samples shown in the graph’s window.
• Min/Max Decibel limit Modify the upper and lower decibel limits shown in the graph’s
wi ndow.
3. Track Mode Offers several ways to review the data set’s graph.
• Normal Displays data in standard view.
• Cursor Coordinates Displays the information of a selected sample point after it has
been clicked on.
• Pan XY Allows the user to pan the graph in the direction of both the X
and Y-axes.
• Pan X Only allows the user to pan the graph in the direction of the X-
axis.
• Pan Y Only allows the user to pan the graph in the direction of the Y-
axis.
• Zoom XY Allows the user to enlarge the graph by both the X and Y-axes.
• Zoom X Allows the user to enlarge the graph by the X-axis i.e. the Y-
axis’s values remain constant.
• Zoom Y Allows the user to enlarge the graph by the Y-axis i.e. the X-
axis’s values remain constant.
4. Reset Scale Reverts back to the initial graph.
5. Print Graph Prints the current graph.
6. Cursor Information Displays the values of the X and Y coordinates (sample number
and decibel value respectively).
11 SL355-EN V1.4 9/13
Page 12
How to set up the SL355 for an 8 or 12 Hour Dose survey
1. Power on the SL355. Make sure that the SL355 has fresh batteries.
2. If you have not calibrated the SL355 you should attach a calibrated sound calibrator to the
SL355. Press the Menu button until CL xx.x appears on the screen. Turn on the calibrator
and set it for 114dB and adjust the calibration potentiometer on the top of the SL355 to 114.
Press the Run/Pause button to lock in the calibration value and date/time.
3. Start the SL355 software and plug the SL355 into the PC. Enter the COM port number that
the meter is connected to.
4. Erase all of the SL355 memory before starting by clicking on the erase icon.
5. Click on the Real Time Clock icon to sync the PC’s Time and Date to the SL355.
6. Click on Set Meter Time to System Time button.
7. Click on the Recording Setup Icon to set up the parameters of your recording.
Typical OSHA (USA) settings for Dose measurements are shown here
12 SL355-EN V1.4 9/13
Page 13
C
8. Click on the Recording options Icon to set up your test time to 8 hours with a 2 second
(minimum) Interval time.
9. Choose duration Period (A) on the pull down list (8 hours minimum for a typical Dose survey).
Setup the Interval time for how often you want to make a measurement.
(2 second minimum for an 8 hour Dose survey)
(5 second minimum for an 12 hour Dose survey)
.
10. Click on the SETUP button (B)to program the recording options into the SL355.
11. Click on START button (next to Period setting C) to start the timed recording.
12. Disconnect the SL355 from the PC and place the unit on the person who will record the noise
survey.
A
B
13 SL355-EN V1.4 9/13
Page 14

How to set up the SL355 for an 8 or 12 Hour Dose survey for a Duration
Time of Recording session
1. Follow steps 1 through 7 above.
2. Set the Duration Limited Period setting to OFF (A).
3. Set Interval to 2 seconds (minimum) for an 8 hour survey, or to 5 seconds (minimum) for a 12
hour survey.
4. Set Repeat to 1 (runs once)
5. Set START time : Date, Hour, Minute
6. Set STOP time: Date, Hour, Minute
7. Click on Setup button (B)
8. Click on Start button (C)
9. The SL355 will show a flashing REC but will not start recording data until the actual
programmed Start time.
Do NOT turn off the meter.
10. Disconnect the SL355 from the PC and place the unit on the person who will record the noise
survey.
A
B
C
14 SL355-EN V1.4 9/13
 Loading...