

Page 1

FTB-1v2 and FTB-1v2 Pro
User Guide
Page 2

Copyright © 2015–2017 EXFO Inc. All rights reserved. No part of this
publication may be reproduced, stored in a retrieval system or transmitted
in any form, be it electronically, mechanically, or by any other means such
as photocopying, recording or otherwise, without the prior written
permission of EXFO Inc. (EXFO).
Information provided by EXFO is believed to be accurate and reliable.
However, no responsibility is assumed by EXFO for its use nor for any
infringements of patents or other rights of third parties that may result from
its use. No license is granted by implication or otherwise under any patent
rights of EXFO.
EXFO’s Commerce And Government Entities (CAGE) code under the North
Atlantic Treaty Organization (NATO) is 0L8C3.
The information contained in this publication is subject to change without
notice.
Trademarks
EXFO’s trademarks have been identified as such. However, the presence
or absence of such identification does not affect the legal status of any
trademark.
Units of Measurement
Units of measurement in this publication conform to SI standards and
practices.
Patents
Feature(s) of this product is/are protected by one or more of: US design
patent D763,712 and equivalent(s) in other countries.
Version number: 2.0.1.1
ii FTB-1v2 and FTB-1v2 Pro
Page 3

Contents
Contents
Certification Information ....................................................................................................... vi
1 Introducing the FTB-1v2 and FTB-1v2 Pro ................................................... 1
Main Features .........................................................................................................................1
LED Indicators Description ......................................................................................................8
Function Buttons Description ................................................................................................10
Power Sources ......................................................................................................................11
Automatic Fan Speed Management ......................................................................................11
Software Options for Your Unit ............................................................................................12
Product Registration .............................................................................................................13
Technical Specifications .........................................................................................................13
Conventions ..........................................................................................................................14
2 Safety Information ..................................................................................... 15
Other Safety Symbols on Your Unit .......................................................................................17
Laser Safety Information .......................................................................................................18
Electrical Safety Information .................................................................................................19
3 Getting Started with Your Unit ................................................................. 23
Attaching and Removing Test Modules .................................................................................23
Positioning Your Unit ............................................................................................................29
Turning On Your Unit ...........................................................................................................30
Turning Off Your Unit ............................................................................................................30
Configuring Your Unit At First Startup ..................................................................................36
Accessing and Exiting Mini Toolbox X ..................................................................................38
Starting Module Applications ...............................................................................................39
Using the On-Screen (Virtual) Keyboard ................................................................................40
Working with Windows 8.1 Pro or Windows Embedded 8 Standard ...................................41
Right-Clicking with the Touchscreen .....................................................................................43
Installing or Upgrading the Applications .............................................................................44
Activating Software Options .................................................................................................47
Installing Third-Party Software on Your Unit .........................................................................50
Protecting your Unit with an Antivirus Software ...................................................................50
Securing your Unit Using the Kensington Lock .....................................................................51
Using a Keyboard, Mouse or Other USB Devices ...................................................................52
Inserting and Removing microSD Cards ................................................................................54
Working with Bluetooth Devices .........................................................................................58
FTB-1v2 and FTB-1v2 Pro iii
Page 4

Contents
4 Setting Up Your FTB-1v2 and FTB-1v2 Pro .................................................59
Adjusting Brightness .............................................................................................................59
Adjusting Speaker and Microphone Volume .........................................................................60
Customizing the Right-Click Feature .....................................................................................66
Enabling or Disabling the Automatic Logon .........................................................................70
Selecting the Startup Applications ........................................................................................74
Configuring Network Printers ...............................................................................................76
Selecting the Language of Operation ..................................................................................78
Setting Date and Time Formats ............................................................................................87
Adjusting the Date, Time and Time Zone .............................................................................89
Configuring the Power Management Options ......................................................................92
Setting Mini Toolbox X Behavior .........................................................................................102
Configuring the Internet Options .......................................................................................104
Getting Ready to Retrieve Geolocation Information ...........................................................107
Configuring Parameters via Windows Mobility Center ........................................................112
Setting Other Parameters ....................................................................................................113
5 Working with Your Unit ............................................................................115
Printing Documents ............................................................................................................115
Viewing PDF Files ................................................................................................................116
Taking Screen Captures ......................................................................................................117
Browsing the Web ..............................................................................................................118
Accessing the Internet with a Mobile Broadband USB Modem Key ...................................119
Retrieving the GPS Location of Your Unit ............................................................................121
Managing Favorites ............................................................................................................124
Using the Calculator ...........................................................................................................132
Using the Text Editor ...........................................................................................................132
Accessing Other Tools ........................................................................................................133
6 Using the Optional Built-In Power Meter and VFL ..................................135
7 Inspecting Fibers with a Probe ................................................................137
8 Managing Data .........................................................................................139
Viewing Disk Space and Managing Files .............................................................................140
Transferring Data via the Bluetooth Technology ..................................................................141
Connecting to a Wireless Network ......................................................................................148
Using the USB to RS-232 Adapter .......................................................................................151
Freeing Up Disk Space with the Disk Cleanup Utility ...........................................................157
Enabling or Disabling the Wireless Communication ............................................................161
Connecting to a VPN from Your Unit ..................................................................................166
iv FTB-1v2 and FTB-1v2 Pro
Page 5

Contents
9 Accessing Your Unit Remotely ................................................................. 173
Working with Remote Desktop ...........................................................................................174
Working With VNC .............................................................................................................184
Adding Exceptions to the Firewall ......................................................................................192
10 Testing Network Connections ................................................................. 197
Performing a Ping Test ........................................................................................................197
Performing a Trace Route Test .............................................................................................200
Exporting the Results ..........................................................................................................202
11 Maintenance ............................................................................................. 203
Cleaning Detector Ports ......................................................................................................204
Cleaning VFL-Type Connectors ............................................................................................205
Cleaning the Touchscreen ...................................................................................................206
Recharging the Battery .......................................................................................................206
Modifying the Low-Battery Thresholds ...............................................................................209
Replacing the Battery ..........................................................................................................214
Installing or Removing the Power Meter and VFL ...............................................................219
Managing Windows Updates .............................................................................................226
Recycling and Disposal (Applies to European Union Only) ..................................................230
12 Troubleshooting ....................................................................................... 231
Solving Common Problems .................................................................................................231
Restoring Your Unit to Normal Operation ...........................................................................238
Accessing the Online Documentation .................................................................................272
Contacting the Technical Support Group ............................................................................274
Viewing System Information ...............................................................................................275
Retrieving Network Interfaces Information .........................................................................278
Transportation ....................................................................................................................282
13 Warranty ................................................................................................... 283
General Information ...........................................................................................................283
Liability ...............................................................................................................................283
Exclusions ...........................................................................................................................284
Certification ........................................................................................................................284
Service and Repairs .............................................................................................................285
EXFO Service Centers Worldwide ........................................................................................286
Index .............................................................................................................. 287
FTB-1v2 and FTB-1v2 Pro v
Page 6

Certification Information
Certification Information
North America Regulatory Statement
This unit was certified by an agency approved in both Canada and the
United States of America. It has been evaluated according to applicable
North American approved standards for product safety for use in Canada
and the United States.
Electronic test and measurement equipment is exempt from FCC part 15,
subpart B compliance in the United States of America and from ICES-003
compliance in Canada. However, EXFO Inc. makes reasonable efforts to
ensure compliance to the applicable standards.
The limits set by these standards are designed to provide reasonable
protection against harmful interference when the equipment is operated in
a commercial environment. This equipment generates, uses, and can
radiate radio frequency energy and, if not installed and used in accordance
with the user guide, may cause harmful interference to radio
communications. Operation of this equipment in a residential area is likely
to cause harmful interference in which case the user will be required to
correct the interference at his own expense.
Modifications not expressly approved by the manufacturer could void the
user's authority to operate the equipment.
Note: Information such as the FCC and IC numbers is available directly from Mini
Toolbox X. From the button bar, tap , and then select the Platform tab.
The numbers are listed under Regulatory information.
vi FTB-1v2 and FTB-1v2 Pro
Page 7

Certification Information
If you purchased the Wi-Fi and Bluetooth® options, your unit comes with
an internal wireless module and antenna for which the following
information applies:
This equipment has been tested and found to comply with the limits
for a Class A digital device, pursuant to Part 15 of the FCC Rules.
This device complies with Industry Canada license-exempt RSS
standard(s). Operation is subject to the following two conditions: (1)
This device may not cause harmful interference, and (2) this device
must accept any interference received, including interference that may
cause undesired operation.
This device complies with the US/Canada portable RF exposure limit
set forth for an uncontrolled environment and is safe for intended
operation as described in this user documentation. The further RF
exposure reduction can be achieved if the device can be kept as far as
possible from the user’s body.
This device does not contain any user-serviceable components. Any
unauthorized product changes or modifications will invalidate
warranty and all applicable regulatory certifications and approvals.
FTB-1v2 and FTB-1v2 Pro vii
Page 8

Certification Information
European Community Declaration of Conformity
Warning: This is a class A product. In a domestic environment, this product
may cause radio interference in which case the user may be required to
take adequate measures.
Hereby, EXFO declares that the radio equipment type “Wideband Data
Transmission” is in compliance with European Directive 2014/53/EU.
The full text of the EU declaration of conformity is available at the following
Internet address: www.exfo.com/library.
The information about the Bluetooth® and Wi-Fi frequency bands is as
follows:
Bluetooth®: Between the frequencies 2400.0 MHz - 2483.5 MHz.
The output power is 4.0 dBm typical.
Wi-Fi: Between the frequencies 2400.0 MHz - 2483.5 MHz.
The maximum output power is 16.0 dBm.
Wi-Fi: Between the frequencies 5150.0 MHz - 5825.0 MHz.
The maximum output power is 12.0 dBm.
This device is a 2.4 GHz and 5 GHz wideband transmission system
(transceiver), intended for use in all EU member states and EFTA countries,
except in France and Italy where restrictive use applies.
In Italy, the end-user should apply for a license at the national spectrum
authorities in order to obtain authorization to use the device for setting up
outdoor radio links and/or for supplying access to telecommunications
and/or network services.
This device may not be used for setting up radio links in France, and in
some areas the RF output power may be limited to 10 mW EIRP in the
frequency range of 2454 - 2483.5 MHz. For detailed information, the
end-user should contact the national spectrum authority in France.
viii FTB-1v2 and FTB-1v2 Pro
Page 9

1 Introducing the FTB-1v2 and
FTB-1v2 Pro
Note: In this documentation, the words “tap” and “double-tap” (related to the
use of a touchscreen) replace the words “click” and “double-click”.
Note: Depending on the version of operating system that your unit is running, the
appearance of the applications may vary slightly from the illustrations
presented in this documentation.
Main Features
Your unit includes the following:
8-inch color capacitive touchscreen (LCD and touchscreen optimized
for outdoor use available as an option)
Two USB 2.0 host ports and one USB 3.0 host port
Ethernet port (10/100/1000 Base-T)
Headset/microphone port (for headsets equipped with a microphone)
MicroSD card slot for extended storage space
Optional Wi-Fi and Bluetooth
®
capability
Optional built-in power meter and VFL
FTB-1v2 and FTB-1v2 Pro 1
Page 10

Introducing the FTB-1v2 and FTB-1v2 Pro
Main Features
Main stream operating system:
FTB-1v2: Windows 10 IoT Enterprise or Windows Embedded 8
Standard, depending on the time of purchase of your unit. Units
running Windows Embedded 8 Standard can be upgraded to
Windows 10 IoT Enterprise by purchasing a license from EXFO.
FTB-1v2 Pro: Windows 10 IoT Enterprise or Windows 8.1 Pro,
depending on the time of purchase of your unit. Units running
Windows 8.1 Pro can be upgraded to Windows 10 IoT Enterprise
by purchasing a license from EXFO.
Multitasking possibilities
Remote access to your unit (via VNC or Remote Desktop)
Direct Web access from your unit
Possibility to take screen captures
PDF file viewer available from your unit
Easy transfer of files and folders to an external storage device
Easy software updates
2 FTB-1v2 and FTB-1v2 Pro
Page 11

Introducing the FTB-1v2 and FTB-1v2 Pro
Front
Battery LED
Touchscreen
On/Off button
(also serves as power LED)
Application switcher buttonKeyboard/
Screen capture button
Brightness buttons
Built-in speaker
Main Features
FTB-1v2 and FTB-1v2 Pro 3
Page 12

Introducing the FTB-1v2 and FTB-1v2 Pro
Top
USB 2.0 host ports
Headset/microphone port
(for any commercially available stereo
headset equipped with a microphone, and
having a 3.5 mm connector)
Ethernet (RJ-45) port
Detector port of the
power meter
VFL port of the power meter;
laser radiation emitted at this
port when VFL is active
Module
USB 3.0 host port
Built-in power meter and VFL
(optional)
MicroSD card slot
(for any commercially available microSD card
compatible with the Secure Digital eXtended
Capacity (SDXC) format)
Main Features
4 FTB-1v2 and FTB-1v2 Pro
Page 13

Introducing the FTB-1v2 and FTB-1v2 Pro
Right panel
(Single-depth module)
AC adapter/charger
connector
Security slot for Kensington lock
Module
Main Features
FTB-1v2 and FTB-1v2 Pro 5
Page 14

Introducing the FTB-1v2 and FTB-1v2 Pro
Right panel
(Double-depth module)
AC adapter/charger
connector
Module
Left panel
(Double-depth module)
Security slot for Kensington lock
Main Features
6 FTB-1v2 and FTB-1v2 Pro
Page 15

Introducing the FTB-1v2 and FTB-1v2 Pro
Back
Support
Main Features
FTB-1v2 and FTB-1v2 Pro 7
Page 16

Introducing the FTB-1v2 and FTB-1v2 Pro
LED Indicators Description
LED Indicators Description
There are two LED indicators located on the front panel of your unit,
providing you with information about the power and battery statuses.
LED Status Meaning
Green Unit is on.
Green, blinking Unit is in Sleep mode.
(when unit is
connected to an
external power
source)
Off Unit is off or in Hibernation mode.
Red There is a major hardware problem
Green The battery is fully charged.
Green, blinking The battery is charging.
Yellow, blinking The unit and its module would be
Red Battery error. For more information,
with the unit. Contact EXFO.
using more power than what is
available from the battery. Do not
disconnect AC power while they are in
use.
A blinking yellow LED takes
precedence over a blinking green one,
so when AC power is connected, even
if the LED is blinking yellow, the battery
is probably charging (depending on
conditions).
see Solving Common Problems on
page 231.
Red, blinking The detected temperature is too high.
This could lead to a thermal shutdown
of the unit if no action is taken to
reduce the temperature.
Off No battery present in the unit.
8 FTB-1v2 and FTB-1v2 Pro
Page 17

Introducing the FTB-1v2 and FTB-1v2 Pro
LED Status Meaning
Off The level of the battery is above the
“low-battery threshold”.
Yellow The level of the battery is low.
Yellow, blinking The unit and its module would be
(when unit is not
connected to an
external power
source)
Red, blinking The detected temperature is too high.
using more power than what is
available from the battery. Connect AC
power as soon as possible.
This could lead to a thermal shutdown
of the unit if no action is taken to
reduce the temperature.
LED Indicators Description
FTB-1v2 and FTB-1v2 Pro 9
Page 18

Introducing the FTB-1v2 and FTB-1v2 Pro
Function Buttons Description
Function Buttons Description
Your unit is equipped with function buttons that give you access to features
at all times.
The table below shows an overview of their purpose.
Button Meaning
Adjust the display brightness level.
Press the desired button as many times as needed.
For more information, see Adjusting Brightness on page 59.
Displays the on-screen keyboard.
Press once to show the keyboard. Press once again to
hide it.
Takes a screen capture. Hold down for a few seconds.
For more information, see Taking Screen Captures on
page 117.
Enables you to switch from one task to another. It is the
equivalent of pressing the ALT + TAB key combination on a
hardware keyboard, or tapping from the taskbar in
Windows 10.
Press once to view the list of running applications.
Press as many times as needed to select the desired
application.
Turns your unit on and off.
Press to turn the unit on.
For more information on the various ways to turn off your
unit, see Turning Off Your Unit on page 30.
10 FTB-1v2 and FTB-1v2 Pro
Page 19

Introducing the FTB-1v2 and FTB-1v2 Pro
Power Sources
Power Sources
Your unit operates with the following power sources:
AC adapter/charger (connected to standard power outlet—indoor use
only). Compatible car outlet adapter available upon request.
When it is connected to an external power source with the AC
adapter/charger, the unit will function even if the battery is not present.
One lithium-ion rechargeable battery (automatically takes over if you
disconnect the unit from its external power source).
Possible to switch from an external power source to battery power
or vice versa without affecting operation.
The battery recharges automatically when the unit is connected to
an external power source (with the AC adapter/charger or car
outlet adapter).
Note: When the ambient temperature is below 0 °C (32 °F) or when it reaches or
exceeds about 40 °C, the battery can either charge more slowly than usual,
or not charge at all, depending on the internal temperature of your unit.
For more information, see Electrical Safety Information on page 19.
Automatic Fan Speed Management
Your unit will determine the most appropriate fan speed, depending on the
power requirements and the type of modules you are using.
If the temperature keeps rising and reaches the limit: your FTB-1v2 and
FTB-1v2 Pro will turn off to protect both the module and the platform itself.
FTB-1v2 and FTB-1v2 Pro 11
Page 20

Introducing the FTB-1v2 and FTB-1v2 Pro
Software Options for Your Unit
Software Options for Your Unit
The following software options are offered for the platform itself.
Name of
the Option
IPT Enables you to perform ping and
trace route tests.
SMARTGPS Enables you to retrieve geolocation
information (latitude and longitude
coordinates) from a smart device.
For more information on how to activate software options for your unit,
see Activating Software Options on page 47.
For more information on the software options available for modules, test
instruments, or dedicated applications, refer to the user documentation
that comes with these products.
Description
12 FTB-1v2 and FTB-1v2 Pro
Page 21

Introducing the FTB-1v2 and FTB-1v2 Pro
Product Registration
Product Registration
You can now register your new EXFO products either online or directly
from your unit (if it is connected to the Internet), and benefit from every
possible opportunity to optimize their performance. By doing so, you will
always be notified of the latest software updates, key product
enhancements and up-to-date support information related to your
products.
To register your product directly from your unit:
1. Ensure that your unit can access the Internet.
2. From Mini Toolbox X, tap Utilities, and then Product Registration.
3. Follow the on-screen instructions.
To register your product online:
1. Open a Web browser and go to www.exfo.com.
2. Log in to your EXFO account.
3. Ta p Support.
4. Under Tools, tap Manage My Products.
5. Ta p Register.
6. Follow the on-screen instructions.
Technical Specifications
To obtain this product’s technical specifications, visit the EXFO Web site at
www.exfo.com.
FTB-1v2 and FTB-1v2 Pro 13
Page 22

Introducing the FTB-1v2 and FTB-1v2 Pro
Conventions
Conventions
Before using the product described in this guide, you should understand
the following conventions:
WARNING
Indicates a potentially hazardous situation which, if not avoided,
could result in death or serious injury. Do not proceed unless you
understand and meet the required conditions.
CAUTION
Indicates a potentially hazardous situation which, if not avoided,
may result in minor or moderate injury. Do not proceed unless you
understand and meet the required conditions.
CAUTION
Indicates a potentially hazardous situation which, if not avoided,
may result in component damage. Do not proceed unless you
understand and meet the required conditions.
IMPORTANT
Refers to information about this product you should not overlook.
14 FTB-1v2 and FTB-1v2 Pro
Page 23

2 Safety Information
WARNING
Do not install or terminate fibers while a light source is active.
Never look directly into a live fiber and ensure that your eyes are
protected at all times.
WARNING
The use of controls, adjustments and procedures, namely for
operation and maintenance, other than those specified herein may
result in hazardous radiation exposure or impair the protection
provided by this unit.
WARNING
If the equipment is used in a manner not specified by the
manufacturer, the protection provided by the equipment may be
impaired.
WARNING
Use only accessories designed for your unit and approved by EXFO.
For a complete list of accessories available for your unit, refer to its
technical specifications or contact EXFO.
FTB-1v2 and FTB-1v2 Pro 15
Page 24

Safety Information
When you see the following symbol on your unit , make sure
that you refer to the instructions provided in your user
documentation. Ensure that you understand and meet the required
conditions before using your product.
Other safety instructions relevant for your product are located
throughout this documentation, depending on the action to
perform. Make sure to read them carefully when they apply to your
situation.
IMPORTANT
IMPORTANT
16 FTB-1v2 and FTB-1v2 Pro
Page 25

Safety Information
Other Safety Symbols on Your Unit
Other Safety Symbols on Your Unit
One or more of the following symbols may also appear on your unit.
Symbol Meaning
Direct current
Alternating current
The unit is equipped with an earth (ground) terminal.
The unit is equipped with a protective conductor terminal.
The unit is equipped with a frame or chassis terminal.
On (Power)
Off (Power)
OR On/Off (Power)
Fuse
FTB-1v2 and FTB-1v2 Pro 17
Page 26
Safety Information
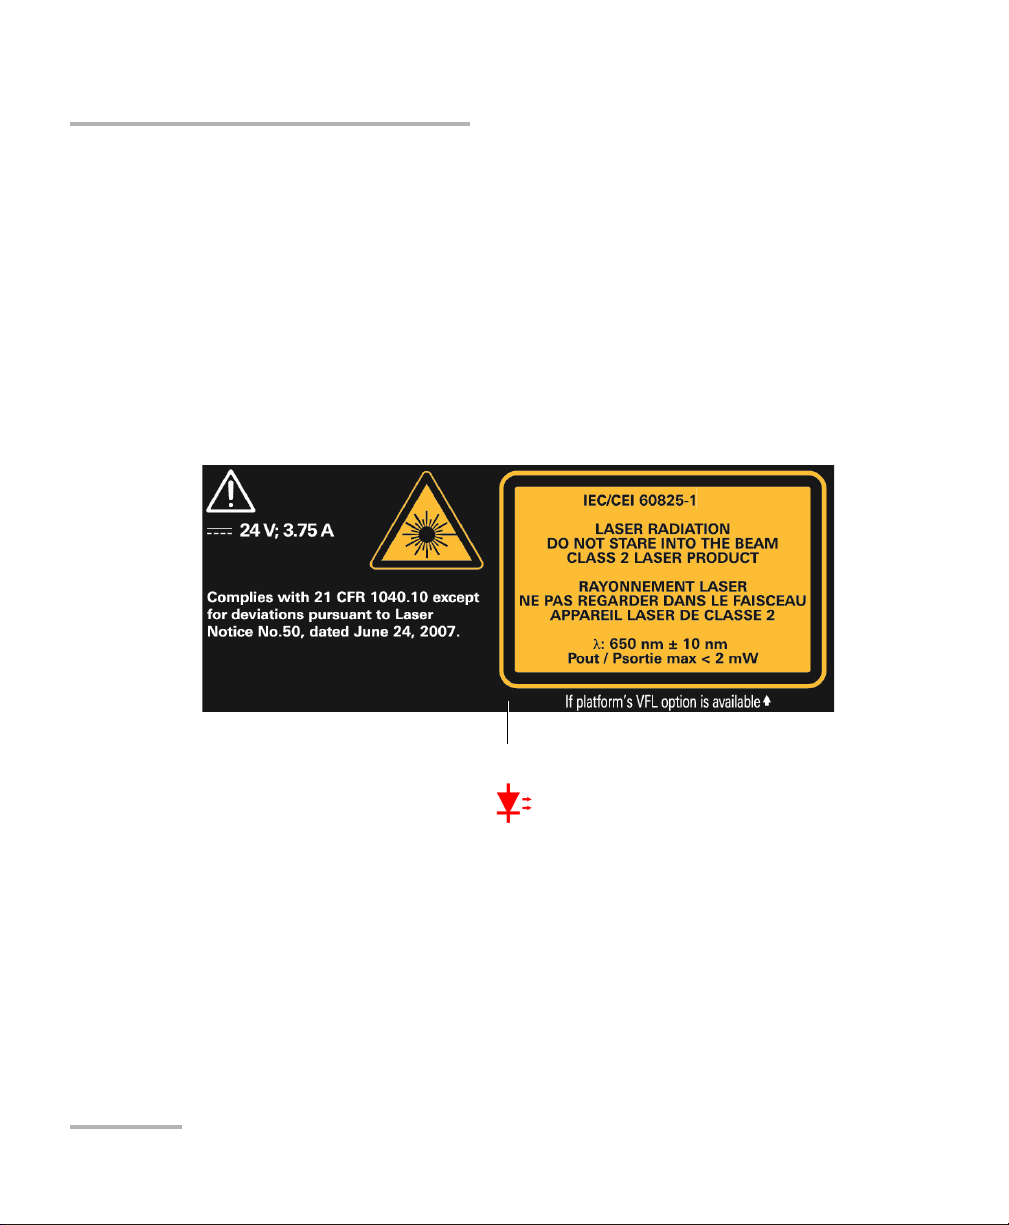
Affixed to the back of the unit.
Laser Safety Information
Laser Safety Information
Units with a Built-In VFL
Your instrument is a Class 2 laser product.
It is in compliance with standards IEC 60825-1: 2007 and 21 CFR 1040.10,
except for deviations pursuant to Laser Notice No. 50, dated June 24, 2007.
It is also in compliance with IEC 60825-1: 2014. Laser radiation is emitted at
the output port.
The following label(s) indicate that the product contains a Class 2 source:
The VFL laser is active when the symbol is displayed in the power
meter and VFL application.
The modules that you use with your unit may have different laser classes.
Refer to the user guide or the online help of the different modules for the
exact information.
Units without a Built-In VFL
If your unit is not equipped with a VFL, the laser class of your unit depends
on the modules that you use. Refer to the user guide or the online help of
the different modules for the exact information.
18 FTB-1v2 and FTB-1v2 Pro
Page 27

Safety Information
Electrical Safety Information
Electrical Safety Information
Note: There is no need to remove the battery before inserting or removing a
power meter or a VFL, but you need to follow the instructions provided in
the user documentation carefully.
WARNING
Never connect the unit to the AC mains (with the
adapter/charger) when it is used outdoors.
Position the unit so that the air can circulate freely around it.
Operation of any electrical instrument around flammable gases
or fumes constitutes a major safety hazard.
To avoid electrical shock, do not operate the unit if any part of
the outer surface (covers, panels, etc.) is damaged.
Only authorized personnel should carry out adjustments,
maintenance or repair of opened units under voltage. A person
qualified in first aid must also be present. Do not replace any
components while the power cable and battery are connected.
There is no need to remove the battery before inserting or
removing a power meter or a VFL, but you need to follow the
instructions provided in the user documentation carefully.
Unless otherwise specified, all interfaces are intended for
connection to Safety Extra Low Voltage (SELV) circuits only.
Capacitors inside the unit may be charged even if the unit has
been disconnected from its electrical supply.
FTB-1v2 and FTB-1v2 Pro 19
Page 28

Safety Information
Electrical Safety Information
Use only the listed and certified AC adapter/charger provided by
EXFO with your unit. It provides reinforced insulation between
primary and secondary, and is suitably rated for the country
where the unit is sold.
Use only the car outlet adapter designed for your unit and
approved by EXFO. The car outlet adapter contains a
replaceable fuse. Replace the damaged fuse ONLY with a fuse of
the same type: 3AB fast-acting fuse, certified, 250 V, 15 A, with
a nominal I
When you use the unit outdoors, ensure that it is protected
from liquids, dust, direct sunlight, precipitation, and full wind
pressure.
WARNING
2
t of 292 A2sec.
20 FTB-1v2 and FTB-1v2 Pro
Page 29

Equipment Ratings
Safety Information
Electrical Safety Information
Tem pe ra tu re
Operation
unit powered by battery: 0 °C to 50 °C (32 °F to
122 °F)
a,b
unit connected to AC adapter: 0 °C to 40 °C (32 °F to
104 °F)
Storage unit without battery: –40 °C to 70 °C (–40 °F to 158 °F)
unit with battery: –20 °C to 60 °C (–4 °F to 140 °F)
Relative humidity
c
unit: 95 % non-condensing
AC adapter: 10 % to 80 % non-condensing
Maximum operation altitude
2000 m (6562 ft) (unit connected to external power
source)
5000 m (16405 ft) (unit operated from battery)
Pollution degree
2 (unit connected to external power source)
3 (unit operated from battery)
d
Overvoltage category unit: I
AC adapter: II
Measurement category Not rated for measurement categories II, III, or IV
Input power
e
unit: 24 V; 3.75 A
AC adapter: 100 - 240 V; 50/60 Hz; 2 A
a. When the unit is used at an altitude of 5000 m, the maximum operating temperature is 32 °C (89.6 °F)
b. Operating time is dependent upon power consumption and temperature. If the unit is used at maximum
power and maximum temperature, it will power off automatically any time after 10 minutes for safety
reasons.
c. Measured in 0 °C to 31 °C (32 °F to 87.8 °F) range, decreasing linearly to 50 % at 40 °C (104 °F).
d. Equipment must be normally protected against exposure to direct sunlight, precipitation and full wind
pressure.
e. Not exceeding ± 10 % of the nominal voltage.
FTB-1v2 and FTB-1v2 Pro 21
Page 30

Safety Information
Electrical Safety Information
The use of voltages higher than those indicated on the label
affixed to your unit may damage the unit.
The operation and storage temperatures, as well as the altitude
and relative humidity values of some modules may differ from
those specified for your platform. In this case, always ensure
that you comply with the most restrictive conditions (either
module or platform).
CAUTION
22 FTB-1v2 and FTB-1v2 Pro
Page 31

3 Getting Started with Your Unit
Attaching and Removing Test Modules
WARNING
To avoid electrical shock, always turn off (shutdown) the
FTB-1v2 or FTB-1v2 Pro unit, and disconnect it from its external
power source BEFORE removing a module.
Never remove a module while the unit is turned on. This will
result in immediate and irreparable damage to both the module
and unit.
CAUTION
To avoid damaging your unit, use it only with modules approved by
EXFO.
FTB-1v2 and FTB-1v2 Pro 23
Page 32

Getting Started with Your Unit
Battery
To uc h sc r ee n
Attaching and Removing Test Modules
To attach a module to the FTB-1v2 or FTB-1v2 Pro:
1. Position the module so that its back panel rests on a flat surface such
as a table. The battery should be visible.
2. Hold the front panel so that you can see the touchscreen.
24 FTB-1v2 and FTB-1v2 Pro
Page 33

Getting Started with Your Unit
Mating connector
Connection slot for the
module
Attaching and Removing Test Modules
3. Place the front panel of the unit on the module, making sure that the
mating connector of the module is well aligned with the corresponding
slot on the front. The bumpers of the module should be flush with
those of the front panel. If necessary, slightly move the front panel until
alignment is correct.
4. While holding the front panel and the module firmly together, turn the
unit over, and position it so that its front panel rests on a flat surface
such as a table.
FTB-1v2 and FTB-1v2 Pro 25
Page 34

Getting Started with Your Unit
Turn scre w s
clockwise
Screws
Screws
Attaching and Removing Test Modules
5. Using a flat screwdriver, turn the screws (4) clockwise until they are
tightened.
This will secure the module into its “seated” position.
When you turn on the unit, the module will be detected automatically
during the startup sequence.
26 FTB-1v2 and FTB-1v2 Pro
Page 35

Getting Started with Your Unit
Screws
Screws
Turn screws
counterclockwise
Attaching and Removing Test Modules
To remove a module from the FTB-1v2 or FTB-1v2 Pro:
1. Turn off your unit (shutdown), and disconnect it from AC power.
2. Position the unit so that its front panel rests on a flat surface such as a
table.
3. Using a flat screwdriver, turn the screws (4) counterclockwise until
they are loose. Since they are captive screws, you cannot remove them
completely.
FTB-1v2 and FTB-1v2 Pro 27
Page 36

Getting Started with Your Unit
Attaching and Removing Test Modules
4. While holding the front panel and the module firmly together, turn the
unit over, and position it so that the module (back panel) rests on a flat
surface such as a table.
5. Hold the front panel by its sides and pull it up.
28 FTB-1v2 and FTB-1v2 Pro
Page 37

Getting Started with Your Unit
Positioning Your Unit
Positioning Your Unit
You can position your unit either vertically (with the screen facing you), or
at an angle, using the support on the back panel.
All the modules designed for your unit are equipped with such a support
that is usable as soon as the module is connected to your unit.
You can also hold your unit with the provided hand strap.
Note: The stand ensures optimum stability to the unit during your tests.
To position the unit using the support:
Pull out the support.
FTB-1v2 and FTB-1v2 Pro 29
Page 38

Getting Started with Your Unit
Turning On Your Unit
Turning On Your Unit
When you turn on the unit for the very first time, a wizard for license
agreements and safety instructions is displayed (see the corresponding
section for more information).
Once you have accepted all the license agreements and confirmed the
reading of safety instructions, the main window is displayed.
To turn on the unit:
Press the On/Off button.
Turning Off Your Unit
There are several ways to turn off the unit, including the following:
Sleep: keeps the unit’s status information in memory (RAM). The next
time you turn your unit on, you will quickly return to your work
environment (running applications will still be running). This mode will
take more battery power while the unit is off.
Hibernation: saves the unit’s status information that was in memory
(RAM) to a special file on the disk. The next time you turn your unit on,
this file will be used to ensure that you return to your work
environment (running applications will still be running). The unit will
take longer to start up than in Sleep mode, but it requires less battery
power when the unit is off.
Shutdown: the unit will perform a complete restart routine the next
time you use it. You should perform a shutdown if you do not intend to
use your unit for a week or more.
After a shutdown, the unit will start in Mini Toolbox X or in the
application you defined as the startup application.
Note: Should the unit ever stop responding, you can force a hardware reset by
pressing and holding down the power button for more than 10 seconds.
30 FTB-1v2 and FTB-1v2 Pro
Page 39

Getting Started with Your Unit
Turning Off Your Unit
By default, your unit will shut down when you press the power button.
However, you can configure your unit to perform a different action when
the power button is pressed.
You can also configure your unit to automatically restart when AC power
comes back after the unit has turned off (power outage, emergency
shutdown, sleep, or hibernation modes) when battery level is too low.
To exit the sleep mode (or hibernation mode) and resume your
work:
Press the On/Off button.
To turn off the unit completely from the unit itself:
Press the On/Off button.
To turn off the unit completely from Windows 10:
1. From the lower left corner of the screen, tap the Start button ( ).
2. From the Start menu, tap .
3. Ta p Shut down.
To turn off the unit completely from Windows 8.1 Pro or Windows
Embedded 8 Standard:
1. From the right side of the screen, swipe left to display the Charm bar.
For more information, see the section about working with Windows
8.1 Pro or Windows Embedded 8 Standard.
2. Ta p Settings > Power > Shut down.
FTB-1v2 and FTB-1v2 Pro 31
Page 40

Getting Started with Your Unit
Turning Off Your Unit
To define the behavior of the power button:
1. From the main window, tap the System Settings button.
2. Ta p Control Panel.
3. Ta p Hardware and Sound.
32 FTB-1v2 and FTB-1v2 Pro
Page 41

Getting Started with Your Unit
Turning Off Your Unit
4. Under Power Options, tap Change what the power buttons do.
5. Ta p Changes settings that are currently unavailable.
FTB-1v2 and FTB-1v2 Pro 33
Page 42

Getting Started with Your Unit
Turning Off Your Unit
6. From the When I press the power button lists, select the desired
behavior when the unit is powered by battery, or by AC current (Shut
down option is selected by default in both cases).
7. Ta p Save changes to confirm the changes and return to the Power
Options window.
34 FTB-1v2 and FTB-1v2 Pro
Page 43

Getting Started with Your Unit
Turning Off Your Unit
To configure your unit to automatically restart after AC power
comes back:
1. From the main window, tap the System Settings button.
2. Ta p Mini ToolBox X Setup.
3. Select the Power on the unit when AC outlet is connected or after
power outage box to enable the corresponding option.
OR
Clear the box if you prefer that your unit does not restart automatically
after AC power comes back.
4. Ta p OK to confirm the changes and return to the System Settings
window.
FTB-1v2 and FTB-1v2 Pro 35
Page 44

Getting Started with Your Unit
Configuring Your Unit At First Startup
Configuring Your Unit At First Startup
The first time you turn on the unit, a Windows configuration wizard is
displayed, enabling you to set all the regional and language settings such as
the country and operation language.
The operation language that you select at the first startup (labelled
“App language”) becomes the default system language, that is the
language that will be available at logon.
During the configuration process, you will also be asked to read and accept
the Microsoft end-user license agreement (EULA).
Once the configuration is complete in Windows, an EXFO wizard will be
displayed, allowing you to read the user documentation for important
safety information, and to read and accept the EULA related to your unit
and instruments.
IMPORTANT
Note: To be able to work with the unit, you must accept all the EULA (from
Microsoft and EXFO), and confirm that you have read the security
information.
To configure your unit at first startup:
1. If it is not already done, turn on the unit (see Turning On Your Unit on
page 30).
2. When the Windows wizard is displayed, set the parameters according
to your needs.
3. Read and accept the Microsoft EULA.
The configuration of Windows parameters may take several minutes.
36 FTB-1v2 and FTB-1v2 Pro
Page 45

Getting Started with Your Unit
Configuring Your Unit At First Startup
4. When the EXFO wizard is displayed, follow the on-screen instructions.
5. Ta p Finish to close the wizard and start working.
FTB-1v2 and FTB-1v2 Pro 37
Page 46

Getting Started with Your Unit
Accessing and Exiting Mini Toolbox X
Accessing and Exiting Mini Toolbox X
By default, Mini Toolbox X is displayed automatically when you turn on the
unit.
However, you can configure your unit to send Mini Toolbox X to the
notification area (see Setting Mini Toolbox X Behavior on page 102). This
could be useful, for example, if you prefer to start working in Windows. You
can also configure your unit to start any of the available applications as
soon as Mini Toolbox X is started (see Selecting the Startup Applications on
page 74).
To access Mini Toolbox X from the Windows environment:
Double-tap the icon on your desktop.
Note: If Mini Toolbox X has been sent to the notification area, from this location,
right-click the icon, and then select Restore Mini ToolBox X.
To e xi t Mi ni To o l bo x X :
Tap .
38 FTB-1v2 and FTB-1v2 Pro
Page 47

Getting Started with Your Unit
Attached module
Applications specific to the module
Starting Module Applications
Starting Module Applications
Your modules can be configured and controlled from their dedicated
applications in Mini Toolbox X.
To start a module application:
1. If necessary, tap the Modules button to display the modules window.
2. On the row corresponding to the desired module, tap the icon of the
application with which you want to work.
FTB-1v2 and FTB-1v2 Pro 39
Page 48

Getting Started with Your Unit
Using the On-Screen (Virtual) Keyboard
Using the On-Screen (Virtual) Keyboard
Whenever you need to enter alphanumeric data, you can use the
on-screen keyboard. This keyboard supports multilingual features, and
functions according to the keyboard settings set in Windows.
To use the on-screen keyboard:
1. Select the location where you want to enter text.
2. From the unit's front panel, press the button.
OR
From the taskbar, tap the on-screen keyboard icon (located to the left
of the clock).
3. Enter the data as required.
4. Close the keyboard when you are done entering data.
40 FTB-1v2 and FTB-1v2 Pro
Page 49

Getting Started with Your Unit
Working with Windows 8.1 Pro or Windows Embedded 8 Standard
Working with Windows 8.1 Pro or Windows
Embedded 8 Standard
If you are not familiar with Windows 8.1 Pro (FTB-1v2 Pro) or Windows
Embedded 8 Standard (FTB-1v2), you may want to visit Microsoft Web site
for tutorials as well as detailed information on the features and concepts
brought by this operating system.
One of the new features is the use of touchscreen gestures to perform
certain tasks. In this documentation, all the necessary gestures are
explained throughout the procedures.
Here is an overview of the gestures that you may use the most with your
unit.
Tap and double-tap: Equivalent of a click and double-click with a
mouse.
Swipe right: To return to the last used application.
From the left edge of the screen, swipe towards the right.
FTB-1v2 and FTB-1v2 Pro 41
Page 50

Getting Started with Your Unit
Working with Windows 8.1 Pro or Windows Embedded 8 Standard
Swipe down: To close windows that do not have a close button.
From the top edge of the screen, swipe towards the bottom.
Swipe left: To display the Charm bar, which is a special toolbar that
gives you access to many tools and settings.
From the right edge of the screen, swipe towards the left.
42 FTB-1v2 and FTB-1v2 Pro
Page 51

Getting Started with Your Unit
Right-Clicking with the Touchscreen
Right-Clicking with the Touchscreen
If you are used to work with a mouse, you may find it useful to be able to
perform a right-click on your touchscreen.
This feature is enabled by default, but you can disable it if you prefer. You
can also modify the right-click behavior. For more information,
see Customizing the Right-Click Feature on page 66.
To right-click with the touchscreen:
From the location where you want to right-click, using the provided stylus
or any capacitive (conductive) stylus, press the screen for a few seconds
until the shortcut menu appears.
If you want to hide the shortcut menu without performing any action,
simply tap anywhere outside the menu.
FTB-1v2 and FTB-1v2 Pro 43
Page 52

Getting Started with Your Unit
Installing or Upgrading the Applications
Installing or Upgrading the Applications
All the necessary applications have been preinstalled and configured at the
factory. However, you may have to upgrade some applications when new
versions become available or to reinstall them.
Note: Only administrator-level users can install software under Windows.
Each time you purchase a new module, it could be a good idea to verify
that the most recent Update Manager application is installed on your unit.
When updates are available for an application, you will need to download
them from EXFO Apps, either directly on your unit or on a computer. The
update files must be copied to the location that has been specified for the
deployment packages in Update Manager.
For the installation or upgrade, you will need:
your unit
a computer equipped with a USB port; Windows must be installed on
the computer
a USB memory key
Note: The computer and USB key are only necessary if you do not wish to
download the files directly on your unit.
Note: For more information on the installation, refer to the Update Manager
online help.
44 FTB-1v2 and FTB-1v2 Pro
Page 53

Getting Started with Your Unit
Installing or Upgrading the Applications
To update or reinstall Update Manager:
1. If necessary, retrieve the desired installation files from EXFO Apps at
http://www.exfo.com/software/exfo-apps.
If you do not intend to download files directly on your unit, connect a
USB memory key to one of the USB ports of the computer and copy the
installation files to this USB key.
2. If it is not already done, turn on your unit.
3. Exit Mini Toolbox X and the modules’ applications.
4. If you want to install Update Manager using the USB key, disconnect it
from the computer and connect it to one of the USB ports of your unit.
5. On your unit, create a folder on the Windows desktop.
6. Copy the installation files (from the USB key) to the newly created
folder.
7. From the newly created folder, double-tap the Update Manager setup
file to start the installation.
8. Follow the on-screen instructions.
9. When the installation is complete, simply disconnect the USB memory
key.
FTB-1v2 and FTB-1v2 Pro 45
Page 54

Getting Started with Your Unit
Installing or Upgrading the Applications
To install or upgrade the applications:
1. If necessary, retrieve the desired installation files from EXFO Apps at
http://www.exfo.com/software/exfo-apps.
If you do not intend to download files directly on your unit, connect a
USB memory key to one of the USB ports of the computer and copy the
installation files to this USB key.
2. If it is not already done, turn on your unit.
3. Exit Mini Toolbox X and the modules’ applications.
4. If you want to install or update applications using the USB key,
disconnect it from the computer and connect it to one of the USB ports
of your unit.
5. Copy the installation files (from the USB key) to the folder containing
the update and installation packages on your unit. By default, Update
Manager will search for files at the root of the USB key. For more
information, refer to the Update Manager online help.
6. On your unit, from Windows desktop, double-tap the Update Manager
icon to start the corresponding application. For more information on
how to install or upgrade applications, refer to the Update Manager
online help.
7. When the installation is complete, simply disconnect the USB memory
key.
46 FTB-1v2 and FTB-1v2 Pro
Page 55

Getting Started with Your Unit
Activating Software Options
Activating Software Options
The software options purchased at the same time as your unit have been
activated for you already. However, if you purchase options afterwards, you
will have to activate them yourself.
Before being able to activate options, you need to contact EXFO with the
following information:
Purchase order number of the newly purchased options
Module or platform serial number (depending on whether the software
options were purchased for a module or the platform)
Customer's name
Customer’s company name
Customer’s phone number
Customer’s e-mail address
Module or platform on which the option will be installed
You will receive a single key (.key) file with which you will be able to
unlock all the new options that you have purchased.
FTB-1v2 and FTB-1v2 Pro 47
Page 56

Getting Started with Your Unit
Activating Software Options
To activate software options for your unit or module:
1. Connect a USB memory key to one of the USB ports of your computer.
2. Copy the key file to the USB memory key.
3. Disconnect the USB key from the computer and connect it to your unit.
4. From the main window, tap the System Settings button, and then tap
Options Activation.
48 FTB-1v2 and FTB-1v2 Pro
Page 57

Getting Started with Your Unit
Activating Software Options
5. Ta p the Platform Options tab or the Module Options tab, depending
on the type of options that you want to activate.
6. Use the Browse button to locate the key file that you want to use.
7. Ta p Activate.
The option indicator will turn into a green check mark to confirm that
the option is now active.
Note: You can see the supported options in the Options list.
8. Ta p OK to close the confirmation message, and then Close to exit.
Note: At this point, if you have used a USB key to copy your key file, you can
remove it as it is not required to use your new options.
FTB-1v2 and FTB-1v2 Pro 49
Page 58

Getting Started with Your Unit
Installing Third-Party Software on Your Unit
Installing Third-Party Software on Your Unit
The applications that can be installed on your unit depend on the operating
system that it runs. The type of license differs from one operating to the
other.
If your unit runs Microsoft Windows 10 IoT Enterprise: You can
install any third-party software, as long as it is used as a
complementary tool to help you perform tests and
measurements with your unit, or provides system utilities,
resource management, or anti-virus or similar protection.
If your unit runs Microsoft Windows 8.1 Pro: You can install any
third-party software, as long as it is compatible with this
operating system.
If your unit runs Windows Embedded 8 Standard: To comply
with the terms of the Microsoft license, you should only install
antivirus software and the applications provided by EXFO.
IMPORTANT
In all cases, EXFO does not provide any support for the installation,
use or troubleshooting of third-party software. Should you need
help, refer to the corresponding third-party software
documentation or technical support.
Protecting your Unit with an Antivirus Software
By default, your unit is protected with the Windows Defender antivirus
software. However, you can apply your own security standards and
antivirus strategy.
50 FTB-1v2 and FTB-1v2 Pro
Page 59

Getting Started with Your Unit
Right panel
(Single-depth module)
Left panel
(Double-depth module)
Module
Securing your Unit Using the Kensington Lock
Securing your Unit Using the Kensington Lock
All the modules designed for your unit are equipped with a security slot
that is usable as soon as the module is connected to your unit. You can
then connect an optional Kensington lock (security cable) to your unit to
prevent theft.
To secure your unit:
Connect your lock to the security slot located on the side panel of your unit.
FTB-1v2 and FTB-1v2 Pro 51
Page 60

Getting Started with Your Unit
Using a Keyboard, Mouse or Other USB Devices
Using a Keyboard, Mouse or Other USB Devices
Your unit supports many USB devices. The table below gives an overview
of the supported USB devices.
Device Details
Memory key For data transfer between your unit and a computer
when you do not have access to a network. If you
need information on how to transfer data using a
memory key, see Managing Data on page 139.
Keyboard When you are required to enter alphanumeric data,
an on-screen (virtual) keyboard is displayed. However,
if you prefer, you can use a hardware keyboard.
Note: Even if a keyboard is connected, the
on-screen keyboard will still be
displayed when you work in Mini
Toolbox X.
Mouse If your prefer to use a mouse instead of the
touchscreen, you can connect one.
Composite device You can use composite devices, that is devices that
input information to your unit using more than one
mean (for example, combinations of keyboard and
mouse).
Hub This device will be particularly useful to you if you
need extra USB ports.
Printer To print documents such as reports directly from your
unit. If you prefer to use a network printer, you can
also configure one. For more information,
see Configuring Network Printers on page 76.
52 FTB-1v2 and FTB-1v2 Pro
Page 61

Getting Started with Your Unit
Using a Keyboard, Mouse or Other USB Devices
Device Details
Mobile broadband
USB modem key
To access the Internet without having to connect to a
Wi-Fi or an Ethernet network. For more information,
see Accessing the Internet with a Mobile Broadband
USB Modem Key on page 119.
USB to RS-232
adapter
(purchased from
EXFO)
To be able to transfer data between your unit and a
device only equipped with RS-232 (serial) ports. For
more information, see Using the USB to RS-232
Adapter on page 151.
You can connect several devices at the same time.
To use a USB device with your unit:
Connect the USB device to any of the USB ports located on the top of the
unit (see Main Features on page 1).
Note: It is not necessary to turn off the unit before connecting the USB device. The
software will automatically detect its presence.
You r dev ice i s au tom a tically recognized and immediately usable (provided
that it uses the drivers already available on your unit).
FTB-1v2 and FTB-1v2 Pro 53
Page 62

Getting Started with Your Unit
Inserting and Removing microSD Cards
Inserting and Removing microSD Cards
Your unit is equipped with a slot for microSD cards for extra storage
capacity. You can use any commercially available microSD card
compatible with the Secure Digital eXtended Capacity (SDXC) format.
Inserting a microSD card upside down could damage both your
unit and the card. Always ensure that the card is properly
positioned before trying to insert it into the slot.
To prevent damage to your microSD card, avoid touching its
gold area.
Always insert or remove the microSD card while the unit is
completely off (shutdown).
Otherwise, the microSD card may not be detected properly.
CAUTION
IMPORTANT
54 FTB-1v2 and FTB-1v2 Pro
Page 63

Getting Started with Your Unit
MicroSD card slot
Smooth edge of the card
Direction arrow
Inserting and Removing microSD Cards
To insert a microSD card into your unit:
1. Locate the microSD card slot on the top panel of your unit.
2. Position the card vertically so that its smooth edge is on the right and
you do not see its gold area. If an arrow is printed on your card, it
should point toward the bottom.
FTB-1v2 and FTB-1v2 Pro 55
Page 64

Getting Started with Your Unit
Inserting and Removing microSD Cards
3. Slide the card into the unit’s microSD card slot, and push it all the way
to the bottom of the card slot.
The microSD card is now ready to be used.
56 FTB-1v2 and FTB-1v2 Pro
Page 65

Getting Started with Your Unit
MicroSD card slot
Inserting and Removing microSD Cards
To remove a microSD card from your unit:
1. Locate the microSD card slot on the top panel of your unit.
2. Pull the card out of the unit’s microSD card slot.
FTB-1v2 and FTB-1v2 Pro 57
Page 66

Getting Started with Your Unit
Working with Bluetooth Devices
Working with Bluetooth Devices
If you have purchased the Wi-Fi and Bluetooth
Bluetooth
With the supported Bluetooth
Use a wireless mouse and keyboard.
Use a wireless headset.
Print from your unit to a printer compatible with the Bluetooth
Transfer files between your unit and a cell phone (see Transferring
®
devices with your unit.
technology.
Data via the Bluetooth Technology on page 141).
®
option, you can use many
®
profiles, you can do the following:
®
Share files between your unit and computers compatible with the
Bluetooth
®
technology (see Transferring Data via the Bluetooth
Tech no lo gy on page 141).
58 FTB-1v2 and FTB-1v2 Pro
Page 67

4 Setting Up Your FTB-1v2 and
FTB-1v2 Pro
Adjusting Brightness
You may want to adjust the display brightness yourself to better fit your
work environment or preferences. Values are kept in memory even when
you turn the unit off.
To adjust the display brightness:
From the unit’s front panel, press the (decrease) or
(increase) button until the brightness level suits you.
The new brightness value is taken into account immediately.
FTB-1v2 and FTB-1v2 Pro 59
Page 68

Setting Up Your FTB-1v2 and FTB-1v2 Pro
Headset/microphone port
(for 3.5 mm connector)
Adjusting Speaker and Microphone Volume
Adjusting Speaker and Microphone Volume
Your unit is equipped with a built-in speaker, but you can also connect a
headset to your unit.
To fit your work environment, you may adjust the volume of the speaker,
the headphones, or the microphone. Values are kept in memory even
when you turn the unit off.
To adjust the speaker (or headphones) volume:
1. If necessary, ensure that the headset is connected to the audio port
located on the top panel of the unit.
2. From the main window, tap the System Settings button.
3. Ta p Windows Mobility Center.
60 FTB-1v2 and FTB-1v2 Pro
Page 69

Setting Up Your FTB-1v2 and FTB-1v2 Pro
Adjusting Speaker and Microphone Volume
4. Move the Volume slider until the sound level is to your liking.
Note: You can also access the sound level slider by tapping the icon from the
taskbar.
The new value is taken into account immediately.
FTB-1v2 and FTB-1v2 Pro 61
Page 70

Setting Up Your FTB-1v2 and FTB-1v2 Pro
Headset/microphone port
(for 3.5 mm connector)
Adjusting Speaker and Microphone Volume
To adjust the microphone volume:
1. Ensure that your headset is connected to the audio port located on the
top panel of the unit.
2. From the main window, tap the System Settings button.
3. Ta p Control Panel.
62 FTB-1v2 and FTB-1v2 Pro
Page 71

Setting Up Your FTB-1v2 and FTB-1v2 Pro
Adjusting Speaker and Microphone Volume
4. Ta p Hardware and Sound.
5. Under Sound, tap Manage audio devices.
FTB-1v2 and FTB-1v2 Pro 63
Page 72

Setting Up Your FTB-1v2 and FTB-1v2 Pro
Adjusting Speaker and Microphone Volume
6. Select the Recording tab.
7. Ensure that your microphone is selected, and then tap Properties.
64 FTB-1v2 and FTB-1v2 Pro
Page 73

Setting Up Your FTB-1v2 and FTB-1v2 Pro
Adjusting Speaker and Microphone Volume
8. From the Levels tab, move the sliders until the settings are to your
liking. If the sound coming from your microphone is too low, you may
want to adjust the boost level as well.
9. Ta p OK to confirm your new settings and close the window.
10. Tap OK to close the window and return to Control Panel.
The new value is taken into account immediately.
FTB-1v2 and FTB-1v2 Pro 65
Page 74

Setting Up Your FTB-1v2 and FTB-1v2 Pro
Customizing the Right-Click Feature
Customizing the Right-Click Feature
By default, you can perform a “press and hold” action which corresponds
to right-clicking with your touchscreen (see Right-Clicking with the
Touchscreen on page 43). However, you can disable this feature if you
prefer.
You can also modify the delay before the unit considers that you are
right-clicking, as well as the amount of time before displaying the shortcut
menu once you have right-clicked.
To customize the right-click feature:
1. From the main window, tap the System Settings button.
2. Ta p Control Panel.
66 FTB-1v2 and FTB-1v2 Pro
Page 75

Setting Up Your FTB-1v2 and FTB-1v2 Pro
3. Ta p Hardware and Sound.
4. Ta p Pen and Touch.
Customizing the Right-Click Feature
FTB-1v2 and FTB-1v2 Pro 67
Page 76

Setting Up Your FTB-1v2 and FTB-1v2 Pro
Customizing the Right-Click Feature
5. From the list, select Press and hold.
6. Ta p Settings.
7. If you want to use the right-click feature with your unit, select the
Enable press and hold for right-clicking check box. Clear the check
box if you prefer not to use this feature.
68 FTB-1v2 and FTB-1v2 Pro
Page 77

Setting Up Your FTB-1v2 and FTB-1v2 Pro
Customizing the Right-Click Feature
8. If you want to modify the response time of the right-click, move the
Speed or Duration sliders to adjust the configuration to your needs.
9. Ta p OK to confirm your changes.
FTB-1v2 and FTB-1v2 Pro 69
Page 78

Setting Up Your FTB-1v2 and FTB-1v2 Pro
Enabling or Disabling the Automatic Logon
Enabling or Disabling the Automatic Logon
Note: Only administrator-level users can enable or disable the automatic logon
feature.
You can configure your unit to automatically log on to Windows at startup
(no need to select a user and enter a password). You can also disable this
feature if you prefer to define separate user accounts with different user
access rights and passwords.
Note: For security reasons, when the unit comes back from sleep mode, the
application will prompt you to select a user and enter a password, even if
you have enabled the automatic logon feature.
Also for security reasons, by default, the automatic logon is not enabled.
Once it is enabled, if you want to modify the password of the user account
for which the automatic logon is enabled, you will have to disable the
feature first, and then enable it again once the new password is defined.
If you want to modify the account used for the automatic logon, you will
also have to disable the feature first, and then enable it again for the new
account.
IMPORTANT
The user name and password that you specify for the automatic
logon must correspond to those of an existing user account. You
can create user accounts or modify passwords from the Accounts
window.
In Windows 10: Start button > Settings > Accounts.
In Windows 8.1 Pro: Charm bar > Settings >
Change PC settings > Accounts).
In Windows Embedded 8 Standard: Charm bar > Settings >
Change PC settings > Users.
70 FTB-1v2 and FTB-1v2 Pro
Page 79

Setting Up Your FTB-1v2 and FTB-1v2 Pro
Enabling or Disabling the Automatic Logon
To enable the automatic logon:
1. From the main window, tap the System Settings button.
2. Ta p Automatic Logon.
3. From the User Accounts window, clear the Users must enter a user
name and password to use this computer check box.
4. Ta p OK to confirm.
FTB-1v2 and FTB-1v2 Pro 71
Page 80

Setting Up Your FTB-1v2 and FTB-1v2 Pro
Enabling or Disabling the Automatic Logon
5. Enter the desired user name (account) and the corresponding
password.
6. Ta p OK to confirm and to return the System Settings window.
At next startup, you will no longer need to specify a user name and
password (except if the unit comes back from sleep mode).
To disable the automatic logon:
1. From the main window, tap the System Settings button.
2. Ta p Automatic Logon.
72 FTB-1v2 and FTB-1v2 Pro
Page 81

Setting Up Your FTB-1v2 and FTB-1v2 Pro
Enabling or Disabling the Automatic Logon
3. From the User Accounts window, select the Users must enter a user
name and password to use this computer check box.
4. Ta p OK to confirm and to return the System Settings window.
At next startup, you will have to specify the user name and password.
FTB-1v2 and FTB-1v2 Pro 73
Page 82

Setting Up Your FTB-1v2 and FTB-1v2 Pro
Selecting the Startup Applications
Selecting the Startup Applications
The first time you start your unit, Mini Toolbox X is displayed. You can
configure your unit to automatically start any of the available applications
as soon as Mini Toolbox X is started. This can save you time, as you do not
need to ensure that they are already running before starting your tests.
If the required module is not present in the unit, the specified applications
will simply not be started. In some cases, you may have to select the
applications again the next time the module is inserted into the unit.
To set applications to start automatically at Mini Toolbox X
startup:
1. From the main window, tap the System Settings button.
2. Ta p Startup Applications.
74 FTB-1v2 and FTB-1v2 Pro
Page 83

Setting Up Your FTB-1v2 and FTB-1v2 Pro
Selecting the Startup Applications
3. Under Module Applications or Other Applications, select the
applications you want to start automatically by selecting the
corresponding check boxes.
4. Ta p OK to use the new settings. Tap Cancel to exit without using the
new settings.
Note: The new settings will be taken into account the next time Mini Toolbox X is
started.
FTB-1v2 and FTB-1v2 Pro 75
Page 84

Setting Up Your FTB-1v2 and FTB-1v2 Pro
Configuring Network Printers
Configuring Network Printers
Your unit supports both (local) USB and network printers (you may have to
install specific drivers on your unit).
For more information on USB printers connection, see Using a Keyboard,
Mouse or Other USB Devices on page 52.
To print documents and images on a network printer, you must configure
the printer first. You must know the IP address of the network printer that
you want to configure, and ensure that your unit is connected to the same
network as the printer (either wireless or Ethernet connection). Contact
your network administrator for more information on your specific network
configuration.
For more information on printing, see Printing Documents on page 115.
To configure the printer:
1. From the main window, tap the System Settings button.
2. Ta p Control Panel.
76 FTB-1v2 and FTB-1v2 Pro
Page 85

Setting Up Your FTB-1v2 and FTB-1v2 Pro
Configuring Network Printers
3. Under Hardware and Sound, tap View devices and printers.
4. Ta p Add a printer.
5. Follow the on-screen instructions.
FTB-1v2 and FTB-1v2 Pro 77
Page 86

Setting Up Your FTB-1v2 and FTB-1v2 Pro
Selecting the Language of Operation
Selecting the Language of Operation
You may display the user interface in one of the available languages.
The availability of the languages is function of the language group that was
installed on your unit at time of purchase. It is possible to download
language packs from the Microsoft Website to add extra languages if
necessary.
The Mini Toolbox X application is offered in several languages. This means
that if Mini Toolbox X supports the language currently selected in
Windows, it will automatically be displayed in this language. If the selected
language is not supported, the English version will be used.
When you change the interface language, the corresponding keyboard is
automatically added to the list of available keyboards. You can then enter
text in a specific language (both on-screen or “real” keyboards). Once the
keyboards are added, you can switch easily from one input language to
another.
Values are kept in memory even when you turn the unit off.
To select a new interface language:
1. From the main window, tap the System Settings button.
2. Ta p Control Panel.
78 FTB-1v2 and FTB-1v2 Pro
Page 87

Setting Up Your FTB-1v2 and FTB-1v2 Pro
Selecting the Language of Operation
3. Under Clock, Language, and Region, tap Add a language.
4. Select the desired language from the list.
5. Ta p Options.
FTB-1v2 and FTB-1v2 Pro 79
Page 88

Setting Up Your FTB-1v2 and FTB-1v2 Pro
Selecting the Language of Operation
6. If you want to select another keyboard layout than the one that has
been added by default, proceed as follows.
6a. Under Input method, tap Add an input method.
6b. Select the desired keyboard layout, and then tap Add.
80 FTB-1v2 and FTB-1v2 Pro
Page 89

Setting Up Your FTB-1v2 and FTB-1v2 Pro
Selecting the Language of Operation
7. Under Windows display language, tap Make this the primary
language.
8. When the application prompts you to log off, tap Log off now.
9. Once you see the lock screen, swipe it down to reveal the user
accounts.
10. Log to your user account.
The new language is now selected and you are able to switch from one
input language to another.
IMPORTANT
In Windows Embedded 8 Standard, when you select a language
that you have installed manually, the Windows interfaces do not
switch to the selected language. They remain in the language
configured at time of purchase. However, the EXFO applications are
displayed in the selected language (when available).
FTB-1v2 and FTB-1v2 Pro 81
Page 90

Setting Up Your FTB-1v2 and FTB-1v2 Pro
Language code
Selecting the Language of Operation
To switch from one of the available input languages to another:
1. From the taskbar, tap the language code to display the list of available
input languages.
2. From the list of languages, select the desired one.
You are now ready to start entering text in the selected input language.
Note: Modifying the input language does not modify the language of the
interface.
82 FTB-1v2 and FTB-1v2 Pro
Page 91

Setting Up Your FTB-1v2 and FTB-1v2 Pro
Selecting the Language of Operation
To download language packs:
1. Ensure that your unit has access to the Internet.
2. From the main window, tap the System Settings button.
3. Ta p Control Panel.
4. Under Clock, Language, and Region, tap Add a language.
FTB-1v2 and FTB-1v2 Pro 83
Page 92

Setting Up Your FTB-1v2 and FTB-1v2 Pro
Selecting the Language of Operation
5. Ta p Add a language.
6. Browse the list of languages, and then select the one that you want to
use.
7. Ta p Open to access the list of sub-languages.
84 FTB-1v2 and FTB-1v2 Pro
Page 93

Setting Up Your FTB-1v2 and FTB-1v2 Pro
Selecting the Language of Operation
8. Select the desired sub-language, and then tap Add.
9. Select the desired language from the list.
10. Tap Options.
FTB-1v2 and FTB-1v2 Pro 85
Page 94

Setting Up Your FTB-1v2 and FTB-1v2 Pro
Selecting the Language of Operation
11. Tap Download and install language pack.
12. When the application prompts you to allow the installation, tap Yes.
The installation may take a few minutes.
13. When the installation is complete, restart your unit.
86 FTB-1v2 and FTB-1v2 Pro
Page 95

Setting Up Your FTB-1v2 and FTB-1v2 Pro
Setting Date and Time Formats
Setting Date and Time Formats
By default, the dates (short and long) and time are displayed in the formats
associated with the global language format (locale). The time can be
expressed with a 12- or a 24-hour notation. You can modify the way dates
and time are displayed if the default values do not suit your needs.
For information on how to adjust the date, the time, and the time zone,
see Adjusting the Date, Time and Time Zone on page 89.
To set date and time formats:
1. From the main window, tap the System Settings button.
2. Ta p Control Panel.
FTB-1v2 and FTB-1v2 Pro 87
Page 96

Setting Up Your FTB-1v2 and FTB-1v2 Pro
Setting Date and Time Formats
3. Under Clock, Language, and Region, tap Change date, time, or
number formats.
4. Refine the settings according to your needs.
5. Ta p Apply to confirm, and then OK to close the window.
The new values are taken into account immediately.
88 FTB-1v2 and FTB-1v2 Pro
Page 97

Setting Up Your FTB-1v2 and FTB-1v2 Pro
Adjusting the Date, Time and Time Zone
Adjusting the Date, Time and Time Zone
Note: Only administrator-level users can adjust the date and time. All users can
modify the time zone.
The current date and time are displayed at the bottom of the main window.
When saving results, the unit also saves the corresponding date and time.
For information on how to modify the format in which the date and time
are displayed, see Setting Date and Time Formats on page 87.
To adjust the date, time or time zone:
1. From the main window, tap the System Settings button.
2. Ta p Control Panel.
FTB-1v2 and FTB-1v2 Pro 89
Page 98

Setting Up Your FTB-1v2 and FTB-1v2 Pro
Adjusting the Date, Time and Time Zone
3. Ta p Clock, Language, and Region.
4. Under Date and Time, tap Set the time and date.
90 FTB-1v2 and FTB-1v2 Pro
Page 99

Setting Up Your FTB-1v2 and FTB-1v2 Pro
Adjusting the Date, Time and Time Zone
5. Ta p Change date and time or Change time zone, depending on the
settings that you want to modify.
6. Modify the settings according to your needs, and then tap OK.
7. Ta p Apply to confirm, and then OK to close the window.
The new values are taken into account immediately.
FTB-1v2 and FTB-1v2 Pro 91
Page 100

Setting Up Your FTB-1v2 and FTB-1v2 Pro
Configuring the Power Management Options
Configuring the Power Management Options
To help you get the optimum performance out of your unit, it comes with
predefined sets of parameters (plans) to manage power.
When you do not use the unit for a while, the display may be turned off to
save power. You can also configure the unit to go into sleep mode after the
specified duration has expired (see Turning Off Your Unit on page 30).
For all of these actions, you can set idle durations for AC adapter/charger
and battery operation. The values that you set are kept in memory even
when you turn the unit off.
Note: When the backlight is turned off and the LED is lit and not blinking, the
unit operation is not interrupted. Touch anywhere on the screen to return to
normal operation.
The table below identifies the predefined power plans.
Power Plan Characteristics
Balanced (selected by
default)
High Performance Provides maximum power, which could be
Power Saver Optimizes the energy consumption, which
You can either modify one of the existing power plans or create one (based
on an existing power plan). It is always possible to revert to factory default
values for the predefined plans. You can delete custom power plans that
you no longer use, but not the predefined plans.
92 FTB-1v2 and FTB-1v2 Pro
Provides extra power when your unit needs
it, and saves power when your unit
consumes less.
particularly useful when you intend to work
with modules requiring extra power.
could be particularly useful when you
operate the unit on battery.
 Loading...