


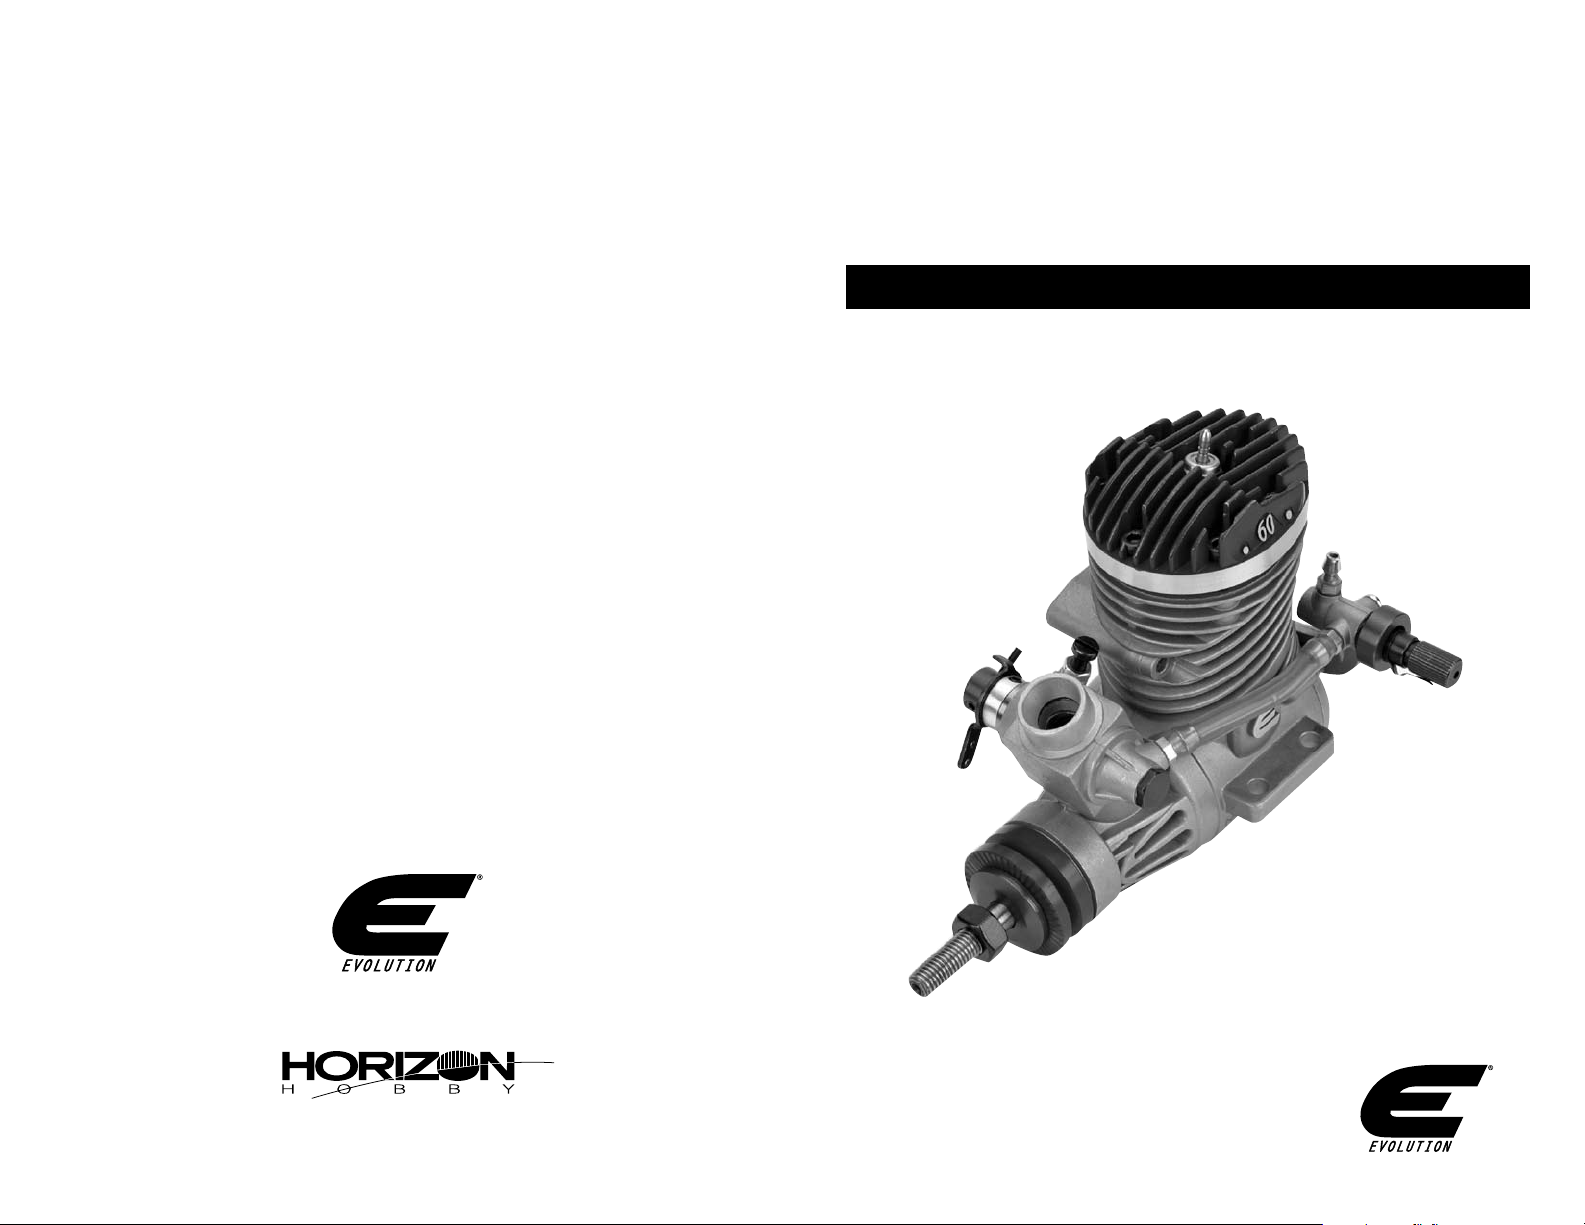
60NX
© 2009 Manufactured exclusively for Horizon Hobby, Inc. 877-504-0233
www.horizonhobby.com
Printed 7/09 16301
.60 Evolution
®
Engine
USER GUIDE

3
2
Table of Contents
Content Included ............................................................................................................. 3
Introduction ..................................................................................................................... 3
Mounting the Engine ....................................................................................................... 5
Installing the Muffler ....................................................................................................... 5
Throttle Linkage ............................................................................................................... 5
Attaching the Fuel Lines ................................................................................................. 6
Attaching the Propeller and Spinner ............................................................................. 7
Starting the Evolution Engine ......................................................................................... 7
Setting the Needle Valves ............................................................................................... 8
Low-Speed SetRight Needle Valves ............................................................................... 9
Why would fuel go “bad”? .............................................................................................. 9
How to Tell If Your Glow Plug Is Bad ............................................................................ 10
.60 Evolution Engines Specifications ........................................................................... 11
Troubleshooting Guide .................................................................................................. 11
Maintenance ..................................................................................................................11
Exploded View ................................................................................................................ 12
Cross Reference of Evolution .60 Part Numbers ....................................................... 13
Warranty Information ...................................................................................................14
Content Included
Engine Optional Items
Muffler (EVO100601) Startup Field Pack (HANSTART)
Muffler Screws & Gasket (EVO100E46A) Tachometer (HAN156)
Glow Plug (EVOGP1) Propeller 11 x 7 (EVO11070) 12 x 6 (EVO12060)
Instruction manual Blue Block After Run Engine Oil Applicator (EVOX1001)
Decal sheet Blue Block After Run Engine Oil Refill (EVOX1002)
MAC2591 Header Long
MAC1250 Muffled Tuned Pipe
HAN3015 # 9 Performance Glow Plug
Introduction
Congratulations on your purchase of the newest and one of the most technically advanced 2-stroke model airplane
engines in the world. Whether you are new to the sport of model aviation or are an experienced flier, you will enjoy the
features of the new Evolution
®
Engines .60 Engine.
The Evolution .60 Engine is designed to be the most powerful in its class, extremely easy to start and operate, and
provide years of enjoyable service. It incorporates many unique design features, such as our Set Right
™
needle valve
assemblies. Every feature is designed to ensure success with your new engine.
This user guide is intended to provide the basic information needed to operate and maintain your Evolution .60 Engine.
Every Evolution engine has been baseline adjusted at the factory and is ready to fly . We recommend a 20-minute break-
in period to become familiar with the engine.
Important: While the Evolution engine is extremely easy to operate, if this is your first experience flying a model airplane,
it is highly recommended that you have the help of an experienced modeler during the first few flights. Your local hobby
store or flying club can put you in touch with an experienced pilot in your area.
54
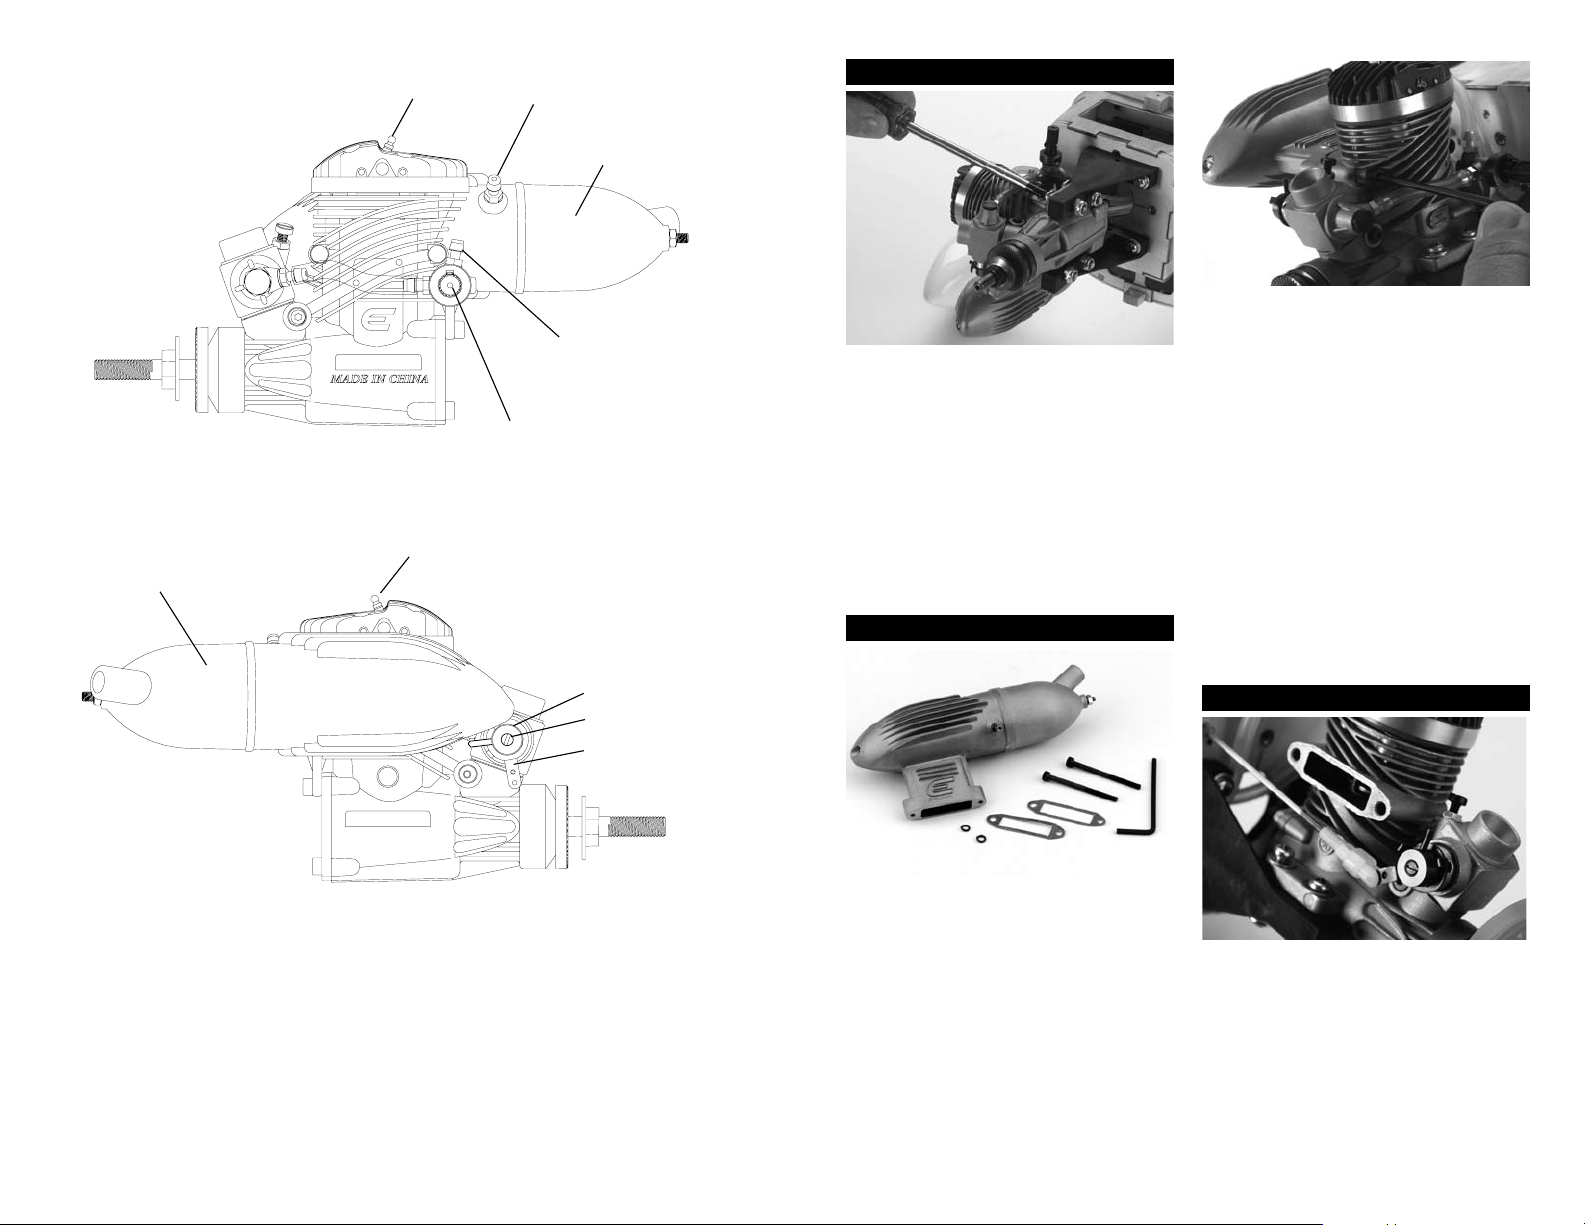
Mounting the Engine
Most model airplanes include an engine mount. It is
extremely important that the engine mount be securely
mounted to the airplane’s firewall and that the engine
is securely mounted to the engine mount. Follow the
instructions included with the airplane for mounting the
engine.
Important: Before each flying session, check that all
engine mounting screws are securely tightened.
Installing the Muffler
Using the included muffler mounting screws and lock
washers, attach the muffler with the included hex
wrench. Be sure the lock washers are placed over the
screws and that one gasket is placed between the
muffler and the engine. A second gasket is included as
a spare. Securely tighten both screws with moderate
torque.
Important: After five runs, retighten the muffler
mounting screws. Heat and vibration from these first
few runs can cause the gasket to compress. Once the
muffler screws are retightened, they will remain tight and
leak-free until the muffler is removed. Also, tighten the
muffler thru-bolt at this time as well—loosen the lock
nut on the back of the muffler, tighten the thru-bolt via
the screwhead at the front of the muffler then retighten
the lock nut at the rear.
Throttle Linkage
A clevis is recommended for attaching the throttle
linkage to the throttle. Attach the throttle linkage to the
hole in the throttle arm (see photo above).
Turn on the radio. With the throttle stick at 1/2 throttle,
install the arm on the servo so that the arm is 90° to the
throttle pushrod.
Securely tighten all engine mounting screws and recheck tightness
before each flying session.
Attach the linkage to the throttle arm.
The muffler mounting accessory package includes mounting screws
(2), lock washers (2), muffler gaskets (2) and an L- wrench.
60
60
60
Low-Speed Needle
Needle Limit Collar
High-Speed Needle
Muffler
Muffler
Glow Plug
Glow Plug
Throttle Arm
Muffler Nipple
Fuel Nipple
 Loading...