

Page 1
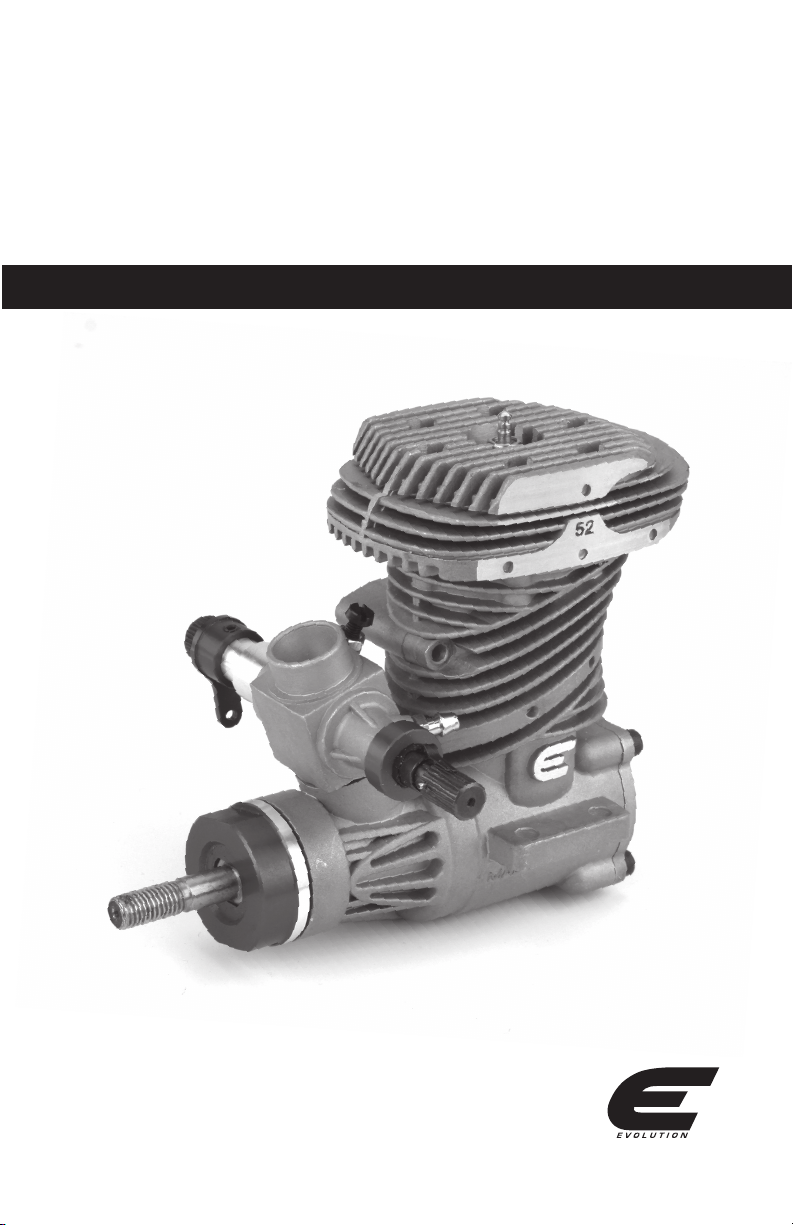
Evolution NX
Helicopter Engine
USER GUIDE
®
Page 2
Introduction
Congratulations on your purchase of the newest
and one of the most technically advanced 2-stroke
helicopter engines in the world. Whether you are new
to the sport of model aviation or an experienced flyer,
you will enjoy the features of the new Evolution®
Engine’s NX Series Helicopter Engine.
The Evolution NX Helicopter Engine is designed to be
the most powerful in its class, extremely easy to start
and operate, and provide years of enjoyable service.
It incorporates many unique design features, such as
our SetRight™ needle valve assembly. Every feature
is designed to ensure success with your new engine.
High Speed Needle
The Evolution NX Helicopter Engine features a
piston/liner made of a unique combination of ABC
(Aluminum piston, Brass, Chromed liner) type
construction with the addition of a ring to ensure
a great seal no matter the operating temperature.
Important: While the Evolution Helicopter Engine
is extremely easy to operate, if this is your first
experience flying a model helicopter, it is highly
recommended that you have the help of an
experienced modeler during the first few flights.
Your local hobby shop or flying club can put you
in touch with an experienced pilot in your area.
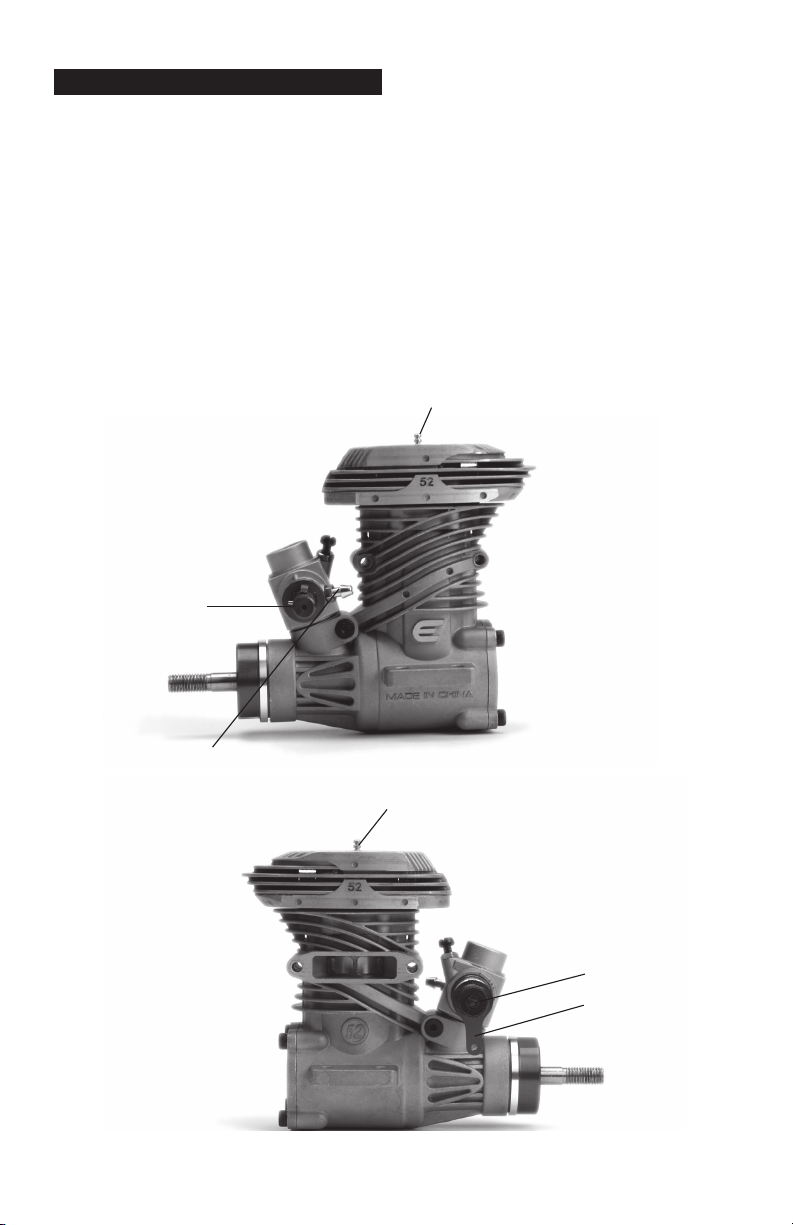
Glow Plug
Fuel Nipple
Glow Plug
Low-Speed Needle
Throttle Arm
2
Page 3
Features
1. Fits common and popular helicopters on
the market
2. Excellent operating and power characteristics
Installing the Muffler
The muffler must be mounted after the helicopter
engine has been installed in the helicopter. Refer to
the installation of the tank and engine in the helicopter
manual for the proper sequence of installation steps.
3. Offers new technology to the helicopter market
Break-in
It is not necessary to mount this engine on a test
stand for break-in. However, the engine should be
adjusted slightly on the rich setting for the first few
flights to insure proper break-in. Always use a good
quality fuel which contains 15-30% nitro methane
and an oil content of 20-23% low viscosity oil.
Mounting the Engine
Important: Be sure the lock washers for the muffler
mounting screws are placed over the screws. Securely
tighten both screws with moderate torque. It would be
wise to check the muffler mounting screws after each
run and prior to each flight as a part of your pre-flight
check of the helicopter.
Notes on Installation of Fuel Tank
1. The fuel lines should be connected to the fuel
tank as shown in the helicopter manual. Some
helicopters will use a “header” or holding tank
to help prevent foaming and provide for a more
stable motor run.
2. Since the tank is exposed to high pressures, be
sure all connections are secure and there is no
leakage.
3. Engines are sensitive to dirt in the fuel, so we
recommend a fuel filter be used. There are many
brands of filters so the modeler has a wide choice.
Always use the filter between the carburetor and
the line that goes to the fuel tank.
4. Adjustment of the carburetor and linkage will be
discussed later. Be sure to refer to the instructions
provided in the helicopter kit.
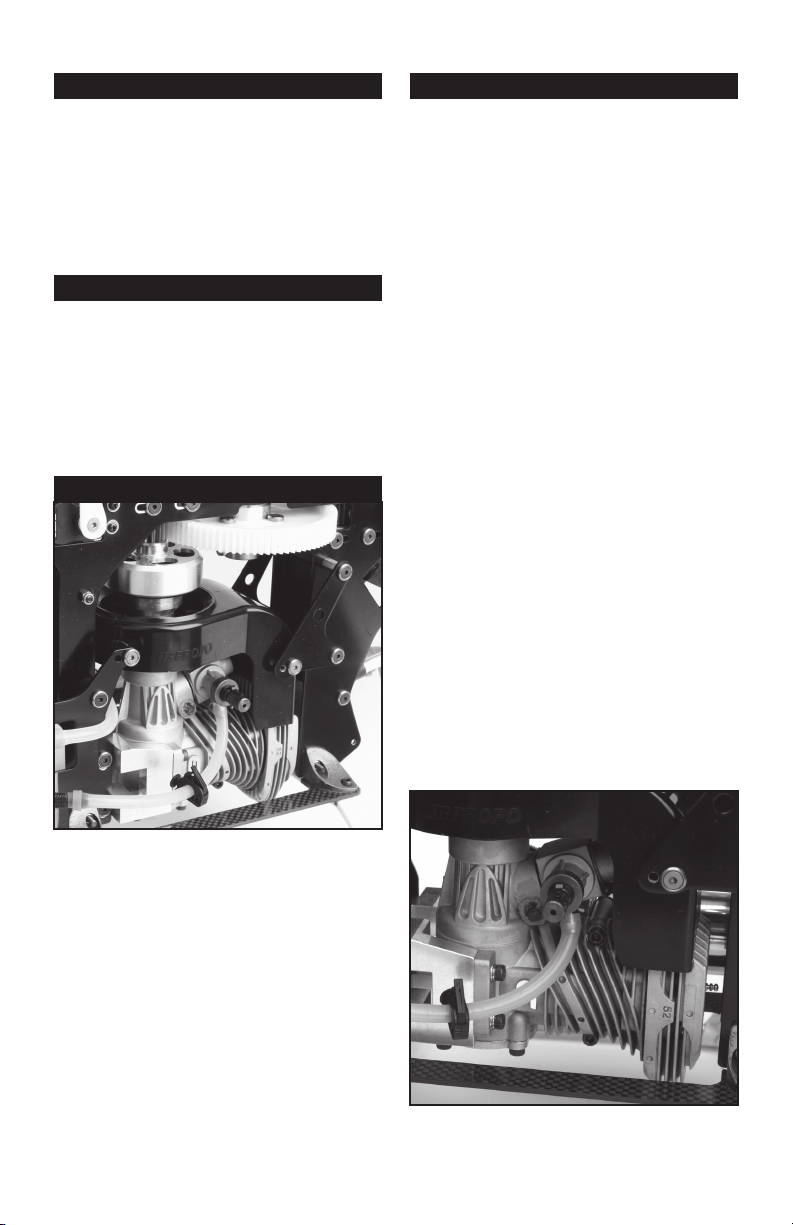
Engine Mounted in Helicopter
Most model helicopter kits include an engine mount.
Please refer to the helicopter manual for mounting
instructions and guidelines. It is extremely important
that the engine be securely mounted to the helicopter
and that the engine is securely mounted to the engine
mount. Follow the instructions included with the
helicopter kit for mounting the engine.
Important: Before each flying session, check that all
engine mounting screws are securely tightened.
Fuel Line Installation
3
Page 4

Throttle Linkage
Install the throttle linkage and servo as per the instructions in the helicopter kit manual. The following illustration
is used as an example for the typical installation of the throttle arm and servo setup. Please note that we have
included markings on the throttle arm side of the carb body and throttle barrel. These markings correspond to “full
open, mid throttle, and fully closed carburetor positions. These marks are included to make your installation and
setup of the throttle mechanism even easier.
Throttle arm/Servo Link
With low-throttle and mid-trim (idle position on transmitter), the throttle barrel should be open approximately 1mm,
giving a low rpm idle (see photo below). Adjust the length of the linkage until the throttle barrel is exactly 1mm open.
Check to be sure the servo is moving in the correct direction. Full throttle should open the throttle barrel fully, while
low throttle, low trim should completely close the throttle barrel. Reverse the servo throw if necessary. Refer to carb
body markings.
Idle, closed to 1mm open
4
Page 5

Open, Full throttle
Note: it may be necessary to reposition the throttle arm on the carburetor and to adjust the length of the throttle linkage
slightly to achieve full open and closed positions of the carburetor. Refer to the helicopter manual for more detailed instructions.
Starting the Evolution Engine
Engine installed with fuel lines attached
Fuel
The Evolution Engine comes pre-run and adjusted from the factory. We recommend using high
quality Cool Power, Omega, Hangar 9® AeroBlend™ or Power Master fuels containing 15-30% Nitro.
The Evolution Engine has been test run using these fuels. If another brand of fuel is used, it may be
necessary to slightly adjust the needle valves to compensate for the differences in fuel.
5
Page 6

Starting the Evolution Engine (cont.)
Glow Plug
The Evolution Engine comes with a specially
designed “Super Plug” that prevents idle and
transition flameouts. The plug’s unique shape
directs incoming fuel/air mixture away from the
plug element. When replacing the plug, be sure
to replace it with another Hangar 9 Super Plug
(HAN3006).
Starting the Engine
Step 1. Fill the tank with the above-mentioned
15% to 30% fuel.
Step 2. Reattach the fuel lines, making sure the
vent and clunk line are attached to the fuel
nipple and the muffler pressure nipple.
Step 3. Close the throttle to the idle position
and have a helper hold your helicopter
and blades.
Step 4. Attach the glow driver.
Step 5. Turn the engine over using an electric starter
with a starter shaft. The engine should fire
within seconds of applying the starter.
Step 6. Allow the engine to idle for 30 seconds. Adjust the
throttle trim if necessary to achieve a constant
slow idle.
and the throttle response is sluggish, you will need
to adjust the idle needle leaner to achieve a smooth
transition. If the engine detonates and the smoke
is inconsistent or a small amount is produced, the
mixture is too lean.
The high-speed needle refines the fuel mixture
for forward flight without affecting the hovering
adjustment.
After the engine is started and warmed up, lift off
into a hover and check that the engine is running
smooth with a good trail of smoke. If everything is
fine, open the throttle and enter forward flight. Take
note of the amount of smoke as you did in the hover
adjustment. It is correct when you see noticeably
steady smoke trail. Adjust the high-speed needle
valve to obtain slightly rich but consistent setting.
Stopping the Engine
Fully close the throttle barrel to stop the engine.
Prior to putting your helicopter away for the day,
pull off the fuel line from the tank to the carburetor,
then start the engine and let it burn off all the
trapped fuel inside the carburetor and the engine.
If you do not plan to run the engine for a time, use
after run oil and squirt into the carburetor, use your
electric starter to turn over the engine for a few
seconds to let the oil coat the inside of the engine.
Needle Valve Adjustment
Start the engine and check the idle. Adjust as
needed.
Lift the helicopter into a hover and check for the
correct rotor rpm recommended by the helicopter
kit manufacturer. Once this is done take note of
the amount of smoke being produced by the muffler.
The mixture is correct for hover when there is a
steady stream of smoke being produced.
Land the helicopter for approximately 20-30
seconds. Lift the helicopter into a hover again
taking note of the transition from idle to hover.
If the engine exhibits a large amount of smoke
Page 7

High Speed Needle Valve
Low Speed Needle Valve
76
Page 8

How to Tell if your Glow Plug is Bad
The glow plugs on the market today are designed
to provide good service to the user and may last a
long time or a short time, all dependent upon the
way you choose to operate your engine.
Physical indications that you might need to
change the glow plug are:
1. Twisted or mangled glow plug element
(usually caused by too high a compression ratio).
2. Small “bumps” are attached to the glow plug
element. This will generally be most noticeable
during the break-in process. These are
actually tiny pieces of aluminum that have
attached to the element and these will
severely hinder the operation of the glow plug.
3. The glow plug element is no longer shiny but
is dull, almost a white powder color. (This just
comes with age and is a by-product of the
catalytic reaction. The shinier the wire,
the better the catalytic reaction can be).
Operating indications that you need to change
your glow plug are:
1. The glow element will not light with a charged
glow igniter. This indicates that there is a
physical short or breakage in the element
wire itself.
2. Glow plug lights but the engine will not
continue running once the battery is dis connected. (This is usually an indication of the
microscopic particles we discussed earlier).
3. Glow plug lights, engine runs but there is a
perceptible loss of rpm at full throttle when
the battery is disconnected. This is a typical
indication that the white powder residue is
building to the point that the catalytic
reaction of the glow plug is no longer
anywhere close to being optimum.
NX Evolution Helicopter Engine Specifications
Disp Bore Stroke Weight Crank K
Items (c.I.) (mm) (mm) (oz) (ISO) Cylinder Propeller
EVOE0520H .520” .882” .847” 15.36 1/4X28 ABC RING N/A
F
H
A
B
E = height
F = length
G = crankshaft thread size
C
Dimensions(mm) A B C D E F G H
EVOE0520H 36 44 17.5 52.5 93.25 105 1/4 X 28 37
D
H = muffler bolt spacing
G
Page 9

Trouble-Shooting Guide
Engine Won’t Fire
• Glow starter not charged
- Charge glow starter
• Glow plug burnt out
- Replace glow plug
• No fuel is getting to the carburetor
- Check tank, fuel lines reversed
• The starter is reversed
- Reverse the polarity on the starter cables
Engine Quits Repeatedly
• Needles need adjusting
- See adjustment procedure
• Bad or old fuel
- Replace with fresh fuel
• Worn out glow plug
- Replace with new HAN3006 super plug
Engine Runs Inconsistently
• Hole in fuel line
- Replace fuel line
• Bad or old fuel
- Replace with fresh fuel
Maintenance
After each flying session:
1. Fully drain the fuel from the tank.
2. Start the engine and run it until the fuel is
completely run out of the engine.
3. Try starting the engine three more times or until
it will no longer fire. This gets all the fuel out of
the engine.
If the engine will not be used within 10 days, several
drops (about 10) of after run oil (Evolution Engine's
Blue Block Rust Inhibitor) should be applied into the
carburetor and the engine should be turned over for
a few seconds with the starter. This will prevent rust
and corrosion.
If you need additional help or have any questions,
please call Horizon’s Service Center. Horizon has trained
technicians who are qualified to answer your engine
questions.
Evolution/Horizon Service Center
4105 Fieldstone Road
Champaign, IL 61822
1-877-504-0233
Evolution® Engines 2-Year Warranty
This Evolution Engines product is guaranteed
to be free from defects in materials and
workmanship for a period
of 2 years from the date of purchase.
During this time, Evolution’s authorized
service center will repair or replace, at
their discretion, any defective parts,
without charge.
This warranty does not apply to damage
or defects resulting from misuse, neglect
or abuse; damage caused by customer
disassembly, use of substandard fuel,
use of incorrect accessories (glow plug,
propeller, etc.); or damage resulting from
a crash or any use of this engine other
than for which it is specifically intended.
Any of the above will automatically void the
warranty of the engine.
Should your engine require warranty or non-
warranty repair service, please package it
carefully and return it to the address at the
bottom, along with a copy of the original
invoice or receipt and a detailed letter
explaining the problems. Write your name,
address and daytime phone number clearly
on the letter and return it via UPS or insured
Parcel Post (Evolution Engines will not be
responsible for product lost en route).
For repairs not covered under warranty,
please specify in your letter whether you
want an estimate of the repair charges prior
to performing the service (which may cause
a slight delay). Unless otherwise specified,
all repaired engines will be returned C.O.D.
We will do everything we can to expedite the
service required to your Evolution product.
_________________________________
Evolution/Horizon Service Center
4105 Fieldstone Road, Champaign, IL 61822
1-877-504-0233
98
Page 10

27
28
19
18
26
29
31
31
30
32
20
22
25
21
31
23
24
16
7
8, 13
3A
3B
16
5
17
3C
4
33, 1
13, 2
6
15
1
31
31
14
11
10
9
12
No. Description No. Description No. Description
1 Crankcase
2 Rear Cover w/Gasket
3A Cylinder Liner
3B Piston Ring
3C Piston & Pin
4 Connecting Rod
(Dual Bushing)
5 Wrist Pin w/Clips (Teflon)
6 Crankshaft ( 1/4X28 )
7 Cylinder Head (Helicopter)
8 Cylinder Head Shim
9 Prop Driver
10 Spacer Washer (Drive Gasket)
11 Carburetor Retainer (Drawbar)
12 Prop Nut
13 Gasket Set, Engine
14 Ball Bearing, Front
(Rubber seal)
15 Ball Bearing, Rear (Open Race)
16 Screw Set, Engine
17 Carburetor
18 Carburetor Body (w/spraybar)
19 Fuel Nipple & Gasket
20 High-Speed Needle Valve
21 High-Speed Needle
Valve Ratchet
22 Collar w/Set Screw
23 Throttle Barrel
24 Spring, Throttle Barrel
25 Idle Needle
26 Throttle Arm
27 Idle Stop Screw w/Nut
28 Idle Needle Knob
29 Throttle Arm Extension
30 Idle Needle Valve Extension
31 Carburetor Gasket/O-Ring Set
32 Small Parts Set, Carburetor
33 Sleeve Index Pin
10
Page 11

Cross-Reference List of Evolution NX Helicopter Part Numbers
No. Description HHD PN#
1 Crankcase EVOØ521Ø1
2 Rear Cover w/Gasket EVOØ521Ø2
3A Cylinder Liner EVOØ522Ø2H
3B Piston Ring EVOØ52236H
3C Piston & Pin EVOØ52214H
4 Connecting Rod (Dual Bushing) EVOØ522Ø4
5 Wrist Pin w/Clips (Teflon) EVOØ52213
6 Crankshaft ( 1/4X28 ) EVOØ5221ØH
7 Cylinder Head (Helicopter) EVOØ521Ø3H
8 Cylinder Head Shim EVOØ52112
9 Prop Driver EVOØ52219H
10 Spacer Washer (Drive Gasket) EVO1ØØ219B
11 Carburetor Retainer (Drawbar) EVO1ØØ129
12 Prop Nut EVO1ØØ221
13 Gasket Set, Engine EVOØ52416
14 Ball Bearing, Front (Rubber seal) EVO1ØØ1Ø9
15 Ball Bearing, Rear (Open Race) EVOØ5111Ø
16 Screw Set, Engine EVOØ529Ø1H
17 Carburetor EVOØ528Ø1H
18 Carburetor Body (w/spraybar) EVOØ52863H
19 Fuel Nipple & Gasket EVO1ØØ114
20 High-Speed Needle Valve EVO1ØØ829A
21 High-Speed Needle Valve Ratchet EVO1ØØ833
22 Collar w/Set Screw EVO1ØØ834A
23 Throttle Barrel EVOØ52813H
24 Spring, Throttle Barrel EVO1ØØ814A
25 Idle Needle EVOØ52844H
26 Throttle Arm EVOØ52864H
27 Idle Stop Screw w/Nut EVO1ØØ825F
28 Idle Needle Knob EVOØ52865H
29 Throttle Arm Extension EVOØ52869H
30 Idle Needle Valve Extension EVOØ52867H
31 Carburetor Gasket/O-Ring Set EVOØ52E52B
32 Small Parts Set, Carburetor EVOØ52E52C
33 Sleeve Index Pin EVO4ØØ16
Ø
11
Page 12

®
© 2006 Manufactured exclusively for Horizon Hobby, Inc. 800-535-5551
www.horizonhobby.com
9127
 Loading...