

Page 1
USER MANUAL
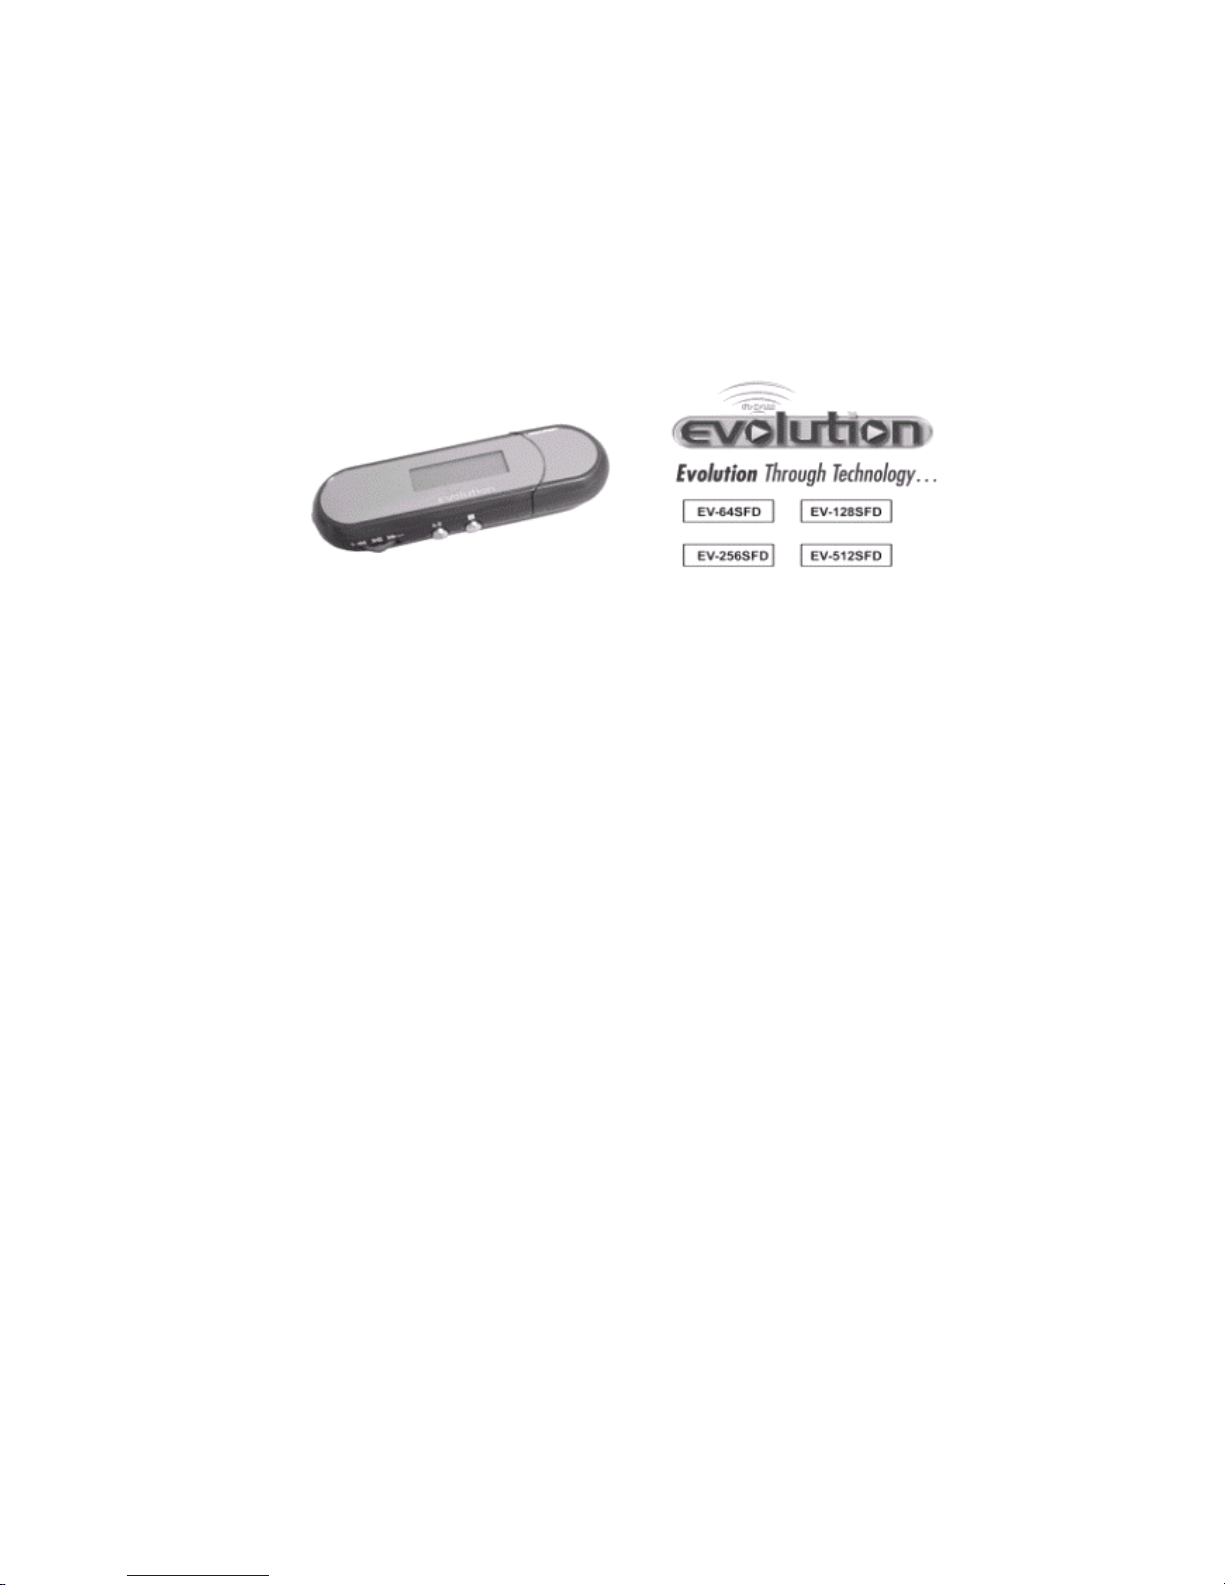
Thank you for choosing Evolution Technologies Inc. exciting new digital
product, the EV- 64SFD/EV-128SFD/EV-256SFD/EV-512SFD, your Digital
MP3 Player and Storage Device with FM Receiver. The
EV- 64SFD/EV-128SFD/EV-256SFD/EV-512SFD contains
64MB/128MB/256MB/512MB Flash Memory. This device features a Digital
Voice Recorder & FM Receiver.
For optimum performance please read the User Manual carefully
before operating your player .
Page 2
FEATURES
The EV- 64SFD/EV-128SFD/EV-256SFD/EV-512SFD is a portable 4-in-1
device.
* 64/128/256/512MB MP3 Player
* USB File storage
* FM Receiver
* Digital Voice Recorder
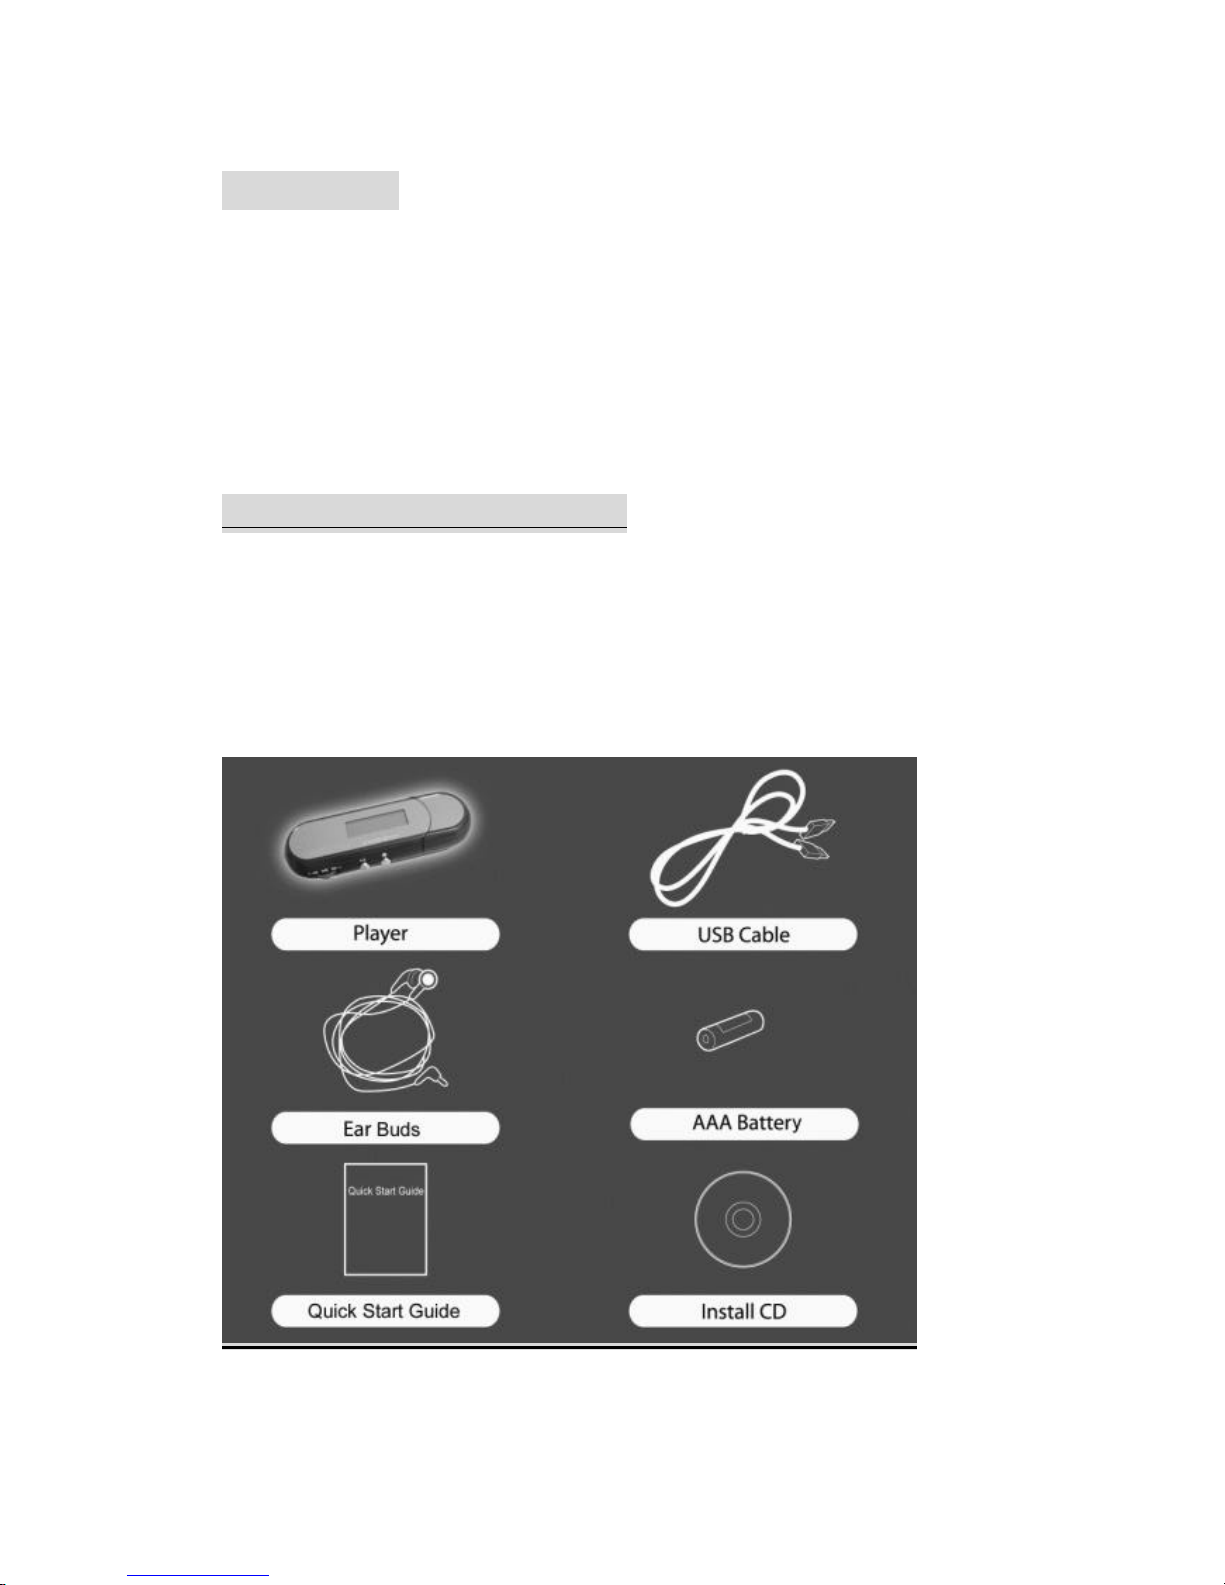
PACKAGE COMPONENTS
1. EV -64SFD/EV-128SFD/EV-256SFD/EV-512SFD Player
2. Manual & Installation CD (Music Match software included)
3. Stereo ear buds 4. USB cable
5. One AAA Alkaline battery 6. Quick Start Guide
Page 3
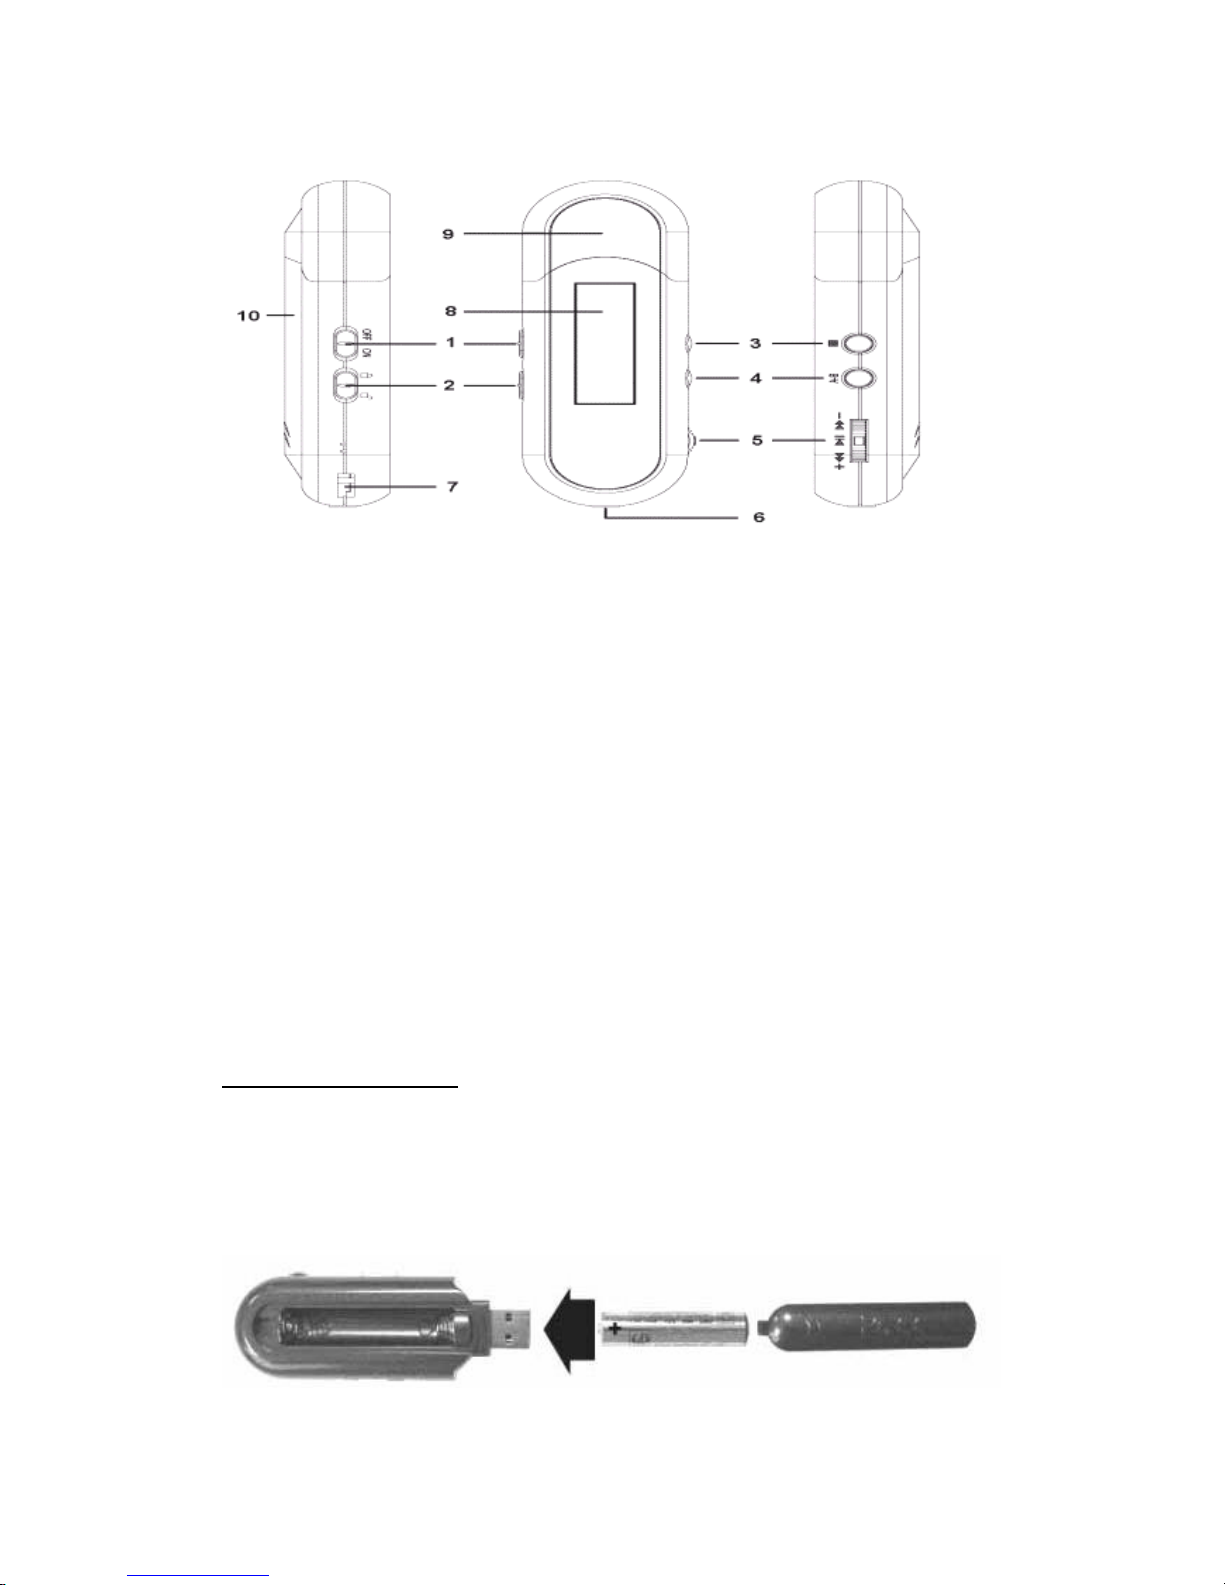
1. Power ON/OFF Switch
2. Hold Switch
3. Stop Button
4. A-B/Mode button
5. Play/Pause/Skip Button
6. Earphone Jack
7. Tether Hole
8. LCD
9. USB Jack Cover
10. Battery Cover
Installing Battery
1. Remove USB Jack Cover
2. Press and Slide open the Battery Cover
3. Insert one AAA alkaline battery
4. Close the battery cover
Page 4
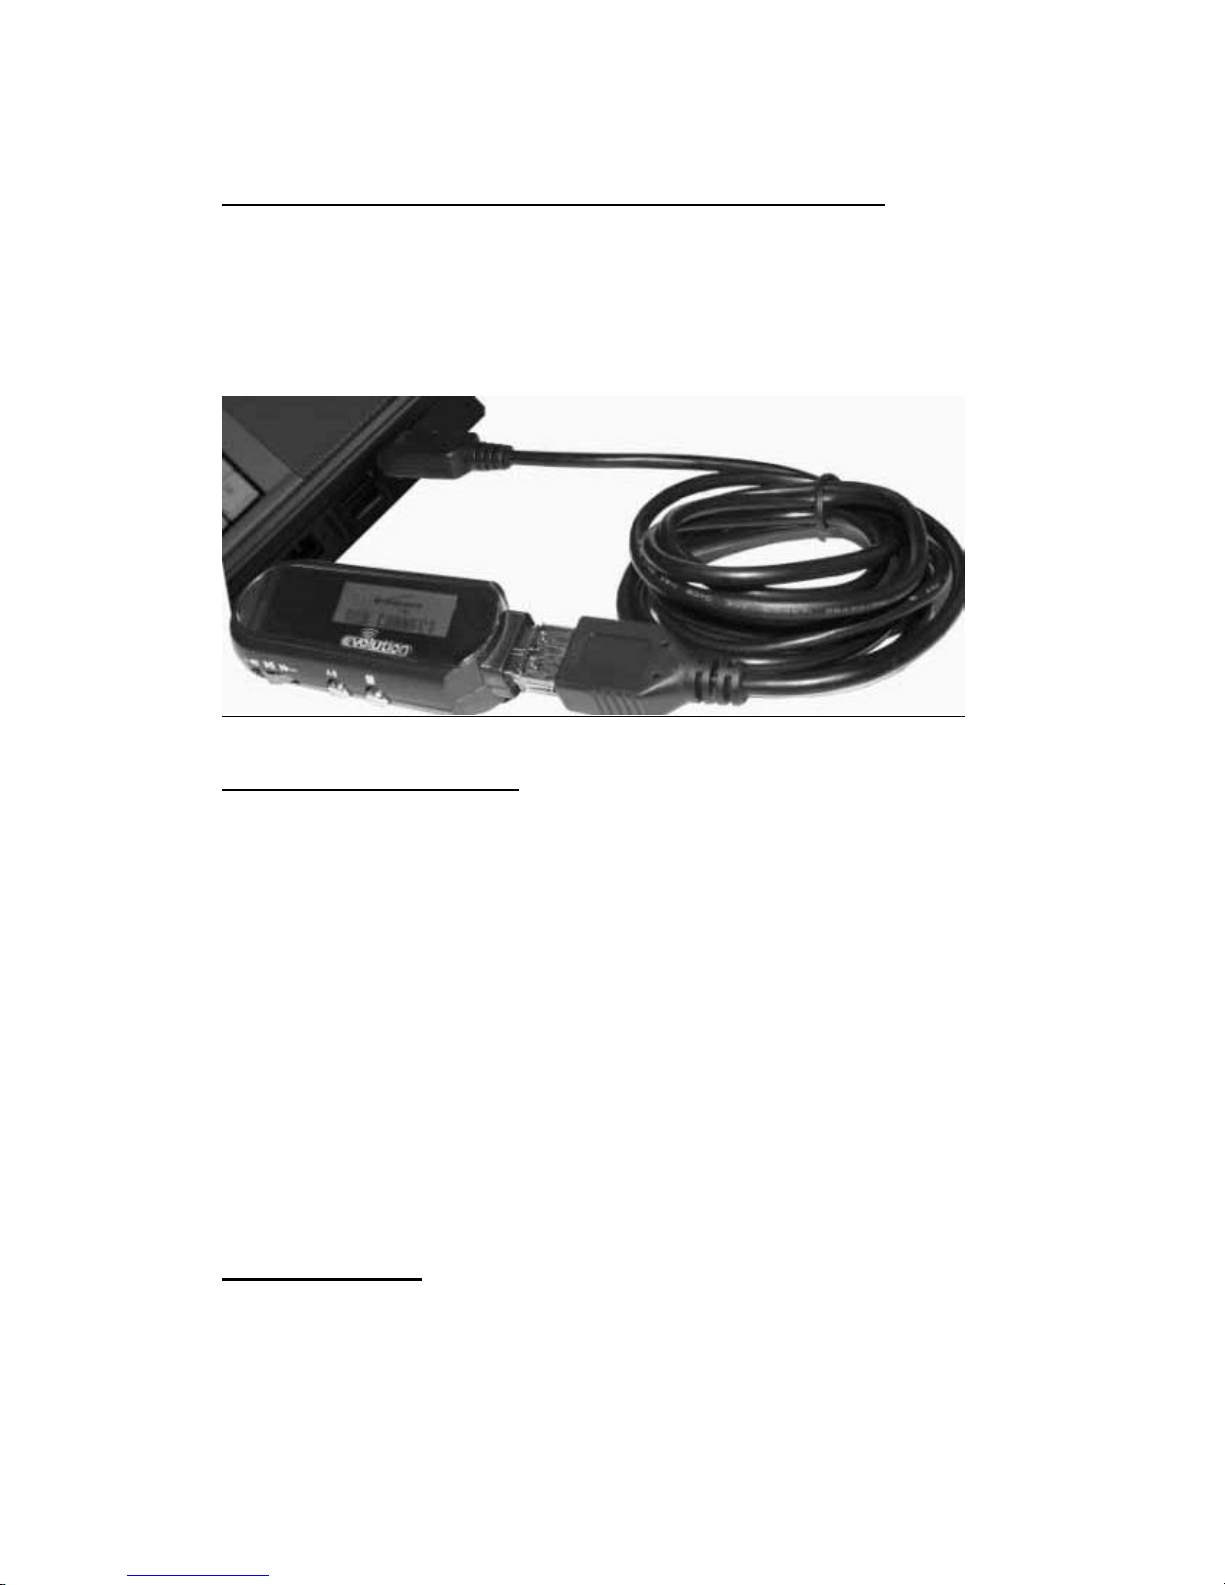
Connect to PC – (Connect your device while OFF)
1. Position your PC so that it s US B ports can be easily accessed.
2. Remove USB Jack Cover.
3. Be sure to have Hold Switch in Inactive or Disengaged Position.
4. Plug the flat USB end of the USB cable to the PC.
5. Plug the square end of the USB cable into the unit
-Or you may plug the device directly into the operating systems USB Port-
Software Installation
If you are using Windows Operating systems ME/2000/XP or Mac OS version
9.0 and higher, your player will be automatically detected as a ‘removable drive’,
without any software installation.
If you are using Windows Operating systems 98 or 98SE, you will need to
install the driver s from the bundled installation disc.
Installation of Driver Files for Windows 98 or 98SE
1.Place the installation disc into your disc drive.
2.Connect the unit to PC.
3.The player will be detected as a new hardware.
4.Following the installation instructions.
5.Restart Your Operating System .
6.Remove Installation CD.
Begin to Play
-Place Power ON/OFF switch into the ON position.
-Press A- B Button to enter main menu.
-Use Skip Button to select between modes and press PLAY Button.
Page 5
Use as an MP3 player
1.Download MP3 files to the unit. This will be done by dragging and dropping
or copying and pasting MP3 files from a saved location on your hard drive to
the removable drive. The removable drive, which represents the internal
memory of your player, will be identified with a listing of all associated drives
on your operating system. Opening the ‘My Computer’ icon on your desktop
normally accesses this listing of drives.
{For Additional Information On Copying and Pasting or Dragging and
Dropping of Files see description below}
2.Following file transfer, unplug the USB Cable from the unit.
DO NOT DISCONNECT THE PLAYER WHILE THE LCD DISPLAYS
“USB BUSY ”
3.Connect the stereo ear buds to earphone jack
4.Place Power ON/OFF Switch to ON position.
5.The unit will play MP3 files automatically.
6.To turn the player off, place Power ON/OFF switch to OFF position.
NOTE: Pressing the Stop button won’t shut off the player.
Copying and Pasting
-Select a file from a saved location on your hard drive and right-click on the file.
-From the pop up menu you will have the option to ‘COPY’. Select this option
for this particular file.
-Access the ‘Removable Drive’ by Double Left clicking the image of the drive.
-Right-click in Removable Drive Window and select ‘Paste’. A copying window
will appear while the LCD displays” USB BUSY”
When download is over, the LCD will display ‘USB CONNECT’, it will now be
safe to disconnect your player.
Please follow the Remove Hardware Instruction s specific to your
Page 6

Operating system to safely remove the Player
USB Storage Device
1.Download files to the unit. This will be done by dragging and dropping or
copying and pasting files from a saved location on your hard drive to the
removable drive. The removable drive, which represents the internal memory
of your player, will be identified with a listing of all associated drives on your
operating system.
-Select a file from a saved location on your hard drive and right-click on the file.
-From the pop up menu you will have the option to ‘COPY’. Select this option
for this particular file.
-Access the ‘Removable Drive’ by Double Left clicking the image of the drive.
-Right-click in Removable Drive Window and select ‘Paste’. A copying window
will appear while the LCD displays” USB BUSY”
When download is over, the LCD will display ‘USB CONNECT’ it will now be
safe to disconnect your player.
Please follow the Remove Hardware Instruction s specific to your
Operating system to safely disconnect the player.
Upload Files to PC
1.Connect Device to Operating system
2. Right-click to open the Removable Disk.
3.Select the files from your device, which you would like to upload, and right
mouse-click on the file(s)
4.Select COPY from the right-click menu.
5.Right mouse-click in the selected area of your hard drive to which you would
like to upload your files
6.Select PASTE from the right-click menu.
D O NOT DISCONNECT THE PLAYER WHILE THE LCD DISPLAYS
“USB BUSY ”
Page 7

Please follow the Remove Hardware Instruction s specific to your
Operating system to safely disconnect your player.
Be sure to right click to stop Removable Device, and then click OK. Do not
remove the unit until suggestion you “USB Mass storage device can be removed
safely now ” .
Voice Recorder
Voice Recording
Select [Record Mic] in main menu and press A-B button to enter Voice
Recording Menu. Select [Start REC], the player starts voice recording.
When you want to stop the voice recording function, press STOP button.
The voice messages are recorded on the built-in memory in the order of
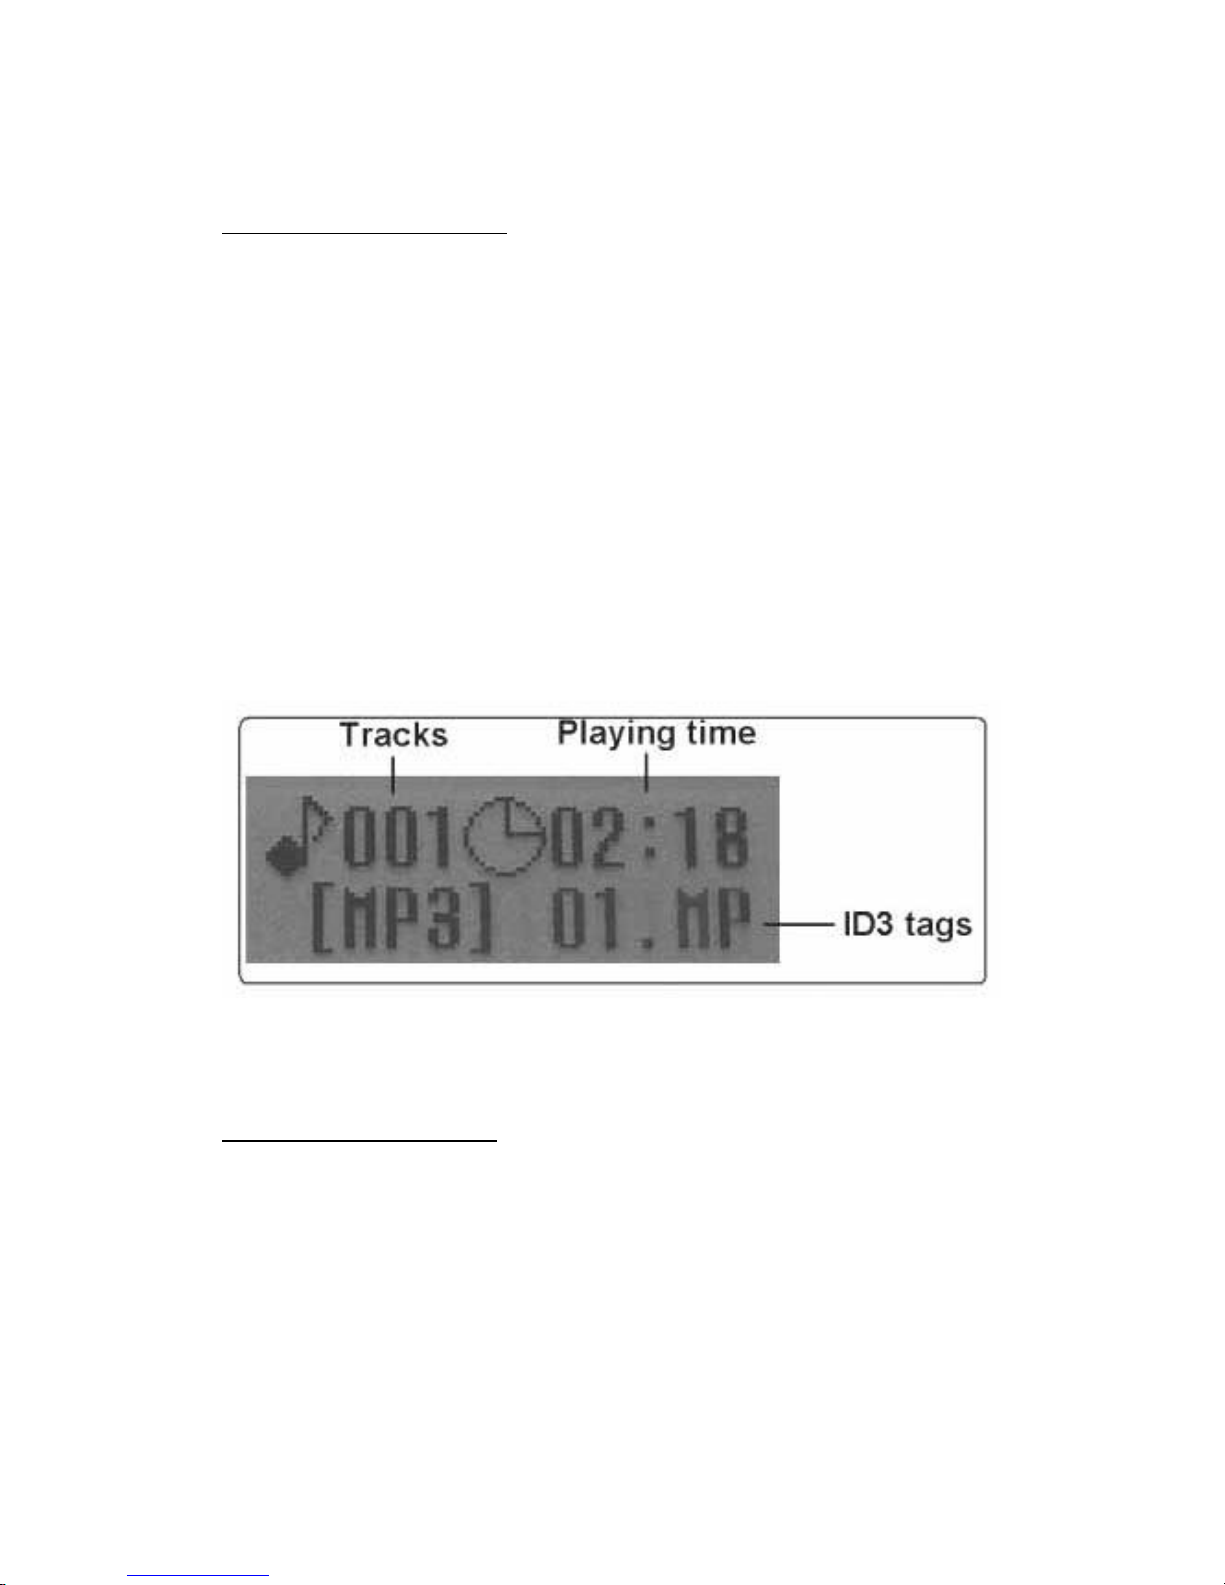
VOICE000.WAV, VOICE001. WAV…VOICE999.WAV.
The record time is displayed on LCD as 00:01,00:02…
Playback voice file
Select [Play REC ] in Record MIC Menu and press PLAY button.
The device will playback the latest voice file recorded automatically.
Press STOP button to stop.
Use SKIP button to select the voice file and press PLAY button to play.
Press A-B button to exit Play REC Mode and back to Record MIC Menu.
To exit Voice Recording Mode to Play Music Mode, select MP3 Play in menu
then press PLAY button.
Erase voice file
-Connect the unit to PC.
-Select the voice files that you want to erase, then right-click on the files.
-Select DELECT in right-click menu.
-Unplug the device when delete is complete. Unplug the cable when the LCD
displays ”USB CONNECT”
Page 8

FM Receiver
How to listen to FM Radio
-To switch to the FM radio mode, please select [FM TUNER] from main menu
and press the PLAY button to listen.
-Use SKIP button to select the station you prefer.
-To exit FM radio mode to Play Music mode, press A-B button and select MP3
Play in menu, then press PLAY button.
Tuning an FM Station
-Select AUTO SEARCH in FM Tuner Menu, press the PLAY button, the player
will find the nearest station .
-To tune manually, select MANUAL mode. Press SKIP button. Pressing the
SKIP button will change the frequency by +/ - 0.05 MHz.
How to save an FM Station to Preset list
After you have tuned an FM station, exit FM Tuner mode to Play Music mode.
By exiting the FM mode the player will save your selected station to preset list
automatically.
Note: If the player is turned off while listening to the FM Radio, the station will
not be saved to Preset list.
The unit can
save 10 preset stations.
Page 9

Other Functions and Settings
Repeat mode
There are 2 Repeat mode s:
1.Normal Play
2.Repeat All: This mode will play all MP3 files repeatedly.
Repeat AB
1.When first pressing A-B button, A- will flash on LCD.
2.When second pressing A- B button, AB will flash on LCD.
The player will play this section of your selected track repeatedly.
3.To exit Repeat AB mode, press A-B button a third time.
4.Press Stop button and A-B button to enter Main Menu.
Page 10

Equalizer
There are 6 EQ mode s:
1. EQ -FLAT 2. EQ -BASS
3. EQ -ROCK 4. EQ -POP
5. EQ -CLASSIC 6. EQ -JAZZ
Use the Skip button and the Play button to select your preferred EQ mode.
Volume
The volume range is 00 to 15.
Push Skip button to turn volume up or down.
NOTE: The volume of FM Radio can only
be adjusted by the volume adjustment on ear buds
LCD Contrast
The LCD Contrast can be adjusted
from10 to 30 by pushing the Skip button.
The recommended LCD Contrast is 22.
Backlight
There are 7 Backlight Modes:
1.Light 3SEC 2.Light 5SEC
3.Light 10SEC 4.Light 15SEC
5.Light 30SEC 6.All Light
7.Light Blank
The recommended Backlight mode is Light 3SEC.
Format Flash
Press Play button to start format flash. The LCD displays “Format…Please wait”.
When Format Flash is complete, the LCD displays “NO MP3 FILE”.
Page 11

Technical Specifications
Memory size:
Flash Memory: 64MB, 128MB, 256MB, 512MB.
Interface:
USB plug A TYPE.
LCD Display:
96*32 graphic LCD with Electro- Luminescent Backlight.
Power supply:
u One AAA alkaline battery for MP3/WAV playback and FM
Receiver.
u
Use USB Bus power while plugging into PC USB port.
S/N ratio:
> 85 dB
Frequency response:
20Hz ~ 20KHz
Maximum output:
Stereo output 32 OHM /15mW+15mW(Max)
EQ:
FLAT, BASS, ROCK, POP, CLASSIC, JAZZ.
Audio Codec support:
MPEG 1.0/2.0 Layer3
FM:
u 76MHz ~ 108MHz
u 10 station preset support
Voice Recording:
Encoding to ADPCM format.
Page 12

FAQ
1. What is an MP3 File?
MP3 is the abbreviation for Moving Picture Experts Group (M PEG) Layer3, a
type of audio data compression technology that can reduce digital sound
files by as much as one-twelfth of their original size, with virtually no loss in
quality. It is an efficient way to store high- quality music or other audio
content on y our computer.
These MP3 files usually have the extension .mp3, and can be downloaded
from the Internet, or are legally produced for personal use form original
audio CDs. It is illegal to encode MP3 files for trade or sale unless you have
he expressed and explicit permission of the copyright holder.
2.How many MP3 files can my player hold?
EV-64SFD: 15 MP3 tracks.
EV-128SFD: 30 MP3 tracks.
EV-256SFD: 60 MP3 tracks.
EV-512SFD: 120 MP3 tracks.
3.Howmany minutes of recorded voice files will my player hold?
EV-64SFD: about 128 minutes. (with memory empty)
EV-128SFD: about 256 minutes.
EV-256SFD: about 512 minutes.
EV-512SFD: about 1024 minutes.
4.How long does the battery last?
Up to 13 hours with only one AAA battery
5.How can I use my player with a Macintosh?
If you are using Mac OS 9.0 up, just connect the player to your PC, the player
will be detected and install one general driver. The built- in flash memory of
the player will appear in “My Computer” as one Removable Disk. After it is
finished, you can upload, download and manage the files in the player.
Page 13

Troubleshooting
1.Nothing is displayed on the LCD.
Please check whether your batteries have made proper contact. Please check
whether you have placed the Power ON/OFF switc h into the ON position.
2.My player will not turn on.
Please verify the strength of your battery.
Please check whether you have placed the Power ON/OFF switch into the ON
position.
3.Player will not play music.
Please check whether you have placed the Pow er ON/OFF switch into the ON
position.
Please check whether MP3 files are stored on the unit.
4.Buttons do not function.
Please check whether you have placed the LOCK/UNLOCK or HOLD switch
into the UNLOCK position.
5.I cannot get the music downloaded to th e unit.
Please verify that the USB cable is making proper contact.
Please check whether you have placed the LOCK/UNLOCK or HOLD switch
into the UNLOCK position.
Please confirm that enough memory is available to transfer the desired
information.
6.My FM Receiver is not working.
Shield Effect in building or elevator may weaken the FM signal.
7.The volume of my player is not working?
Push Skip button to turn volume up in Volume Menu.
Page 14

Memory size and audio quality
The MP3 memory size and MP3 quality are related. The higher quality
required, the higher the bit-rate needed. This leads to more data storage
and memory requirements. The amount of memory required for the player
is proportional to audio playback time.
Page 15

Evolution Technologies, Inc. Warranty Information
A. Extent of Limited Warranty
1. Evolution Technologies, Inc. warrants to the end user customer that Evolution
Technologies, Inc. products will be free from defects in materials and workmanship for
the duration of 150 days, which begins on the date of purchase by the customer.
Customer is responsible for maintaining proof of date of purchase.
2. For software products, Evolution Technologies, Inc. limited warranty applies only to a
failure to execute programming instructions. Evolution Technologies, Inc. does not
warrant that the operation of any product will be uninterrupted or error free.
3. Evolution Technologies, Inc. limited warranty covers only those defects which arise as
a result of normal use of the product, and do not apply to any:
1. Improper or inadequate maintenance or modification;
2. Software, interfacing, media, parts, or supplies not provided or supported by
Evolution Technologies, Inc.; or
3. Operation outside the product's specifications.
4. If Evolution Technologies, Inc. receives, during the applicable warranty period; notice
of a defect in any hardware product, which is covered by Evolution Technologies, Inc.
warranty, Evolution Technologies, Inc. shall either repair or replace the defective
product at Ev olution Technologies, Inc. option.
5. If Evolution Technologies, Inc. is unable to repair or replace, as applicable, a defective
product which is covered by warranty, Evolution Technologies, Inc. shall within a
reasonable time after being notified of the defect, refund the purchase price for the
product.
6. Evolution Technologies, Inc. shall have no obligation to repair, replace or refund until
the customer returns the defective product to Evolution Technologies, Inc.
7. Any replacement product may be either new or like new, provided that it has
functionality at least equal to that of the product being replaced.
8. Evolution Technologies, Inc. limited warranty is only valid in the country of original
purchase.
9. All United States customers requesting warranty repairs are responsible for all
shipping charges to Evolution Technologies, Inc. Evolution Technologies, Inc. will
cover return shipping.
10. All Non United States customers requesting warranty repairs are responsible for all
shipping charges, customs, duties and brokerage fees to and from Evolution
Technologies, Inc.
B. Limitations of Warranty
1. To the extent allowed by local law, neither Evolution Technologies, Inc. nor its third
party suppliers make any other warranty or condition of any kind, whether express or
implied, with respect to the Evolution products, and specifically disclaim the implied
Page 16

warranties or conditions of merchantability, satisfactory quality, and fitness for a
particular purpose.
C. Limitations of Liability
1. To the extent allowed by local law, the remedies provided in this Warranty Statement
are the customer's sole and exclusive remedies.
2. To the extent allowed by local law, except for the obligations specifically set forth in
this warranty statement, in no event shall Evolution Technologies, Inc. or it's third
party suppliers be liable for direct, indirect, special, incidental, or consequential
damages, whether based on contact, tort, or any other legal theory and whether
advised of the possibility of such damages.
D. Local Law
1. This Warranty Statement gives the customer specific legal rights. The customer may
also have other rights that vary from state to state in the United States, from province
to province in Canada, and from country to country elsewhere in the world. To the
extent that this Warranty Statement is inconsistent with local law, this Warranty
Statement shall be deemed modified to be consistent with such local law. Under such
local law, certain disclaimers and limitations of this Warranty Statement may not
apply to the customer. For example, some states in the United States, as well as some
governments outside the United States (including provinces in Canada), may:
1. Preclude the disclaimers and limitations in this Warranty Statement from
limiting the statutory rights of a consumer (e.g., the United Kingdom);
2. Otherwise restrict the ability of a manufacturer to enforce such disclaimers or
limitations; or grant the customer additional warranty rights, specify the
duration of implied warranties which the manufacturer cannot disclaim, or
not allow limitations on the duration of implied warranties.
Page 17

 Loading...