

Page 1

A USB VGA Display Port
Quick Install Guide
Supports UV 12, UV 16 and UV 19
®
Page 2

Introduction
EVGA’s UV Plus+ gives you the ability to use multiple displays by utilizing a USB 2.0 port on your
laptop or PC. Each monitor will need either a UV 12, UV 16 or UV 19. Up to 6 UV Plus+ devices can
be used at the same time allowing multiple displays through CRT and LCD monitors, or a
Projector. With the ability to Mirror or Extend your desktop up, down, left, or right, EVGA’s UV Plus+
gives you full freedom to move about your virtual work space.
System Requirements:
• An available USB 2.0 port
• Windows® 2000, XP 32-Bit, Vista or 7
• CD-ROM or DVD-ROM if using the provided installation CD
• 30 MB of free disk space
• 1.2 GHz or higher processor
• 512 MB of system memory (1 GB or more is recommended)
UV 12
Package Contents:
Your EVGA UV Plus+ device will have the following optional items included
in this package:
1 x DVI to VGA Adapter
1 x USB Cable
1 x Installation CD for Drivers and Software
1 x Travel Case
UV 16
UVPlus+ Supports:
Windows Aero
32-Bit Color Depth
Widescreen Aspect Ratio
Ability to Clone or Extend
VGA, DVI, and FPI Display Connections
High-Definition Displays
UV 19
Page 3
The Following Resolutions
are Supported:
Resolutions may vary depending on your displays capabilities.
• 800x600, 1024x768, 1280x768, 1366x768,
1280x1024, 1440x900, 1400x1050
Supported on UV 12, UV 16, and UV 19
• 1680x1050, 1600x1200
Supported by UV 16 and UV 19 models only
• 1920x1200, 2048x1152
Supported by UV 19 model only
DVI connection
Hardware and Driver Setup:
1 – Power on your Laptop or your monitor and PC to begin the installation.
2 – Once in Windows, install the UV Plus+ drivers from the provided
installation CD. After the installation process has finished reboot your
computer.
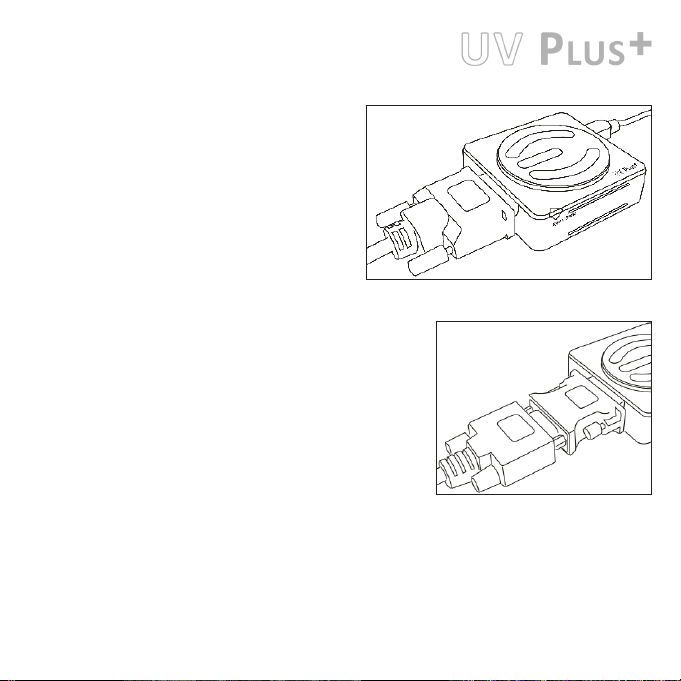
3 – Attach your monitor’s DVI connector to UV Plus+ (a DVI to VGA connector
is provided if needed)
4 – Plug in the provided USB cable to UV Plus+ and the other end to your
Notebook or PC’s USB port. The UV Plus+ software will now detect your
attached display.
5 – Right-click the EVGA icon in the Windows System Tray to configure how the attached monitor should display.
A DVI to VGA Adapter is provided to allow a VGA connection to the UV Plus+ DVI connection. A USB Extension cable is
also provided to allow for optimum placement of your UV Plus+.
DVI to VGA Adapter
Page 4

FAQ:
Question: Will the UV Plus+ attached monitor render full 3D hardware rendered graphics when in Mirror or Extended
Modes?
Answer: Yes, full 3D hardware rendered graphics can be displayed while in Mirror or Extended Modes, however running
in such a configuration is limited as the application in use may become slower or not as responsive.
Question: Discoloration and constant flickering occurs through the UV Plus+ attached monitor.
Answer: Check that your monitor’s cable is properly attached and check for loose or faulty cables. If the problem
continues, please contact EVGA Support at (888)-880-EVGA (3842)
Question: Why do I experience lag and delay when playing a 3D hardware accelerated game in either Mirrored or
Extended mode?
Answer: USB 2.0 is limited to a 480Mbps transfer speed and because of this limitation only so much data can pass
through at one time. This causes a delay that can both be seen and felt when playing a game when using the UV Plus+
device.
Question: How many monitors are supported when using UV Plus+?
Answer: The maximum amount of monitors supported is 6. Note that due to current driver limitations, only a maximum
of 4 monitors can be used with an NVIDIA® based graphics card.
Question: How can I stay updated with the latest UV Plus+ software releases?
Answer: The UV Plus+ software that installs on to your computer has a built in Auto Update feature which will
automatically check for any updates and then prompt you accordingly. You can right click the UV Plus+ icon in the
Windows System Tray and select Updates to either configure how your computer updates or to manually check for
an update.
Question: How do I uninstall UV Plus+ software?
Answer: In Vista/7 click Start Control Panel Uninstall a program Select EVGA UV Plus+ and select Uninstall.
In XP or 2000 click Start Settings Control Panel Add or Remove Programs Select EVGA UV Plus+ and select
Uninstall.
Question: Why does my UV Plus+ attached monitor not display anything when my computer is booting up or in a DOS
based environment?
Answer: UV Plus+ will only activate in a Windows based environment. Signal will be passed to your UV Plus+ attached
monitor when the UV Plus+ software has fully loaded as part of the Windows startup process.
 Loading...