

EverFocus ECOR Series Instruction Manual
Instruction Manual
5
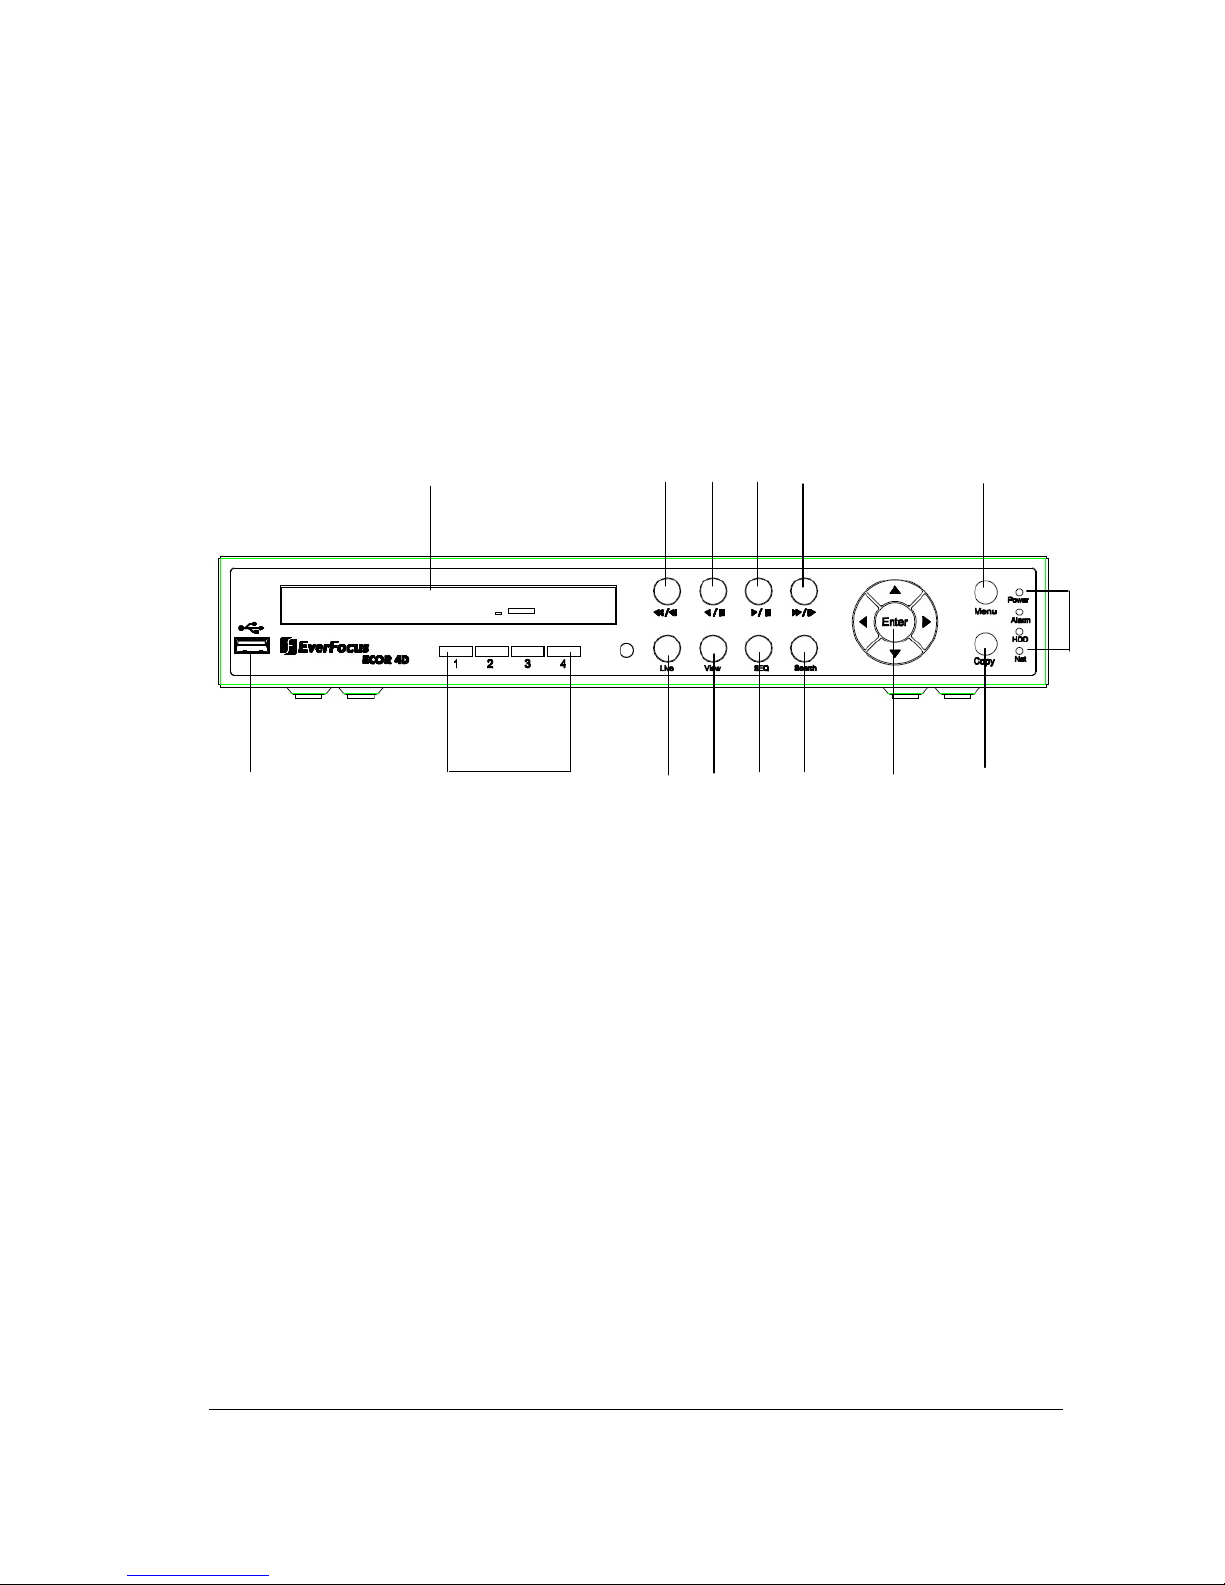
1.4 Front Panel
Your primary interaction with your new DVR will be through the Front Panel buttons and their
corresponding buttons on the included Remote Control. Take a moment to learn where the keys are as the
remainder of the manual will refer to them often.
1. USB 2.0 (front)
For connecting USB mouse or USB flash memory.
2. DVD+RW Burner
DVD+RW burner (D models only)
3. Channel Key (1~4)/(1~8)
Press channel key (CH1~CH4) / (CH1~CH8) to display that channel in full screen view.
4. Live
Press this key to show live view. Press to exit from playback mode.
5. View
Press this key to switch between 4-screen, 9-screen, Picture In Picture, and Full-screen displays in
live and playback mode.
Note1: PIP display is not available in playback mode.
Note2: 9-screen display available in 8 Channel model only
1
2
8910
11
14
15
131276543

6
6. SEQ
Press this key to enter the auto sequential switching mode. The sequence dwell time can be set in
“Display Setting” tab of the Menu. For more detail about SEQ, please see “5.8.2 Display SettingMain M/T SEQ”.
7. Search
Press this key to enter Search Menu. For more detail about Search function, please see “4.8
Search ”.
8. Fast reverse playback or step reverse playback depending on playback mode
9. Reverse playback or pause
10. Forward playback or pause
11. Fast Forward playback or step forward playback depending on playback mode
12. Enter and Arrow buttons
If you do not use a mouse, you can use these keys to change the Menu settings.
13. Copy
Press this key to enter Copy Menu. For more detail about Copy function, please see “4.7 Copy”.
14. Menu
Press this key to enter/exit MAIN SETUP MENU.
15. System LEDs
LED displays for Power, Alarm, HDD and Net active.
14
3 Mouse and Front Panel Operation
ECOR series DVR supports multiple sources to control the DVR. It can be controlled with a mouse, the
front panel, an EKB500, the handheld remote control, or serial command from RS232 port.
This chapter will cover the basic operation using mouse and front panel.
3.1 General USB Mouse Operation
3.1.1 OSD Root Menu
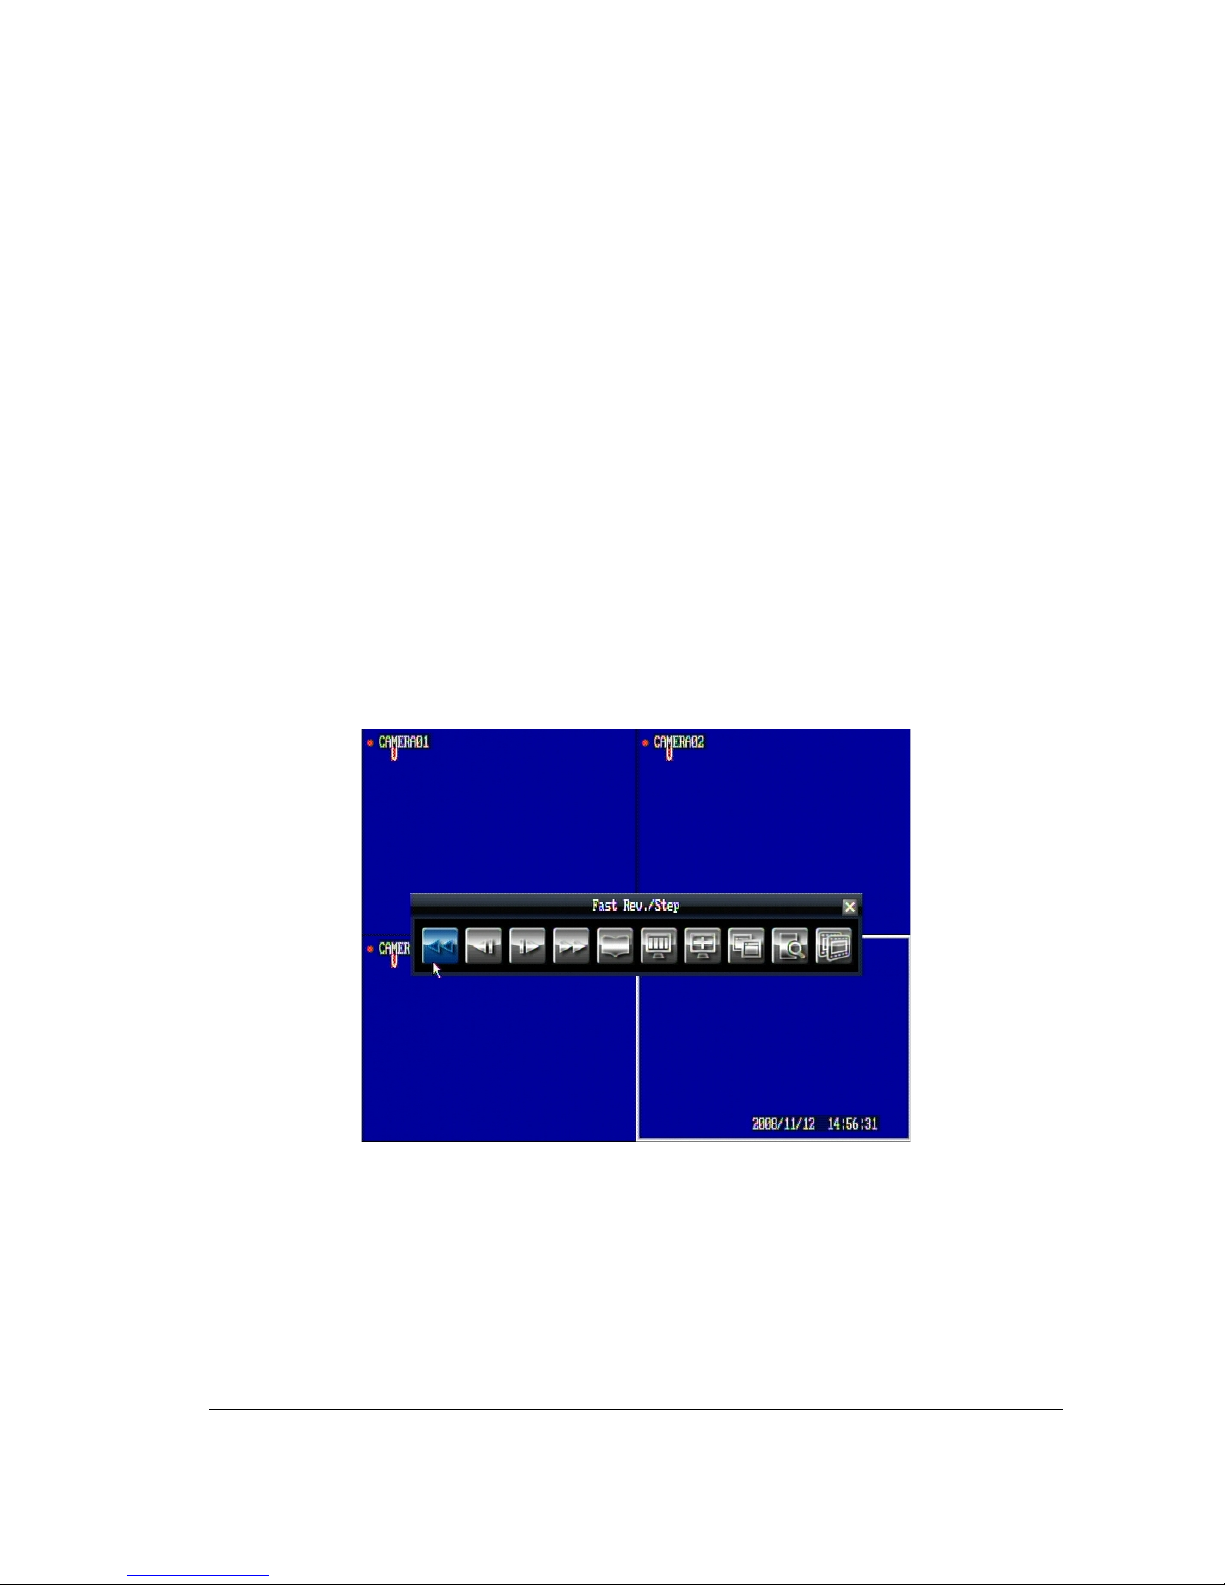
1. Right-click the mouse to obtain DVR control bar (see Figure 3.1). When you move the mouse over each
icon, the appropriate title will be displayed on top of the control bar.
Figure 3.1
2. Click on any icon to perform that action. These actions are covered in detail in Chapter 4.
3. Click the “x” sign in the top-right corner to close the DVR control bar.
Chapter
3
15
3.1.2 Operation in Configuration Menu
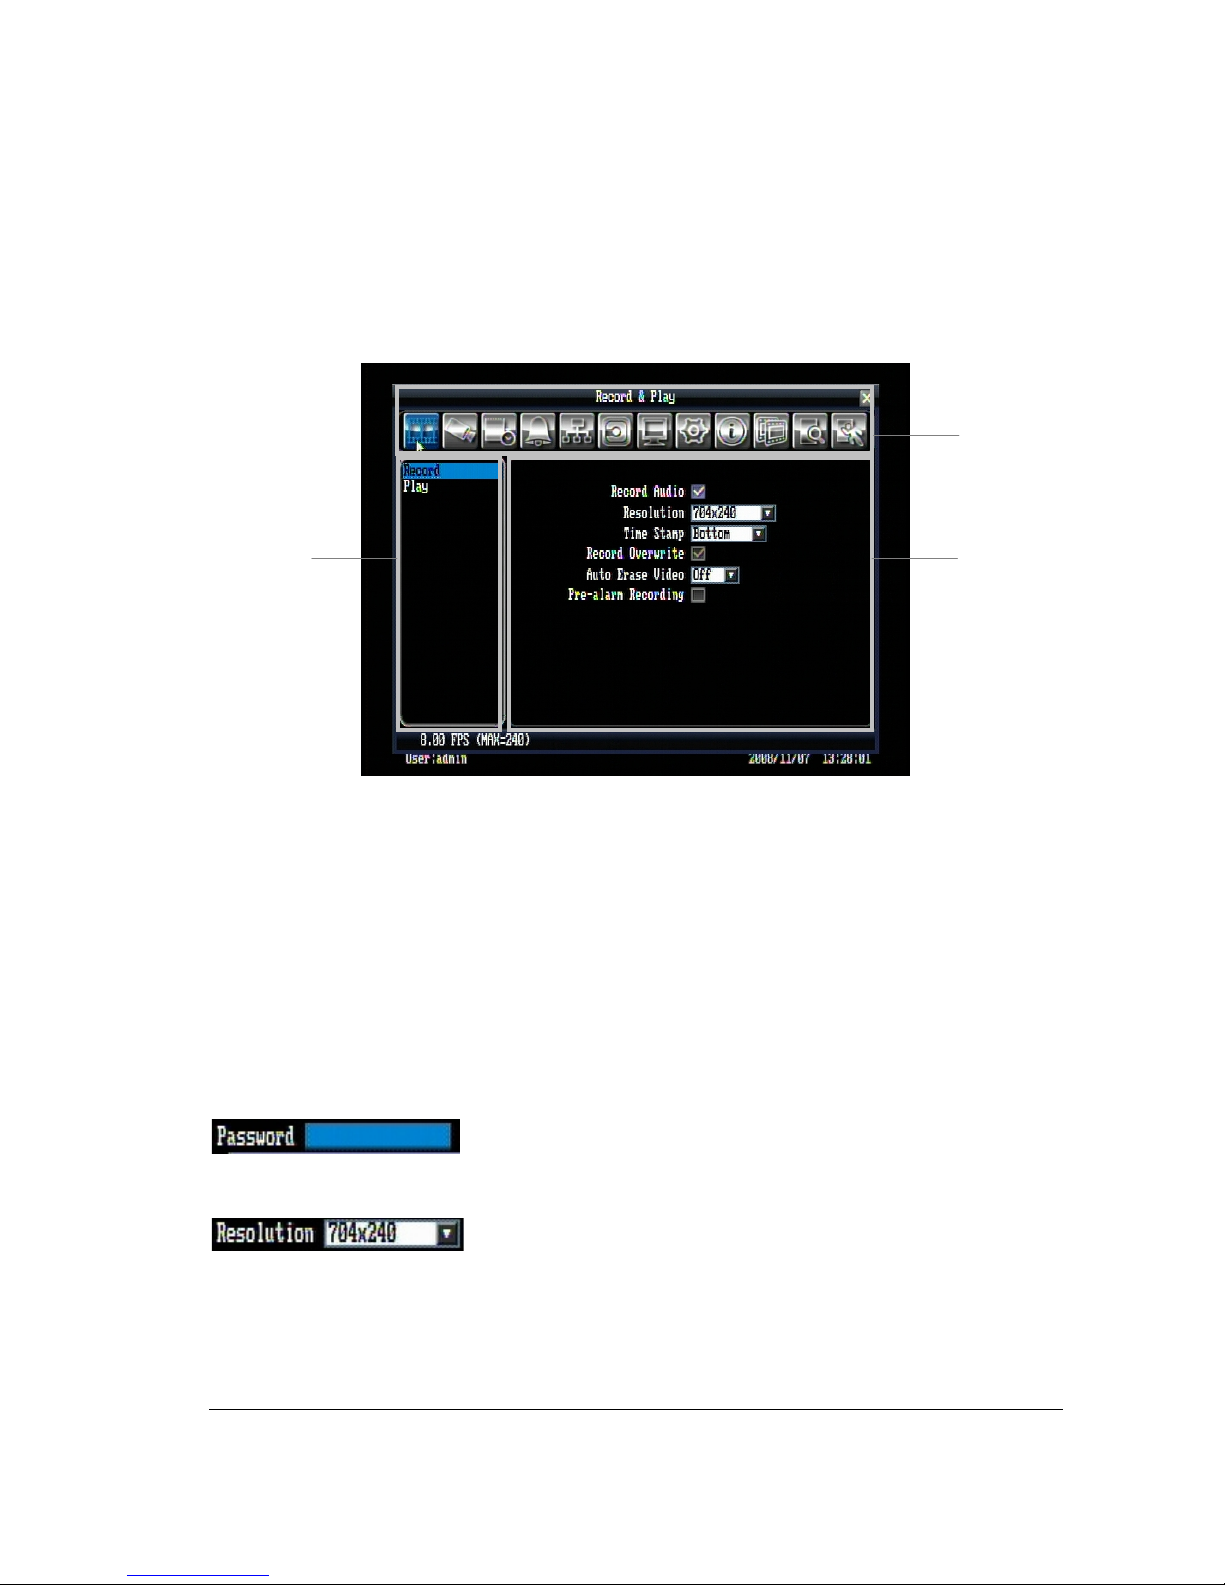
The Main menu (shown in Figure 3.2) is divided into 3 main sections.
Figure 3.2 (OSD Menu)
1In section 1, there are twelve setup options available. Move the mouse over an icon to select it.
2In section 2, the main options for the selected icon will be displayed. Click on a word to select it.
3In section 3, all the details for the selected option will be available. Click on an option to make changes.
3.1.3 Component Options
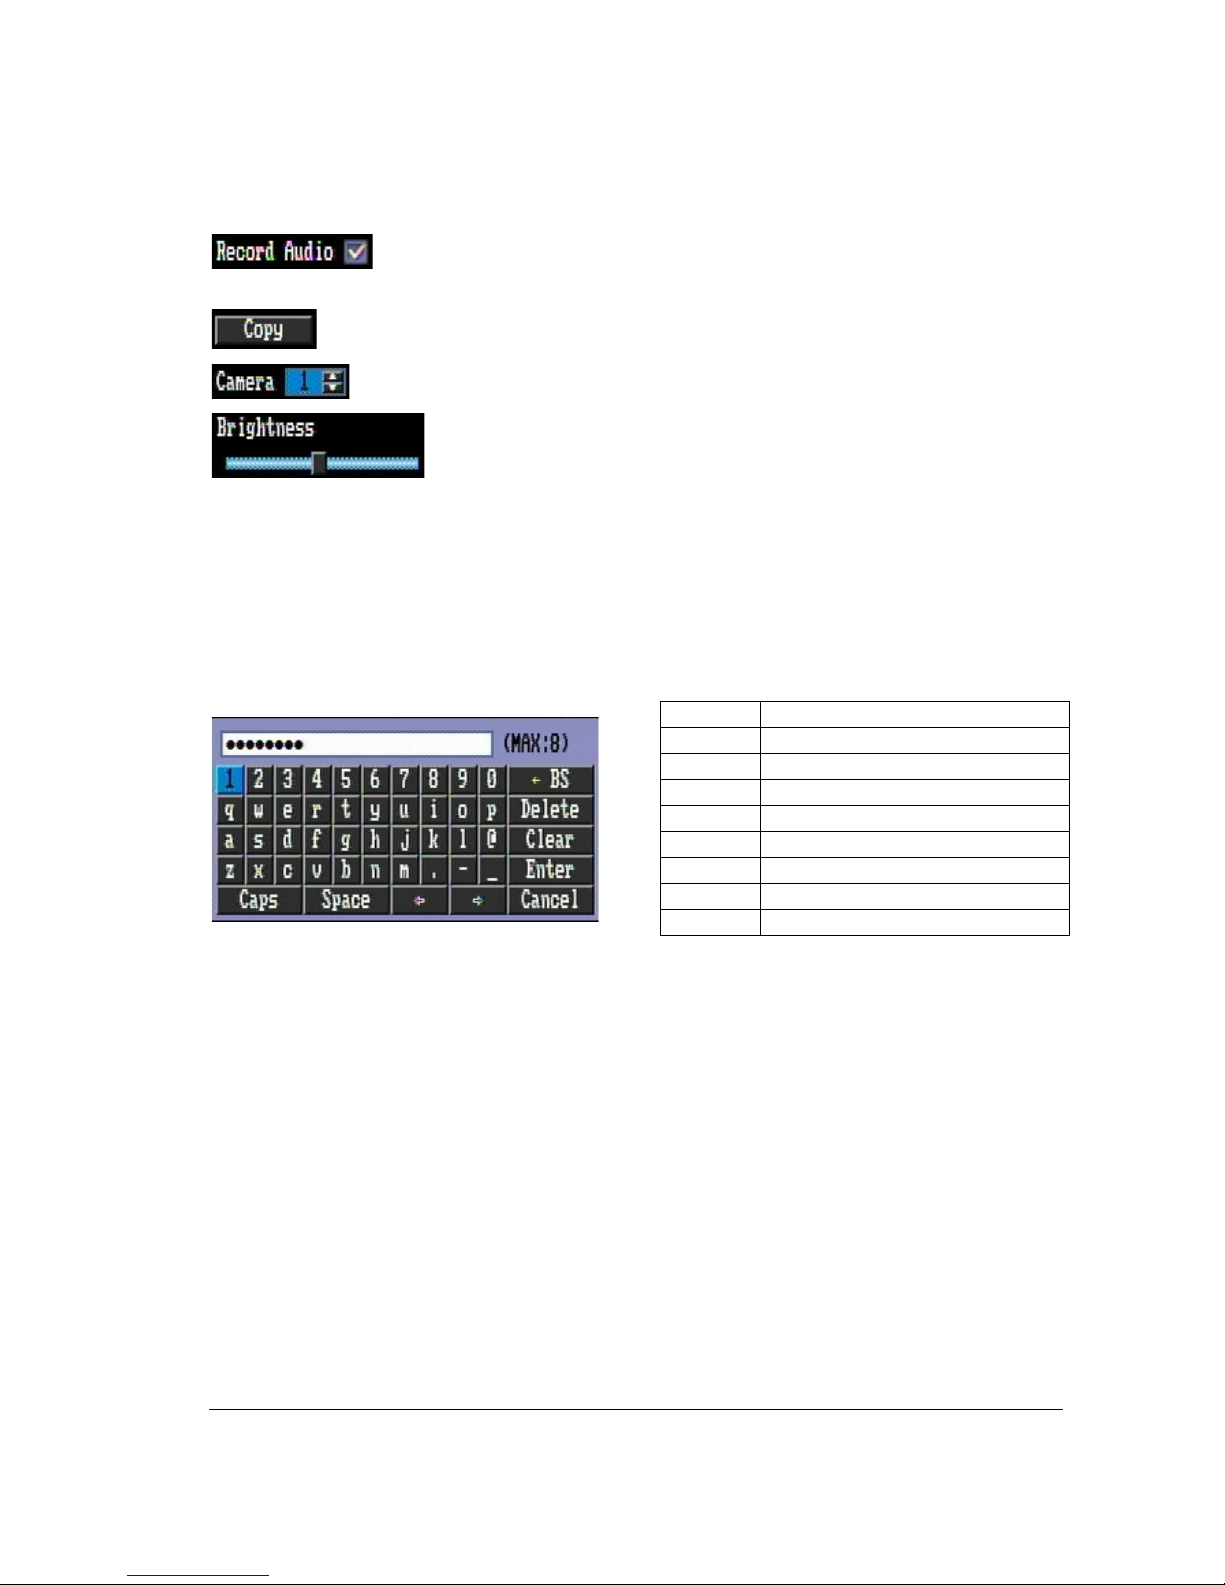
The following are examples of different fields available in the Configuration menu.
Textbox: Click on the box and an on-screen keyboard will appear below it.
(For more details about on-screen keyboard, please see “*Note about on-screen keyboard”).
Dropdown box: Click on the down arrow to see all selections, then
directly click on an option to select it.
1
3
2
16
Check box: Click on the box to check or uncheck it. Checked will enable the function,
unchecked will disable the function.
Button: Click the button to execute the function.
Selection box: Click Up/Down arrow to increase or decrease the value.
Bar: Click and hold on the bar to adjust the cursor Left or Right.
* Note about on-screen keyboard:
Click on a button to input that character.
The buttons on the right and bottom have the following functions:
<- BS
Delete the previous letter
Delete
Delete the next letter
Clear
Clear box
Enter
Confirm the selection
Caps
Switch to capital letters
Space
Enter a space
<-
Move to left
->
Move to right
Cancel
Cancel and exit from the keyboard

17
3.2 General Front Pa nel Ope rat ion
3.2.1 Front Panel Key Review
The basic principle of front panel operation is to use navigation keys (up, down, left and right) to navigate
among the menu items. Use “Enter” key to confirm a selection or enter the next level menu. Press “Menu”
key to enter the Main Menu or exit from the current level of the menu.
3.2.2 Operation in Configuration Menu
Press “Menu” button to enter the Main Menu.
NOTE: If password is active, you will need to log in first. Refer to “4.2 Login” for information on logging in.
The menu (shown in Figure 3.3) is divided into 3 main sections.
Figure 3.3 (OSD Menu)
1In section 1, there are twelve setup options available. Use the arrow keys to highlight an icon and press
“Enter” to select it.
2In section 2, the main options for the selected icon will be displayed. Use the arrow keys to highlight an
option and press “Enter” to select it.
1
3
2
 Loading...