

Page 1

User’s Guide
Mobile Phone
T28z
Page 2

Contents
at a Glance
Getting Started 3
Preparing Your Phone for Use 4
Turning Your Phone On and Off 9
Display Information and Key Functions 11
Making and Receiving Calls 14
During a Call 17
Register your new phone, purchase
Ericsson original accessories, and see the
latest in products by visiting us at:
www.ericsson.com/us/consumer
Para obtener una copia en español de esta
Guía del Usuario, visite nuestra página
Web en www.ericsson.com/phones o, si se
encuentra en Estados Unidos, también
puede llamar al 1-800-374-2776.
Ericsson T28z
First edition (August 2000)
This manual is published by Ericsson Inc.,
without any warranty. Improvements and
changes to this m anual necessitated by
typographical errors, inaccuracies of
current information, or improvements to
programs and/or equipment,may be made
by Ericsson Inc. at any time and without
notice. Such changes will, however, be
incorporated into new editions of
this manual.
© 2000 Ericsson Inc.
Publication number: AE/LZT 123 5962 R1
All rights reserved.
PrintedinUSA
Functions and Settings 19
T28z Features 20
Using the Menus 21
Your Personal Phone Book 27
Using the Call List 35
Your Voice Mail Service 37
Personalizing Your Phone 39
Sending and Receiving Text
Messages (SMS) 46
Forwarding Incoming Calls 56
Security for Your Phone and Subscription 58
Handling More than One Call Simultaneously 65
Setting Network Preferences 70
Knowing the Call Time/Call Cost 73
Using Two Voice Lines 75
Voice Control 76
Calling Card Calls 79
Sending and Receiving Fax and Data Calls 81
Extras 83
The Profile Concept 87
Accessories 90
Online Services 98
Additional Information 101
Quick Keys 102
Troubleshooting 104
Ericsson Mobile Internet 106
Glossary 107
Guidelines for Safe and Efficient Use 111
Index 123
Page 3

Please note!
Some of the services in this manual are not supported by all
networks. This also applies to the GSM International Emergency
Number 112 (or 911 in the Americas).
Please contactyour network operator orservice provider if youare
in doubt whether you can use a particular service or not.
Note! You should read the chapter Guidelines for Safe and
Efficient Use and the booklet Warranty Conditions before using
your mobile phone.
Page 4

Getting Started
Preparing Your Phone for Use 4
Turning Your Phone On and Off 9
Display Information and Key Functions 11
Making and Receiving Calls 14
During a Call 17
Page 5
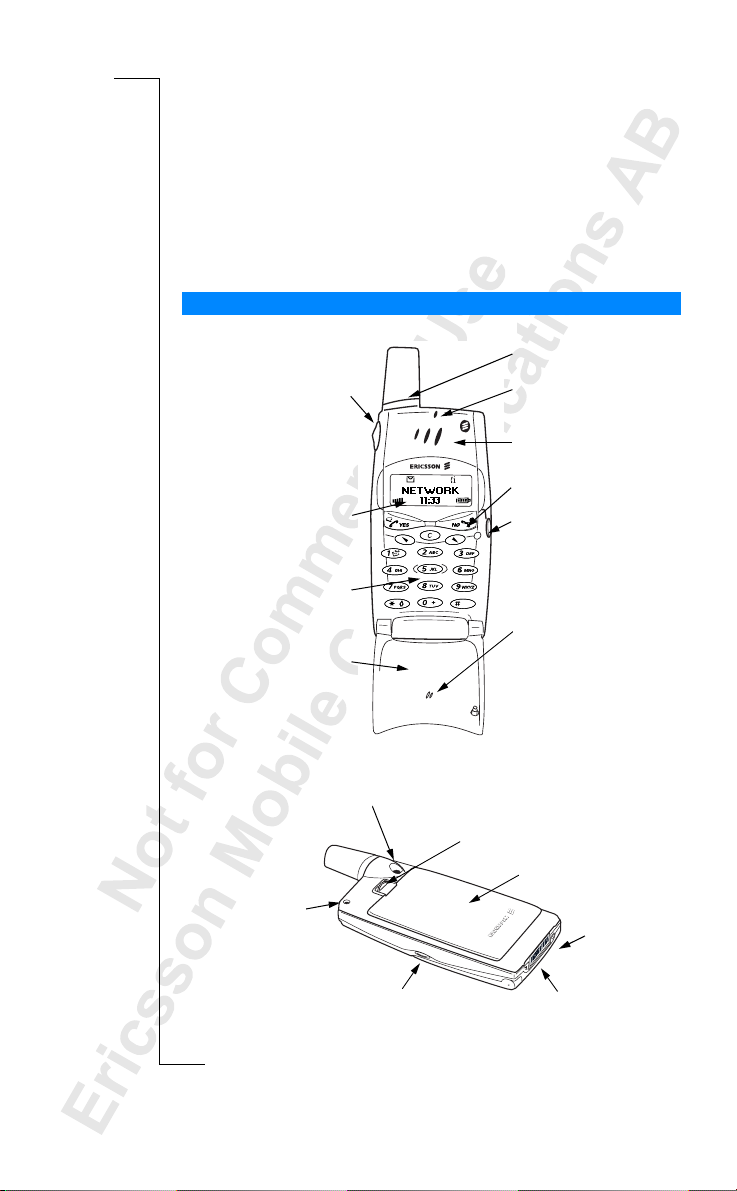
Preparing Your Phone for Use
Overview
Front
Antenna
Volume key
Back
Connector for external antenna
Hole for belt clip
Display
Keypad
Flip
Indicator light
Earpiece
Power On/Off
Flip release button
Microphone
Battery release catch
Battery
Handsfree
connector
Flip release button
4 Preparing Your Phone for Use
Charging
connector
Page 6
Assembly
You need to do the following to use your phone:
• insert the SIM card
• attach the battery to the phone
• charge the battery
The SIM Card
When you register as a subscriber w ith a network operator, you get a SIM
(Subscriber Identity Module) card. The SIM card contains a computer chip
that keeps track of yourphone number, the services included in your
subscription, and your Phone Book information, among other things.
SIM cards come in two sizes. One is the size of a credit card and the other is
smaller. Your phoneuses the smaller card. Many credit card-sized SIM cards
have a perforated smaller card that you can takeout easily.Before you can use
your phone, you must insert the SIM card as shown below.
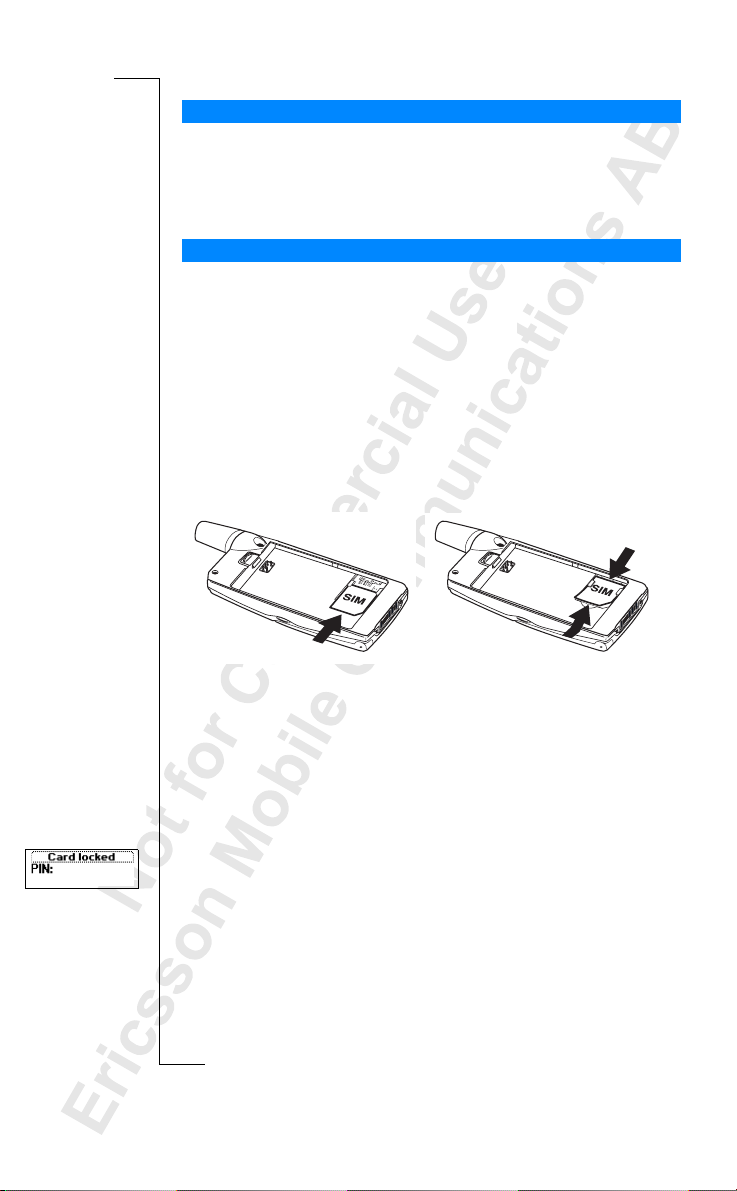
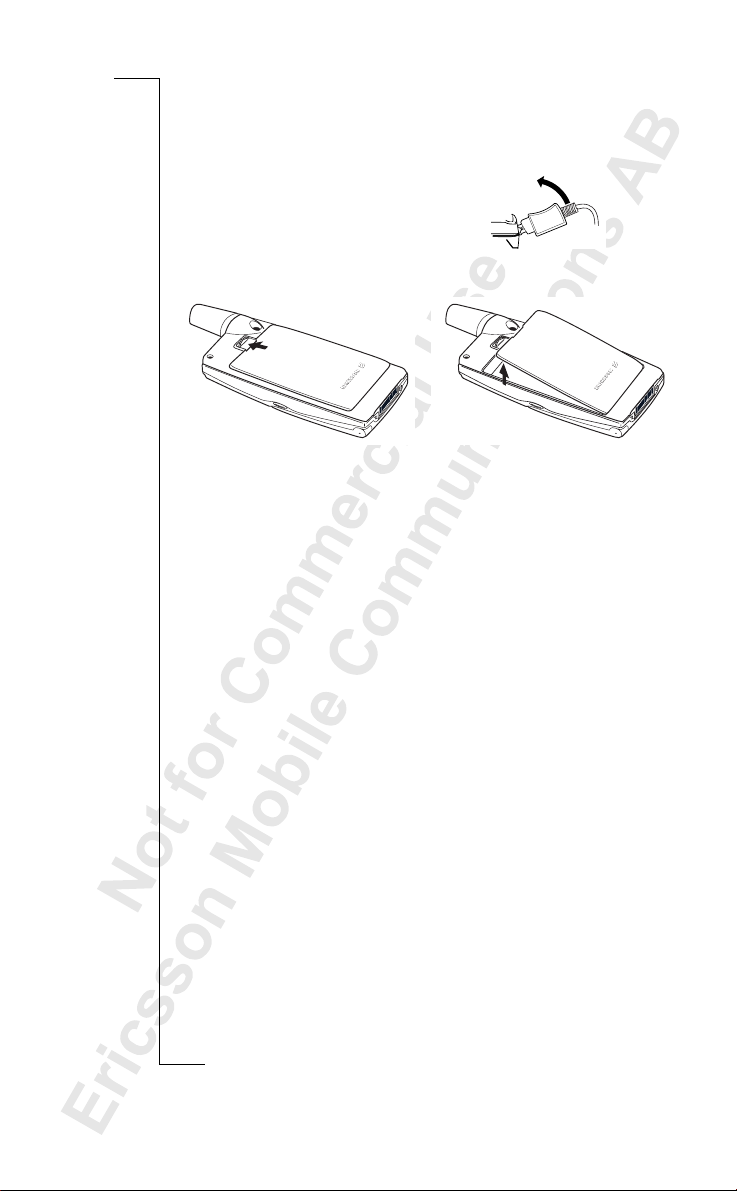
Inserting and Removing the SIM Card
1. Remove the battery if
attached. Slide the SIM card
2. Raise theedge ofthe SIM card
and slide it out.
into the slot, u nder the silver
colored holders, with the
golden connectors facing
down and the cut corner to
the right.
The PIN
Most SIM cards are supplied with a security code, a lso known as PIN
(Personal Identity Number), which you needto access the network.
Every time youturn on your phone, you are askedto enter your PIN. You will
find your PIN in the information from your operator.
Some operators may have services that require a second PIN, your PIN2.
You should be careful with your PIN, since itis your protection against
unauthorized use of your subscription.
Preparing Your Phone for Use 5
Page 7
If your PIN is entered incorrectly three times in a row, the SIM card is
blocked. If this happens, you can unlock it by using your PUK (Personal
Unblocking Key code), which you also get from your operator.
The Battery
Your T28z comes with a lithium battery. The battery is not charged when you
buy your phone, but there may be enough power to switch the phone on. We
recommend that you charge the battery up to three hours before you use the
phone for the first time.
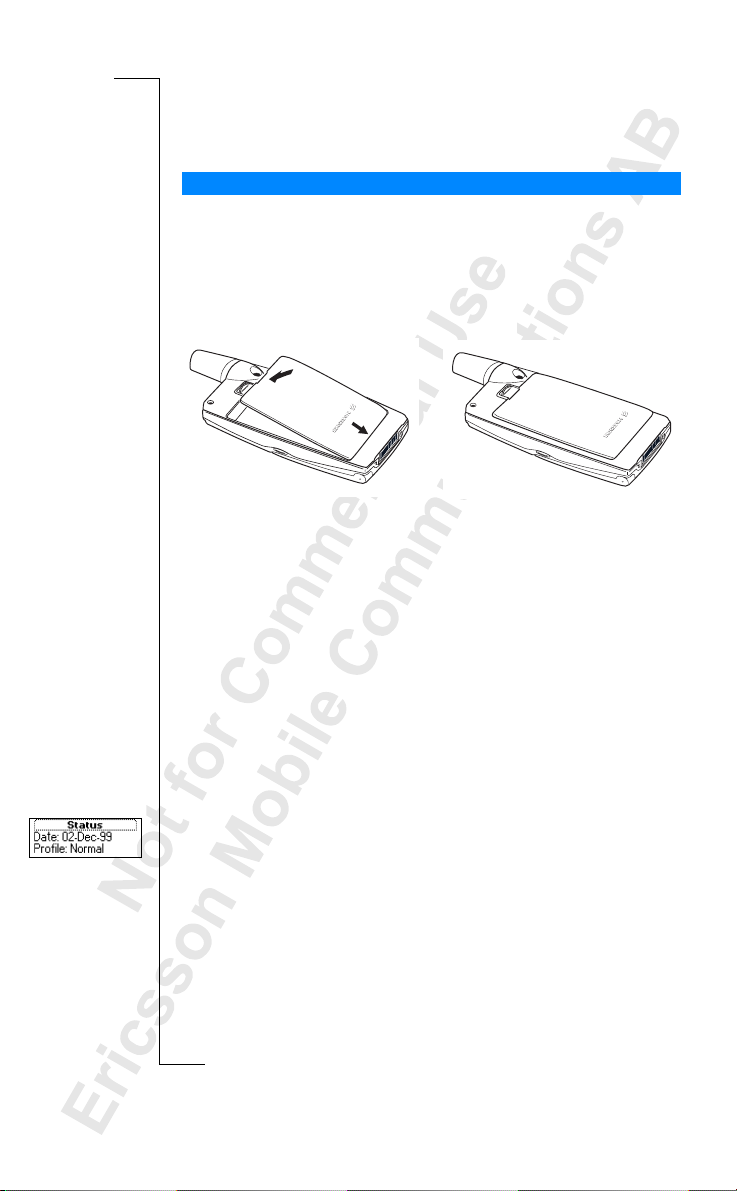
Attaching the Battery to Your Phone
• Place the battery on the back of the phone and push until you hear a click.
When to Charge the Battery
The battery that comes with your phone can be charged wheneveryou wish
without affecting its performance. You can also charge the battery when the
phone is off.
Toremindyouthatyouwillsoonneedtochargethebatteryorreplaceitwith
a charged one:
• an alarm signal (a shortbeep) sounds and the message
Attention Battery low
appears in the display
• the indicator light on top of the phone starts flashing red
If you have an Ericsson-approved battery, you can check the remaining talk
and standby times in the Status menu by sliding the volume key upwards or
downwards in standby mode. You can move downwards in the menu by
d. The remaining standby and talk times depend on the type of
pressing
battery you use and your position in the network. Please notethat these times
are approximate and you may have 20% less time thanis shown in the display.
Note! The phone turns itself off when the battery can no longer power it
satisfactorily.
6 Preparing Your Phone for Use
Page 8
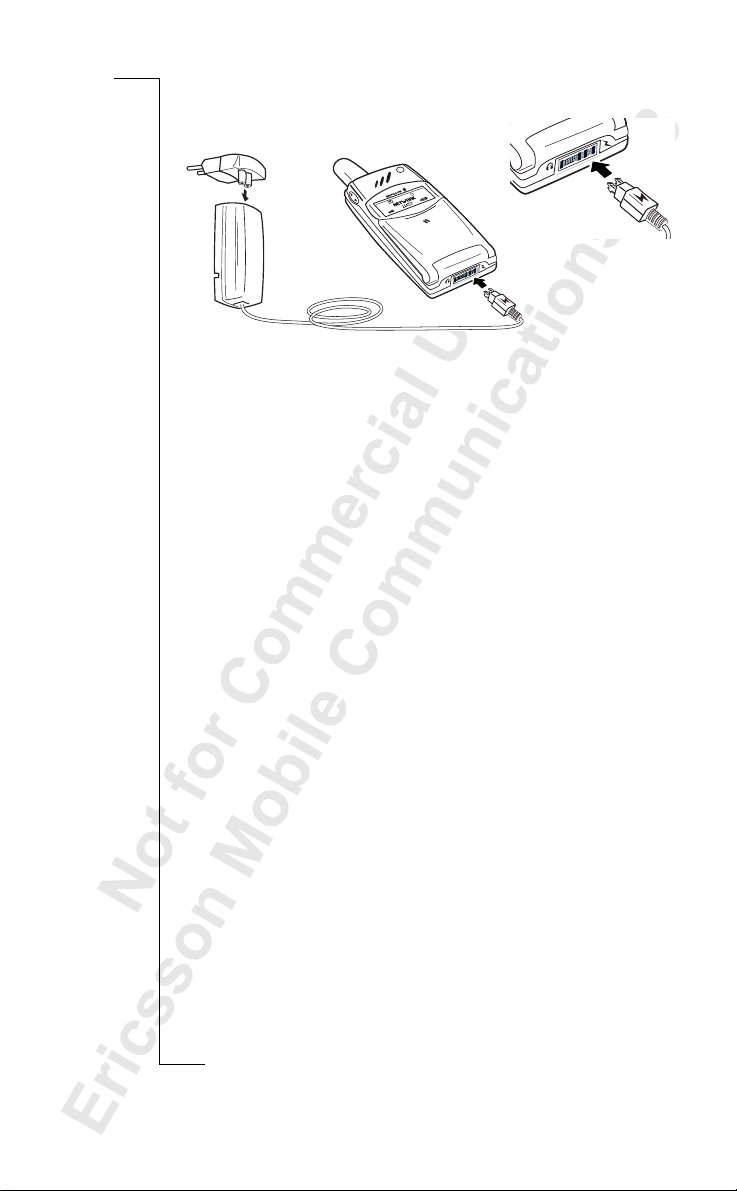
Charging the Battery
1. Make sure that the battery is
attached to the phone.
2. Connect the charger to the
3. Connect the charger to the phone
as shown. The flash symbol onthe
plug must face upwards.
electricaloutlet.
Note! The electrical plug may look different dependingon the electrical outlet
in yourcountry. Do not connect it to any otheritem than yourEricsson Travel
Charger CTR-10. It must not bedisconnected from the charger when plugged
into the electrical outlet.
To indicate charging:
• the indicator on thetop of the phone shows a steady red light (or green,
if the phone is switched on)
• the message
Charging only
is shown in the display
• the battery meter in the display pulses continuously
Note! If you charge a new battery that is empty, or a battery thathas not been
used for a long time, it may take a while until you get an indication of
charging in thedisplay.
An Ericsson-approved battery is indicated by
Ericsson Optimized charging
each
time you start charging the battery when the phone is switched on.For the best
charging, talk and standby times in the long run, we recommend that you use
only Ericsson-approved batteries with your phone.
Batteries that are not Ericsson-approvedare charged slowly for safety reasons.
These are indicated by
Chargingalienbattery
each time you start charging the
battery when the phone is switched on.
Tip! You can use the phone while the battery is being charged. However, this
lengthens the charging time.
Preparing Your Phone for Use 7
Page 9
When the battery is fully charged, the battery meter in the display is full and
the indicator on the top of the phone shows a steady green light.
Disconnecting the Charger
Disconnect the charger from the phoneby
moving the plug upwards.
Removing the Battery
1. Slide the release catch upwards.
2. Lift the battery away from
the phone.
8 Preparing Your Phone for Use
Page 10
Turning Your Phone On and Off
Turning your Phone on
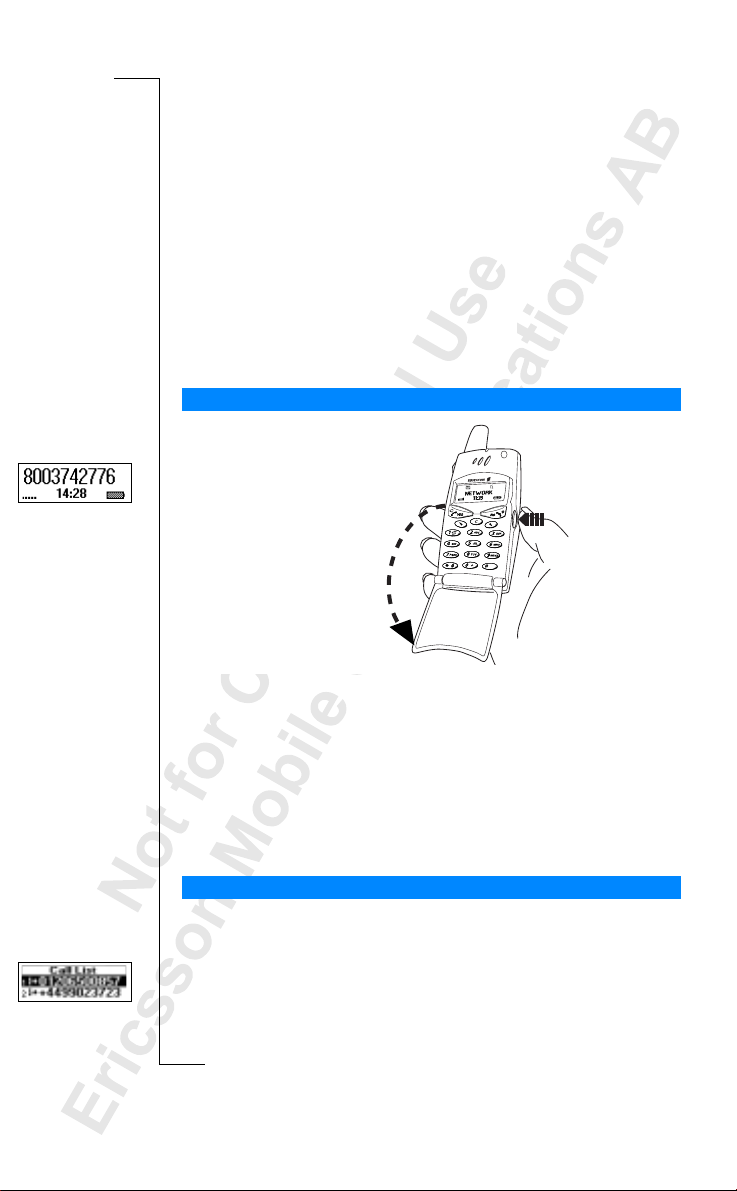
1. Open the flip by pressing the flip release button on the right side of
the phone.
2. Press and hold the
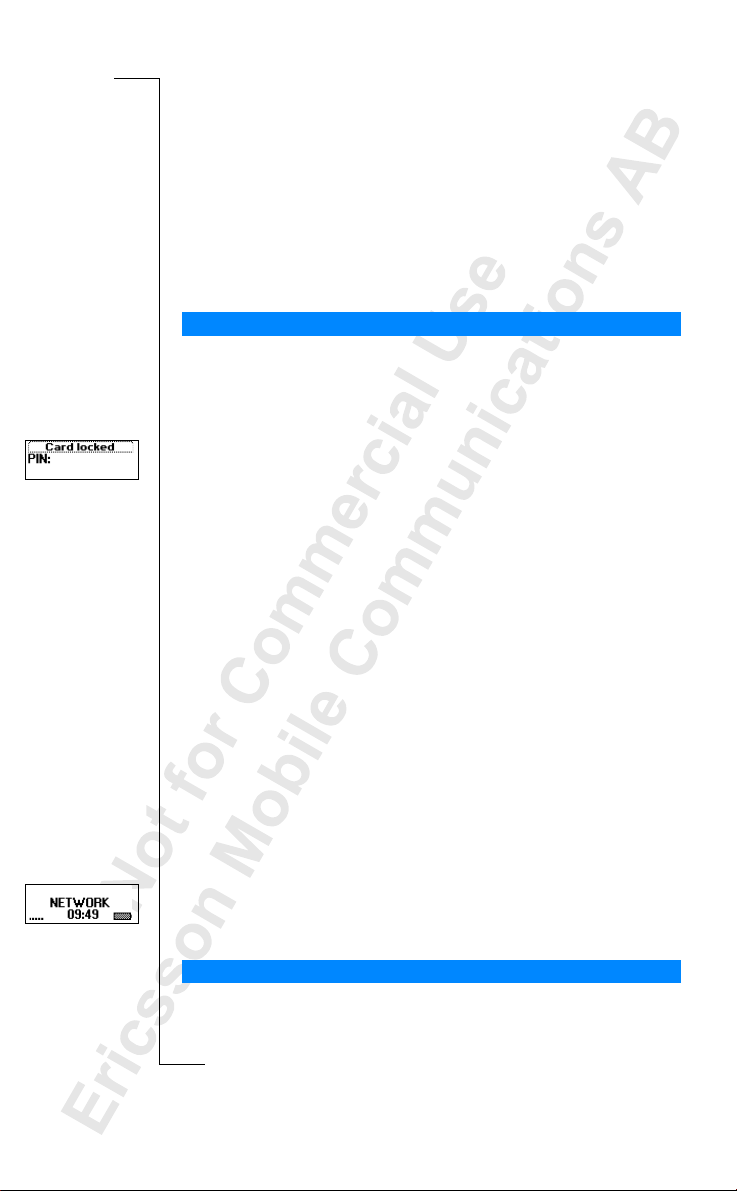
If “PIN:” Appears in the Display
Some SIM cards are protected with a PIN code. If
after you have turned on the phone:
1. Enter yourPIN. If you make a mistake while entering your PIN, delete the
wrong number by pressing the
2. Press
Note! If your PIN is entered incorrectly three times in a row, the SIM card is
blocked. You can unblock it by using your PUK. See “The SIM Card Lock”on
page 58.
YES.
NO key until you hear a tone.
C key.
PIN:
appears in the display
Phone locked
If
Phone Lock” on page 59.
Network Search
After you have turned on the phone (and entered your PIN),the phone
searches for a network.
When a network is found, the phone beeps three times. The indicator light on
top of thephone flashes green once everysecond and yournetworkoperator’s
name (in most cases abbreviated) appears in the display.
This is called standby mode. You can now make and receive calls.
Note! See “Error Messages” on page 104, if you do not reach standby.
Initial Settings
The first time you turn on your phone, youmay wantto choose the ring signal
type and set the clock and date. For more information about these and other
appears in the display, enter your phone lock code. See “The
Turning Your Phone On and Off 9
Page 11
settings, see “Personalizing Your Phone” on page 39.
Display Language
Most modern SIM cards automatically set the display language to the
Automatic
language of the country where you bought your SIM card, (
If this is not the case, the preset language is
English (US)
. To change thedisplay
).
language, see “Display Language” on page 43.
If yourphone shows a language that you donot understand, youcan change it
Automatic
,or
to
English(US)
, in the following ways:
To change the display language to Automatic
1. If not in standby mode, press and hold the
2. Press the
u arrow key.
NO keytogotostandby.
3. Enter 8888.
4. Press the
d arrow key.
To change the display language to English (US)
1. If not in standby mode, press and hold the
2. Press the
u arrow key.
NO keytogotostandby.
3. Enter 0000.
4. Press the
d arrow key.
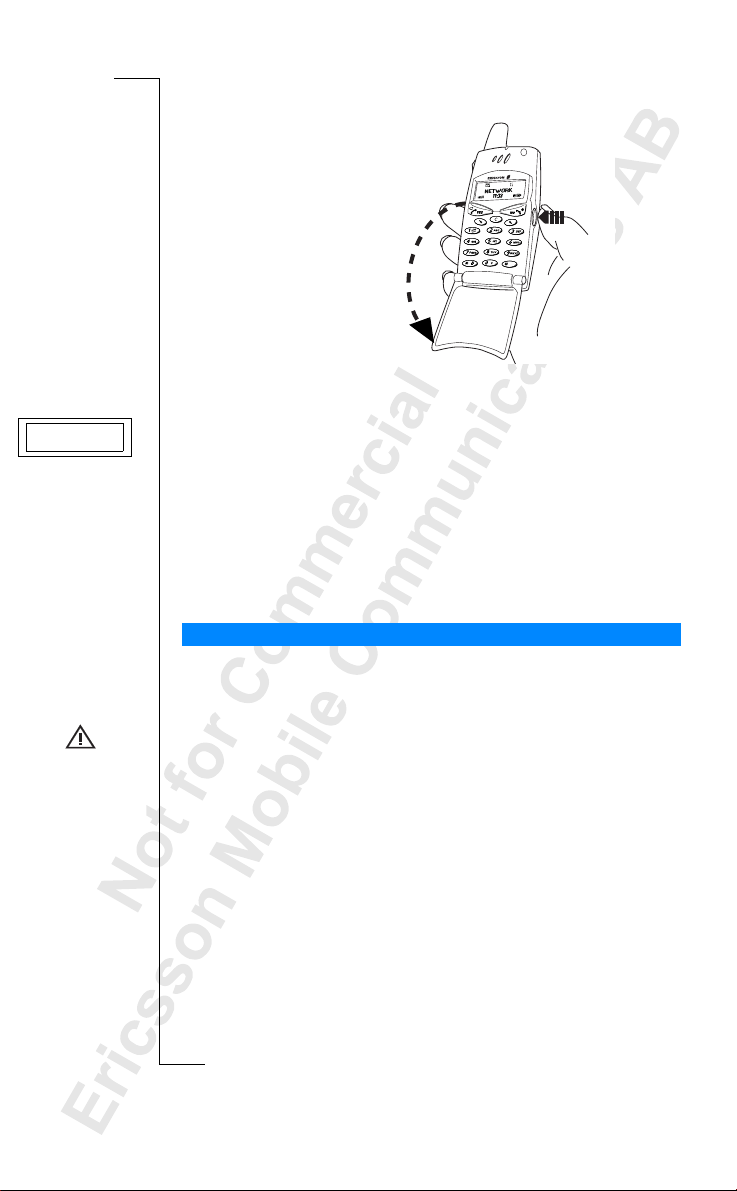
Turning Your Phone Off
• In standby mode, press and hold the
NO key until you hear a tone.
10 Turning Your Phone On and Off
Page 12
Display Information and Key Functions
In standby mode, the display shows the name of your operator, the time, the
signal strength and the battery power. Other icons appear if you receive any
messages, forward all your incoming calls, set the alarmclock and so on.
In this chapter, you will also learn about the key functions.
Display Information
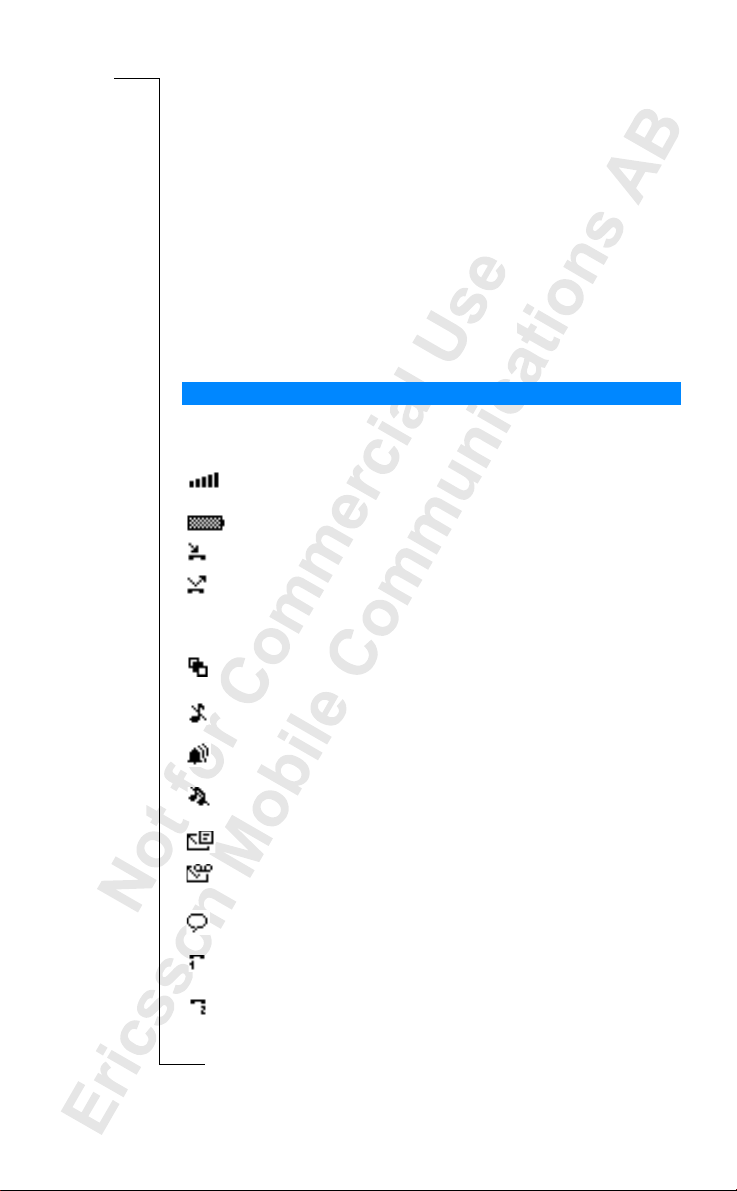
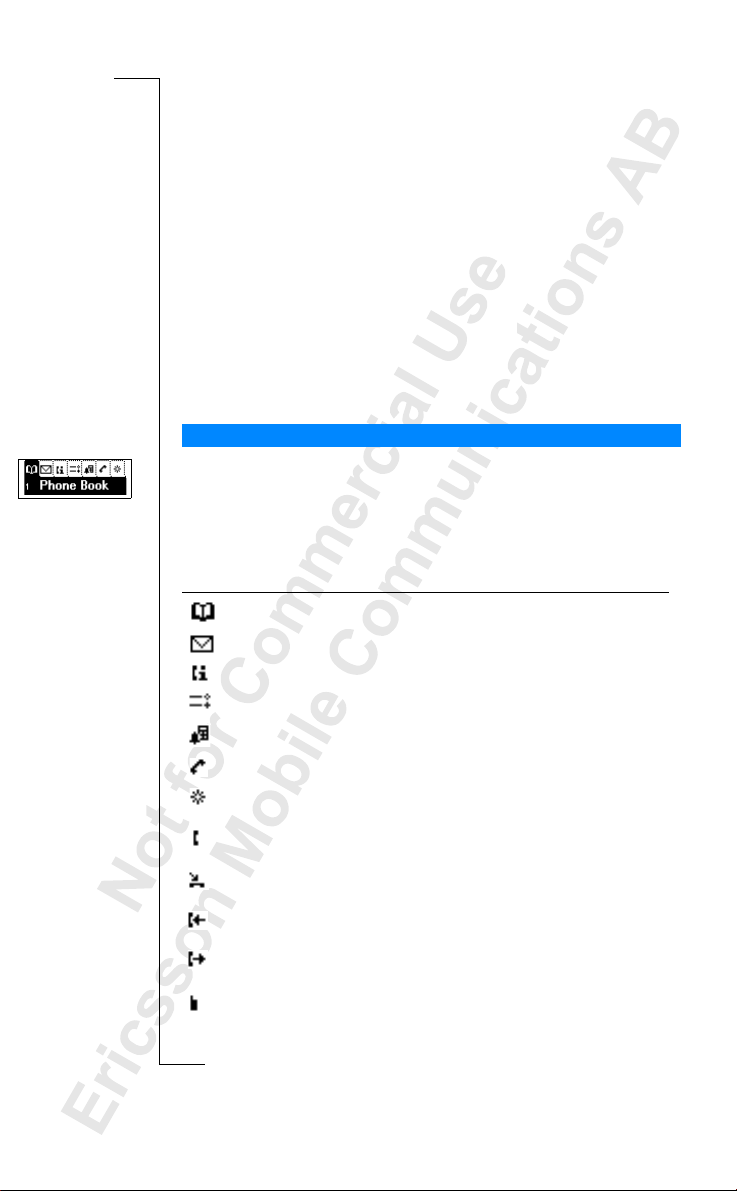
The table below shows and explains each icon which may appear in standby.
Icon Name Explanation
Signal strength meter Tells you the strength of the
Battery meter Tells you the status of the battery.
Missed call indicator Youhave missed an incoming call.
Forward indicator
Accept Some/None
indicator
Profile indicator Another profile than Normal has
Ring signal off indicator No sound can be heard when you
Alarm indicator The alarm clock has been set
Silent indicator All audiblesignals are turnedoff,
SMS indicator You have received a text message.
Voicemail indicator You have received a voice message,
Voicelabel in phone
indicator
Line 1 indicator Line 1 is in use for outgoing calls – if
Line2indicator Line2isinuse–ifyousubscribeto
network signal.
All incoming calls will be forwarded
to a defined number.
No calls or only certain calls from
numbers in a list are received.
been chosen.
receive a call.
and is on.
exceptthealarmandtimer.
depending on your subscription.
Indicates that voice dialing is set to
Starton Open.
yousubscribetotheTwoLineService
the Two Line Service.
Display Information and Key Functions 11
Page 13
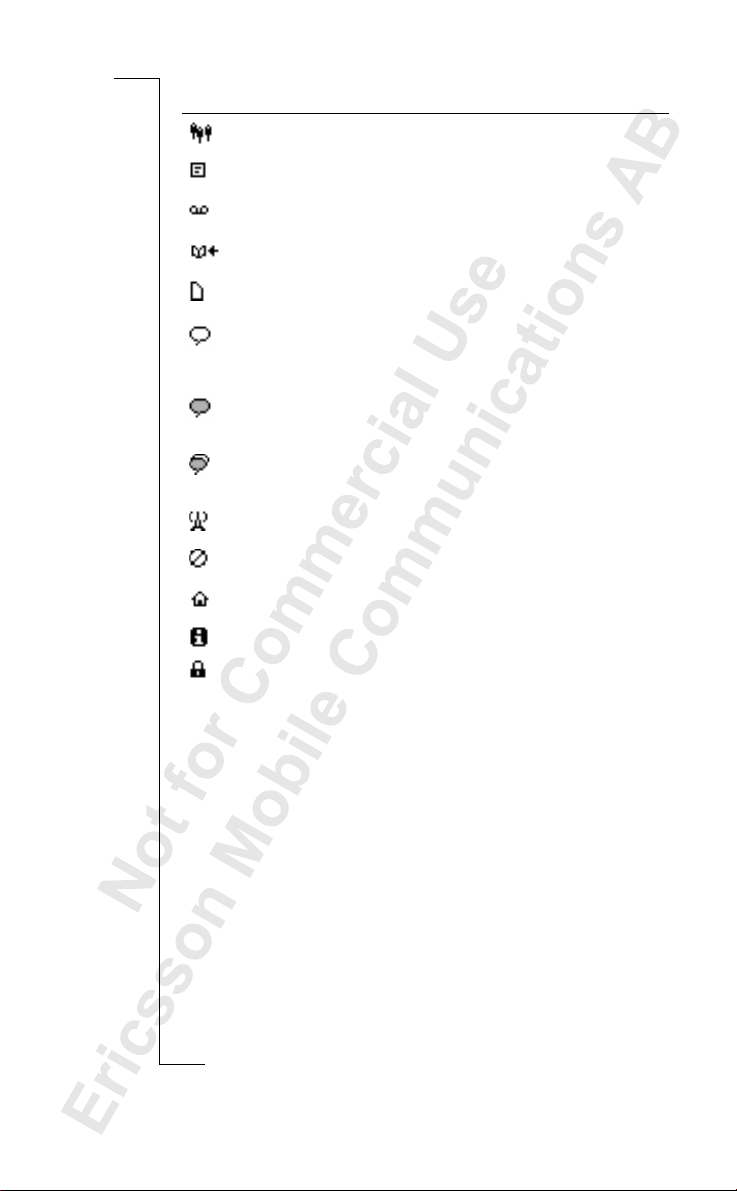
Ciphering indicator Ciphering is currently not being
provided by the network.
Home zone indicator You are in your home zone.
Does not appear on all networks.
Note! Each menu has got its own symbol. See “Menu Graphics” on page 21.
Key Functions
The table below explains the key functions.
Key Use
Flip release button To open the flip and answer incoming calls.
(Toendacall,closetheflip.)
YES
To make ca lls and answer calls.
To voice dial, press and hold the key.
To enter the Call List from standby.
To choose a menu, s ub-menu or setting.
NO
To turn the phone on or off, press and hold the key
in s tandby.
Toendacall.
To reject a call.
To go back one level in the menus,to exit a setting or to
leave a setting unchanged.
To get back to standby mode, press and hold the key.
u and d
To enter the menu system.
To move (scroll) through menus, lists and text.
C (Clear)
To delete numbers and letters from the display.
To mute the microphone during a call, press and hold
down the key.
To set the phone silent, press and hold the key
from standby.
To delete an item from a list.
Number keys To enter the digits 0-9.
The 0 key enters the international prefix (+) if held down.
To call your Voice Mail, press and hold the 1 key.
To enter the phone book, press and hold any of the
numbers 2-9.
To move through menus using shortcuts.
To enter letters, for example when writing an SMS.
*
To enter *.
To shift between upper- and lower-case letters.
12 Display Information and Key Functions
Page 14

Key Use
#
(Hash)
Volume key
upwards and
downwards
To enter #.
To increase or decrease the volume of the earpiece or
handsfree loudspeaker during a call.
To reject an incoming call, quickly slide the key twice.
To voice dial, slide and hold the key w hen the flip is open
To move through the menus.
To open the flip without answering a call, slide and hold
the key while pressing the flip release button.
To enter the Status menu.
Note! For information about the key functions in the menus, see “Moving
through the Menus” on page 23.
Display Information and Key Functions 13
Page 15
Making and
Receiving Calls
In this chapter, we assume that you have turned on your phone and that you
are within rangeof a network.If you are abroad, you may use other networks,
provided your home network has an agreement that allows you to do this.
See “Setting Network Preferences” on page 70.
Making a Call
1. Opentheflipbypressing
the flip release button.
2. Enter the area code and
phone number.
YES.
3. Press
Note! Some countries may not use area codes.
While a callis in progress, a time counter automaticallystarts and you cansee
how long you have been on the phone. If your network and subscription
supports it, you see the cost of the call in the display. See “Knowing the Call
Time/Call Cost” on page 73.
Ending a Call
• Close the flip or press
NO to end the call.
Redialing a Previously Called Number
In the Call list you find num bers that you have dialed, answered or missed.
To redial a previously called number
1. Press
2. Press
3. Press
For more information, see “Using the Call List” on page 35.
14 Making and Receiving Calls
YES to enter the Call List.
u or d to choose the number you want to call.
YES to make the call.
Page 16
Userbusy
Retry?
Automatic Redialing
Retry?
If the connection failed when you firstcalled and the display shows
you can redial the number by pressing
YES. Yourphone automatically redials
,
(upto10times)
• until the call is answered.When the call is successfully connected, you
hear a ring signal.
• until you press a key or receive a call.
Note! You do notneed to take the phone to your ear until you hear the
ring signal.
Automatic redialing is not available for fax and data calls.
Making Internatio nal Calls
1. Press and hold the 0 key until a + sign appears.
The + replaces the international prefix number of the country from which
you are calling.
2. Enter the country code, area code (without the leading zero) and
phone number.
3. Press
YES.
Making Emergency Calls
1. Enter 112(the international emergency number, o r in the Americas 911).
2. Press
YES.
The international emergency number 112 (or 911)can normallybe used in any
country, with or without a SIM card inserted,if a GSM network is within range.
Note! Some network operators may require that a SIM card is inserted, and in
some cases that the PIN code has been entered as well.
Some networksmay not use the international emergency number 112 (or911).
911can also be used in areas that use 112 as the international emergency
number, and vice versa.
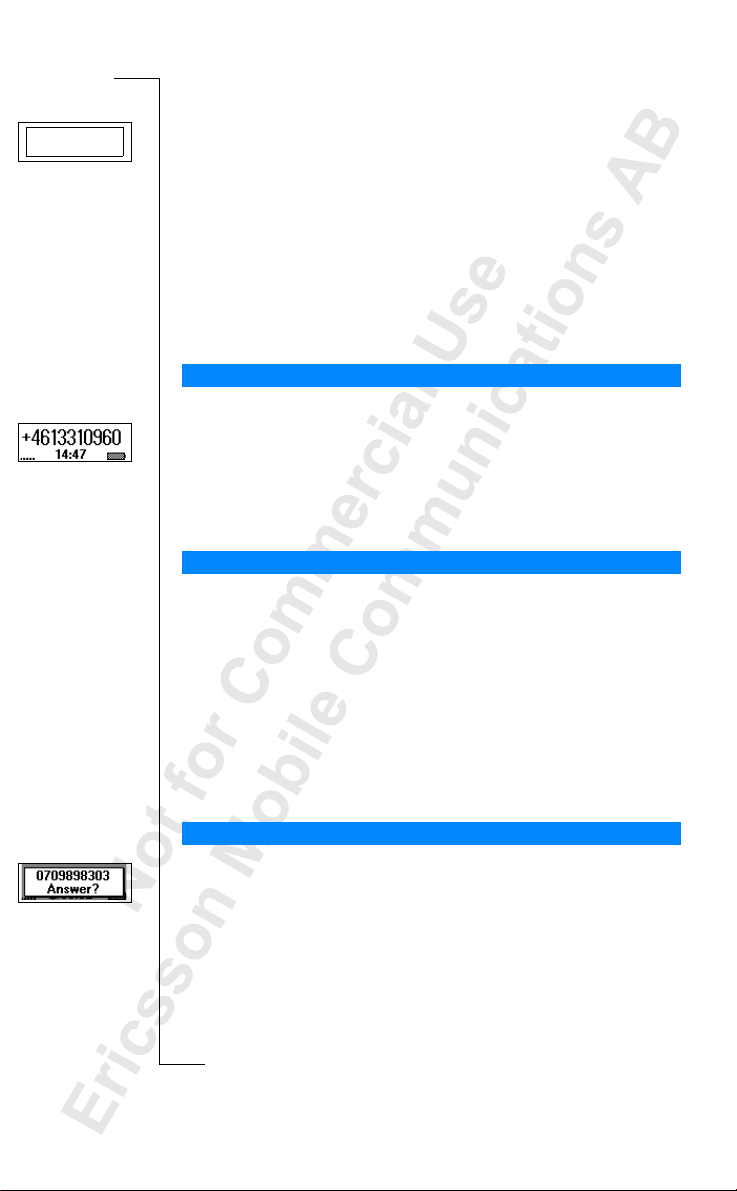
Receivin g a Ca ll
When you receive a call, the phone rings and the display shows Answer?
If yoursubscription includes the Calling Line Identification (CLI) service and
the caller’s network sends the number, you see the caller’s number in the
display. If the caller’s number and name are stored in the phone book, the
caller’s name is also shown.
Private
If the incomingcall is a restricted number, the displayshows
incoming call is a number without any CLI service,
Making and Receiving Calls 15
Unknown
.Ifthe
is shown.
Page 17
Busy signal
Answering a Call
• Open the flip by pressing
the flip release button
YES if the flip
or press
is open.
Rejecting a Call
• Slide the volume key on the side of the phone twice.
The display shows
Busysignal
. The caller hears a busy signal if this is
supported by the caller’s subscription. If ForwardWhenBusyis on, the
call is forwarded to the number you have specified.See “Forwarding
Incoming Calls” on page 56.
Note! Toopentheflipwithoutansweringacall,youneedtoslidethevolume
key while opening the flip. Then you may reject a call by pressing
NO or by
closing the flip.
Ciphering
Ciphering is a built-infeature that scrambles your calls and messages to
provide additional privacy.
Anexclamationmarkisshowninthedisplaytoindicatethatcipheringis
currently not being provided by the network.
16 Making and Receiving Calls
Page 18
Mute
During a Call
Your phonehas several functions,which you might find helpful whilea call is
in progress.
Changing the Listening Volume
You can easily change the listening volume during a call by sliding the
volume key on theside of the phone.
To change the listening volume during a call
• Slide upwards to increase the volume.
• Slide downwards to decrease the volume.
Muting the Microphone
If you wish, you may turn the microphone off during a call.
To turn th e microphone off temporarily during a call
1. Press and hold down the
Mute
appears in the display.
2. To continue your conversation, release the
C key.
C key.
Call on hold
Tip! Instead of pressing and holding the
C key, you can put the call on hold.
T oput a call on hold
1. Press
2. To continue your conversation, press
YES.
Call on hold
appears in the display.
YES again.
Sending Tone Signals
To use telephone banking services or to control an answering machine, you
need to use codes. These codes are sent as tone signals (also known asDTMF
tones or touch tones). With your mobile phone, you may use these codes
during a call. If you press 0-9, * and # during a call, these numbers and
charactersare sent as tone signals.
Tip! You can also save codes only or codes together with a phone number in
your Phone Book.See “Telephone Banking Services” on page 32. However, it
may be a risk to save your codesin the phone in case it is stolen.
During a Call 17
Page 19

The Notepad
If you want to make a note of a phone number during a call, you can use your
phone display as a notepad.
To use the notepadduring a call
• Use the number keys to enter the number.
When you end the call, the number remains in the display or, if Ask toadd is
on, you will be asked to save the numberin your phone book. You can also
find the numberin Add New in the Phone Book menu. See “Your Personal
Phone Book” on page 27.
When you enter the number, the person you are talking to will hear the tones.
If you wish, you may turn the tones off during a call. See “Scratchpad” on
page 42.
Checking the Duration or Cost of the Call
During a call, the display normally shows the duration in minutes and
seconds. Depending on your subscription, you may see the call cost
displayed instead.
Note! This depends on your network and SIM subscription. See “Knowing the
Call Time/Call Cost” on page 73.
Minute Minder
If youturn on the minute minder, you heara beep once every minute during a
call as a reminder of the duration of the ongoing call. See “Minute Minder”on
page 42.
More than One Call Simultaneously
Your phoneis capableof handlingmore thanone callsimultaneously. Youcan
put the current call on hold and then make or answer a second call. You can
also set up a conference call with up to five people. See “Handling More than
One Call Simultaneously” on page 65.
18 During a Call
Page 20

Functions and Settings
T28z Features 20
Using the Menus 21
Your Personal Phone Book 27
Using the Call List 35
Your V oice Mail Service 37
Personalizing Your Phone 39
Sending and Receiving Text Messages (SMS) 46
Forwarding Incoming Calls 56
Security for Your Phone and Subscription 58
Handling More than One Call Simultaneously 65
Setting Network Preferences 70
Knowing the Call Time/Call Cost 73
Using Two V oice Lines 75
Voice Control 76
Calling Card Calls 79
Sending and Receiving Fax and Data Calls 81
Extras 83
The Profile Concept 87
Accessories 90
Online Services 98
Page 21

T28z Features
Your T28z is a small new generation phone: a GSM 1900 phone with a
lithium battery; a phone of modern design and advanced technology.
The active flip makes it possible for you to answer by just opening the flip.
Or why not use the Voice Controland say‘Answer’ to a nswera call or ‘Busy’
ifyouwishtorejectthecall.Youcanalsocallapersonbysimplysaying
the name.
The T28z has a ‘Profile’ feature which makes it possible for you to change a
few settings by just choosing a certain Profile, since each profile includes a
group of settings preset to suit a certain environment.For example, when you
go to a meeting, you can just choose the ‘Meeting’ profile and a number of
settings that suit a meeting are then set automatically.
The Profiles are also related to intelligent accessories such as a desktop
charger, a portable or vehicle handsfree. For example, you may place the T28z
in a vehicle handsfreekit and the ‘In Car’ profile is chosen automatically.
In the display of the T28z you can see a mixture of text and symbols, which
makes it easier for you to move through the menus when you want to change
a c ertain setting, turn on the Vibrate Mode, send a message, save a number
andsoon.
An extra feature is the numbered shortcuts, which takes you to a certain
setting quickly and easily.You may also createyour own favorite menu,
‘My Shortcuts’, by including thesettings you use most often. If you should
need help using the menus, the T28z is equipped with help texts to guide you.
20 T28z Features
Page 22
Using the Menus
You can find all your phone functions in the menus. Youuse the menus every
time you want to change a setting in your phone, such as the ring signal.
You also use the menus to get themost out of your phone: to set the alarm
clock, send text messages, save important phone numbers, etc.
The menus are arranged in a loop, which you enter and move (scroll) through
u and d keys or by using shortcuts. Each menu contains a list
with the
of options. Some menus have sub-menus with additional options.
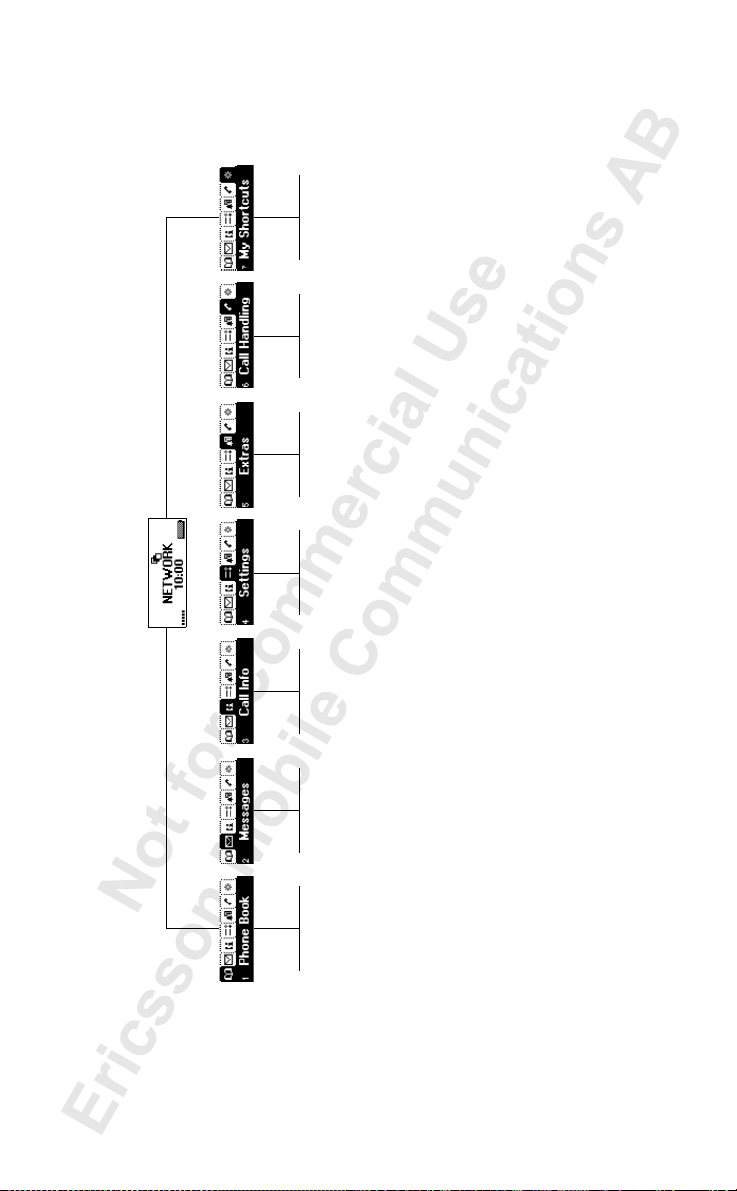
Menu Graph ics
You ent erthe menus by pressing
are icons symbolizing each menu. Besides these, there are symbols within the
sub-menus indicating missed calls, help texts, voice labels etc.
The table below illustrates and explains each menu icon and symbol.
Symbol Name Description
Phone Book menu Your personal phone book.
Messages menu Handling of text and voice messages.
Call Info menu Call time andcall cost information.
Settings menu Personal settings and profiles.
Extras menu Games, alarm clock and other extras.
Call Handling menu Handling of ongoing calls.
My Shortcuts menu A selection of your most frequently used
Ongoing call
indicator
Missed callsindicator Indicates a missed call in the Call List,
Answeredcall
indicator
Dialed number
indicator
Phone memory
indicator
u or d.At the top of the display, there
functions.
Youhave an ongoing call.
in themissed calls list and in standby.
Indicates an answered call in the CallList.
Indicates a dialed number in the Call List.
Indicates that a phone book entry is
saved in the phone memory and the SIM
memory is full.
Using the Menus 21
Page 23
Symbol Name Description
Group indicator Indicates that a phone book entry
Unread SMS
indicator
Unchecked Voice
Mail
Phone book look up
indicator
SIM card memory
indicator
Voice labelin phone
indicator
Voice labelin car
indicator
Voice labelin phone
and in car indicator
Preferrednetwork
indicator
Forbidden network
indicator
Home zone indicator Indicates that you are in your home zone.
Help text indicator Indicates a help text.
Lock indicator Indicates that the card lock or
is a group.
Indicates that a text message has not
been read.
Indicates that a voice message has not
been checked.
Indicates that you can enterthe phone
book by pressing
Indicates that a phone book entry is
saved in the SIM card memory.
Indicates that a voice label has been
recorded for an entryin the phone only.
Indicatesthat voice dialing isset to Start
on Open.
Indicates that a voice label has been
recorded for an entry in the car
handsfree kit.
Indicates that a voice label has been
recorded for an entryin the phone andin
the car handsfree kit.
Indicates that a networkis preferred and
canbeused.
Indicates that a networkis forbidden and
cannot be used.
Does not appearon all networks.
phone lock is on.
u.
22 Using the Menus
Page 24
Moving through the Menus
There are two ways of moving through the menus:
• scrolling with
u or d
• using shortcuts
Scrolling by Using
Press... to...
U
D
YES
NO
C
u or d
scroll left or up through menus or functions.
scroll right or down through menus or functions.
select a menu,sub-menu or setting.
go back one level in the menusystem, exit a setting or
leave a setting unchanged.
go back to standby mode by pressing and holding
the key.
delete an item from a list.
Note! For information about how to enter letters, see “Entering Letters” on
page 28.
Tip! Once inthe menusystem, you can press and hold the
u or d key or
slide and hold the volume key until you reach themenu or sub-menu that you
want instead of pressing the
u or d key repeatedly.
Using Shortcuts
A quicker way to move through the menusis to use the shortcuts. You simply
enter the number of the menu or sub-menu to which you wantto go, but you
firstneed to enter themenusby pressing
you press and hold
NO as normal.
u or d. To get back to standby,
Tip! A quicker way to enter the Find and Call function is to press and hold
d. A quicker way to enter the first sub-menu in the My Shortcuts menu is
to press and hold
u.
Note! Your phone may not have all the menu alternatives described in this
manual since many of them are network- and subscription-dependent.
Because of this, the shortcut numbers may vary between phones.
How To Interpret the Instructions
In the instructions in this manual we use the
u and d keys to describe
the functions and settings, since the shortcut numbers may vary between
phones due to your subscription and network.
The following instruction tells you how to set the key sound to ‘Tone’.
Using the Menus 23
Page 25

To set thekey sound
1. Scroll to
2. Select
Tone
Sounds & Alerts
.
, YES,
Key Sound
, YES.
Settings
, YES,
Interpret the instruction as follows:
1. From the standby mode, use
2. Press
YES to select the menu.
Now you are in the
Settings
d or u to scroll to the
menu.
Settings
menu.
The name of the menu that you have chosen is shown at the top of the
Settings
display (
3. Press
YES to select the
).
Sounds & Alerts
sub-menu.
(Y oudo not need to scroll with the arrow keys since this is the first
sub-menu in the main menu
d or u to scroll to the
4. Use
YES to select the sub-menu.
Press
d or u to scroll to
5. Use
YES to select the
Press
Tone
Settings
).
Key Sound
Tone
.
alternative.
sub-menu.
Now you have set the key sound to ‘Tone’.
To go back to standby mode, press and hold the
NO key.
This is how to interpret the same instruction as above when using shortcuts:
To set thekey sound
1. Press
2. Press 4 to select the
3. Press 1 to select the
4. Press 5 to select the
5. Select
d or u to enter the menu system.
Settings
menu.
Tone
Sounds & Alerts
Key Sound
.
sub-menu.
sub-menu.
Display Text
When you move throughthe menu system, the display changes.The following
hints can help you:
• Black text within a frame at the top indicates the menu you have chosen.
• Inverted text on a black layer indicates your position in the menu system.
If you press
• Gray text indicates a function that is temporarily unavailable, for example
due to yoursubscription or due to a certain setting which is not on.
• Text marked with a check indicates the current setting or settings selected.
• Textmarked with a filled button indicates the current setting selected.
Note! Most sub-menus in the Call Handling menu are shown in gray text
when no call is active. However,they are shown in black text during a call.
24 Using the Menus
YES you enter this menu or select this setting.
Page 26
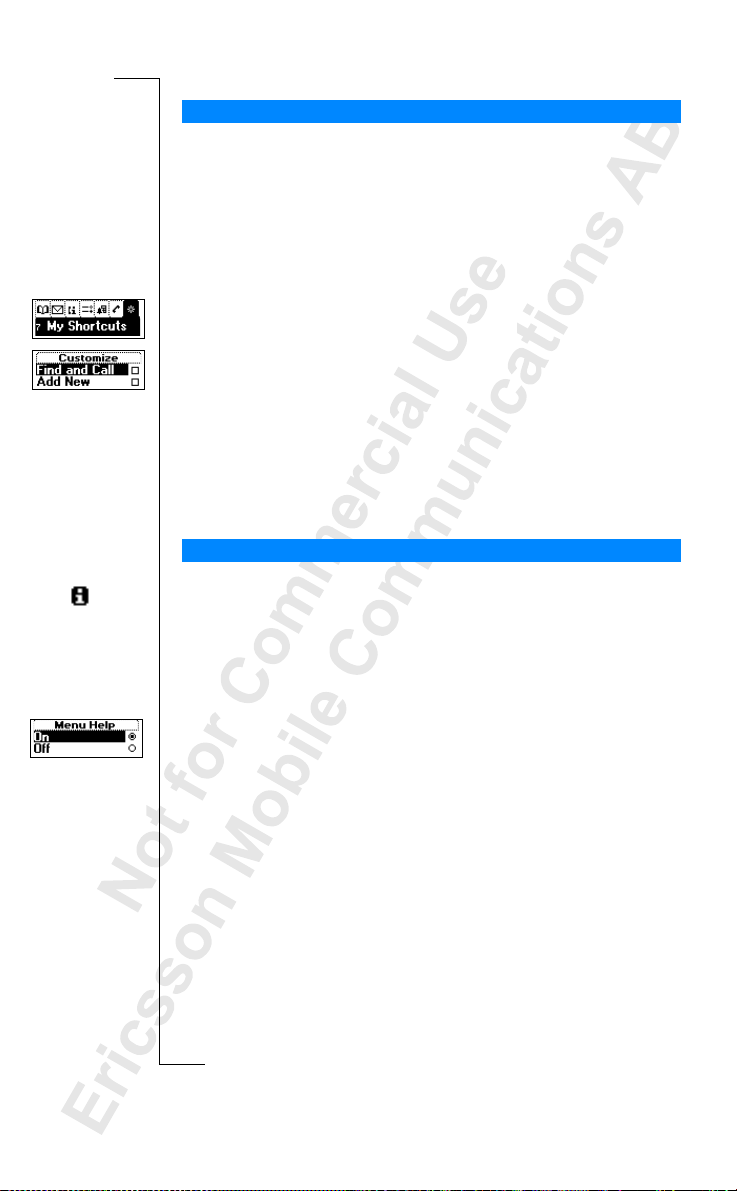
My Shortcuts
You can place your favorite settings in the menu My Shortcuts. In this way,
you can quickly and easily reach the settings you use most.
When you buy your phone, My Shortcuts contains a few settings which you
can remove if you wish. You can also add a setting from another menu to
My Shortcuts.
To add a setting to My Shortcuts
1. Scroll to
My Shortcuts
, YES,
Customize
, YES.
2. Select a setting from the list by pressing *.
3. Enter the position number you want for your setting in this menu.
4. Press
YES.
If you want to add another setting, repeat steps 2 and 3.
To remove a setting from
5. Press
YES to exit the list.
My Shortcuts
, repeat steps 1 and 2.
Tip! A quicker way to enterthe first sub-menu in theMy Shortcuts menu isto
press and hold
u.
Help texts
To help you use the functions and settings of the menus, your phone includes
pop-up help texts that explain the sub-menus.
These help texts are set to On when you buy your phone, but you may turn
them off at any time.
To turn the help texts on or off
Settings
OnorOff
, YES,
.
1. Scroll to
2. Select
Display
, YES,
Help Functions
, YES,
MenuHelp
, YES.
Using the Menus 25
Page 27
Customize
Ring Volume
Select Profile
Switch to Line 1
*
*
*
*
*
*
*
*
*
Switch to Line 1
Alarm Clock
Sounds & Alerts
Missed Calls
Call Voice Mail
*
Next Call Type
Timer
Profiles
Call List
Inbox
Retrieve call
VoiceControl
Clear Call List
Join calls
Handsfree
Clear Counters
Transfercall
Master Reset
Options
Extract
Release all
Please note that many of the menu alternatives
are network- and subscription-dependent.
*Onlyavailableduringacall.
Hold Call
Scratchpad
Switch calls
Enable Caller ID
Disable Caller ID
Calculator
Stopwatch
Networks
Call Options
Credit
Last Call
Send new
Unsnt items
Release active
Games
Accessories
Locks
Display
Language
Time and Date
Fee
Total Cost
Total Time
Outgoing Time
Options
Templates
Sent Items
26 Using the Menus
Groups
Add New
Delete all
Find and Call
VoiceLabels
Find and Edit
Find and Send
Calling Cards
Email Addresses
Options
Info Numbers
Serv Numbers
Memory Status
Fixed Numbers
Page 28

Your Personal
Phone Book
You can create a personal phone book by saving phone numbers and
accompanyingnames (an entry). Aneasy way to make calls is by recalling the
phone numbers or names saved in your phone book.
Creating a Personal Phone Book
Before youstart creatingyour personalphone book,there are a few things you
need to know. Youneed to learn about the memories, how to save the numbers
with the international (+) sign and how to enter letters.
Phone Book Memories
You can save phone numbers and names in:
• thecardmemoryontheSIMcard
• the phone memory
Your entries are first saved in the positions on your SIMcard. The actual
number of memory positions available depends on your SIM card.
Saving your numbers in the card memory allows you to use the numbers
saved on theSIM card even when you change phones, i.e. when you insert
your SIM card into another phone.
By saving your numbers in the phone memory, they are always available to
you in your phone, even if you change SIM cards. The phone memory holds
99 positions in which your entries are saved when all SIM positions are used.
International Numbers
If you intend to use your phone both at home and abroad, it is a good idea to
save all phone numbers as international phone numbers, i.e. with the (+) sign,
(which automatically replaces the international dialing prefix for the country
you are calling from) followed by the country code, the area code and the
phone number.
Your Personal Phone Book 27
Page 29
To enter an international phone number
• Press and hold 0 to enterthe + sign.
Excludetheleadingzerointheareacode.
Entering Letters
You can enter letters when you use the phone book and when you compose a
short m essage(SMS). See “Sending and Receiving Text Messages (SMS)” on
page 46.
Press the appropriate key,1–9, 0 or #, repeatedlyuntilthe characteryou want
appears in the display.
Press… to get…
1 Space-?!‚.:;"’<=>()_1
2 ABCЕДЖаЗ2Γ
3DEFèÉ3∆ Φ
4GHIì4
5JKL5Λ
6 MNOÑÖØò6
7PQRSß7Π Σ
8TUVÜù8
9 WXYZ9
0 +&@/¤%$£¥§¿¡0Θ Ξ Ψ Ω
##*↵
Example:
• To enter an ‘A’, press 2 once.
• To enter a ‘B’, quickly press 2 twice.
• Toenter lower-case letters, enter the letter, for example an ‘A’,
andthenpress*.An‘a’ appears. Lower-case letters now appear
until you press * again.
• To enter numbers, press and hold any number key.
• Todelete letters and numbers, press the
C key.
You may also use the volume key as a shortcut to certain letters:
• To enter a ‘B’, slide the volume key upwards and press2.
• To enter a ‘C’, slide the volume key downwards and press 2.
Tip! You can choose another alphabet by pressing and holding #.
28 Your Personal Phone Book
Page 30
Saving a Number Together with a Name
Every phone number that you save gets a position number. You can save the
phone numbers together with a nameto make it easier for youto keeptrack of
your phone numbers.
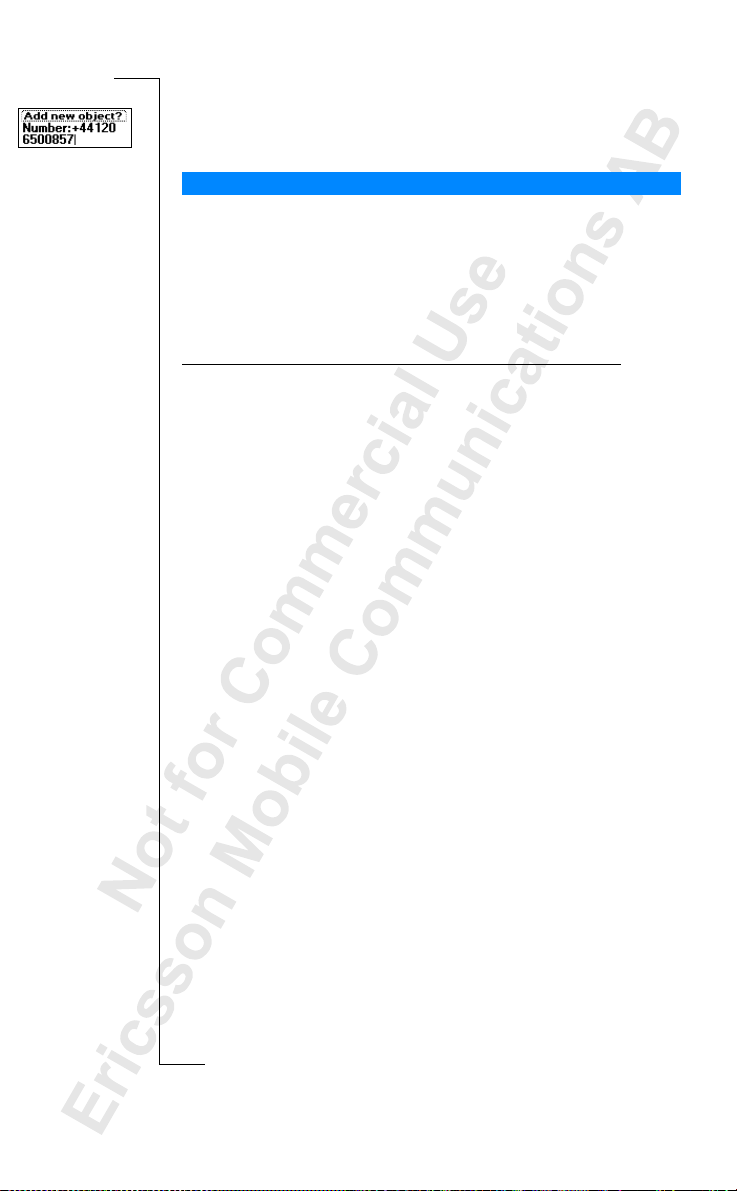
To save a numbertogether with a name
1. Scroll to
Phone Book
, YES,
Add New
, YES.
A listof numbers used but not saved appears.
2. Select
Addnew object?
or any ofthe numbers from the list by pressing YES.
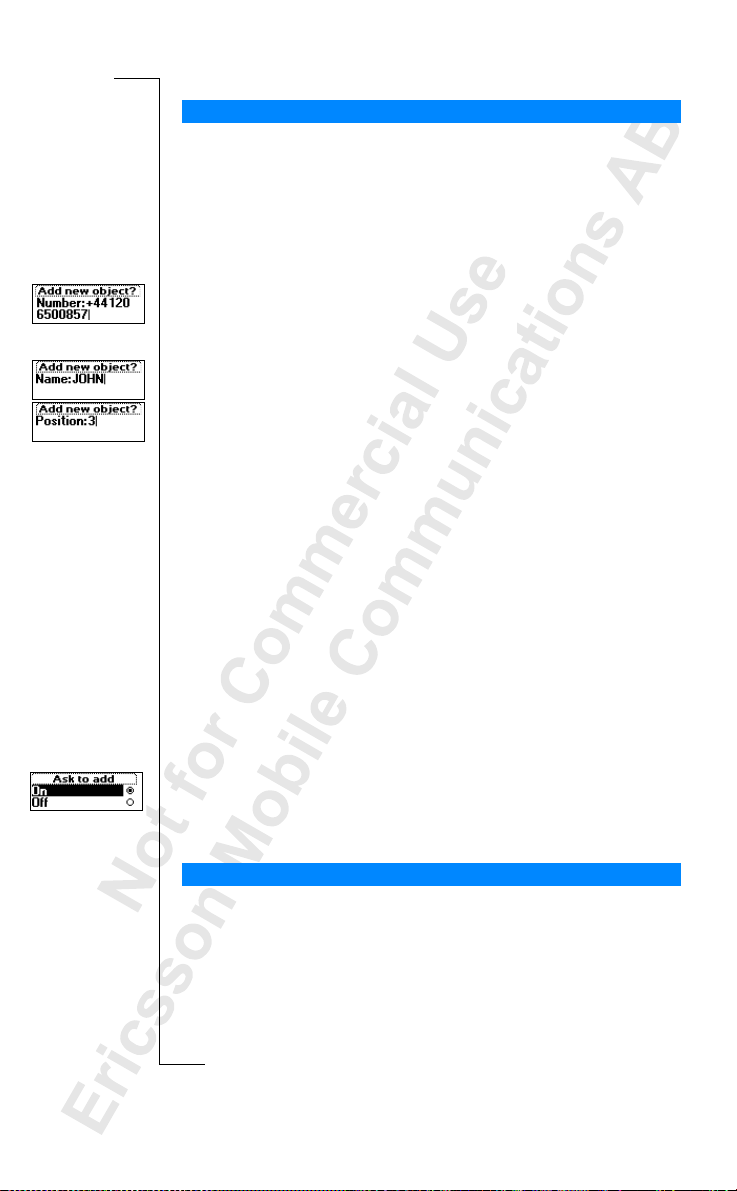
3. Enter a phone number that you wish to save (includingthe (+) sign and the
country code) and press
4. Enteranamethatyouwanttolinkwiththephonenumberandpress
YES.
YES.
5. Younow have three options:
• Tosave the number in the suggested first empty position, press
• Tosave the number in another position, press
number, enter a new position number and press
C to delete the position
YES.
YES.
• Tosave the number in the phone memory, you need to know how many
positions you have got on your SIM card. You can check this in
Memory Status in the Phone Book menu. If, for example, you have
200 positions on your SIM, you can enter position number 201 to save
a number in the phone memory.
If you have turned V oice Dialing on, you are asked if you want to add a voice
label to your phone book entry. See “Voice Control” on page 76.
Ask to Save
If you wish to be asked to save any dialed or answered number that is not
already saved in your phone book, you can turn on the Ask to Save option.
To turn the Ask to Save function on or off
1. Scroll to
2. Select
OnorOff
Help Functions
.
, YES,
Ask to add
, YES.
Settings
, YES,
Display
, YES,
Note! Your subscription must supportthe Calling Line Identification service.
Calling a Number Saved In the Phone Book
You can either call a number by using the name saved with it or you can call
the number by using the position number that it was saved in.
The order of searching for names and numbers depends on the sort order you
have chosen, i.e. alphabetically or by position.
Your Personal Phone Book 29
Page 31

To choose a sort order
1. Scroll to
Phone Book
, YES,
Options
, YES,
Sort Order
, YES.
2. Select a sort order.
To call a number saved in the phone book
1. Scroll to
Phone Book
, YES,
Find and Call
, YES.
2. Enter the position number or the name (or the first few letters of the name)
linked with the number that you want to call.
3. Press
YES.
If the name displayedis not the one you want, press
u or d until you
find the correct name and number.
4. Press
YES to make the call.
Tip! A quickerway to enter the Find and Call function is to press
and hold
d.
Shortcutsto Phone Book Entries
When in standby, you can find an entry by:
• entering the position number followed by#.
• pressing and holding one of the keys 2-9 to findan entry beginningwith a
specific letter.
For example, pressing and holding 2 takes you to thefirst entry beginning
with the letter A (or closest following).
Once you are in the list of phone book entries you can use
u or d to
scroll through the positions, or enter a position number ora letter to go to a
certain entry.
Speed Dialing
You can callthe phone numbers that you have saved in positions 1–9 in the
memory by entering the position numberand then pressing
Example:
1. Enter the number 3.
2. Press
YES to make the call.
Keeping the Phone Book Up to Date
You may need to change thenames and numbers inthe phone bookfrom time
to time. You may also want to change the positionnumber of an entry.
Editing a Phone Number In the Phone Book
Youneedtofindthephonebookentrythatyouwishtoedit.Youcanuse
either the stored position or the name. See “Calling a Number SavedIn the
Phone Book” on page 29.
30 Your Personal Phone Book
YES.
Page 32

To edit an entry
1. Scroll to
Phone Book
, YES,
Find and Edit
, YES.
2. Enter the position number or the nameof the entry that you wish to edit.
YES.
Press
If the name displayedis not the one you want, press
u or d until you
find the correct name and number.
3. Press
4. Select
5. Edit the number and press
6. Edit the name and press
7. Edit the position number and press
YES to select the entry.
Edit
.
YES.
u or d keys to move the cursor.Use the C key to delete.
Use the
YES.
YES.
Overwrite Protection
If you try to save a phone number in a position which already contains a
phone number, the message
Replace?
appears together with the name saved in
that position. You now have two options:
To save the number in the selected position
• Press
YES to replace the number with the new one.
To save the number in a different position
1. Press
NO.
2. Enter the new position number.
3. Press
YES to save the number in the new position.
When the Card M emory Is Full
When all SIM card positions are full, an icon appears next to the position
number, see margin. From now on your entries arestored in the
phone memory.
If all positions, including the phone memory are full, you have to delete an old
number by entering a position that is already used and press
YES.
To delete an entry from the memory
1. Scroll to
Phone Book
, YES,
Find and Edit
, YES.
2. Enter the position number or the nameof the number that you want to
delete and press
YES. (This depends on the sort order, i.e.alphabetically
or by position.)
3. Press
4. Select
5. Press
YES.
Delete
.
YES to confirm your choice.
Your Personal Phone Book 31
Page 33

Delete all in
phone memory?
To delete all entries from the phone memory
1. Scroll to
Phone Book
2. The question
YES.
Press
3. Enter the phone lock code (
, YES,
Delete all
, YES.
Delete all in phone memory?
0000
or another one thatyou have chosen
appears.
yourself).
All entries in the phone memory are deleted.
Telephone Banking Services
If you use telephone banking services, you can save the phone number of your
banking servicetogether withyour personalcodes, or you can save yourcodes
p
only.Youneedtoaddapause(
) between the phone number and the codes.
You insert a pause by pressing and holding the * key. Usually, a # is required
after each code. Sometimes a pause is required, too. Talk to your bank if you
p
are in doubt about how to use # and pause (
).
Note! It may be a risk to save your codes in the phone in case it is stolen.
To save a phone number with codes
1. Scroll to
Phone Book
, YES,
Add New
, YES,
Addnew object?
, YES.
2. After entering the phone number, press and hold the * key until the pause
p
character
appears in the display.
3. Enter the code and #. If required, enter a pause, the next code and so on.
4. Enter the name that you want to link with the phone number and code and
YES.
press
5. Press
YES to save.
If you want to save the number in a different position than the one
suggested, see “Saving a Number Together with a Name” on page 29.
To make a call with tone signal codes, proceed as described in “Calling a
Number Saved In thePhone Book” on page 29. When you make the call, the
phone dials the number, waits until the call is answered and then sends the
code. If you insert another pause and another code, it pauses again, sends the
next code and so on.
To save codes only
1. Scroll to
Phone Book
2. Enter the code followed by a # and if required, a pause, another code and
so on.
3. Press
YES.
4. Enteranamethatyouwanttolinkwithyourcodesandpress
5. Press
32 Your Personal Phone Book
YES to save.
, YES,
Add New
, YES,
Addnew object?
, YES.
YES.
Page 34

During a call, you can retrieve these codes from the phone book and send them.
To send th e codes during a call
1. Scroll to
Phone Book
, YES,
Find and Send
, YES.
2. Enterthename(orfirstfewletters)orpositionnumberofyourcodesand
YES.
press
3. Press
YES to send the codes.
Groups
The T28z allows you to creategroups of phone book entries.
In thisway youcan send a text message toseveral recipients at the same time.
See “Sending and Receiving Text Messages (SMS)” on page 46.
To create a new group
1. Scroll to
2. Enter a name for the group and press
3. Scroll to
Phone Book
Add new object?
, YES,
Groups
, YES.
, YES,
Add new object?
YES.
, YES.
4. Select an entry in your phone book.
5. To add the next member, press
Add newobject?
.
YES at
To add a new member to an existing group
1. Scroll to
Phone Book
, YES,
Groups
, YES.
2. Select the group that you want to edit.
3. Scroll to
Addnew object?
, YES.
Edit
, YES,
4. Select an entry in your phone book.
To delete a member from a group
1. Scroll to
Phone Book
, YES,
Groups
, YES.
2. Select the group that you want to edit.
3. Select
4. Scroll to the member that you want to delete and press
5. Press
Edit
.
YES to confirm your choice.
C.
To delete a group
1. Scroll to
Phone Book
, YES,
Groups
, YES.
2. Select the group that you want to delete.
Delete
3. Select
4. Press
.
YES to confirm your choice.
E-mail add resses
You can save e-mail addresses to be used when you want to send a text
message as an e-mail. See “Sending and Receiving Text Messages (SMS)” on
page 46. You can save 10 e-mail addresses, each consisting of 60 characters.
Your Personal Phone Book 33
Page 35

To save an e-mail address
1. Scroll to
Phone Book
2. Enter an e-mail address a nd press
3. Enter a name and press
, YES,
Email Addresses
YES.
YES.
, YES,
Add new object?
, YES.
Tip! The @ sign is accessed by pressingthe 0 key three times.
To edit an e-mailaddress
1. Scroll to
Phone Book
, YES,
Email Addresses
, YES.
2. Select the entry that you want to edit.
Edit
3. Select
4. Edit the e-mail address and press
5. Edit the name and press
.
YES.
YES.
To delete an e-mail address
1. Scroll to
Phone Book
, YES,
Email Addresses
, YES.
2. Select the entry that you want to delete.
Delete
3. Select
4. Press
.
YES to confirm your choice.
Checking th e Status of the Memories
The Memory Status function in your phone book lets you check how many
memory positions you have left in your memories.
To check the status of your different phone book memories
1. Scroll to
2. Use
Phone Book
u or d to scroll through the list.
, YES,
Memory Status
, YES.
34 Your Personal Phone Book
Page 36

Using the Call List
The Call List is a phone number log that saves information (time, date,phone
number and name) about the last 30 incoming and outgoing calls. Once your
list exceeds 30 calls, the oldest one is deleted.
What Calls Are Saved?
The numbers that you have dialed are always saved.If your subscription
includes the Calling Line Identification(CLI) service and the caller’s network
sends the number , you will also find the numbers (together with a name if
saved in your phone book) of answered and missed calls in the Call List.
Private
Unknown
.
is shown.
If the incomingcall is a restricted number, the displayshows
If the incoming call is a number without any CLI service,
You can call any of the numbers in the Call List.
The Call List saves:
Dialed numbers
Answered calls
Missed calls
All the calls are saved together in chronological order. The last call you have
made is saved in the first position. If the same number is called more than
once, the latest call replaces earlier ones. If you check a call within 24 hours,
the time of the call is displayed. Otherwise, the time is replaced by the date.
Note! If you change SIM cards or turn the Call List off, the list is cleared.
Called numbers may remain in the SIM card memory though.
To call a number from theCall List
Call Info
, YES,
Call List
1. Scroll to
2. Scroll to the number that you wantto call and press
Tip! Press
Call List.
YES when the phone is in standby mode to go directly to the
, YES.
YES.
Using the Call List 35
Page 37

Missed calls: 1
To delete a number from the Call List
Call Info
, YES,
Call List
1. Scroll to
2. Scroll to the number you want to delete and press
The question
3. Press
Delete?
YES to delete the number.
, YES.
C.
appears in the display.
To clear the Call List
1. Scroll to
The question
2. Press
YES to clear the Call List.
ClearCall List
Call List Clear?
, YES.
appears in the display.
Call Info
, YES,
To turn the Call List on or off
1. Scroll to
2. Select
3. Press
Call Info
, YES,
OnorOff
.
Off
If you select
YES to clear the Call List.
the question
Options
, YES,
Set Call List
CallList Clear?
, YES.
appears in the display.
Missed Calls
If you have missed a call, the message
1
where the number
1. Press
YES to display the missed calls.
indicates the number of missed calls.
Missed Calls: 1
appears in standby mode,
2. IfyouwishtocallanumberfromtheMissedCallsList,press
number you want to call.
Note! You can also see the Missed Calls List in the Call Info menu.
Missed calls are also saved in the Call List.
YES at the
To be able to see if you have missed a call, the Call List must be on.
Showing And Hiding Your Number
Some operators offer subscriptions where your phone number is normally
hidden. You can choose to show or hide your number for a particular call,
if Calling Line Identification Restriction service(CLIR) is supported by your
subscription.
To hide your phone number for a particular call
1. Enter the phone number you wish to call.
2. Scroll to
3. Press
Call Handling
YES to make the call.
To show your phone number for a particular call
1. Enter the phone number you wish to call.
2. Scroll to
3. Press
36 Using the Call List
Call Handling
YES to make the call.
, YES,
, YES,
Disable Caller ID
EnableCaller ID
, YES.
, YES.
Page 38

Your Voice Mail Service
Note! This service depends on your subscription and operator.
Theansweringserviceofyournetworkallowscallerstoleaveavoice
message when you cannot answer your calls. Depending on your network
operator, you will be informed that you have received a voice message in
different ways.
Some operators inform you by sending a specific Voice Mail indication.
If this is the case, the voice mail icon appears in the display.
Most operators, however, inform you by sending a text message, (i.e. an
SMS), for example asking you to call your Voice Mail Service. For more
informationabout receiving and reading text messages, see “Receiving a
Message” on page 50.
Note! For more informationabout your VoiceMail Service, please refer to the
information provided by your network operator.
Communicating With Your Voice Mail Service
If you want your phone to easily interact with your Voice Mail Service, you
can store the number to your Voice MailService. You will get the number in
the information provided by your network operator.
To store your Voice Mail number
Messages
, YES,
Options
, YES,
1. Scroll to
2. Enter your Voice Mail number and press
Note! The number to your Voice Mail Service may be different if you are
calling from a network that is not your home network.
Voice Mail No.
, YES.
YES.
Calling your Voice Mail
When you receive a voice mail, an alert signal sounds and the message
New voice mail
indication). If you want to check your voice mail now, press
Voice Mail Service.
If you pr ess
to your recorded messages.
appears in the display (only if you receive the specificvoice mail
YES to call your
NO, you can call your Voice Mail Service at a later time to listen
Your Voice Mail Service 37
Page 39

Tocall your Voice Mail Service
• Scroll to
Call VoiceMail
, YES.
Messages
, YES,
Tip! You can also call your Voice Mail Service by pressing and holding 1
from standby.
Changing Num ber and Signal
To change your Voice Mail number
Messages
, YES,
Options
, YES,
1. Scroll to
2. Press and hold
C to delete the existing number.
Voice Mail No.,
3. Enter your new Voice Mailnumber and press
YES.
YES.
To change the message alert signal
1. Scroll to
MessageAlert
, YES.
Messages
, YES,
Options
, YES,
2. Select the signal you want.
Tip! If you subscribe to the Two Line Service, you may have different Voice
Mail numbers for your two lines. You mayalso setdifferent options for the two
lines. For example, youcan set all incomingcalls on Line 1 to be forwarded to
your Voice Mail and let all incoming calls on Line 2 be connected.
Further information about your Voice Mail Service can be found in the
operating instructions supplied by your network operator.
38 Your Voice Mail Service
Page 40

Personalizing Your Phone
Silent
You can choose to set your phone completely silent so that all signals except
the alarm and timer signals are turned off.
To set the phone silent
1. From standby, press and hold
Silent on?
2.
appears. Press YES.
An icon appears in standby.
Tocancel, repeat step 1 and press
Ring Signal Volume
You can set the volume in six steps. The first step means that two clicks
are heard when you receive a call. You can also turn the ring signal off (0).
An icon then appears in standby.
To set the ring signal volume
Settings
1. Scroll to
The level of the ring volume appears in the display.
u to increase the volume, d to decrease it.
2. Use
The phone rings once with the actual setting as you increase the volume.
3. Press
YES to save the setting.
, YES,
C.
YES at
Sounds & Alerts
, YES,
Silent off?
Ring Volume
.
, YES.
Tip! Use the volume key on the side of the phone to change the volume of the
ring signal silently.
Increasing R ing
Youcanchoosearingsignalthatrisesinstepsfromthesoftestvolumetothe
loudest, Increasing Ring.
To set the ring signal to Increasing Ring
Settings
, YES,
1. Scroll to
On
2. Select
The Increasing ring must be Off for the ring signal volume to apply.
Note! If the phone is set to silent, the increasing ring signal is not heard.
.
Sounds & Alerts
, YES,
Increasingring
PersonalizingYour Phone 39
, YES.
Page 41

Ring Signal Type
You can choose a ring signal from a list of different sounds and melodies.
You can also compose up to four melodies of your own by entering notes with
the keypad. See “Composing Ring Signals” on page 41.
To choose one of the ring signal types
1. Scroll to
Speech Calls
Sounds & Alerts
, YES.
, YES,
Ring Signals
, YES,
Settings
, YES,
2. Select the ring signal type that you want.
Tip! If you do not wish to disturb other people,use the volume key on the side
of the phone to scroll silently.
Different Ring Signals for Line 1 and Line 2
If you subscribe to theTwo Line Service, youcan set different ring signalsfor
the two lines.
andL2are displayed instead of
Speech
.
L1
Different Ring Signals for Voice, Data and Fax Calls
Provided your SIM subscription supports Fax and Data calls, you can set
different ring signals for voice, fax and data calls respectively.
Specific Ring Signals for Personal Calls
If your subscription includes the Calling Line Identification(CLI) service,
youcanassignapersonalringsignaltouptotencallers.Youcan,for
example, have one ring signal for your friend and another one for your
colleague.
If the lastseven digits of a caller’snumber correspond to a number you have
specified, then that caller’s ring signal is used.
You can include question marks (?) in a phonenumber. For example,
012345??? means that calls from phone numbers between 012345000and
012345999 will have the same personal ring signal. You get a question mark
by pressing and holding #.
To specify a caller’s number and the accompanying ring signal
Settings
1. Scroll to
YES,
Add new object?,
, YES,
2. Enter the caller’s number and press YES.
You can alsorecall it from the PhoneBook by pressing
3. Select the ring signal type you want.
40 Personalizing Your Phone
Sounds & Alerts
YES
.
, YES,
Ring Signals
, YES,
u.
Personal rings
,
Page 42

To delete a caller’s number
Settings
, YES,
1. Scroll to
Personal rings
, YES.
Sounds & Alerts
2. Scroll to the number you wish to delete and press
Delete
3. Select
.
, YES,
Ring Signals
YES.
, YES,
Composi ng Ring Signals
You can compose four different ring signals.
To compose a ring signal
1. Scroll to
2. Select
3. Press
Settings
, YES,
Sounds & Alerts
Custom Rings
, YES.
My Ring 1,My Ring 2,My Ring 3orMy Ring 4
C to clear the display.
, YES,
Ring Signals
.
, YES,
4. Use the keypad to enter notes.
The keypad now works as a keyboard (see figure in margin above):
• Press and hold a key to enter a long note.
B
• Press 0 to raise the note oneoctave.
• Press # once to raise the note one half-tone.
• Press # twice to lower the note one semitone.
5. To listen to your melody,press
6. Press
YES again to save it or press NO to continue editing.
YES.
Vibrate Mode
You can choose to be notified of an incoming call by the buzzing of the
Vibrate Mode. You can set the phone’s Vibrate Mode to one of the following:
• On (all the time)
• On if silent (on when the ring volume is turned off or when you have set
the phone to silent)
• Off (all the time)
Note! When yourphone is placed in a desktop charger or a handsfree carkit,
the Vibrate Mode is turned off automatically.
To set the Vibrate Mode
1. Scroll to
Sounds & Alerts
, YES,
Vibrate Mode
, YES.
Settings
, YES,
2. Select the setting you want.
PersonalizingYour Phone 41
Page 43

Message S ignal
You can choose whether to hear clicks, tones or nothing (silent) when you
receive a voice or text message (SMS).
To set the message signal
1. Scroll to
MessageAlert
Sounds & Alerts
, YES.
, YES,
Ring Signals
, YES,
Settings
, YES,
2. Select the signal you want.
You can also find the Message Alert in Options in the Messages menu.
Alarm Signal
To change the alarm signal for the alarm clock
1. Scroll to
Alarm Signal
Sounds & Alerts
, YES.
, YES,
Ring Signals
, YES,
Settings
, YES,
2. Select the signal you want.
Key Sound
You can choose whether to hear clicks, tones or nothing (silent) when you
press the keys.
To set thekey sound
1. Scroll to
Sounds & Alerts
, YES,
Key Sound
, YES.
Settings
, YES,
2. Select the key sound you want.
Minute Minder
If you turn on the minute minder, you hear a beep once every minute during
acall.
To turn theminute minder on or off
Settings
OnorOff
, YES,
.
1. Scroll to
2. Select
You can also find the minute minder in Options in the Call Info menu.
Scratchpad
If you make a note of a number during a call, you use the displayas a notepad,
see“TheNotepad”onpage18.Thepersonyouaretalkingtowillhearthe
tone signals as you press the keys. If you wish to, you may turn the tone
signals off.
Note! You can only turn the tones on or off during a call.
42 Personalizing Your Phone
Sounds & Alerts
, YES,
Minute Minder
, YES.
Page 44

To turn thetone signals off during a call
1. Scroll to
2. Select
Call Handling
Scratchpad
, YES.
.
To turn th e tone signals on during a call
1. Scroll to
2. Select
Call Handling
DTMF Mode
, YES.
.
Display Light
You can set the display light to automatic, off or on. In automatic mode, the
display light is turned off automatically a few seconds afteryou have pressed
the last key. It comes on again when you press a key, open the flip, or when
you receive a call or message.
To set the display light
1. Scroll to
Settings
, YES,
Display
, YES,
DisplayLight
, YES.
2. Select the display light setting you want.
Display Language
Most modern SIM cards automatically set the display language to the
language of the country where you bought your SIM card, Automatic. If this
is not the case, the preset language is English (US).
To change the display language
Settings
, YES,
Language
1. Scroll to
, YES.
2. Select the language you want.
Tip! You can always choose English (US) by pressing
u, 0000, d in
standby.
You can always choose Automatic by pressing
u, 8888, d in standby.
Greeting Text
When you turn on your phone, ‘Ericsson’ appears in the display. Instead of
this, you can write your own greeting.
Note! Some operators may have their own greeting.
To write a new greeting
1. Scroll to
2. Select
Custom
User Greeting
.
, YES.
Settings
, YES,
Display
, YES,
3. Write your new greeting, using the number keys. For information on how
to enter letters, see “Entering Letters” on page 28.
You may also edit your greeting.
4. Press
YES to confirm your setting.
PersonalizingYour Phone 43
Page 45

To set th e standard greeting
1. Scroll to
2. Select
Standard
User Greeting
.
, YES.
Settings
, YES,
Display
, YES,
To turn the greeting off
1. Scroll to
2. Select
Off
User Greeting
.
, YES.
Settings
, YES,
Display
, YES,
Phone Number Display
My Numbersallows you to check your phone number(s). If your phone
number cannot be retrieved from your SIM card, you can enter it yourself.
To enter your phone number
1. Scroll to
2. Enter the number and then press
Settings
, YES,
Display
, YES,
YES.
My Numbers
, YES,
Speech
, YES.
Tip! You can also enter your fax and/or data number and your different
numbers for Line1 and Line 2, if these are supported by your subscription.
Time
The time is always displayed when the phone is in standby mode.
To set the time format
1. Scroll to
Settings
, YES,
Time and Date
, YES,
Time Format
, YES.
2. Select the 24-hour or 12-hour (am/pm) clock.
To set theclock
1. Scroll to
2. Enter the time in hours and minutes, and press
Settings
, YES,
Time and Date
, YES,
Move from number to number by pressing
Set Clock
, YES.
YES.
u or d.
If you select the 12-hour clock, you can alternate between am and pm
by pressing #.
Automatic Time Zon e
With the Automatic Time Zone function, you will be asked whether to update
the clock when you enter a new time zone.You can choose to turn the function
off, if you like.
To turn theAutomatic Time Zone off
Settings
Off
, YES,
.
1. Scroll to
2. Select
Note! This service depends on the network.
44 Personalizing Your Phone
Time and Date
, YES,
Auto Time Zone
, YES.
Page 46

Date
When the phone is in standby mode, you canslide the volume key upwards or
downwards to see today’s date in the Status menu.
To set the date format
1. Scroll to
Time and Date
, YES,
Date Format
, YES.
Settings
, YES,
2. Select the date format you want.
To set the date
Settings
, YES,
1. Scroll to
Time and Date
2. Enter the year (two digits), month and day and then press
, YES,
Set Date,
YES.
YES.
If you have chosen another date format you must enterthe date differently.
Master Reset
You can resetthe phone’s settingsto the way they were when you bought
your phone.
To reset the phone
Settings
, YES,
1. Scroll to
MasterReset
2. Enter the phone lock code (
, YES.
0000
) and pressYES.
The phone lock code may be another one, in case you have changed it.
PersonalizingYour Phone 45
Page 47

Sending and Receiving
Text Messages (SMS)
TheShortMessageService(SMS)allowsyoutosendandreceivetext
messages consisting of up to 160 characters.
A useful feature in your T28z is that you can send text messages to a group
which you have defined in your phone book. See “Groups” on page 33.
Instead of calling or sending a text message to the members of that group one
at a time, you can simply send a single group SMS.
If your SIM card does not contain the phone number to your network service
center, you must specify the number yourself. Otherwise you cannotreply to
received messages or send your own messages. See “Enable the Phone to
Send SMS” below.
Note! The Short Message Service may notbe available on all networks. Some
network operators may only allow SMS to be sent within their own network.
Enable the Phone to Send SMS
If you want to send or reply to a message, you need to make sure that your
network operator’s Service center number is set. Most modern SIM cards
already contain this information at the time of purchase. You can obtain the
service center number from your network operator.
To activate a service center number found in the list
Messages
, YES,
Options
Options
, YES,
, YES,
1. Scroll to
2. Scroll to the number you want and press
Activate
3. Select
If no number is found in the list,you have to setthe number yourself.
To enter the phonenumber to your service center
1. Scroll to
YES.
2. Enter the number, including the international (+)sign and country code
and press
46 Sending and Receiving Text Messages (SMS)
.
Messages
YES.
, YES,
Service Centers
YES.
Service Centers
, YES.
, YES,
Add newcenter?
,
Page 48

Composing a Text Message
For more information on how to enter text and the letters,
see“EnteringLetters”onpage28.
Example:
• To enter an ‘A’, press 2 once.
• To enter a ‘B’, quickly press 2 twice.
• Toenter lower-case letters, enter the letter, for example an ‘A’,
andthenpress*.An‘a’ appears. Lower-case letters now appear
until you press * again.
• To enter numbers, press and hold any number key.
• Todelete letters and numbers, press the
C key.
You may also use the volume key as a shortcut to certain letters:
• To enter a ‘B’, slide the volume key upwards and press2.
• To enter a ‘C’, slide the volume key downwards and press 2.
Tip! You can choose another alphabet by pressing and holding #.
Sending a New Text Message
1. Scroll to
2. Enter your message and press
Messages
, YES,
Send new
, YES.
YES.
3. Enter the recipient’s phone number or recall it from the phone book by
u.
pressing
4. Press
5.
YES to send the message.
Sendingmessage
appears in the display followed by
Messagehas been sent
.
Note! If you have turned on any of the Ask foroptionsoptions (Message Type,
Validity Period, Reply Request), you need to make these choices before entering
the phone number. See “Customizing your Text Messages” on page 48.
Saving the Message for Later Use
If you do not want to send the message now, you can save it in the phone
memory and send it later:
• Press
NO when you are asked to enter a phone number. The message can
now be recalled from the Unsnt itemslist in the Messagesmenu.
To send th e message later
1. Scroll to
Unsnt items
, YES
Messages
, YES,
2. Select the message you want to send.
The message appears in the display.
3. Press
YES.
Sending and Receiving Text Messages (SMS) 47
Page 49

4. Select
Send
.
If you wish, you may now edit yo ur message.
5. Press
YES and proceed from step 3 as described in “Sending a New Text
Message” above.
Note! The same procedure is used with all types of messages, for example
e-mail, fax messages etc. Check with your networkoperatorto find out which
message types you can use.
Sending Text Messages to a Group
With your T28z you can send text messagesto a pre-defined group. You need
to specify a group and save it in your phone book before you can send text
messages to a group. For more information on how to create groups, see
“Groups” on page 33.
Tosendatextmessagetoagroup
Messages
, YES,
Send new
1. Scroll to
2. Enter your message and press
3. Press
4. Scroll to
u to enter the Phone Book menu.
Groups
and press YES.
5. Select the group you want and press
, YES.
YES.
YES to send the message.
Note! When you send text messages to a group, you will be charged for each
member included in that group.
Customizing your Text Messages
Before you send yourmessage, you can set the type of message, the validity
period and if you want the recipient of your message to reply to your message.
Message Type
Your phone can send different types of messages. Your network operator’s
service center may offerthe facility of converting a text message into a format
(e-mail,fax,etc.) that suits the equipmentthat is going to receivethe message.
Please contactyour network operator to find out which message types you can
use and how.
You can set a standard messagetype that you want to use or you can turn on a
Set on Send option,whichmeansthatyouareaskedtoselectwhichmessage
type you want to send, before sending it.
48 Sending and Receiving Text Messages (SMS)
Page 50

To set a standard message type
1. Scroll to
, Message Type
, YES,
Set Default
, YES.
Messages
, YES,
Options,
YES
2. Select the message type you want.
The selected message type is now standard until you change it.
ToturnSetonSendonoroff
1. Scroll to
YES.
2. Select
OnorOff
Message Type
.
, YES,
Ask for options
,
Messages
, YES,
Options
, YES,
Validity Period
If your message cannot be delivered because the recipient has turned off the
phone, your service center can save the message to send it later. If the service
center has not been able to reach the recipient within a certain time, the
message will b e deleted.
You can seta validity period as your standard or you can turn on a Ask for
options option, which means that you are asked to set the validity period
before sending the message.
To set a validity period as your standard
1. Scroll to
ValidityPeriod
, YES,
Set Default
, YES.
Messages
, YES,
Options
, YES,
2. Select the validity period you want.
The selected validity period is now your standard until you change it.
To turn theSet on Send function on or off
Messages
, YES,
Options
YES,
1. Scroll to
YES.
2. Select
OnorOff
Validity Period
.
, YES,
Ask for options
,
Reply to Messages
If you want the recipient of your message to reply, you can turn on the
Request Reply option. When this function is on, you are asked to choose if
you wantthe recipient toreply ornot before your message is sent. If you want
On
the recipient to reply, select
and press YES.
To turn the Request Reply function on or off
1. Scroll to
2. Select
OnorOff
Reply Request,
.
YES.
Messages
, YES,
Options
, YES,
Note! Not all network operators support these functions.
Sending and Receiving Text Messages (SMS) 49
Page 51

Templates
If you have one or more standard messages that you use often, you can save
these as Templates to be reused whenever you want. You can save up to
5 templates which canconsist of 30 characters each. Yourtemplatesare saved
in the phone memory.
To save a template
1. Scroll to
2. Enter the message and press
Add new object?
YES.
, YES.
Messages
, YES,
Templates
, YES,
For more information on how to enter text, See “Composing a Text
Message” on page 47.
3. Ifyouwanttosendthemessagenow,press
YES when
Send message now?
appears in the display, and proceed as described in “Sending a New Text
Message” on page 47. The message is saved in the list of templates.
4. If you do not want to send the message now, press
NO. The message is
saved as a template for later use.
To send a template
1. Scroll to
Messages
, YES,
Templates
, YES.
2. Select the template you want to send.
You may edit the message before sending it. See “Sending a New Text
Message” on page 47.
3. When you have completed the message, press
YES.
4. Enter the recipient’s phone number.
5. Press
YES to send the template.
To delete a template
Messages
, YES,
Templates
1. Scroll to
, YES.
2. Select the message you want to delete and then press
The message
3. Press
Delete?
appears in the display.
YES to delete the message.
Receiving a Message
New message
Read now?
When you receive a message, you hear a signal, the indicator light on the top
of the phonerapidly flashes green and the message
appears in the display.
Note! All networks do not send an audible signal.
50 Sending and Receiving Text Messages (SMS)
C.
New message Read now?
Page 52

To read the message now
1. Press
YES when you see the question
New message Read now?
.
The display shows when the messagewas received and from what number
it was sent, if your networksupports the Calling LineIdentification service
(CLI). If you have saved the number together with a name in the phone
book, the name is shown instead.
2. Scroll through the messageusingthe arrow keys.
u takes you backwards through the message. An arrow at the
and
d takesyou forwards
bottom right corner of the display indicates that there is more text in
the message.
3. At the end of the message, when the arrow in the display disappears,
YES. A new menu with different options appears:
press
Delete
•
•
Reply
•
Forward
•
Save
•
Call?
•
Read next
The options are described on the following pages.
Note! If thesender of the message wants you to reply, the message
Reply requested Reply?
appears in the displ ay when you press YES, if this
function is supported by your network operator. If you do not want to reply,
NO.
press
Toread the message later
• Press
NO when you see the question
New message Read now?
.
The message is nowsaved in the phone memory and an envelope icon
appears at the top of the display. The envelope icon disappears as soon as
you have read the message. If you want to read the message later you can
retrieve it from the Inbox menu (see below).
Calling a Phone Number Found in a Message
1. Press
2. Select
YES when the number is highlighted.
Call 0990237237
.
Calling the Sender of the Message
1. When you have read the message, press
Call
2. Select
in the option list.
YES.
If you have saved the number together with a name in the phone book,
the name of theperson who sent the message appears together with
Sending and Receiving Text Messages (SMS) 51
Call
.
Page 53

Replying to a Message
1. When you have read the message, press
Reply
2. Select
in the option list.
YES.
3. Select what message you want to send as a reply (send a new message or
include this message when replying).
4. Enter your message and press
YES to send the message.
Note! If thesender of the message wants you to reply, the message
Reply requested Reply?
your network operator,when you press
YES again to reply. If you do not want to reply, press NO.
appears in the display, if this function is supported by
YES at the end of the message.Press
Forwarding a Message
1. When you have read the message, press
Forward
2. Select
in the option list.
YES.
You may edit your message before sending it.
3. When you have completed your message, press
YES.
4. Enter the recipient’s phone number.
5. Press
YES to send the message.
Deleting a Message
1. When you have read the message, press
Delete
2. Select
in the option list.
YES.
Tip! You can also delete a messageby pressing
Delete?
The message
appears in the display. Press YES to delete the message.
You can delete a message from thelist of messagesin the Inbox menu without
having to open it.
To delete a message from the list in the Inbox menu
Messages
, YES,
Inbox
1. Scroll to
, YES.
2. Select the message you want to delete and press
Delete?
The message
3. Press
YES to delete the message.
appears in the display.
Saving Incoming Messages
If you do not want to read an incoming message at once, it is automatically
saved in the phone memory. This allows you to read it later. If there are any
unread messages in this memory, the envelopeicon appears at the top of the
standby display.
52 Sending and Receiving Text Messages (SMS)
C while reading it.
C.
Page 54

Saved on card
3 (15)
Thephonememorycanholdupto15messages.Whenallmemory
positions are full,the oldest read message is overwritten when a new message
is received.
If the phonememory becomes full of unread messages, new messages are
automatically saved on the SIM card.
Messages remain in thephone memory until you delete them, untilyou insert
a different SIM card or until the phone needs the memory space to save new
messages.
The SIM Card Memory
You can save important messages on your SIM card. Messagesthat are saved
on the SIM card remain there until you delete them, i.e. they will not be
overwritten if you receive any new messages. The maximum number of
messages that you can savedepends on your SIM card.
Tosave a received message in the SIM card memory
1. When you have read the message, press
Save
2. Select
in the option list.
YES.
The message automatically moves from the phone memoryto the SIM
card memory. The display shows the posit ion of the message and the
number of saved messages, for example the third message of fifteen that
can be saved on the SIM card.
Note! If you save your messages on the SIM card, you can reach them if you
should use your SIM card with another phone.
Reading a saved Message
Messages
, YES,
Inbox
1. Scroll to
, YES.
means an unread message.
means that the message is saved on the SIM card.
2. Select the message you want to read.
3. Read the message as described in “Receiving a Message” on page 50.
4. If you want to read the next message, press
Read next
5. Select
in the option list.
Sending and Receiving Text Messages (SMS) 53
YES at the end of the message.
Page 55

Area Information
The ordinary Short Message Service is a personal service thatcarries your
private messages.The AreaInformation is another type of text messagewhich
is sent to all subscribers in a certain network area.
The information may be a local road report or a phone number to a local taxi.
Note! This feature may not be available on all networks.
To turn Area Information on or off
1. Scroll to
2. Select
Messages
OnorOff
.
, YES,
Options
, YES,
Area Info
, YES,
Reception
, YES.
Area Information Message Types
Each type of Area Information message is identified by a three-digit code.
The list belowshows examples of the Area information codes that existtoday.
Code: AI Message Type:
000 Index
010 Newsflashes
020 Hospitals
022 Doctors
024 Pharmacies
030 Long-distance road reports
032 Local road reports
034 Taxis
040 Weather
050 District BSID
052 Network information
054 Operator services
056 Directory inquiries (national)
057 Directory inquiries (international)
058 Customer care (national)
059 Customer care (international)
Note! These codes are operator dependent. For information about the area
informationservices that you canuse, please refer to the information supplied
by your network operator.
54 Sending and Receiving Text Messages (SMS)
Page 56

Area Information Message List
You can decide which types of areainformationmessagesyouwish to receive.
The number of Area Info codes that can be saved depends on your SIM card.
To insert an Area Information code
Messages
, YES,
Options
, YES,
Area Info
, YES,
Edit list
, YES,
1. Scroll to
object?
, YES.
2. Enter the new code and press
YES.
Add new
To delete the code
Messages
, YES,
Options
, YES,
Area Info
, YES,
Edit list
1. Scroll to
2. Select the code you want to delete and press
The message
3. Press
Delete?
appears in the display.
YES to delete the code.
C.
, YES.
Receiving an Area Message
When you receive an Area Information message,the message automatically
appearsinthedisplay.Youreadthemessageinthesamewayasyoureadan
ordinary text message, see “Receiving a Message” on page 50. When you
have read the message, press
YES. The message is deleted.
BSID
The BSID channel (see“Area Information Message List”on page 55) is used by
network operators for sending messages to their subscribers within a certain
network area. For example, the operator may inform you that you are within
your home network area and that you can now make calls at a lower rate.
Note! This feature may not be supported by your network operator.
To turn BSID on or off
Messages
, YES,
Options
, YES,
BSID
1. Scroll to
2. Select
OnorOff
.
Sending and Receiving Text Messages (SMS) 55
, YES,
Page 57

Forwarding Incoming Calls
If you want to make certain that your incoming calls are correctly handled
when you are unable to answer them, you can use the Forward service to
forward them to another phone number.
Note! The Forward Calls service may not be available on all networks.
The Forward service lets you forward your voice, fax and data calls
respectively – provided your subscription supports fax and data calls.
For voice calls, you may choose between the following forward alternatives:
• forward all voice calls, All speechcalls
• forward calls if you are already on the phone, When Busy
• forward calls that you do not answer within a specified time limit
(operator dependent), No Reply
• forward calls if your phone is turned off or if you are unreachable,
Not Reachable
Note! These alternatives are only valid for voice calls.
If you subscribe to theTwo Line Service, you mayset differentForwardCalls
for your two voice lines, i.e. Line 1 and Line 2. You will then h ave an
additional forward alternative, i.e. All Line 2 Calls.
Tip! If you place yourT28z in a specificEricssonDesktopCharger, your calls
may be forwarded automatically. See “Desktop Charger” on page 91.
When you are making a phone call and the phone call is forwarded to another
number, this is indicated in your di splay, if supported by your subscription.
Similarly, when receiving an incoming phone call which has been forwarded
from another number, this is indicated in your display,if supported by your
subscription.
56 Forwarding Incoming Calls
Page 58

Activating Forward Calls
Toforwardacall
Settings
, YES,
1. Scroll to
Call Options
2. Scroll to the forward alternative you want to turn on (
Busy
,
No Reply,Not Reachable,Fax CallsorDatacalls
Activate
3. Select
.
, YES,
Forward
, YES.
) and press YES.
All speech calls,When
4. A phone number recently used for the forward function or a number
recently present in the display will be suggested as a forward number.
Enter the phone number, including the area code, to which you want your
calls to be forwarded and then press
C.
press
YES. Ifyou need to delete numbers,
Tip! If the phone number isstored in the phonebook, you do not need to enter
u and then recall the number.
it. Press
WhenyouturnontheAll speech calls forward option, an icon is shown in
standby.
Note! When the Restricted Calls function is on, some Forward optionscannot be
activated. See “Security for Your Phone and Subscription” on page 58.
Cancelling Forward Calls
To cancel a certain Forward Calls
Settings
, YES,
1. Scroll to
CallOptions
2. Scroll to the forward alternative you want to cancel and press
3. Select
Cancel
The message
.
Pleasewait
appears,followedby a messagewhichinformsyou
, YES,
Forward
, YES.
YES.
that the Forward Calls has been cancelled.
Checking th e Forward Status
To check the status of a certain Forward Calls
1. Scroll to
Call Options
, YES,
Forward
, YES.
Settings
, YES,
2. Scroll to the forward alternative you want to check and press
Get status
3. Select
The message
.
Pleasewait
appears,followedby a messagewhichinformsyou
whether the Forward Calls is on or not.
To check thestatus of all F orward Calls
• Scroll to
Settings
, YES,
Call Options
, YES,
Forward
, YES,
Check All
Forwarding Incoming Calls 57
YES.
, YES.
Page 59

Security for Your Phone
and Subscription
There are several ways to protect your phone and subscription from
unauthorized use. Anythingfrom a SIM card lock to full phone number control.
The SIM Card Lock
The SIM card lock only protects your subscription and not your phone itself
from unauthorized use. If you change SIM cards, the phone still works with
the new SIM card.
Most SIMcards are lockedat the time of purchase. If the SIM card lock is on,
you have to enter the PIN (Personal IdentityNumber) every time you turn on
your phone. If you enter your PIN incorrectly three times in a row, the SIM
card is blocked. This is indicated by the message
you need to unblock it to access yoursubscription.
To unblock your SIM card
PIN blocked
1.
2. EnteryourPUK(orPUK2)whichyouwillfindintheinformation
supplied by your network operator.
3. Press
4. Enter a new four-to eight-digit PIN (or PIN2).
5. Press
6. Re-enter the new PIN (or PIN2) to confirm.
7. Press
appears.
YES.
YES.
YES.
PIN blocked
. If this happens
Note! If you enter thewrong PUK ten times in a row, your card is permanently
blocked. If this happens, you should contact your network operator.
To change your PIN code
Settings
, YES,
Locks
1. Scroll to
2. Enter your old (current) PIN and press
3. EnteryournewPINandpress
ThephoneasksyoutorepeatthePIN.
4. EnteryournewPINasecondtimeandpress
The PIN has now been changed.
58 Securityfor Your Phone and Subscription
, YES,
YES.
Card Lock
YES.
, YES,
YES.
Change PIN
, YES.
Page 60

Note! If themessage
incorrectly. If themessage
Match error
Wrong PIN
appears, this means you entered the newPIN
appears, followed by
Old PIN:
, you entered
your old PIN incorrectly.
To change your PIN 2
1. Scroll to
Change PIN2
, YES.
Settings
, YES,
Locks
, YES,
Card Lock
, YES,
2. Follow the same procedure as described in ‘To change your PIN code’ above.
To turn offthe SIM card lock
Settings
, YES,
Locks
, YES,
Card Lock
, YES,
Protection
1. Scroll to
Off
, YES.
2. EnteryourPINandpress
The message
Unlocked
confirms that the card lock has now been turned off.
YES.
, YES,
Note! This only worksif your SIM card allows you to cancel the card lock.
To turn on the SIM card lock
1. Scroll to
2. EnteryourPINandpress
Settings
On
, YES.
The message
, YES,
Locks
, YES,
Card Lock
YES.
Locked
confirms that the card lock is now on.
, YES,
Protection
, YES,
The Phone Lock
The phone lock protects the phone against unauthorized use if it is stolen and
the SIM card is exchanged. It is not on when you buy the phone. You can
change the phone lock code (0000) to any four- to eight-digit personalcode.
The phone lock can be On, Automatic or Off.
Phone lock on
If the phonelock is On, the message
Phone locked Phone lock code:
time you turn on the phone. You have to enter your code followed by
appears each
YES to
use your phone.
Automatic
If the phonelock is set to Auto matic, you do not need to enter your phone
lock code until a different SIM card is inserted in thephone. After the phone
lock code has been entered correctly, the phone can be used with the new
SIM card. You are not asked to enter the phone lock code again until the
original SIM card or a different SIM card is inserted.
Security for Your Phone and Subscription 59
Page 61

Changing the phone lock code
1. Scroll to
Phone Lock
, YES,
Change code
, YES.
Settings
, YES,
Locks
, YES,
2. Follow the steps described in “To change your PIN code” on page 58.
Note! It is importantthat you remember your new code.If you should forget it,
you have to hand in your phone to your local Ericsson retailer.
To set the phone lock to on, automatic or off
1. Scroll to
2. Select
On,AutomaticorOff
.
3. Enter the phone lock code and press
Phone Lock,Protection
YES.
, YES.
Settings
, YES,
Locks
, YES,
The new lock statusis shown.
Restrict Calls
The Restrict Calls service allowsyou to restrict certain types of callsto be
made and received.
Note! This service maynot be available on all networks or may require a
separate subscription.
The following callscan be restricted:
• all outgoing calls,
• all outgoing international calls,
• all outgoing international calls except to your home country,
• all incoming calls,
• all incoming calls when you areabroad (when roaming),
Restictall Outg
Outgoing Intl
OutgIntlRoam
All Incoming
Inc when Roam
Tomake sure that a call restriction is notchanged by someone else, you need a
password, which comes with your subscription, to turn onor cancel a call
restriction. Youcan change the password as often as you like.
Toactivate/cancel a call restriction
1. Scroll to
Call Options
, YES,
Settings
, YES,
2. Scroll to the option you want and press
3. Select
ActivateorCancel
4. Enter your password and press
The message
Pleasewait
.
YES.
appears,followedby a messagewhichinformsyou
whether the call restriction is on or not.
Note! If you forward incoming calls you cannot activate some Restrict Calls
options. Likewise, if you restrict calls, you cannot activate some Forward
options. See “Forwarding Incoming Calls” on page 56.
60 Securityfor Your Phone and Subscription
Restrict Calls
YES.
, YES.
Page 62

To cancel all call restrictions
Settings
, YES,
1. Scroll to
Call Options
2. Enter your password and press
The m essage
Pleasewait
appears, followed by a message confirming that all
, YES,
YES.
Restrict Calls
, YES,
Cancelall
, YES.
call restrictions have been cancelled.
To check thestatus of a call restriction
Settings
, YES,
1. Scroll to
Call Options
2. Scroll to the option you want and press
Get status
3. Select
The message
.
Pleasewait
appears,followedby a messagewhichinformsyou
, YES,
Restrict Calls
YES.
, YES.
whether the call restriction is on or not.
To change the password
1. Scroll to
2. Enter the old (current) password and press
3. Enter the new password and press
4. Enter the new password a second time and press
Settings
New password
The message
, YES,
, YES.
Please wait
Call Options
, YES,
YES.
Restrict Calls
YES.
YES.
, YES,
appears, followedby a message confirmingthat the
password has been changed.
Fixed Dialing
Fixed Dialing is a way of restricting outgoing calls. It requires a SIM card that
allows fixed numbersto be saved. The fixednumbers are normally protected by
your PIN2. How many fixed numbers you can save depends on your SIM card.
The Fixed Dialing function allows calls to be made only to certain numbers
saved on the SIM card. If an attempt is made to call other numbers, the
message Number not permitted appears in the display.
It is possibleto save partial numbers, for example an area code, or an area
code followed by the first digits common to several numbers. Storing
0123456 allows calls to bemade to all numbers starting with 0123456.
Numbers beginning with the international (+) sign and country code can also
be saved, allowing you to make calls abroad.
Numbers which include question marks canbe saved.A question mark should
be read as a wild card, i.e. it can represent any number (0-9). To enter a
questionmarkpressandhold#.
Note! The Fixed Dialing service does not prohibit calls to the international
emergency number 112 (or 911 in the Americas).
Security for Your Phone and Subscription 61
Page 63

To turn the Fixed Dialing service on or off
1. Scroll to
Phone Book
2. Enter your PIN2 and press
3. Select
OnorOff
, YES,
Options
, YES,
Fixed Dialing
YES.
, YES.
.
To save fixed n umbers
1. Scroll to
Phone Book
2. Enter your PIN2 and press
3. Enter the fixed number and press
, YES,
Fixed Numbers
YES.
YES.
, YES,
Add new object?
4. Enterthenameyouwanttolinkwiththenumberandpress
To edit a saved fixed number
1. Scroll to
Phone Book
, YES,
Fixed Numbers
, YES.
2. Scroll to the fixed number that you want to edit and press
Edit
3. Select
4. Enter your PIN2 and press
5. Edit the fixed number and press
6. Edit the name and press
7. Enter the position number and press
.
YES.
YES.
YES.
YES.
To delete a fixed number
1. Scroll to
Phone Book
, YES,
Fixed Numbers
, YES.
2. Scroll to the fixed number that you want to delete and press
Delete
3. Select
4. Enter your PIN2 and press
.
YES.
The fixed number is deleted.
, YES.
YES.
YES.
YES.
Closed User Groups
The Closed User Group (CUG) function is another way of lowering call
costs. It depends entirely on your operator and subscription. Not all networks
support this function.
Your network operator can place certain numbers in groups. On some
networks it is cheaper to make calls within a call group. You can have a
maximum of 10 groups.
ToaddaClosedUserGroup
1. Scroll to
Add new object?
Call Options
, YES.
, YES,
Settings
, YES,
2. Enter the name of the Closed User Group and press
3. Enter the index number of the group and press
Note! The index numbers are provided by your network operator.
62 Securityfor Your Phone and Subscription
Closed Groups
YES.
, YES,
YES.
Edit list
, YES,
Page 64

To activate a Closed User Group
Settings
, YES,
1. Scroll to
Call Options
2. Scroll to the group you want to activate and press
Activate
3. Select
.
, YES,
Closed Groups
YES.
, YES,
Edit list
, YES.
Calls can only be made within the selected user group.
To call outside Closed User Groups
You can decide whether outgoing calls to a non-CUG number are allowed.
1. Scroll to
Open Calls
2. Select
On
Call Options
, YES.
.
, YES,
Closed Groups
, YES,
Settings
, YES,
To edit a name in the CUG List
Settings
, YES,
1. Scroll to
Call Options
2. Scroll to the group that you want to edit and press
Edit
3. Select
.
4. Enter a new name and press
YES.
, YES,
Closed Groups
YES.
, YES,
Edit list
, YES.
To delete a group from the CUG List
Settings
, YES,
1. Scroll to
Call Options
2. Scroll to the group that you want to delete and press
Delete
3. Select
.
, YES,
Closed Groups
, YES,
YES.
Edit list
, YES.
Call Screening
With the Call Screening service, you can choose to receive calls only from
certain numbers. Other calls are automatically rejected by a busy signal.
You have to save the numbers that you want to receive in an Accepted List.
The rejected calls are saved in the Call List in the Call Info menu.When you
buy yourphone, the setting for the Call screening service is set to Accept all
calls, i.e. you receive calls as normal.
To add numbers to the Accepted Callers List
1. Scroll to
YES,
Add new object?
Call Options
, YES. This takes you to your phone book.
, YES,
Call screening
, YES,
Settings
, YES,
2. Select a number.
Toadd moreparticipants in the
Accepted List
, repeat steps 1 to 2 above. It is
possible to choose a number within a group in your phonebook.
To delete numbers from the Accepted Callers List
Settings
, YES,
1. Scroll to
AcceptedList
, YES.
Call Options
2. Scroll to the number you want to delete and press
Security for Your Phone and Subscription 63
, YES,
Call Screening
, YES,
C.
Accepted List
,
Page 65

To check the Accepted Callers List
• Scroll to
AcceptedList
Call Options
, YES.
, YES,
Call Screening
, YES,
Settings
, YES,
To Accept calls from the list
Settings
, YES,
1. Scroll to
Screening Mode
2. Select
, YES.
Acceptsome
Call Options
.
Now you will only receive calls from the participants in the
, YES,
Call Screening
, YES,
AcceptedList
An icon is shown in standby.
To reject all calls
1. Scroll to
2. Select
Settings
Screening Mode
Accept none
, YES,
, YES.
.
Call Options
, YES,
Call Screening
, YES,
All incoming calls will now be rejected.The caller hears a busy signal and
you get no indication of incoming calls. An icon is shown in standby.
Toaccept callsfrom all
1. Scroll to
Screening Mode
2. Select
, YES.
AcceptAll Calls
Call Options
.
, YES,
Call Screening
, YES,
Settings
, YES,
Youwill now receive all calls as normal.
Tocheck the Accepted Calls function
• Scroll to
Screening Mode
Call Options
, YES.
, YES,
Call Screening
, YES,
Settings
, YES,
The Accepted Calls alternativethatisonismarkedwithafilledbutton.
.
64 Securityfor Your Phone and Subscription
Page 66

Handling More than One Call Simultaneously
Your phone allows you to handle more than one call simultaneously.
This means that you can put a call that is in progress on hold, while youmake
or answer a second call, and then switch between the two calls.
You may also set up a Conference Call to have a joint conversation with up
to five people. You may put an individual or a group of conference members
on hold while you add other people to the conference call. You mayalso
put conference members on hold while you talk to someone privately.
See “Conference Calls” on page 67.
The Call Waiting Service
If you wish to be able to receive a second call, while another call is in
progress, you must turnon the Call Waiting service.
Note! The Call Waiting servicemaynotbeavailableonallnetworks.
If you are engaged in a fax or a data call, you will not hearany incoming
calls. Incoming calls are rejected.
To turn on the Call Waiting service
Settings
, YES,
• Scroll to
There may be a short delay beforethe network responds. In the meantime,
the message
Call Waiting Activated
To cancel the Call Waiting service
• Scroll to
To check whether the Call Waitingservice is on or not
• Scroll to
Pleasewait
Settings
Settings
Call Options
is d isplayed. This is followed by the message
.
, YES,
Call Options
, YES,
Call Options
, YES,
, YES,
, YES,
Call Waiting
Call Waiting
Call Waiting
, YES,
, YES,
, YES,
Activate
Cancel
, YES.
Get status
, YES.
, YES.
Call on hold
Making a Second Call
1. Put the current call on hold by pressing
2. Enter the number you wish to call and press
You may also retrieve the number from your phone bookby pressing and
d.
holding
Note! You can only put one call on hold.
Handling More than One Call Simultaneously 65
YES.
YES.
Page 67

Receiving a Second Call
If the Call Waitingserviceis on,you hear a tone in the earpiece if youreceive
a second call. The number or name of the caller is normally shown at the top
of the display togetherwith a list of the alternatives Answer, Busy and
Release&answer.If the incoming call is a restricted number, the display
Private
shows
Unknown
. If the incoming call is a number without any CLI service,
is shown.
You can do one of the following:
Put the current call onhold and answer the waiting call
• Press
YES to answer the waiting call.
The current call is now put on hold.
Your held call ismarked in gray in the display and the active call ismarked
in black.
Continue the current calland reject the waiting call
Busy
• Select
.
The waiting call is rejected. If the caller’s networksupports it, the caller
hears a busy signal.
Note! If ForwardWhenBusyis on, the waiting call is forwarded to the
number you have specified.
End the current call and answer the waiting call
• Select
Release&Answer
.
One Active Call and One Call On Hold
When you have one active call and one call on hold, you can do one of the
following:
Switch between the two calls
• Press
YES.
End the active call and return to the call on hold
1. Press
2. Press
If you press
NO.Thequestion
YES.
NO, also thecall on hold will beended.
Retrieve call?
appears.
Endbothcalls
• Scroll to
66 Handling More than One C all Simultaneously
Call Handling
, YES,
Releaseall
, YES.
Page 68

Connect the two calls (CallTransfer)
• Scroll to
Call Handling
, YES,
Transfer call
, YES.
The two calls are nowconnected to each other, and you are disconnected
from both calls.
Note! The Call Transfer service may not be available on all networks.
Join the two calls intoa Conference Call
• Scroll to
Call Handling
, YES,
Join calls
, YES.
See ‘Conference Calls’ below.
Receiving a Third Cal l
If the Call Waiting service is on, you may receive a third call when you have
one active call and a second call on hold. From now on, you cannot answer any
more calls without disconnecting one, if you do notwant to create a conference
call. You hear a tone in the earpiece and
Release&Answer
appear in
Busy
and
the display.
You can do one of the following:
End the current call and accept the waiting call
• Select
Release&Answer
.
The waiting call becomes active and the call on hold remains on hold.
Reject the waiting call
Busy
• Select
.
The third call is rejected. Provided the caller’s network supports this
function, the caller hears a busy signal.
Create a conference call
• See below
Conference Calls
Note! The Conference Call service may not be available on all networks.
A conference call is a call with more than two p articipants. As in an ordinary
conference, all participants can hear each other at the same time. You may
include up to five participants in a conference call.
Creating a Conference Call
Tocreate a conference call, you must have one active call and one call on hold.
To join the two calls into a conference call
• Scroll to
Call Handling
, YES,
Join calls
, YES.
You have now createda conference call (with yourselfand the active and
held calls).
Handling More than One Call Simultaneously 67
Page 69

Adding New Participants to the Conference Group
You may put the conference group on hold and then add new participants.
To add a new participant
1. Press
YES to put the conference group on hold.
2. Call the next person you wish to include in the conference group.
3. Scroll to
Call Handling
, YES,
Join calls
, YES.
You can include up to five participants in the conference group by
repeatingsteps1to3above.
To check the participants in the conferencegroup
1. Scroll to
Call Handling
, YES,
ID Conf Parties
, YES.
The first participant’s phone number is displayed, if available. If the
participant’s number and name are stored in your phone book, the name is
displayed instead. Otherwise the display shows part 1, 2 etc.
2. Scroll with
d to check theother participants.
Having a Private Conversation with One of the Participants
If you wish to have a private conversation with one of the participants, you
may extract that participantfrom the conferenceand put the other participants
on hold.
To extract a participant
1. Scroll to
Call Handling
, YES,
Extract
, YES.
2. Select the participant that you want to extract.
T orejoin the participant to the conference group
• Scroll to
Call Handling
, YES,
Join calls
, YES.
Releasing Participants from the Conference Group
You can release participants from the conference group one by one or
allatonce.
To release a certainparticipant
1. Scroll to
Call Handling
, YES,
Release
, YES.
2. Select the participant that you want to release.
To release all participants
• Scroll to
68 Handling More than One C all Simultaneously
Call Handling
, YES,
Releaseall
, YES.
Page 70

Making a Call while a Conference Call Is in Progress
You can put the conferencegrouponhold and make another call. Youcan then
switch between the new call and the conference call.
Toputtheconferencegrouponholdandmakeanewcall
1. Press
2. Enter the number you wish to call and press
YES.
YES.
To switch between the new call and the conference group
• Press
YES.
To end thenew call and return to the conference group
• Press
NO and then YES.
Ending the Conference Call
• Close the flip or press
NO.
Handling More than One Call Simultaneously 69
Page 71

Setting Network Preferences
Searching for Networks
When you turn on the phone, it searches for the last accessed network. If this
is not within range, you may use another network, provided your home
network has an agreement that allows you to do so. This is calledroaming.
The order of preference in which the phone chooses a network is determined
by a list of preferred networks on your SIM card. Your phone includes a
number of functions that let you determine how it searches for a network.
You may also choose a network yourself from those within range.
Toselect a network
Settings
, YES,
Networks
, YES,
, YES,
Select Network
New Search
1. Scroll to
2. If there is more than onenetwork within range, scroll to the network you
want and press
To start an automat ic network search
• Scroll to
The phone automatically starts searching for a network according to the
list of preferred networksstored on your SIM card.
YES to select it.
Settings
, YES,
Networks
, YES.
, YES.
Display Information
The currently used network is marked with a filled button. Together with the
networkname,youalsogetthefollowinginformationinthedisplay:
The display shows... meaning...
70 Setting Network Preferences
You are in your home zone.
Does not appear on all networks.
The name of the network is included in a list of
preferred networks on your SIM card.Youcan use
this network.
The name of the network is included in a list of
forbidden networks on your SIM card. You may not
be allowed to use this network, except for
emergency calls.
Page 72

All other networks without any icons are available, i.e.they are not included
in the preferred or forbidden list on your SIM card but they may be used.
Forbidden Networks
The names of the forbidden networks are stored on your SIM card. If such a
forbidden network is within range, it is left out when the phone searches for a
network (automatic search mode).
If your home network and a forbidden network come to an agreement that
allows you to use the forbidden network,you can select this network even
Forbidden
though the message
is displayed.
List of Preferred N etworks
You can create and edit a list that defines in which order your phone will
select a network during automatic network selection, when your home
network is not within range.
The number of networks that can be storedin the list depends on your SIM card.
You can review the network list and rearrange the order of the networks.
You can also add new networks to the list and delete networks from it.
To review the list of networks
• Scroll to
PreferredNets
, YES.
Settings
, YES,
Networks
, YES,
The name of the first network is displayed.
u or d to scroll through the networks in the list.
Use
To see a network’s full name
Settings
, YES,
Networks
, YES,
1. Scroll to
2. Scroll to a network and press
Full name
3. Select
.
PreferredNets
YES.
, YES.
To add a network to the list
Settings
, YES,
Networks
, YES,
1. Scroll to
YES.
PreferredNets
2. Scroll to the network that you want to add and press
If the networkyou want does not appearin the list,scroll to
YES. Enter the three-digit country number and the two-digit network
number and press
3. Enter a position number and press
YES.
YES.
, YES,
YES.
Addnew object?
Other
and press
Note! All lower prioritized networks will be shifted one step down in the list.
Setting Network Preferences 71
,
Page 73

To delete a network from the list
Settings
, YES,
Networks
, YES,
1. Scroll to
PreferredNets
2. Scroll to the network that you want to delete and press
Delete
3. Select
.
, YES.
YES.
To rearrange the list
Settings
, YES,
Networks
, YES,
1. Scroll to
PreferredNets
2. Scroll to the network that you want to move and press
3. Select
Change priority
.
4. Enter the new position within the list and p ress
, YES.
YES.
YES.
Search Modes
When you turn on your phone, it searches for a network. This can be done in
two different ways, depending on the search mode that is on. When you buy
your phone it is set to automatic search mode.
Automatic search mode means that your phone searches for the last accessed
network first. If thisis not available, it automatically searches for another
available network within range.
Manual search mode means that your phone searches for the last accessed
network first. If thisis not available, the question
Select net?
appears. You then
need to choose a network as described in “Searching for Networks” on
page 70.
To turn on the automatic search mode
Settings
, YES,
Networks
, YES,
• Scroll to
Search Mode
, YES,
Automatic
, YES.
To turn on the manual search mode
Settings
• Scroll to
72 Setting Network Preferences
, YES,
Networks
, YES,
Search Mode
, YES,
Manual
, YES.
Page 74

Knowing the Call Time/ Call Cost
During a call, the duration of the call is shown in the display. When you end
the call, the call duration information is shown for another three seconds.
If you subscribeto cost inform ation, the call cost (or the number of call units)
is displayed instead of the call duration.
TotalCallTimeorCallCost
The Call Info menu allows you to check the total time or cost of your calls.
To check the time/cost of the last call
Call Info
, YES,
Last Call
• Scroll to
Now you can check the duration or cost (if you subscribe to cost
information) of the last call.
To check the time of your outgoingcalls
Call Info
Call Info
Call Info
, YES,
, YES,
, YES,
• Scroll to
To check the total call time
• Scroll to
To check thetotal call cost
• Scroll to
, YES.
Outgoing Time
Total Time
, YES.
Total Cost
, YES.
, YES.
Toreset the total call time/call cost
1. Scroll to
2. Select
3. Press
Note! If yousubscribe to cost inf ormation, you must enter your PIN2 to clear
thecostortimecounter.
Call Info
, YES,
Clear Counters
Total Cost,Total TimeorOutgoing time
YES to reset the cost or time.
, YES.
.
Determining the Call Cost
The Price function lets you enter and specify the priceper call unit. The price
enteredisstoredonyourSIMcard.
Knowing the Call Time/Call Cost 73
Page 75

Note! This service must be supported by your subscription and your network.
If youdo not specify a price per call unit, the numberof callunits is displayed
during a c all,and in Last Call and Total Cost in the Call Info menu.
T oenter the price per call unit
Call Info
, YES
Options
, YES,
Set Fee
1. Scroll to
2. Enter your PIN2 and press
3. Select
Change price
.
YES.
, YES.
4. Enter the code for the currency you want, for example USD for US
Dollars, and then press
5. Enter the price per call unit, for example 0.75, and press
YES.
YES. To enterthe
decimal point, press #.
To revert to call units
1. Scroll to
2. Enter your PIN2 and press
3. Select
Units
Call Info
.
, YES,
Options
, YES,
YES.
Set Fee
, YES.
Credit Limit for Ca ll s
If both your network and SIM card support this feature, you can enter a total
amount ofmoney that can be used for makingcalls. This could be useful when
you lend your phone to someone and do not want their call costs to exceed a
certain amount which you can d ecide. After a call is made, the cost is
deductedfrom this amount. When theamount reaches zero,no more calls can
be made.
Note! As the price of a call may vary due to where you are calling from,
at what time of the day you are calling and so on, the credit limit is only an
estimated value.
To set a specific credit limit
Call Info
, YES,
1. Scroll to
Options
2. Enter your PIN2 and press
3. Select
Change Credit
.
4. Enter the amount, for example 50 dollars, and then press
Toset unlimited credit
Call Info
, YES,
1. Scroll to
Options
2. Enter your PIN2 and press
Unlimited
3. Select
.
Note! If you set the credit to Unlimited, the cost counter startsfromzero and
increases.
74 Knowing the Call Time/Call Cost
, YES,
YES.
, YES,
YES.
Set Credit
Set Credit
, YES.
YES.
, YES.
Page 76

Using Two Voice Lines
If yoursubscription supports the Two LineService, your phone willhave two
voice lines with different phone numbers, separate bills and perhaps different
subscription services. This isuseful for example if you want to keep business
calls and private calls on separate lines.
When you buy your phone, the names of the linesare normallyLine 1 and Line
2, but you can change their names. You can only send text messages (SMS) on
Line 1. An icon indicates the line currently chosen foroutgoing calls.
To change the name of a line
Settings
, YES,
Display
, YES,
1. Scroll to
2. Select a line.
3. Enter a new name and press
Edit Line Tags
YES.
Changing Phone Lines
When you want to make a call, you need to choose which line to use.
Note! Incomingcalls can be received on both lines no matter which line is
currently chosen.
To change phone lines
1. Scroll to
2. Select
Call Handling
Switch to Line 1orSwitch to Line 2
From now on, all outgoing calls are made on this line.
, YES.
.
, YES.
Different Settings for E ach Line
You may have different settings for each line, for examplethe ring signal or
forward calls.
Tip! You may also have separate Voice Mail numbers for each phone line, if
supported by your subscription.
Some operators may show the call time or call cost for each line respectively.
Using Two Voice Lines 75
Page 77

Voice Control
Your phone allows you to:
• voice dial - call someone by simply saying the name
• answer and reject calls using your voice when connected to a handsfree kit
Tocall someone, you o nly need to press
name (voice label)linked with thatperson and yourphone automatically dials
the number. To answer or reject calls, say Answer or Busy.
YES until you hear a tone, say the
Preparing your Phone for Voice Dialing
When you buy your phone, voice dialing is set to on. If, for some reason, it has
been turnedoff, you will need to turn it on again before you can start using it.
To turn Voice Dialing on
1. Scroll to
2. Select
Note! Once you have turned voice dialing on, you are asked if you want to
record a voice label every time you savea new number in your phone book.
See “Saving a Number Together with a Name” on page 29.
Before you can usevoice dialing, you need to record voice labels for your
phone book entries. To get a good result when recording voice labels, make
sure you are in a quiet environment.
1. Scroll to
2. Select a phone book entry to which you want to add a voice label.
3. Wait for the tone and say the name (voice label) that you want to save.
4. Press
Settings
, YES,
VoiceControl
On
.
Your phone is now ready to record voice labels.
T orecord voice labels for existing phone book entries
Phone Book
The voice label is played back to you.
YES to save the voice label you have recorded.
If you do not find the recording OK, repeat step 3.
, YES,
, YES,
VoiceLabels
, YES,
VoiceDialing
Add voice?
, YES.
, YES.
An icon appears next to those phone book entries for which you have saved a
voice label. You can save 10 voice labels in the phone.
You can also record voice labels in Find and Edit in the Phone Book menu.
76 Voice Control
Page 78

Note! To use voicedialing with a vehicle handsfree unit, you need to record
your voice labels in the car, when connected to a vehicle handsfree.
Voice labels for phone book entriesrecordedin thephone will not be available
in the car, and vice versa. For more information about the Vehicle Handsfree
unit, see “Vehicle Handsfree” on page 93.
Recording Problems
If your phone cannot detect any speech, one of the following might have
happened:
• you spoke too softly- try speaking louder
• the voice label was too short - it should be around one second long
• you spoke too late or too soon - speak after the tone
Go back to step 1 of ‘To record voice labels for phone book entries’.
Listening to and Editing V oice Labels
Your phone allows you to listen to and edit a list of the phone book entries that
have voice labels.
T olisten to and/or edit the voice labels saved in your phone book
1. Scroll to
Phone Book
, YES,
VoiceLabels
, YES.
2. Scroll to the entry that you want to edit.
The voice label is played back to you.
3. Press
4. Select
YES.
Editvoice
if you want to re-recordthe voice labelor select
Delete voice
if you want to delete the recorded voice label.
5. Continue according to the instructions.
You can also listen to and/or edit your voice labels in Find and Edit in the
Phone Book menu.
Voice Label Playback
If you have recorded a voice label for an entry in your phone book, the voice
label is played back to you in the following cases:
• when you move through the phone book or voice label listand reach
this entry
• when you receive a call from the number corresponding to this entry
• when you voice dial this entry (before the call is connected)
Making Calls Using your Voice
To make a call
1. Press and hold
2. Release
YES until you hear a tone.
YES and say a name that you have recorded earlier.
The name (voice label) is played back to you, and the call is connected.
Voice Control 77
Page 79

Instead of pressing and holding YES, as in step 1 above, you can slide and
hold the volume key when the flip is open. A third alternative is to initiate
voice dialing by just opening the flip, but then Start on Open must be on.
To turn on Start on Open
1. Scroll to
2. Select
On
VoiceControl
.
, YES,
Start on Open
, YES.
Settings
, YES,
When Start on Open is on, an icon appears in standby.
Voice Answering
When connected to a portable or vehicle handsfreeunit, you can answer or
reject incoming calls by using your voice.
Before you can use voice answering, you need to turn on the voice answering
function and record your voice commands.
To turn on Voice Answering
1. Scroll to
2. Select
On
Voice Answer
.
, YES.
Settings
, YES,
Handsfree
, YES,
You now have to train your phone to recognize your voice answering
commands.
3. Press
YES to continue.
4. Follow the instructions in the phone display, i.e. say the word Answer and
YES to save yourrecording. (Use the microphone of the Handsfree
press
unit.) If the recording was not OK, repeat step 3.
5. Say the word Busyand press
YES to save your recordings.
Note! If you prefer, you can use other words instead of ‘Answer’ and ‘Busy’.
To answer an incoming call using your voice
• When the phone rings,say the word Answer.
The word Answer is played back to you and the call will be connected.
To reject an incoming call
• When the phone rings,say the word Busy.
The word Busy is played back to you, and thecall is rejected,i.e. thecaller
hears a busy signal.
Note! For more information about handsfree units, see “Portable Handsfree”
on page 92 and “Vehicle Handsfree” on page 93.
78 Voice Control
Page 80

Calling Card Calls
When making international or long distance calls, you may not want your
operator to charge you for these calls on your normal account. If you have a
credit card or a calling card, you may want to redirect the charges to one of
these accounts instead. The Calling card service lets you redirect the charges
to either a credit card account or to a calling card account.
You can save two separate card numbers in your phone. These numbers are
protected by a four- to eight-digit phone lock code. When you buy your phone
thecodeissetto0000. You may change the code to one that you choose
yourself. See “The Phone Lock” on page 59.
Note! YoucannotusetheCallingcardservicewhenmakingafaxoradatacall.
Activating the Calling Card Service
To be able to make calling card calls, you need to turn on the service.
To turn on the Calling card service
1. Scroll to
2. Enter your phone lock code (
3. Select
Phone Book
On
.
The Calling card service is now on and the sub-menu Calling Cards is
availablein the Phone Book menu.
, YES,
Options
, YES,
0000
) and pressYES.
Set calling cards
, YES.
Saving Calling C ard Numbers
You can save two calling card numbers in your phone.
To save a card number
1. Scroll to
2. Enter your phone lock code and press
3. Select
4. Enter the access number of the calling card server and press
5. Enter a name that you want to link with your calling card server and
6. Enter the verification code of the calling card server and press
7. Select whether you want to send the number that you want to call or the
Phone Book
Addnew object?
YES.
press
verification code first and press
, YES,
.
CallingCards
, YES.
YES.
YES to confirm your choice.
YES.
YES.
Calling Card Calls 79
Page 81

Note! Your service provider will give you the information needed for the
verification codes.
To delete a card number
1. Scroll to
Phone Book
2. Scroll to the card number that you want to delete and press
3. Select
Delete
The question
4. Press
YES.
, YES,
.
Delete?
appears in the display.
CallingCards
, YES.
YES.
The card number has been deleted.
Toeditacardnumber
1. Scroll to
2. Scroll to the card number that you want to edit and press
3. Select
Phone Book
Edit
.
, YES,
CallingCards
, YES.
YES.
Y oumay now edit the card number.
4. Press
YES to confirm the new number.
Youmaynowalsoeditthenameandcode.
Choosing a Card
If you have saved two card numbers,you must choose which card you want to
usebeforemakingacallingcardcall.
To select a card
1. Scroll to
Phone Book
2. Enter your phone lock code and press
, YES,
CallingCards
, YES.
YES.
3. Select the card that you want to use.
4. Select
Selectcard
.
Making a Calling Card Call
1. Enter the phone number of your calling card server or retrieve it from the
Phone Book by pressing and holding
2. Press and hold
The access number of the calling card server is called and during the
connecting phase, you are asked to send the phone number of the person
that you want to call and the verification code, in the order chosen earlier
(see above).
3. To send the number and verification code during the connecting phase,
YES whenthe display shows
press
sent automatically. Now you are connected to your personal phone call.
80 Calling Card Calls
YES.
d.
Send
or wait a few seconds and theyare
Page 82

Sending and Receiving Fax and Data Calls
Note! To be able to use various communications services you need the
appropriate software such as a fax program, an e-mail program or an
Internet browser.
Sending Fax and D ata Calls
All fax and data calls are initiated from the appropriate computer software.
To send fax and data calls you need to connect your phone to a computer,
for example by means of an infrared modem and then start the appropriate
software program.
Receiving Fax and Data Calls
The procedure of receiving fax and data calls depends on your network and
subscription. If you have different numbers for voice, fax and data calls, this is
referred to as multi numbering.This means that you can have up to three
numbers in your subscription. If you only have one n umber for all call types,
this is referred to as single numbering.
Receiving Fax and Data Ca lls – Multi Numbering
If your network and subscription support multi numbering, the type of
incoming call is shown in the display. There are two possible calls apart from
voice calls:
• Fax calls
• Data calls
The display shows the type of call.
Toreceiveafaxordatacall
1. Connectyour computer to the phone.
2. Answer the call from within the software program (if it does not answer
automatically).
Note! You cannot answer an incoming fax or data cal l by pressing the
key on thephone but you may reject the call by pressing NO.
Sending and ReceivingFax and Data Calls 81
YES
Page 83

Receiving Fax and Data Ca lls – Single Numbering
If you have a SIM card that does not support separate fax and data numbers,
the phone does not recognize the type of incoming call.
Next Incoming Call Type
If you want to receive a fax or data call you have to set the phone to one of
these options in theNext Incoming sub-menu. Youonly see this menu if your
phone detects that you do not have separate numbers for data, fax and voice.
Once you have set your phone for a specific incoming call, it stays like this
until you change it. The default setting is Voice.
To set thenext incoming call type
1. Scroll to
Call Handling
, YES,
Next Call Type
, YES.
2. Select the call typeyou want (Voice,Data or Fax).
82 Sending and ReceivingFax and Data Calls
Page 84

Extras
Alarm Cl ock
The phone has an alarm clock, which you may find useful when travelling.
When it is on, an icon is shown in the display.
The alarm rings at the time set and the display flashes, even if the phone is
turned off. The volume of the alarm signal is always increasing, provided the
battery is attachedand charged.
The alarm rings for 60 seconds and is repeated every nine minutes, if you do
not turn it off. After 60 minutes, the repeat function is turned off
automatically.
To set the time of the alarm
Extras
, YES,
1. Scroll to
2. Enter the time.
3. Press
1. Scroll to
2. Enter the time.
3. Press
YES to confirm your setting.
To change the alarm time
Extras
, YES,
YES to confirm your setting.
AlarmClock
AlarmClock
, YES.
, YES,
Set new time
, YES.
To turn the alarm signal off
• Pressanykeytoturnthealarmoffwhenitrings.
If you do not want the alarm to be repeated, press
To turn offthe alarm function
Extras
, YES,
1. Scroll to
Cancel
2. Select
You can also find the Alarm Clock in Time and Date in the Settings menu.
.
AlarmClock
, YES.
YES.
Extras 83
Page 85

Calculator
The phone has a built-incalculator, which can add, subtract, divide
and multiply.
+,-,x,/
• Press # to get
• Press
C to delete a figure to the left of the cursor.
.
• Press * to enter a decimal point.
To use the calculator
In this example we are going to divide 134 by 32.
Extras
, YES,
Calculator
1. Scroll to
, YES.
2. Enter 134.
3. Press # repe atedly until the division sign (/) appears.
4. Enter 32.
5. Press
6. To clear the display,press
YES to get the answer.
C.
Stopwatch
The phone has a built-in stopwatch for you to time a certain activity.
To run the stopwatch
Extras
, YES,
Stopwatch
1. Scroll to
2. Press
YES to start the stopwatch. Press YES againtostopit.
, YES.
To resetthe stopwatch
• Press
C when the stopwatch is not running.
Tip! By pressing # when the stopwatch is running, you can store up to 9 lap
times. Press
u or d to check your stored lap times.
Note! If you receivean incoming call or voiceor text message while the
stopwatch is running, the stopwatch is turned off. If you exit the stopwatch
menu, the stopwatch is turned off.
The phone has a built-in 24-hour timer. You set the time you want and when
that time is out, an alert signal sounds.
1. Scroll to
2. Enter the time and p ress
84 Extras
Timer
To set the timer
Extras
, YES,
Timer
, YES.
YES.
The countdown begins. The timer is shown in standby mode.
When the alert sounds, press any key to turn it off.
Page 86

To set a new time when the timer is running
1. Scroll to
2. Enter the time and p ress
Set new time
YES.
, YES.
Extras
, YES,
Timer
, YES,
The countdown begins. The timer is shown in standby mode.
When the alert sounds, press any key to turn it off.
To turn off the timer
Extras
, YES,
Timer
1. Scroll to
2. Select
Cancel
.
, YES.
Note! The timer does not work when the phone is turned off.
Games
Your phone has two different games for your enjoyment. There are help texts
available in each game as a guide for you to get started.
®
Tetris
The object of Tetris is to prevent the blocks from reaching the top. Each time
you fill a line, the line disappears.
To start Tetris
Extras
, YES,
Games
, YES,
Tetris
1. Scroll to
Tetris
appears in the display.
2. To start a game, select
Start
.
, YES.
3. Select level (1–10).
4. Pressanykeytostart.
• Instead of choosing Start you can scroll with
d to select
High-score, Help or Quit (at step 2 above).
To control the game
• 8 or slide the volume key downwards = move left
• 2 or slide the volume key upwards = moveright
• 5 or 9 = rotate
• 3 or 6 =dropfaster
C =pause
•
NO =quit
•
®
Tetris
; © Elorg 1987. Classic Tetris™; © Elorg 1998
Tetris Logo by Roger Dean; © The T etris Company 1997
All Rights Reserved.
Extras 85
Page 87

Solitaire
The object of Solitaire is to form four piles of cards, one persuit, running
from ace toking. The cards are dealtout into seven columns. The last six
columns have one or more cards facing downwards. If the top card in a
column is removed, revealing the face-down card, you may turn it face up.
Only kings, orstacks of cards beginning with a king may be moved to an
empty column.
Columns of cards are builtup in descending order and alternating colour.
For example, the eight of hearts may be placed on either the nine of clubs
or spades.
The remaining cards in the deck are available for play. You can turn these
cards one at a time. The card inthe discard pile may be placedon the columns
or the ace piles. When you run out of cards in the deck, you can flip it over
and continue.
To start Solitaire
Extras
, YES,
Games
, YES,
Solitaire
1. Scroll to
Solitaire
appears in the display.
New game
2. To start a game select
(or
• Instead of choosing Start you can scroll with
, YES.
Resume game
if you have played before).
d to select
Resume game or Help (at step 2 above).
To control the game
• 1 = Select card/pile, Confirm move, Flip card
• 2 =Turnupnewcardfromgamedeck
• 3 = Put card on ace pile
• 4 = View a pile (selection and move is possible)
86 Extras
Page 88

The Profile Concept
Your phone includes a number of pre-programmed profiles. A profile is a
group of settings which are set to suit a certain environment. For example,
when you go to a meeting, you can just choose the Meeting profileand a
number of settings that suit a meeting are set.
Some accessories can choose a profile automatically. For example, when you
place your phone in a vehicle handsfree unit, the In Car profile is chosen.
For more information on automatic activation of profiles. See “Accessories”
on page 90.
The Profiles
There are six pre-programmed profiles:
• Normal
• Meeting
• In car
• Outdoors
• Prt H andsfree
• Home
Your phoneis alwaysset to one of the six profiles.When you buy your phone,
it is set to the Normal profile. You cannot create more profiles, but you can
change the name of a profile,change the settings included in a profile or add
an accessory to a certain profile.
Note! You cannotchange the name of the Normal profile and you cannotadd
an accessory to the Normal profile.
For information on how to add an accessory to a profile, see “Adding
Accessories to a Profile” on page 96.
Tip! To find out which profile you are using, slide the volume key upwards or
downwards in standby mode.
The Profile Concept 87
Page 89

The table below shows the settings of each profile.
Ring Volume
Increasingring
Vibrate Mode
Call screening
Forward
CallingCards
Display Light
Line 1/2
Silent
Auto Activation
Accessories
Normal Meeting In car Outdoors Prt
5(6) 0(6) 6(6) 6(6) 6(6) 5(6)
Off Off Off Off Off Off
On On if silent Off On On Off
Accept
Accept All
All Calls
Calls
Off Off Off Off Off Off
None None None None None None
Auto Auto On Auto Auto Auto
L1 L1 L1 L1 L1 L1
Off On Off Off Off Off
Off Off On Off On Off
- - Vehicle HF - Handsfree -
Accept All
Calls
Accept All
Calls
Handsfree
Accept All
Calls
Home
Accept All
Calls
You can always choose a profile manually.
Toselect a profile manually
1. Scroll to
SelectProfile
, YES.
Settings
, YES,
Profiles
, YES,
2. Select the profile you want.
You can a lso find Select Profile in the My Shortcuts menu. The quickest way
to reach this sub-menu is to press and hold
u.
If you choose a profile other than Normal,aniconisshowninstandby.
Note! A profile which is not linked with any accessory, such as Meeting or
Normal, must be chosen manually, even if automatic activation is on.
The profiles linked with accessories can be chosenautomatically.
See “Accessories” on page 90.
Changing the profile settings
You can re-name the pre-programmed profiles and change the settings
according to your wishes.
To change the name of a profile
1. Scroll to
Settings
2. Enter a new name and press
88 The Profile Concept
, YES,
Profiles
, YES,
YES.
Profile name
, YES.
Page 90

To change a profile setting
Settings
, YES,
Profiles
, YES,
Edit profile
1. Scroll to
, YES.
A list of the profile settings appears.
2. Select a setting by pressing
YES.
3. Change the profile setting according to your wishes.
For information, see the relevant chapters“Personalizing Your Phone” on
page 39, “Security for Your Phone and Subscription” on page 58,
“Calling Card Calls”on page 79 and “Accessories” on page 90.
If you change a setting which is included in a certain profile, the profile is
updated. With the Re set Profiles function, you can change all profile settings
back to the way they were set when you bought your phone.
To reset the profile settings
• Scroll to
ResetProfiles
, YES.
Settings
, YES,
Profiles
, YES,
The profile settings are reset.
The Profile Concept 89
Page 91

Accessories
By using your T28z together with Ericsson original accessories, you have
access to a large range of useful features, in addition to thoseyou have when
the phone is used separately.
• Automatic forward of incoming calls when the phone is placed in a
desktop charger
• Portable handsfree calling
• Handsfree calling in your car
• Infrared communication between your phone and computer
Note! This is one condition that the specific accessories exist in your market.
The Profiles concept, see “The Profile Concept” on page 87, allows you to
instruct your phone to activate a specific profile automatically when used
together with a certain accessory. On the following pagesyou can find
information on how different accessories interact with your phoneand its
different profiles.
Note! You are informed of the current profile when you slide the volume key
upwards ordownwards in standby mode or whenyou choose another profile.
Every time you disconnect your phone from the accessory, the profile is
changed to the one which was active before, if the current profile was
activated automatically.
For the profiles linked with an accessory to change automatically,the
automatic activation must be on. When you buy your phone, the automatic
activation is set to On for the Vehicleand Portable handsfree units. If you
wish, you may turn it off.
To turn automatic activation on or off
1. Scroll to
2. Select
Note! You can always choose a profile manually, even if a profile has been
activated automatically. See “The Profiles” on page 87.
90 Accessories
Settings
OnorOff
, YES,
.
Profiles
, YES,
Auto Activation,
YES.
Page 92

Desktop Charger
If you use the T28z with a specific Ericsson Desktop Charger you have access
to some useful features besides ordinary charging. Youcan choose to make
the phone switch to the Home profile automatically and forward all calls to
your home number when you place your phone in the charger.
Tobe able to use these features, you need to make some settings the first time
you place your phone in the desktop charger.
Placing the Phone in the Desktop Charger
1. Place the phone in the desktop
charger as shown and press
backwards to attach the phone.
2. Pull the phonetowards youand
upwards to detach the phone
from the charger.
Note! For further instructions on how to connect the desktop charger, please
contact your local Ericsson retailer.
To link the desktop charger with a profile and a forward number
1. Place the phone in the desktop charger. The message
Selectprofile?
appears
in the display.
2. Press
YES. (If you press NO, the desktop charger will not be linked with
any profile).
3. Select a profilethat you want to link with thedesktopcharger, for example
the Home profile.
4. The message
Forward when connected to accessory?
appears. Press YES.
This means that you want to forward your calls to your home number
when, for example, you place the phone in the desktop charger.
(If you press
NO, your calls will not be forwarded).
Accessories 91
Page 93

5. Enter a phone number including the area code (for example, your home
number) and press
A number you used before may be suggested to you. If so, press
YES.
YES to
choose the number, or enter another number.
6. The message
The message
Automaticactivationon?
Profile:Home
appears. Press YES.
appears to confirm your choice.
You can also make these settings later, if you wish. In this case, you need to
add the desktop charger to the Home profile,or another profile. See “To add
an accessory to a profile” on page 96. You may set the forward number in the
Settings
Edit Profile sub-menu, where all profile settings are included (
Profiles
, YES,
Edit profile
, YES). See “Changing the profile settin gs” on page 88.
, YES,
Note! Thephone must be switched on and theautomatic activation must be on
for the phone to switch profile automatically when connected to an accessory.
Tip! If youhave several desktopchargers, theycan each be added to a profile
or they can all be added to the same profile.
Portable Handsfree
When youconnect a specific Ericsson Portable Handsfreeto the T28z, the Prt
Handsfree profile is set automatically. This means that all profile settings are
set to the values specified for the Prt Handsfree profile.
See “The Profile Concept” on page 87.
Tip! If you do not wantyour phone to switch profile automatically when you
connect it to thePortable Handsfree, you need to turn the Auto activation
off. To do this, manually select the Prt Handsfree profile, and set the Auto
activation to off.
Using the Portable Handsfree
To answer an incoming call
• When the phone rings, press the button on your Portable Handsfree once.
Tip! You can also answer a callby using your voice.See “Voice Answering”
on page 78.
Toendacall
• Press the button on your Portable Handsfree once.
If the Call Waiting service is on, see “The CallWaitingService” on page 65,
you can answer a second call by pressingthe button onyour Portable Handsfree.
92 Accessories
Page 94

To answer a second call
• Press the button on your Portable Handsfree once to answer the waiting call.
The current call is now put on hold.
When you press the button on your PortableHandsfree again, the second
call is disconnected and the first call is retrieved automatically.
Tovoice dial using the Portable Handsfree
1. Press and hold the button on your Portable Handsfree untilyou hear a tone.
2. Release the button and say a name (voice label) that you have recorded
previously.
The name is played back to you and the call is connected.
Note! Before you can use voice dialing,you need to record voice labelsfor
entries in your phone book. See “Preparing yourPhone for VoiceDialing” on
page 76.
For best performance when voice dialing and voice answering with a
Portable Handsfree unit, we recommend recording your voice labels when
connected to a Portable Handsfree unit.
Vehicle Handsfree
When you connect an Ericsson Advanced Vehicle Handsfree to the T28z, the
In Car profile is set automatically. This means thatall profilesettings are set
to the values specified for the In car profile.
See “The Profile Concept” on page 87.
Placing the Phone in the Vehicle Handsfree
1. Place the phone in the
holder as shown and press
backwards to attach it.
2. Pressthebuttonontop
of the holder to release
the phone.
Accessories 93
Page 95

Tip! If you do not wantyour phone to switch profile automatically when you
connect it to the Advanced Vehicle Handsfree, you need to turn the Auto
Activation off. To do this, manually select the In car profile and set the A uto
Activation to Off.
Note! Your Advanced Vehicle Handsfree should be installed by professional
personnel. For more information, please contact your local Ericsson retailer.
Voice Control
The Advanced Vehicle handsfree unit is equipped with its own voice control
system which allows you to:
• voice dial - call someone by simply saying the name
• answer and reject calls using your voice
Before you can usevoice dialing, you need to record voice labels to entries
in your phone book and the Voice Dialing function needs to be on.
See “Preparing your Phone for Voice Dialing” on page 76. To use voice
dialing with the Vehicle Handsfree unit, you need to record the voice labels in
the car. Voice labels for phonebook entries recorded in the phone will not be
available in the car, and vice versa.
The vehicle handsfree can store up to 100 voice labels. The icons for the
phone book entries with voice labels saved when connected to a vehicle
handsfree kit look slightly different from those that you save in the phone,
see margin.
To voice dial using the Vehicle Handsfree
1. Slide and hold the volume key (when the flip is closed) or press
YES until
you hear a tone.
2. Release and say a name (voice label) that you recorded in the car earlier.
(Use the microphone of the Vehicle Handsfree unit.)
The name is played back to you, and the call is connected.
To answer a callusing your voice
• See“VoiceAnswering”onpage78.
Handsfree Types
If you use a Vehicle Handsfree Unit, you can choose between two
different ways in which your phone can handle speech. This is done in
the Handsfree sub-menu.
94 Accessories
Page 96

Basic Handsfree
Basic Handsfree means that the phone handles the call in semi-duplex mode.
This means that you cannot speak at the same time as the person at the
other end of the line. Use this alternative only if Full Handsfree does not
work properly.
Full Handsfree
Full Handsfree means that the phone handles the call in fullduplex mode.
This considerably increases the quality of speech, since you do not have to
wait until it is your turn to speak.
For Full Handsfree to work properly, your phone adapts to the sound
environment around the handsfree equipment. This adaptation might take a
few calls. Duringthis learning phase, the person you are talking to might hear
an echoof hisor her own voice (because the sound goes from the speaker into
the microphone again). However, thisdisappears as the other person speaks.
If the echo lasts longer than the first few calls, try Basic Handsfree instead.
Tip! Set the handsfree type to Full Handsfree first. If speech quality is poor,
set the Basic Handsfree type instead.
To set the handsfree type
1. Scroll to
Handsfree Type
, YES.
Settings
, YES,
Handsfree
, YES,
2. Selectthetypeyouwant.
Answering M ode
When using a Portable or Vehicle Handsfree unit, you may choose to answer
incoming calls with Any Key or Auto answering.
• Any Key: If you use the phone with handsfree equipment and this function
isturnedon,youcanansweranincomingcallbypressinganykey,except
NO key.
the
• Auto answering: If you choose the automatic answering mode, an
incoming call is answered automatically after one ring signal, if the phone
is used with handsfree equipment.
To set an answering mode
1. Scroll to
Answering Mode
, YES.
Settings
, YES,
Handsfree
, YES,
2. Select a mode.
If you choose the Normal alternative, you have to answer calls as normal.
Tip! You can also answer calls by using the Voice Answer function.
See“VoiceAnswering”onpage78.
Accessories 95
Page 97

Infrared modem
With an Ericsson infrared modem you can connect your T28z to a computer
via an infrared link. This makes the cableand PC card obsolete.
If you want to use the infrared modem
with a computer that is running
Windows 95/98/NT 4.0, you can install
PC software whichallows you to
manage the phone book in your mobile
phone, send and receive SMS messages,
fax and datacalls, edit your mobile
phone’s settings, browse the Internet or
connect to your corporate network.
When you have connected the infrared modem to the phone, an icon appears
in the display.
Note! For more information, please contact your local Ericsson retailer.
Adding Access ories to a Profile
You can add one or more accessories to a profile. For example, if you usually
use a portable handsfree together with a specific desktop charger, you can add
the desktop charger to the Prt H andsfree profile. The phone recognizes the
first accessory when it is connected and switches profile automatically.
Note! Only profiles linked with accessories can be activated automatically.
Apart from the desktop charger and theportable and vehicle handsfree units,
youcanalsoaddaninfraredmodemtoaprofile.
Before you can add an accessory to a profile, you must choose the profile
manually to which you want to add the accessory. See “To select a profile
manually” on page 88.
Toaddanaccessorytoaprofile
1. Scroll to
Now you are inthe list of the accessorieswhich have already been added
to the profile.
2. Select
Now you are in the list of all accessories that you can add to the profile.
3. Select an accessory.
4. The question
on already.
96 Accessories
Settings
, YES,
Add accessory?
Automaticactivationon?
.
Profiles
, YES,
Accessories
, YES.
appears, if automatic activation is not
Page 98

Press YES to turn automatic activationon, which means that the profile
will be chosen automatically when the accessory is connected.
Note! In addition to the portable and vehicle handsfree units, you can add
another 12 accessories to a profile. Any accessory above this number will
work as ordinary non-profile accessories. You cannot have the same
accessory linked with several profiles.
To remove an accessory from a profile
Settings
, YES,
Profiles
, YES,
1. Scroll to
Accessories
2. Scroll to the accessory that you want to remove and press
Delete?
3.
appears. Press YES.
, YES.
C.
Accessories 97
Page 99

Online Services
Imagine that you hear about a new service that your network operator is
offering. You callyour operator, explain that you want to subscribe to the
service and suddenly, within seconds, you have a new menu in your phone
that instantly lets you use the new service.
You do not need upgraded software for your phone, but you may need to visit
your networkoperator to get a new SIM card. The rest is alltaken care of over
the air.
This is just one example of the added value services that are made possible
through the ‘Online Services’.
Note! The T28z does not support all services offered by the Online Services.
What is Online Services?
The Online Services is the network operators’way of offering customized
services, independently of mobile phones and mobile phone manufacturers.
Compatibility
Added valueservices basedon the Online Services requiretwo thingsin order
to work:
• a mobile phone that supports the Online Services. Your Ericsson T28z is
such a phone.
• a network operator offering the Online Services.
Note! The Online Services on the SIM are designed and run by network
operators and not by mobile phone manufacturers. If you require further
information about the Online Services, please contact your network operator.
98 Online Services
Page 100

New Menu
A SIM card which supports the Online Services works in the same way as a
normal SIM card.
When you have inserted your SIM card and turned on your phone, your
network operator may download data to your SIM card. After the first data
download and after restarting your phone, theproactive SIM offers a new
menu in the phone. Themenu offers you new features and services, which can
be used instantly.
On your T28z, this menu appears under the Extras menu. There can only be
one new sub-menu entry under the main menu, but there can be several submenus under the newsub-menu entry.
To enter your new menu system
Extras
, YES,
1. Scroll to
Online Services
If any sub-menus appear, select the one that you want and press
2. Press
NO to go back to the standby menu.
, YES.
YES.
Note! Some operators may not use the name Online Services for this menu.
Please consult your network operator for more information.
Proactive SIM
The Online Services provides a proactive SIM. This means that the SIM can
tell the phone to take certain actions. These actions could include:
• showing text from the SIM in the phone’s display
• setting up a call to a number on the SIM
• initiating a dialogue with the user
Note! All these actionsare taken by the SIM card and, consequently, they have
nothing to do with the phone’ ssoftware.
Data Dow nlo ad to th e SIM o ver the Air
Your network operator may at any time download new data to your SIM card
over the air. This new data could consist of new features or a new menu.
Resetting your SIM Card
When the operator updates your SIM card over the air, the phone notifiesyou
by showing a message in your display. You also hear a beep.
Online Services 99
 Loading...