

Page 1
INSTRUCTION SHEET
HV Type
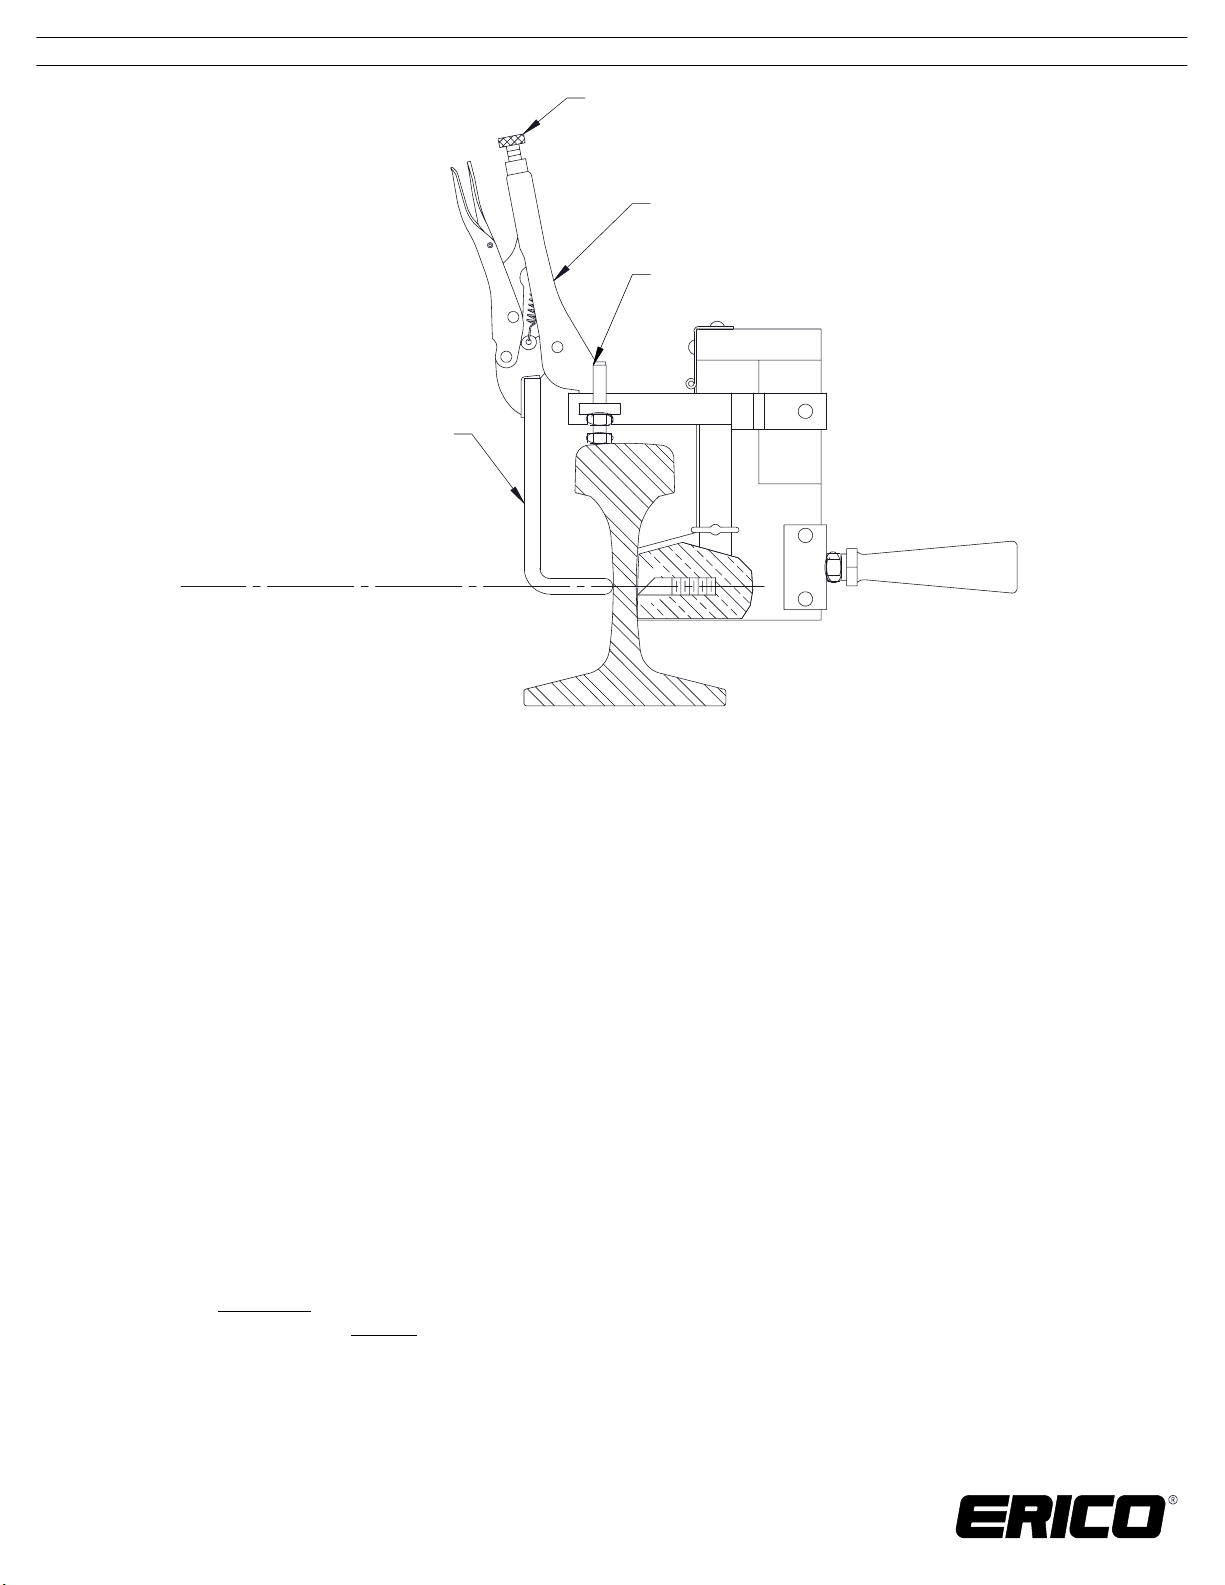
Clamp Adjustment Screw
Clamp
Height Adj. Screw
Clamp Bar
Neutral
Axis
Prior to making a connection, read and follow the full instructiuon sheets IPP, IPX,
IPRLBR and special instructions below.
Insert stud into mold as far as it will go (As shown above).
1.
Using the locking pliers on clamp, open clamp bar and position over rail head
2.
with height adjusting screws resting on head of rail.
Adjust adjusting screws until center of clamp bar is on neutral axis of rail.
3.
Check that mold face fits snug against rail.
4.
Using locking pliers clamp adjusment screw, adjust clamp bar, and lock clamp
5.
and mold to rail at neutral axis. Do not over tighten.
Follow standard welding procedures.
6.
WARNING:
ERICO products shall be installed and used only as indicated in ERICO product instruction sheets and training materials. Instruction sheets are available at
1.
www.erico.com
ERICO products must never be used for a purpose other than the purpose for which they were designed or in a manner that exceeds specified load ratings.
2.
All instructions must be
3.
Improper installation, misuse, misapplication or other failure to completely follow ERICO's instructions and warnings may cause product malfunction, property
4.
damage, serious bodily injury and death.
SAFETY INSTRUCTIONS:
All governing codes and regulations and those required by the job site must be observed.
Always use appropriate safety equipment such as eye protection, hard hat, and gloves as appropriate to the application.
and from your ERICO customer service representative.
completely
followed to ensure proper and safe installation and performance.
CADDY, CADWELD, CRITEC, ERICO, ERIFLEX, ERITECH, and LENTON are registered trademarks of ERICO International Corporation.
TECHNICAL SUPPORT:
www.erico.com
IP7509_B
1 OF 1
© 1995, 2014
ERICO International Corporation
 Loading...