

Page 1
INSTRUCTION SHEET
SBC105R Mold
Assembly with
Quick Grip
Extension Clamp
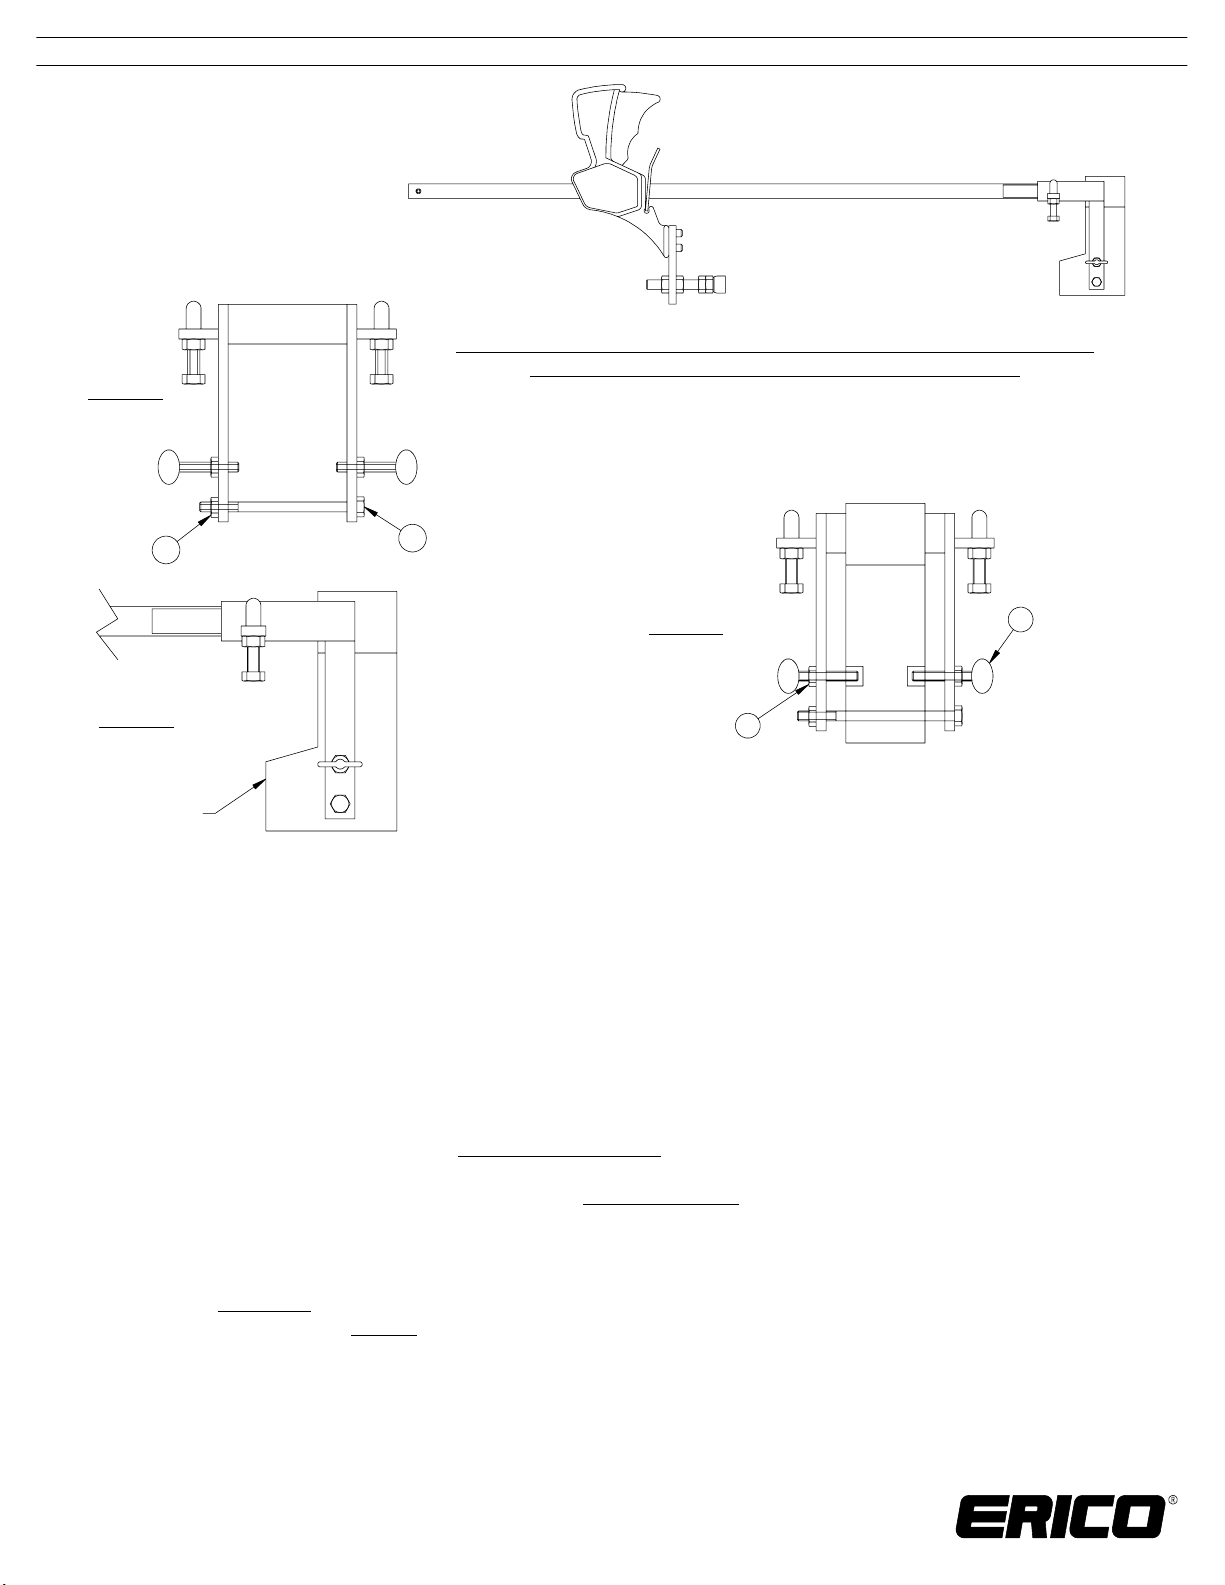
Figure 1
Mold is not supplied with clamp, must be ordered separately
See reverse for attachment of assembly to rail
2
Figure 2
Nose of mold
Prior to making a connection, read and follow the full instruction sheets IPP, IPX,
IPRLBR and special instructions below.
1.
2.
3.
4.
5.
6.
1
Figure 3
3
4
Remove item 1 (hex bolt) and item 2 (hex nut) from clamp assembly (As
shown in Figure 1).
Place mold between mounting frame, with nose of mold facing inward (As
shown in Figure 2).
Insert hex bolt through one side of frame, then through mold and opposite side
of frame (As shown in Figure 3).
Secure assembly with item 2 (hex nut) to item 1 (hex nut). Tighten nut until nut
is flush with frame.
Do not over tighten
and cause frame to bend.
Center mold in frame by adjusting item 3 (thumb screws) into counterbored
holes provided in side of mold.
Do not tighten.
Mold should "float" slightly
within the assembly for seal against rail during usage.
Tighten item 4 (hex nuts) on item 3 (thumb screws) to mold frame.
WARNING:
ERICO products shall be installed and used only as indicated in ERICO product instruction sheets and training materials. Instruction sheets are available at
1.
www.erico.com
ERICO products must never be used for a purpose other than the purpose for which they were designed or in a manner that exceeds specified load ratings.
2.
All instructions must be
3.
Improper installation, misuse, misapplication or other failure to completely follow ERICO's instructions and warnings may cause product malfunction, property
4.
damage, serious bodily injury and death.
SAFETY INSTRUCTIONS:
All governing codes and regulations and those required by the job site must be observed.
Always use appropriate safety equipment such as eye protection, hard hat, and gloves as appropriate to the application.
CADDY, CADWELD, CRITEC, ERICO, ERIFLEX, ERITECH, and LENTON are registered trademarks of ERICO International Corporation.
TECHNICAL SUPPORT:
www.erico.com
and from your ERICO customer service representative.
completely
followed to ensure proper and safe installation and performance.
IP7451A_B
1 OF 2
© 1995, 2014
ERICO International Corporation
Page 2
INSTRUCTION SHEET
SBC105R Mold
Assembly with Quick
Grip Extension Clamp
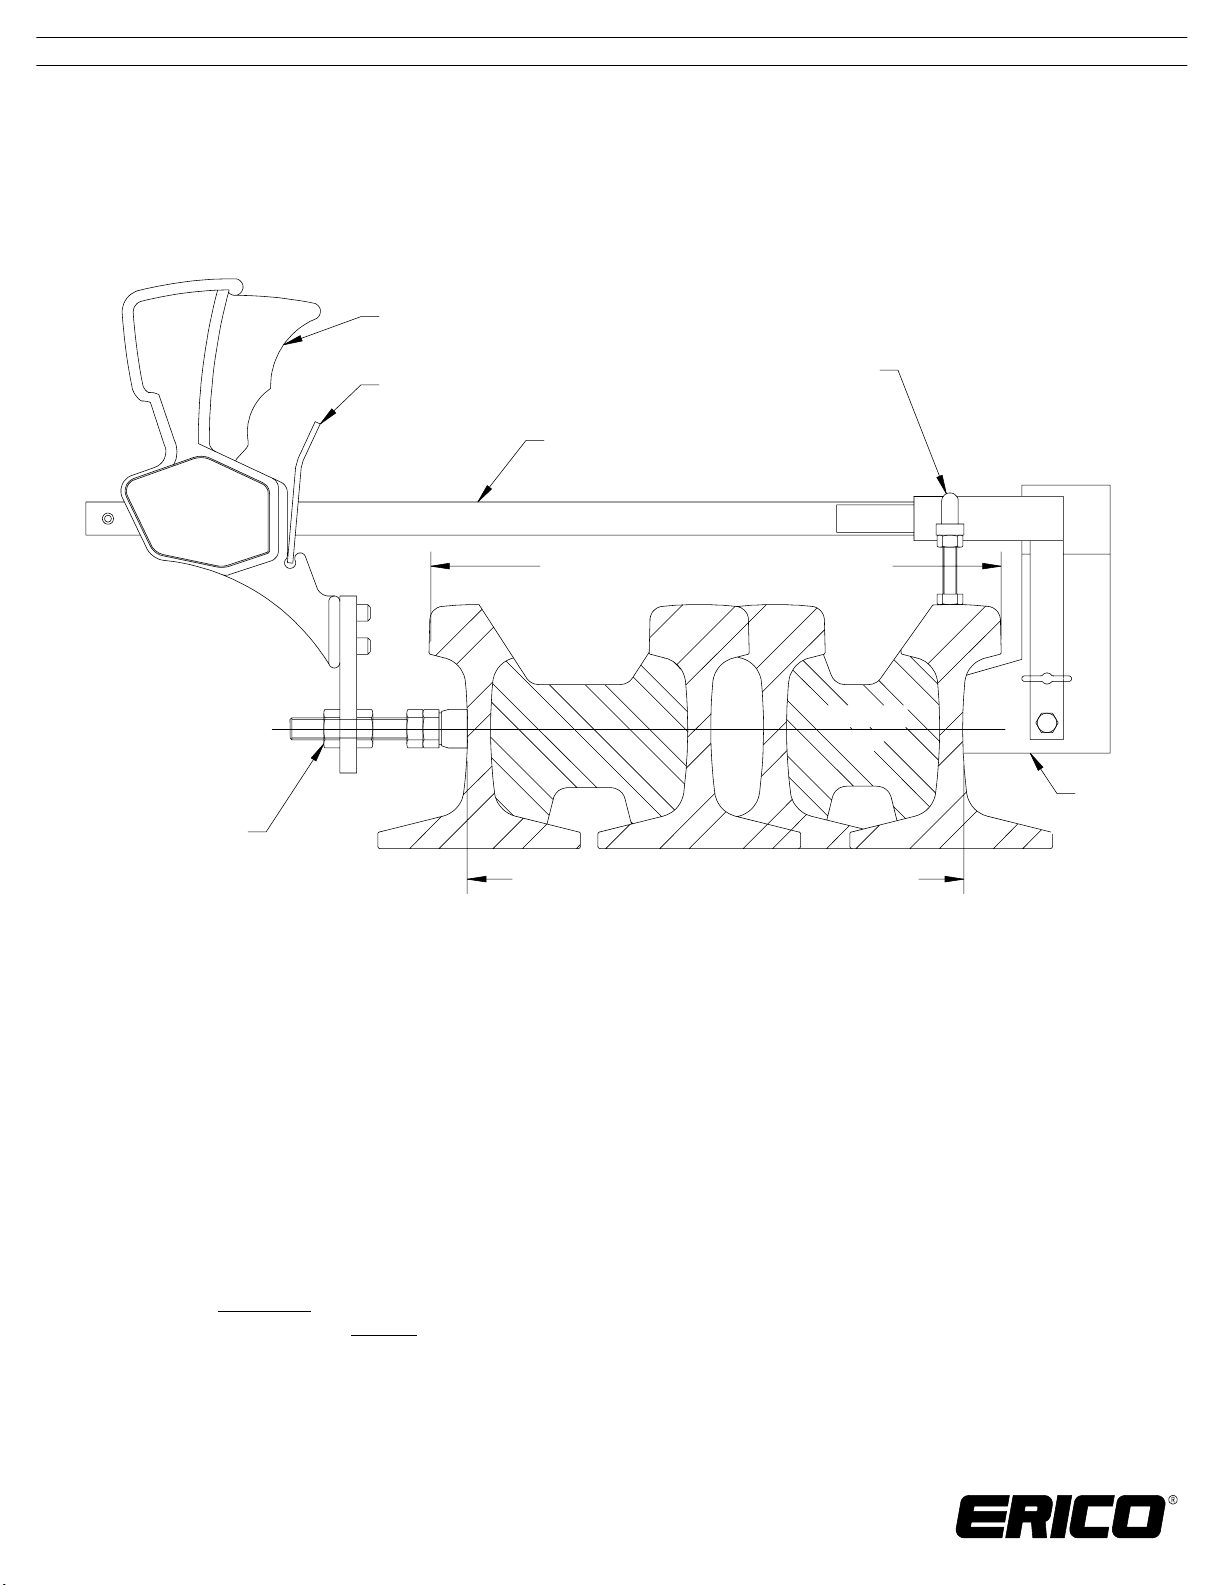
"Locking Grip Clamp"
Adjustable
Swivel Pad
"Quick Release"
25.5" [648mm] Max Clamp Web to Web]
Height Adjustment Screw
C105R Clamp Frame Assembly
28" [711mm] Max Head Clearance
Neutral
Axis
Mold
Prior to making a connection, read and follow the full instruction sheets IPP, IPX,
IPRLBR and special instructions below.
Place mold welder against web of rail with center of bond at the neutral axis ±0.13
1.
[3mm]. Use "height adjusting screw" to raise for location.
Adjust the swivel pad for proper clearance of the rail head.
2.
Use the "quick release" to move the clamp into position. Use the "Locking Grip
3.
Clamp" to secure the clamp and mold to the rails.
See IPP for set-up and welding procedures.
4.
Upon completion of the weld, squeeze the "quick release" while pulling back
5.
away from the weld.
WARNING:
ERICO products shall be installed and used only as indicated in ERICO product instruction sheets and training materials. Instruction sheets are available at
1.
www.erico.com
ERICO products must never be used for a purpose other than the purpose for which they were designed or in a manner that exceeds specified load ratings.
2.
All instructions must be
3.
Improper installation, misuse, misapplication or other failure to completely follow ERICO's instructions and warnings may cause product malfunction, property
4.
damage, serious bodily injury and death.
SAFETY INSTRUCTIONS:
All governing codes and regulations and those required by the job site must be observed.
Always use appropriate safety equipment such as eye protection, hard hat, and gloves as appropriate to the application.
CADDY, CADWELD, CRITEC, ERICO, ERIFLEX, ERITECH, and LENTON are registered trademarks of ERICO International Corporation.
TECHNICAL SUPPORT:
www.erico.com
and from your ERICO customer service representative.
completely
followed to ensure proper and safe installation and performance.
IP7451A_B
2 OF 2
© 1995, 2014
ERICO International Corporation
 Loading...