

Epson TX600FW User Manual
Fax Guide
Setting Up Your Fax
Power Supply Information..................................................................................... 3
Connecting a Phone or Answering Machine .................................................... 3
Setting Up Your Fax Features................................................................................ 4
Faxing Photos or Documents
Handling Originals................................................................................................ 10
Handling Paper .................................................................................................... 10
Sending Faxes ...................................................................................................... 10
Receiving Faxes ................................................................................................... 12
Selecting Send/Receive Settings .......................................................................13
Printing Reports .................................................................................................... 14
Solving Problems
Error Messages...................................................................................................... 16
Problems and Solutions .......................................................................................16
Appendix
Important Safety Instructions.............................................................................. 17
Personal Information Stored in Memory............................................................ 18
Fax mode Menu List............................................................................................. 19
English

Warnings, Cautions, and Notes
Follow these guidelines as you read your instructions:
w Warning: Warnings must be followed carefully to avoid bodily injury.
c Caution: Cautions must be observed to avoid damage to your equipment.
Note: Notes contain important information about the printer.
Tip: Tips contain hints for using the printer.
Copyright Notice
No part of this publication may be reproduced, stored in a retrieval system, or transmitted in any form or by any
means, electronic, mechanical, photocopying, recording, or otherwise, without the prior written permission of Seiko
Epson Corporation. The information contained herein is designed only for use with this product. Epson is not
responsible for any use of this information as applied to other printers.
Neither Seiko Epson Corporation nor its affiliates shall be liable to the purchaser of this product or third parties for
damages, losses, costs, or expenses incurred by the purchaser or third parties as a result of accident, misuse, or abuse
of this product or unauthorized modifications, repairs, or alterations to this product, or (excluding the U.S.) failure
to strictly comply with Seiko Epson Corporation's operating and maintenance instructions.
Seiko Epson Corporation shall not be liable for any damages or problems arising from the use of any options or any
consumable products other than those designated as Original Epson Products or Epson Approved Products by Seiko
Epson Corporation.
Seiko Epson Corporation shall not be held liable for any damage resulting from electromagnetic interference that
occurs from the use of any interface cables other than those designated as Epson Approved Products by Seiko Epson
Corporation.
®
is a registered trademark and EPSON STYLUS™ and Exceed Your Vision are trademarks of Seiko Epson
EPSON
Corporation.
General Notice: Other product names used herein are for identification purposes only and may be trademarks of
their respective owners. Epson disclaims any and all rights in those marks.
Setting Up Your Fax
This product lets you send faxes by
entering fax numbers or selecting entries
from a speed dial/group dial list. You can
customize the fax header information, and
select various report printing and
send/receive settings. You can also set up
the product to automatically receive faxes
or set it to ask for confirmation before
receiving a fax.
Power Supply Information
Turning off the Power
When the power is turned off, the
following data stored in the printer’s
temporary memory is erased.
❏ Fax reception data
❏ Data stored in Delayed Fax
❏ Data being redialed
Also, when the power is left off for
extended periods of time, the clock may be
reset causing irregularities. Check the
clock when you turn the power on.
Power saving function
After 13 minutes of inactivity, the screen
turns black to save energy.
Press any button (except P On) to return
the screen its previous state.
Also, see "Restarting Automatically After
a Power Failure" in the Basic Operation
Guide.
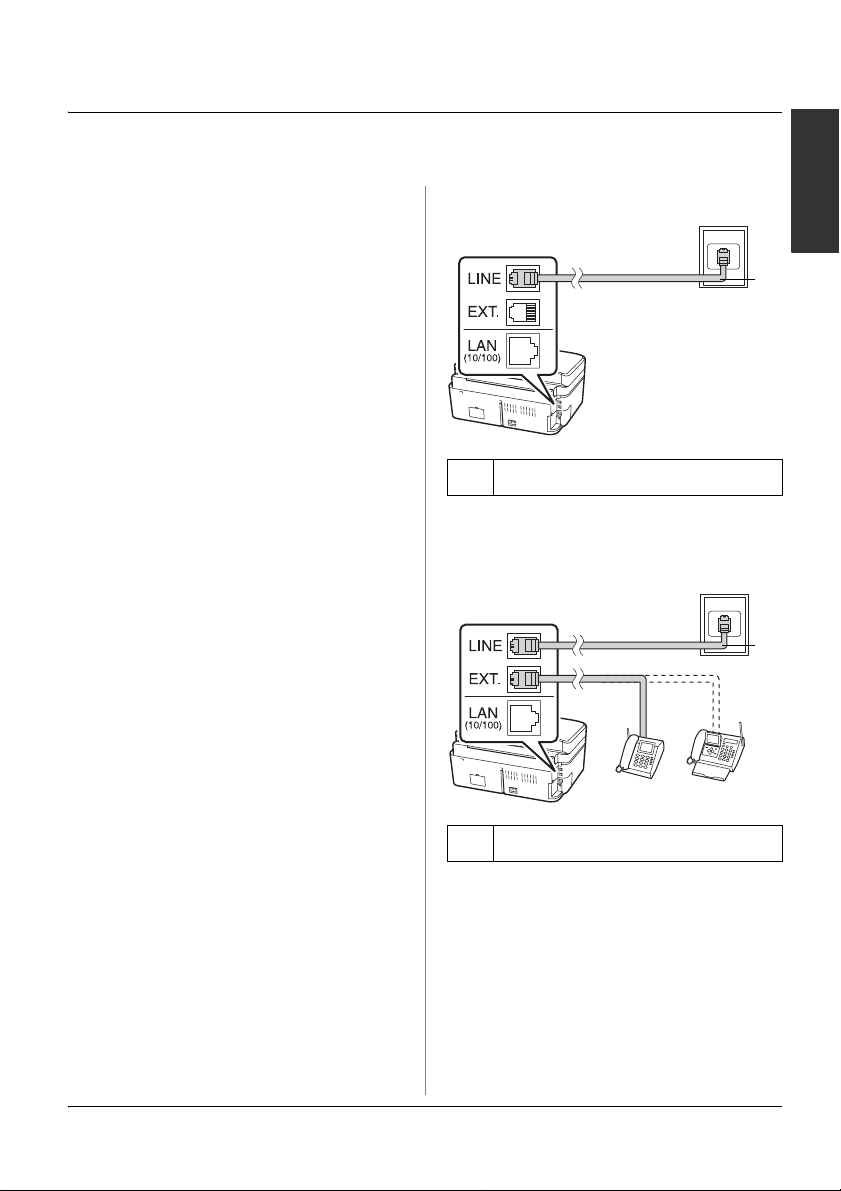
Connecting the phone line
a
a Telephone wall jack
Connecting the phone line to an answering machine
a
a Telephone wall jack
English
Connecting a Phone or Answering Machine
Follow these steps to connect the product
to a phone line/ISDN line and connect a
telephone/answering machine to the
same phone line/ISDN line to pick up
voice call.
Setting Up Your Fax 3
Connecting DSL
cb
a Telephone wall jack
b Splitter
cDSL modem
Connecting ISDN (two telephone numbers)
a
a
b
a ISDN wall jack
b Terminal adapter or ISDN router
See the documentation that came with
your DSL modem.
Connecting ISDN (one telephone number)
b
aISDN wall jack
b Terminal adapter or ISDN router
See the documentation that came with
your terminal adapter or ISDN router.
See the documentation that came with
your terminal adapter or ISDN router.
Setting Up Your Fax Features
Before sending or receiving faxes, you
may want to create a fax header, select
a
your fax preferences, and set up a speed
dial/group dial list of frequently used fax
numbers.
Checking your selected region
Before using the product, you need to
select the region where you are using the
product.
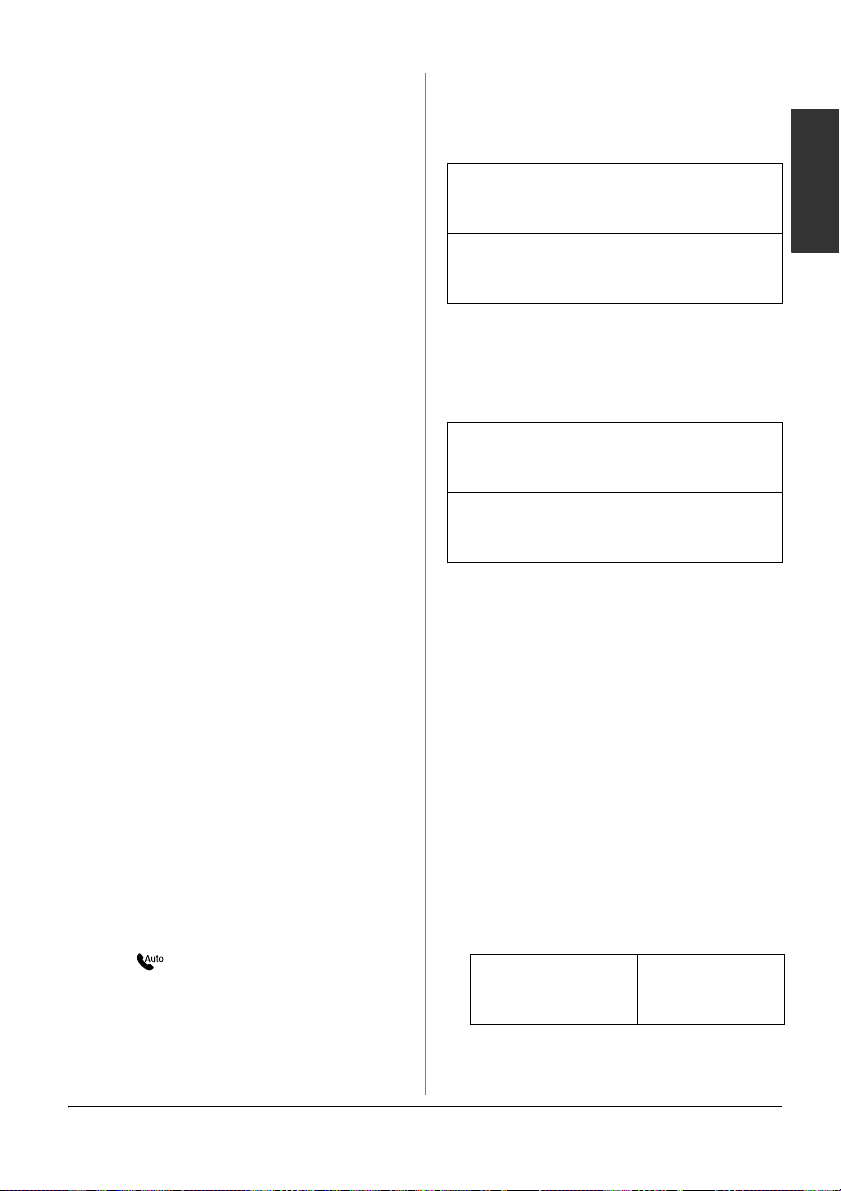
1. Press l or r to select F Setup, and then
press OK.
2. Press l or r to select Printer Setup and
then press OK.
4 Setting Up Your Fax
3. Press u or d to select Country/Region,
and then press OK.
4. If you need to change the region, use
u or d to select your region.
5. Press OK. An information screen is
displayed.
6. Select Yes to change the region, and
then press OK.
Note:
❏ To cancel changing the region, select No
and then press OK.
❏ When you change the region, the fax
settings are restored to their defaults.
7. Press Home to return to the first screen.
Switching receive mode
When a telephone with an answering
machine is connected, you can set the
answer time for the telephone and the
product, and a connection is made after
the other party (fax or caller) responds. If
it is a fax, you can set it to automatically
start receiving.
Note:
Rings to Answer may be unavailable or the
range of values may differ depending on the
region.
1. Press l or r to select F Setup and then
press OK.
2. Press l or r to select Fax Setting, and
then press OK.
3. Press u or d to select Communication,
then press OK.
4. Press u or d to select Rings to Answer,
then press r.
5. Press u or d to set the number of rings
before answering, then press OK.
6. Make sure you set the number of rings
before the answering machine picks up
to a value less than the Rings to
Answer setting.
See your telephone's documentation
for the setup method.
7. Press [Auto Answer/Space], and
turn on Auto Answer mode.
8. Press OK.
9. Press Home to return to the first screen.
For example, use the following procedure
if the Rings to Answer is set to five, and
the answering machine is set to four.
When the phone is answered before the
fourth ring, or when the answering
machine picks up on the fourth ring
If the other party is a fax, it automatically
connects to this product and begins
receiving the fax.
If the other party is a caller, the phone can
be used as normal or they can leave a
message on the answering machine.
When it continues to the fifth ring when
the connected telephone does not have
an answering machine, or the answering
machine is switched off
The product connects to the telephone line.
If the other party is a fax, it receives and
begins printing the fax.
The product connects to the telephone line.
If the other party is a caller it still enters fax
mode.
Note:
❏ When it starts automatically receiving a fax,
the line switches from the telephone to the
product, and the telephone is disconnected.
When receiving a fax, replace the handset
and wait for the operation to complete.
❏ When Auto Answer mode is set to Off, you
can receive the fax manually by lifting the
handset. (& "Receiving faxes manually" on
page 13)
Using control panel buttons in fax mode
When entering dial numbers and
characters in Fax mode, you can use the
following buttons as well as the numeric
buttons.
Entering dial number
l, r Moves the
cursor to the left
or right.
English
Setting Up Your Fax 5
[Auto Answer/
Space]
Inserts a space
or moves the
cursor one
character to the
right.
2. Press l or r to select Fax Setting, and
then press OK.
Dial/Group
[Speed
Dial/Backspace]
[Redial/Pause]
Deletes a
character or
moves the
cursor one
space to the left.
Inserts a pause
(-) and moves
the cursor one
character to the
right.
Entering characters
l, r Moves the
Auto
[
Answer/Space
Speed
[
Dial/Group
Dial/Backspace
cursor to the left
or right.
Inserts a space
]
or moves the
cursor one
character to the
right.
Deletes a
character or
]
moves the
cursor one
space to the left.
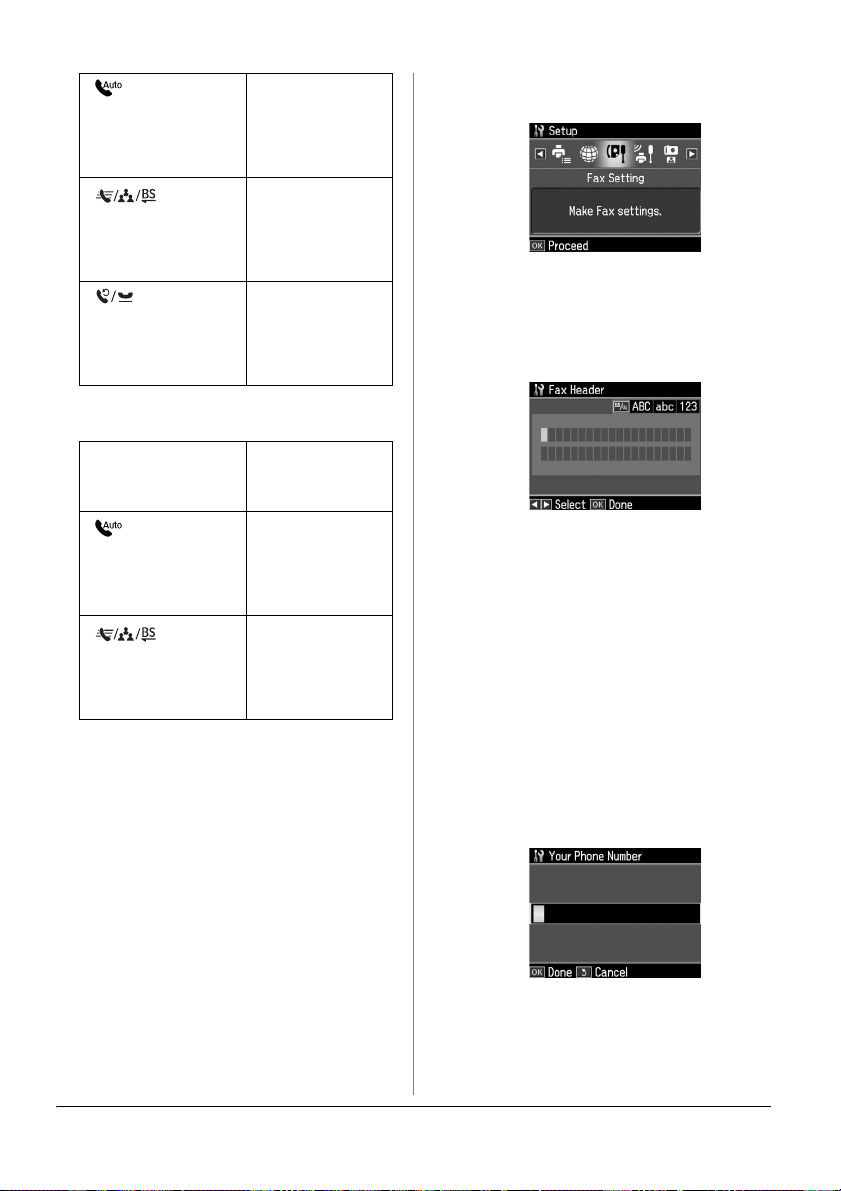
Creating header information
Before sending or receiving faxes, you can
create a fax header by adding information
such as a phone number or name.
Entering your header
information
1. Press l or r to select F Setup and then
press OK.
3. Press u or d to select Header, and then
press OK.
4. Select Fax Header, then press OK. You
see the header information input
screen.
5. Use the numeric keypad with other
buttons on the control panel to enter
the header information (& "Using
control panel buttons in fax mode" on
page 5). You can enter up to 40
characters.
6. Press OK. You return to Header.
Setting up your phone number
After entering header information, you
can set up or change your phone number
settings.
1. Press d once to select Your Phone
Number from the Header menu, and
then press OK. You see the phone
number input screen.
6 Setting Up Your Fax
2. Use the numeric keypad with other
buttons on the control panel to enter
your phone number (& "Using control
panel buttons in fax mode" on page 5).
You can enter up to 20 digits.
Note:
When entering your phone number, the "*"
button does not work, and the "#" button
functions as a "+" (international phone calls)
button.
3. Press OK. You return to Header.
4. Press Home to return to the first screen.
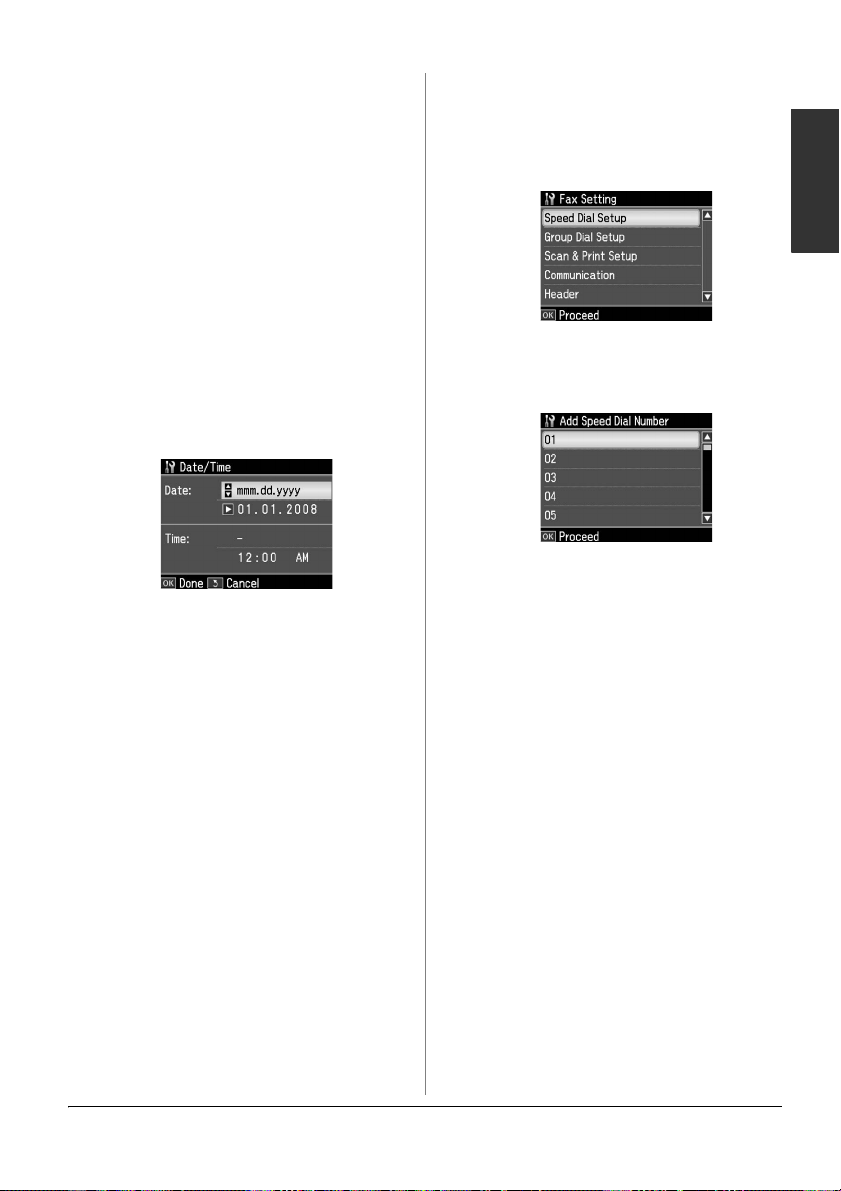
Setting up date and time
If you have not yet set the date or time, or
if you want to change the settings, you can
change them using the Printer Setup
menu.
1. Press l or r to select F Setup, and then
press OK.
2. Press l or r to select Printer Setup and
then press OK.
3. Press u or d to select Date/Time, and
then press OK.
4. Use u or d to select the type of date
display, and then press r.
5. Use the numeric keypad to change the
date.
6. Use u or d to select a 12-hour or
24-hour display, and then press r.
7. Use the numeric keypad to change the
time.
8. If you selected 12h, use u or d to select
AM or PM.
9. Press OK. You return to Date/Time.
10.Press Home to return to the first screen.
Note:
To select daylight savings time, set Daylight
Saving Time to On.
Setting up your speed dial list
You can create a speed dial list of up to 60
fax numbers so you can quickly select
them for faxing. You can also add names
to identify the recipients and print the
speed dial list.
Creating a new speed dial list
1. Press l or r to select F Setup and then
press OK.
2. Press l or r to select Fax Setting, and
then press OK.
English
3. Press OK to select Speed Dial Setup.
4. Select Create, then press OK. You see
the available speed dial entry numbers.
5. Select or type the speed dial entry
number that you want to register. You
can register up to 60 entries.
6. Press OK.
7. Use the numeric keypad with other
buttons on the control panel to enter a
phone number (& "Using control panel
buttons in fax mode" on page 5). You
can enter up to 64 digits.
8. Press OK.
9. Use the numeric keypad with the other
buttons on the control panel to enter a
name to identify the speed dial entry
(& "Using control panel buttons in fax
mode" on page 5). You can enter up to
30 characters.
10.Press OK. You return to Create.
11.If you want to add another speed dial
entry, press OK and repeat steps 5
through 10.
12.Press Home to return to the first screen.
Setting Up Your Fax 7
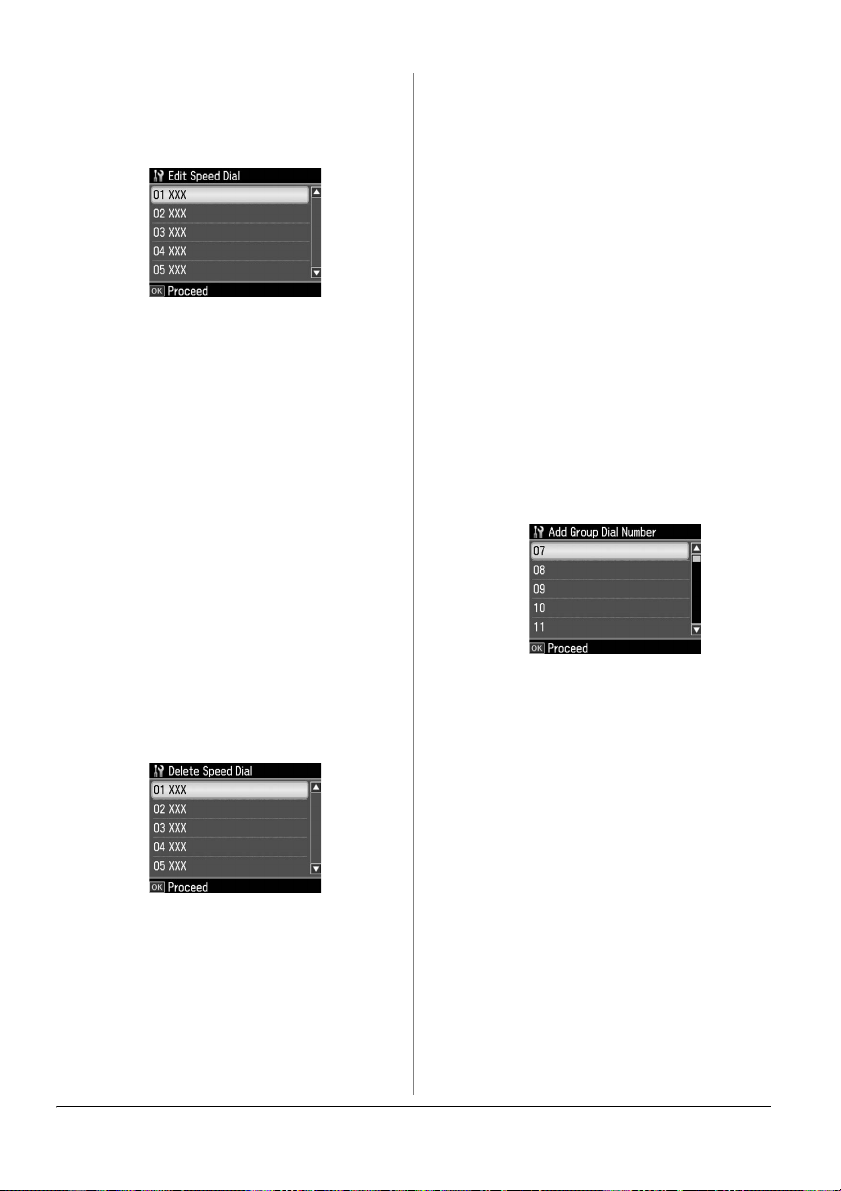
Editing a speed dial entry
1. Select Edit from the Speed Dial Setup
menu, then press OK. You see the
registered speed dial entry numbers.
2. Select or type the speed dial entry
number that you want to edit, then
press OK.
3. Use the numeric keypad with other
buttons on the control panel to edit the
phone number (& "Using control panel
buttons in fax mode" on page 5).
4. Press OK.
5. Use the numeric keypad with the other
buttons on the control panel to edit the
name for the speed dial (& "Using
control panel buttons in fax mode" on
page 5).
6. Press OK. You return to Speed Dial
Setup.
7. Press Home to return to the first screen.
Deleting a speed dial entry
1. Select Delete from the Speed Dial
Setup menu, then press OK. You see
the registered speed dial entry
numbers.
2. Select or type the speed dial entry
number that you want to delete, then
press OK.
3. You see a confirmation message. Select
Yes to delete the entry, and then press
OK. You return to Speed Dial Setup.
Note:
To cancel deleting the entry, select No and
then press OK.
4. Press Home to return to the first screen.
Setting up your group dial list
The group dial list allows you to easily
send the same fax message to many fax
numbers.
Before creating a group dial entry, you
need to register a fax number as a speed
dial entry. You can register up to 60
entries combined with speed dial entries
and group dial entries.
Creating a new group dial list
1. Press l or r to select F Setup and then
press OK.
2. Press l or r to select Fax Setting, and
then press OK.
3. Press d to select Group Dial Setup,
and then press OK.
4. Select Create, and then press OK. You
see the available group dial entry
numbers.
5. Select or type the group dial entry
number that you want to register.
6. Press OK. The screen displays Enter
Name.
7. Press the keys on the numeric keypad
to enter a name for the group dial entry
(up to 30 characters). Use the number
keys to enter letters from A to Z (in
upper case or lower case), numbers 0 to
9, and various symbols.
8. Press OK.
9. Press u or d to select the speed dial
entry number that you want to register
in the group dial list.
10.Press r to add the speed dial entry to
the group dial.
Note:
Press l to cancel adding the speed dial
entry that you selected.
8 Setting Up Your Fax
 Loading...