

Page 1

User’s
Guide
Page 2

Copyright Notice
All rights reserved. No part of this publication may be reproduced, stored in a retrieval system, or transmitted in
any form or by any means, electronic, mechanical, photocopying, recording, or otherwise, without the prior
written permission of SEIKO EPSON CORPORATION. The information contained herein is designed only for
use with this EPSON printer. EPSON is not responsible for any use of this information as applied to other
printers.
Neither SEIKO EPSON CORPORATION nor its affiliates shall be liable to the purchaser of this product or third
parties for damages, losses, costs, or expenses incurred by purchaser or third parties as a result of: accident, misuse,
or abuse of this product or unauthorized modifications, repairs, or alterations to this product, or (excluding the
U.S.) failure to strictly comply with SEIKO EPSON CORPORATION’s operating and maintenance instructions.
SEIKO EPSON CORPORATION shall not be liable for any damages or problems arising from the use of any
options or any consumable products other than those designated as Original EPSON Products or EPSON
Approved Products by SEIKO EPSON CORPORATION.
Trademarks
EPSON and EPSON Stylus are registered trademarks of SEIKO EPSON CORPORATION.
Micro Piezo, PhotoEnhance, and Smart Panel are trademarks of Epson America, Inc.
General Notice: Other product names used herein are for identification purposes only and may be trademarks of
their respective owners. EPSON disclaims any and all rights in those marks.
The E
NERGY STAR
emblem does not represent EPA endorsement of any product or service.
CPD-8875R1
Copyright © 2000 by Epson America, Inc. 2/00
ii
Page 3

C
Welcome
Contents
Special Features . . . . . . . . . . . . . . . . . . . . . . . . . . . . . . . . . . . 2
About Your Software . . . . . . . . . . . . . . . . . . . . . . . . . . . . . . . 3
Getting More Information . . . . . . . . . . . . . . . . . . . . . . . . . . . 4
Warnings, Cautions, Notes, and Tips . . . . . . . . . . . . . . . 5
Registering . . . . . . . . . . . . . . . . . . . . . . . . . . . . . . . . . . . . . . . 5
Reading Your Reference Guide . . . . . . . . . . . . . . . . . . . . . . . 5
Reading Your Other Electronic Manuals . . . . . . . . . . . . . . . . 7
Using the EPSON Smart Panel . . . . . . . . . . . . . . . . . . . . . . . 9
Copy Utility . . . . . . . . . . . . . . . . . . . . . . . . . . . . . . . . . 10
Scan to Fax . . . . . . . . . . . . . . . . . . . . . . . . . . . . . . . . . . 11
Scan to E-mail . . . . . . . . . . . . . . . . . . . . . . . . . . . . . . . . 12
Scan to OCR . . . . . . . . . . . . . . . . . . . . . . . . . . . . . . . . 13
Photo Print (Windows) . . . . . . . . . . . . . . . . . . . . . . . . . 14
PrintFun (Macintosh) . . . . . . . . . . . . . . . . . . . . . . . . . . 15
Scan to Application . . . . . . . . . . . . . . . . . . . . . . . . . . . . 16
Scan for Creativity . . . . . . . . . . . . . . . . . . . . . . . . . . . . 17
Using Smart Panel in Palette Mode (Windows) . . . . . . 18
Copying
1
Positioning the Original Document . . . . . . . . . . . . . . . . . . . 20
Using the Control Panel . . . . . . . . . . . . . . . . . . . . . . . . . . . 21
Using the Copy Utility . . . . . . . . . . . . . . . . . . . . . . . . . . . . 23
Basic Copying . . . . . . . . . . . . . . . . . . . . . . . . . . . . . . . . 23
Adjusting the Copy Size . . . . . . . . . . . . . . . . . . . . . . . . 25
Making Advanced Settings . . . . . . . . . . . . . . . . . . . . . . 28
Adding Time Stamps and Watermarks . . . . . . . . . . . . . 31
Saving Advanced Settings . . . . . . . . . . . . . . . . . . . . . . . 34
iii
Page 4

Printing
2
Choosing the Right Paper and Settings . . . . . . . . . . . . . . . . 35
Handling Paper . . . . . . . . . . . . . . . . . . . . . . . . . . . . . . . . . . 36
Printing on Photo Paper . . . . . . . . . . . . . . . . . . . . . . . . 37
Printing on Envelopes . . . . . . . . . . . . . . . . . . . . . . . . . . 38
Basic Printing with Windows . . . . . . . . . . . . . . . . . . . . . . . 39
Basic Printing on a Macintosh . . . . . . . . . . . . . . . . . . . . . . . 42
Printing with Special Settings . . . . . . . . . . . . . . . . . . . . . . . 44
Enhancing Photographs . . . . . . . . . . . . . . . . . . . . . . . . 45
Using Custom Project Types . . . . . . . . . . . . . . . . . . . . . 45
Using Advanced Print Settings . . . . . . . . . . . . . . . . . . . 46
Choosing the Right Settings for EPSON Papers . . . . . . . . . 48
Using Photo Print (Windows) . . . . . . . . . . . . . . . . . . . . . . . 49
Scanning in Your Photo . . . . . . . . . . . . . . . . . . . . . . . . 49
Opening Images on Your Computer . . . . . . . . . . . . . . . 52
Printing Your Photos . . . . . . . . . . . . . . . . . . . . . . . . . . 53
Using PrintFun (Macintosh) . . . . . . . . . . . . . . . . . . . . . . . . 58
Scanning in Your Photo . . . . . . . . . . . . . . . . . . . . . . . . 58
Opening Images on Your Computer . . . . . . . . . . . . . . . 62
Printing Your Photos . . . . . . . . . . . . . . . . . . . . . . . . . . 63
Printing a Catalog of Your Photos . . . . . . . . . . . . . . . . . 66
Scanning
iv
3
Basic Scanning with TWAIN . . . . . . . . . . . . . . . . . . . . . . . 70
Starting Your Scan . . . . . . . . . . . . . . . . . . . . . . . . . . . . 70
Making Changes to Your Scan . . . . . . . . . . . . . . . . . . . 72
Scanning Part of an Image . . . . . . . . . . . . . . . . . . . . . . 75
Scanning to OCR . . . . . . . . . . . . . . . . . . . . . . . . . . . . . . . . 76
Scanning the Text . . . . . . . . . . . . . . . . . . . . . . . . . . . . . 76
Processing the Text . . . . . . . . . . . . . . . . . . . . . . . . . . . . 78
Saving the Text File . . . . . . . . . . . . . . . . . . . . . . . . . . . 80
Opening a Word Processing Program . . . . . . . . . . . . . . 82
Scanning to E-mail . . . . . . . . . . . . . . . . . . . . . . . . . . . . . . . 85
Scanning Your Document . . . . . . . . . . . . . . . . . . . . . . . 85
Formatting and Sending the File . . . . . . . . . . . . . . . . . . 89
Scanning for Creativity . . . . . . . . . . . . . . . . . . . . . . . . . . . . 91
Scanning Your Images . . . . . . . . . . . . . . . . . . . . . . . . . . 91
Creating Your Project in Windows . . . . . . . . . . . . . . . . 92
Creating Your Project on a Macintosh . . . . . . . . . . . . . 94
Page 5

Scanning to an Application . . . . . . . . . . . . . . . . . . . . . . . . . 95
Registering New Applications . . . . . . . . . . . . . . . . . . . . 98
Removing Applications or Changing Properties . . . . . 100
Quick Scanning . . . . . . . . . . . . . . . . . . . . . . . . . . . . . . . . . 101
Setting Up the EPSON Scanner Monitor
(Macintosh) . . . . . . . . . . . . . . . . . . . . . . . . . . . . . 101
Selecting an Application in EPSON Smart Panel . . . . 102
Faxing
4
Using the
5
Automatic
Document
Feeder
Maintenance
6
Faxing with Smart Panel . . . . . . . . . . . . . . . . . . . . . . . . . . 104
Sending a Fax . . . . . . . . . . . . . . . . . . . . . . . . . . . . . . . 104
Receiving Faxes . . . . . . . . . . . . . . . . . . . . . . . . . . . . . . 106
Customizing Scan to Fax . . . . . . . . . . . . . . . . . . . . . . . 108
Using eFax . . . . . . . . . . . . . . . . . . . . . . . . . . . . . . . . . . . . . 109
Installing the Automatic Document Feeder . . . . . . . . . . . . 111
Loading Your Document . . . . . . . . . . . . . . . . . . . . . . . . . . 114
Clearing Paper Jams . . . . . . . . . . . . . . . . . . . . . . . . . . . . . . 115
Cleaning the Paper Path Guide . . . . . . . . . . . . . . . . . . . . . 117
Replacing an Ink Cartridge . . . . . . . . . . . . . . . . . . . . . . . . 121
Removing and Installing Ink Cartridges . . . . . . . . . . . 122
Replacing an Outdated Ink Cartridge . . . . . . . . . . . . . 125
Cleaning the Print Head . . . . . . . . . . . . . . . . . . . . . . . . . . 126
Using the Head Cleaning Utility . . . . . . . . . . . . . . . . . 126
Using the Control Panel to Clean the Print Head . . . . 127
Examining the Nozzle Check Pattern . . . . . . . . . . . . . 128
Aligning the Print Head . . . . . . . . . . . . . . . . . . . . . . . . . . 129
Cleaning the EPSON Stylus Scan . . . . . . . . . . . . . . . . . . . 129
Transporting the EPSON Stylus Scan . . . . . . . . . . . . . . . . 130
v
Page 6

Solving
7
Problems
Diagnosing Problems . . . . . . . . . . . . . . . . . . . . . . . . . . . . . 133
Running a Printer Check . . . . . . . . . . . . . . . . . . . . . . 135
EPSON Stylus Scan Parts . . . . . . . . . . . . . . . . . . . . . . . . . 136
Problems and Solutions . . . . . . . . . . . . . . . . . . . . . . . . . . . 137
Solving Problems Setting Up the EPSON Stylus Scan
or Installing Its Software . . . . . . . . . . . . . . . . . . . . 137
Solving Problems with Printing and Copying . . . . . . . 140
Solving Problems with Paper Feeding . . . . . . . . . . . . . 141
Solving Miscellaneous Printout Problems . . . . . . . . . . 142
Solving Problems with Scanning and Copying . . . . . . 143
Solving Print Quality Problems . . . . . . . . . . . . . . . . . . 145
Solving Scan Quality Problems . . . . . . . . . . . . . . . . . . 150
Uninstalling the EPSON Stylus Scan Software . . . . . . . . . 152
Uninstalling in Windows (USB Connection) . . . . . . . 152
Uninstalling in Windows (Parallel Connection) . . . . . 153
Uninstalling on a Macintosh . . . . . . . . . . . . . . . . . . . . 153
Where To Get Help . . . . . . . . . . . . . . . . . . . . . . . . . . . . . 154
EPSON Technical Support . . . . . . . . . . . . . . . . . . . . . 154
Technical Support for Other Software . . . . . . . . . . . . 155
vi
Notices
8
Index
Windows System Requirements . . . . . . . . . . . . . . . . . . . . . 157
Macintosh System Requirements . . . . . . . . . . . . . . . . . . . . 158
ENERGY STAR Compliance . . . . . . . . . . . . . . . . . . . . . . 159
Options . . . . . . . . . . . . . . . . . . . . . . . . . . . . . . . . . . . . . . . 159
Important Safety Instructions . . . . . . . . . . . . . . . . . . . . . . 160
Ink Cartridge Safety Instructions . . . . . . . . . . . . . . . . 161
DECLARATION of CONFORMITY . . . . . . . . . . . . . . . 163
FCC Compliance Statement . . . . . . . . . . . . . . . . . . . . . . . 164
EPSON AMERICA, INC. LIMITED WARRANTY. . . . 165
Page 7

Welcome
W
The EPSON Stylus® Scan 2500 is the complete solution for
full-featured printing, scanning, and copying in a single device,
without compromising quality.
It’s the ideal printer for business graphics, single-page layout
proofs, digital photography—or any project you create on your
computer. It’s also a 36-bit professional color scanner that lets
you capture images with amazing detail. You can scan, then
e-mail or fax images, or publish them on a web site. You can
even scan in a printed document, and then edit the text on your
computer.
You can also use your EPSON Stylus Scan 2500 as a copier.
You can select copy settings from the printer’s control panel,
then print the copies without ever turning on your computer.
Or you can use a control panel on your computer screen to
select custom settings and copy.
The EPSON Stylus Scan 2500 comes with these features:
■ Print resolutions up to 1440 × 720 dpi, for photo-quality
color and sharp text even on plain paper
■ EPSON’s unique variable dot Micro Piezo
superior printing results
™
technology for
■ 600 × 2400 dpi scanning with 36-bit color depth for
capturing images with over 68 billion colors
■ Photo-quality color copying
■ Plug and play setup on both Windows
Macintosh
system meets the system requirements on page 157 and
page 158)
■ Parallel connection for Windows 95 and 98
®
computers with a USB connection (if your
®
98 and
Welcome 1
Page 8

note:
means the
W
information is for
Windows users only.
means the
M
information is for
Macintosh users only.
■ Quick scanning, which lets you automatically send your
scan to a target application whenever you press the
button on the EPSON Stylus Scan control panel
■
Easy-to-use software for printing, scanning, and copying
■
Optional automatic document feeder (included with the
EPSON Stylus Scan 2500 Pro model) for copying or
scanning up to 20 pages at a time. Also lets you scan and
copy legal-size documents.
■
Optional transparency unit for scanning slides, negatives,
and transparencies
Special Features
Your EPSON Stylus Scan makes it easy to do specialized
projects using these features:
■ Photo Print
W
M
■ Copy Utility
PrintFun
You can make extra prints of your favorite photos, starting
with an actual photograph or with an image on your
computer. You can choose the size, number, and format of
your prints, and use special paper for professional results.
Place a printed document on the document table and then
use the control panel on your computer screen to make
custom settings for high-quality copies.
(Windows) or
(Macintosh)
] Scan
2 Welcome
■ Quick Scanning
When you set up this feature, you just press the
]
button on the control panel for quick access to EPSON
Smart Panel
■ OCR
™
applications.
Most scanning creates an image, even when you’re working
with text. OCR (optical character recognition) lets you scan
a page of words and create a text file that you can edit in
your word processing application.
Scan
®
Page 9

■ Fax
If you have a modem in your computer, you can send and
receive faxes on your EPSON Stylus Scan 2500. Anything
that you can scan in or create on your computer, you can
fax. The same utility lets you receive incoming faxes. Or
you can use eFax
™
to receive faxes through your e-mail. See
Chapter 4 for more information.
■ E-mail
If you have a modem, an Internet connection, and an
e-mail application, you can scan an image or a document,
then send it to colleagues, customers, or friends.
About Your Software
Your software enables the EPSON Stylus Scan to print, scan,
and copy. Make sure you follow the instructions on the Start
Here sheet to install this software:
■ Your printer driver and scanner driver
Work behind the scenes to let you print and scan. You
can access the printer driver and scanner driver (called
TWAIN) directly if you want to experiment with advanced
settings. Even if you don’t, your drivers operate whenever
you use your EPSON Stylus Scan 2500.
■ EPSON Smart Panel
Lets you scan, copy, and print by clicking a few buttons on
your computer screen. You can also use it with the
button on your control panel for quick scanning.
W
■ WinFax
M
■ FAXstf
Let you send and receive faxes through the modem in your
computer.
■ eFax
Internet fax service provided by eFax.com, which lets you
receive faxes through your e-mail. For instructions on
installing and using eFax, see page 109.
®
Basic (Windows) or
®
(Macintosh)
] Scan
Welcome 3
Page 10

■ Adobe
®
Acrobat® Reader
Lets you read the on-screen manuals for EPSON Smart
Panel, WinFax, FAXstf, Adobe PhotoDeluxe
,® or any other
files in the Portable Document Format (PDF).
■ Adobe PhotoDeluxe
(on a separate CD-ROM)
Image-editing software for enhancing your scanned photos,
adding special effects, and creating projects like web pages,
business cards, and calendars.
Getting More Information
There are several sources of information for your EPSON
Stylus Scan 2500, including printed materials, help utilities and
electronic manuals. Here’s where to look for help:
■ Start Here sheet
Read this first to set up your EPSON Stylus Scan 2500 and
install its software. You need to follow these instructions
carefully before you can use the EPSON Stylus Scan.
■ Electronic EPSON Stylus Scan 2500 Reference Guide
Check here for detailed information about your EPSON
Stylus Scan 2500, including technical specifications. You
must have a web browser (Netscape
Microsoft
®
Internet Explorer, version 3.0 or later) to read
your Reference Guide; see page 5 for instructions.
®
Navigator®
or
4 Welcome
■ On-screen Help
Whenever you’re working with EPSON Smart Panel or any
of the other software that came with your EPSON Stylus
Scan 2500, you can click the
■ Other Electronic Documents
Help button or Help menu.
EPSON Smart Panel, WinFax, FAXstf, and Adobe
PhotoDeluxe include electronic manuals in the Adobe
Acrobat PDF format. See page 7 for instructions on
accessing and reading your Acrobat manuals.
If none of these sources answers your questions, please see
“Where To Get Help” on page 154.
Page 11

warning
caution
note
tip
Warnings, Cautions, Notes, and Tips
Please follow these guidelines as you read this manual:
■
Warnings must be followed carefully to avoid bodily injury.
■
Cautions must be observed to avoid damage to your
equipment.
■
Notes contain important information about your EPSON
Stylus Scan.
■ Tips give you useful hints for printing, scanning, and
copying.
Registering
Please take a minute to fill out the registration card for your
EPSON Stylus Scan 2500 and mail it back to us, if you haven’t
already registered when you installed your software. This
enables you to receive special information on options, new
products, and software upgrades. You’ll get immediate
attention if you have a problem with your EPSON Stylus Scan.
note:
You must have a web
browser (Netscape
Navigator or Internet
Explorer, versions 3.0
or later) to view your
Reference Guide.
Reading Your Reference Guide
Your electronic EPSON Stylus Scan 2500 Reference Guide is on
your EPSON Stylus Scan 2500 software CD-ROM. You can
view it from the CD-ROM or copy it to your hard drive and
view it from there. Follow these steps:
1. Insert your EPSON Stylus Scan 2500 software CD-ROM.
W 2. Double-click the
Then double-click the
M Double-click the
W 3. Double-click the
Ess2500 icon.
My Computer icon on your desktop.
Epson_ss2500 CD-ROM icon.
EPSON SS2500 CD-ROM icon.
Manual folder, then double-click the
Welcome 5
Page 12
note:
Click Install Reference
Guide to copy the
manual to your hard
drive so you can read the
guide at any time. To
read the copied guide, do
one of the following:
Windows: Click Start,
point to Programs,
EPSON, and select
EPSON Stylus Scan
2500 Reference Guide.
Macintosh: Double-click
the View Reference
Guide icon in the
EPSON STYLUS
SCAN 2500 folder on
your hard drive.
M Double-click the
EPSON STYLUS SCAN 2500 icon.
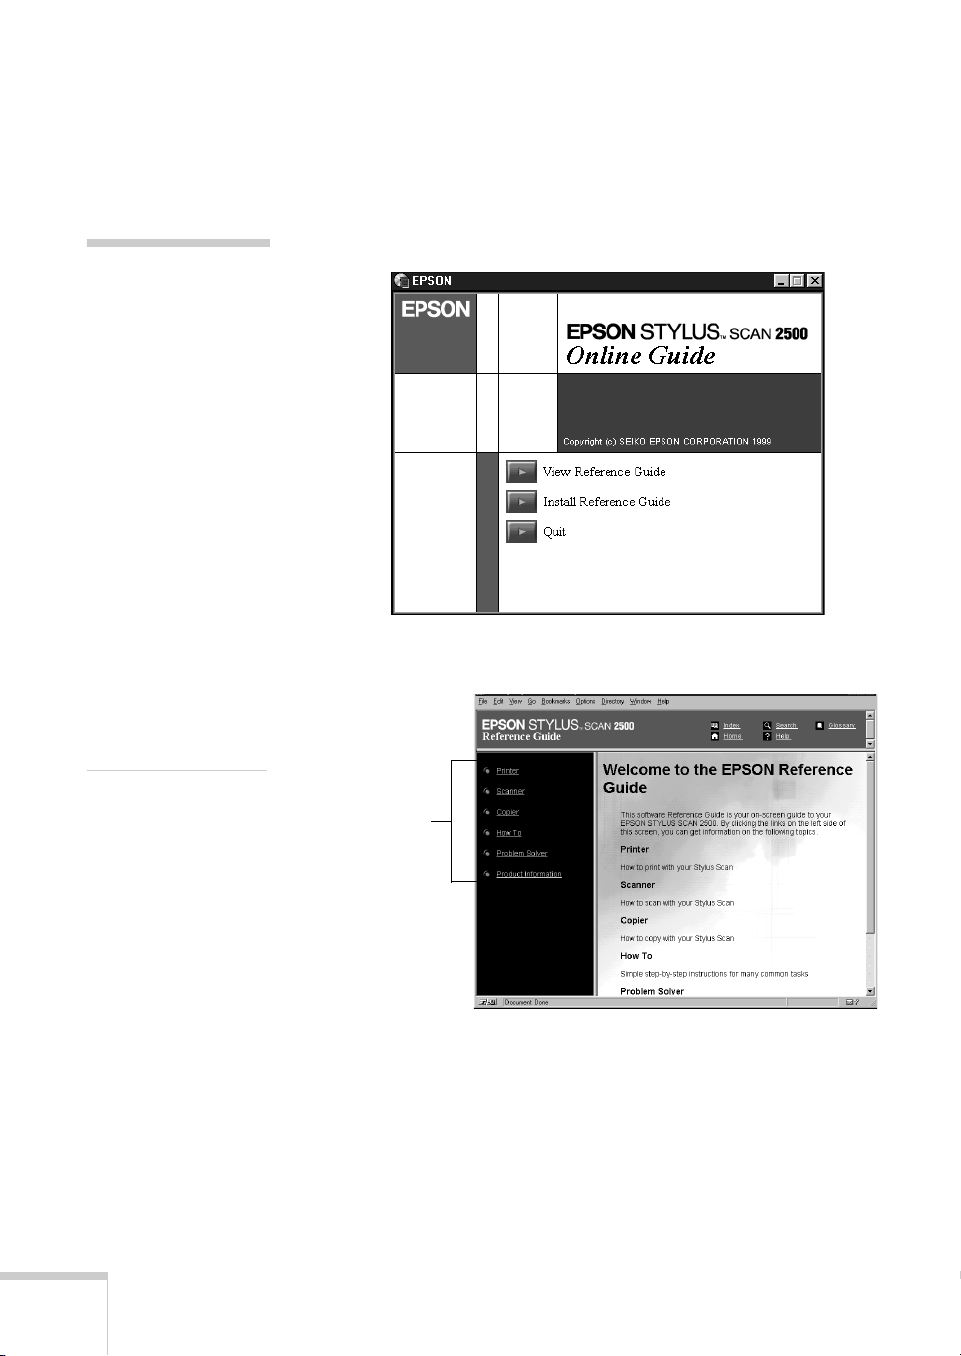
The Reference Guide window opens:
4. Click
View Reference Guide. You see this window:
Manual icon, then double-click the
6 Welcome
Click a topic
to expand
the contents.
Click topics on the left to expand the contents.
Page 13
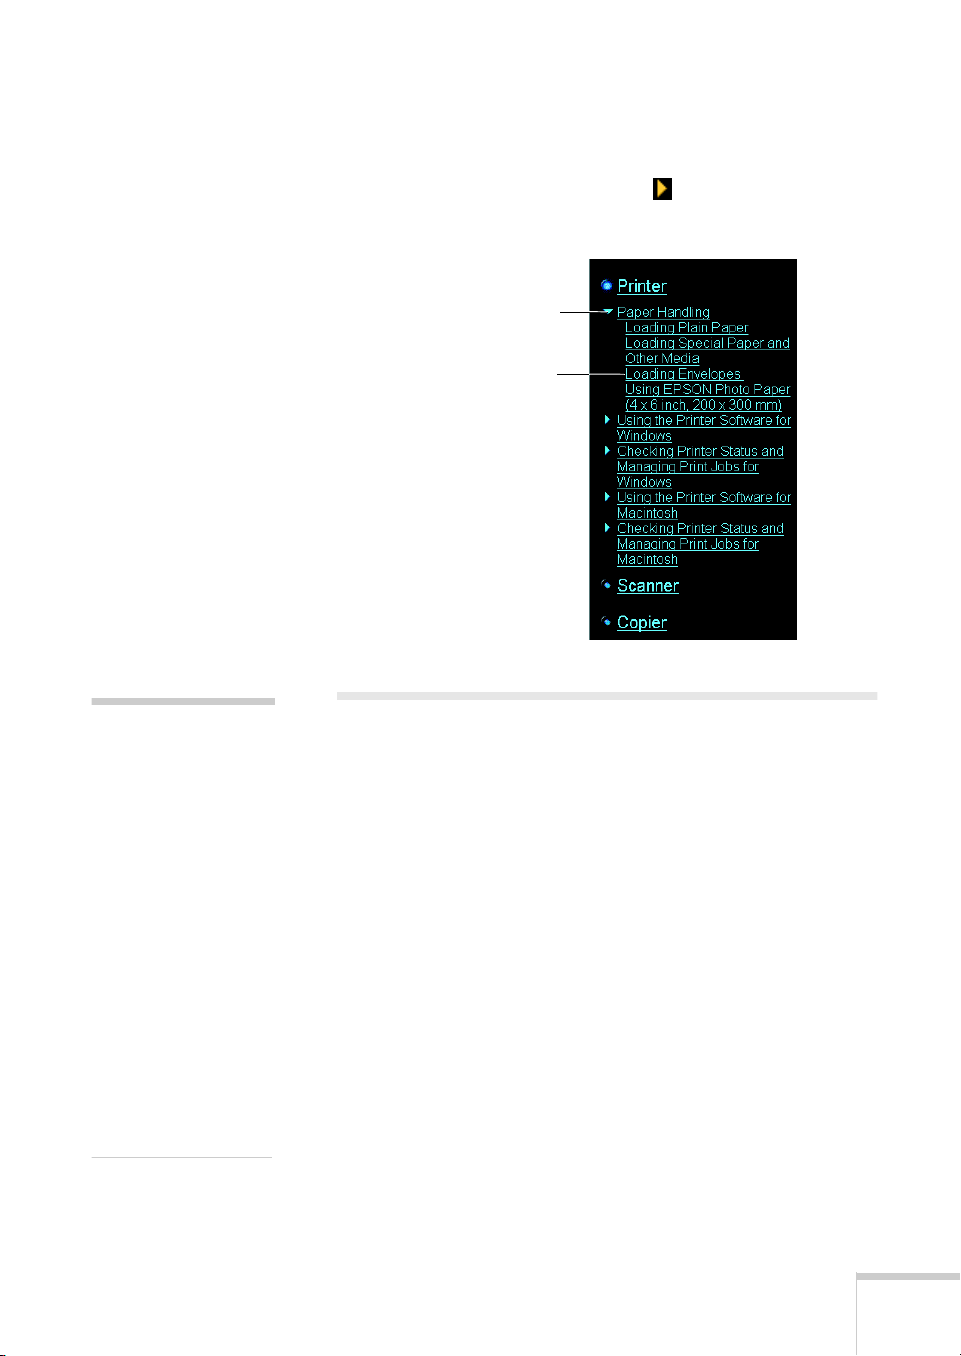
After expanding the contents, you can click on the topic you
want to view. If there’s a right arrow , click it to view
subtopics. Then click the topic you want to see.
Click here to
expand a subtopic.
Click here to view
a topic.
note:
You probably installed
Acrobat Reader when
you installed your other
EPSON Stylus Scan
2500 software. If not,
you can install it from
the EPSON Stylus Scan
2500 CD-ROM.
Follow the instructions
on your Start Here
sheet.
If you already have a
version of Acrobat
Reader on your system,
you can use it to open
your manuals.
Reading Your Other Electronic Manuals
To read your electronic manual for EPSON Smart Panel,
WinFax, FAXstf, PhotoDeluxe, or any other PDF manuals,
you’ll use Adobe Acrobat Reader.
Here’s where your software PDF manuals are located:
■ For Smart Panel, do one of the following:
W Click
M Open the
W
■ For WinFax, locate the User’s Guide (Wfscript.pdf) in the
M
■ For FAXstf, locate the FAXstf User Manual in the FAXstf
Start, point to Programs, EPSON Smart Panel,
and click
EPSON Smart Panel User’s Guide.
WinFax/Docs folder on the EPSON software CD-ROM.
Smart Panel User’s Manual.
EPSON SMART PANEL folder and double-click
folder on your hard drive.
Welcome 7
Page 14
■ For PhotoDeluxe, locate the Getting Started guide
(GetStart.pdf) in the
English (Windows) or Extras
(Macintosh) folder on your Adobe PhotoDeluxe
CD-ROM.
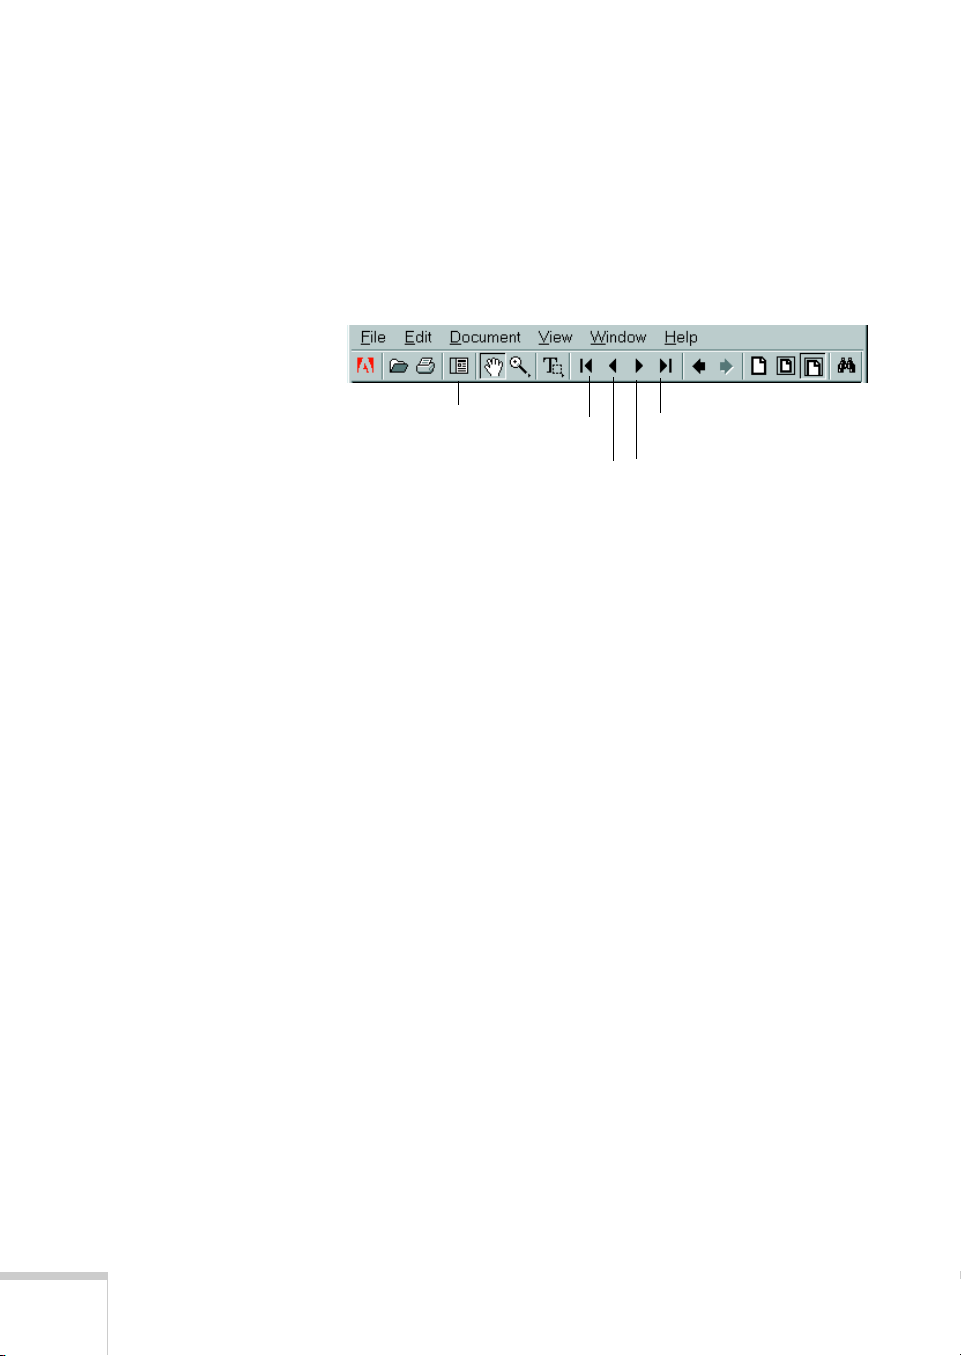
When you open an electronic manual, you’ll see this toolbar:
Show navigation
pane
First page
Previous page
Last page
Next page
With Acrobat Reader, you have several ways to navigate
through text:
■
Use the navigation pane on the left side of the screen to
move quickly to the topic of your choice.
■
Use the arrow buttons in the toolbar or the vertical scroll
bar on the right side of the document to move through a
manual. (The box to the left of the scroll bar displays the
current page number.)
■
Click on hot topics, which are usually underlined or
displayed in a different color. To find out if a topic is hot,
move your cursor over it. If the cursor turns into a pointing
hand, the topic is hot—you can jump to it by clicking once.
For more information, see your Acrobat Reader online guide.
8 Welcome
Page 15

Using the EPSON Smart Panel
Windows Macintosh
You can use the EPSON Smart Panel for all types of scanning,
note:
Make sure you’ve
installed your EPSON
Smart Panel software,
following the
instructions on the
Start Here sheet.
as well as for high-quality copying and photo printing. You can
also use it for quick scanning to any of the Smart Panel
applications (see page 101 for details).
To open the EPSON Smart Panel, do one of the following:
W
■
Click the Smart Panel icon on the right side of the
Windows task bar.
■
M
Smart Panel opens automatically when you start your
Macintosh. If you closed it and need to open it, select
EPSON SMART PANEL from the Apple menu or from
the EPSON Smart Panel folder on your hard drive.
You see the EPSON Smart Panel window shown above. Click
an icon on the panel to use any of the applications described on
the following pages.
If you need more information, see the electronic Smart Panel
User’s Manual, as described on page 7.
Welcome 9
Page 16

Click here to
make precise
adjustments
to the size of
the output
image.
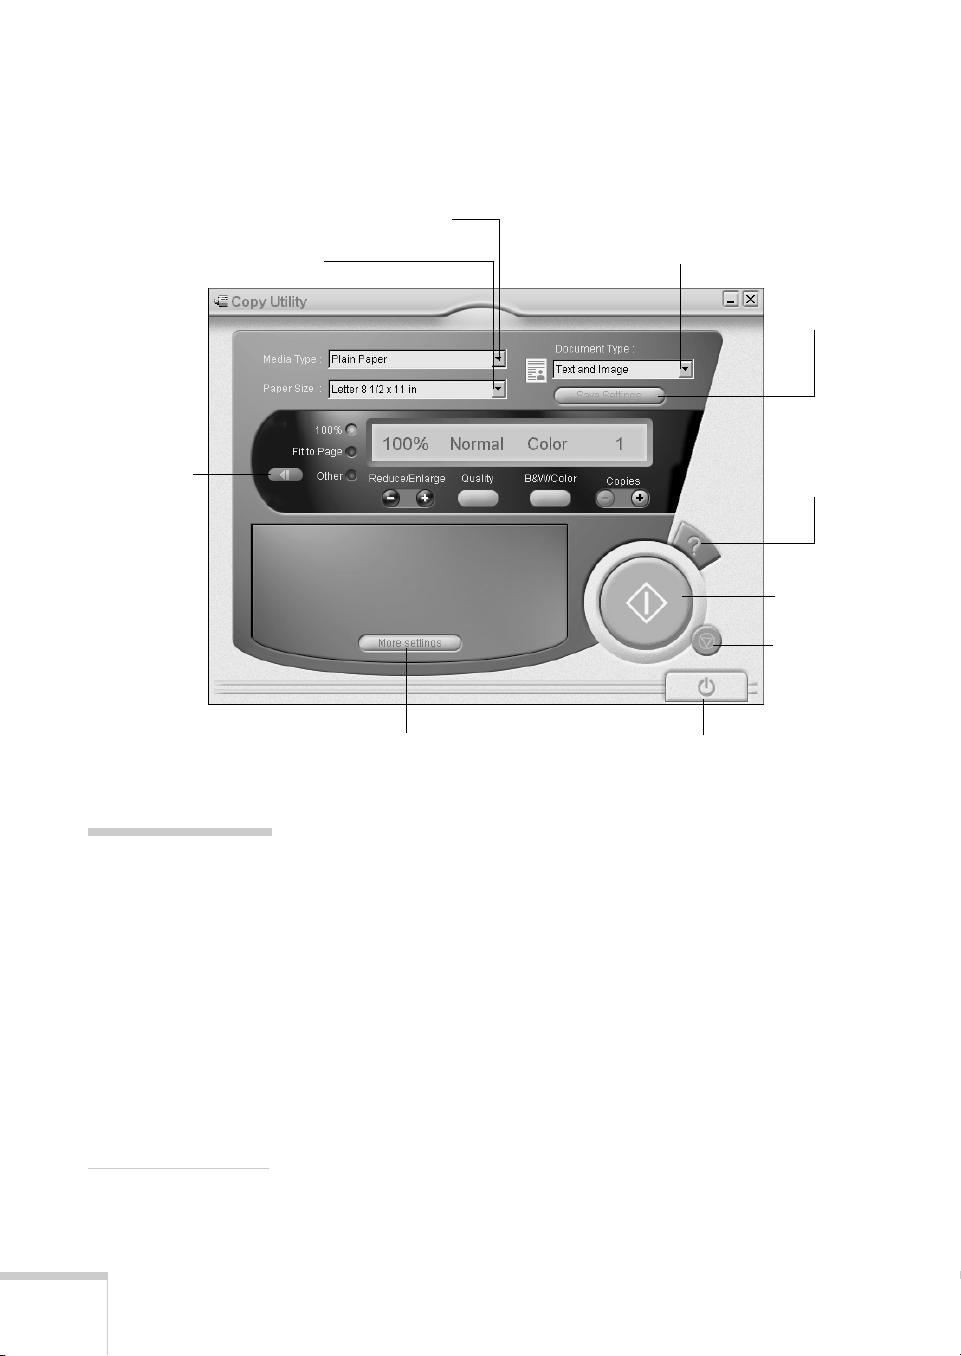
Copy Utility
Click to make custom settings.
You can use the control panel on your computer screen to make
copies of printed pages and photos, with customized settings to
enhance your copies. When you make copies using the Smart
Panel Copy utility, you have more control over the quality of
your output than when you make copies without your
computer.
Click to
display
online help.
Click to start
copying.
Click to stop
copying in
progress.
Click to close the Copy Utility.
10 Welcome
For detailed instructions, see “Using the Copy Utility” on
page 23.
Page 17

Scan to Fax
Click the speed-dial
buttons, or
Click the numbers on
the keypad to dial.
Then click the
Start button.
. . .
If you have a modem, you can use a virtual “fax machine” on
your computer screen to send photos or text. First place your
page or photo face down on the EPSON Stylus Scan’s
document table, then enter the fax number by clicking the
keypad on your screen and click the Start button. The EPSON
Stylus Scan scans your document and converts it to a fax image.
You can also set up Scan to Fax to print received faxes
automatically (Windows only).
For detailed instructions, see “Faxing with Smart Panel” on
page 104.
Welcome 11
Page 18
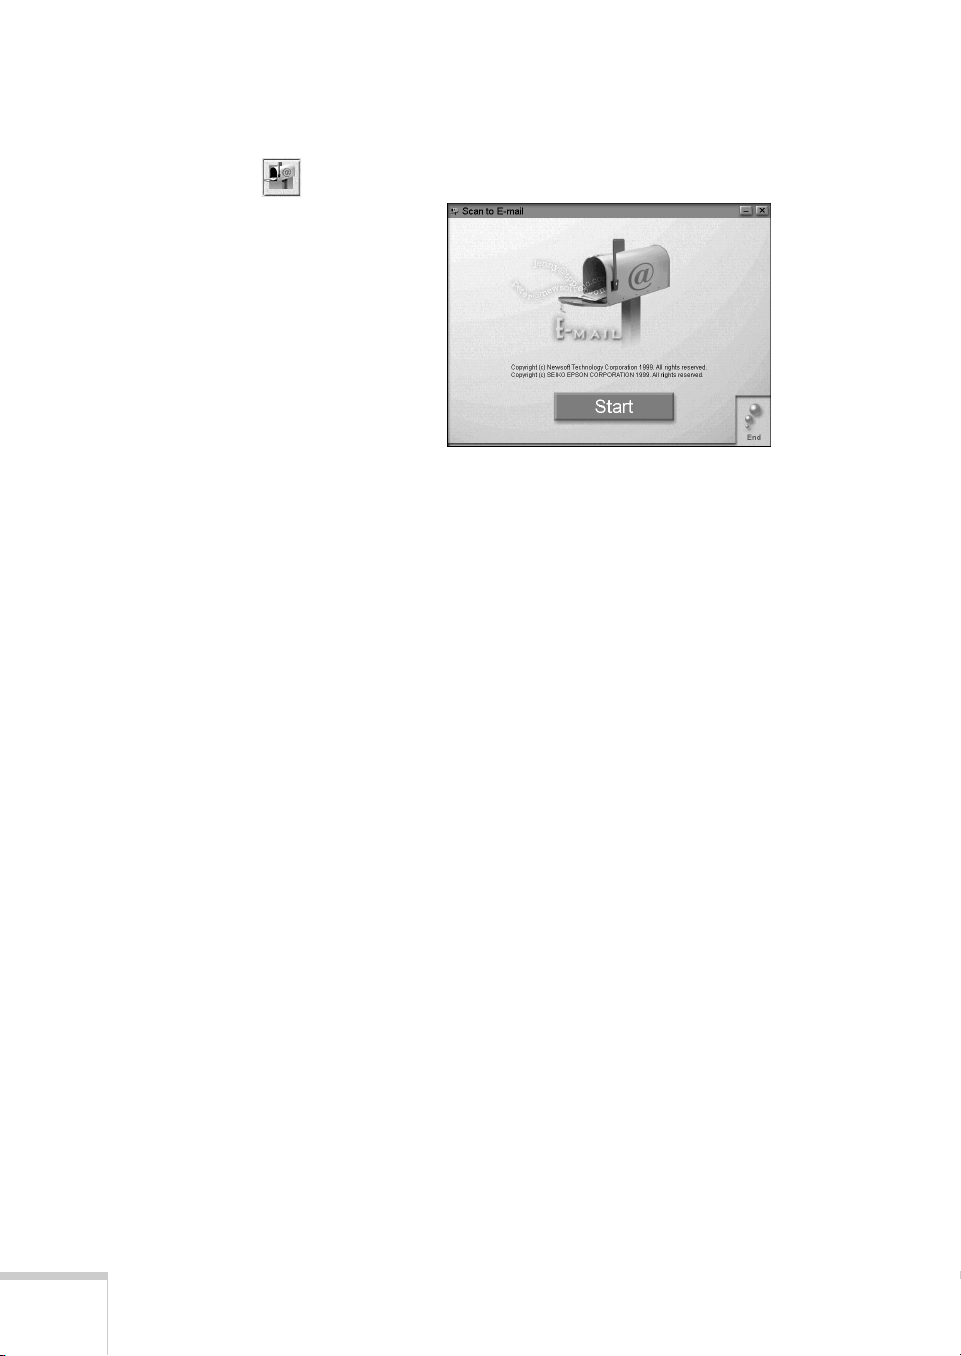
Scan to E-mail
If you have a modem and e-mail service, you can use your
EPSON Stylus Scan to send photos or documents. The Scan to
E-mail utility saves the scan in any format you choose,
including text. Then it opens your e-mail program so you can
attach the scanned file and share it with friends or colleagues.
For detailed instructions, see “Scanning to E-mail” on page 85.
12 Welcome
Page 19

Scan to OCR
Optical character recognition, or OCR, converts a scanned text
image into text that you can edit in a word processing program.
The Scan to OCR utility makes it easy for you to do all the
steps in this process:
■
Scan the document
■
Process and edit the text, using a window like this:
If you scanned
more than one
page, click the
page in this
column that
you want to
edit.
This window
shows a
close-up of the
scanned image.
Edit your text
here.
Click the + or −
button to enlarge
or reduce the
view.
■ Save the file in any format you choose, including HTML.
■ Open your word processor so you can work with the text.
For detailed instructions, see “Scanning to OCR” on page 76.
Welcome 13
Page 20

tip:
Try using the EPSON
Photo Paper that came
in your Media Pack to
print your photos.
The number of sheets you’ll
need for the selected
image(s) in the layout shown.
Photo Print (Windows)
The Photo Print utility gives you an easy way to reprint your
photos in any size you want. You can scan in your photos and
then print them on EPSON snapshot-size photo paper or cards.
You can also use full-size sheets of photo paper to create
enlargements or combine several prints on one sheet.
After you scan or open your images, you see a window like this,
where you can select the print layout:
To select a page size,
click its button.
14 Welcome
For detailed instructions, see “Using Photo Print (Windows)”
on page 49.
Page 21

tip:
Try using the EPSON
Photo Paper that came
in your Media Pack to
print your photos.
PrintFun (Macintosh)
The PrintFun utility gives you an easy way to reprint your
photos in any size you want. You can scan in your photos and
then print them on EPSON snapshot-size photo paper or cards.
You can also use full-size sheets of photo paper to create
enlargements or combine several prints on one sheet.
After you scan or open your images, you see a window like this,
where you can select to print individual photos or a catalog of
photos on one sheet, like a proof sheet:
Print individual photos,
or
a catalog sheet of photos.
For detailed instructions, see “Using PrintFun (Macintosh)” on
page 58.
Welcome 15
Page 22
Registered
applications
appear here.
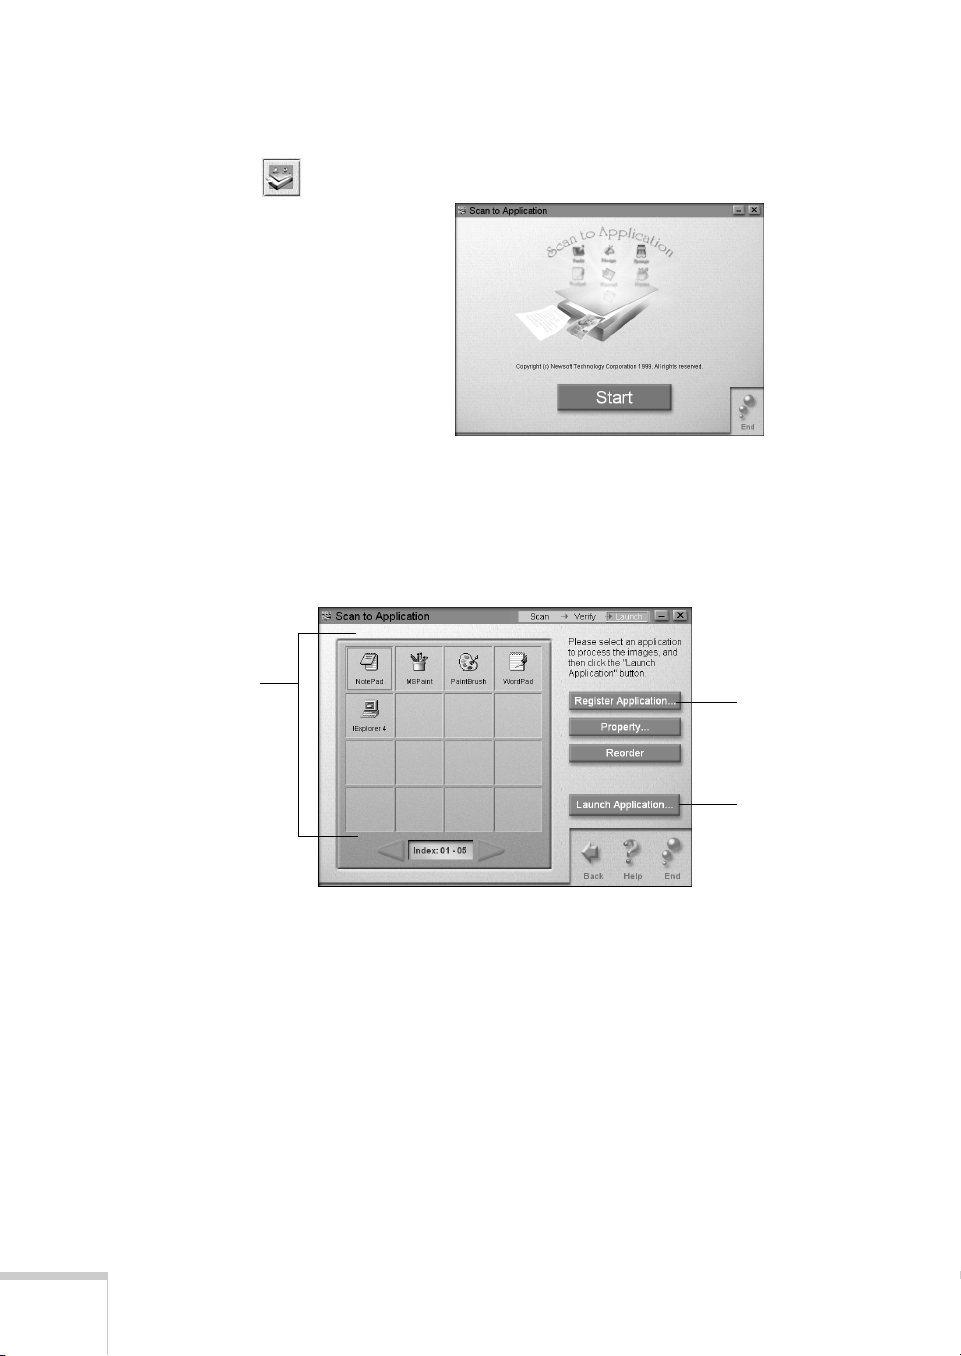
Scan to Application
This utility automatically scans your image and then opens it in
any supported application program on your computer. You can
select the program you want to use and the default file format
for the scanned image, using this window:
Click to register a
new application.
16 Welcome
Click to open the
selected
application.
For detailed instructions, see “Scanning to an Application” on
page 95.
Page 23
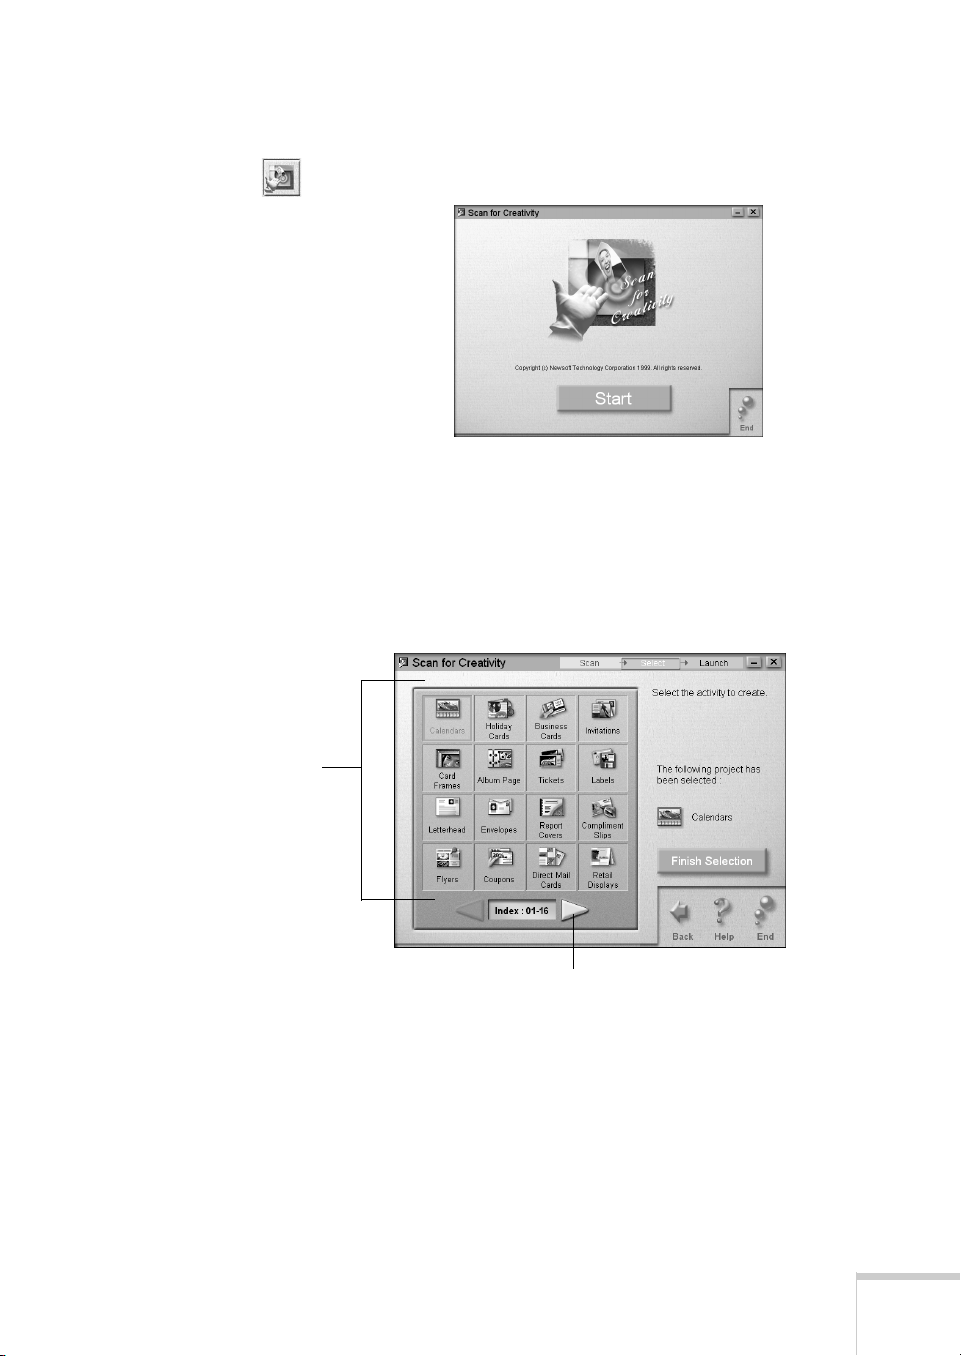
Scan for Creativity
This utility scans your image automatically and then opens it in
PhotoDeluxe, which guides you through the steps to create a
print project—such as a calendar, card, label, or web page.
W With Windows, you first choose from 25 different project types
you can create with your scanned images.
To select a project,
click its icon.
Click here to display more projects.
For detailed instructions, see “Scanning for Creativity” on
page 91.
If you need more information about PhotoDeluxe, see its
electronic manual as described on page 7.
Welcome 17
Page 24
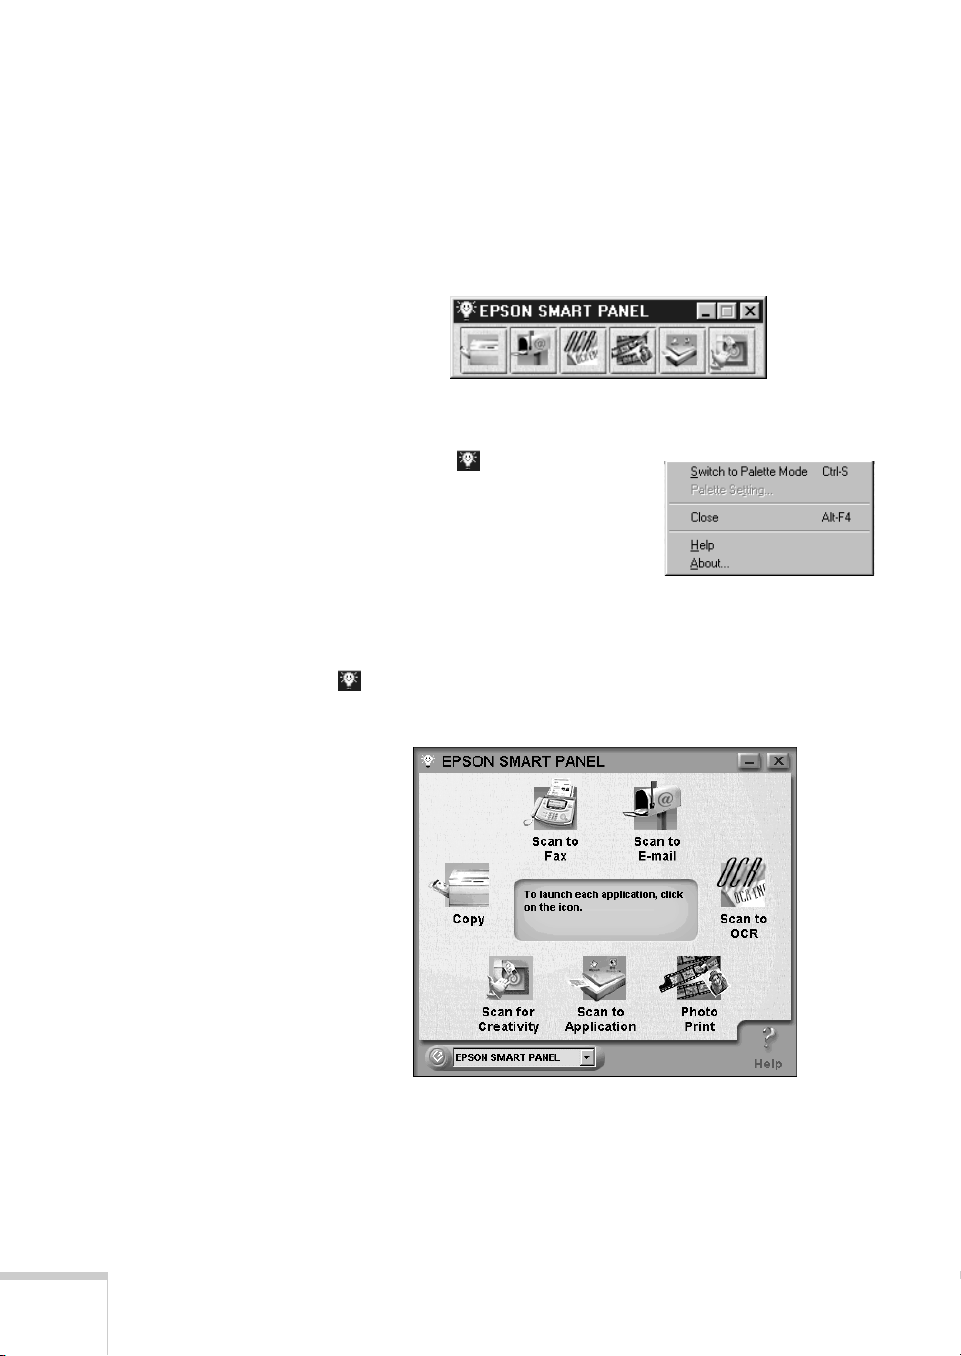
W
Using Smart Panel in Palette Mode (Windows)
In palette mode, your Smart Panel icons are arranged in a
compact toolbar rather than a panel:
To switch to palette mode:
1. Click the Smart Panel icon
in the upper left corner of the
Smart Panel window. You see
the system menu:
2. Select
Switch to Palette
Mode
.
To switch from palette mode back to panel mode, click the
Smart Panel icon on the palette toolbar and select
Panel Mode
. EPSON Smart Panel returns to this view:
Switch to
18 Welcome
Page 25

Copying
1
note:
You can’t use the
optional transparency
unit with the copy
function.
You can use your EPSON Stylus Scan like a standard copier—
load paper in the sheet feeder, place a document on the
document table, then press the
have to turn on your computer. The buttons on the EPSON
Stylus Scan’s control panel let you make all the basic settings:
paper and copy size, copy quality, number of copies, color or
black and white, and lighter or darker copies.
If you want more copying options, you can use the EPSON
Smart Panel Copy Utility to control copying from your
computer.
You’ll find instructions in this chapter for the following:
■
Positioning your original on the document table
■
Using the control panel to copy without a computer
■ Using the Smart Panel Copy Utility
Copy
button. You don’t even
Copying 19
Page 26

note:
If you have the
automatic document
feeder, you can copy up
to 20 pages at a time.
See “Loading Your
Document” on page 114
for instructions on
loading your original in
the automatic document
feeder.
Positioning the Original Document
First make sure you have paper loaded, following the
instructions in “Handling Paper” on page 36. Then follow these
steps to place the document you want to copy:
1. Open the document cover.
2. Place the original document face down on the document
table. Position it so the horizontal and vertical edges are
carefully aligned with the scales along the sides of the
document table.
20 Copying
top corner of document
3. Close the document cover slowly. Be careful not to move
the document.
Page 27
Scan
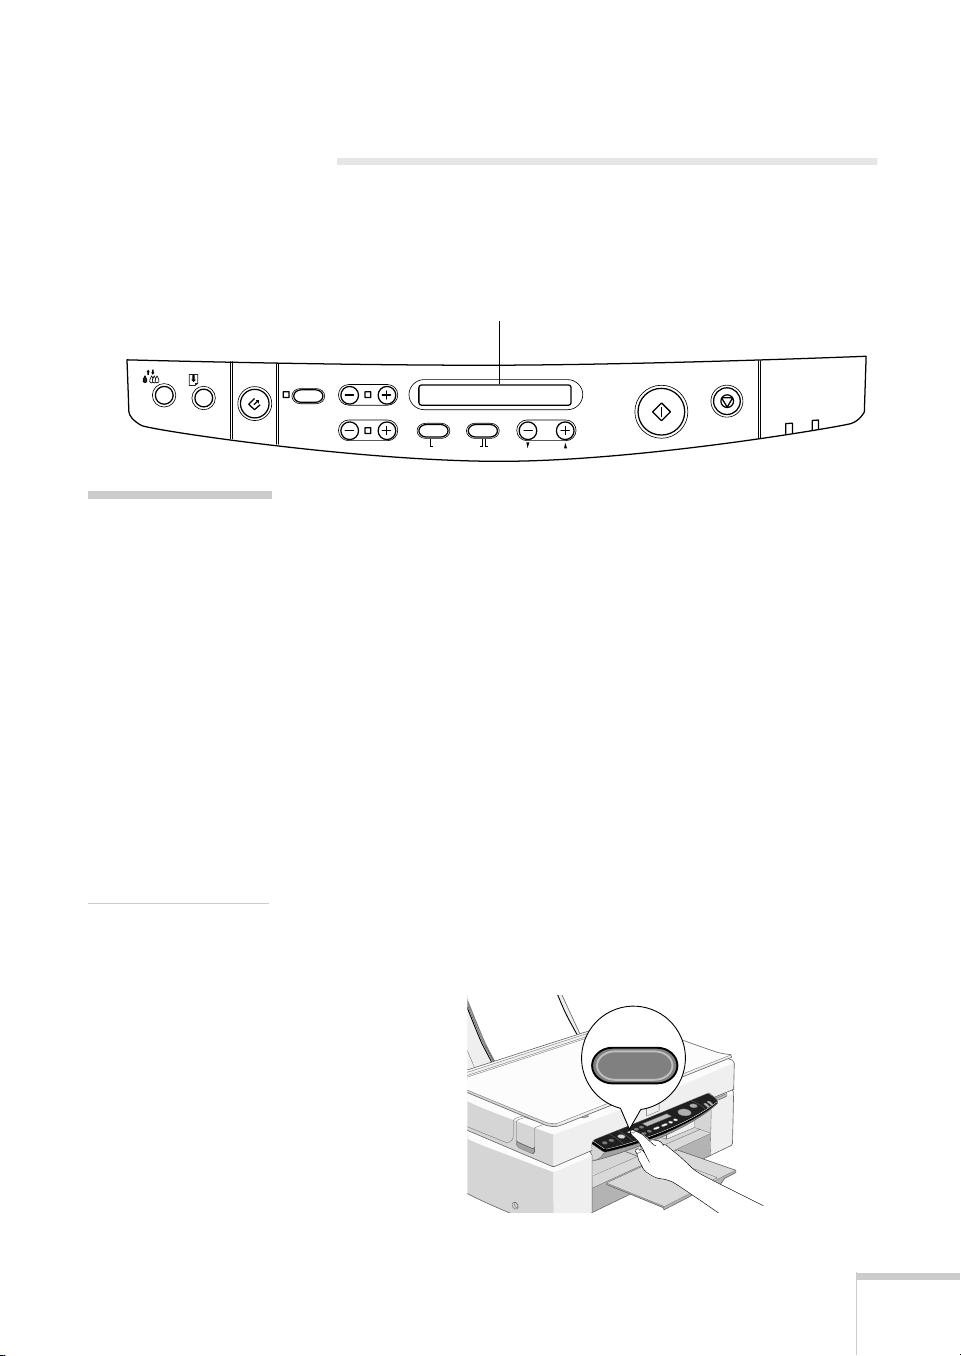
Using the Control Panel
You can perform most basic copy operations from the EPSON
Stylus Scan’s control panel.
LCD panel
Copy
Darker/LighterPaper Size
CopiesQualityB&W/ColorReduce/Enlarge
ItemReturnHold for Menu
Set
Stop/Clear
Operate
Error
note:
You can use the control
panel’s Menu Mode to
print a status sheet, set
the bottom margin,
change from U.S. to
metric paper sizes, set
the language on the
LCD panel, or reset the
control panel to the
factory defaults. For
detailed information
about Menu Mode, see
your electronic EPSON
Stylus Scan 2500
Reference Guide.
The LCD panel displays the current copy settings. When you
first turn on the EPSON Stylus Scan, you see these default
settings:
100% B&W Normal 1. This means you’re set to
produce one black and white copy, of the same size as the
original document, at Normal quality (360 dpi resolution for
everyday copying).
Follow these steps to copy using the control panel:
1. Press the
Scan. Wait until the
P Operate button to turn on the EPSON Stylus
Operate
light stops flashing.
2. Load paper in the feeder and place your original face down
on the document table. Close the document cover.
3. Press the
Paper Size
the LCD panel, with brackets around
paper size, press the
button. A list of paper sizes appears in
Letter. To change
Paper Size
button to move the
brackets.
Paper Size
Copying 21
Page 28

note:
To return a setting to its
default, press the
Stop/Clear button while
changing the setting.
When you restart the
EPSON Stylus Scan, all
settings automatically
return to their defaults.
4. If you want to make your copy lighter or darker, press the
+ or – button under Darker/Lighter. The settings appear
temporarily in the LCD panel, with the current setting
bracketed. Continue to press the
+
or – button to move the
brackets to a new setting. (You can make your copy up to
twice as light or twice as dark as the original.)
5. To make your copy smaller or larger than the original,
press the
+
or – button under
Reduce/Enlarge
. You can
make copies as small as 50% of the original size, or as large
as 200%.
note:
The Photo setting
doesn’t appear in the
LCD panel unless the
EPSON Stylus Scan is
set to produce color
copies.
6. If you want to make a color copy, press the
button.
7. Press the
Quality button to set copy quality. The following
settings are recommended for different originals:
Normal:
Fine:
Photo:
Text, line art, or graphics on plain paper
Photographs on plain paper
Color photographs on EPSON Photo
Paper
8. To make more than one copy, press the
Copies
9. Press the green
. You can make up to 20 copies.
Copy button to begin copying.
+
B&W/Color
button under
22 Copying
Page 29

Using the Copy Utility
The Copy Utility on the EPSON Smart Panel gives you a way
to produce professional quality copies with special features, like
watermarks and time stamps.
Make sure the Smart Panel software is installed and your printer
is set up, connected to your computer, and turned on. Then
continue with the instructions in these sections:
■
Basic copying
■
Adjusting the image size
■ Making advanced settings
■
Adding time stamps and watermarks
■
Saving custom settings
Basic Copying
1. Load paper in the sheet feeder. For instructions on loading
paper, see “Handling Paper” on page 36.
2. Position your original on the document table (as described
on page 20) or in the automatic document feeder (as
described on page 114).
3. Do one of the following:
W Click the Smart Panel icon on the Windows taskbar to
open the Smart Panel.
M Click the Apple menu icon, then click
PANEL
4. Click the
to open the Smart Panel.
Copy icon.
EPSON SMART
Copying 23
Page 30
You see the Copy Utility control panel on your screen.
Click here to choose the type of paper you’re using.
Click here to choose paper size.
Click here to
adjust the size
of the output
image (see
page 25).
Click to make advanced
settings (see page 28).
Click here to choose
your document type.
Click to save
customized
settings.
Click to
display
online help.
Click to start
copying.
Click to stop
copying in
progress.
Click to close the Copy utility.
note:
The EPSON Stylus
Scan automatically
adjusts the ink coverage
according to your
Media Type setting.
That’s why this setting
is so important for
high-quality copies. See
“Choosing the Right
Settings for EPSON
Papers” on page 48 for
details.
24 Copying
5. Choose the type of paper you’re using in the
Media Type
list. Then choose your paper size.
6. Choose your document type in the
■ Choose Text if your document contains text only.
■ Choose Photo
■ Choose Text and Image
if you’re copying a photograph.
Document Type list.
if your document includes
both text and illustrations.
■ Choose Multi-page Document if you’re using the
automatic document feeder to copy multiple pages.
(To print collated copies, see “Saving Advanced
Settings” on page 34.)
Page 31

7. Click the appropriate buttons to set copy quality, switch
from color to black and white, or increase the number of
copies you want to make.
8. When you’re finished selecting copy settings, click the
large, green Copy button on the screen.
The EPSON Stylus Scan scans the image and displays a
progress bar on the screen. Then it loads paper and prints
your copies. A print job control window also appears on the
screen; see page 41 (Windows) or page 44 (Macintosh) for
instructions on controlling printing.
Adjusting the Copy Size
You can use the Copy Utility to fine-tune the size of your
copies.
If you don’t need to preview your image, you can use the
following methods to change the copy size:
■
If you want the output image to be the same size as the
original, select
100% on the screen’s control panel.
■
■ Click the + or – button under Reduce/Enlarge to
Select
setting.
Fit to Page
Auto
to set the image to fit your paper size
appears on the Copy Utility control panel.
gradually increase or decrease the size of your image from
25% to 400%. (The percentage expresses the ratio of the
copy size to the original image size. It changes by one
percentage point each time you click a button.)
Copying 25
Page 32

You can also use the Scaling window to preview your copy and
adjust the size. Follow these steps:
1. Click the Scale button on the Copy Utility control
panel. You see the window below.
Click and drag to
resize your image
by an exact
percentage.
Click to fit your
image to a standard
page size, or
preview it before
you resize it.
26 Copying
2. If you don’t need to preview the image, use the slider to
reduce or enlarge it by an exact percentage. Then click
to return to the control panel.
OK
Page 33

3. If you want to select a standard page size or preview the
image, select
Fit to Page. You see this window:
preview
area
4. Do one of the following:
■
Choose a page size from the
Standard Size
list.
Continue with step 6.
■
If you want the software to automatically detect the
correct image size, click
Recognize Test
. A preview of your Output Image
Automatic
, then click
appears in the preview area beside your Source Image.
Continue with step 6.
■
To adjust the Output Image manually, click
Area selection
, and then click
Preview
. You see a
preview of your Source and Output Images in the
preview area. Continue with the next step.
5. Do one of the following:
■ To resize the image manually, click and drag the frame
around the Output Image. Release the mouse when the
image is the correct size.
■ To define the area you want to copy, click and drag the
frame around the Source Image. The results are
immediately visible in the Output Image.
6. Click
OK to return to the Copy Utility control panel.
User
Copying 27
Page 34

Making Advanced Settings
note:
When you make
changes via the More
settings button, the
Document Type on the
Copy Utility’s control
panel automatically
changes to User Setting.
If you change to a
different Document
Type, you will lose your
settings unless you save
them. See page 34 for
instructions on saving
your settings.
You can automatically enhance your photograph or text, adjust
a photo layout, apply a blue or sepia tint, change your image’s
brightness, contrast, and saturation, and collate multi-page
copies via the More settings button. Follow the instructions in
the sections below.
Using Automatic Enhancements
To automatically enhance photographs or text, follow these
steps:
1. Click
2. On the
More settings on the Copy Utility control panel.
You see this box:
Imaging
tab, select
Enhanced Copy
Click the
arrows to see
additional
options.
, if necessary.
28 Copying
3. To optimize the quality of your copy automatically, select
Automatic Document Enhancement
and click the
arrow. You see this box.
4. Select the option that best describes your source document
and click
OK. You return to the Imaging tab.
Page 35

Using an Automatic Photo Layout
If you’re copying a photograph and want to adjust the layout
automatically, follow these steps:
note:
If Automatic Photo
Layout is grayed out,
click the arrow on
Automatic Document
Enhancement. Make
sure Photograph is
selected, then click OK
to return to the
Imaging tab.
The number of copies
of an image you can fit
on a page depends on
the image size and
page size. You may
need to reduce the size
of your images to fit
several copies on a
page.
1. Click
2. On the
3. Select
More settings on the Copy Utility control panel.
Imaging
Automatic Photo Layout and click the arrow. You
tab, select
Enhanced Copy
, if necessary.
see this box:
4. Choose one of the following options:
■ Straighten Only automatically straightens your image
on the page.
■ Maximum Enlargement enlarges the image to the
maximum size that fits on the page.
■ Extra Copy fits multiple copies of the image on a page.
5. Click
OK
. You return to the Imaging tab.
Adding a Monotone Tint
If you want to produce a copy in a single color tint, follow these
steps:
1. Click
2. On the
More settings
Imaging tab, select Enhanced Copy, if necessary.
on the Copy utility control panel.
Copying 29
Page 36

3. Select
Monotone Conversion and click the arrow. You
see this box:
4. Choose the tint you want to add to your copy and
OK
click
. You return to the Imaging tab.
Adjusting Colors and Collating Multiple Copies
To adjust the colors in your image or to collate multi-page
copies when using the automatic document feeder, follow these
steps:
1. Click
2. Click the
More settings on the Copy utility control panel.
Color Setting tab:
3. To adjust colors, use the sliders to adjust the following
settings:
■ Brightness controls the amount of light in the image.
■ Contrast
defines the degree of difference between light
and dark extremes in the image’s colors.
■ Saturation
determines the intensity of color. The
greater the saturation, the less gray in the color.
30 Copying
Page 37

4. If you’re using the automatic document feeder and you
selected
setting, you see the
Multi-page Document as the Document Type
ADF Feature
options. If you want to
collate copies of multi-page documents into sets, select
Collate Order
. If not, leave
Normal Order
selected.
5. Click
Close when you’re done. You return to the Copy
Utility control panel.
Adding Time Stamps and Watermarks
Follow these steps to create a time stamp or watermark:
1. Click
2. Click the
3. If you want to show the printing date and time on your
4. To add a watermark, click the arrow next to
More settings on the Copy utility control panel.
Advanced tab. You see this box:
copy, select
Time Stamp
. (The date and time come from
your computer’s clock.)
Watermark/Layout
. A message appears asking you to
choose Layout on the printer software window.
Copying 31
Page 38

Windows
5. Click
OK. Your printer driver opens and you see one of the
following printer settings windows:
Macintosh
Windows
W 6. Click the
Layout
tab to open the Layout window.
M Click the Layout icon to open the Layout window.
Click here to
choose a
watermark.
Macintosh
W 7. Click the arrow in the
Watermark selection box and select
a predefined watermark from the list.
M Click the
Watermark checkbox, then select a predefined
watermark from the list.
32 Copying
Page 39

8. If you want to change the color, position, size, or density of
the watermark, do one of the following:
W Click
Settings
. You see the Watermark window. Make any
changes you want and click
OK
.
M Change the watermark settings on the Layout window and
OK
click
W 9. Click
M Click
. You return to the printer settings window.
OK again to close the Properties window.
Print to close the printer settings window.
You return to the Advanced tab in the Copy Utility control
panel.
10. Click
Close
. You return to the Copy Utility control panel.
Copying 33
Page 40

Saving Advanced Settings
You can save your advanced settings as a user-defined document
type. Then, when you want to use the same settings again, select
your new document type in the
Follow these steps to save your settings:
1. After you’re finished making changes to your settings, click
Save Settings on the Copy Utility control panel. You see
the Document Type Setting box:
Document Type list.
Type a name for your
document type here.
34 Copying
2. Type a name in the
3. Click
Close. You return to the Copy Utility control panel.
The name you entered is added to the
Name box and click Save
Document Type list
.
on the control panel.
If you later decide to delete a user-defined document type, just
click
Save Settings, select the document type you want to
delete, and click
Delete.
Page 41

Printing
2
Printing with your EPSON Stylus Scan 2500 is a lot like using
any other printer; just click the
from the File menu) in any Windows or Macintosh program.
For printing photographs in a variety of creative layouts, you
can use Photo Print (Windows) or PrintFun (Macintosh) in the
EPSON Smart Panel.
To print with your EPSON Stylus Scan, follow the instructions
in these sections:
■
Choosing the right paper and printer settings
■
Handling paper
■ Basic printing with Windows
■
Basic printing with a Macintosh
■
Printing with special settings
■ Using Photo Print (Windows)
■
Using PrintFun (Macintosh)
Choosing the Right Paper and
Print
button (or select
Print
Settings
No matter how you print, you need to remember two things:
■ Use the right paper
■ Choose the right printer settings
You may be surprised at how much difference your paper and
printer settings can make. Plain paper is fine, but special photo
and ink jet papers, like those in the Media Pack that came with
your printer, are even better.
Printing 35
Page 42

Your printer adjusts itself for each type of paper, which is why
the Media Type setting in your printer’s software is so
important. Although you only need to make a few basic
settings, such as ink color and paper size, you may want to
experiment with your printer software’s advanced settings.
These allow you to fine-tune your printouts for professional
results. See “Printing with Special Settings” on page 44 for
details.
Handling Paper
For the most vivid colors and sharpest text, always use
EPSON’s special ink jet papers. You can demonstrate the
difference for yourself by experimenting with the Media Pack
that came with your EPSON Stylus Scan.
To load paper, slide out the left edge guide and place the stack
of paper against the right side of the sheet feeder. Then slide the
left edge guide against the paper.
If the paper has a cut
corner, make sure you
load it like this.
36 Printing
Slide the left edge
guide against the
paper.
Follow these guidelines for loading paper:
■ Always load the printable side (the whiter and brighter side)
face up. Some special papers come with a cut corner to help
you load them correctly.
■ Load letterhead or preprinted paper so the top of the paper
feeds into the printer first.
Page 43

■ Don’t load paper above the arrow on the left edge guide.
note:
For limitations on
other special papers, see
the Printer section of
your electronic EPSON
Stylus Scan 2500
Reference Guide.
trim size
image
size
■ You can load up to 20 sheets of Photo Paper, 30
transparencies, or 30 Photo Quality Ink Jet Cards. For
Photo Quality Ink Jet Paper, you can load up to the arrow
mark on the left edge guide.
■
Use a support sheet if you find it in the paper package.
■
Return unused paper to the original package as soon as you
finish printing.
Printing on Photo Paper
You can use the EPSON Photo Paper that came in your Media
Pack to print photographs that look almost as good as the ones
you get from film processing. EPSON 4
micro-perforated around the edges so you can trim your
printouts and “bleed” the photo—extend it to the edge of the
paper—on all sides.
You’ll also find letter-size Photo Paper in your Media Pack. In
addition, Photo Paper is available in A4 (8.3
panoramic (8.27
×
23.4 inches) sizes.
Whatever size of Photo Paper you choose, select
as the Media Type and select the correct Paper Size before you
print.
Keep the following in mind when you use EPSON 4
Photo Paper:
×
6-inch Photo Paper is
× 11.7 inches) and
Photo Paper
×
6-inch
■ You can load up to 20 sheets of Photo Paper at a time.
■ Before you print, size your photo to 4.25 × 6.25 inches.
■ After you print, fold the paper back and forth along the
perforations and carefully tear off the margins.
For optimal results and longer print life, print your digital
photos on EPSON Photo Paper. See the inside back cover for a
list of EPSON papers and ordering information. For complete
instructions on using all of EPSON’s special ink jet papers, see
the electronic EPSON Stylus Scan 2500 Reference Guide.
Printing 37
Page 44

Printing on Envelopes
You can print on almost any kind of envelope. Load up to
10 envelopes in the printer’s sheet feeder, flap edge first, with
the flap side down. Slide the left edge guide against the
envelope’s edge.
note:
Be sure to select Plain
paper as the Media Type
setting and select the
correct envelope size
before you print.
Set the paper thickness switch to the
switch to the
0
position before you print on regular paper.)
paper thickness switch
+
position. (Return the
38 Printing
Page 45

note:
For more information
on printing, see the
electronic EPSON
Stylus Scan 2500
Reference Guide.
W
Basic Printing with Windows
You can print any type of document from any Windows
program following the steps in this section.
Before you start, make sure the EPSON Stylus Scan is set up,
connected to your computer, turned on, and the software is
installed. See the Start Here sheet for instructions.
1. Load paper as described on page 36.
2. Open the File menu and click
those below.
(If you click the
Print
button on your screen you may not
see a print window.)
If you see this
screen, click
Setup...
Print. You see windows like
make sure your printer
is selected...
then click
Properties.
Printing 39
Page 46

3. After you click the
Properties button, you see the EPSON
Stylus Scan 2500 Properties window:
Select the paper you loaded.
This box shows
you the current
settings.
note:
The settings in the
Paper and Layout tabs
are often available in
your application
software. If so, you
should select them there
instead.
Choose Color, unless you’re
printing in black only.
Set the Mode option to
Automatic.
Choose between faster
printing or better quality.
Click if you need
more information.
Choose the settings noted above. If you’re not sure which
Media Type to choose, see page 48.
4. Click the
Paper
tab at the top of the box if you need to
change the paper size, number of copies, page orientation,
or printable area.
Paper tab
Paper Size
setting
Click the Help button
for more information
about any setting. Or
check the electronic
EPSON Stylus Scan
2500 Reference Guide,
as described on page 5.
40 Printing
Page 47

5. Click the Layout tab if you want to do any of the
following: reduce or enlarge your printed image, print
multiple pages on one sheet of paper, “tile” an image to
make a large poster, or add a watermark.
Name of the file
you’re printing.
Does not appear
if you are printing
over a network.
Click to display
or close Epson
Printing Tips
below.
6. Click
OK
until you see the Print window again. To start
printing, click
OK or Print, depending on your application.
After a moment, the Progress Meter window appears. You can
cancel, pause, or restart your print job. You can also see how
much ink you have left and view printing tips.
Pages printed/
pages in job.
Click to cancel printing.
Click to pause/resume
printing.
Click to view more details
about the displayed Tip.
Printing 41
Page 48

M
Basic Printing on a Macintosh
You can print any type of document from any Macintosh
program, following the steps in this section.
Before you start, make sure the EPSON Stylus Scan is set up,
connected to your computer, turned on, and the software is
installed. Also, make sure you’ve selected
SS 2500
Chooser. See the Start Here sheet for instructions.
1. Follow the instructions for loading paper on page 36.
in the
note:
Click the Help icon for
more information about
any setting. Or check
the electronic EPSON
Stylus Scan 2500
Reference Guide, as
described on page 5.
2. Open the File menu and click
Setup
). You see a Page Setup window like this:
Paper Size setting
Page Setup
(or
Print
3. Choose your paper size, page orientation, and printable
area as necessary. Then click
OK.
42 Printing
Page 49

4. Now open the File menu and choose Print. You see the
Print Options window.
This box
shows you
the current
settings.
(If you click the
Print
button on your screen you may not
see a print window.)
Select the paper you loaded.
Choose Color
unless you’re
printing in
black only.
Set the Mode option
to Automatic.
Choose between faster
printing or better quality.
5. Choose the settings noted above. If you’re not sure which
Media Type to choose, see page 48.
6. You can also do the following:
■
Click the Layout icon to reduce or enlarge your
image, print multiple page layouts, or add a watermark.
■
Click the Background Printing icon to prioritize
printing of your print job.
■ Click the Preview icon to change the Print button
to
Preview. You can then click it to preview your
printout.
■ Click the Ink icon to check your ink levels.
7. Click
Print to start printing.
Printing 43
Page 50

If you turned on background printing, EPSON Monitor3
begins. To display the EPSON Monitor3 window, select
EPSON Monitor3
in the Macintosh Application menu.
In addition to viewing your print job’s progress, you can cancel
, pause , or restart your print job from this window.
Printing with Special Settings
You can choose special settings for photographs and other types
of print jobs, or customize advanced printing features to fit your
needs. This section covers the following special settings for both
Windows and Macintosh:
44 Printing
■
Enhancing photographs
■
Using custom project types
■ Using advanced print settings
Page 51

Enhancing Photographs
If you have low resolution photographs, special print settings
can improve their appearance. Although you can also edit your
photos with PhotoDeluxe, the changes you make are
permanently applied to your photos. When you use your print
settings, it only affects the printout, not the photo itself.
1. Open your EPSON Stylus Scan 2500 Properties window
(Windows; see page 39) or Print options (Macintosh; see
page 43).
2. Set the Media Type for the paper you’re printing on, then
choose the
Color
Ink setting.
Windows
Macintosh
3. Click
PhotoEnhance
, then click
Standard
available settings, as shown at the left.
4. Choose
Standard
for most photos, or experiment with the
other settings.
5. Select any other settings you need to change, then:
W Click
M Click
OK
until you see the Print window again. Then click
OK
Print
(or
) to start printing.
Print to start printing.
Using Custom Project Types
Custom project types let you choose settings for presentation
graphics, ink savings, or color matching. Some project types
may not be available, depending on your operating system and
other settings you choose.
1. Open your EPSON Stylus Scan 2500 Properties window
(Windows; see page 39) or Print options (Macintosh; see
page 43).
2. Select the Media Type setting for your paper, then choose
Color or Black Ink.
to display the
3. Click the
Settings
shown to the left.
Custom button, then click the Custom
list. You see a list of custom project types, as
Printing 45
Page 52

Select one of the types listed below:
■ Text/Graph: For printing graphics-intensive
documents like presentations with charts and graphs.
W
■ Economy:
■ ICM:
For rough drafts on plain paper. Saves ink.
(Image Color Matching; Windows only)
For printing documents created in an ICM compatible
application, and for matching monitor colors as closely
as possible.
W
■ sRGB
(standard Red Green Blue; recommended for
Windows 98 only): For printing documents created in
an sRGB compatible application using sRGB colors,
such as those designed for the Web. See your
Windows 98 online help for details.
M
■ ColorSync
(Macintosh only): For printing documents
in conjunction with ColorSync
and applications.
4. Select any other settings you need to change, then:
W Click
M Click
OK
until you see the Print window again. Then click
OK (or Print) to start printing.
Print
to start printing.
®
compatible devices
note:
For instructions on
using all your printer
software’s advanced
settings, see the
electronic EPSON
Stylus Scan 2500
Reference Guide, as
described on page 5.
46 Printing
Using Advanced Print Settings
For maximum control over your projects, you can use advanced
settings. You can even save your advanced settings as a group so
you can use them whenever you print a similar project.
1. Follow the instructions in the previous section to open your
EPSON Stylus Scan 2500 Properties window (Windows)
or Print options (Macintosh).
2. Select the correct Media Type setting for your paper, then
choose
Color or Black Ink.
Page 53

3. Click the Custom button, then click the Advanced
button. You see the Advanced window:
Windows
tip:
After you customize
your print settings, you
can save them as a
group. Then you can
reuse them whenever
you print a similar
project. Click Save
Settings in the
Advanced window.
Type a name for your
setting group and
click OK.
Macintosh
4. Check the Media Type and Ink settings. These are the same
as the ones you selected on the main printer software
screen. You can change them here as you customize your
settings, if needed.
5. Choose a Print Quality (resolution) setting.
6. Select a color management system (the availability depends
on your operating system).
7. Select any other settings you need to change, then:
W Click
M Click
OK
until you see the Print window again. Then click
OK
click
Print
(or
Print to start printing.
) to start printing.
OK to return to the Print options window. Then
Printing 47
Page 54

Choosing the Right Settings for EPSON Papers
You need to choose the right Media Type setting so your
EPSON Stylus Scan can adjust the ink coverage accordingly.
This ensures that you’ll get the best print results on any kind
of paper.
Before you print, always check your Media Type setting. Here
are the settings you should choose for EPSON paper:
For this paper . . . Select this Media Type setting . . .
Plain paper sheets or envelopes Plain paper
EPSON 360 dpi Ink Jet Paper
EPSON Iron-On Cool Peel Transfer Paper
EPSON High Quality Ink Jet Paper
EPSON Photo Quality Ink Jet Paper
EPSON Photo Quality Ink Jet Cards
EPSON Photo Quality Self Adhesive Sheets
EPSON Matte Paper – Heavyweight Matte Paper – Heavyweight
EPSON Photo Paper
EPSON Photo Quality Glossy Paper
EPSON Photo Quality Glossy Film
EPSON Photo Stickers
EPSON Ink Jet Transparencies Ink Jet Transparencies
360 dpi Ink Jet Paper
Photo Quality Ink Jet Paper
Photo Paper
Photo Quality Glossy Film
For the EPSON Photo Paper that came in your Media Pack,
choose
choose
Photo Paper. For the ink jet paper in your Media Pack,
Photo Quality Ink Jet Paper.
48 Printing
Page 55

W
Using Photo Print (Windows)
The easiest way to print photographs is to use Photo Print on
the EPSON Smart Panel (Windows only). You can print on
special snapshot-size paper (like the 4
Paper in your Media Pack), create enlargements, or print several
small pictures on one sheet.
You start by scanning in one or more pictures or opening
images that are already saved on your computer.
First, make sure your printer is set up, connected to your
computer, turned on, and the software is installed. Then follow
the instructions under “Scanning in Your Photo” below, or
“Opening Images on Your Computer” on page 52.
×
6-inch EPSON Photo
Scanning in Your Photo
1. Place your photo(s) face down with the first one in the
upper right corner of the document table. Line up the edges
of the photo with the scales bordering the document table.
If you have more than one photo, leave a little space
between each one.
2. Click the Smart Panel icon on the Windows task bar to
open the Smart Panel. Then click the
You see the Photo Print welcome.
3. Click
Start. The Photo Print window opens:
Photo Print
Printing 49
icon.
Page 56

4. Click
Scan Photos. You see this window:
5. Click the
Start Scan
button on your screen to scan your
photo. When scanning is finished, you see a window like
this on your screen:
50 Printing
Page 57

6. If you want to scan more photos, click Yes and repeat steps
4 and 5 above. If you’re finished scanning, click
see your photo(s) in a window like this:
For a closer look,
double-click an
image to open it
in the Image
Viewer window.
See page 88 for
more information.
No. You
7. Click
Finish Verification
.
Then continue with the steps in “Printing Your Photos” on
page 53.
Printing 51
Page 58

Opening Images on Your Computer
1. Click the Smart Panel icon on the Windows task bar to
open the Smart Panel. Then click the
You see the Photo Print welcome.
Start
2. Click
. The Photo Print window opens:
Photo Print
icon.
3. Click
File from Disk. You see a Select Folder window:
4. Locate the folder where your image(s) are stored. Then
click
OK. You see your image(s) displayed briefly on the
screen. Then you see the Photo Print selection window.
Continue with the instructions in the next section.
52 Printing
Page 59

Printing Your Photos
You can choose to print one copy of all the scanned or opened
images, or you can set the number of prints for each image.
■
■ If you click Specify number of prints, you can click
Click here to
increase the
number of prints
for an image.
If you click
Select All
, you see the layout window.
Continue with step 1 on page 54.
an image, and then use the up and down arrows to set
the number of prints for each image, as shown below.
Printing 53
Page 60

Click to print on EPSON
Photo Quality Ink Jet Cards.
Click to print on EPSON
×
4
6-inch Photo Paper.
Click to print on plain paper
or any letter-size special
ink jet paper.
note:
See page 36 for
instructions on loading
and handling paper.
When you’ve set the number of prints you want for each
image, click
Finish. You see the layout window:
1. Click the button for the paper you’re printing on. You can
choose from three different paper sizes:
■ A6
, for printing on EPSON Photo Quality Ink Jet
Cards (or similar size paper)
■ 4×6
, for printing on 4 × 6-inch EPSON Photo Paper
54 Printing
■ Letter, for printing on letter-size plain paper or any
type of special paper.
You see several layout choices, depending on which paper
you’re using.
Page 61

If you click Letter, for example, you see the following:
Displays the number of
sheets you’ll need to print
your photos in that layout.
2. Click the layout that you want to use for printing. On a
letter-size sheet, for example, you can have 1, 2, 3, 6, or
8 prints per page, depending on the size print you want.
If you are only printing one image, you can have up to
8 copies of the picture on one sheet. If you’re printing
several images, you can print each one on a separate sheet
(enlarged), or combine them.
After you click the layout you want, you see this window:
Click here to scroll
through the Media
Type list.
Printing 55
Page 62

3. Click
Plain Paper, then click the small arrows at the right
to scroll through the Media Type list. Choose the right
Media Type for the paper you’re printing on, For example:
note:
Your printer
automatically adjusts
the ink coverage
according to the Media
Type setting you choose.
For complete
instructions on using all
of EPSON’s special ink
jet papers, see the
electronic EPSON
Stylus Scan 2500
Reference Guide.
■
Choose
360 dpi Ink Jet Paper
if you’re printing on
EPSON 360 dpi Ink Jet Paper.
■
Choose
Photo Quality Ink Jet Paper
for EPSON
Photo Quality Ink Jet Paper (like the ink jet paper that
came in your Media Pack) or EPSON Photo Quality
Ink Jet Cards.
■ Choose Matte Paper – Heavyweight if you’re
printing on EPSON Matte Paper – Heavyweight.
■
Choose
Photo Paper
if you’re printing on EPSON
Photo Paper.
For a list of EPSON papers and their corresponding Media
Type settings, see page 48.
4. After you choose your Media Type, click
Print Options.
You see this window:
56 Printing
Page 63

5. Choose from the following settings (not all settings are
available for all paper sizes and layouts):
■ Standard trimming
, which automatically crops and
enlarges your photo slightly to fit the layout, or
apply trimming.
■
If you chose
with cutting guide
your images. You can then select
border
the cutting guideline, if you want
■
Choose an enhancement option:
Enhance
color
color
6. When you’re done making settings, click the
Standard trimming
, you can select
to print a cutting guideline around
Print with white
to add a white border between your image and
.
Auto Photo
(to increase contrast and sharpness),
(for one of three special effects), or Original
(to retain the image’s original colors).
Finish
button. You return to the Photo Print printing window.
Start Printing
Click
to print your photo(s).
After a moment, the Progress Meter window appears, as
shown on page 41.
End
7. When you’re finished printing, click
to close Photo
Print.
Do not
Print
Single
Printing 57
Page 64

M
Using PrintFun (Macintosh)
The easiest way to print photographs is to use PrintFun on the
EPSON Smart Panel (Macintosh only). You can print on
special snapshot-size paper (like the 4
Paper in your Media Pack), create enlargements, or print several
small pictures on one sheet.
You start by scanning in one or more pictures or opening
images that are already saved on your computer.
First, make sure your printer is set up, connected to your
computer, turned on, and the software is installed. Then follow
the instructions under “Scanning in Your Photo” below, or
“Opening Images on Your Computer” on page 62.
×
6-inch EPSON Photo
Scanning in Your Photo
1. Place your photo face down with the first on in the upper
right corner of the document table. Line up the edges of the
photo with the scales bordering the document table. If you
have more than one photo, leave a little space between each
one.
58 Printing
2. Open the Apple menu and click
to open the Smart Panel. Then click the
You see the PrintFun welcome.
3. Click
Start. The PrintFun window opens:
EPSON SMART PANEL
PrintFun
icon.
Page 65

note:
If you’re scanning a
printed picture that is
a film-processed
not
photograph), make sure
you choose Magazine,
Newspaper, or
Brochure. These settings
will give you better
scans and eliminate
unwanted dot patterns.
4. Click Scan Photos. You see the PrintFun scanning
window:
5. Select the type of document(s) you’re scanning from the
Scan Material icons. If the basic settings listed beneath the
icons are correct, go to step 8.
To change the basic settings chosen by the Scan Material
selection, go to steps 6 and 7.
If you’re an advanced user and want more control over your
settings, click the
TWAIN button. See page 70 for
information about using the TWAIN settings.
6. Choose one of the following Scan Mode buttons:
■ Color: For any type of document or photo in color
■ Grayscale: For black and white photographs or
artwork with subtle shading
■ Black&White: For text or drawings with no shading.
7. Choose one of the following Destination buttons:
■ Screen: For images that will be displayed on the
Internet or viewed on the screen only
■ Printer (Normal): For text or images that will be
printed normally
■ Printer (Fine): For photographs or other images that
will be printed at the highest quality or resolution
(scanning is slower with this setting)
Printing 59
Page 66

8. If you’re using the document table to scan more than one
image, click
Scan Multiple Images.
9. If you’re using the optional automatic document feeder,
Enable ADF
click
. Then go to step 12.
If you’re not using the automatic document feeder, go to
step 10.
note:
You can’t use the
Preview button if
you’re using the
optional automatic
document feeder.
10. Click the
Preview
button. The EPSON Stylus Scan scans
your document and displays a preview in the scan window
on your screen:
11. Click and drag the dotted-line border on the preview to
define the area you want to scan. You can adjust any of
your other settings at this point.
12. When you’re satisfied that the settings are correct, click the
Scan button. Your original document is scanned.
60 Printing
If you selected
Scan Multiple Images, a message appears
asking if you want to continue scanning.
13. If you click
Yes to scan more images, click inside the
dotted line border on the first preview image and move it to
the next image. Size the border as necessary and repeat
step 12.
If you click
No, go to step 14.
Page 67

14. When scanning is completed, you see a window like this:
If you want to print individual photos, click the Print
Photos
button. After a moment, the Presto! PrintFun Photo window opens. Continue with “Printing Your
Photos” on page 63.
If you selected multiple images and you want to print them
all on one sheet of paper (like a proof sheet), click the
Catalog
button. The Presto! PrintFun - Catalog window
Print
opens. Continue with “Printing a Catalog of Your Photos”
on page 66.
Printing 61
Page 68

Opening Images on Your Computer
1. Open the Apple menu and click EPSON SMART PANEL
to open the Smart Panel. Then click the
You see the PrintFun welcome.
Start
2. Click
. The PrintFun window opens:
PrintFun
icon.
3. Click
File from Disk. You see the Select Image Files’
Folder window.
4. Locate your image folder. Then click
Open. You see your
image(s) displayed briefly on the screen. Then you see the
Presto! PrintFun - Photo window described in the next
section.
62 Printing
Page 69

Printing Your Photos
You can choose to print one copy of all the scanned or opened
images, or you can set the number of prints for each image.
1. Scan your photos or select your files as described in the
previous sections.
2. From the PrintFun index window, click
Print Photos
see the PrintFun - Photo window:
3. Select your paper size and desired layout from the
Style
list. You can choose from a variety of different paper
sizes.
Each size has multiple layouts to choose from. On a
letter-size sheet, for example, you can have 1, 2, 3, 6, or
8 prints per page, depending on the size print you want.
. You
Paper
4. To add photos, click the image thumbnail on the left and
then click the frame where you want the photo to appear.
(You can replace the existing photos with different ones.)
Printing 63
Page 70

5. Select your paper from the
Media Type list. You can select
one of the following settings:
■ Plain Paper
■ 360 dpi Ink Jet Paper
■ Matte Paper - Heavyweight
■ Photo Paper
■ Photo Quality Glossy Film
■ Ink Jet Transparencies
6. Select the number of copies by clicking the arrow buttons.
(The number of copies applies to all the pages, so if you
have three pages of images and you choose 2 copies, you’ll
print six pages.)
7. To add a title to the top of all your pages, click the
Title
button. Type your title in the box. You can also change the
font for your title. Click
OK
when you are done.
8. To rotate your photo or change other layout settings, click
Option button. You see the following window:
the
64 Printing
Page 71

9. Make any changes you want as described below (the
preview reflects your selections):
■
Add a
Title, Date
, or
Outline
to your photo by
clicking the corresponding boxes to select them.
■
Add a color effect to your image by clicking
White
■
Resize the image in its cell by selecting one of the
following:
the Cell (Trimming)
Brown
,
Original, Fit the Cell (No Trimming), Fit
, or
Blue
, or
.
Adjust
. If you select
you can drag the slider to resize the image to an exact
size.
■
Align the image to a specific part of the cell by clicking
one of the nine squares in the grid.
■
Rotate the image to the left or right by 90 degrees, or
rotate it 180 degrees by clicking the arrows under
Orientation.
10. When you’re finished making settings, click
OK
11. Click
click
12. Click
to apply your changes to the current photo or
All Photos to apply your changes to all the photos.
OK
to return to the main window.
Black and
OK
.
Adjust
,
13. When you are finished with all your settings, click
Your EPSON Stylus Scan prints your photos.
14. Click
15. Click
Exit at the PrintFun - Photo window.
Exit if you’re finished printing, or one of the other
buttons to continue.
Printing 65
Print
.
Page 72

Printing a Catalog of Your Photos
You can print out a catalog of all your scans to use for reference
or to see your images before you print them. Follow these steps:
1. Scan your photos or select your files as described in the
previous sections.
2. From the PrintFun index window, click the
Print Catalog
button. You see the PrintFun - Catalog window:
3. To add photos, click the image thumbnail on the left and
then click the frame where you want the photo to appear.
(You can replace the existing photos with different ones.)
4. Select a paper size from the
Paper Style
list. You can
choose from a variety of different paper sizes.
66 Printing
5. Select your paper type from the
Media Type list. You can
select one of the following settings:
■ Plain Paper
■ 360 dpi Ink Jet Paper
■ Matte Paper - Heavyweight
■ Photo Paper
■ Photo Quality Glossy Film
■ Ink Jet Transparencies
6. Select Portrait or Landscape for the print orientation.
Page 73

7. Change the number of printouts and their size with the
Row and Col (column) settings. (The settings are reversed
when you switch between
8. To add a title, click the
box. You can also change the font for your title. Click
Portrait
Title
button. Type your title in the
Landscape
and
.)
OK
when you’re done.
9. Select the number of copies by clicking the arrow buttons.
(The number of copies applies to all the pages, so if you
have three pages of images and you choose 2 copies, you’ll
print six pages.)
10. If you want to adjust your page margins or layout, click the
Paper
button. Select the settings you want, then click OK.
In the window that appears, name your settings to create a
Paper Style
new
automatically selected as the current
option, then click OK. The new option is
Paper Style
.
11. To rotate your photo or change other layout settings, click
the
Option
button. You see the following window:
Printing 67
Page 74

12. Make any changes you want as described below (the
preview reflects your selections):
■
Add a
Title, Date
, or
Outline
to your photo by
clicking the corresponding boxes to select them.
■
Add a color effect to your image by clicking
White
■
Resize the image in its cell by selecting one of the
following:
the Cell (Trimming)
Brown
,
Original, Fit the Cell (No Trimming), Fit
, or
Blue
, or
.
Adjust
. If you select
Black and
you can drag the slider to resize the image to an exact
size.
■
Align the image to a specific part of the cell by clicking
one of the nine squares in the grid.
■
Rotate the image to the left or right by 90 degrees, or
rotate it 180 degrees by clicking the arrows under
Orientation.
13. When you are finished making settings, click
OK
to return
to the main window.
14. When you are finished with all your settings, click
Your EPSON Stylus Scan prints your catalog.
Adjust
Print.
,
68 Printing
15. Click
16. Click
Exit
Exit if you’re finished printing, or one of the other
buttons to continue.
at the PrintFun - Catalog window.
Page 75

Scanning
3
Scanning with the EPSON Stylus Scan 2500 lets you turn
pictures and text into digital files on your computer. Then you
can fax or e-mail the files, display them on your web site, or use
them to create projects that you can print out.
If you’re experienced with scanning, you can use the EPSON
Stylus Scan TWAIN interface to scan with applications like
Adobe Photoshop
Or, you can use the Smart Panel for all types of scanning with a
convenient on-screen control panel.
®
or any other TWAIN-compliant program.
Your EPSON Stylus Scan also offers quick scanning, which lets
you send your scan to a Smart Panel application by simply
pressing the
You’ll find instructions for the following in this chapter:
■ Basic scanning with TWAIN
■ Scanning to OCR (word processing)
■ Scanning to e-mail
] Scan button on your scanner’s control panel.
Scanning 69
Page 76

■ Scanning for creativity (PhotoDeluxe projects)
■ Scanning to an application
■
Quick scanning
Basic Scanning with TWAIN
The basic scanning process involves a number of steps:
■
Placing your photo or page on the document table
■ Opening an application (such as PhotoDeluxe or
Photoshop)
■
Opening the TWAIN window and setting scan options
note:
The commands you
choose in steps 3 and 5
differ from one host
application to another.
For example, with some
host applications you
might choose Acquire
or Select Source from
the File menu instead of
Import.
If you’re using
PhotoDeluxe, start by
clicking GET AND FIX
PHOTO, then click the
arrow below the
Scanners icon and select
Stylus Scan FB as your
input source. Click the
Scanners icon to open
the Scanning tab, then
click Mode to open the
EPSON TWAIN
window.
■ Scanning and saving your scanned image
The first time you scan with your EPSON Stylus Scan 2500,
you’ll also need to select it as your TWAIN source. For detailed
instructions on using your EPSON TWAIN software, see your
electronic EPSON Stylus Scan 2500 Reference Guide.
Starting Your Scan
Before you scan, make sure your scanning software is installed
and your EPSON Stylus Scan is set up, connected to your
computer, and turned on.
1. Place the document you want to scan face down on the
document table. Position it so the horizontal and vertical
edges are carefully aligned with the scales on the sides of the
document table. Then close the document cover.
2. Start your application, for example, Adobe Photoshop.
3. From the File menu, choose
following:
W
Select TWAIN 32 Source
M TWAIN Select
Import, then select one of the
70 Scanning
Page 77

4. Select EPSON Stylus Scan FB and click one of the
following:
Select the
basic settings.
Size the
image.
Adjust the
resolution.
W
Select
M OK
5. From the File menu, choose
following:
W
TWAIN 32
M TWAIN Acquire
The EPSON TWAIN window opens. (The Windows
screens are shown, but the Macintosh screens are the same.)
Import
, then select one of the
Scan the image.
note:
If the optional
transparency unit or
automatic document
feeder are not
installed, you won’t see
those options in the
Document Source list.
6. Choose the Document Source:
■ Select Flatbed if you’re scanning from the document
table.
■ Select Auto Document Feeder if you’re scanning
from the optional automatic document feeder.
■ Select TPU for Neg. Film if you’re using the optional
transparency unit to scan negative film.
■ Select TPU for Pos. Film if you’re using the
transparency unit to scan positive film.
Scanning 71
Page 78

7. Choose your Image Type:
■
Select
Color Photo
to scan a color photograph in
24-bit color.
■
Color Photo De-screening
Select
to remove moiré
patterns from a halftone picture (for example, from a
photo in a magazine).
■
Black & White Photo
Select
to scan a photo in gray
tones.
■ Select Line Art to scan your image in black and white
without shading.
■ Select OCR to scan text.
■
Select
Copy & Fax
to scan a document combining text
and graphics in black and white at draft quality.
8. Choose the Destination:
Fax, OCR, Printer (Fine), or Laser Printer. For the
highest quality photo prints, choose
Printer (Photo), Screen/Web
Printer (Photo)
.
9. Click the Preview icon to preview your image. To
make further adjustments, see the next section and
“Scanning Part of an Image” on page 75.
,
note:
Higher resolutions
create larger files that
take longer to print
and process.
72 Scanning
Making Changes to Your Scan
You can adjust the quality and size of your scan or make
corrections to the color, tone, contrast, and highlights.
1. To change the size of your final image, type new values in
the
Source and Target boxes, or drag the Scale slider.
(The percentage of reduction or enlargement is shown to
the right of the slider.)
2. Choose the resolution for scanning:
■ Choose 300 dpi for photos you plan to print (or 72 dpi
to view them only on your computer or the Web).
■ Choose 400 dpi for most text scanning.
■ Choose a higher resolution for line drawings, or if you
plan to enlarge a photo.
Page 79

3. Click the Auto Locate button to automatically set the
scan area for your image. (To scan only part of your image,
see page 75.)
4. To optimize your image automatically, click the Auto
Exposure button. Your TWAIN software adjusts color,
tone, contrasts, and highlights for you. Skip to step 8 if you
choose this setting.
5. To adjust the highlights and contrast in your image, click
the Image Controls button. You see the following box:
Lighten or darken
your image.
Adjust the midtones.
Adjust the brightest
parts of the image.
Adjust the darkest
parts of the image.
Adjust gray shades
so that they contain
more black or white
(mainly for text in OCR).
Scanning 73
Page 80

6. To correct image tones, click the Tone Correction
button. You see the following box:
Select the colors
you want to modify.
Drag points on the tone curve to
adjust the tone.
7. To adjust colors, click the Color Adjustment button.
You see this box:
Remove unwanted
color casts from
your image.
74 Scanning
Adjust the intensity
of the color.
8. When you’ve finished making changes, click the
Scan
button. Your image is scanned to your host application.
When it’s finished, close the EPSON TWAIN window so that
you can continue working with your image in the host
application.
If you’re not happy with the results, click the
Reset button to
return to your original image.
Page 81

Scanning Part of an Image
Scanning is faster if you reduce the size of the image by
scanning only part of it. If you want to select a portion of your
image for scanning, follow these steps:
1. Click the Auto Locate button on the EPSON TWAIN
window. A frame appears around your preview.
2. Click and drag a corner of the frame to define the area you
want to scan.
Frame
3. Click the Zoom Preview button to preview your
redefined image.
4. Follow the steps in “Making Changes to Your Scan” on
page 72 to make any necessary changes and scan the image.
Scanning 75
Page 82

Scanning to OCR
OCR (optical character recognition) is the process of converting
a scanned image into text that you can edit in a word processing
program. After you scan your document, the software processes
or “recognizes” it. Then you can edit it and either save the file
or open it in any word processing program on your computer.
This section covers:
■
Scanning the text
■
Processing the text
■ Saving the text file
Scanning the Text
1. Place your original document face down on the document
table, as described in “Positioning the Original Document”
on page 20.
2. Do one of the following to open the EPSON Smart Panel:
W Click the Smart Panel icon on the Windows taskbar.
76 Scanning
M Open the Apple menu and select
3. Click the
4. Click
Scan to OCR
Start
. The Scan to OCR window opens:
icon. You see the OCR welcome.
EPSON SMART PANEL.
Click here to use
EPSON TWAIN, or...
Select your scan
settings here.
Click here if you’re
using the optional
automatic
document feeder.
Page 83

5. Click the Paper Size button that corresponds to the page
you’re scanning.
note:
If you’re an advanced
user and want more
control over your
settings, click the
TWAIN button. See
page 70 for
information about
using the TWAIN
settings.
note:
You can’t use the
Preview button if
you’re using the
automatic document
feeder.
6. Choose one of the following Scan Mode buttons:
■ Color
■ Grayscale
: for documents printed in color
: for documents that include black and
white photographs or artwork with subtle shading
■ Black&White
: for documents that include black text
only or text with black line drawings
7. If you’re using the document table to scan more than one
page, click
Scan Multiple Images.
8. If you’re using the optional automatic document feeder,
Enable ADF
click
.
9. If you want to scan the entire page, go to step 10. If not,
click the
Preview
button. The EPSON Stylus Scan scans
your document and displays a preview in the scan window
on your screen.
10. Click and drag the dotted-line border on the preview to
define the area you want to scan. You can adjust any of
your other settings at this point.
11. Click the
Scan
button to begin your scan.
12. If you selected
Scan Multiple Images
, a message appears
asking if you want to continue scanning.
If you click
Yes to scan more images, replace the page on
the document table and repeat steps 9 through 12.
If you click
No, follow the steps in the next section to
process or “recognize” the text.
Scanning 77
Page 84

Processing the Text
When scanning is completed, you see this window:
If you have a
different OCR
program on your
computer, you
can select it here.
1. If the text you scanned is not in English, select the correct
language.
2. Make sure the OCR Engine option is set to use the OCR
program you have on your system. If necessary, select one
from the list.
78 Scanning
3. Click
Options
. You see the box shown below.
4. Choose one of the following Document Layout options:
■ Auto Detect: retains the original page format, which is
especially useful for documents with columns, tables,
and lists
■ Force Single Column: aligns all text into one column
5. Click
Draft Mode Dot Matrix if the document you’re
scanning was printed on a dot matrix printer.
Page 85

6. Click Straighten Image to have the software
e
automatically correct crooked scans and improve the
accuracy of the text.
If you scanned
more than one
page, click
here to display
the one you
want to edit.
This window
shows a
close-up of
the scanned
image.
7. Click
click
OK
to return to the Scan to OCR window. Then
Recognize
to process the text.
When processing is completed, you see a window like this:
Edit your text
here.
Click to enlarg
or reduce the
view.
8. Your text appears in the square window. If necessary, click
+
or — button to change the size of the display. Use the
the
scroll bars to display the rest of the page.
9. Unclear characters are highlighted in blue (Windows) or
underlined (Macintosh). Unrecognized characters are
marked with a tilde (~).
Click on the text in the square window and correct or edit
it as necessary. The small window at the bottom shows an
enlarged view of the original scanned image, corresponding
to the text you are editing.
Scanning 79
Page 86

10. When you’re done editing the text, click the
Finish button.
You see the Export window:
You can either save the text file or open it in a word processing
program for further editing. Follow the instructions in “Saving
the Text File” below, or “Opening a Word Processing Program”
on page 82.
Saving the Text File
80 Scanning
1. Click
Save
in the Export window. You see this window:
Page 87

2. Choose a file type from the following list.
■ Text Document: For files that you can open and edit
with any text editor. Text documents contain no
formatting.
■ RTF Document
can open and edit in Microsoft
: (Rich Text Format) For files that you
®
Word (Windows),
SimpleText (Macintosh), or many other popular
programs. Rich Text Format documents contain
limited formatting.
■ HTML Document: (Hypertext Markup Language) For
files that can be viewed in a browser or posted on the
Web.
W
■ PDF Document: (Portable Document Format;
Windows only) For files that you can open in Adobe
Acrobat.
3. Type a name for the file; the file extension is added
automatically. If you’re saving multiple files, the program
automatically adds an identifying number to the end of
each filename.
4. Click the
Browse
button to choose the folder where you
want to save your file(s).
5. Under Output Method, choose one of the following:
■ Create one file for all pages
: Saves all scanned pages
in one file.
■ Create one file for each page: Saves each page in a
separate file, using the file name you entered, plus an
additional number to identify each page.
Scanning 81
Page 88

note:
If you’re saving your file
in PDF format, you’ll
see the Save As window
instead of the Continue
Exporting window.
Navigate to the folder
where you want to save
your file, type a new file
name, and click OK.
Type any information
you want to add on the
next screen, then click
OK again.
6. Click the
7. Click
save additional files, or
Save button. You see the following window:
Exit
to close Scan to OCR,
Return to Start
Continue Exporting
to delete your
edited text file and start the scanning to OCR process from
the beginning.
Opening a Word Processing Program
to
82 Scanning
1. Click
Open
in the Export window. You see a window like
this:
The software automatically detects the word processing
programs that can open the scanned file.
2. Select the program you want to use, then click the
button. (If you want to remove a program from the list or
change a default file format for a program, click
and see page 84 before you click
Open.)
Property
Open
Page 89

The program opens and displays your file. You can work
with it just like any other file on your computer. The file is
automatically named as follows:
note:
Your files are not
actually saved until you
save them in your word
processing program. If
you close the program
before saving the files,
they are lost.
W
■
The default file name is DOCU0001 in your
Windows\temp folder.
M
■
The default file name is ocr___01 (three underscores)
in the Temporary Items folder.
For each new file, the number used in the file name
increases (for example, DOCU0002 or ocr___02).
3. Save the file(s). You can change the location and file name
in your word processing application as you save the file(s),
if you want. See your application’s help utility for
instructions.
4. When you exit your word processing application, you see
the Scan to OCR exit window. Click
Continue Exporting to save additional files, or
OCR,
Return to Start
to start the scanning to OCR process from
Exit
to close Scan to
the beginning.
Scanning 83
Page 90

Changing Word Processor Program Properties
If you want to change the way your program opens scanned
files, click the
■
To change the default file format, select a program on the
list. The default file format appears in the Format box. You
can select any of the other formats (there may be only one
available).
■
If you want to add a program to the list, you need to use
Scan to Application. See page 98 for instructions.
Property
button. You see this window:
84 Scanning
■
If you want to remove a program from the list, select the
program and click
Appear in Application List
the check.
■
Click OK to close the Application Properties window.
to remove
Page 91

Scanning to E-mail
note:
Before you can scan to
e-mail, you need to
have a modem that is
already connected to the
Internet.
If you have a modem, Internet service, and an e-mail
application, you can easily share photos and other images. After
you scan the image, your software can convert it to a variety of
file formats for easy viewing. You can even have the image open
automatically when the recipient reads your e-mail message.
Scanning Your Document
1. Place your original document(s) face down on the
document table, as described in “Positioning the Original
Document” on page 20.
2. Do one of the following to open the EPSON Smart Panel:
W Click the Smart Panel icon on the Windows taskbar.
M Open the Apple menu and select
3. Click the Scan to E-mail icon. You see the Scan to E-mail
welcome.
Start
4. Click
. The Scan to E-mail window opens:
EPSON SMART PANEL
.
note:
If you’re scanning a
printed picture that is
a film-processed
not
photograph, make sure
you choose Magazine,
Newspaper, or
Brochure. These settings
will give you better
scans and eliminate
unwanted dot patterns.
5. Select the type of document(s) you’re scanning from the
Scan Material icons. If the basic settings listed beneath the
icons are correct, go to step 8.
Scanning 85
Page 92

To change the basic settings chosen by the Scan Material
selection, go to steps 6 and 7.
If you’re an advanced user and want more control over your
settings, click the
TWAIN
button. See page 70 for
information about using the TWAIN settings.
6. Choose one of the following Scan Mode buttons:
■ Color
■ Grayscale: For black and white photographs or
: For any type of document or photo in color
artwork with subtle shading
■ Black&White: For text or drawings with no shading.
7. Choose one of the following Destination buttons:
■ Screen
: For images that will be displayed on the
Internet or viewed on the screen only
■ Printer (Normal)
: For text or images that will be
printed normally
■ Printer (Fine): For photographs or other images that
will be printed at the highest quality or resolution
(scanning is slower with this setting)
8. If you’re using the document table to scan more than one
image, click
Scan Multiple Images
.
9. If you’re using the optional automatic document feeder,
Enable ADF. Then go to step 12.
click
If you’re not using the automatic document feeder, go to
step 10.
86 Scanning
Page 93

note:
You can’t use the
Preview button if
you’re using the
optional automatic
document feeder.
10. Click the Preview button. The EPSON Stylus Scan scans
your document and displays a preview in the scan window
on your screen:
11. Click and drag the dotted-line border on the preview to
define the area you want to scan. You can also adjust any of
your other settings at this point.
12. Click the
If you selected
Scan
button. Your original document is scanned.
Scan Multiple Images
, a message appears
asking if you want to continue scanning.
Yes
13. If you click
to scan more images, click inside the
dotted line border on the preview image and move it to the
next image. Size the border as necessary, then repeat
steps 12 and 13.
If you click
No, go to step 14.
Scanning 87
Page 94

14. When scanning is completed, you see a window like this:
For a closer look, double-click any image to display it in the
Image Viewer window.
Click to change
the image size.
Click to see the
next or previous
image.
88 Scanning
Choose
Exit (Windows) or Quit (Macintosh) from the File
menu when you’re finished viewing your file. You return to
the image selection window.
To format and send your scanned file, see the next section.
Page 95

Windows
Formatting and Sending the File
1. At the Specify window, click Specify Name & Type. You
see this box (shown to the left) next to the window.
2. Enter a file name prefix for your scans. If you scanned more
than one image, they will be automatically numbered.
3. Under File Type, choose a file format for your scanned
images.
■ The JPEG format is a good choice for most images.
If you select JPEG as the image type, the
button becomes active. If you want to adjust the image
quality or compression of JPEG files for your
application, click the
Option
button and use the slider
to choose between high image quality and high
compression. Then click
OK.
Option
Macintosh
W
■
If you want to e-mail mainly text, choose
Text Format
, or HTML. The software will
Text, Rich
automatically perform OCR and convert the file into
editable text. See page 76 for more information.
■ Choose Presto! Wrapper (Windows only) to have
your file open automatically in a “viewer” when the
recipient clicks it.
The available file formats are based on the type of image
you’re scanning. See your EPSON Smart Panel online help
for a complete list of supported formats.
4. Click
Apply to save your choices and close the box.
Scanning 89
Page 96

note:
Scan to E-mail supports
®
Lotus
cc:Mail® 6.0,
Qualcomm
Pro
Mail
MAPI-compliant mail
programs like Microsoft
Exchange
Microsoft Outlook®97.
®
®
Eudora
3.0, Netscape
™
4.x, and
®
and
5. Click
Finish in the image selection window.
The software detects the e-mail programs on your
computer and lets you choose the one you want to use.
6. Select the e-mail program you want to use, then click
E-mail
.
Send
Your e-mail program opens. You can write a message and
then send it with your image or text file attached.
7. When you’re finished e-mailing, close your e-mail program.
You see the Scan to E-mail exit screen.
Exit
8. Click
to close Scan to E-mail,
e-mail additional files, or
Return to Start
Continue E-mailing
to start the
to
scanning to e-mail process from the beginning.
90 Scanning
Page 97

Scanning for Creativity
Your EPSON Stylus Scan lets you turn your photos into
creative projects like calendars, business cards, and letterheads.
Scanning for Creativity makes these projects simple by
automatically opening the PhotoDeluxe program that came
with your EPSON Stylus Scan.
Scanning Your Images
1. Place your original document(s) face down on the
document table, as described in “Positioning the Original
Document” on page 20.
2. Do one of the following to open the EPSON Smart Panel:
W Click the Smart Panel icon on the Windows taskbar.
M Open the Apple menu and select
3. Click the Scan for Creativity icon. You see the Creativity
welcome.
Start
4. Click
5. Follow the steps in “Scanning Your Document” beginning
on page 85 to choose your settings and preview your image.
6. Click the
. The Scan for Creativity window opens:
Scan button. Your original document is scanned.
EPSON SMART PANEL
.
Scanning 91
Page 98

7. If you selected
Scan Multiple Images, a message appears
asking if you want to continue scanning.
If you click
Yes
to scan more images, click inside the
dotted line border on the preview image and move it to the
next image. Size the border as necessary, then repeat steps 6
and 7.
If you click
No
, continue with one of the following
sections:
■
“Creating Your Project in Windows” below
■ “Creating Your Project on a Macintosh” on page 94
W
Creating Your Project in Windows
If you’re using Windows, you see the activity selection window:
92 Scanning
Click here to display more projects.
1. Click the project you want to create, for example,
Letterhead.
2. Click the
Finish Selection button. You see a window
confirming your choice.
3. Click the
Launch PhotoDeluxe button to open
PhotoDeluxe.
Page 99

note:
Once PhotoDeluxe is
open, you can use all of
its features to edit and
enhance your photo, add
text and special effects,
or create many types of
projects. For more
information, click Help
or check the electronic
manual for PhotoDeluxe,
as described on page 7.
PhotoDeluxe opens with your scanned image in the Hold
Photo area on the left:
Click the first tab.
Scanned
image in Hold
Photo area.
Work area.
4. Drag your photo to the work area if you want to edit it or
add special effects before you begin your project.
5. Click the first tab to start working on your project. Then
follow the instructions on the screen to complete the
project.
Make sure you have your PhotoDeluxe CD-ROM handy
so you can insert it when requested.
Scanning 93
Page 100

M
Creating Your Project on a Macintosh
You see the Scan for Creativity launch window.
note:
Once PhotoDeluxe is
open, you can use all of
its features to edit and
enhance your photo, add
text and special effects,
or create many types of
projects. For more
information, click Help
or check the electronic
manual for PhotoDeluxe,
as described on page 7.
1. Click the
Launch PhotoDeluxe button to open
PhotoDeluxe. PhotoDeluxe opens with your scanned image
in the work area:
Cards & More
button.
Work area.
2. To begin a project, click the
Cards and More button,
select a project, and follow the instructions on the screen to
create it.
3. When you’re finished working, exit PhotoDeluxe. You see
the Scan for Creativity exit screen.
4. Click
Exit to close Scan for Creativity, Continue
Launching
Start
to work with additional files, or Return to
to start the scanning for creativity process from the
beginning.
94 Scanning
 Loading...