

Page 1

DOS User's Guide
Installing the Printer Driver for DOS Programs. . . . . . . . . . . . . . . 3
Changing the Print Settings. . . . . . . . . . . . . . . . . . . . . . . . . . . . . . . . 4
Using the default settings . . . . . . . . . . . . . . . . . . . . . . . . . . . . . 5
Changing the default settings . . . . . . . . . . . . . . . . . . . . . . . . . 8
Troubleshooting and Maintenan ce. . . . . . . . . . . . . . . . . . . . . . . . . . 11
Running a printer operation check . . . . . . . . . . . . . . . . . . . . . 11
Problems and solutions. . . . . . . . . . . . . . . . . . . . . . . . . . . . . . . 13
Ink cartridge problems . . . . . . . . . . . . . . . . . . . . . . . . . . . . . . . 2 0
Cleaning the print heads. . . . . . . . . . . . . . . . . . . . . . . . . . . . . . 22
Aligning the print head. . . . . . . . . . . . . . . . . . . . . . . . . . . . . . . 24
Cleaning the printer. . . . . . . . . . . . . . . . . . . . . . . . . . . . . . . . . . 26
Transporting the printer . . . . . . . . . . . . . . . . . . . . . . . . . . . . . . 27
Character Tables . . . . . . . . . . . . . . . . . . . . . . . . . . . . . . . . . . . . . . . . . 28
International character sets. . . . . . . . . . . . . . . . . . . . . . . . . . . . 38
Characters available with ESC ( ^ com ma nd. . . . . . . . . . . . . 39
4009815
xxx-00
Page 2

Copyright © 1998 by SEIKO EPSON CORPORATION,
Nagano, Japan
Page 3

Installing the Printer Driver for DOS Programs
Most DOS software programs include a driver for EPSON
ESC/P 2™ print ers, an d req uire you to s el ect the prin ter name f rom
a list to install the printer driver. To take advantage of your printer's
advanced built-in scalable fonts and graphics handling, you must
select an appropriate driver.
If your printer is not included in the list, contact your software
manufacturer to obtain updated software.
If the manufacturer does not have an updated print er driver for your
printer, selec t an alt ernativ e print er name f rom those belo w, starti ng
from the top.
When printing black only:
LQ-870/1170
LQ-570 (+)/1070(+)
SQ-870/1070
LQ-850
LQ-500
When printing black and color:
EPSON S t ylus PR O
EPSON S t ylus COLOR 500
EPSON S t ylus COLOR II
LQ-860
LQ-2550
Note:
The drivers for the printers listed above do not provide all EPSON STYLUS
COLOR 900 features, such as 720-dpi printing, 1440 -dpi printing and
MicroWeave.
DOS software varies greatly. See the printing section o f your software
manual for information on access ing the printer driv e r settings.
3
Page 4
Changing the Print Settings
You can change many print settings such as print direction and
loading position. Becau se these sett ings take ef fect each time you turn
on the printer, they are also called default se ttings.
The factory default settings are designed to meet the needs of most
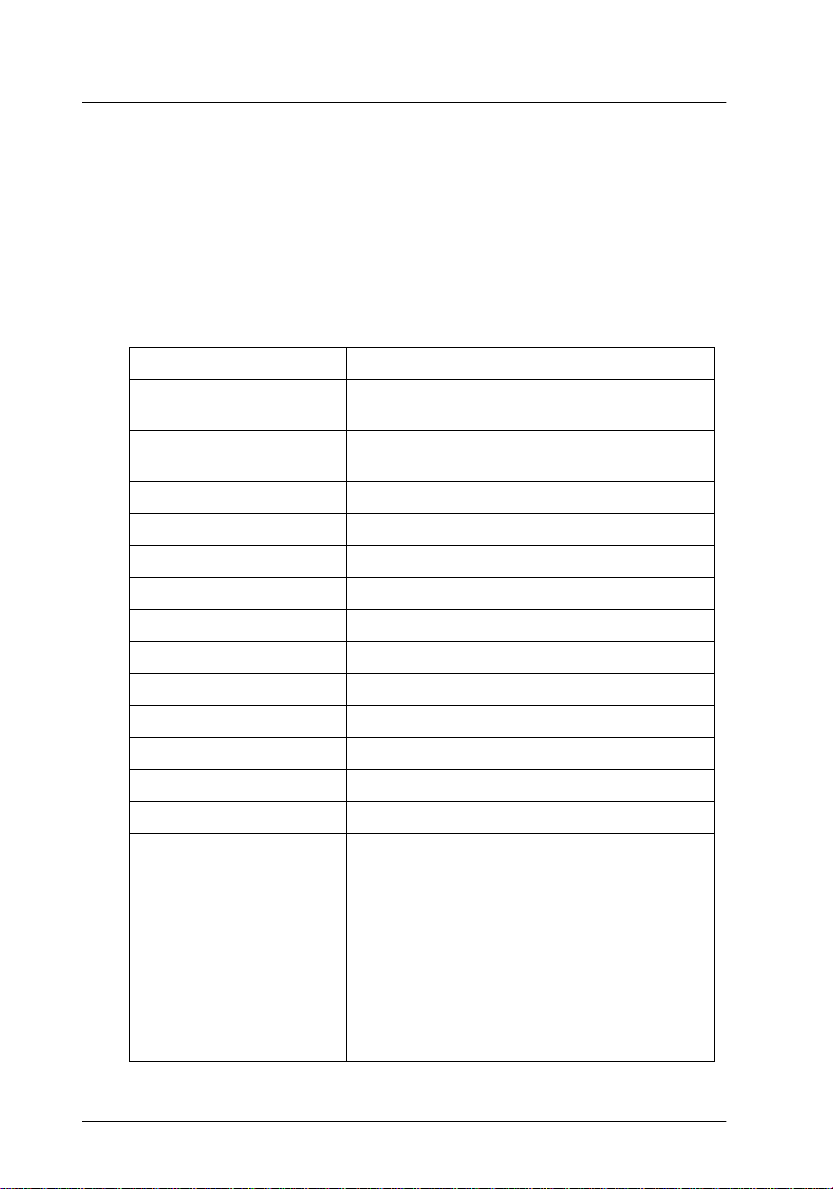
users, so you may not need t o change them. The table bel ow list s the
features you can select in the default-set ting mode.
Settings Options
Font Courier, Roman, Sans Serif, Prestige, Script,
Pitch 10 cpi, 12 cpi , 15 cpi, 17.1 cpi, 20 cpi,
Print direction Auto, Bi-D, Uni-D
Loading position 8.5 mm, 3 mm, Others
I/F mode Auto, Parallel, Serial, USB, Optional
Auto I/F wait time 10 seconds, 30 seconds
Network I/F mode Off, On
Parallel I/F transfer rate Fast, Norm al
Software ESC/P 2, IBM X24E
Auto CR (IBM mode only) Off, On
AGM (IBM mode only) Off, On
Auto line feed Off, On
0 slash 0, 0 with slash
Character table
Roman T, Sans Serif H, Draft
Proportion al
Standard model:
PC861, PC863, PC865, BRASCII, Abicomp,
Roman 8, ISO Latin 1, PC858, ISO 8859-15
All ot her m odels:
PC850, PC852, PC853, PC855, PC857, PC866,
PC869, MAZOWIA, Code MJK, ISO 8859-7,
ISO Latin 1T, Bulgaria, PC774, Estonia,
ISO 8859-2, PC866 LAT, PC866 UKR, PCAPTEC,
PC708, PC720, PCAR864, PC860, PC861,
PC863, PC865, BRASCII, Abicomp, Roman 8,
ISO Latin 1, PC858, ISO 8859-15
Ital ic, PC43 7, PC850, PC860,
Italic, PC437, PC437Greek,
4
Page 5

For more details, see the next section, “Using the default settings”.
To change a setting, see “Changi n g the default settings” on page 8.
Note:
Most software controls the character table and auto line feed. If your
software controls these features, you may never need to set them with the
control panel.
Using the default settings
Print direction
Your printer has three direction settings: Auto, Bi-D, and Uni-D.
Auto ca u se s th e pr in t e r to switch au to matica ll y bet ween
bidirectional (for text data) and unidirectional (for graphics data).
Bi-D cause s the print h eads to pr int in both direct ions. T his provid es
the fastest printing. Uni-D causes the print heads to print in one
direction only. This provides maximum alignment for both graphics
and character printing.
Note:
Most software controls this setting. If your software does, you may never
need to set it with the control panel.
Font
Use this setting to select the default font.
Pitch
With this setting, you can specify the default character pitch (font
size).
5
Page 6

I/F (interface) mode
You may need to change the I/F mode so that your print e r and
computer ca n commu ni ca te pro p erly . If yo u se le ct Au to, th e p rin te r
automatically selects the interface that is receiving data, and uses that
interface until the end of the print job. This setting allows you to share
the printer among multiple computers without changing the
interface mode.
Check your computer documentation if you are not sure of th e type
of interface your computer requires.
Auto I/F (interface) wait time
If you select Auto as the I/F mode opti on, you can set the inte rface
timeout to 10 se conds or 30 s econds. The p rinter does not accep t data
from another interface unless it receives no data from the current
interface for the period set in Auto I/F wait time.
Software
Use this setting to specify the type of control codes you want to use
to control the printer . If you select ESC/P 2, the printer emulates an
EPSON ESC/P 2 printer. If you s elect IBM X24E, the pr inter operates
as an IBM Proprinter™ X24E. If possi b l e , sel ect EPSON ESC/P 2 in
your application program s. This will allow you to use the most
advanced font and graphics handling available.
Auto CR
This feature is available when you select IBM X24E emulation as the
Software set ting. When Auto C R is on, the auto car riage return option
performs a carriage-return line-fee d (CR LF) operation whenever the
print position exceeds the right margin. If this is o ff, the printer does
not print characters beyond the right margin, and does not perform
a linewrap until it receives a CR command.
AGM (Alternate Graphics Mode)
This feature is available when you select IBM X24E emulation as the
Software setting. When AGM is on, the printer can use highresolution 24-pin graphi cs commands. The default is off.
6
Page 7

Character table
Character tables contain the character s and symbols us ed in different
languages. The printer prints text based on the selected character
table. For the available character tables, see “C h aracter Tables” on
page 28.
Auto line feed
When the Auto line feed feature is on, each carriage return (CR) code
is accompanied by a line feed (LF) code. If your printed text is
unexpectedly double-spaced, set t his feature to
on top of each other, set it to On.
Off
. If text lines print
Network I/F mode
If your printer is connected to a single computer, leave this feature
off. If yo u want to shar e the prin ter with another computer, turn thi s
feature on. When this feature is on, data may be present in the
printer’ s buffer even thoug h the print er is not p rinting. Always make
sure the printer does not receive data before turning off the printer.
Loading position
If you want to prin t more lin es on a p age, set th is feat u re to 3 mm. I f
you set the top margin with your software, that setting is ad ded to
the default - se tting value .
0 slash
If you want to use the zero character which has a slash, set this feature
to 0 with slash. Th e slash allows you to easily distinguish between
an uppercase letter “O” and a zero.
Parallel I/F transfer rate
This setting specifies the interface tr ansfer rate. F or most printi ng,
leave this setting set to
Normal
.
Fast
. If you encounter problems, set it to
7
Page 8
Changing the default settings
To change t he printer’s default sett ings, use the c ontrol panel b uttons;
the control panel lights show your selections.
1. Make sure the pri nter i s turned off and A4 or Letter size paper is
loaded in the sheet feeder.
cleaning button and turn on the printer to
2. Hold down the
enter the defa u lt-setting mode.
The printer loads a sheet of paper and prints a brief summary
and instructions. It instructs you to select the language that you
want messages printed in (English, French, German, Italian,
Spanish, or Portuguese).
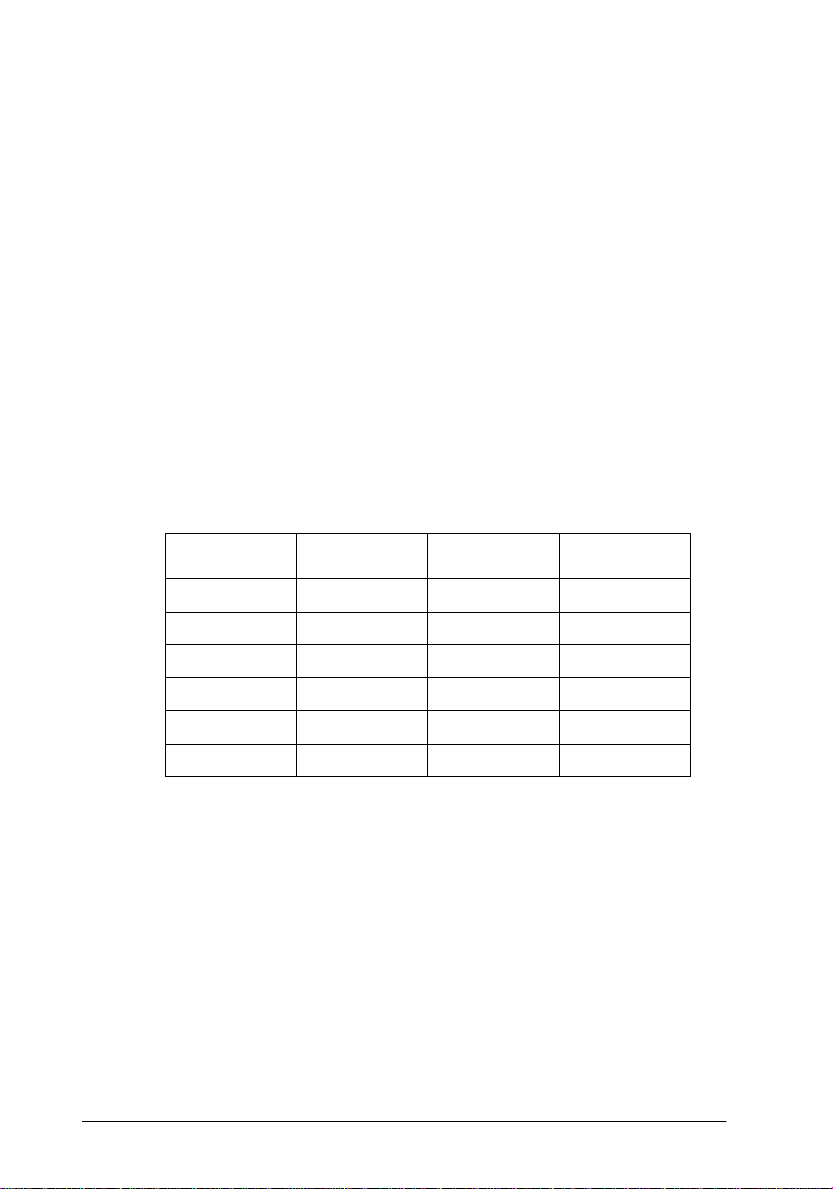
3. Press the
indicate the language of your choice, as shown below.
R
cleaning button until the control panel lights
R
Language
English
French
German
Italian
Spanish
Portuguese
o
= On, n = Off
S
n
n
n
o
o
o
B
n
o
o
n
n
o
A
o
n
o
n
o
n
4. Press the Eload/ejec t butto n to p rint the cu rrent default sett ings
and the next instructions in the language yo u selected. The
printed instruction s include submenu tab les that list all of the
settings you can change and show you how the control panel
lights appear for each selection. Use the instruction sheets to
change the se ttings from the control panel.
8
Page 9
5. After making your changes, exit the default - se tting mode by
turning off the printer.
Note:
You may exit the defaul t-s et ting mode any time by turning off the printer.
Any changes you have made remain in effect until you change the m again.
If you want t o check the cur re nt default settings, enter the defaultsetting mode again and print the current settings. Current settings
are indicated with arrows .
Selecting fonts
Your printer has eight built-in character fonts including two EPSON
fonts: EPSON Roma n T and EPSON Sans Se rif H. (Roman T is si milar
to the Times™ font; Sans Serif H is similar to Helvetica™.)
To select a font, enter the default-setting mode. See “Changing the
default settings” on page 8.
Note:
The font selections you make with your software override your printer’s
control panel selections. For best results, use your software to select fonts.
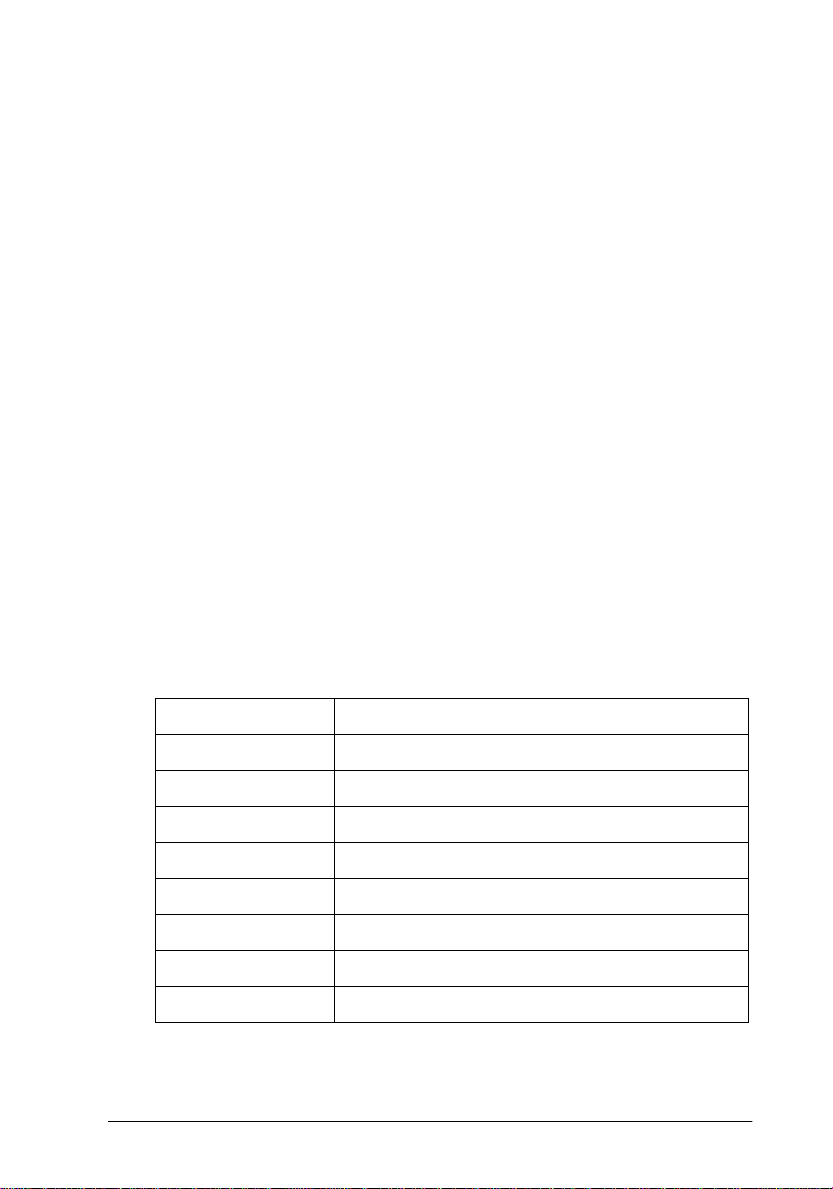
The following table shows the available fonts.
Fonts Sample
EPSON Courier
EPSON Roman T
EPSON Sans Serif H
EPSON Roman
EPSON Sans Serif
EPSON Prestige
EPSON Script
Draft
9
Page 10

Note:
❏ Roman T and Sans Serif H fonts are available in proportionally spaced
fonts on l y .
❏ Some of the character tables might not be able to print with EPSON
Roman T and EPSON Sans Serif H fonts. In these cases, selected
character tables are prin te d with EP SON R om an.
Scalable fonts
The size of the Roman, Sans Serif, Roman T, and Sans Serif H fonts
can be selec te d from 8 to 32 points in 2- p oint increment s through
your software or by sending an ESC/P 2™ command. See the
document ation that came wi th your softwar e f or information on
sele ct i ng th e size of sca l a b le fo n t s.
EPSON
Roman
EPSON
Roman T
scalable sample
EPSON
Sans Se ri f
EPSON
Sans Serif H
10
Page 11

Troubleshooting and Maintenance
This section describes what you can do if you are having problems
printing. See also “Maintenance” and “Troubleshooting” in your
Setup & Daily Use
Running a printer operation check
Perfor ming a printe r o p e ra tio n check can he lp you de t e rm in e
whether the problem comes from the printer or the computer.
To print a printer operation check page, follow these steps.
1. Make sure both the printer and computer are turned off.
2. Unlock the wire clips on both sides of the interface connector,
and remove the gr ound connec tor if nece ssary. Then disconn ect
the cable fr om the printer’s i nterface connector.
manual.
3. Make sure that A4 or Letter size paper is loaded in the sheet
feeder.
11
Page 12
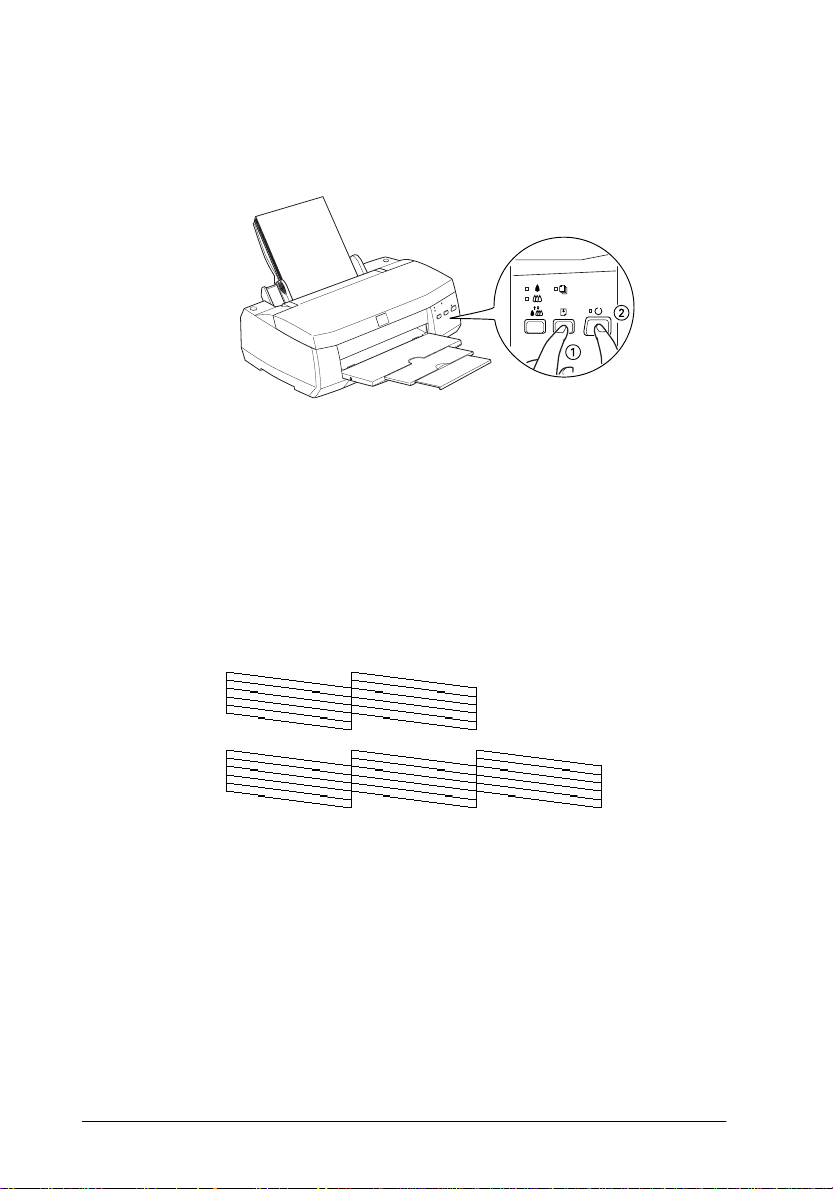
4. Hold down the Eload/eject button
P
and press the
power button
(➀ in the ill ustration below)
(➁ in the illustration below)
turn on the printer. Then release both buttons.
The printer prints an operation ch eck page including the v ersion
of your printer’s ROM, th e ink counte r code, the cu rrent code
page, and a nozzle check pattern.
❏
If the operation check page results appear as shown in step 4, the
printer itself is all right and the problem probably lies in the
printer software settings, application settings, the interface cable
(be sure to use a shielded cable), or the computer itself.
to
12
The above sampl e is in blac k and whi te, but the ac tual test pri nts in color
(CMYK).
Page 13

❏
If the operation check page does not print satisfactorily, for
example, if any segment of the printed lines is missing, there is
a prob l em with the printer. This could be a cl o gg e d ink nozz le
or a misaligned prin t head.
segments are missing
The above sample is in black and white, but the actu al test prints in color
(CMYK).
Problems and solutions
Most printer problems have simple solutions. Define the problem
from those below and apply the re commended solu tions.
Print quality problems
If you want to improve print quality, see the following problems and
solution s.
Horizontal banding
Try one or more of these solutions:
❏
Make sure the printable side of the paper is face up in the sheet
feeder.
❏
Clean the print heads to clear clogged ink nozzles. See “Clean ing
the print head s” on page 22.
❏
Check the
B
black and Acolor ink out ligh ts. If a light is flashing,
replace an ink cartridge. See “ Replacing Ink Cartridges” in your
Setup & Daily Use
manual.
13
Page 14

Vertical misalignment or banding
Try one or more of these solutions:
❏
Make sure the printable side of the paper is face up in the sheet
feeder.
❏
Run the
head” on page 24.
❏
Clean the print heads to clear clogged ink nozzles. See “Cleaning
the print heads” on page 22.
Print Head Alignment
utility. See “Aligning the print
Color gaps
Try one or more of these solutions:
❏
Make sure your paper is not damaged, dirty, or old. Also, make
sure the printable side of the paper is face up in the sheet feeder.
❏
Clean the print heads to clear clogged ink nozzles. See “Cleaning
the print heads” on page 22.
❏
Check the
replace an ink cartri dge. See “Replacing Ink Cartrid ges” in your
Setup & Daily Use
B
black and Acolor ink out lights. If a light is flashing,
manual.
Incorrect or missing colors
Try one or more of these solutions:
❏
Make sure the printable side of the paper is face up in the sheet
feeder.
14
❏
Clean the print h e ads. See “Cleaning th e print heads” on page
22. If colors are still incorrect or missing, replace the ink cartridge.
Page 15

Blurry or smeared printouts
Try one or more of these solutions:
❏
Make sure the paper is dry and the printable side is face up.
❏
If you’re printin g on thick media, su ch as enve lopes or ca rds, set
the adjust lever to the “+” position.
❏
If you’re pr inting on glossy media or trans p arencies, place a
support sheet (or a piece of plain paper) beneath the stack, or
load one sheet at a time.
❏
Clean the print heads. See “Cleaning the print heads” on page 22.
❏
Run the
Print Head Alignment
utility. See “Aligning the print
head” on page 24.
❏
Ink may have leaked inside the printer; wipe the inside of the
printe r as shown below with a soft, clean cloth.
Wipe here.
15
Page 16

Printouts are no t what you expected
If any of the following problems have occurred, see the solutions
given b elow.
Incorrect o r garbled characters
Turn off the printer and computer. Make sure the printer’s interface
cable is plugged in securely.
Incorrect margins
Check the margin settings in your app licatio n softw are.
Printing is too slow
Try one or both of these solutions:
❏
Don’t run too many applications at the same time. Clos e any
applications you are not currently using.
❏
Delete unnecessary fi les to make room on your hard disk driv e.
Printer doesn’t print
If any of the following problems have occurred, see the solutions
given b elow.
All lights are off
❏
Press the
❏
Turn off the printer and make sure the power cord is plugged in
securely.
❏
Make sure the power outlet is working and is not controlled by
a wall switch or timer.
16
P
power button and make sure the printer is on.
Page 17

Lights came on and then went out
The printer’s voltage may not match the outlet rating. Turn off the
printer and unplug it immediately. Then, check the printer labels.
If the voltage doesn’t match, DO NOT PLUG YOUR PRINTER BACK
IN. See “Where to Get Help” in your
Setup & Daily Use
manual.
Only th e power light i s on
Try one or more of these solutions:
❏
Turn off the printer and computer. Make sure the printer’s
interface cable is plugged in securely.
❏
Make sure there’s no packing material in the printer.
❏
Turn off the printer and computer and disconnect the printer’s
interface cable. Then print an operation check page. See
“Running a printer operation check” on page 11.
❏
If it prints, make sure the printer software and your application
softwa re is installed correctly.
Note:
If you’re trying to print a large image, your compute r may not ha ve
enough memory to print.
❏
If the above doesn’t work, replace the ink cartridges. See
“Replacing Ink Cartridges” i n your
Setup & Daily Use
The paper out light is flashing or on
❏
❏
If the
If the
S
paper out light is flashing, remove the jammed paper.
S
paper out light is on, load more paper in the sheet feeder.
manual.
17
Page 18

One of the ink out lights is flashing or on
❏
B
If the
Prepare a replacement cartridge.
black or Acolor ink out light is flashing, ink is low.
❏
B
If the
corresponding cartridge. See “Replaci ng Ink Cartridges” in your
Setup & Daily Use
black or Acolor light is on, ink is out. Replace the
manual.
Ink out lights are on and the other lights are flashing
Follow these steps.
1. Remove any pa per in the printer.
2. Turn the printer off. Check for and remove any foreign objects
or pieces o f paper from inside the printer. Also, ma ke sure
that there is sufficient space around the vent on the back of
the printer allowing for proper ventilation. Remove any
objects blocking the vent. Then turn the printer back on.
3. If the error is not cleared, contact your dealer.
Paper doesn't feed correctly
If any of the following problems have occurred, see the solutions
below.
Paper doesn't feed
Remove the stack of paper and check that:
18
❏
The paper isn’t curled or creased.
❏
The paper isn’t too old. See the instructions that came with the
paper for more information.
❏
The paper isn’t loaded above the arrow on the left edge guide.
❏
The paper isn’t ja mmed inside. If it is, remove the jam med paper.
Page 19

Multiple pages feed
Remove the stack of paper and:
❏
Make sure the paper is not too thin.
❏
Fan the edges of the stack to separate the sheets, then reload the
paper.
The paper jams
Press the E load/eject button to eject the jammed paper. If the error
message does not clear, open the cover and remove all the paper
inside, including any torn pieces. Then load the paper again.
If the paper jams frequently, make sure you:
❏
Use smooth, high-quality paper, loaded with the printable side
up.
❏
Fan the stack before loading it.
❏
Don’t load paper above the arrow mark on the left edge guide.
❏
Adjust the left edge guide to fit your paper.
Paper isn't ejected fully or is wrinkled
Try one or more of these solutions:
❏
If the paper doesn’t eject fully, press the
check the paper size setting in your application or printer driver.
❏
If the paper is wrinkled when it comes out, it may be damp or
too thin. Load a new stack.
Note:
Store any unused paper in its original package in a dry area.
E
load/eject bu tton. Also
19
Page 20

Ink cartridge problems
If output quality does not improve ev en after cleaning and aligning
the print head, you may need to replace one or both of the ink
cartridges.
B
To replace an ink cartridge before the
flashes, follow these steps.
B
If the
empty ink cartridge as described in “Replacing Ink Cartridges” in
your
c
1. Make sure the pri nter is on. Th e
2. Lower the output tray; then open the printer cover.
3. Hold down the
black or Acolor ink out light is flashing or is on, replace the
Setup & Daily Use
Caution:
❏ Once you remove an ink cartridge, it becomes unusable and
cannot be reinstalled even if ink remains.
❏ Leave the old cartridge installed in the printer until you are
ready to replace it with a new one.
not flashing.
head moves to the black cartridge replacement position. The
P
power light begins flashing.
manual.
E
load/eject button for three seconds; the print
black or Acolor ink out light
P
power light should be on, but
20
Page 21

4. If you need to replace only the color ink cartridge, press the
E
load/eject but ton to mov e the print h ead to the c olor cartr idge
replacement position.
5. Lift the ink cartridge clamp. Then lift the cartridge out of the
printer and dispose of the ink cartridge properly.
6. Remove th e yellow tape seal from th e new cartridge.
7. Place the cartridge gently into the cartridge holder. Do not press
down on the cartridg e.
8. Press the ink cartridge clamp down until it locks in place.
Caution:
c
9. Press the
cartridge replacement position. If you need to replace color ink
cartridge as well, repeat steps 5 through 8. Otherwise, cont inue
to the next step.
Once you install the cartridges, do not open their clamps again
until you replace the ink cartridge s. Otherwi se, the cartri dges
may become unusable.
E
load/eject b ut ton. The pr int h ead moves t o the col or
21
Page 22

10. Press the Eload/eject button again. The printer mo ves the pri nt
head b a ck to its home pos i tion and ch arges ink in the syste m .
Caution:
P
power light continues to flash while the printer performs
c
The
the ink charging operation. Never turn off the printer while the
P
power light is flashing. Doing so can result in incompl ete
chargi ng of ink.
Cleaning the print heads
If print quality diminishes, use the printer’s built-in print head
cleaning cycle to ensure that the nozzles are deliver ing ink properly.
To avoid wasting ink, clean th e prin t head on ly if print qualit y
declines.
P
1. Make sure that the
A
color ink out lights are of f.
Note:
The print head cannot be cleaned if the
is flashing or on. Replace the ink cartridges as needed before proceeding.
22
power light is on and the Bblack and
B
black or Acolor ink out light
Page 23

2. Hold down the Rcleaning button for three seconds.
P
3. The printer start s cleani ng the prin t head an d the
begins flashing. Print head cleaning takes about one minutes to
complete.
Caution:
P
c
4. When the
document to confirm that the head is clean and reset the cleaning
cycle.
Never turn off the printer while the
Doing so may damage the printer .
P
power light stops flashing, print a few lines from a
power light is flashing.
power light
If print quality hasn’t improved after repeating this procedure
four or five times, t urn the printer off and leave it alone overnight.
Then do the head cleaning again.
If the print quali ty still h as not improved, on e or both of you r ink
cartridges may be old or damage d and may need to be rep lac ed.
To replace a n ink cartridge before it is empt y, se e “Ink cartridge
problems” on page 20.
If print quality remains a problem after replacing the ink
cartridg e s, contact your dealer.
Note:
To maintain print quality, we recommend turning on the printer for at
least one minute every mon th.
23
Page 24

Aligning the print head
If you find that the printed image is fuzzy or the vertical lines in your
printout are not properly aligned, you may need to align the print
head with the EPSON Print Head Alignment Utility. This utility
aligns the print head to print images clearly. You may need to align
the print head when you transport the printer or move it to a different
place.
Using the print head alignment utility
To use this utility, follow these steps.
1. Insert the EP SON Printe r S oftware CD int o your C D-ROM d rive.
2. Type
3. After running the setup program, type
4. Make sure your printer is selected. Click
D:\SETUP
a different drive letter, or if you are using the floppy version,
substitute the approp riate let te r for
follow the directions on the screen.
hard disk
appropria te letter.
appears.
directions on the screen.
at the DOS prompt. (If your CD-ROM driver has
D:\
.) Then press
C:\EPCALIB2
drive has a drive letter other than “C”, substitute the
Then press
Enter
. The following window
Next
, then follow the
Enter
, and
. If your
24
Page 25

Using the control panel buttons
If you cannot use t he print head ali gnment utility progra m that came
with your printer, follow these steps to align the print head.
1. Make sure that A4 or Letter size paper is loaded in the sheet
feeder.
R
2. While holding down the
button
3. The
flashing, press the
The printer p ri nts a sheet of instructions in English, French,
German, Italian, Spanish, and Portuguese explaining how to
align the print heads. Follow these ins tructio ns .
Note:
If you fail to press the
setting mode. If this happens, turn off the printer and return to step 2.
4. After aligning the print h ead, turn off the printe r to exit the pr int
head alignment mode.
to turn on the prin te r. Then release both buttons.
S
paper out ligh t flashes for about thr ee seconds. While it is
E
load/eject button.
load/eject button, the printer enters the default-
E
cleaning button, press th e
P
power
25
Page 26

Cleaning the printer
To keep your printer operating at its best, clean it thor oughly several
times a year.
1. Make sure the printer is turned off and all the printer’s lights are
off. Then unplug the power cord.
2. Remove any paper from the sheet feeder.
3. Use a soft brush to carefully clean away all dus t and dir t.
4. If the outer case or the inside of the sheet feeder is dirty, clean it
with a soft, clean cloth dampened with mild detergent. Keep the
printe r cover clo s e d to pr e ve n t wa te r from ge tt i ng i nside.
5. If the inside of the printer is accidentally soiled with ink, wipe it
out wi th a damp cloth .
Warning:
w
c
Be careful not to touch the gears inside the printer.
Caution:
❏ Never use alcohols or thinners to clean the printer; these
chemicals can damage the components as well as the case.
26
❏ Be careful not to get water on the printer mechanism or
electronic components.
❏ Do not use a hard or abrasive brush.
❏ Do not spray the inside of the printer with lubricants;
unsuitable oils can damage the me chanism. Contact your dealer
or a qualified service person if lubrication is needed.
Page 27

Transporting the printer
If you need to transport your printer a significant distance, carefully
repack it using the original box and packing materials as follows:
1. Open the printer cover and make sure that the print head is in
the home ( far rig ht) po si tion . I f not, t urn on th e pr int er and wa it
until the print head returns to the home position. Then turn off
the printer and close the printer cover.
Caution:
c
2. Unplug the power cord from the electrical outl et; then disconnect
the interface cable from the printer.
3. Remove the paper from the sheet feeder and remove the paper
support.
4. Push in the out put exte nsion tra y, and then ra ise the output tra y.
5. Open the printer cover again . Secure the ink cartridge ho lder to
the printer with tape as shown below, then close the printer
cover.
Leave the ink cartridges installed during transportation,
otherwise the prin te r may be damaged.
6. Attach the protective materials to both sides of the printer.
7. Repack the printer and power cord in the original box.
8. Keep the printer level during transport.
27
Page 28

Character Tables
These character tables are selected with the default-setting mode or
by using software commands.
All tables except the italic character table are th e same as th e PC437
table for h e x codes 00 through 7F, so only the PC437 table is shown
in its enti rety . Th e r est o f the tab les show on ly the c harac ter s for hex
code s 80 th r ough FF.
The tables with an asterisk ( *) aft er the table name ar e only av ailable
in certain areas.
PC437 (U.S./Standard Europe)
28
Page 29

PC850(Multilingual) PC860(Portuguese)
PC861(Icelandic) PC863(Canadian-French)
29
Page 30

PC865(Nordic) BRASCII
Abicomp Roman 8
30
Page 31

ISO Latin 1 PC858
ISO 8859-15 PC437Greek(Greek)*
31
Page 32

PC852(East Europe)* PC853(Turkish)*
PC855(Cyrillic)* PC857(Turkish)*
32
Page 33

PC866(Russian)* PC869(Greek)*
MAZOWIA(Polish)* Code MJK (CSFR)*
33
Page 34

ISO 8859-7 (Latin/Greek) * ISO Latin 1T (Turkish)*
Bulgari a * PC774 (LST 128 3: 1993)*
34
Page 35

Estonia* ISO 8859-2*
PC866 LAT. (Latvian)* PC866 UKR*
35
Page 36

PC APTEC(Arab ic)* PC708(Arabic)*
PC720(Arabic)* PC AR864(Arabic)*
36
Page 37

Italic
No character s are available for hex
code 15 in the italic character table.
37
Page 38

International character sets
You can select one of the following international character sets with
the default-setting mode or the ESC R command. For example, when
you select “Italic France,” the characters in the “France” row on the
table below are used in the italic character table.
The following eight international character sets can be selected with
the default-setting mode or with the ESC R command.
The following seven additional set s can be selected only wi th the ESC
R command.
38
Page 39

Characters available with ESC ( ^ command
To print the charact ers in the table below, use the ESC ( ^ c ommand.
The characters in the right table are av ailable with PC864 (Arabic),
PC AR864 (Arabic), and PC APTEC (Arabic).
39
Page 40

Printed in Japan 98.xx-x
 Loading...