

Epson Stylus Color 660 Daily Use Guide
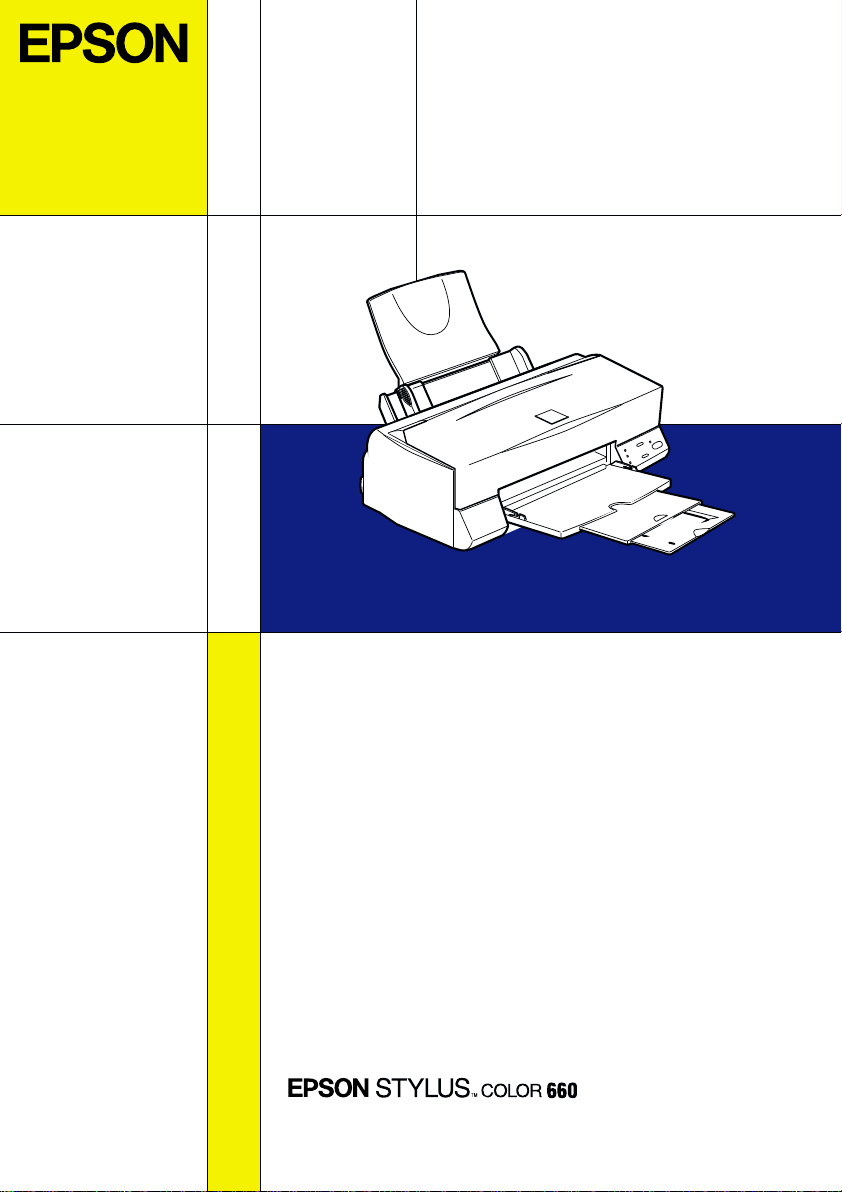
Color Ink Jet Printer
Daily Use
4010612
XXX-00

Where to Find Information
Setup Guide
This guide will help you set up and begin using your printer.
❏
It includes information on setting up your printer and
installing the printer software.
Daily Use Guide
This guide provides information on daily printer operation.
❏
It also contains troubleshooting tips and customer support
information.
Online Guides included on the CD-ROM
The guides on the CD-ROM included with your printer will help
you learn more about your printer and color printing. To view
these guides, you must have a Web browser installed on your
computer. For more information on using this CD-ROM, see the
included
CD-ROM Booklet
.
❏ Reference Guide
❏ Color Guide
Provides detailed information about
printer software settings, printing on
special paper, maintenance, and problem
solving.
Includes sample images, explanations and
troubleshooting information that will help
answer your questions about color imaging
and printing.

All rights reserved. No part of this publication may be reproduced, stored in a retrieval
system, or transmitted in any form or by any means, electronic, mechanical, photocopying,
recording, or otherwise, without the prior written permission of SEIKO EPSON
CORP ORATIO N. The in formati on conta ined he rein is des igned on ly for us e with th is EPSON
printer. EPSON is not responsible for any use of this information as applied to other printers.
Neither SEIKO EPSON CORPORATION nor its affiliates shall be liable to the purchaser of
this product or third parties for damages, losses, costs, or expenses incurred by the purchaser
or third parties as a result of: accident, misuse, or abuse of this product or unauthorized
modifications, repairs, or alterations to this product, or (excluding the U.S.) failure to strictly
comply with SEIKO EPSON CORPORATION's operating and maintenance instructions.
SEIKO EPSON CORPOR AT ION shall not be liable for any damages or problems arising from
the use of any options or any consumable products other than those designated as Original
EPSON Products or EPSON Approved Products by SEIKO EPSON CORPORATION.
SEIKO EPSON CORPORATION shall not be held liable for any damage resulting from
electromagnetic interference that occurs from the use of any interface cables other than those
designated as EPSON Approved Products by SEIKO EPSON CORPORATION.
EPSON is a registered trademark and EPSON Stylus is a trademark of SEIKO EPSON
CORPORATION.
Microsoft and Windows are registered trademarks of Microsoft Corporation.
General Notice: Other product names used herein are for identification purposes only and may be
trademarks of their respective owners. EPSON disclaims any and all rights in those marks.
Copyright © 1999 by SEIKO EPSON CORPORATION, Nagano, Japan.

Declaration of Conformity
According to ISO/IEC Guide 22 and EN 45014
Manufacturer:SEIKO EPSON CORPORATION
Address: 3-5, Owa 3-chome, Suwa-shi,
Nagano-ken 392-8502 Japan
Representative:EPSON EUROPE B.V.
Address: Prof. J. H. Bavincklaan 5 1183
AT Amstelveen
The Netherlands
Declares that the Product:
Product Name: Ink Jet Printer
Model: P954A
Conforms to the following Directive(s) and Norm(s):
Directive 89/336/EEC:
EN 55022 Class B
EN 61000-3-2
EN 61000-3-3
EN 50082-1
IEC 801-2
IEC 801-3
IEC 801-4
Directive 73/23/EEC:
EN 60950
May 1999
H. Horiuchi
President of EPSON EUROPE B.V.
ii

Contents
Safety Instructions 1
Important Safety Instructions . . . . . . . . . . . . . . . . . . . . . . . .1
A Few Precautions . . . . . . . . . . . . . . . . . . . . . . . . . . . . . . . . . . 2
ENERGY STAR Compliance . . . . . . . . . . . . . . . . . . . . . . . . .4
For United Kingdom Users . . . . . . . . . . . . . . . . . . . . . . . . . . 4
Warnings, Cautions, and Notes . . . . . . . . . . . . . . . . . . . . . . .5
Printer Parts and Functions 6
Printer Parts and Control Panel Functions . . . . . . . . . . . . . 6
Loading Special Paper . . . . . . . . . . . . . . . . . . . . . . .8
Loading Special Paper and Other Media . . . . . . . . . . . . . . .8
Loading Envelopes . . . . . . . . . . . . . . . . . . . . . . . . . . . . . . . . .10
Printing with Windows . . . . . . . . . . . . . . . . . . . . . . . . 12
Printer Software Introduction . . . . . . . . . . . . . . . . . . . . . . . . 12
Making Changes to Printer Driver Settings . . . . . . . . . . . . . 13
Getting Information Through Online Help . . . . . . . . . . . . . 21
Printing with Macintosh . . . . . . . . . . . . . . . . . . . . . . .22
Printer Software Introduction . . . . . . . . . . . . . . . . . . . . . . . . 22
Making Changes to Printer Driver Settings . . . . . . . . . . . . . 22
Replacing Ink Cartridges . . . . . . . . . . . . . . . . . . . . .31
Maintenance . . . . . . . . . . . . . . . . . . . . . . . . . . . . . . .37
Checking the Print Head Nozzles . . . . . . . . . . . . . . . . . . . . . 37
Cleaning the Print Head . . . . . . . . . . . . . . . . . . . . . . . . . . . . . 40
Aligning the Print Head . . . . . . . . . . . . . . . . . . . . . . . . . . . . . 42
iii

Troubleshooting . . . . . . . . . . . . . . . . . . . . . . . . . . . . . 44
Error Indicators . . . . . . . . . . . . . . . . . . . . . . . . . . . . . . . . . . . . 44
Typical Problems and Solutions . . . . . . . . . . . . . . . . . . . . . . 46
Cancelling Printing . . . . . . . . . . . . . . . . . . . . . . . . . . . . . . . . 48
Where to Get Help . . . . . . . . . . . . . . . . . . . . . . . . . . . . . . . . . 50
Options and Consumable Products . . . . . . . . . . . . . 56
iv

Safety Instructions
Important Safety Instructions
Read all of these instructions before using your printer. Also be
sure to follow all warnings and instructions marked on the
printer.
Do not block or cover the openings in the printer’s cabinet.
❏
Do not insert objects through the slots.
Take care not to spill liquid on the printer.
❏
Use only the type of power source indicated on the printer’s
❏
label.
Connect all equipment to properly grounded power outlets.
❏
Avoid using outlets on the same circuit as photocopiers or air
control systems that regularly switch on and off.
Avoid electrical outlets controlled by wall switches or
❏
automatic timers.
Keep the entire computer system away from potential sources
❏
of electromagnetic interference, such as loudspeakers or the
base units of cordless telephones.
Do not use a damaged or frayed power cord.
❏
If you use an extension cord with the printer, make sure the
❏
total ampere rating of the devices plugged into the extension
cord does not exceed the cord’s ampere rating. Also, make
sure the total ampere rating of all devices plugged into the
wall outlet does not exceed the wall outlet’s ampere rating.
Do not attempt to service the printer yourself.
❏
1

Unplug the printer and refer servicing to qualified service
❏
personnel under the following conditions:
The power cord or plug is damaged; liquid has entered the
printer; the printer has been dropped or the cabinet damaged;
the printer does not operate normally or exhibits a distinct
change in performance.
If you use the printer in Germany, observe the following:
❏
To provide adequate short-circuit protection and overcurrent protection for this printer, the building installation
must be protected by a 16 Amp circuit breaker.
Bei Anschluß des Druckers an die Stromversorgung muß
sichergestellt werden, daß die Gebäudeinstallation mit einem
16 A-Überstromschalter abgesichert ist.
A Few Precautions
When using the printer
2
Do not put your hand inside the printer or touch the ink
❏
cartridges during printing.
Do not move the print head by hand; otherwise, you may
❏
damage the printer.
Always turn the printer off using the
❏
this button is pressed, the
goes off. Do not unplug the printer or turn off the power to
the outlet until the
Before transporting the printer, make sure the print head is in
❏
the home (far right) position and the ink cartridges are in
place.
power light stops flashing.
P
power light flashes briefly then
P
power button. When
P

When handling the ink cartridges
Keep ink cartridges out of the reach of children. Do not allow
❏
children to drink from or otherwise handle the cartridges.
If ink gets on your skin, wash it off with soap and water. If it
❏
gets in your eyes, flush them immediately with water.
Do not shake an ink cartridge; this can cause leakage.
❏
Install the ink cartridge immediately after you remove it from
❏
its package. Leaving the cartridge unpacked for a long time
before use may result in reduced print quality.
Once you install an ink cartridge, do not open the clamp or
❏
remove the cartridge except to replace it with a new one. The
cartridge may become unusable otherwise.
Do not use an ink cartridge beyond the date printed on the
❏
cartridge carton. For best results, use up the ink cartridges
within six months of installing them.
Do not dismantle the ink cartridges or try to refill them. This
❏
could damage the print head.
When choosing a place for the printer
Place the printer on a flat, stable surface that is larger than the
❏
printer. The printer will not operate properly if it is tilted or
at an angle.
Avoid places subject to rapid changes in temperature and
❏
humidity. Also keep the printer away from direct sunlight,
strong light, or heat sources.
Avoid places subject to shocks and vibrations.
❏
Leave enough room around the printer to allow for sufficient
❏
ventilation.
3

Place the printer near a wall outlet where the plug can be
❏
easily unplugged.
Note for French-speaking users:
Placez l’imprimante près d’une prise de contacte où la fiche peut être
débranchée facilement.
NERGY STAR Compliance
E
As an ENERGY STAR Partner, EPSON has
E
determined that this product meets the
S
TAR guidelines for energy efficiency.
E
The International
a voluntary partnership with the computer and office equipment
industry to promote the introduction of energy-efficient personal
computers, monitors, printers, fax machines, and copiers in an
effort to reduce air pollution caused by power generation.
NERGY STAR Office Equipment Program is
NERGY
For United Kingdom Users
Use of options
EPSON (UK) Limited shall not be liable against any damages or
problems arising from the use of any options or consumable
products other than those designated as Original EPSON
Products or EPSON Approved Products by EPSON (UK) Limited.
Safety information
Warning:
w
4
This appliance must be earthed. Refer to the rating plate for
voltage and check that the appliance voltage corresponds to the
supply voltage.

Important:
The wires in the mains lead fitted to this appliance are coloured in
accordance with the following code:
Green and yellow — Earth
Blue — Neutral
Brown — Live
If you have to fit a plug:
As the colours of the mains lead of this appliance may not match
coloured markings used to identify the terminals in a plug, please
proceed as follows:
The green and yellow wire must be connected to the terminal in
the plug which is marked with the letter E or the earth symbol (
The blue wire must be connected to the terminal in the plug
marked with the letter N.
The brown wire must be connected to the terminal in the plug
marked with the letter L.
If damage occurs to the plug, replace the cord set or consult a
qualified electrician.
G
).
Replace fuses only with a fuse of the correct size and rating.
Warnings, Cautions, and Notes
Warnings
w
c
Notes
contain important information and useful tips on the operation of your
printer.
must be followed carefully to avoid bodily injury.
Cautions
must be observed to avoid damage to your equipment.
5

Printer Parts and Functions
Printer Parts and Control Panel Functions
paper support
edge guides
sheet feeder
output tray extension
ink cartridge clamps
printer cover
output tray
adjust lever
6
control panel
Buttons
Button Function
P
Power
E
Load/Eject
R
Cleaning
Lights
Light Printer Status
P
Power
S
Paper out
Turns the printer on and off.
Clears the printer's memory if pressed twice while the
power is on.
Loads or ejects paper if pressed and released within
2seconds.
Resumes printing if pressed and released after a paper
out error.
Moves the print head to the ink cartridge replacement
position if pressed for 3 seconds while the
color ink out light is flashing or on.
A
Returns the print head to its home position after ink
cartridge replacement.
Performs print head cleaning if pressed for 3 seconds
when the
On when the printer is on.
Flashes when receiving data, printing, replacing an ink
cartridge, charging ink, or cleaning the print head.
On when the printer is out of paper. Load paper in the
sheet feeder, then press the
resume printing.
Flashes when the paper is jammed. Take all of the
paper out of the feeder, then reload the paper. If the
light continues to flash, turn off the printer and gently
pull all the paper out of the printer.
black or
B
color ink out light is off.
A
load/eject button to
E
black or
B
B
Black ink out
A
Color ink out
Flashes when the black ink cartridge is nearly empty.
On when the black ink cartridge is empty. Replace the
black ink cartridge (S020187).
Flashes when the color ink cartridge is nearly empty.
On when the color ink cartridge is empty. Replace the
color ink cartridge (S020191).
7
Loading Special Paper
Loading Special Paper and Other Media
You can print on a wide variety of special media, including ink
jet paper, photo quality glossy film, photo paper, transparencies,
envelopes, index cards, and adhesive sheets.
When loading special paper distributed by EPSON, read the
instruction sheets packed with your special media first and keep
the following points in mind. For more details on using such
media, see “Paper Handling” in the online
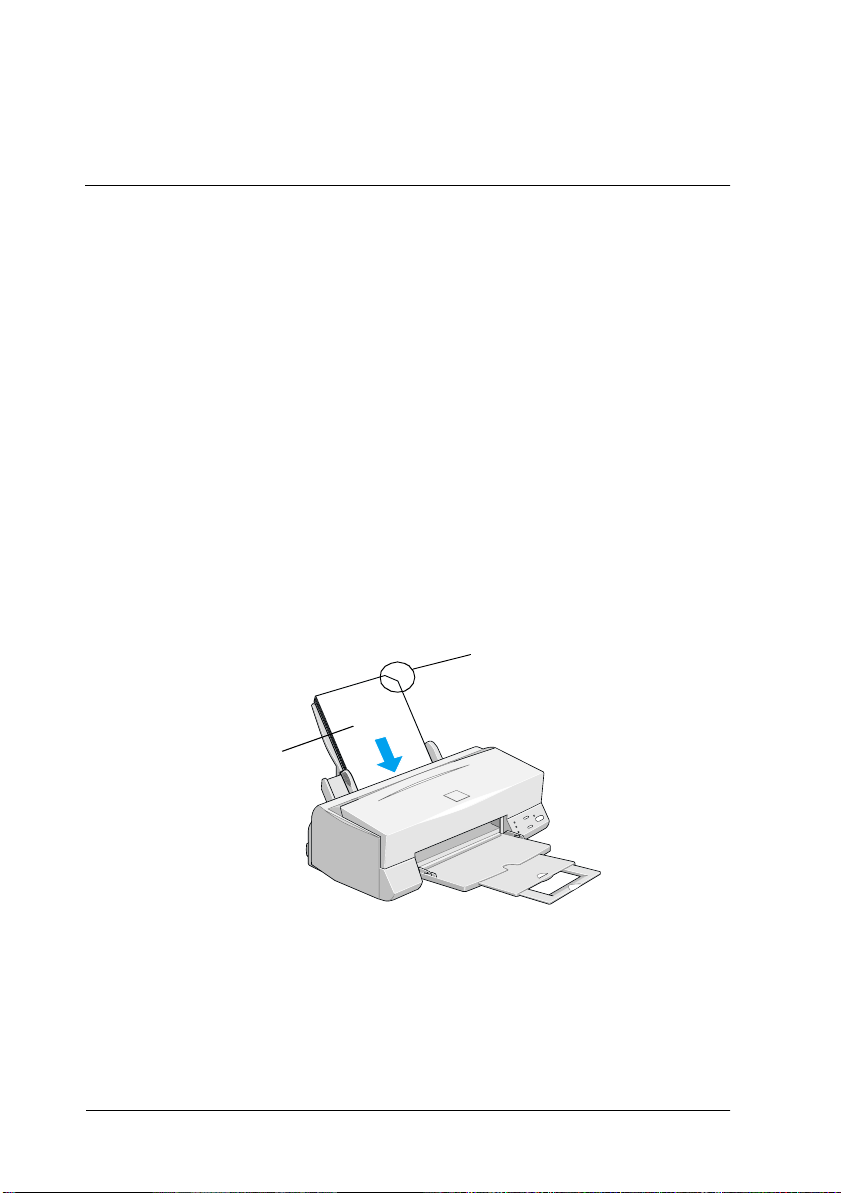
Make sure the printable side of the paper is facing up when
❏
loading media into the sheet feeder. See the instruction sheets
packed with the media to determine which side is the
printable surface. Some media have cut corners to help
identify the correct loading direction, as shown in the
illustration.
Reference Guide
cut corner
.
8
printable
side up
Make sure the paper stack fits under the arrow mark located
❏
on the inside surface of the left edge guide.

Loading capacity for envelopes and EPSON special media is
❏
explained below.
Envelopes Up to 10 envelopes.
Note:
If the total thickness of the stack of
envelopes exceeds 10 mm, press each
envelope flat before loading.
360 dpi Ink Jet Paper and
Photo Quality Ink Jet Paper
Photo Quality Ink Jet Card,
Ink Jet Note Card, and Ink
Jet Greeting Card
Photo Quality Glossy Film One sheet at a time for best results. Always
Ink Jet Transparencies Up to 30 t ransparencies. Always put a sheet
Photo Quality Self Adhesive
Sheet
Photo Paper Up to 20 sheets of 4×6 inch Photo Paper.
Photo Stickers 16 and Photo
Stickers 4
Up to the arrow mark on the left edge
guide.
Up to 30 index cards. Always place the
included support sheet* under the cards.
put a support sheet* or a sheet of plain
paper under the glossy film.
If you wish to load multiple sheets, load a
maximum of 20 sh eets and set the minimum
top margin of the page to 30 mm.
of plain paper under the stack of
transparencies.
One sheet at a time.
Always put a support sheet* under the
stack of Photo Paper.
200×300 mm Photo Paper can only be
loaded 1 sheet at a time.
One sheet at a time. Always put the
included Support Sheets A and B under the
stack of Photo Stickers.
Panoramic Photo Paper
and Iron-On Cool Peel
Transfer Paper
One sheet at a time.
9

Matte Paper-Heavyweight Up to 20 sheets. Always put a support sheet*
* Take care not to print on support sheets loaded under special media.
under the stack of Matte PaperHeavyweight.
About special media cleaning sheets
Cleaning sheets packaged with EPSON special media should not
be used with this printer. The cleaning function performed by
these sheets is not necessary with this type of printer, and the
sheets could jam in the printer.
Loading Envelopes
When printing on envelopes, please note the following:
You can load up to 10 envelopes into the sheet feeder.
❏
Note:
The folding quality and thickness of envelopes varies widely. If the
total thickness of the stack of envelopes exceeds 10 mm, press each
envelope in the stack flat before loading.
10
Set the adjust lever to the “+” position. To do this, open the
❏
printer cover and reposition the lever.
Note:
❏
Return the adjust lever to the “0” position, which is the normal
position, after you finish printing on envelopes. Leaving the
lever in the “+” position may cause gaps to appear in images
printed on other media.
❏
When the adjust lever is in the “+” position, make sure the High
Speed setting in the printer driver’s Advanced dialog box is off.
To turn this option off, you may also need to change the Print
Quality setting.
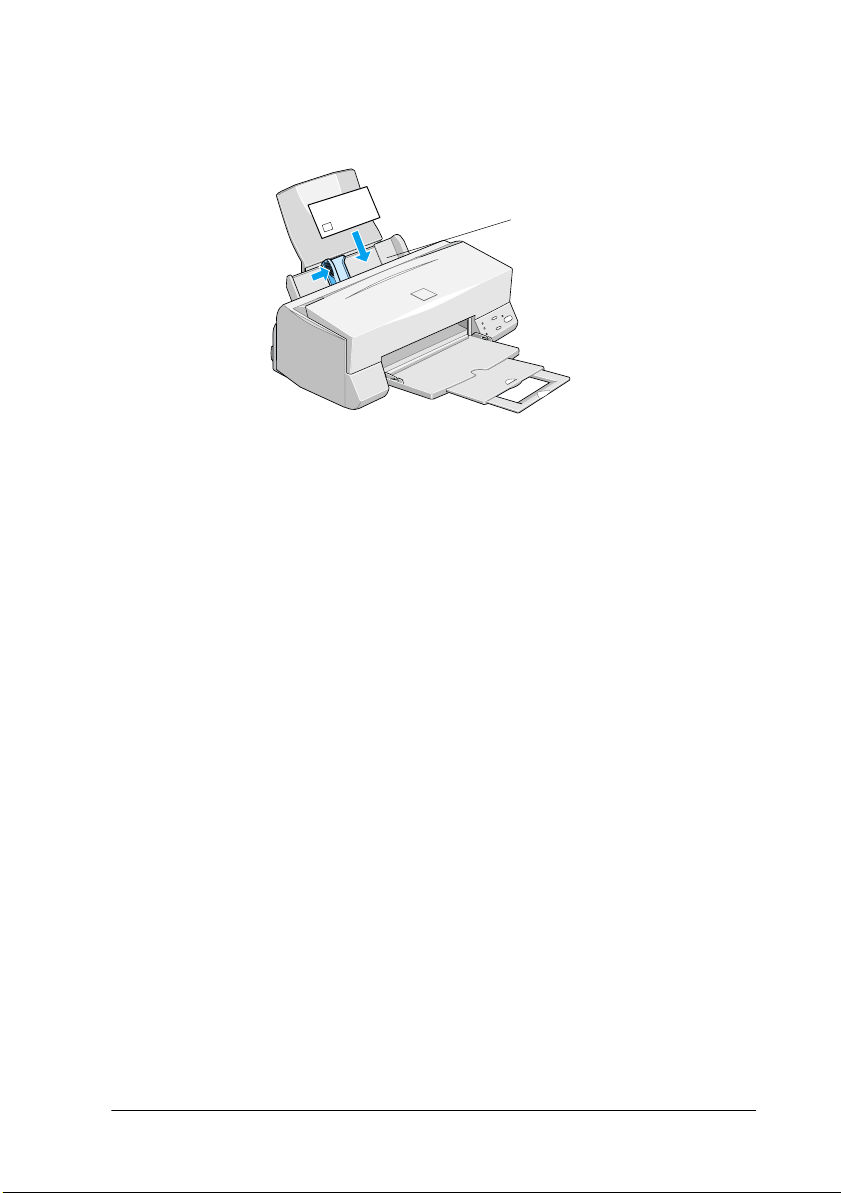
Load envelopes flap edge first with the flap side down, as
❏
shown in the illustration.
Available envelopes sizes are:
No.10, DL, C6
Do not use envelopes that are curled or folded. Make sure to
❏
flatten the envelope flaps before loading. Also avoid using
envelopes that are too thin; they may curl during printing.
❏
Select
as the Media Type setting on the printer
Plain Paper
driver.
11

Printing with Windows
Printer Software Introduction
The printer software includes a printer driver and printer utilities.
The printer driver lets you choose from a wide variety of settings
to get the best results from your printer. The printer utilities help
you check the printer and keep it in top condition.
Getting more information
For information on using the printer driver, see “Making Changes
to Printer Driver Settings” on page 13.
For information on using the printer utilities, see “Using the
Printer Utilities” in the online
Note:
The specific features available in the printer software vary depending on
the version of Windows you are using.
Reference Guide
.
Online help provides more information about the printer
software. See “Getting Information Through Online Help” on
page 21 for instructions on accessing help.
Accessing the printer software
You can access the printer software from most Windows
applications, or from the Windows Start menu.
When you access the printer software from a Windows
application, the settings you make apply only to the application
you are using.
When you access the printer software from the Start menu, the
settings you make apply to all of your Windows applications.
12

From Windows applications
Open the File menu and choose
Printer, Setup, Options
Properties
, or
Print
Print Setup
or
. Then click
. (Depending on your
application, you may need to click a combination of these
buttons.) The printer software window appears.
From the Start menu
1. Click
Start
, point to
Settings
, then click
Printers
.
2. For Windows 95 and 98, select your printer, then click
Properties
printer, then click
on the File menu. For Windows NT 4.0, select your
Document Defaults
on the File menu. The
printer software window appears.
Making Changes to Printer Driver Settings
The printer software features the following printer driver setting
menus.
Main Media Type, Ink, Mode
Paper Paper size, Copies, Orientation, Printable Area
Layout Reduce/Enlarge, Multi-Page, Watermark
The Mode options on the Main menu are arranged to give you
four levels of control over the printer driver, as explained below.
Automatic
PhotoEnhance
The quickest and easiest way to start
printing. See “Using the Automatic
mode” on page 17.
Lets you apply a variety of imagecorrection settings specially designed for
photos. See “Using the Photo Enhance
mode” on page 18.
13

Custom
Choose from a list of ready-made settings
suited to the kind of document you want
to print. You can also add your own
settings to this list. See “Using the Custom
mode” on page 19.
Advanced
Allows you to make detailed settings to fit
your individual needs. You can also add
your settings to the Custom Settings list.
In addition to making groups of settings that affect overall print
quality, you can also modify individual aspects of the print style
and layout using the Paper and Layout menus.
Making the Media Type setting
The Media Type setting determines what other settings are
available, so you should always make this setting first.
On the Main menu, select the Media Type setting that matches
the paper you loaded in the printer. Find your paper in the list
below, then select a corresponding Media Type setting (shown in
larger type). For some kinds of paper, you have several Media
Type settings to choose from.
14
 Loading...