

Epson Stylus 925 Quick Reference Guide
EPSON Stylus
®
Photo 925
Quick Reference
Quick Reference
CPD-14610
Printing Without a Computer

1
Using This Guide
Your EPSON Stylus Photo 925 lets you print without even connecting a computer.
It’s as easy as following these steps:
Turn on the printer
Connect your camera or insert its memory card (pages 3 and 4)
Select your photos (page 6) and print settings (page 8)
Load paper (page 5 for sheets or page 12 for roll paper)
Print your photos
For more details on printing—with or without
a computer—see Printer Basics.
Keeping This Guide Handy
Use the hook that came with this guide to
hang it on the side of your printer.

2
Using the Control Panel
Cancel control panel
settings or cancel
printing
Start printing
Select your photos
and print settings
Turn on the printer
Load, cut, and eject
roll paper
3
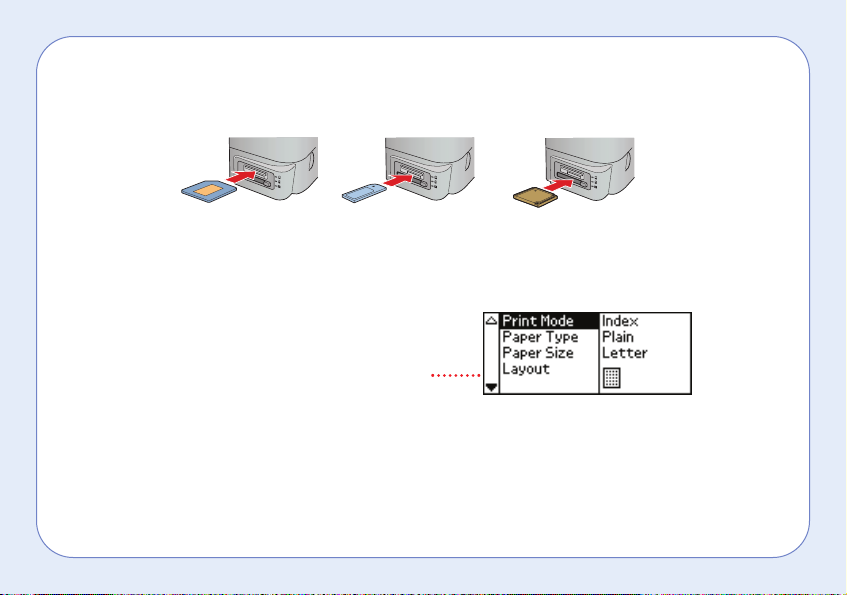
Inserting a Memory Card
1. Insert the memory card into the appropriate slot, as shown:
Note: If you’re using a Memory Stick or SmartMedia card, it won’t be possible
to insert it fully; this is normal.
2. The printer checks for images on the card.
After a moment, you see a screen similar to
this and your images are available for printing.
Caution: Do not eject a card while the light next to the card slot is flashing, or you may
lose data on the card.
If your computer is connected to the printer, do the following before ejecting the card.
Windows XP or 2000: Click the Unplug or Eject Hardware icon on the taskbar, then stop
the EPSON Mass Storage Device. Macintosh: Drag the memory card icon to the trash.
SmartMedia™
(top)
Memory Stick
®
(middle)
CompactFlash™ or
Microdrive™ (bottom)
4
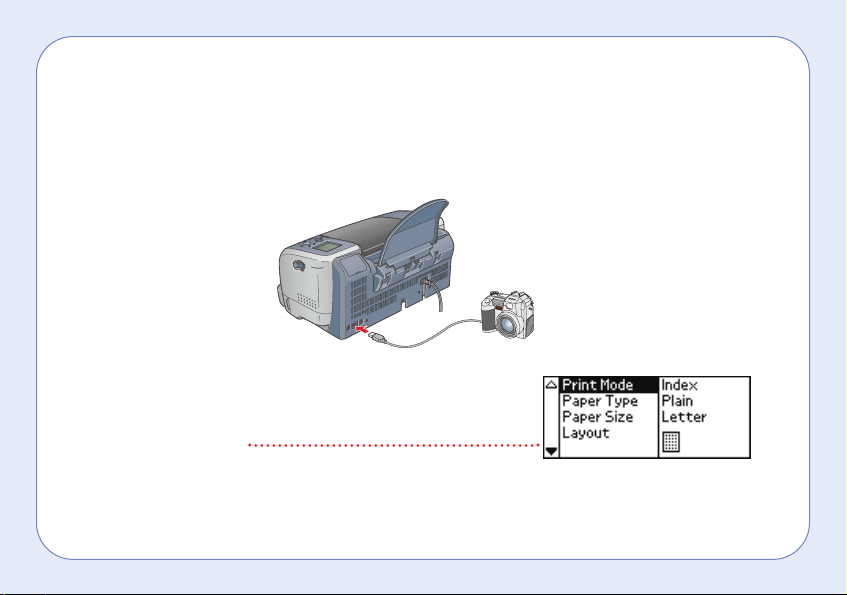
Connecting a Digital Camera
1. Remove any memory cards from the printer.
2. Connect the USB cable from your camera to the back of the printer. Some digital cameras
require a special USB cable; if so, be sure to use the one that came with the camera.
3. Make sure the printer and your camera are turned on.
The printer checks for images on the card. After a moment,
you see a screen similar to this and your images are
available for printing.
Note: Not all cameras are compatible. If necessary, remove the camera’s card and
insert it in the printer as described on page 3.
 Loading...