

Page 1
All in One Product
Basic Operation Guide
English
Safety Instructions . . . . . . . . . . . . . . . . . . . . . . . . . . . . . . .3
Important Safety Instructions. . . . . . . . . . . . . . . . . . . . . . . . . . 3
Warnings, Cautions, and Notes . . . . . . . . . . . . . . . . . . . . . . . . 3
Using the Control Panel . . . . . . . . . . . . . . . . . . . . . . . . . .4
Control Panel Functions . . . . . . . . . . . . . . . . . . . . . . . . . . . . . . 4
Basic Copying . . . . . . . . . . . . . . . . . . . . . . . . . . . . . . . . . .5
Overview of the Basic Procedure. . . . . . . . . . . . . . . . . . . . . . . 5
Loading Paper. . . . . . . . . . . . . . . . . . . . . . . . . . . . . . . . . . . . . . . 5
Placing a Photo or Document on the Document Table. . . . . 7
Changing the Copy Layout. . . . . . . . . . . . . . . . . . . . . . . . . . . . 8
Changing Copy Settings . . . . . . . . . . . . . . . . . . . . . . . . . . . . . . 9
Useful Information for Copying. . . . . . . . . . . . . . . . . . . . . . . 11
Copying on CD/DVD . . . . . . . . . . . . . . . . . . . . . . . . . . . 13
Loading a CD/DVD. . . . . . . . . . . . . . . . . . . . . . . . . . . . . . . . . 13
Copying a CD/DVD . . . . . . . . . . . . . . . . . . . . . . . . . . . . . . . . 13
Adjusting the Print Position . . . . . . . . . . . . . . . . . . . . . . . . . . 14
Ejecting the CD/DVD Tray. . . . . . . . . . . . . . . . . . . . . . . . . . . 14
Printing Directly from a Memory Card -
Basic Printing . . . . . . . . . . . . . . . . . . . . . . . . . . . . . . . . 15
Inserting Memory Cards . . . . . . . . . . . . . . . . . . . . . . . . . . . . . 15
Printing Basics to 10 x 15 cm Paper . . . . . . . . . . . . . . . . . . . . 16
Printing Using an Index Sheet . . . . . . . . . . . . . . . . . . . . . . . . 16
Changing the View of Photos on the LCD Panel and
Selecting Photos. . . . . . . . . . . . . . . . . . . . . . . . . . . . . . . . . . 18
Printing Directly from a Memory Card –
Printing Options . . . . . . . . . . . . . . . . . . . . . . . . . . . . . .20
Printing a Single Photo . . . . . . . . . . . . . . . . . . . . . . . . . . . . . . 20
Printing Multiple Photos onto One Sheet. . . . . . . . . . . . . . . 20
Printing Enlarged Images . . . . . . . . . . . . . . . . . . . . . . . . . . . . 21
Printing Photo Stickers . . . . . . . . . . . . . . . . . . . . . . . . . . . . . . 21
Printing on CD/DVD. . . . . . . . . . . . . . . . . . . . . . . . . . . . . . . . 22
Printing a CD Jacket. . . . . . . . . . . . . . . . . . . . . . . . . . . . . . . . . 23
Printing on EPSON Iron-On Cool Peel Transfer Paper . . . 24
Printing Using a Combo Printing Sheet . . . . . . . . . . . . . . . . 24
Printing with DPOF Functions. . . . . . . . . . . . . . . . . . . . . . . . 26
Printing with Photo Frames . . . . . . . . . . . . . . . . . . . . . . . . . . 26
Changing Print Settings. . . . . . . . . . . . . . . . . . . . . . . . . . . . . . 28
Printing from Film . . . . . . . . . . . . . . . . . . . . . . . . . . . . . . . 31
Loading and Setting Film on the Document Table . . . . . . . 31
Printing Basics to10 x 15 cm Paper. . . . . . . . . . . . . . . . . . . . . 32
Printing a Single Photo . . . . . . . . . . . . . . . . . . . . . . . . . . . . . . 33
Printing Enlarged Images . . . . . . . . . . . . . . . . . . . . . . . . . . . . 33
Selecting the Film Type. . . . . . . . . . . . . . . . . . . . . . . . . . . . . . 34
Changing Print Settings. . . . . . . . . . . . . . . . . . . . . . . . . . . . . . 34
Storing the Film Holder. . . . . . . . . . . . . . . . . . . . . . . . . . . . . . 34
Scanning to a Memory Card . . . . . . . . . . . . . . . . . . . . .35
Scanning and Saving a document to a Memory Card . . . . 35
Scanning and Saving a film to a Memory Card. . . . . . . . . . 35
Printing Directly from a Digital Camera . . . . . . . . . . . .37
Printing Directly from a Digital Camera. . . . . . . . . . . . . . . . 37
Printing Directly from an External Device . . . . . . . . . . .38
Printing Directly from an External Device. . . . . . . . . . . . . . 38
Replacing Ink Cartridges . . . . . . . . . . . . . . . . . . . . . . . . 39
Choosing Ink Cartridges . . . . . . . . . . . . . . . . . . . . . . . . . . . . . 39
Checking the Ink Level . . . . . . . . . . . . . . . . . . . . . . . . . . . . . . 39
Precautions on Ink Cartridge Replacement . . . . . . . . . . . . . 39
Replacing Ink Cartridges. . . . . . . . . . . . . . . . . . . . . . . . . . . . . 40
Maintenance and Transporting . . . . . . . . . . . . . . . . . . .41
Checking the Print Head Nozzles . . . . . . . . . . . . . . . . . . . . . 41
Cleaning the Print Head . . . . . . . . . . . . . . . . . . . . . . . . . . . . . 41
Aligning the Print Head . . . . . . . . . . . . . . . . . . . . . . . . . . . . . 42
Restoring Factory Settings . . . . . . . . . . . . . . . . . . . . . . . . . . . 42
Transporting This Product . . . . . . . . . . . . . . . . . . . . . . . . . . . 43
Changing the language displayed on the LCD panel. . . . . 43
Troubleshooting . . . . . . . . . . . . . . . . . . . . . . . . . . . . . . . .44
Error Messages . . . . . . . . . . . . . . . . . . . . . . . . . . . . . . . . . . . . . 44
Clearing the Jammed Paper . . . . . . . . . . . . . . . . . . . . . . . . . . 44
The Copied Image Is Improperly Sized . . . . . . . . . . . . . . . . 45
The Printout Is Blurry or Smeared. . . . . . . . . . . . . . . . . . . . . 45
A Message Prompting You to Format the Memory Card
Appears . . . . . . . . . . . . . . . . . . . . . . . . . . . . . . . . . . . . . . . . 45
The Terms on the LCD Panel Are Is Not Displayed in
Your Language . . . . . . . . . . . . . . . . . . . . . . . . . . . . . . . . . . 45
Customer Support . . . . . . . . . . . . . . . . . . . . . . . . . . . . . .46
Contacting Customer Support . . . . . . . . . . . . . . . . . . . . . . . . 46
Technical Support Web Site . . . . . . . . . . . . . . . . . . . . . . . . . . 46
Product Specifications . . . . . . . . . . . . . . . . . . . . . . . . . .46
Summary of Panel Settings . . . . . . . . . . . . . . . . . . . . . . .48
Index . . . . . . . . . . . . . . . . . . . . . . . . . . . . . . . . . . . . . . . .51
1
Page 2
Parts
All in One Product
Basic Operation Guide
No part of this publication may be reproduced, stored in a
retrieval system, or transmitted in any form or by any means,
electronic, mechanical, photocopying, recording, or otherwise,
without t he prior written p ermission of Sei ko Epson Corpora tion.
The information contained herein is designed only for use with
this product. Epson is not responsible for any use of this
information as applied to other printers.
Neither Seiko Epson Corporation nor its affiliates shall be liable
to the purchaser of this product or third parties for damages,
losses, costs, or expenses incurred by the purchaser or third
parties as a result of accident, misuse, or abuse of this product or
unauthorized modifications, repairs, or alterations to this
product, or (excluding the U.S.) failure to strictly comply with
Seiko Epson Corporation's operating and maintenance
instructions.
Seiko Epson Corporation shall not be liable for any damages or
problems arising from the use of any options or any consumable
products other than those designated as Original Epson Products
or Epson Approved Products by Seiko Epson Corporation.
Seiko Epson Corporation shall not be held liable for any damage
resulting from electromagnetic interference that occurs from the
use of any interface cables other than those designated as Epson
Approved Products by Seiko Epson Corporation.
®
EPSON
trademark of Seiko Epson Corporation.
PRINT Image Matching™ and the PRINT Image Matching logo
are trademarks of Seiko Epson Corporation. Copyright © 2001
Seiko Epson Corporation. All rights reserved.
USB DIRECT-PRINT™ and the USB DIRECT-PRINT logo are
trademarks of Seiko Epson Corporation. Copyright © 2002 Seiko
Epson Corporation. All rights reserved.
The Bluetooth word mark and logos are owned by the Bluetooth
SIG, Inc. and any use of such marks by Seiko Epson Corporation
is under license.
Microsoft
Corporation.
DPOF™ is a trademark of CANON INC., Eastman Kodak
Company, Fuji Photo Film Co., Ltd. and Matsushita Electric
Industrial Co., Ltd.
SD™ is a trademark.
Memory Stick, Memory Stick Duo, Memory Stick PRO, and
Memory Stick PRO Duo are trademarks of Sony Corporation.
xD-Picture Card™ is a trademarks of Fuji Photo Film Co.,Ltd.
General Notice: Other product names used herein are for
identification purposes only and may be trademarks of their
respective owners. Epson disclaims any and all rights in those
marks.
Copyright © 2005 Seiko Epson Corporation. All rights reserved.
is a registered trademark and EPSON Stylus™ is a
®
and Windows® are registered trademarks of Microsoft
edge guide
transportation
clamp
CD/DVD guide
paper support
back tray
feeder guard
edge guide
front cover/front tray
reflective
document mat
document table
control panel
memory card slot
external device USB connector
scanner unit
cartridge cover
cartridge cover (left)
(right)
output tray
print head
2
Page 3

Safety Instructions
Important Safety Instructions
Read all of the instructions in this section when
setting up and using this product.
When placing this product
❏ Avoid places subject to rapid changes in
temperature and humidity. Also, keep this
product away from direct sunlight, strong light,
and heat sources.
When using this product
❏ Do not put your hand inside this product.
❏ Do not block or cover the vents and openings in
this product.
❏ Do not open the ink cartridge cover when this
product is performing an action such as printing.
You may print incorrectly.
❏ Do not attempt to service this product by
yourself.
❏ Do not insert objects into the slots on this
product.
❏ Take care not to spill liquid on this product.
English
❏ Avoid places subject to dust, shocks, or
vibrations.
❏ Leave enough room around this product for
sufficient ventilation.
❏ Place this product near a wall outlet where you
can easily plug in and unplug this product.
❏ Place this product on a flat, stable surface that
extends beyond the base of this product in all
directions. If you place this product by the wall,
leave more than 10 cm between the back of this
product and the wall. This product will not
operate properly if it is tilted at an angle.
❏ When storing or transporting this product, do
not tilt it, stand it on its side, or turn it upside
down. Otherwise ink may leak from the
cartridge.
When choosing a power source
❏ Use only the type of power source indicated on
the label on the back of this product.
❏ Use only the power cord that comes with this
product. Use of another cord may result in fire
or electric shock.
❏ This product’s power cord is for use with this
product only. Use with other equipment may
cause fire or electric shock.
❏ Unplug this product and refer servicing to
qualified service personnel under the following
conditions:
The power cord or plug is damaged; liquid has
entered into this product; this product has been
dropped or the cover damaged; this product
does not operate normally or exhibits a distinct
change in performance.
When handling ink cartridges
❏ Do not shake the ink cartridges; this can cause
leakage.
❏ Keep the ink cartridge out of the reach of
children. Do not allow children to handle it, or
drink ink.
❏ Be careful when you handle used ink cartridges,
as there may be some ink remaining around the
ink supply port. If ink gets on your skin, wash
the area thoroughly with soap and water. If ink
gets into your eyes, flush them i mmediately with
water. If discomfort or vision problems remain
after a thorough flushing, see a doctor
immediately.
❏ Do not remove or tear the label on the cartridge;
otherwise, ink will leak.
❏ Be sure your AC power cord meets the relevant
local safety standards.
❏ Do not use a damaged or frayed power cord.
❏ If you use an extension cord with this product,
make sure that the total ampere rating of the
devices plugged into the extension cord does not
exceed the cord’s ampere rating. Also, make sure
that the total ampere rating of all devices
plugged into the wall outlet does not exceed the
wall outlet’s ampere rating.
Warnings, Cautions, and Notes
Warnings
w
must be followed carefully to avoid bodily injury.
Cautions
c
must be observed to avoid damage to your
equipment.
Notes
Contain important information and useful tips on the
operation of your product.
Safety Instructions 3
Page 4
Using the Control Panel
Control Panel Functions
Buttons
Icon Button Function
On Turns this product on and off. When this product turns on, the On light remains lit,
indicating that this product has completed its initialization.
Setup Enters Setup Mode.
Creative Projects Copies in Copy Photo or print a photos using a Combo Printing Sheet.
Memory Card Enters Memory Card Print Mode.
Film Enters Film Print Mode.
Copy Enters Copy Mode.
Scan Enters Scan Mode.
Screen View Changes the view of the photos in the memory card.
Options Displays detailed settings for each mode.
Back Cancels the operation on the LCD panel and returns to the previous menu.
Copies Sets the number of copies or prints.
B&W Copies or prints in grayscale.
Color Copies, prints, or scans in color.
Stop Stops copying, printing, or scanning. The sheet being copied or printed is ejected.
4-way Scroll Selects the menu items.
OK Enters the settings you have selected.
LCD panel
Displays a preview of the selected images, items or settings which can be changed with the buttons.
If you leave this product on without performing an operation for 13 minutes, the LCD display panel turns to black.
(Saving energy mode)
Press any other button than the P On button to revert the LCD display panel to the display which appeared before
it turned to black.
4 Using the Control Panel
Page 5
Basic Copying
Overview of the Basic Procedure
1. Press the Copy button.
2. Load appropriate paper.
& See “Loading Paper” of the next section
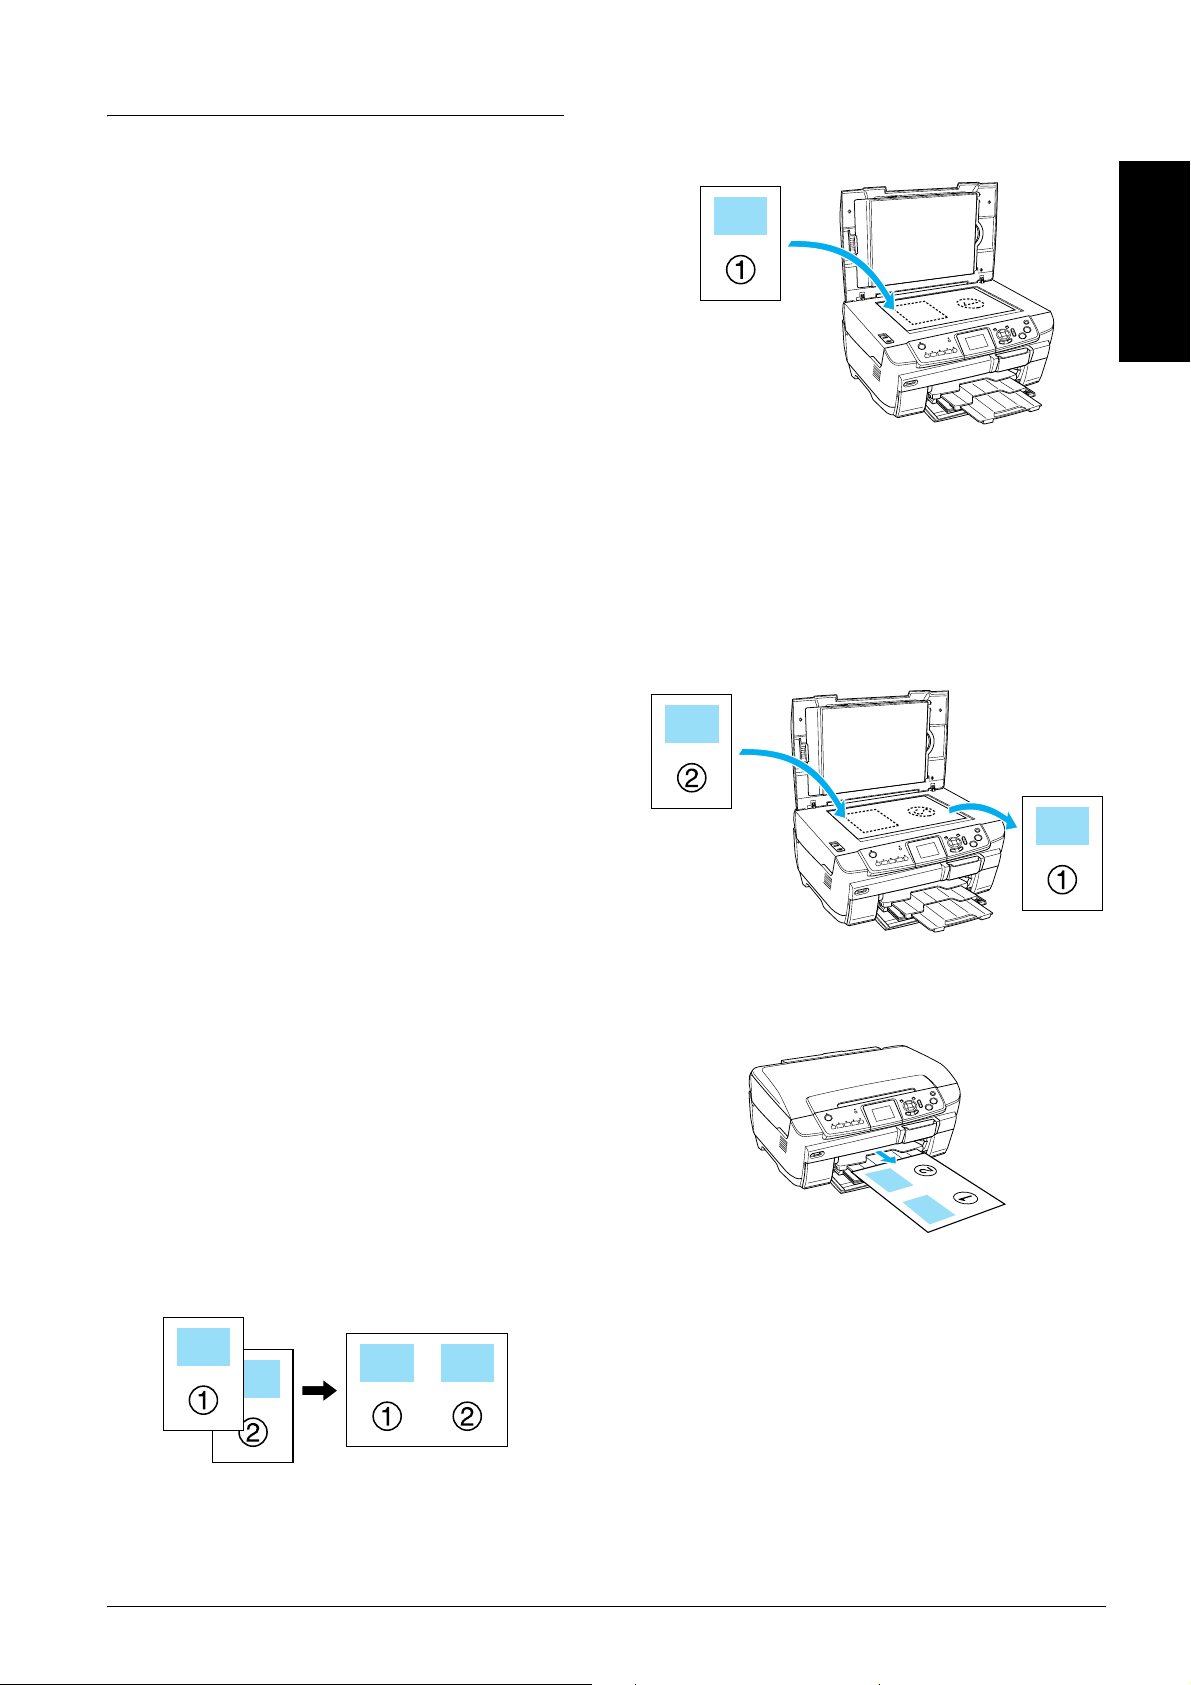
3. Place the original document.
& See “Placing a Photo or Document on the
Document Table” on page 7
Loading Paper
Note:
❏ Always load paper before you start printing.
❏ The print result is affected by the kind of paper you
use. For the best quality, use the appropriate paper.
English
❏ Keep enough space in front of this product for paper
to be fully ejected.
❏ Make sure the CD/DVD tray is not inserted in this
product and the CD/DVD guide is closed.
Loading A4 plain paper into the
front tray
Note:
Only A4 plain paper can be loaded into the front tray.
When loading paper other than A4 plain paper, load into
the back tray.
1. Open the front cover by pressing the hollow
portion as illustrated.
4. Change the copy layout if necessary.
& See “Changing the Copy Layout” on page 8
5. You can change the copy settings if necessary.
& See “Changing Copy Settings” on page 9
6. Press the x Color button to copy in color, or
x B&W button to copy in grayscale.
Note:
❏ If you need to stop copying, press the y Stop
button.
❏ Do not pull the paper out of this product.
❏ If the edge of the document is not copied correctly,
place the document slightly away from the edge
of the document table.
2. Fan a stack of paper, then tap it on a flat surface
to even the edges.
3. Load the paper with the printable side facing
down flash with the right edge guide. Then, slide
the paper into the front tray so that the edge of the
paper is level with the guideline on the front tray.
Caution:
c
Never open the scanner unit while scanning or
copying; otherwise, you may damage this product.
Basic Copying 5
Page 6

Caution:
c
Do not push the paper too far. If you do so, the
paper is not loaded correctly.
The paper is pushed past the
guideline for A4 paper.
2. Pull the paper support and slide out the
extension.
Some sheets of paper are
pushed past the guideline
for A4 paper.
4. Slide the left edge guide so that it meets the left
edge of the paper.
5. Pull the output tray and slide out the extension.
Note:
❏ You can load up to 150 sheets at a time.
3. Open the front cover by pressing the hollow
portion as illustrated.
4. Pull the output tray and slide out the extension.
5. Fan a stack of paper, then tap it on a flat surface
to even the edges.
❏ You cannot use plain paper when Borderless has been
selected in the Copy Layout.
Loading paper into the back tray
1. Open the feeder guard.
6 Basic Copying
6. Load the paper with the printable side facing up
and so it is against the right edge guide, then
slide it into the back tray.
Note:
Always load paper into the trays by the short edge
first.
Page 7
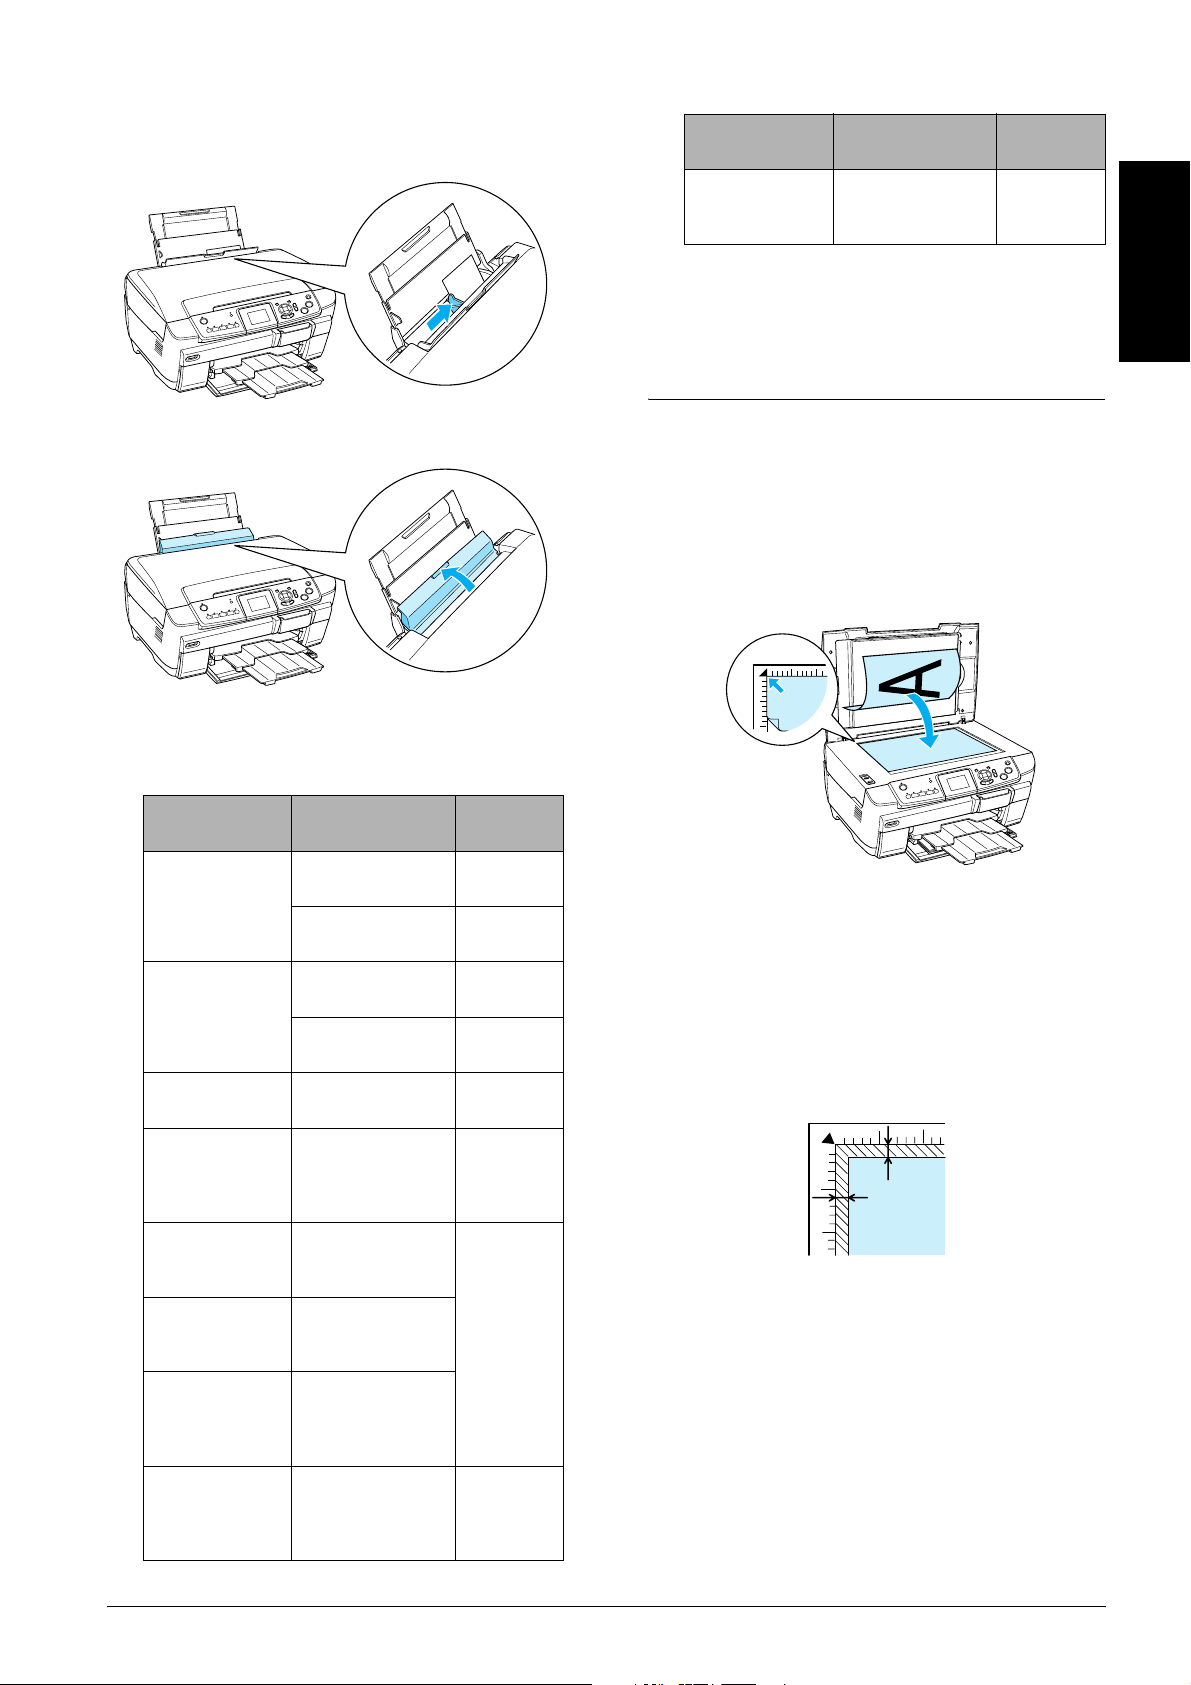
7. Slide the left edge guide so that it meets the left
edge of the paper.
Paper Type Paper Type
Settings
Loading
Capacity
8. Close the feeder guard.
Note:
❏ The loading capacity differs depending on the
following types of paper.
Iron-on Cool
Peel Transfer
Paper
* The appropriate paper type is automatically selected
when selecting Custom Print and Iron in the Memory
Card mode.
None*
(for printing from
a memory card)
One sheet
at a time
❏ You cannot use Plain Paper when Borderless has been
selected in the Copy Layout.
Placing a Photo or Document on the Document Table
1. Open the document cover. Place the original
document facing down on the document table.
Make sure that the document is properly
aligned.
English
Paper Type Paper Type
Plain Paper Plain (Front) Up to 150
EPSON Bright
White Ink Jet
Paper
Epson Photo
Paper
EPSON Photo
Quality Ink Jet
Paper
EPSON Matte
PaperHeavyweight
EPSON
Premium Glossy
Photo Paper
EPSON
Premium
Semigloss
Photo Paper
EPSON Photo
Stickers
Settings
Plain (Back) Up to 120
Bright White
(Front)
Bright White
(Back)
Photo Paper Up to 20
PQIJ/Matte (PQIJ
when copying
and Matte when
printing)
Matte Up to 20
Prem.Glossy
SemiGloss
Photo Stickers
(for copying and
printing from a
memory card)
Loading
Capacity
sheets
sheets
Up to 100
sheets
Up to 80
sheets
sheets
Up to 100
sheets
sheets
One sheet
at a time
Caution:
c
Never open the document cover beyond its
limit by intention.
Note:
When copying photos or copying on CD/DVD, place
the document 5 mm away from the edge of the
document table.
5 mm (max)
5 mm (max)
2. Make sure the reflective document mat is
attached to the document cover.
3. Close the document cover gently so that the
document does not move.
Note:
To copy the document properly, close the document
cover to prevent interference from the external light.
Basic Copying 7
Page 8
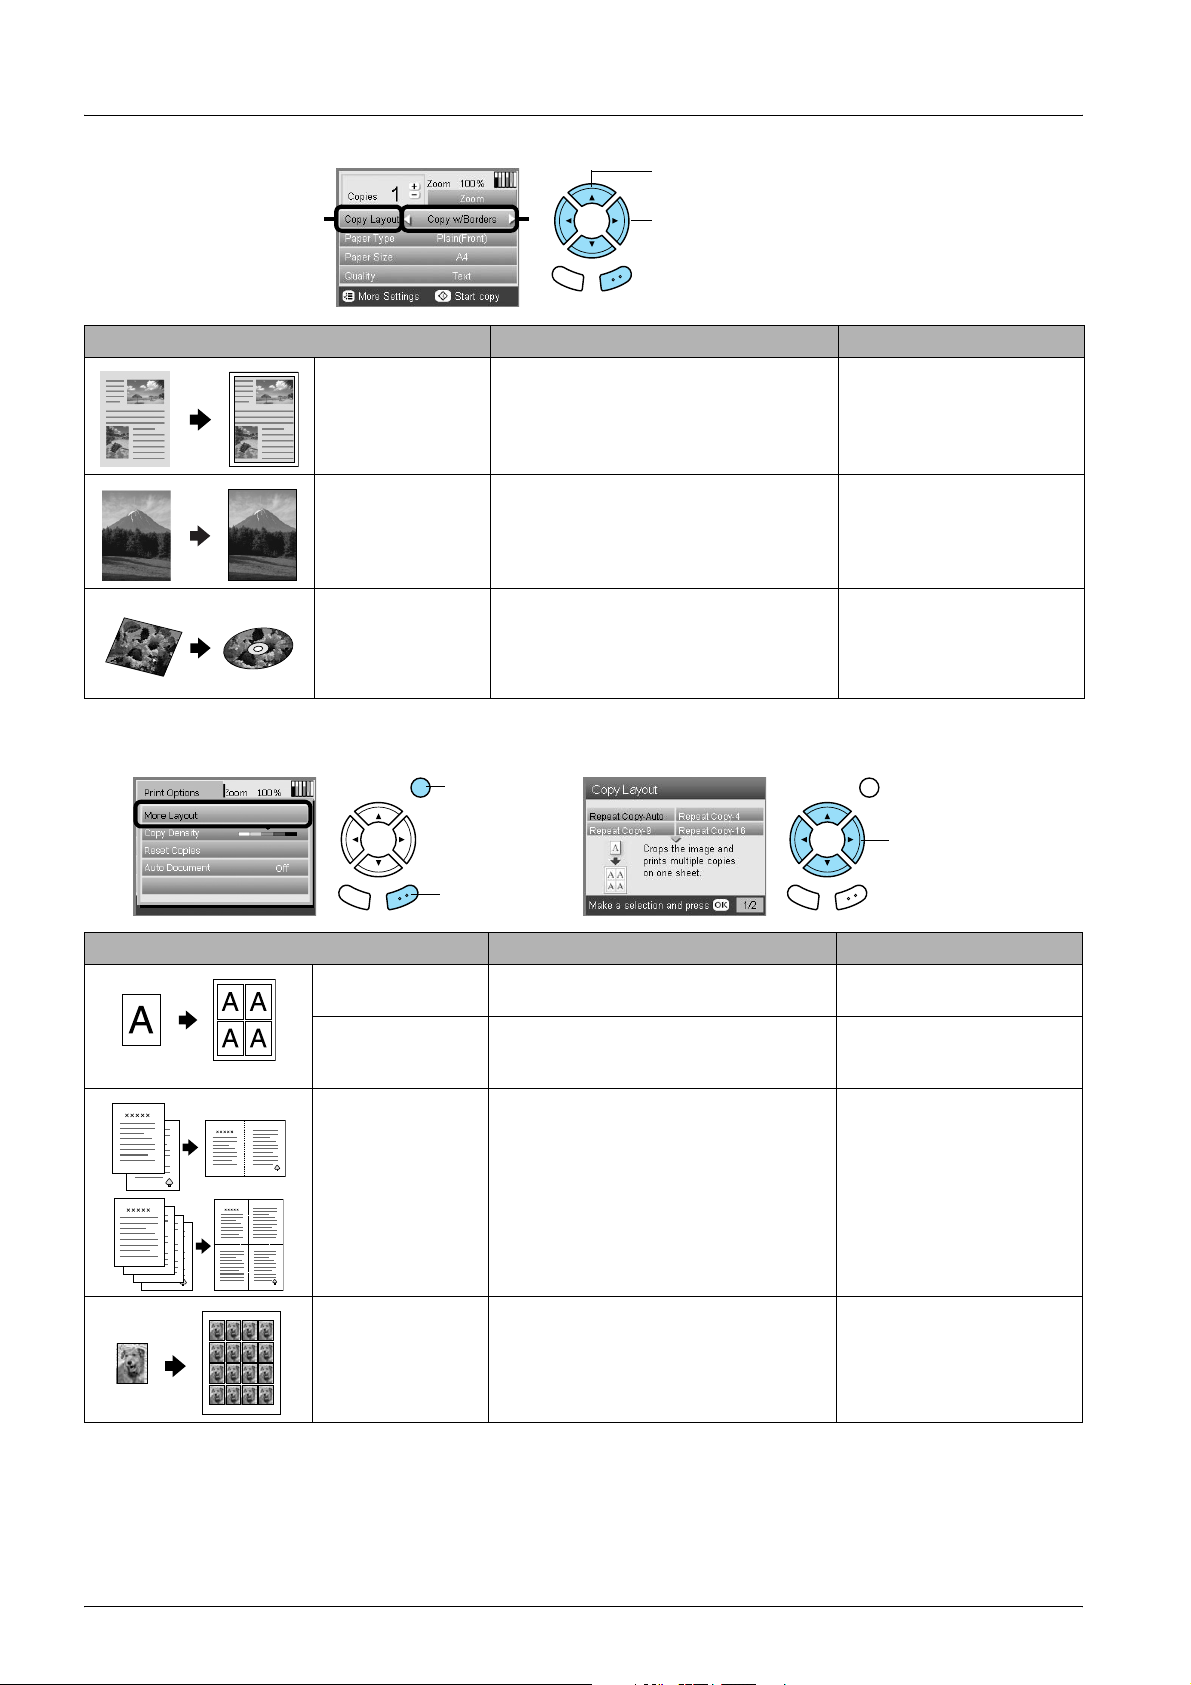
Changing the Copy Layout
1. Select Copy Layout.
21
Back OK
Copy Layout Feature Useful Information
Copy w/Borders
(Default setting)
Borderless Copies without margins. See “When copying in
CD Copy Copies an image onto a CD or DVD label. See “Copying on CD/DVD”
Copies with 3 mm margins.
2. Select the Copy Layout.
Borderless layout” on page
11
on page 13
Other copy layouts
1. Press the
Options button.
3. Select the Copy
Layout.
2. Press the
OK button.
Copy Layout Feature Useful Information
Repeat Copy-Auto Copies an image to its actual size as many
time as it will fit on an A4 page.
Repeat Copy-4
Repeat Copy-9
Repeat Copy-16
2-up Copy
4-up Copy
Photo Stickers Copies an image 16 times onto a Photo
Copies an image multiple times onto an
A4 page.
Copies several documents onto one A4
page.
Stickers sheet.
See “To copy in 2-up Copy
layout” on page 11
For details on adjusting the
Photo Stickers position, see
“Adjusting the print position
on Photo Stickers sheet” on
page 22.
Note:
The layout that you selected last in More Layout is added to Copy Layout. But this is replaced with the one you select next
time in More Layout.
8 Basic Copying
Page 9
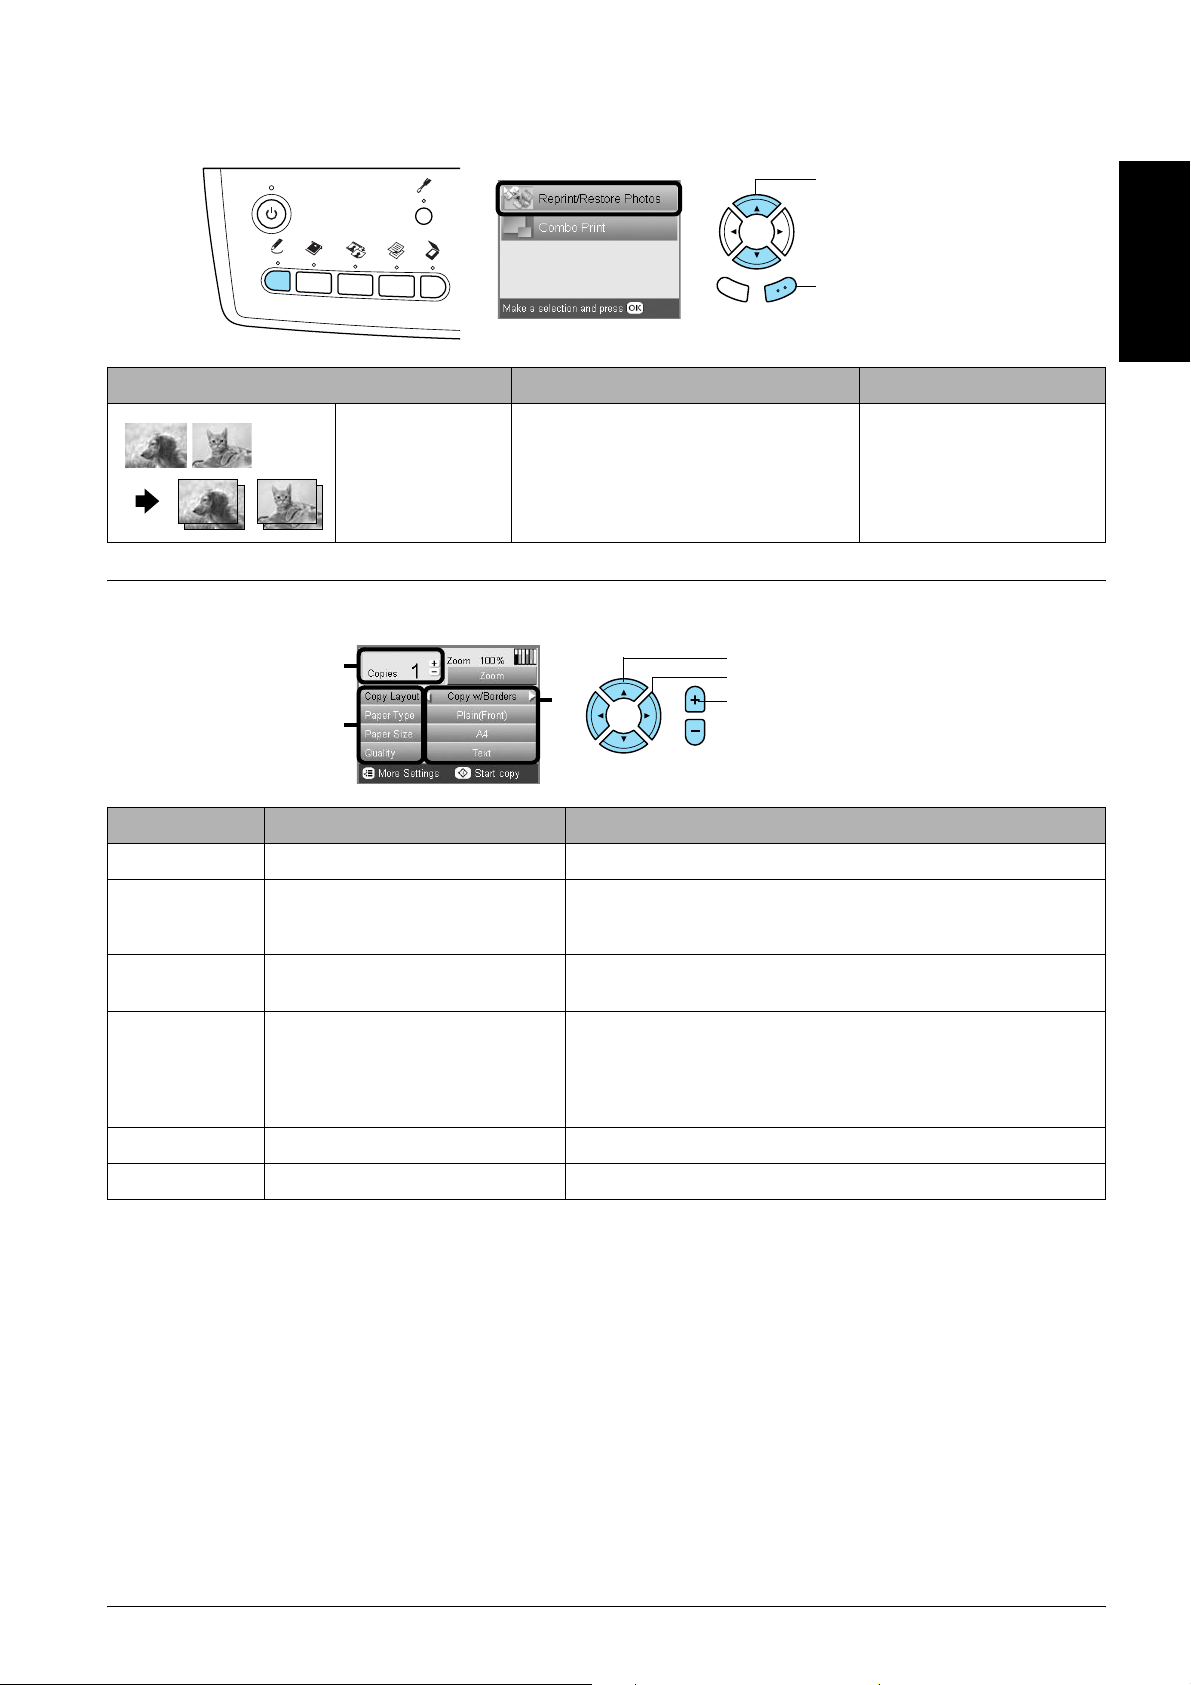
Copy photo layout
1. Select Reprint/Restore
Photos.
2. Press the OK button.
Back OK
Copy Layout Feature Useful Information
Copy Photo Copies multiple photos placed together
as separate copy.
The copied images are reduced or
enlarged automatically to fit the selected
paper size.
See “When copying in Copy
Photo” on page 12
Changing Copy Settings
.
3
2
1
Menu Item Setting Item Description
Copies 1 to 99 Sets the amount of copies to make.
1. Select the Menu Item.
2. Select the Setting Item.
3. Set the number of copies.
English
Zoom Press the OK button to display the Zoom Menu.
For detailed information, see “Changing Zoom settings” in the next
section.
Copy Layout Copies in the selected layout.
Paper Type Plain (Front), Plain (Back),
Prem.Glossy, GlossyPhoto,
SemiGloss, Matte, PQIJ, Photo
Paper, Bright White (Front), Bright
White (Back), Sticker, CD/DVD
Paper Size A4, A5, A6, 10 × 15 cm (4 × 6 in) Sets the paper size to copy to.
Quality Draft, Text, Photo, Best Photo Sets the quality of the copy to be made.
See “Changing the Copy Layout” on page 8.
Sets the type of paper on which to print.
See page 7 for detailed settings.
Note:
The available menu items and settings will vary according to the copy layout selected.
Basic Copying 9
Page 10
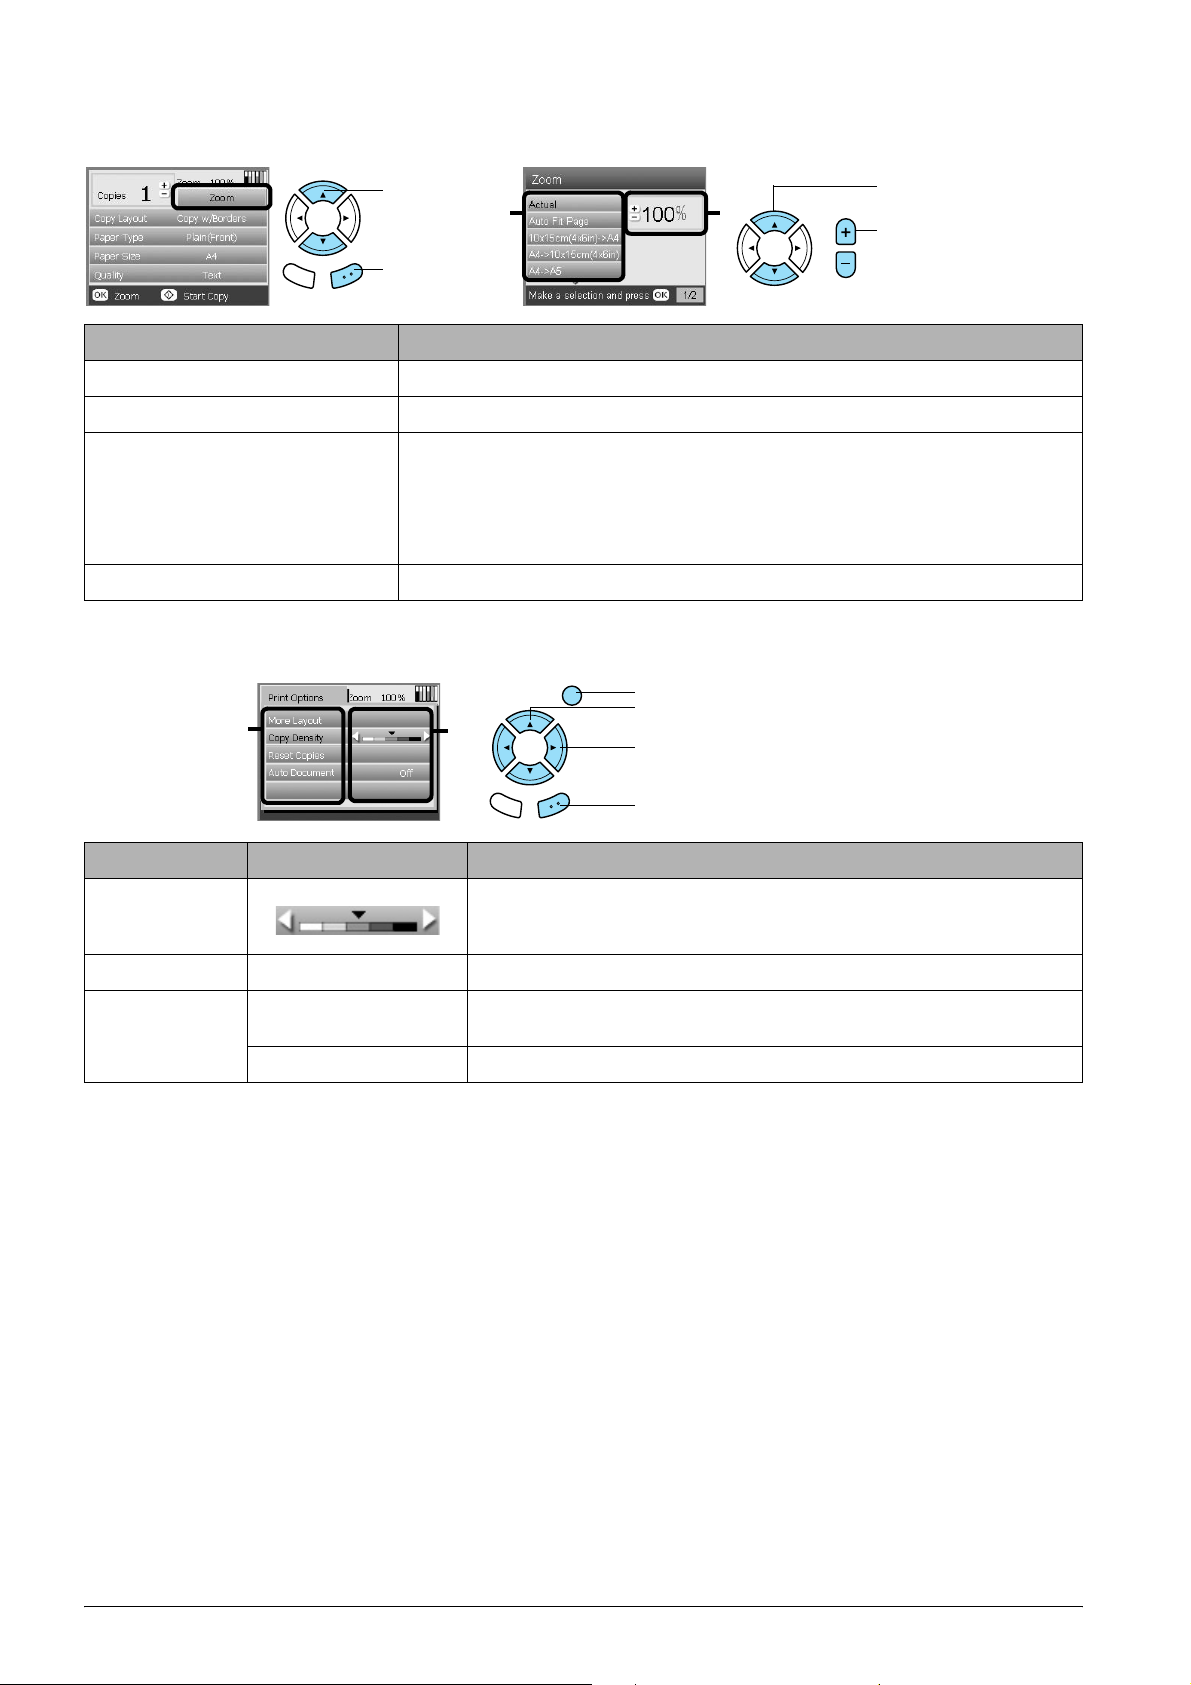
Changing the Zoom settings
.
1. Select the
Zoom.
2. Press the
Back OK
Setting Item Description
Actual Copies to the actual size.
Auto Fit Page Copies to the reduced or enlarged size that fits the size of the paper.
OK button.
21
1. Select the Setting Item.
2. Set the percentage by
which the image will be
reduced or enlarged.
10 × 15 cm (4 × 6 in) -> A4
A4 -> 10 × 15 cm (4 × 6 in)
A4 -> A5
A5 -> A4
25% to 400% Sets the percentage by which the image will be reduced or enlarged and copied.
Copies to the reduced or enlarged size by selecting the appropriate selection (original
document size -> copy result size).
Changing Detailed settings
.
2
Menu Item Setting Item Description
Copy Density Adjusts the density of copied documents.
Reset Copies Resets the number of copies to one.
Auto Document ON Makes clear copies when copying text documents. This feature is available
3
only when copying on plain paper with a border.
1. Press the Options button.
2. Select the Menu Item.
3. Select the Setting Item.
4. Press the OK button.
OFF Makes no adjustment.
10 Basic Copying
Page 11
Useful Information for Copying
Note for copying
❏ When you make a copy using a control panel
function, a moiré (cross-hatch) pattern may
appear on your printout. To eliminate the moiré,
change the reduce/enlarge ratio or shift the
position of the original document.
❏ The copied image may not have exactly the same
size as the original.
❏ Depending on the type of paper used, print
quality may decline in the top and bottom areas
of the printout, or these areas may be smeared.
❏ If this product runs out of paper while making
copies, be sure to load additional paper as soon
as possible. If left without paper for a long period
of time, the colors of the first copy made after
reloading may not accurately reflect those of the
original.
❏ If the LCD panel indicates low ink while you are
copying, you can either continue making copies
until the ink runs out, or stop making copies and
then replace the ink cartridge.
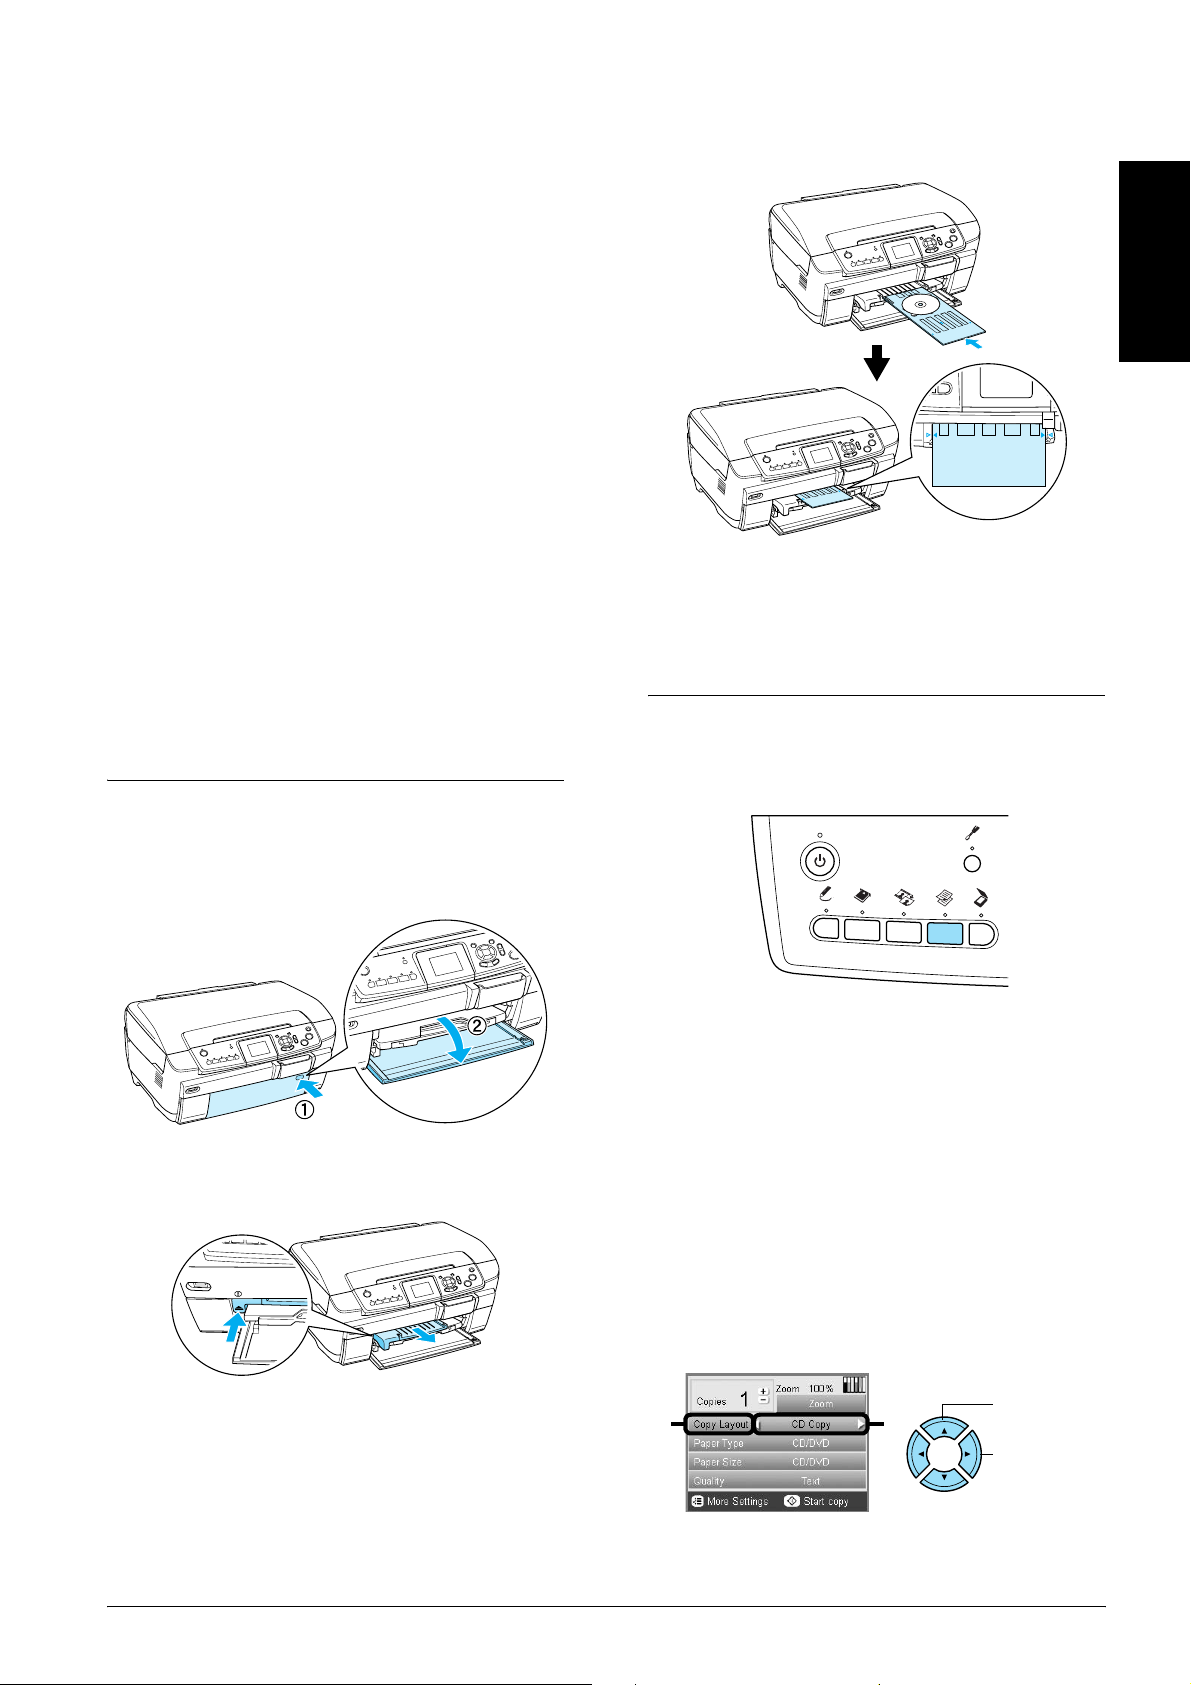
1. Place the first page of the original document on
the document table.
English
2. Select 2-up Copy as the copy layout.
3. Change the copy settings if necessary.
4. Press the x Color button or x B&W button. The
first page of the original document is copied.
5. Place the following page of the original
document on the document table when Change
pages to 2 page(s) appears in the LCD panel.
When placing a document on the
document table
❏ Keep the document table clean.
❏ Make sure the document is flat against the glass
surface; otherwise the image becomes out of
focus.
❏ Do not leave photographs on the document table
for an extended period of time. They may stick
to the glass of the document table.
❏ Do not place heavy objects on top of this product.
When copying in Borderless layout
Because this layout enlarges the image to a size
slightly larger than the paper size, the portion of the
image that extends beyond the edge of the paper will
not be copied.
To copy in 2-up Copy layout
6. Press the x Color button or the x B&W button
again. The following page of the original
document is copied and copying is completed.
Note:
If you need to stop copying, press the y Stop button.
If you want to make copies in the 4-up layout, select
4-up Copy in step 2 and repeat steps 5 and 6 twice to
complete copying.
Basic Copying 11
Page 12

When copying in Copy Photo
Place each photo horizontally as shown in the
illustration below.
❏ You can copy photos bigger than 64 ×
and smaller than 127 × 178 mm inclusively.
❏ Position each photo at least 10 mm apart from its
adjacent photo.
❏ You can copy two 10 × 1 5 c m ( 4 × 6 in) size pho tos
at a time.
❏ You can place any sizes of photos at a time.
You can use the Restoration feature. When
Restoration is set to On in Print Settings, faded photos
or ones that have been changed by sunlight are
copied with nearly their original color.
89 mm,
12 Basic Copying
Page 13
Copying on CD/DVD
Note:
❏ Use only CD/DVD media labelled as suitable for
printing, for example “Printable on the label surface”
or “Printable with ink jet printers”.
4. Insert the CD/DVD tray into the CD/DVD
guide.
❏ The printed surface is easily smeared immediately
after printing.
❏ Be sure to let CD/DVD dry completely for more than
24 hours before using them or touching the printed
surface.
❏ Do not allow the printed CD/DVD to dry in direct
sunlight.
❏ Moisture on the printable surface may cause
smearing.
❏ If the CD/DVD tray or the inner transparent section
of the CD/DVD are accidentally printed on,
immediately wipe off the ink.
❏ Reprinting on the same CD/DVD may not improve
the print quality.
Loading a CD/DVD
1. Open the front cover by pressing the hollow
portion as illustrated.
English
Note:
Align the arrow mark on the CD/DVD tray with the
arrow mark on the CD/DVD guide.
Copying a CD/DVD
1. Press the Copy button.
2. Press 5 on the CD/DVD guide. The CD/DVD
guide slides out.
3. Place the CD/DVD on the CD/DVD tray with
the label surface up.
2. Load the CD/DVD.
& See “Loading a CD/DVD” on page 13
3. Place the original document on the document
table.
& See “Placing a Photo or Document on the
Document Table” on page 7
Note:
The maximum square area in the center on the
document is scanned. When printing, the square area
is enlarged or reduced to CD/DVD size and trimmed
to doughnut shape.
4. Select Copy Layout and CD Copy.
1. Select
21
5. Select Quality and the desired quality setting.
Copy Layout.
2. Select CD
Copy.
Copying on CD/DVD 13
Page 14
6. Press the x Color button to copy in color, or the
x B&W button to copy in grayscale.
Note:
❏ If you need to stop copying, press the y Stop
button.
❏ We recommend that you print a test of the layout
on a test CD/DVD, before printing on a real
CD/DVD.
❏ If necessary, you can adjust the print position.
See “Adjusting the Print Position” on page 14
for details.
❏ If an error message appears on the LCD panel,
follow the instructions on the LCD panel to clear
the error.
❏ The printable area of a CD/DVD is illustrated as
follows.
12-cm CD/DVD
2. To move the image up or down, select CD/DVD
Position Up/Down. To move the image left or
right, select CD/DVD Position Left/Right.
Back OK
3. Select the amount to move the image. Select the
minus quantity when moving the image down
or left, and the plus quantity when moving up
or right.
Back OK
Note:
❏ You can select from –5.0mm to 5.0mm.
❏ This product remembers the print adjustment
settings even after it has been turned off, so you
do not need to adjust the position each time you
use the CD/DVD function.
Adjusting the Print Position
1. Press the Setup button.
Ejecting the CD/DVD Tray
1. Make sure that copying is finished.
2. Eject the CD/DVD tray by pulling it out straight
from the CD/DVD guide.
3. Press 5 on the CD/DVD guide. The CD/DVD
guide retracts.
14 Copying on CD/DVD
Page 15
Printing Directly from a Memory Card - Basic Printing
Note:
We recommend that you disconnect the USB cable when
printing directly from a memory card, otherwise the print
operation may take longer.
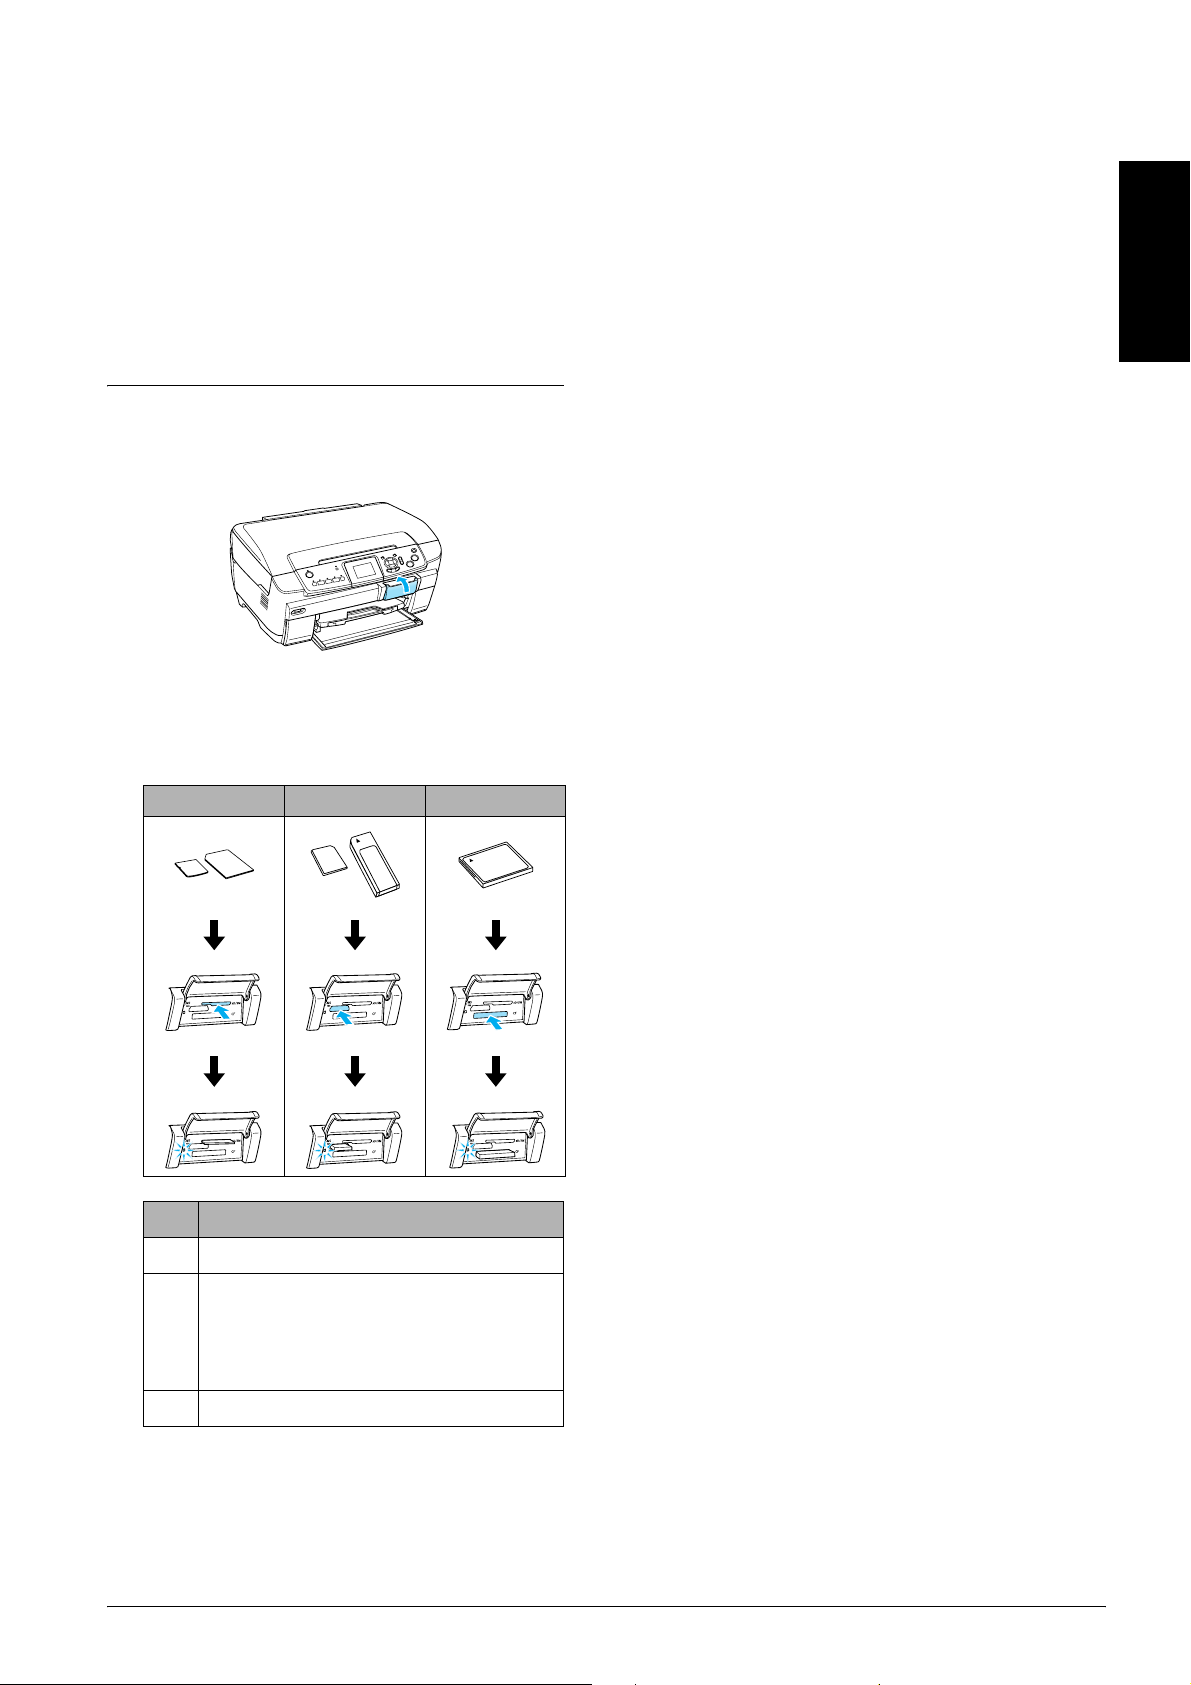
Inserting Memory Cards
1. Open the memory card slot cover.
3. Close the memory card slot cover.
Caution:
c
❏ Do not try to squeeze the memory card into the
slot. Memory cards cannot be fully inserted
into the card slots.
❏ Incorrect loading of a memory card may
damage this product, memory card, or both.
❏ Keep the memory card slot cover closed while
the memory card is loaded, which protects the
memory card and the slot from dust and static;
otherwise data on the memory card may be
lost, or this product may be damaged.
❏ Depending on the memory card loaded in this
product, the static charge on the memory card
may cause this product to malfunction.
Note:
If the memory card is inserted incorrectly, the memory
card light does not go on.
English
2. Make sure the memory card light beside the
memory card slot is off, and then insert a
memory card as far as it can go into the
appropriate slot.
a b c
Slot Card
a SmartMedia/xD-Picture Card
When ejecting memory cards
1. Make sure all the printing jobs are finished and
the memory card light is not flashing.
2. Open the memory card slot cover.
3. Eject the memory card by pulling it out straight
from the slot.
Caution:
c
Do not remove the memory card or turn off the
product while the printing or while the
memory card light is flashing. Data on the
memory card may be lost.
Note:
If you are using this product with a computer which
has Windows 2000 or XP installed, never turn this
product off or disconnect the USB cable with a
memory card inserted in this product; this may
destroy data on the memory card. See the User’s
Guide for detail.
4. Close the memory card slot cover.
b Memory Stick/MagicGate Memory Stick/
Memory Stick Duo*/Memory Stick PRO/
Memory Stick PRO Duo*/
MagicGate Memory Stick Duo*/SD Card/
miniSD Card*/MultiMediaCard
c CompactFlash/Microdrive
*An adapter is required.
Note:
You can load only one memory card at a time.
Printing Directly from a Memory Card - Basic Printing 15
Page 16
Printing Basics to 10 x 15 cm
Printing Using an Index Sheet
Paper
You can print photos to 10 × 15 cm (4 × 6 in) Premium
Glossy Photo Paper without altering any settings.
1. Load a memory card.
2. Press the Memory Card button.
3. Select Basic Print.
Back OK
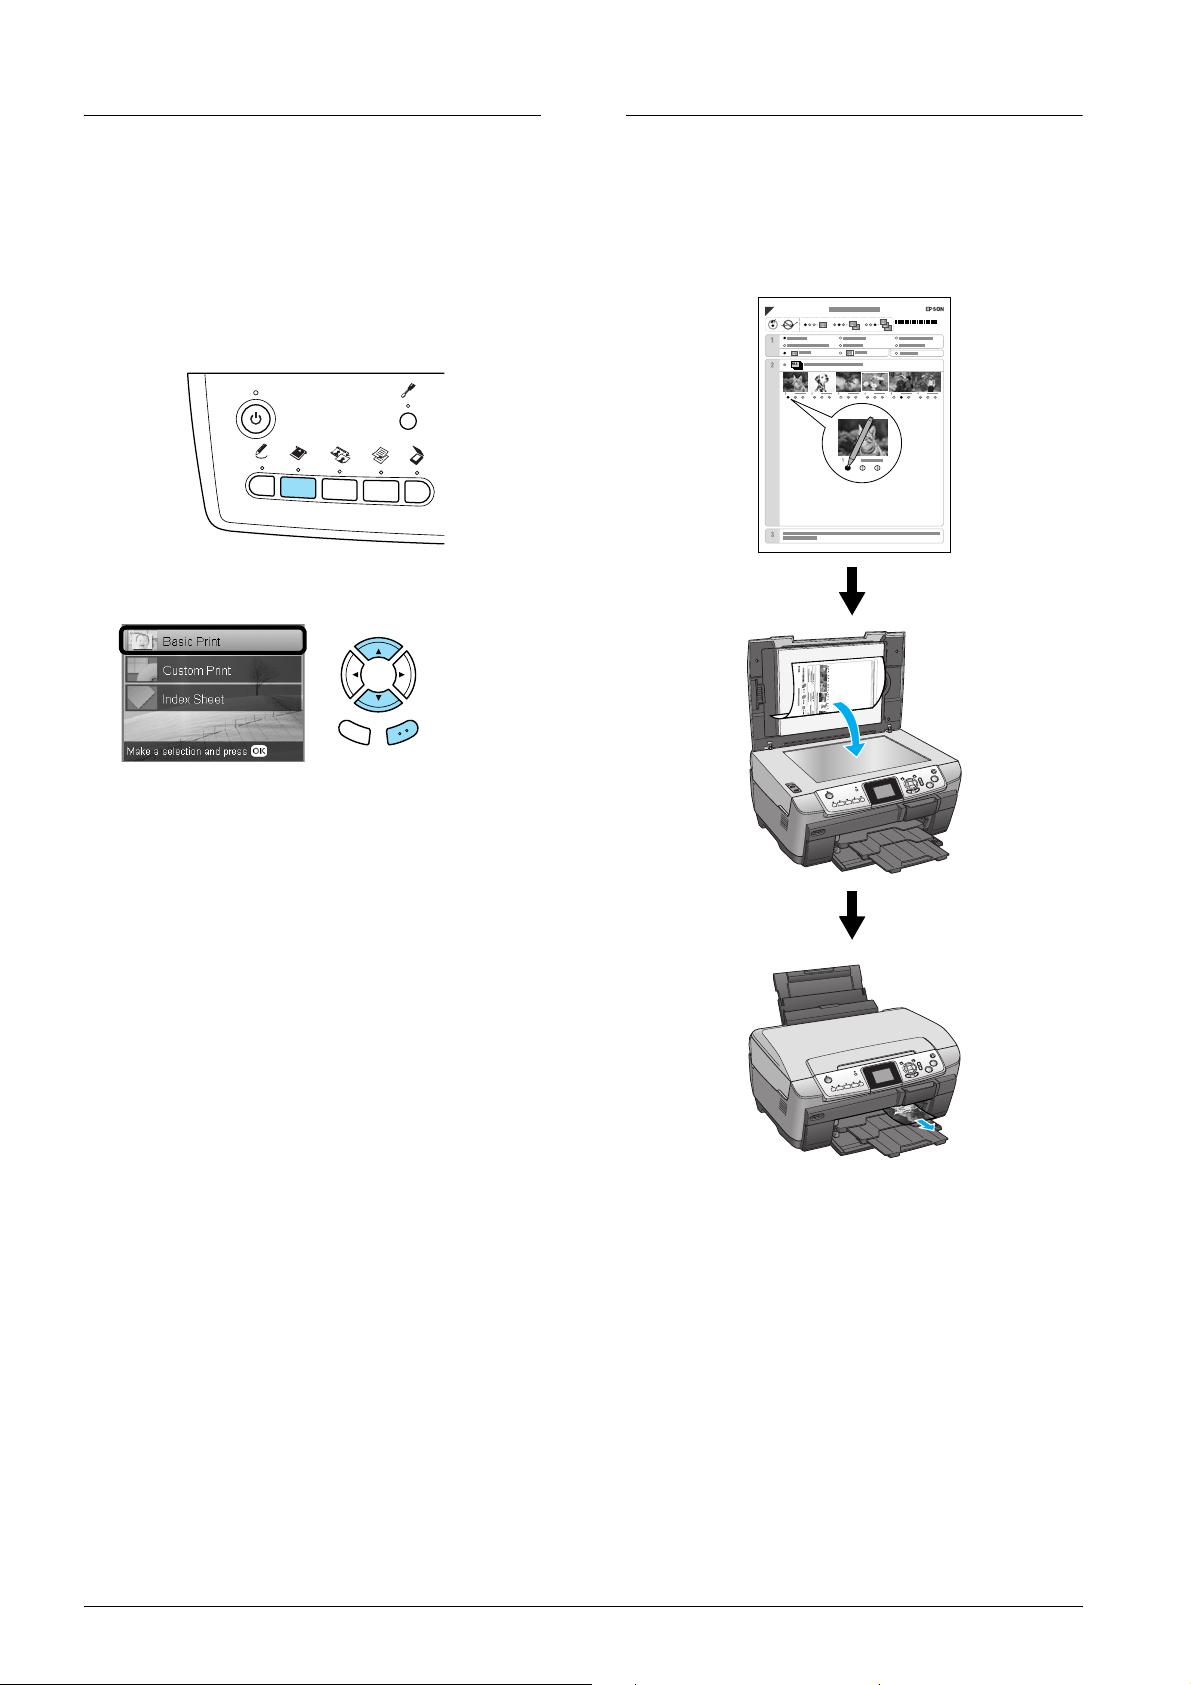
The Index Sheet gives you a thumbnail view of
photos stored on the memory card. You can easily
print photos by filling the circles underneath the
photo you want to print.
4. Select the photos you want to print and set the
number of copies.
& See “Changing the View of Photos on the LCD
Panel and Selecting Photos” on page 18
5. Load 10 × 1 5 cm ( 4 × 6 in) Premium Glossy Photo
Paper into the back tray.
& See “Loading paper into the back tray” on
page 6
6. Press the x Color button to start printing.
Note:
If you need to stop printing, press the y Stop button.
16 Printing Directly from a Memory Card - Basic Printing
Page 17

Printing an Index Sheet
Printing photos by filling in the
1. Load a memory card.
2. Press the Memory Card button.
3. Select Index Sheet.
Back OK
4. Select Print Index Sheet.
Back OK
5. Select the range of the photos you want to print
on the Index Sheet.
Index Sheet
1. On the Index Sheet, use a dark pen to fill in the
circle on the left side of the paper type and size,
and select printing with border or borderless
printing. Then fill in the circles underneath the
photos that you want to print, and the number
of prints to be printed for each photo.
See the examples below.
Good
Not good
Note:
❏ Complete the Index Sheet correctly. You cannot
change the settings using the control panel.
❏ If you fill more than one circle, this product will
print the largest number you chose.
❏ When you fill in the circle on the left of ALL, all
photos are printed at a time.
English
Back OK
Range Description
All photos Prints all photos stored on a memory card.
Latest 30 Prints 30 photos from the latest one in
Latest 60 Prints 60 photos from the latest one in
Latest 90 Prints 90 photos from the latest one in
order of the file name.
order of the file name.
order of the file name.
6. Load A4 plain paper into the front tray.
& See
“Loading A4 plain paper into the front
tray” on page 5
7. Press the x Color button to start printing.
Note:
If you need to stop printing, press the y Stop button.
2. Load the paper type and size that you selected
on the Index Sheet.
3. Select Scan Index Sheet.
Back OK
4. Place the Index Sheet with its face down, and its
top touching the left edge of the document table.
& See “Placing a Photo or Document on the
Document Table” on page 7
5. Press the OK button to start printing.
Note:
If you need to stop printing, press the y Stop button.
Printing Directly from a Memory Card - Basic Printing 17
Page 18

Changing the View of Photos on the LCD Panel and Selecting Photos
You can change the view of photos by pressing the Screen View button when selecting photos.
Screen View
One photo Displays one photo stored on the memory card at a time.
2
1
Note:
You can set up to 99 as the number of prints.
Nine photos Displays nine photos stored on the memory card at a time.
2
1
Note:
You can set up to 99 as the number of prints.
Slide Show Displays one photo stored on the memory card at a time and advances to the next photo automatically.
1. Select the desired photo.
2. Set the number of prints.
3. Press the OK button.
1. Select the desired photo.
2. Set the number of prints.
3. Press the OK button.
Note:
You cannot set the number of prints when running Slide Show.
18 Printing Directly from a Memory Card - Basic Printing
Page 19

Detailed settings for selecting photos
You can set the number of prints in detail by pressing the Options button when selecting photos.
2. Select the Select
1. Press the
Option button.
2
Select All Sets one print for all photos in the memory card.
Note:
Press the Copies button to change the number of prints for each photo.
Back OK
Photos option.
3. Press the OK button.
English
Select
Range
Sets the range of photos in the memory card and the number of prints for each.
1. Select the first photo.
2. Press the OK button.
Back OK
3. Select the last photo.
4. Press the OK button.
Back OK
5. Press the OK button.
Back OK
Note:
Press the Copies button to change the number of prints for each photo.
Deselect All Sets the zero as the number of prints for all photos.
DPOF Prints photos with the DPOF function. For detailed information, see “Printing with DPOF Functions” on page 26
Printing Directly from a Memory Card - Basic Printing 19
Page 20

Printing Directly from a
Printing Multiple Photos onto
Memory Card – Printing
Options
Printing a Single Photo
1. Load a memory card.
2. Press the Memory Card button.
3. Select Custom Print.
Back OK
4. Select Photo (Single).
One Sheet
You can print multiple photos in the memory card
onto one sheet. You can print in 2-up, 4-up, 8-up,
20-up and 80-up layouts.
1. Load a memory card.
2. Press the Memory Card button.
3. Select Custom Print.
Back OK
4. Select Photo (Multi).
Back OK
5. Change the print setting.
& See “Changing Print Settings” on page 28
6. Select the photo which you want to print and set
the number of copies.
& See “Changing the View of Photos on the LCD
Panel and Selecting Photos” on page 18
7. Load the appropriate paper.
& See “Loading Paper” on page 5
8. Press the x Color button or x B&W button to
start printing.
Note:
If you need to stop printing, press the y Stop button.
20 Printing Directly from a Memory Card – Printing Options
Page 21

Printing Enlarged Images
9. Load appropriate paper.
& See “Loading Paper” on page 5
You can crop and enlarge your photos.
1. Load a memory card.
2. Press the Memory Card button.
3. Select Custom Print.
Back OK
4. Select Crop.
Back OK
5. Change the print setting if necessary.
& See “Changing Print Settings” on page 28
10. Press the x Color or x B&W button to start
printing.
Note:
If you need to stop printing, press the y Stop button.
English
Printing Photo Stickers
You can print up to 16 stickers on one Photo Stickers
sheet.
1. Load a memory card.
2. Press the Memory Card button.
3. Select Custom Print.
Back OK
6. Select the desired photo.
Back OK
7. Set the area you want to crop by moving the
frame and changing the frame size.
1. Move the
frame.
Change
the size of
the frame.
2. Press the
Back OK
OK button.
8. Confirm the preview image and set the number
of copies.
Set the
number of
copies.
4. Select Photo Stickers.
Back OK
5. Select the photo which you want to print and set
the number of copies.
& See “Changing the View of Photos on the LCD
Panel and Selecting Photos” on page 18
Note:
When only a single photo is selected, 16 copies of the
same photo are printed in the 16-up layout on a single
sheet of paper. When two or more photos are selected,
copies of each photo selected in this step are printed
in the 16-up layout.
6. Load Photo Stickers in the back tray.
& See “Loading paper into the back tray” on
page 6
7. Press the x Color button or x B&W button to
start printing.
Note:
If you need to stop printing, press the y Stop button.
Press the Back button when readjusting the
zoom area.
Printing Directly from a Memory Card – Printing Options 21
Page 22

Adjusting the print position on
Photo Stickers sheet
Printing on CD/DVD
1. Press the Setup button.
2. To move the image up or down, select Photo
Stickers Position Up/Down. To move the
image left or right, select Photo Stickers
Position Left/Right.
3. Select the amount to move the image. Select the
minus quantity when moving the image down
or left, and the plus quantity when moving up
or right.
Note:
❏ You can select from –2.5mm to 2.5mm.
❏ This product remembers the print adjustment
settings even after it has been turned off, so you
do not need to adjust the position each time you
use the Photo Stickers function.
This section provides information on how to use the
LCD panel to print directly onto a CD/ DVD, without
the use of a computer.
Refer to the User
printing from a computer connected to the printer.
Note:
❏ Use only CD/DVD media labelled as suitable for
printing, for example “Printable on the label surface”
or “Printable with ink jet printers”.
❏ The printed surface is easily smeared immediately
after printing.
❏ Be sure to let CD/DVD dry completely more than 24
hours before using them or touching the printed
surface.
❏ Do not allow the printed CD/DVD to dry in direct
sunlight.
❏ Moisture on the printable surface may cause
smearing.
❏ If the CD/DVD tray or the inner transparent section
are accidentally printed on, immediately wipe off the
ink.
’s Guide on the desktop if you are
❏ Reprinting on the same CD/DVD may not improve
the print quality.
1. Load a memory card.
2. Load a CD or DVD.
& See “Loading a CD/DVD” on page 13
3. Press the Memory Card button.
4. Select Custom Print.
Back OK
5. Select CD/DVD.
6. Change the print setting.
22 Printing Directly from a Memory Card – Printing Options
Back OK
& See “Changing Print Settings” on page 28
Page 23

7. Select the photo which you want to print and set
the number of copies.
& See “Changing the View of Photos on the LCD
Panel and Selecting Photos” on page 18
Printing a CD Jacket
You can print a CD jacket on A4 paper.
Note:
You cannot set the number of images to more than
will fit on one CD/DVD. For example, you cannot
select more than five photos when printing in 4-up
layout.
8. Press the x Color button or x B&W button to
start printing.
Note:
❏ If you need to stop printing, press the y Stop
button.
❏ We recommend that you print a test of the layout
on a test CD/DVD, before printing on a real
CD/DVD.
❏ If necessary, you can adjust the print position.
See “Adjusting the Print Position” on page 14
for details.
❏ If an error message appears on the LCD panel,
follow the instructions on the LCD panel to clear
the error.
❏ The printable area of a CD/DVD is illustrated as
follows.
12-cm CD/DVD
1. Load a memory card.
2. Press the Memory Card button.
3. Select Custom Print.
Back OK
4. Select CD Jacket.
Back OK
5. Change the print setting.
& See “Changing Print Settings” on page 28
6. Select the photo which you want to print and set
the number of copies.
& See “Changing the View of Photos on the LCD
Panel and Selecting Photos” on page 18
English
7. Load the appropriate paper.
& See “Loading Paper” on page 5
8. Press the x Color button or x B&W button to
start printing.
Note:
If you need to stop printing, press the y Stop button.
Printing Directly from a Memory Card – Printing Options 23
Page 24

Printing on EPSON Iron-On Cool
Printing Using a Combo Printing
Peel Transfer Paper
You can print an image on EPSON Iron-On Cool Peel
Transfer Paper and copy the printed image onto
fabric using an iron.
1. Load a memory card.
2. Press the Memory Card button.
3. Select Custom Print.
Back OK
4. Select Iron.
Sheet
You can add handwritten letters or drawings to your
favorite photographs using the Combo Printing
Sheet.
ABC
ABC
1 2 3 4 5 6 7 8 9 10
ABCABCABC
Back OK
5. Change the layout.
& See “Changing Print Settings” on page 28
6. Select the photo which you want to print and set
the number of copies.
& See “Changing the View of Photos on the LCD
Panel and Selecting Photos” on page 18
7. Load EPSON Iron-On Cool Peel Transfer Paper
into the back tray.
& See “Loading paper into the back tray” on
page 6
8. Press the x Color button or x B&W button to
start printing.
Note:
If you need to stop printing, press the y Stop button.
24 Printing Directly from a Memory Card – Printing Options
Page 25

Printing a Combo Printing Sheet
1. Load a memory card.
2. Press the Creative Projects button.
3. Select Combo Print.
Back OK
4. Select Select Photo and Print Template.
Layout Description
Prints a photo on the upper half and
handwritten drawings on the lower half of
the paper.
Prints handwritten drawings on the upper
half and a photo on the lower half of the
paper.
Prints handwritten drawings on the photo.
Prints handwritten drawings edged with a
thin border on a photo.
Prints handwritten drawings edged with a
thick border on a photo.
English
Back OK
5. Select the photo which you want to print.
& See “Changing the View of Photos on the LCD
Panel and Selecting Photos” on page 18
6. Load A4 plain paper into the front tray.
& See “Loading A4 plain paper into the front
tray” on page 5
7. Press the x Color button to start printing.
Note:
If you need to stop printing, press the y Stop button.
Printing with handwritten drawings
by written in the Combo Printing
Sheet
1. On the Combo Printing Sheet, use a dark pen to
fill in the circle to select the paper type and size,
layout and number of prints.
See the examples below:
Good
2. In the handwriting area on the Combo Printing
Sheet, use a dark pen to write letters or make
drawings that you want to add to the photo.
ABC
ABC
1 2 3 4 5 6 7 8 9 10
ABCABCABC
Note:
When you select the third layout from the left in step
1, your text or drawings may be difficult to read if you
use a color similar to the color of the photo.
3. Load the paper you have selected on the Combo
Printing Sheet.
4. Place the Combo Printing Sheet with its face
down, and its top touching the left edge of the
document table.
& See “Placing a Photo or Document on the
Document Table” on page 7
Not good
1. Select the paper
type and size.
2. Select the layout.
See the follwing table
for detail.
3 . S e l e c t t h e n u m b e r o f
prints.
Printing Directly from a Memory Card – Printing Options 25
5. Select Scan Template and Print Greeting Card
to start printing.
Back OK
Note:
If you need to stop printing, press the y Stop button.
Page 26

Printing with DPOF Functions
Printing with Photo Frames
DPOF (Digital Print Order Format) is an
industry-standard print file request format. This
product conforms to DPOF version 1.10. DPOF lets
you select photos and the number of copies for
photos stored on a digital camera, before you start
printing. To create DPOF date, you must use a digital
camera that supports DPOF. For details on DPOF,
refer to the documentation of your digital camera.
1. Load a memory card which contains DPOF data.
2. Press the Memory Card button.
3. Select Basic Print or Custom Print.
Back OK
4. When you select Custom Print, change the print
setting.
& See “Changing Print Settings” on page 28
You can add colorful and creative frames to your
favorite photographs by editing frames using the PIF
DESIGNER software and saving them with the
EPSON PRINT Image Framer Tool software. Choose
from a variety of ready made frames in the software
CD-ROM and save the frames to a memory card in
advance. For details, see the documentation of each
application.
Printing a list of all frame data
You can print the thumbnails and filenames of your
PRINT Image Framer data for checking before
printing photos with frames.
1. Load a memory card containing PRINT Image
Framer data.
2. Press the Memory Card button.
3. Select Custom Print.
5. Press the Options button once the Select photos
screen is displayed.
6. Select DPOF.
Back OK
7. Load appropriate paper.
& See
“Loading Paper” on page 5
8. Press the x Color or x B&W button (for Custom
Print only) to start printing.
Note:
If you need to stop printing, press the y Stop button.
Back OK
4. Select P.I.F. Index.
Back OK
5. Load A4 plain paper into the front tray.
& See “Loading A4 plain paper into the front
tray” on page 5
6. Press the x Color button.
Note:
If you need to stop printing, press the y Stop button.
26 Printing Directly from a Memory Card – Printing Options
Page 27

Printing photos with PRINT Image
Framer
1. Load a memory card containing photo data and
PRINT Image Framer data.
Note:
Be sure to save the PRINT Image Framer data to the
memory card using the EPSON PRINT Image
Framer Tool; otherwise the P.I.F. file name will not
appear on the LCD panel.
2. Press the Memory Card button.
3. Select Custom Print.
Back OK
4. Select Photo (Single)or Photo (Multi).
English
Back OK
5. Select the P.I.F. file name that you want to add
as the Layout setting in the Print Settings menu.
& See “Changing Print Settings” on page 28
Note:
When you select a P.I.F. file name as the layout, the
paper size is set automatically to fit to the frame size.
6. Select the photo which you want to print and set
the number of copies.
& See “Changing the View of Photos on the LCD
Panel and Selecting Photos” on page 18
7. Confirm the layout and number of prints on the
LCD panel.
8. Load appropriate paper.
& See
“Loading Paper” on page 5
9. Press the x Color button or x B&W button to
start printing.
Note:
If you need to stop printing, press the y Stop button.
Printing Directly from a Memory Card – Printing Options 27
Page 28

Changing Print Settings
1. Select the Menu Item.
12
Menu Item Setting Item Description
Paper Type Plain (Front), Plain
(Back), Prem.Glossy,
GlossyPhoto,
SemiGloss, Photo
Paper, Matte, Bright
White (Front), Bright
White (Back), CD/DVD
Paper Size A4, A6, 10 × 15 cm
(4 × 6 in), CD
Layout Borderless* Prints without margin.
with Border Prints with a 3 mm margin along the top, bottom, and on both sides.
Upper1/2 Prints on upper half part of paper.
Prints in the paper type you select.
See page 7 for detailed settings.
Sets the paper size for printing.
2. Select the Setting Item.
3. Press the OK button.
Back OK
2-up
8-up
80-up
P.I.F. file name Prints photos with a PRINT Image Framer Tool frame.
1-up Prints one photo on the CD/DVD, centered on the hole in the middle of the disc.
4-up Prints four photos on the CD/DVD, with one image in each of the four quarters.
12-up Prints 12 photos on the CD/DVD, arranged in a circle around the outer edge of the disc.
Jewel Case Upper 1/2 Prints a photo into one side of the CD case.
4-up
20-up
Prints multiple photos on one sheet. In 20-up and 80-up layout, the numbers and shooting
dates are printed.
The size of each photo is adjusted automatically according to the number of photos to
print and the size of paper.
You cannot print in black and white in 80-up layout.
Note:
When Crop is selected, copies of the same photo are printed to the selected layout on
a single sheet of paper. A single copy of the photo is printed when anything other than
the Crop is selected.
You can select this option only when CD/DVD is selected in the Memory Card Custom
Print screen.
You can select this option only when CD/DVD is selected in the Memory Card Custom
Print screen.
You can select this option only when CD/DVD is selected in the Memory Card Custom
Print screen.
You can select this option only when CD Jacket is selected in the Memory Card Custom
Print screen.
Jewel Case Index Prints multiple photos into the CD case.
You can select this option only when CD Jacket is selected in the Memory Card Custom
Print screen.
28 Printing Directly from a Memory Card – Printing Options
Page 29

Menu Item Setting Item Description
Density
(only for
CD/DVD)
Normal Makes no adjustment.
Darker Makes printouts slightly darker.
Darkest Makes printouts very dark.
Print detail settings
1. Press the
Options button.
23
Back OK
Print Options
Item
Date Format
Prints the
shooting date.
Time Format
Prints the
shooting time.
Quality Normal, Photo*,
Filter Off* Does not print in sepia tone, but in color or gray scale. If you select Off, P.I.M. is
Auto Correct P.I.M.* Prints using the PRINT Image Matching function. If the photo data does not include P.I.M.,
Brightness Darkest Makes printouts very dark.
Contrast Highest Makes contrast of printouts very strong.
Sharpness Sharpest Makes the outline of subjects very sharp.
Setting Item Description
None* Prints with no date information.
yyyy.mm.dd e.g. 2005. 05. 15 The date is not printed when printing
mmm.dd.yyyy e.g. May. 15. 2005
dd.mmm.yyyy e.g. 15. May. 2005
None* Prints with no time information.
12-hour system e.g. 10:00 The time is not printed when printing
24-hour system e.g. 22:00
Sets the print quality.
Best Photo
automatically set as Auto Correct.
Sepia Prints in sepia tone. If you select Sepia, PhotoEnhance is automatically set as Auto Correct.
try printing with PhotoEnhance.
PhotoEnhance Prints enhanced images automatically.
It requires longer time, but gives better quality.
Exif Prints using the Exif Print function. It provides you with high-quality printouts.
None Prints with no automatic correction.
Darker Makes printouts slightly darker.
Standard* Makes no adjustment.
Brighter Makes printouts slightly brighter.
Brightest Makes printouts very bright.
Higher Makes contrast of printouts slightly stronger.
Default* Makes no adjustment.
Sharper Makes the outline of subjects slightly sharper.
Default* Makes no adjustment.
Softer Makes the outline of subjects slightly softer.
Softest Makes the outline of subjects very soft.
images that hav e already been scanned
and saved to the memory card using this
product.
images that hav e already been scanned
and saved to the memory card using this
product.
2. Select the Print
Options Item.
3. Select the
Setting Item.
4. Press the
OK button.
English
Printing Directly from a Memory Card – Printing Options 29
Page 30

Print Options
Item
Saturation Lowest Makes printouts very dull.
Small Image On Interpolates image resolution (and removes)
Print Info. Off* Prints with no information.
Fit to Frame On Automatically trims the areas of an image that extend beyond the margins of the selected
Bidirectional On* Faster (Printing quality is normal.)
Setting Item Description
Lower Makes printouts slightly duller.
Default Makes no adjustment.
Higher Makes printouts slightly more vivid.
Highest Makes printouts very vivid.
noise. (Printing speed is slow.)
Off* Interpolates image resolution (but does not
remove) noise.
On Also prints information about the photo taken.
print size. Either the top and bottom, or the left and right areas of photo is trimmed,
depending on the aspect ratio of the original photo and the selected print size.
Off* Does not trim the image.
By turning this function on, you can perform bidirectional printing (printing from right to left
and from left to right).
Off Slower (Printing quality is fine.)
This feature is not available when None is
selected as the Auto Correct setting.
* Indicates the default setting.
30 Printing Directly from a Memory Card – Printing Options
Page 31

Printing from Film
Loading and Setting Film on the Document Table
Caution:
c
Hold the film at its edges, or else use gloves.
Touching the film surface with bare hands can
leave fingerprints or other traces on the film.
Note:
Wipe the inside of the document cover and the document
table before scanning transparencies.
1. Make sure the document cover’s cable is
connected to the TPU interface connector and
open the document cover.
3. Load the transparency into the film holder and
position it on the document table. Follow the
instructions below as appropriate to your film.
35 mm film strips
1 Open the film cover.
English
2 Set the film into the fi lm holder, flush with the edge
and with the front side down. the front side of the
film is the side where the film maker's name and
film ID numbers can be read correctly.
Top
Bottom
2. Remove the reflective document mat gently
along the document cover.
3 Close the film cover.
4 Place the film holder on the document table with
the side where the film is placed facing toward
you.
Printing from Film 31
Page 32

35 mm slides
1 Place the film holder on the document table with
the side where the slides will be placed facing
toward you.
2 Set the slides into the film holder with the base side
facing down. The base side of the film is the side
where the film maker's name and film ID numbers
can be read correctly.
Top
Printing Basics to10 x 15 cm Paper
You can print photos to 10 × 15 cm (4 × 6 in) paper
without altering any settings.
1. Load and set film on the document table.
& See “Loading and Setting Film on the
Document Table” on page 31
2. Press the Film button.
3. Select Basic Print.
Bottom
Note:
❏ There is a possibility that a film may not be
readable due to the difference of the pitch width
within 6 frames.
❏ Do not press the glass of the document table with
too much force.
4. Close the document cover completely.
Note:
❏ A newton ring (ring-shaped stripes pattern) may
appear in the scanned image. To remove the newton
ring, set the film with the base side facing up. See the
User’s Guide for detail.
❏ When you are not using the film holder, you can store
it inside the document cover. See “Storing the Film
Holder” on page 34 for details.
Back OK
4. Select the film type.
& See “Selecting the Film Type” on page 34
5. Select the desired photo and set the number of
prints.
1. Select
the desired
1
2
Back OK
photo.
2. Set the
number
of prints.
6. Load appropriate paper.
& See
“Loading Paper” on page 5
7. Press the x Color or x B&W button to start
printing.
Note:
If you need to stop printing, press the y Stop button.
32 Printing from Film
Page 33

Printing a Single Photo
Printing Enlarged Images
You can print photos to various size and types of
paper with the appropriate settings.
1. Load and set film on the document table.
2. Press the Film button.
3. Select Custom Print.
Back OK
4. Select Photo (Single).
Back OK
5. Change the print setting.
& See “Changing Print Settings” on page 34
6. Select the film type.
& See “Selecting the Film Type” on page 34
7. Select the desired photo and set the number of
prints.
You can crop and enlarge photos from your film.
1. Load and set film on the document table.
2. Press the Film button.
3. Select Custom Print.
Back OK
4. Select Crop Print.
Back OK
5. Change the print setting if necessary.
& See “Changing Print Settings” on page 34
6. Select the film type.
& See “Selecting the Film Type” on page 34
7. Select the desired photo.
English
1. Select
the desired
2
1
Back OK
photo.
2. Set the
number
of prints.
8. Load appropriate paper.
& See
“Loading Paper” on page 5
9. Press the x Color or x B&W button to start
printing.
Note:
If you need to stop printing, press the y Stop button.
Back OK
8. Set the area you want to crop by moving the
frame and changing the frame size.
& See step 7 in “Printing Enlarged Images” on
page 21
9. Confirm the preview image and set the number
of copies.
& See step 8 in “Printing Enlarged Images” on
page 21
Press the Back button when readjusting the
zoom area.
10. Load appropriate paper.
& See
“Loading Paper” on page 5
11. Press the x Color or x B&W button to start
printing.
Note:
If you need to stop printing, press the y Stop button.
Printing from Film 33
Page 34

Selecting the Film Type
Print detail settings
1. Press the
Options button.
Back OK
Color negative film Positive color film (strip)
Color slide B&W negative
Changing Print Settings
1. Select the
Menu Item.
12
Back OK
Menu Item Setting Item Description
Paper Type Plain (Front),
Plain (Back),
Bright White
(Front), Bright
White (Back),
Photo Paper,
Prem.Glossy,
GlossyPhoto,
SemiGloss,
Matte
Prints in the paper type
you select.
See page 4 for detailed
settings.
2. Select the
Setting Item.
3. Press the
OK button.
2. Select the
2
Print Options
Item
Quality Normal, Photo,
Saturation Less Saturation Makes printouts duller.
Setting Item Description
Best Photo
Normal Makes no adjustment.
More
Saturation
3
Back OK
Prints in the quality
setting you select.
Makes printouts more
vivid.
Menu Item.
3. Select the
setting Item.
4. Press the
OK button.
Storing the Film Holder
When not using the film holder, you can store it
inside the document cover.
1. Open the document cover.
2. Slide the film holder into the document cover.
Paper Size A4, 10 × 15
cm (4 × 6 in)
Layout Borderless Prints without margin.
with Border Prints with margin.
Restoration ON Restores faded colors on
OFF Leaves faded colors on
Prints in the paper size you
select.
film and in photos.
Note:
This setting has no effect
when B&W negative is
selected as the Film Type.
film and in photos as they
are.
3. Insert the reflective document mat.
4. Close the document cover.
34 Printing from Film
Page 35

Scanning to a Memory
Quality affects the file size of images as follows:
Card
Note:
❏ For information on scanning images to a computer or
e-mail, see the User’s Guide.
❏ The scanned images are saved in JPEG format to the
“epscan” folder which is automatically created when
you scan to a memory card.
Scanning and Saving a document to a Memory Card
1. Place an original document on the document table.
& See “Placing a Photo or Document on the
Document Table” on page 7
2. Load a memory card.
& See “Inserting Memory Cards” on page 15
3. Press the Scan button to enter the Scan Mode.
Document
type
Text Normal 200 × 200
Graphics Normal 500 KB
*A4, color document.
Quality Scanning
Text and
Image
Text and
Image
resolution
dpi
300 × 300
dpi
300 × 300
dpi
Approximate file
size*
300 KB
500 KB
3.0 MB
6. Press the x Color button to start scanning.
Note:
If you need to stop scanning, press the y Stop button.
Caution:
c
Never open the scanner unit while scanning
as you may damage this product.
Scanning and Saving a film to a
English
4. Select Scan to Memory Card.
Back OK
5. Select the appropriate scan settings.
21
Back OK
1. Select the
Menu Item.
2. Select the
Setting Item.
3. Press the
OK button.
Memory Card
1. Set a film on the document table.
& See “Loading and Setting Film on the
Document Table” on page 31
2. Load a memory card.
& See “Inserting Memory Cards” on page 15
3. Press the Film button to enter the Film Mode.
4. Select Scan to Memory Card.
Setting Selection
Scan area Auto cropping, Max area
Document Type Text, Graphics
Quality Normal, Text and Image
Back OK
5. Select the film type.
& See “Selecting the Film Type” on page 34
Scanning to a Memory Card 35
Page 36

6. Select the desired photo and enter the check
mark of the photo you want to save.
1. Select
the desired
photo.
2. Enter
12
Back OK
the check
mark.
7. Select the Quality option by pressing the l/r
buttons.
Scan quality affects the file size of the images. Be
sure to leave enough space according to the
following table:
Quality Scanning
resolution
Text 1200 × 1200 dpi 500 KB
Photo 2400 × 2400 dpi 4.5 MB
Approximate
file size
8. Press the x Color button to start scanning.
Note:
If you need to stop scanning, press the y Stop button.
36 Scanning to a Memory Card
Page 37

Printing Directly from a Digital Camera
6. Turn on the digital camera, then connect this
product and the digital camera with a USB cable.
Printing Directly from a Digital Camera
You can use this feature with digital cameras which
support the USB DIRECT-PRINT or PictBridge
functions. For more details on the operation of the
digital camera, refer to its manual.
1. Turn on this product.
2. Make sure that no memory card is loaded.
3. Press the Setup button.
4. Select PictBridge Setup.
7. Use the digital camera to select the photo you
want to print. Be sure to make the desired print
settings on the digital camera because the digital
camera settings generally take precedence over
the print settings of this product. See your digital
camera's documentation for information on
more detailed settings.
8. Load appropriate paper.
& See
“Loading Paper” on page 5
9. Print from the digital camera.
Note:
❏ Some of the settings on your digital camera may
not be reflected in the output because of the
printer’s specifications.
❏ You cannot print TIFF format image files. If you
wish to print TIFF files, print directly from a
memory card.
English
Back OK
5. Change the print setting if necessary.
& See “Changing Print Settings” on page 28
1. Select the
Menu Item.
12
Back OK
2. Select the
Setting Item.
Printing Directly from a Digital Camera 37
Page 38

Printing Directly from an External Device
Printing Directly from an External Device
You can print images directly from an external
device such as an MO drive, CD-R drive or USB flash
drive, when connected to this product with a USB
cable.
Note:
❏ This feature is only available with images that have
been backed up using this product. See “Copying
images from the memory card to an external device
(backup)” of the next section.
❏ Not all of the devices that can be connected using a
USB cable are supported. Contact your regional
Customer Support for details.
Copying images from the memory
card to an external device
(Backup)
1. Follow steps 1 and 2 in “Printing Directly from
an External Device” in the previous section.
2. Insert a medium into the external device.
3. Load a memory card.
& See “Inserting Memory Cards” on page 15
4. Press the Setup button.
1. Make sure that this product and the external
device are switched off and that no memory card
is loaded.
2. Use a USB cable to connect the external device to
this product then switch them both on.
When using a USB flash drive, insert the drive
directly into the USB port, and proceed to step 4.
3. Insert a medium that contains photo data into
the external storage device.
4. When the following screen is displayed, select
which folder to print from.
5. Select Backup Memory Card.
Back OK
6. Confirm the following message, then press the
OK button.
Back OK
7. Press the OK button again to start the backup.
Back OK
5. Follow the same procedure as when printing
from a memory card to perform printing.
38 Printing Directly from an External Device
Page 39

Replacing Ink Cartridges
Precautions on Ink Cartridge Replacement
Choosing Ink Cartridges
You can use the following cartridges with this
product.
Black ink cartridge Black T5591
Color ink cartridge Cyan
Magenta
Yellow
Light cyan
Light magenta
Caution:
c
Epson recommends the use of genuine Epson ink
cartridges. Epson warranties do not cover damage
to your product caused by the use of ink cartridges
not manufactured by Epson.
T5592
T5593
T5594
T5595
T5596
Checking the Ink Level
1. Press the Setup button.
2. Select Ink Levels.
❏ If you need to remove an ink cartridge
temporarily from this product, be sure to protect
the ink supply area of the ink cartridge from dirt
and dust. Store the ink cartridge in the same
environment as this product.
❏ The valve in the ink supply port is designed to
contain any excess ink that may be released.
However, careful handling is recommended. Do
not touch the supply port of the ink cartridge or
its surrounding area.
❏ This product uses ink cartridges equipped with
an IC chip. The IC chip accurately monitors the
amount of ink used by each cartridge, so even if
a cartridge is removed and then later inserted
again, all of its ink can be used.
❏ When an ink cartridge becomes empty, you
cannot continue copying or printing even if the
other cartridges still contain ink. Before copying
or printing, replace the empty cartridge.
❏ In addition to being used in document copying
or printing, ink is als o consumed in the following
operations: print head cleaning, self-cleaning
cycle performed when this product is turned on,
and ink charging when an ink cartridge is
installed in this product.
English
Back OK
The amount of ink appears.
3. Press the OK button to return to the previous
display once you have checked the ink level.
❏ Do not refill the ink cartridges. This product
calculates the amount of ink remaining using an
IC chip built into an ink cartridge. Even if the
cartridge is refilled, the amount of ink remaining
is not recalculated by the IC chip and therefore
the amount of ink available for use does not
change.
❏ After an ink cartridge is replaced, if the ink is low
it may become empty. When a message appears
to indicate the ink is low, prepare a new ink
cartridge.
❏ Do not touch the green IC chip on the top of the
cartridge. This can damage the ink cartridge.
Replacing Ink Cartridges 39
Page 40

Replacing Ink Cartridges
Note:
Before replacing an ink cartridge, read “Precautions on
Ink Cartridge Replacement” on page 39 and “When
handling ink cartridges” on page 3.
1. When the ink is empty:
Refer to the LCD panel message to see which ink
cartridge is empty.
5. Insert the new ink cartridge slowly until it clicks
into place.
When the ink is low:
Proceed to the next step.
2. Open the cartridge covers.
3. Remove an ink cartridge from its package.
4. Gently push in on the ink cartridge that you
want to replace. Pull the cartridge out of this
product and dispose of it properly. Do not take
the used cartridge apart or try to refill it.
6. Close the cartridge covers.
Caution:
c
Never turn off this product while ink charging
in progress; Otherwise, this will cause
incomplete charging of the ink.
Note:
❏ Do not repeatedly remove and reinsert the ink
cartridge once it is installed.
❏ If you install a used ink cartridge with a low ink
level, it may become empty right after the
replacement. In this case, replace the ink
cartridge with a new one.
The illustration shows replacement of the light
cyan ink cartridge.
Warning:
w
If ink gets on your hands, wash them
thoroughly with soap and water. If ink gets
into your eyes, flush them immediately with
water. If discomfort or vision problems
continue after a thorough flushing, see a
doctor immediately.
Caution:
c
Leave the used ink cartridge installed until
just before replacement; otherwise, ink
remaining in the print head nozzles may dry
out.
40 Replacing Ink Cartridges
Page 41

Maintenance and
Cleaning the Print Head
Transporting
Checking the Print Head Nozzles
If you find that the printed image is unexpectedly
faint or some dots in the printed image are missing,
checking the print head nozzles helps you to identify
the problem.
Note:
Make sure the CD/DVD tray is not inserted in this
product and the CD/DVD guide is closed before using the
Nozzle check utility.
1. Make sure that A4 paper is loaded in the front
tray and press the Setup button.
2. Select Nozzle Check.
If you find that the nozzle check result is
unexpectedly faint or some dots in the printed image
are missing, you may be able to solve these problems
by cleaning the print head, which ensures that the
nozzles are delivering ink properly.
Note:
❏ Print head cleaning uses both color and black ink. To
avoid wasting ink, clean the print head only if the copy
or print quality drops (for example, blurred printout,
incorrect or missing color).
❏ Before cleaning the print head, perform the nozzle
check first to see if it really needs to be cleaned. This
saves ink.
❏ When a message appears on the LCD panel to prompt
you to replace the ink cartridge or to indicate the ink
is low, you cannot clean the print head. In this case,
replace the appropriate ink cartridge first.
❏ Make sure the CD/DVD tray is not inserted in this
product before using the Head Cleaning utility.
1. Press the Setup button.
2. Select Head Cleaning.
English
Back OK
3. Confirm the messages on the LCD panel, then
press the OK button to start the nozzle check.
4. Check the printout.
Good: print head does not need to be cleaned
yet.
Not Good: print head needs to be cleaned.
The actual printouts are printed in color (CMYK).
If the nozzle check result is not good, there may be a
clogged ink nozzle or a misaligned print head. To
solve these problems, press the OK button and
follow step 3 and 4 in “Cleaning the Print Head” of
the next section.
If the nozzle check result is good, press the Back
button to return to the Setup menu.
Back OK
3. Confirm the messages on the LCD panel, then
press the OK button to start head cleaning.
4. When Print head cleaning in progress.
disappears from the LCD panel, press the OK
button to perform the nozzle check to confirm
that the head is clean and to reset the cleaning
cycle. See “Checking the Print Head Nozzles” of
the previous section.
Caution:
c
Never turn off this product while Head
cleaning is in progress. Doing so may damage
this product.
Maintenance and Transporting 41
Page 42

Note:
❏ If the print quality has not improved after
repeating this procedure four or five times, turn
this product off and leave it alone overnight.
Then, perform the nozzle check again and repeat
head cleaning if necessary.
❏ If the print quality still has not improved, one or
more of your ink cartridges may be old or
damaged and may need to be replaced. To replace
an ink cartridge, see “Replacing Ink Cartridges”
on page 40.
❏ To maintain good print quality, we recommend
printing a few pages at least once every month.
Aligning the Print Head
If you notice vertical lines are not aligned properly
on the nozzle check result, you may be able to solve
this problem by aligning the print head.
Note:
❏ Do not press the y Stop button to cancel printing
while printing an alignment pattern.
❏ Make sure the CD/DVD tray is not inserted in this
product and the CD/DVD guide is closed before using
the print head alignment utility.
1. Make sure that A4 paper is loaded in the front
tray and press the Setup button.
2. Select Head Alignment.
4. The following alignment sheet is printed.
5. Look at the alignment pattern in each set and
find the patch which is mo st evenly printed, with
no noticeable streaks or lines.
6. Select the set and the corresponding line number
and press the OK button.
1. Select the
set.
2. Select the
21
corresponding
line number.
Back OK
3. Confirm the messages on the LCD panel, then
press the OK button to start head alignment.
Back OK
7. Press the OK button to finish.
Restoring Factory Settings
This resets all the settings to default. If you use this
function, the setting values for each mode will be
reset to the values which were preset at the factory.
1. Press the Setup button.
2. Select Restore to Factory Settings.
Back OK
42 Maintenance and Transporting
Page 43

3. After confirming the message on the LCD panel,
press the OK button to restore the settings.
All the settings are restored to their defaults.
7. Close the CD/DVD guide if it is open. And then
close the paper support, feeder guard, output
tray, and front tray
.
Transporting This Product
If you need to transport this product, carefully
repack it using the original box (or a similar box that
this product fits snugly into) and packing materials
as follows:
Caution:
c
❏ When storing or transporting this product, do
not tilt it, stand it on its side, or turn it upside
down. Otherwise ink may leak from the
cartridge.
❏ Leave the ink cartridges in their installed
positions when transporting this product;
removing the cartridges for transportation
may damage this product.
Note:
Do not forget to remove the protective materials from this
product before using it again.
1. Remove all paper from the trays and make sure
that this product is off.
2. Open the scanner unit.
English
8. Attach the protective materials to both sides of
this product, and then repack this product and
attachments in the box.
Note:
Be careful not to catch the document cover's cable on
anything.
9. Keep this product on a flat surface to protect it
from shocks during transportation.
3. Make
4. Close the scanner unit.
5. Open the document cover and slide the
6. Unplug the power cord from the electrical outlet.
sure that the print head is in the home
position on the right.
transportation clamp to lock the scanner
carriage.
Changing the language displayed on the LCD panel
You can change the language displayed on the LCD
panel.
1. Press the Setup button.
2. Press the u or d button to select Language.
3. Press the u or d button to select the language
that you want to display, then press the OK
button.
Maintenance and Transporting 43
Page 44

Troubleshooting
Error Messages
You can diagnose and solve most problems by checking the error messages on the LCD panel. If you cannot solve
the problems by checking the messages, use the following table and try the recommended solution.
Note:
The solutions provided are for problems which may arise when using this product as a stand alone device. Refer to the Online
User’s Guide for detailed solutions regarding printing, scanning, print quality, or computer-related problems.
Error Messages Problem Solution
Printer error occurred. Please see
documentation.
Scanner error occurred. Please see
documentation.
Service required.
Parts inside your printer are at the
end of their service life. See your
printer's documentation for details.
Service required.
Parts inside your printer are at near
end of their service life. See your
printer’s documentation for details.
Format error. An error has occurred during
An error has occurred in the
printer parts.
An error has occurred in the
scanner parts.
formatting.
Turn this product off, and then back on. If the error
message still appears, contact your dealer.
Turn this product off, and then back on. Then make
sure the transportation lock is released. If the error
message still appears, contact your dealer.
Contact your dealer.
Contact your dealer.
Retry the procedure. If t he error reoccurs, there may
be a problem with your memory card or storage
media. Check the media and try again.
Clearing the Jammed Paper
If paper is jammed inside this product, an error message appears on the LCD panel. You may be able to clear the
jammed paper using the Control Panel. Follow the instructions below.
1. Press the x Color button to eject the jammed paper. If the jammed paper is not ejected, go on to the next step.
2. Locate where the paper is jammed.
If the paper is jammed at the paper feeding position, remove all of the paper by hand.
If the paper is jammed at the ejecting position, remove the output tray. Remove all of the paper by hand, and
then attach the output tray.
If the paper is jammed inside this product, press the P On button to turn off this product. Open the scanner
unit and the CD/DVD guide. Remove all of the paper inside by hand, including any torn pieces.
3. After clearing the jammed paper, close the scanner unit and the CD/DVD guide, and then press the P On
button.
4. Load a stack of paper in the front or back tray.
44 Troubleshooting
Page 45

The Copied Image Is Improperly
A Message Prompting You to
Sized
When Auto Fit Page is selected as the Zoom setting
on the LCD panel and the border of the original
document is white or very light, the size of the
original might not be recognized correctly. This may
cause the copied image to be improperly sized. To
correct this, select Actual as the Zoom setting and
then use the Optional zoom setting to adjust the size
of the copied image.
The Printout Is Blurry or Smeared
If the printout is blurry or smeared, adjust the paper
thickness.
1. Press the Setup button.
2. Select Paper Thickness Adjustment.
Format the Memory Card
Appears
If the message prompts you to format the memory
card appears on the LCD panel, press the OK button
to format the memory card.
Caution:
c
All data on a memory card is deleted when you
format the memory card.
Cancelling the format
Press the Cancel button to cancel format, and then
exchange it with a formatted one.
The Terms on the LCD Panel Are Is Not Displayed in Your Language
English
Back OK
3. Select On.
Back OK
Note:
The Paper Thickness Adjustment setting is set to On until
this product is turned off. The setting returns to Off the
next time this product is turned on.
If the language displayed on the LCD panel is not the
one you want to display, select the language you
want from the Setup menu. See “Changing the
language displayed on the LCD panel” on page 43
for details.
Troubleshooting 45
Page 46

Customer Support
Product Specifications
Electrical
Contacting Customer Support
If your Epson product is not operating properly and
you cannot solve the problem using the
troubleshooting information in your product
documentation, contact customer support services
for assistance. Check your Pan-European Warranty
Document for information on how to contact EPSON
Customer support. They will be able to help you
much more quickly if you give them the following
information:
❏ Product serial number
(The serial number label is usually on the back
of the product.)
❏ Product model
❏ Product software version
(Click About, Version Info, or similar button in
the product software.)
❏ Brand and model of your computer
❏ Your computer operating system name and
version
❏ Names and versions of the software applications
you normally use with your product
120V Model
Input voltage
range
Rated frequency
range
Power
consumption
220-240V Model
Input voltage
range
Rated frequency
range
Power
consumption
100 to 120V
50 to 60 Hz
Approx. 25 W (Standalone copying
ISO10561 Letter pattern)
Approx. 2.5 W in sleep mode
Approx. 12.5 W in low power mode
Approx. 0.2 W in powered off mode
220 to 240V
50 to 60 Hz
Approx. 25 W (Standalone copying
ISO10561 Letter pattern)
Approx. 2.5 W in sleep mode
Approx. 12.5 W in low power mode
Approx. 0.4 W in powered off mode
Note:
Check the label on the back of this product for the voltage
information.
Environmental
Technical Support Web Site
Go to http://www.epson.com and select the
Support section of your local EPSON web site for the
latest drivers, FAQs, manuals and other
downloadables.
Epson's Technical Support Web Site provides help
with problems that cannot be solved using the
troubleshooting information in your printer
documentation.
Temperature Operation:10 to 35°C (50 to 95°F)
Mechanical
Paper path Sheet feeder, front and back entry
Sheet feeder
capacity
Dimensions 450 mm × 418 mm × 236 mm
Weight Approx. 12.9 kg (28.4 lb)
Front:
About 150 sheets at 64 g/m² (17 lb)
paper
back:
About 120 sheets at 64 g/m² (17 lb)
paper
(W × D × H, not including rubber feet
and loading tray)
Printing
Printing method On-demand ink jet
Nozzle
configuration
Monochrome (black) 180 nozzles
Color (cyan, magenta, yellow, light
cyan, light magenta) 900 nozzles (180
nozzles per color × 5)
46 Customer Support
Page 47

Scanning
Scanner type Flatbed color image scanner
Document size 8.5 × 11.7"(216 × 297 mm) A4 or US letter
size (The reading area can be
specified from your software.)
Scanning resolution 3200 dpi (main), 6400 dpi (sub)
Paper
Note:
❏ Since the quality of any particular brand or type of
paper may be changed by the manufacturer at any
time, Epson cannot guarantee the quality of any
non-Epson brand or type of paper. Always test a
sample of paper stock before purchasing large
quantities or printing large jobs.
❏ Poor quality paper may reduce the print quality and
cause paper jams or other problems. If you have print
quality problems, switch to a higher grade paper.
English
Single sheets
Size A4 (210 × 297 mm), A5
(148 × 210 mm)
Paper types Plain bond paper, special paper
Thickness (for plain
bond paper)
Weight (for plain
bond paper)
Photo Quality Ink Jet Paper
Size A4 (210 × 297 mm)
Paper Types Special paper distributed by Epson
Bright White Ink Jet Paper
Size A4 (210 × 297 mm), A5 (148 × 210 mm)
Paper types Special paper distributed by Epson
Matte Paper - Heavyweight
Size A4 (210 × 297 mm)
Paper types Special paper distributed by Epson
Photo Paper
Size A4 (210 × 297 mm),
Paper types Special paper distributed by Epson
Premium Glossy Photo Paper
Size A4 (210 × 297 mm),
Paper types Special paper distributed by Epson
Premium Semigloss Photo Paper
Size A4 (210 × 297 mm),
Paper types Special paper distributed by Epson
Photo Stickers
Size A6 (105 × 148 mm)
Paper types Special paper distributed by Epson
Iron-on Cool Peel Transfer Paper
Size A4
Paper Types Special paper distributed by Epson
CD/DVD
Size 12-cm CD/DVD, 8-cm CD/DVD
Paper Types Printable CD/DVD
distributed by Epson
0.08 to 0.11 mm (0.003 to 0.004 inch)
64 g/m² (17 lb) to 90 g/m² (24 lb)
10 × 15 cm/4 × 6"(101.6 × 152.4 mm)
10 × 15 cm/4 × 6"(101.6 × 152.4 mm)
10 × 15 cm/4 × 6"(101.6 × 152.4 mm)
❏ Do not load curled or folded paper.
❏ Use paper under normal conditions:
Temperature 15 to 25°C (59 to 77°F)
Humidity 40 to 60% RH
Memory card
Loadable memory card
Memory Stick Memory Stick
Duo*
Memory Stick
PRO Duo*
SD Card miniSD Card* MultiMediaCard
CompactFlash Microdrive
SmartMedia xD-Picture Card
* An adapter is required.
MagicGate
Memory Stick
Note:
The method of using each memory card varies between
memory card types. Be sure to refer to the documentation
packaged with your memory card for details.
Available image files
Media DCF compliant*
File format JPEG or TIFF format image files
Image size Vertical 80 to 4600 pixels, horizontal 80 to
Number of
files
* DCF stands for the “Design rule for Camera File system”
standard, which is set by the Japan Electronics and
Information Technology Industries Association (JEITA).
** Supports Exif Version 2.21.
Note:
You cannot print images with file names containing
double-byte characters.
a DCF compliant digital camera.
4600 pixels
Up to 999
Memory Stick PRO
MagicGate
Memory Stick Duo*
**
taken with
Product Specifications 47
Page 48

Summary of Panel Settings
Copy Mode
Copies 1 to 99
Copy Layout Copy w/Borders, Borderless, CD
Copy
Paper Type Plain (Front), Plain (Back),
Prem.Glossy, GlossyPhoto,
SemiGloss, Matte, PQIJ,
Photo Paper, Bright White (Front),
Bright White (Back), Sticker,
CD/DVD
Paper Size A4, A5, A6, 10 × 15 cm (4 × 6 in)
Quality Draft, Text, Photo, Best Photo
Copy Layout Settings
Repeat Copy-Auto 2-up Copy
Repeat Copy-4 4-up Copy
Repeat Copy-9 Photo Stickers
Repeat Copy-16
Memory Card Mode
Basic Print Index Sheet
Custom Print
Zoom Setting
Actual A4 -> A5
Auto Fit Page A5 -> A4
10 × 15 cm (4 × 6 in) -> A4 25% to 400%
A4 -> 10 × 15 cm (4 × 6 in)
Detailed Settings for Copy Mode
Custom Print Settings
Photo (Single) CD Jacket
Photo (Multi) Iron
Crop Photo Stickers
CD/DVD
More Layout
Copy Density
Reset Copies
Auto Document OFF, ON
48 Summary of Panel Settings
Page 49

Print Setting for Memory Card Mode
Paper Type Plain (Front), Plain (Back),
Prem.Glossy, GlossyPhoto,
SemiGloss, Photo Paper, Matte,
Bright White (Front), Bright White
(Back), CD/DVD
Paper Size A4, A6, 10 × 15 cm (4 × 6 in), CD
Layout Borderless, with Border,
Density
(only for CD/DVD)
Print Options for Memory Card Mode
Upper 1/2, 2-up, 4-up, 8-up,
20-up, 80-up, P.I.F. file name, 1-up
(CD/DVD), 4-up (CD/DVD),
12-up (CD/DVD)
Jewel Case Upper 1/2,
Jewel Case Index
Normal, Darker, Darkest
Film Mode
English
Basic Print Scan to Memory Card
Custom Print
Film Type Setting
Scan Film Color negative film, Positive colo r
film (strip), Color slide, B&W
negative
Custom Print Settings
Date Format None, yyyy.mm.dd,
mmm.dd.yyyy, dd.mmm.yyyy
Time Format None, 12-hour system, 24-hour
system
Quality Normal, Photo, Best Photo
Filter Off, Sepia
Auto Correct P.I.M., PhotoEnhance, Exif, Off
Brightness Darkest, Darker, Standard,
Brighter, Brightest
Contrast Highest, Higher, Default
Sharpness Sharpest, Sharper, Default,
Softer, Softest
Saturation Lowest, Lower, Default, Higher,
Highest
Small Image On, Off
Print Info. Off, On
Fit to Frame On, Off
Bidirectional On, Off
Photo (Single) Crop
Print Settings for Film Mode
Paper Type Plain (Front), Plain (Back), Bright
White (Front), Bright White (Back),
Photo Paper, Prem.Glossy,
GlossyPhoto, SemiGloss, Matte
Paper Size A4, 10 × 15 cm (4 × 6 in)
Layout Borderless, with Border
Restoration OFF, ON
Summary of Panel Settings 49
Page 50

Print Options for Film Mode
Scan Original Photo Setting for
Reprint/Restore Photos
Original Size 10 × 15 cm (4 × 6 in)
Quality Normal, Photo, Best Photo
Saturation Less Saturation, Normal, More
Saturation
Scan Mode
Scan to Memory Card Scan to Email
Scan to PC
Scan Settings
Scan area Auto cropping, Max area
Document Type Text, Graphics
Quality Normal, Text and Image
Print Settings for Reprint/Restore Photos
Paper Type Prem.Glossy
Paper Size 10 × 15 cm (4 × 6 in), A4
Restoration On, Off
Menus for Combo Print
Select Photo and Print Template
Scan Template and Print Photo
Setup Mode
Creative Projects Mode
Reprint/Restore Photos Combo Print
50 Summary of Panel Settings
Ink Levels CD/DVD Position
Nozzle check CD/DVD Position
Head Cleaning BT Printer ID Set
Head Alignment BT Connectivity Mode
PictBridge Setup BT Encryption
Direct Print Document Set BT PIN Code Set
Backup Memory Card BT Device Address
Folder select Paper Thickness
Photo Stickers Position
UP/Down
Photo Stickers Position
Left/Right
Up/Down
Left/Right
Adjustment
Restore to Factory
Settings
Language
Page 51

Index
A
Aligning print head, 42
B
Borderless
copies, 8, 11
printing, 28, 34
Buttons, 4
C
Cleaning print head, 41 to 42
Control panel, 4
Copying
basic copying, 5
borderless photos, 8, 11
layout settings, 8, 11, 12
multiple photos, 9, 12
non-readable area, 7
number of copies, 9
paper type, 7
Zoom, 9
D
Digital camera, 26, 37
DPOF (Digital Print Order Format), 26
M
Memory card
compatible, 15, 47
ejecting, 15
formatting, 45
inserting, 15
Memory card print
adding date to prints, 29
adding time to prints, 29
Auto correct setting, 29
Bidirectional setting, 30
Brightness setting, 29
Contrast setting, 29
Crop print, 21
Filter setting, 29
Fit to Frame setting, 30
layout settings, 28
P.I.F., 26
paper type, 7, 28
print information, adding, 30
printing basics, 16
print settings, 28 to 30
Saturation setting, 30
Sharpness setting, 29
N
Nozzle check, 41
English
E
Error messages, 44
F
Film
35 mm film strips, 31
35 mm slides, 32
Basic Print, 32
Crop print, 33
Custom print, 33
loading, 31 to 32
print settings, 34
Quality setting, 34
selecting photos, 32, 33
storing holder, 34
type, 34
I
Index sheet for printing, 16
Ink cartridge
checking the ink level, 39
replacing, 39 to 40
J
Jammed paper, 44
P
Paper specifications, 47
Photos
copying, 9, 12
placing on the document table, 7, 12
scanning to memory card, 35
PictBridge, 37
Protective materials, 43
R
Reflective document mat, 7, 31, 34
Restore to factory settings, 42
S
Scanning
quality, 35, 36
to memory card, 35 to 45
T
Transporting, 43
Troubleshooting, 44
U
USB DIRECT-PRINT, 37
L
Loading paper, 5 to 7
Index 51
Page 52

EPSON OVERSEAS MARKETING LOCATIONS
Epson America, Inc.
3840 Kilroy Airport Way
Long Beach, CA 90806
Phone: (562) 981-3840
Fax: (562) 290-5220
EPSON DEUTSCHLAND GmbH
Zülpicher Straße 6,
40549 Düsseldorf Germany
Phone: (0211) 56030
Fax: (0211) 5047787
EPSON AUSTRALIA PTY. LTD.
70 GIBBES STREET,
CHATSWOOD 2067 NSW.
Phone: 2-9903-9000
Fax: 2-9903-9177
EPSON HONG KONG LTD.
20/F Harbour Centre,
25 Harbour Road,
Wanchai, Hong Kong
Phone: 2585-4300
Fax: 2827-7083
EPSON UK LTD.
Campus 100, Maylands Avenue,
Hemel Hempstead, Herts,
HP2 7TJ, U.K.
Phone: (+44) 01442 261144
Fax: (+44) 01442 227227
EPSON FRANCE S.A.
68 bis, rue Marjolin
92300, Levallois-Perret, France
Phone: 33.1.41.86.26.56
Telex: 610657
EPSON SINGAPORE PTE. LTD.
No. 1 Temasek Avenue #36-00
Millenia Tower, Singapore 039192
Phone: (065) 633 77 911
Fax: (065) 633 41 185
EPSON TAIWAN TECHNOLOGY & TRADING
LTD.
14F, No.7, Song Ren Road,Taipei,
Taiwan 110
Phone: (02) 8786-6688
Fax: (02) 8786-6633
EPSON ITALIA S.p.A.
V.le F.lli Casiraghi 427
20099 Sesto S.Giovanni
MI, Italy
Phone: +3902262331
Fax: +39022440750
SEIKO EPSON CORPORATION
(Hirooka Office)
80 Harashinden, Hirooka
Shiojiri-shi, Nagano-ken
399-0785 Japan
EPSON IBERICA S.A.
Av. de Roma, 18-26
08290 Cerdanyola del Valles
Barcelona, Spain
Phone: 582. 15.00
Fax: 582. 15.55
EPSON PORTUGAL, S.A.
R. do Progresso, 471, 1° Perafita
4460 Matosinhos, Portugal
Phone: (02) 996 14 02
Fax: (02) 996 14 11
2003 November
Printed in XXXXXX XX.XX-XX
 Loading...