

Page 1
CPD-17417R1
4049801-00
XXX
Page 2
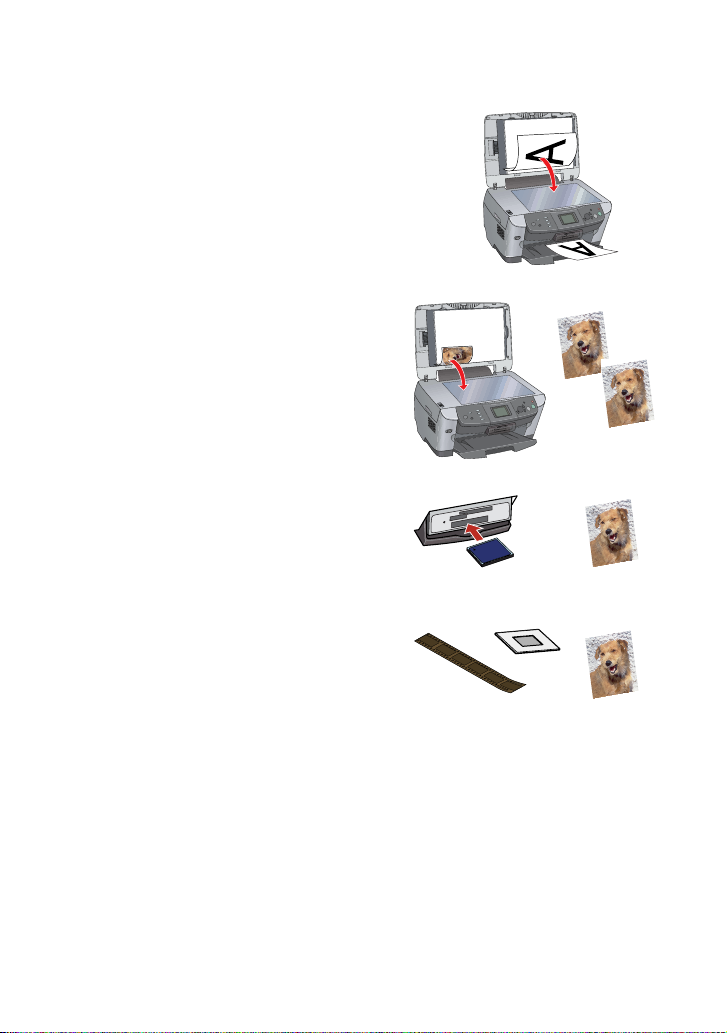
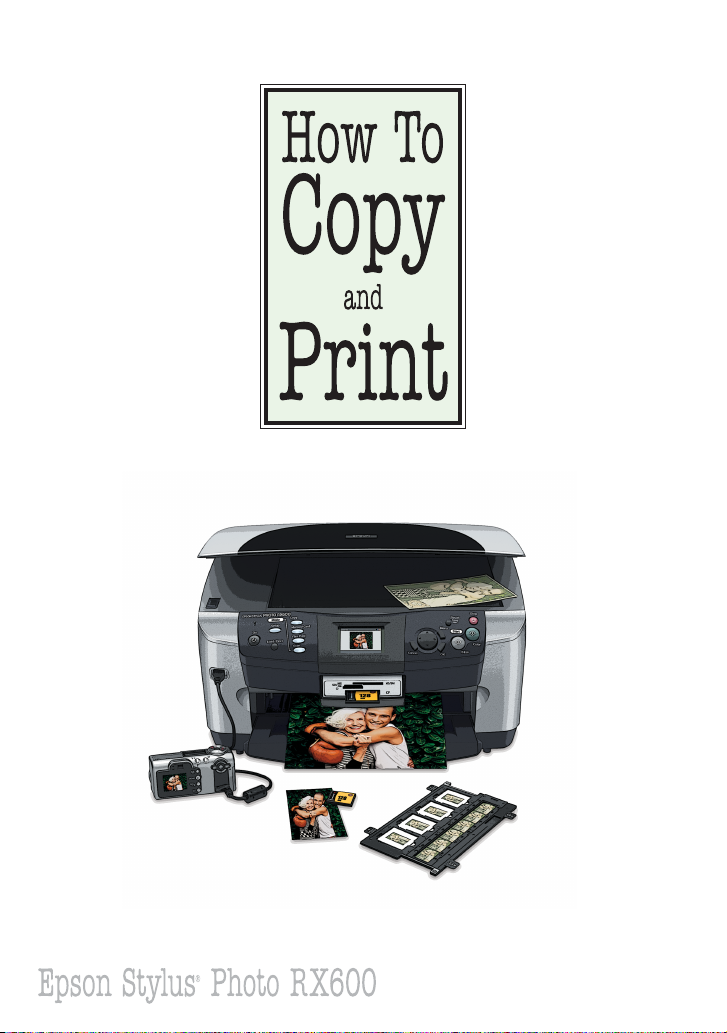
Here’s How To . . .
■ Make a quick letter-size copy (page 1)
■ Print an exact duplicate of a
4 × 6-inch photo (page5)
■ Print photos from y our camera’s
memory card (page 10)
■ Print photos from 35 mm film
or slides (pag e 15)
®
And you can do all these things with your Epson Stylus
Photo
RX600 without using your computer!
There’s much more you can do with your RX600. See some examples
on page 24.
To set up and connect your RX600, see the Start Here sheet.
For detailed instructions on using the RX600, see your User’s Guide.
Page 3
Making a Quick Letter-Size Copy
The default settings on the RX600 screen make it quick and easy to
copy a letter-size document on plain paper. Here’s how:
Loading Paper
1 Press the P On button to turn on the RX600.
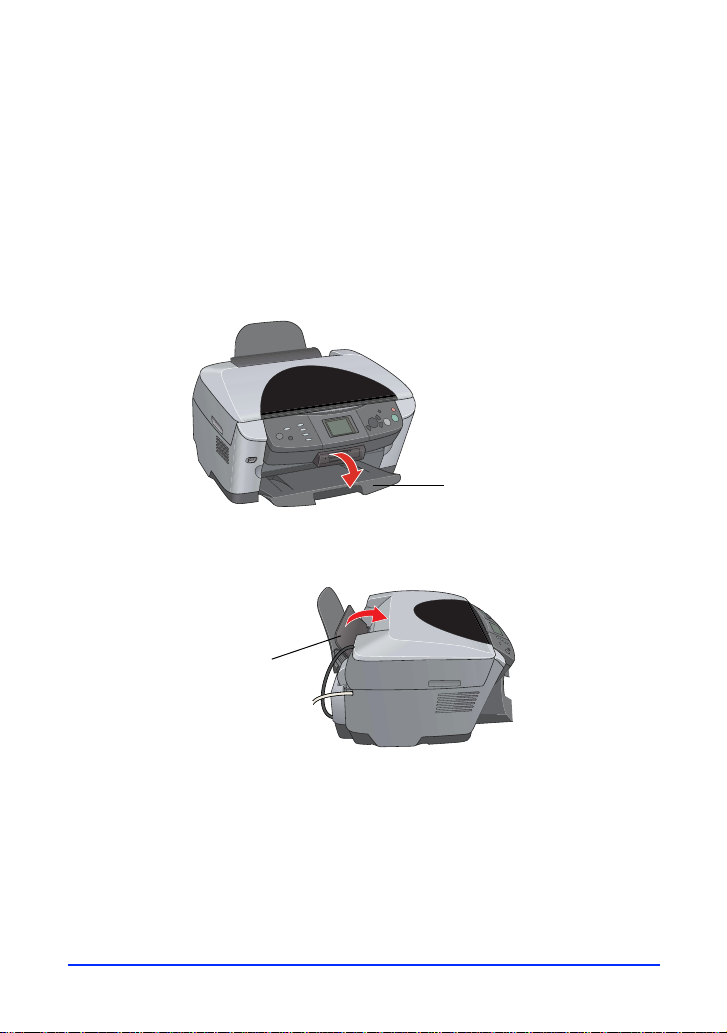
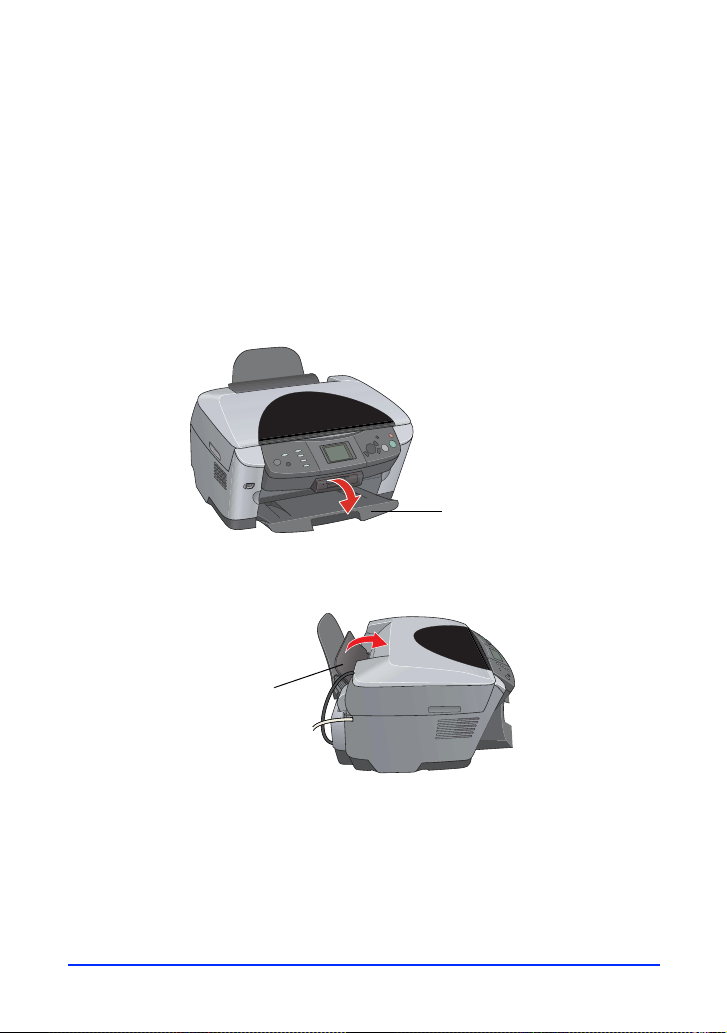
2 Open the output tray.
Output tray
3 Flip the feeder guard forward.
Feeder
guard
1
Page 4

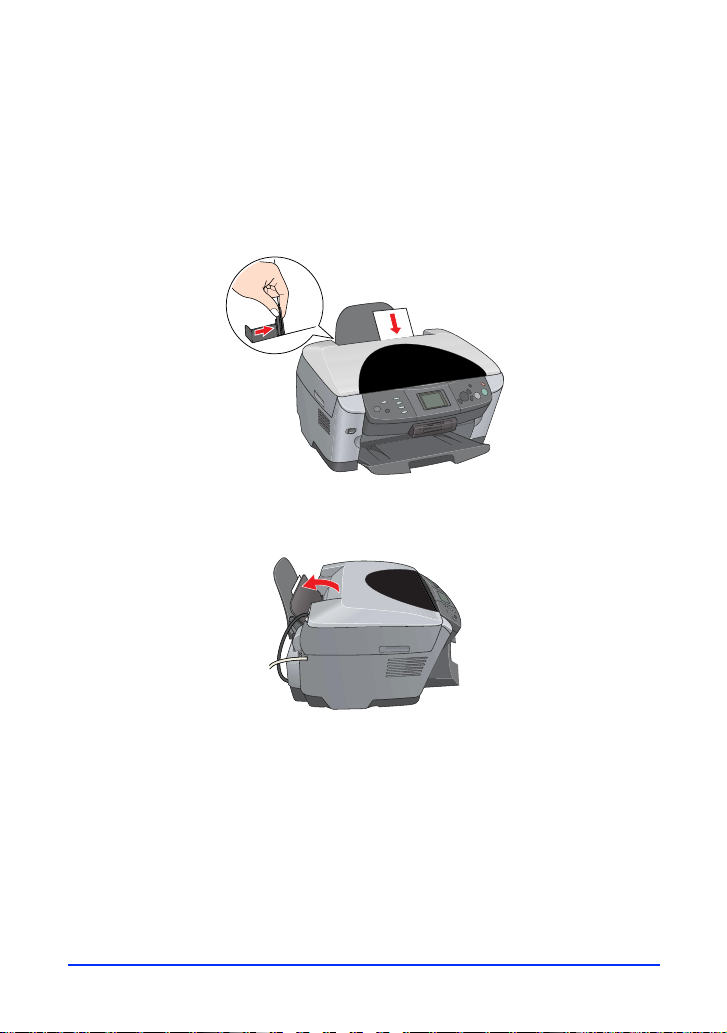
4 Insert a sheet of 8.5 × 11-inch plain paper—short edge first—
against the right edge of the sheet feeder and under the tabs on
the edge guides.
5 Press the sides of the left edge guide together and sl ide it against
the paper (but not too tightly).
6 Flip the feeder guard back over the paper.
2
Page 5
Placing Your Document
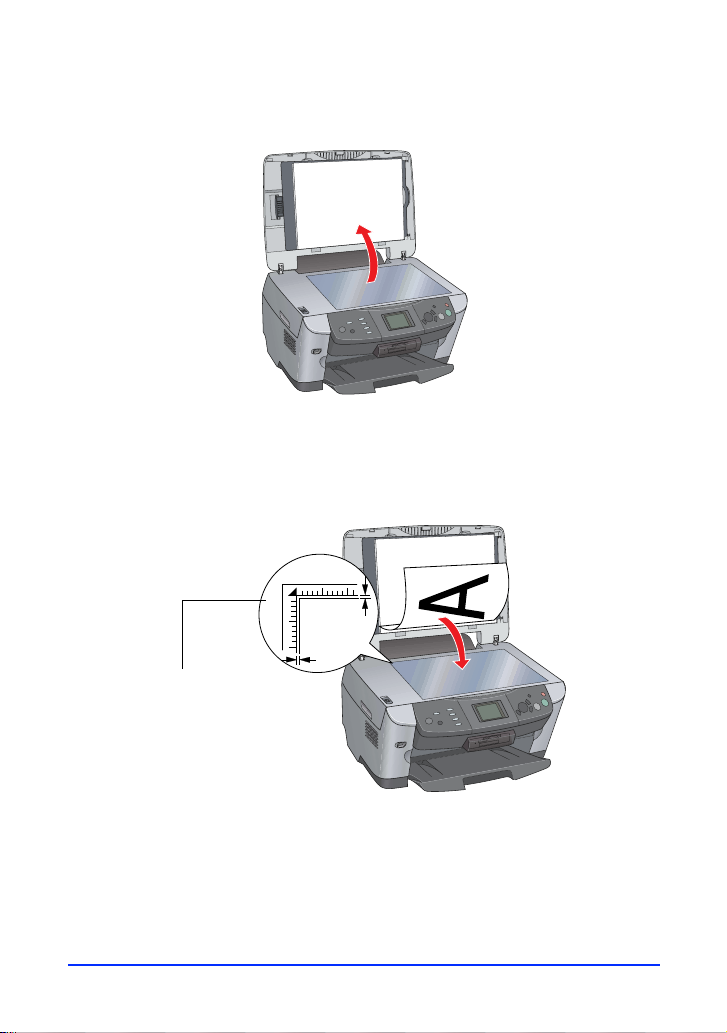
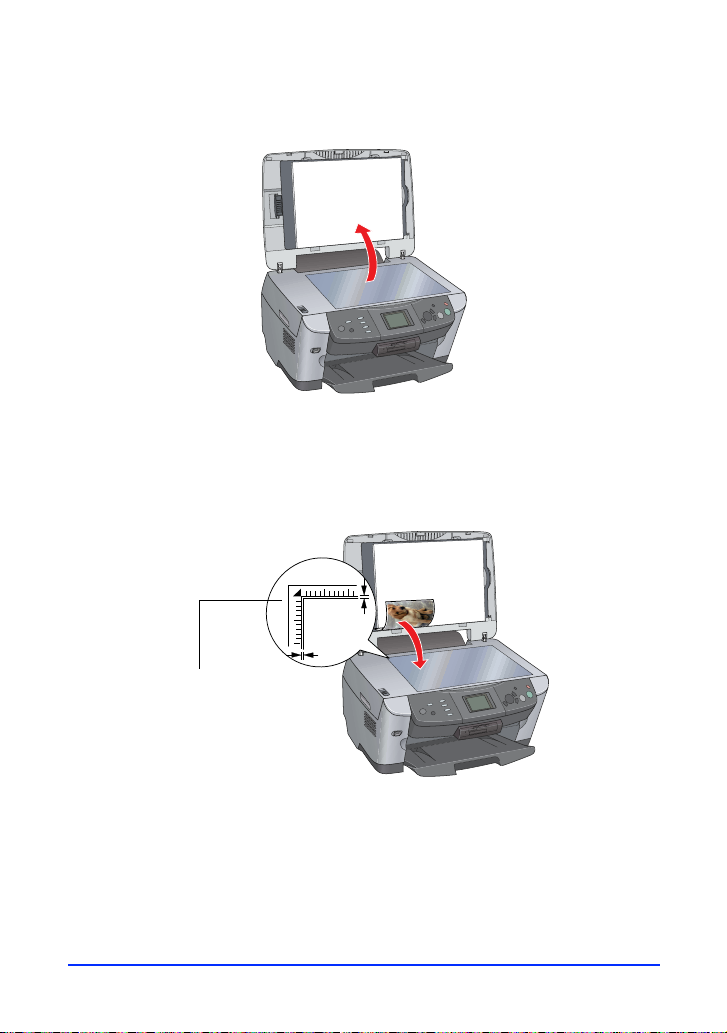
1 Open the scanner lid.
2 Place your document face-down on the glass, in the upper left
corner. Move your document about 1/10 inch from the top and
side edge so your entire document is scanned.
0.1 in
0.1 in
Move the document
in about 1/10 inch
from the edges
3
Page 6
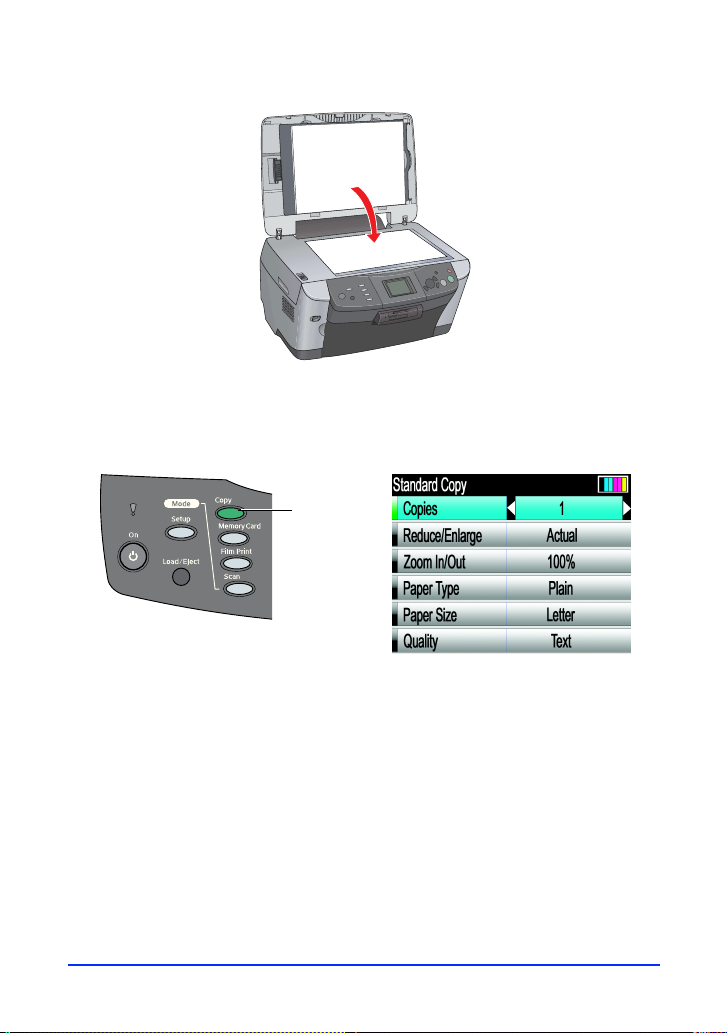
3 Close the scanner lid.
Copying Your Document
1 Press the Copy button to access the Copy Menu.
Copy
button
2 Press the x
B&W button to make a black and white copy.
x
Note: To cancel copying, press the y Stop button. Canceling appea r s o n
the RX600 screen.
Color button to make a color copy or press the
4
Page 7
Printing a Duplicate of a Photo
You can print an exact duplicate of a 4 × 6-inch photo on Epson
photo paper. In this example, you’ll select Epson Premium Glossy
Photo Paper.
Loading Paper
1 Press the P On button to turn on the RX600.
2 Open the output tray.
Output tray
3 Flip the feeder guard forward.
Feeder
guard
5
Page 8
4 Insert a few s heets of 4 × 6-inch Premium Glossy Photo Paper—
short edge first and shiny side up—against the right edge of the
sheet feeder, under the tab.
5 Press the sides of the left edge guide together and sl ide it against
the paper (but not too tightly). Make sure the paper is under the
tab on the left edge guide.
6 Flip the feeder guard back over the paper.
6
Page 9
Placing Your Photo
1 Open the scanner lid.
2 Place your 4 × 6-inch photo face-down on the glass, in the upper
left corner. Move your photo about 1/10 inch from the top and
side edge so your entire photo is scanned.
0.1 in
0.1 in
Move the photo
in about 1/10 inch
from the edges
7
Page 10

3 Close the scanner lid.
Printing Your Duplicate Photo
1 Press the Copy button to access the Copy Menu.
Copy
button
2 Press the Menu button to change the Copy Layout setting.
Menu
button
3 Press the u or d button to choose
l or r button to change the setting to
Copy Layout, then press the
BorderFree.
®
8
Page 11

4 Press the OK button.
5 Select the follow in g settings:
■ Copies: choose the number of
prints you want
■ Reduce/Enlarge: choos e
AutoFitPage
■ Zoom In/Out: leave this setting blank (if it is accidently
changed, reset the
■ Paper Type: choose Prem.Glossy
■ Paper Size: choose 4x6in.
■ Quality: choose BestPhoto
Reduce/Enlarge setting to AutoFitPage)
OK button
Press the u or d button to choose an option, then press the
l or r button to change settings.
Before you print, make sure the RX600 screen looks like this:
BorderFree
AutoFitPage
Paper type
and size, and
print quality
6 Press the x
x
B&W button to make black and white prints.
Note: To cancel copying, press the y Stop button. Canceling appea r s o n
the RX600 screen.
Color button to make color prints or press the
9
Page 12

Printing Photos from a Memory Card
You can view photos on your memory card and print them on
4 × 6-inch Epson photo paper. In this example, you’ll select Epson
Premium Glossy Photo Paper.
Loading Paper
1 Press the P On button to turn on the RX600.
2 Open the output tray.
Output tray
3 Flip the feeder guard forward.
Feeder
guard
10
Page 13

4 Insert a few sheets of 4 × 6-inch Premium Glossy Photo Paper—
short edge first and shiny side up—against the right edge of the
sheet feeder, under the tab.
5 Press the sides of the left edge guide together and sl ide it against
the paper (but not too tightly). Make sure the paper is under the
tab on the left edge guide.
6 Flip the feeder guard back over the paper.
11
Page 14

Inserting Your Memory Card
1 Press the Memory Card button to access the Memory Card
menu.
Memory
Card button
2 Open the memory card slot cover.
12
Page 15

3 Insert your memory card into the correct slot. Be careful not to
force it in (it won ’t go in all the way).
Note:
Do not insert more than one card.
CompactFlash™ or
Microdrive
™
(bottom)
SmartMedia
(top)
Memory Stick
™
(middle)
®
SD or MMC
(middle)
xD
(top)
4 The memory card light flashes, then turns green. Close the cover.
Memory card light
If the light doesn’t turn green, or if you see the message
No memory card. Operation Canceled on the RX600 screen,
the card may be inserted incorrectly or may not be supported .
Note:
To remove the card, first m ake s ure you r RX600 is not prin ting and the
memory card light is not flashing. Then open the memory card slot
cover and pull the card straight out of the slot.
13
Page 16

Viewing and Printing Your Photos
1 Press the u or d button to choose Basic Print 4 x 6", then press
the l or r button to choose
Select Print.
2 Press the
OK button. The RX600 screen displays the first, second,
and last photo on the card.
Last First Second
3 Press the l or r button to move through the photos.
4 When the photo you want to print is in the middle of the screen,
press the u or d button to cho os e the number of copies to print
of that photo.
5 Press the x
Color button to print a color photo. (You can’t print
in black and white from this mode.)
Note:
To cancel printing, press the y Stop button. Canceling appears on the
RX600 screen. To print an Index Sheet (also called a proof or contact
sheet) with small thumbnails of all your photos, see your User’s Guide.
14
Page 17

Printing a Photo from Film or a Slide
You can print a 4 × 6-inch photo from a 35 mm film negative or a
slide. (For additional details on film printing, see your User’s Guide.)
Before you start, make sure the cable is connected to the
(transparency unit) connector. (If it is not connected, turn off the
RX600, connect the cable, then turn the RX600 bac k on.)
TPU
Loading Paper
1 Press the P On button to turn on the RX600.
2 Open the output tray.
15
Output tray
Page 18

3 Flip the feeder guard forward.
Feeder
guard
4 Insert a few sheets of 4 × 6-inch Premium Glossy Photo Paper—
short edge first and shiny side up—against the right edge of the
sheet feeder, under the tab.
5 Press the sides of the left edge guide together and sl ide it against
the paper (but not too tightly). Make sure the paper is under the
tab on the left edge guide.
16
Page 19

6 Flip the feeder guard back over the paper.
Removing the Film Holder
1 Open the scanner lid.
17
Page 20

2 Remove the document mat from the scanner lid by pulling the
handle to the left.
3 Carefully lift the film holder out of the scanner lid by pulling it
straight up.
4 Continue with one of these sections:
■ “Loading a Filmstrip” on page 19
■ “Placing a Slide” on page20
18
Page 21

Loading a Filmstrip
1 Lift off the filmstrip cover.
2 Slide the strip of film into the film holder, with the duller
(emulsion) side up (the images should appear reversed). Position
the top of the images next to the outside edge of the film holder.
3 Reinstall the filmstrip cover over the strip of fi lm (it snaps into
place). Press it around the edges to make sure it is closed.
4 Place the film holder on the glass, inserting its positioning posts
into the two holes near the scanner lid.
19
Holes
Make sure the film
is toward the center
of the glass
Page 22

5 Close the scanner lid.
6 Continue with “Printing Your Photo” on page 22.
Placing a Slide
1 Place the film holder on the glass, inserting its positioning posts
into the two holes near the scanner lid.
Holes
20
Make sure the slide
section is toward the
center of the glass
Page 23

2 Place your slide in the holder with the duller (emulsion ) side up.
Make sure the top of images
with portrait orientation face
the front of the RX600
Note:
If your slide image is in landscape orientation (wider than it is long), place
it in the same direction as slide images in portrait orientation (longer than
they are wide). This copies the maximum image area, but your preview
will be rotated.
3 Close the scanner lid.
4 Continue with “Printing Your Photo” on page 22.
21
Page 24

Printing Your Photo
1 Press the Film Print button to access the Film Print Menu.
Film Print
button
2 Press the u or d button to choose
3 Press the
OK button.
Basic Print 4 x 6".
4 Press the l or r button to choose one of the following:
■ For color filmstrip negatives: Negative Color Film
■ For color filmstrip positives: Positive Color Film (Strip)
■ For color slides: Positive Color Film (Slide)
■ For black and white filmstrip negatives: Negative B&W
Film
Color
filmstrip
negative
Slide
5 Press the OK button. The RX600 previews your photos and
displays them on its screen.
22
Page 25

6 Press the l or r button to move through the photos (if you
placed more than one).
Last First Second
Note:
If your photos are upside-down or backward, re-position them in the
film holder, press the Cancel button, and start again at step 1.
7 When the photo you want to print is in the middle of the screen,
press the u or d button to cho os e the number of copies to print
of that photo.
8 Press the x
black and white photo, press the x
Note:
To cancel printing, press the y Stop button. Canceling appears on
the RX600 screen.
Color button to print a color photo. (If you have a
B&W button to print it.)
9 To sele ct anot her p hoto for pr intin g, pr ess t he Cancel button and
repeat steps 6 through 9.
If you’re finished printing, press
Menu, or simply select another
Note:
Your printed image may be cropped slightly from the original film or slide.
This is because t he proportio ns of fil m and s lide i mages are di fferent fro m
the proportions of your paper.
OK to return to the Film Print
Mode button on the left.
23
Page 26

What Else You Can Do
There is much more you can do with your Stylus Photo RX600.
Print and scan from yo ur
computer. See your User’s
Guide.
Make copies in a variety
of layouts, with or without
your computer. See your
User’s Guide.
Copy or scan your old photos, film, or
slides, and bring the colors back to life
with advanced photo restoration
technology. See the copying and
scanning chapters in your User’s Guide.
Save your memory card photos to
a CD-ROM or Zip
to your RX600. You can also print
photos saved on a CD-ROM or
Zip disk. See your User’s Guide.
®
drive connected
24
Page 27

Send photos wirelessly from
a Bluetooth
®
-enabled PDA,
phone, computer, or other
device to your RX600 using
the optional Bluetooth Photo
Print adapter. See your
User’s Guid e.
If you have a PictBridge
®
- or USB Direct
Print-enabled camera, you can connect it
to the RX600 to print photos right from
your camera. See your User’s Guide.
If your camera has P.I.M. (PRINT Image
Matching
™
) or Exif Print suppor t, you can
use these enhancement features when you
print from your memory card. See your
on-screen Reference Guide for details.
Epson and Epson Stylus are registered trademarks, and PRINT Image Matching and the
PRINT Image Matching logo are trademarks of Seiko Epson Corporation.
BorderFree is a registered trademark of Epson America, Inc.
General Notice: Other product names used herein are for identification purposes only and may
be trademarks of their respective owners. Epson disclaims any and all rights in those marks.
© 2004 Epson America, Inc. 2/ 04
25
Page 28

Printed in XXXXXX XX.XX-XX
 Loading...