

Epson BrightLink 450Wi, PowerLite 1760W, PowerLite 1770W, PowerLite 1775W, PowerLite 1830 User's Guide
...Page 1

Message Broadcasting
Message Broadcasting is a plug-in for EasyMP Monitor.
Administrators can use the plug-in to send messages or
announcements to one or more projectors or all the projectors on the
network. You can send messages manually, or use the Timer function
in EasyMP Monitor to have messages sent automatically.
You can use Message Broadcasting to send images in JPEG format.
The maximum resolution for an image is 1920 × 1200 pixels.
Getting Started
Before you install the Message Broadcasting plug-in, make sure
EasyMP Monitor (version 4.40 or later) is installed, and your
projectors are registered in EasyMP Monitor. Make sure your
projectors support Message Broadcasting; check
www.epson.com/support
Follow the instructions on the Epson website for downloading and
installing.
if necessary.
You need to use a networked Windows computer running
Windows
Professional to install the plug-in.
If any of the projectors you select are switched off, they will power on
automatically when you begin Message Broadcasting. For network
communication, make sure the
projectors’ Extended menu is set to
®
7, Windows Vista®, Windows XP, or Windows 2000
Standby Mode setting in the
Communication On.
Message Broadcasting 1
Page 2
Creating Messages
The easiest way to create messages in the JPEG format is to save slides
®
from Microsoft
1. After you create a slide or series of slides in PowerPoint, open the
File menu and select
PowerPoint® as .JPG files.
Save As.
note
This screen shows an
example of Group View.
Your screen will look
different in Detail View.
2. For the file type, select
then click
Save.
JPEG File Interchange Format (*.jpg),
If you are working with a series of slides, you can select whether
you want to save all slides or just the curent slide.
Broadcasting Manually
You can broadcast a single image or select a folder containing a series
of images to broadcast as a slideshow.
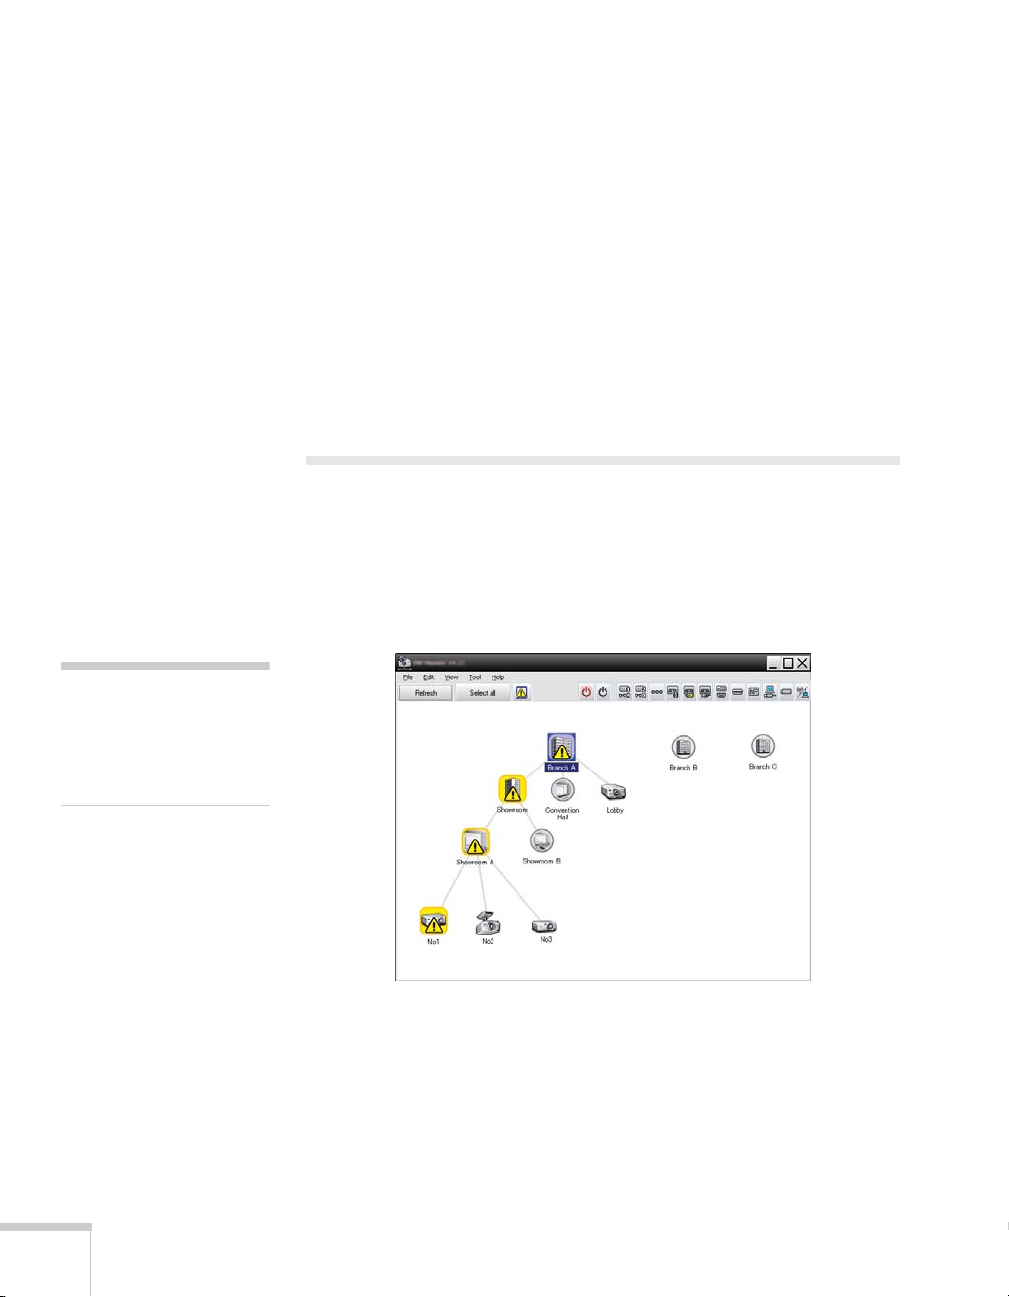
1. Start EasyMP Monitor. You may see a screen like the following,
showing your registered projectors and groups:
2 Message Broadcasting
2. Open the
Broadcasting
Tool menu and select Plug-in > Message
.
Page 3
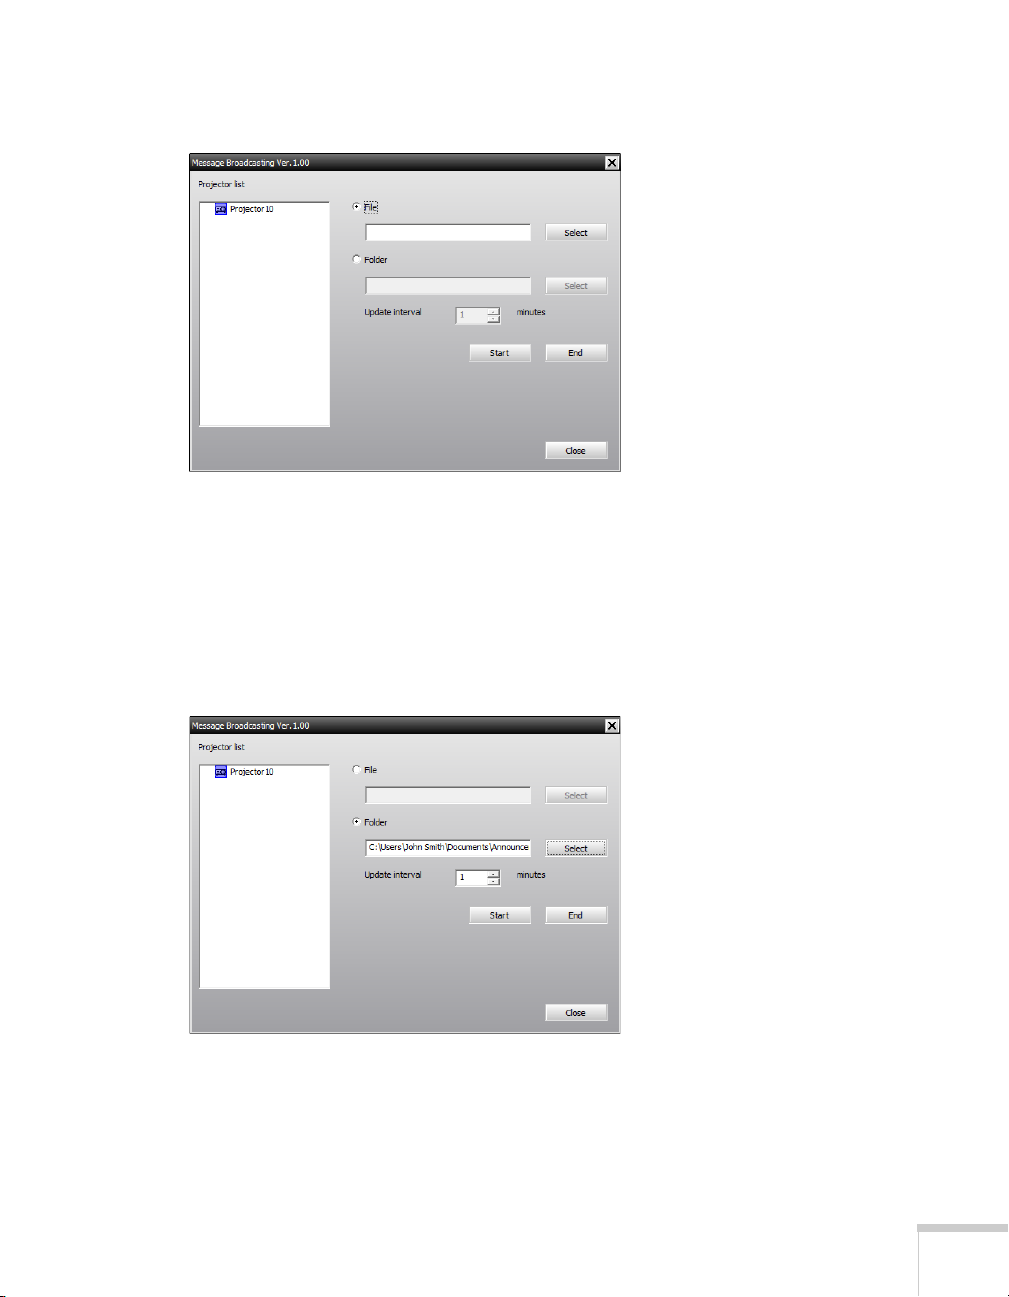
You see the Message Broadcasting window:
3. Select the projector or group you want to send your message to.
4. Click the
File or Folder button, depending on whether you want
to broadcast an individual message (File) or a series of slides
(Folder).
5. Click
Select, then select the file or folder you want to broadcast.
You see the file or folder on the Message Broadcasting window:
6. If you have selected a folder, you can specify the timing between
slides. Select the number of minutes for the
Update interval.
7. Click
Start. Your message or slideshow is sent to the selected
projector or group. You will not see a confirmation message.
Message Broadcasting 3
Page 4

note
Projector users or presenters
can end the message
broadcast at any time by
pressing the Esc button on
the projector or remote
control. The following
reminder is displayed in the
lower left corner of the
screen: [ESC]: Close
Message Broadcasting.
Once the Esc button is
pressed, the projector will
not receive broadcast
messages until it is restarted.
If a projector is already operating, the Message Broadcast will
interrupt the existing projection.
8. When you want to end the message display or slideshow, click
End.
If you are broadcasting a series of slides, you may need to calculate
the end time. Multiply the number of slides by the Update
interval between slides, then add the number of minutes to the
start time.
If you do not click
End, the message will remain on the screen. If you
are broadcasting a slideshow, it will repeat until you end it.
However, individual projector users or presenters can stop the
broadcast by pressing the
control. Once the
Esc button is pressed, the projector will not receive
Esc button on the projector or remote
broadcast messages until it is restarted.
Broadcasting Automatically
You can use the Timer function in EasyMP Monitor to set up
slideshows or messages for automatic broadcasting.
note
This screen shows an
example of Group View.
Your screen will look
different in Detail View.
4 Message Broadcasting
1. Start EasyMP Monitor. You may see a screen like the following,
showing your registered projectors and groups:
2. Open the
Tool menu and select Timer > Timer Settings.
Page 5

You see the Timer Settings window:
3. Select the projector or group you want to send your message to.
4. Click
Add. You see the Create New Timer window:
Message Broadcasting 5
Page 6

5. Click the arrow in the
Schedule mode box and select one of the
following:
■ Date—Select the date you want to broadcast.
■ Every Week—Select the start and end dates, and the day or
days you want to broadcast.
■ Every Day—Select the start and end dates for the daily
broadcast.
6. Select the time you want to start broadcasting.
6 Message Broadcasting
7. Click the arrow in the
Broadcasting start
, then click OK.
Operation box and select Message
Page 7

You see the following:
8. Click the
File or Folder button, depending on whether you want
to broadcast an individual message (File) or a series of slides
(Folder).
9. Click
Select, then select the file or folder you want to broadcast.
10. If you are broadcasting a slideshow, you can specify the timing
between slides. Select the number of minutes for the
interval
11. Click
.
OK.
Update
Message Broadcasting 7
Page 8

You see your schedule in the Timer Settings window:
note
Projector users or presenters
can end the message
broadcast at any time by
pressing the Esc button on
the projector or remote
control. The following
reminder is displayed in the
lower left corner of the
screen: [ESC]: Close
Message Broadcasting.
Once the Esc button is
pressed, the projector will
not receive broadcast
messages until it is restarted.
12. To set the message end time, click
select
Message Broadcasting end in the Operation box and
OK. You must set the end time; otherwise, your message
click
Add, select the time, then
broadcast will continue indefinitely.
You can use the buttons at the bottom of the screen to enable,
disable, edit, or delete your timer settings.
13. When you are finished adjusting timer settings, click
save the settings.
Close to
8 Message Broadcasting
Page 9

Solving Problems
If messages fail to display on the selected projectors, check the
following:
■ If the message does not appear on any of the projectors, check the
firewall settings on the computer running EasyMP Monitor.
Make sure EasyMP Monitor is selected as an exception.
■ If an individual projector fails to display the message, make sure
the
Standby Mode setting in the projector’s Extended menu is
set to
Communication On.
■ Try restarting the projector. If a projector user or presenter has
pressed the
projector will not receive messages until it is restarted.
Esc button to stop the message broadcast, the
© 2010 Epson America, Inc. 1/10 CPD-27543R1
Message Broadcasting 9
 Loading...