

Page 1
Using the Epson Perfection 1250
About the Epson 1250
The Epson Perfection 1250 is a flatbed scanner
which can scan documents up to 8.5" wide by
11" tall.
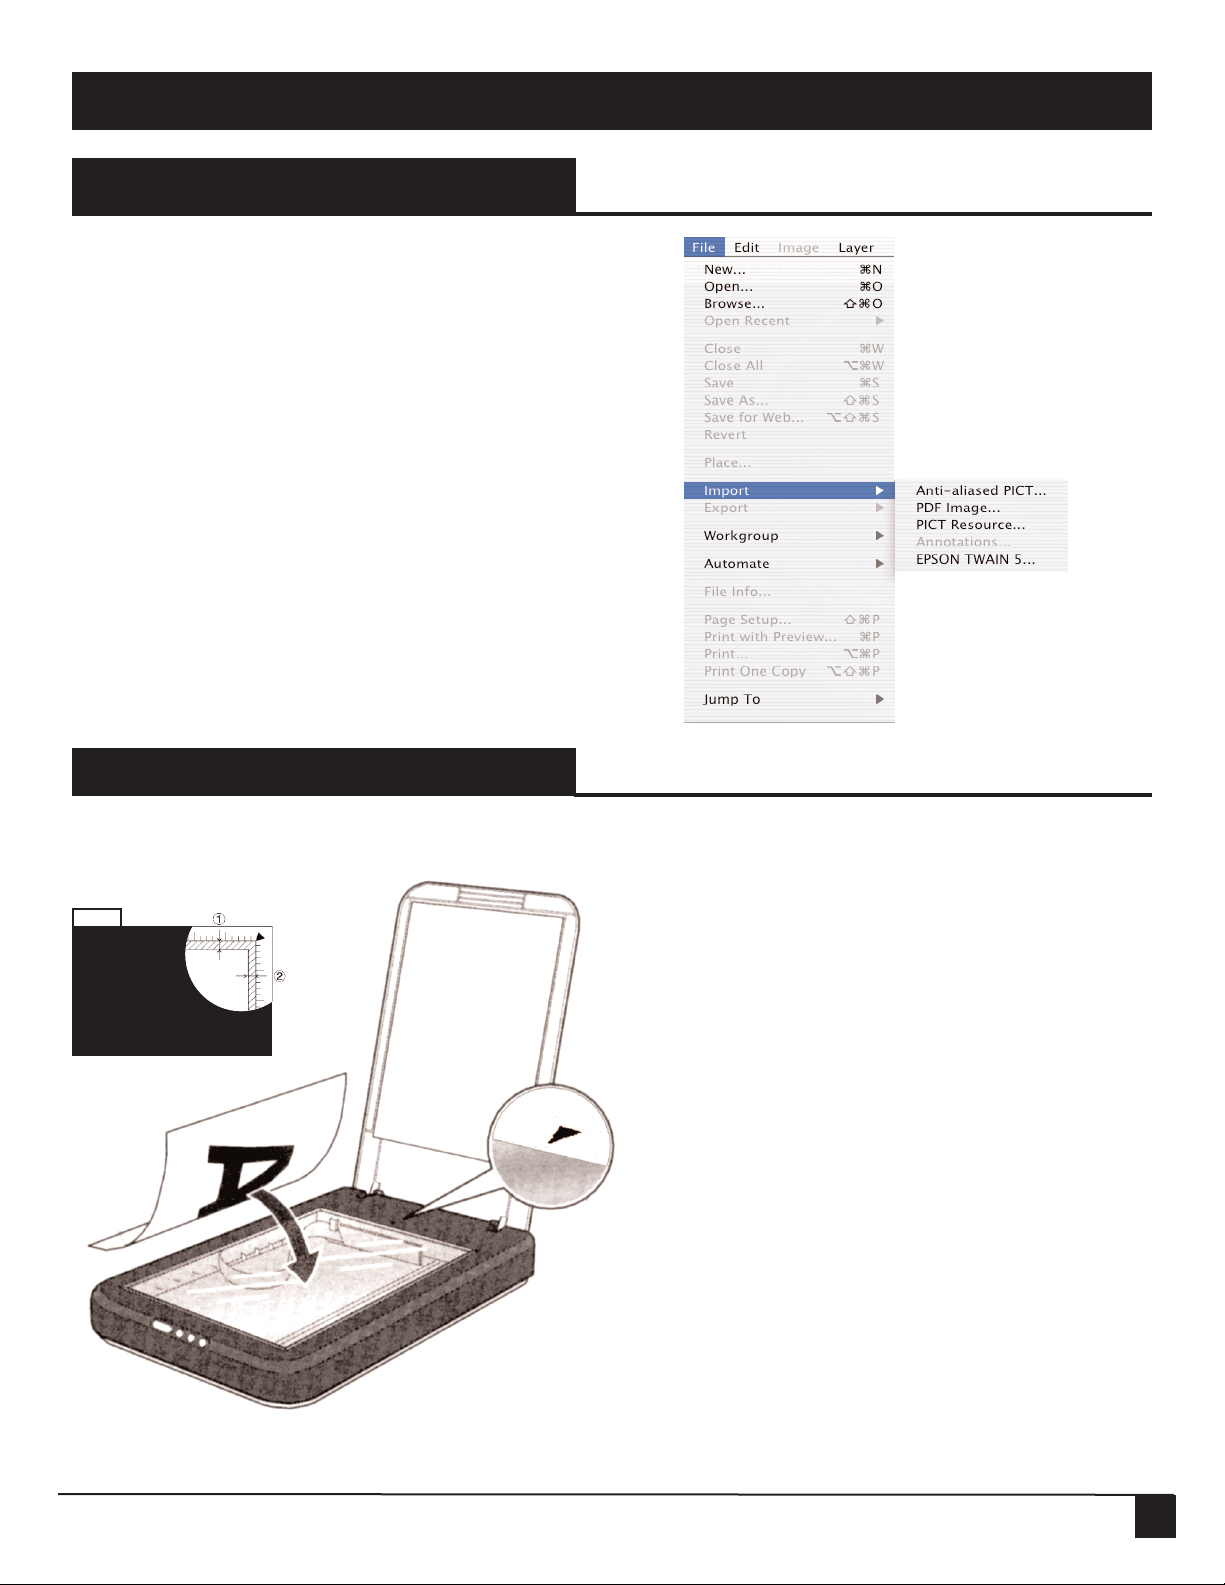
• Images are scanned into Photoshop by selecting
Photoshop’s File> Import command, then
choosing Epson TWAIN 5.
Placing Documents into the Scanner
Note
The area with
a width of 5
mm from the
scanner’s horizontal and vertical
guides is not scanned.
Center guide
marker
Placing documents:
• Media is placed facedown onto the scanner’s glass
table, as shown in the illustration on the left.
• Documents should be centered using the arrow
marker on the scanner’s horizontal guide (see left).
• After placing media, close the scanner’s cover to
ensure the best quality scan.The Epson’s self-adjusting lid allows thick documents—such as books—to
be scanned without having to remove the scanner’s
cover.
• Although the Perfection 1250 can be used to scan
three-dimensional objects as well as documents,
please avoid placing anything on the scanner which
could scratch or otherwise damage its glass.
Digital Resource Group: www.eciad.ca/DRG
November /03
11
Page 2
Using the Epson Perfection 1250
Quick Scanning Instructions
1) Insert documents into the scanner following the steps outlined
on page one.
2) Launch Photoshop. Pull down the File menu, highlight
Import, and choose EpsonTWAIN 5.
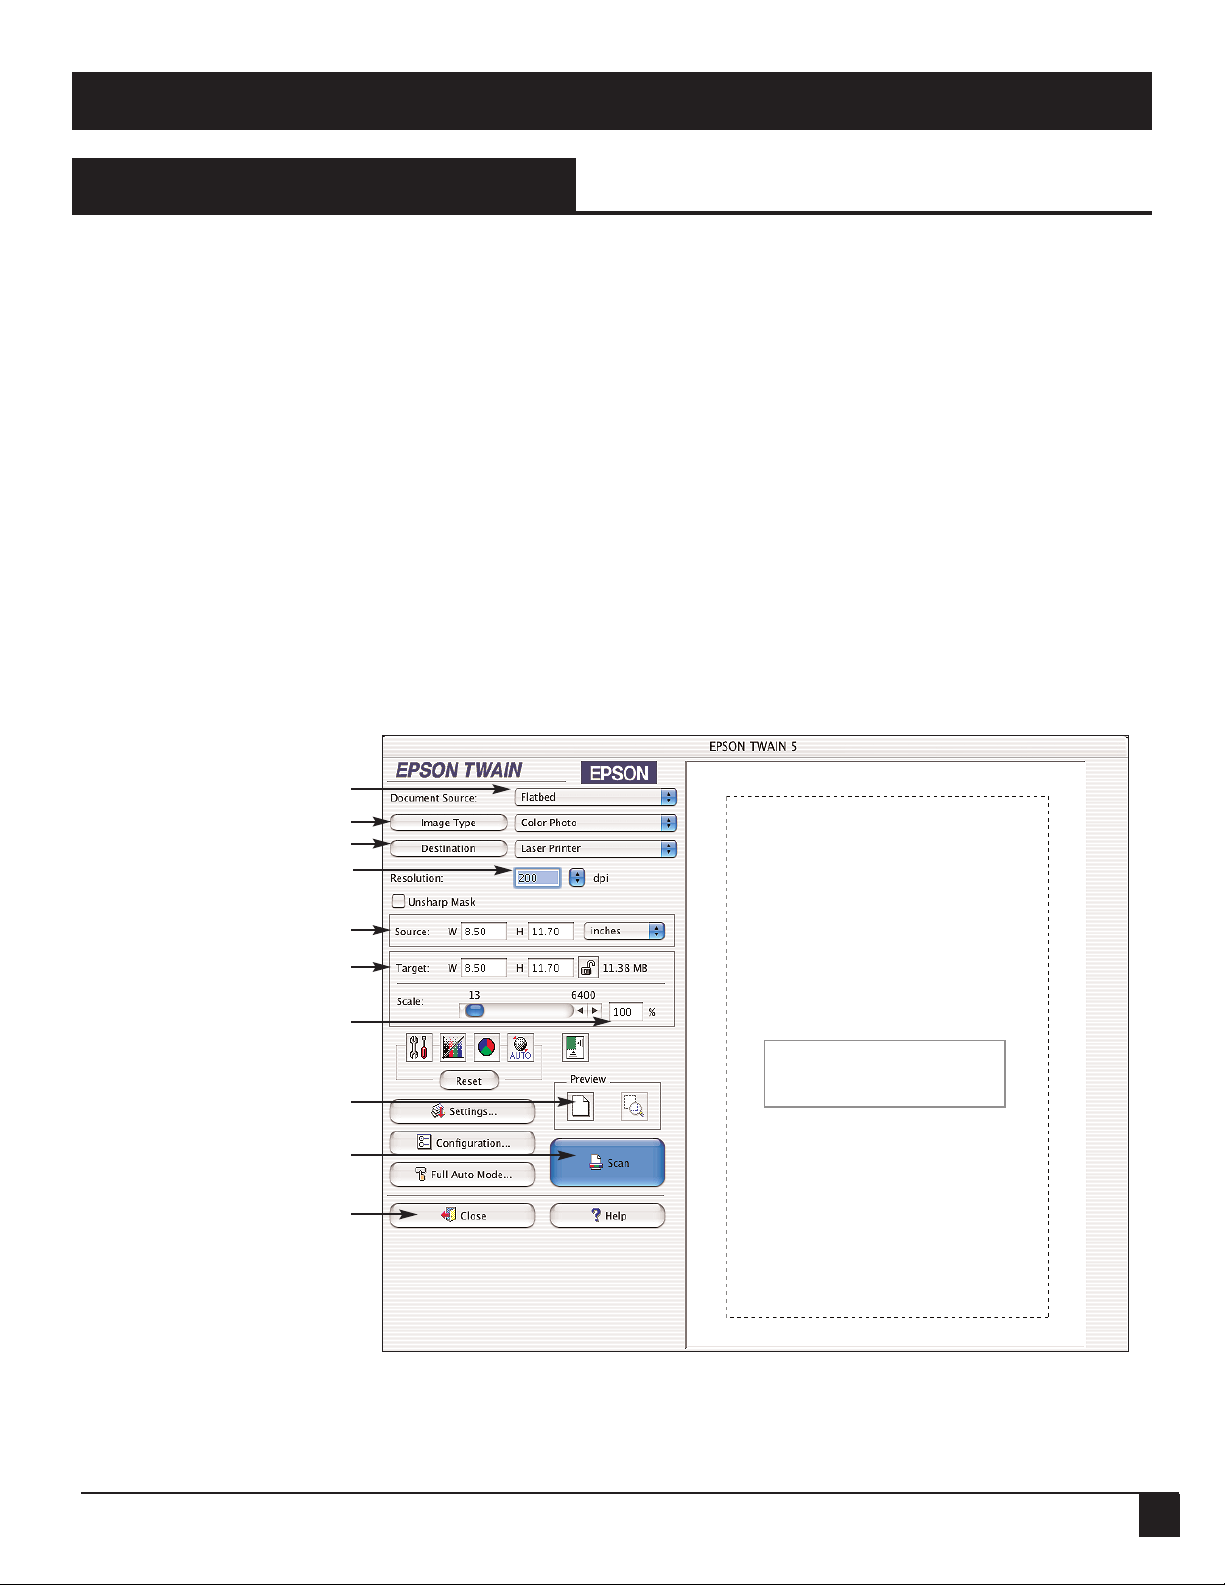
The window illustrated below will appear (the Epson Twain
Window).
3) Choose Document Source. This should be set to flatbed.
4) Choose Image Type. Selections available here include Colour
Photo, Colour Document, B&W Photo, B&W Document,
Illustration and Text/Line Art. The choice depends on the
type and colour mode of your original document.
Epson Twain Window
Document Source
Image Typ e
Destination
Output Resolution
5) Destination. Refers to the output device used for your
image. On offer: Screen/Web, Fax, OCR, Epson Stylus
Printer (Fine), Epson Stylus Printer (Photo) and Laser
Printer. For work printed in the Mac labs, Laser Printer is
generally the best choice. Selections from this pull-down
menu also automatically provide an optimal resolution for
your scan based on destination.
6) Preview. Click the Preview button to bring the preview
image into view.
7) Adjust the Selection Box in the Preview Window to choose the
portion of the image to be captured in the final scan.
(Continued on page 3)
Selection Box
Source: input size
Target: output & file size (mb)
Scale: output size (%)
Preview
Scan
Cancel/ Return
to Photoshop
Drag dotted lines to change the
e of the selection rectangle
siz
Preview Window
Digital Resource Group: www.eciad.ca/DRG
November/03
22
Page 3

Using the Epson Perfection 1250
Quick Scanning Instructions Cont.
8) Output Resolution. The Epson 1250 lets users scan
at a number of resolutions, ranging from 50 to 12800 dpi.
(See sidebar for more on resolution)
9) Target: Width and Height.These variables set the final
dimensions of the output scan. They also work proportionately–change one and you automatically change the other an equal
amount.
from 13 % to 6400 %, or enter the amount in the % field.
Note: Any reduction, enlargement or resolution adjustment
of your image will effect the file size (mb) of your scan.
Information about file sizes is provided by Size in the
Twain Window.
11) Scan. Once the desired settings and preview selection have
been chosen, click the Scan button. The scanned image will
open in an untitled Photoshop window as a default TIFF file.
10) Scale. Like Target Width and Height, lets you choose the
final size of your output scan. Use the slider to set a range
Epson Twain Window
Output Resolution
Source: input size
Target: output size
Scale: output size (%)
Scan
Save the Photoshop file to the Documents folder, a zip disk or a
network account.
Which Resolution Should I Use ?
In a nutshell, the higher the resolution the better
the scan.
You may want to adjust the size and resolution of an
image, depending its use and how it will be output.
For example, will be it be printed? And on which
printer? Or is it destined for the computer
screen/web? Considerations like these will determine the best resolution for your scan.
File size
For printed material, the following formula is a good
guide for deciding image resolution:
2 x lpi x (output size ÷ input size)= dpi/ppi
In our labs, the black and white printer = 75 lpi, and
the colour = 100 lpi.
Black and White printer example:
2 x 75 lpi x (4 " ÷ 2.5 " ) = 240 dpi/ppi
Cancel/ Return
to Photoshop
An html version of the Epson reference guide, and a pdf of
this handout,
is also available in the Public area on the
Gould server.
If you encounter any problems with the scanner not covered
in these documents, please contact a technical assistant.
Digital Resource Group: www.eciad.ca/DRG
Colour printer example:
2 x 100 lpi x (4 "÷ 2.5 ") = 320 dpi/ppi
Some Key Terms:
lpi= lines per inch. Term used by printers regarding
commercial offset printing, such as magazines. As a
rule of thumb, lpi is roughly half the dpi of an image
(150 lpi = 300 dpi).
dpi=dots per inch. Often used interchangeably with
ppi, or pixels per inch. Technically speaking, dpi is
used with printed material while ppi is reserved for
co
mputer screen images. Most screen images are set
at 72 ppi, although 96 ppi is used occasionally.
November /03
33
 Loading...