

Page 1

KM-1650
KM-2050
KM-2550
Advanced Operation Guide
Page 2

Page 3

Legal Information
CAUTION:
improper installation
Notice
The information in this guide is subject to change without notification.
Additional pages may be inserted in future editions. The user is asked to
excuse any technical inaccuracies or typographical errors in the present
edition.
No responsibility is assumed if accidents occur while the user is following
the instructions in this manual. No responsibility is assumed for defects in
the printer’s firmware (contents of its read-only memory).
Copyright
This guide, any copyrightable subject matter sold or provided with or in
connection with the sale of the machine, are protected by copyright. All
rights are reserved. Any copies made of all or part of this manual, or any
copyrightable subject must contain the same copyright notice as the
material from which the copying is done.
Regarding Trade names
No liability is assumed for any damage caused by
PRESCRIBE is a registered trademark of Kyocera Corporation. KPDL and
KIR (Kyocera Image Refinement) are trademarks of Kyocera Corporation.
Diablo 630 is a product of Xerox Corporation. IBM Proprinter X24E is a
product of International Business Machines Corporation. Epson LQ-850 is
a product of Seiko Epson Corporation. Hewlett-Packard, PCL, and PJL are
registered trademarks of Hewlett-Packard Company. Centronics is a trade
name of Centronics Data Computer Corp. PostScript is a registered
trademark of Adobe Systems Incorporated. Macintosh is a registered
trademark of Apple computer, Inc. Microsoft, Windows, and Windows NT
are registered trademarks of Microsoft Corporation. PowerPC is a
trademark of International Business Machines Corporation. ENERGY
STAR is a U.S. registered mark. All other brand and product names are
registered trademarks or trademarks of their respective companies.
ADVANCED OPERATION GUIDE i
Page 4

ii ADVANCED OPERATION GUIDE
Page 5

Introduction
This Advanced Operation Guide has the following chapters:
• 1 Copy Functions
Explains the copier functions available on the
machine.
• 2 Printer Settings
Explains the settings available for the printer
functions.
• 3 System Settings
Explains the general settings available on the
machine.
• 4 Job Accounting
Explains the Job Accounting function and settings.
• Appendix
Contains machine specifications.
ADVANCED OPERATION GUIDE iii
Page 6

Guides Included
The following guides are included with this machine. Refer to the guide that
corresponds to your particular objective.
Basic Operation Guide
The Basic Operation Guide contains procedural steps for initial installation and set-up
of the machine and connection to a computer. It also includes basic procedures for
using the machine as a copier and printer and has a Troubleshooting section.
Advanced Operation Guide (this guide)
This Advanced Operation Guide contains explanations on copier and printer functions
as well as default settings adjusted on the machine.
KX Printer Driver Operation Guide
Describes how to install and set-up the printer driver.
PRESCRIBE Technical Reference
PRESCRIBE is the native language of these printers. This Technical Reference
contains information about how printing is performed using the PRESCRIBE
commands, as well as a font and emulation description.
PRESCRIBE Command Reference
Gives a detailed explanation of the PRESCRIBE command syntax and par ameters with
the aid of print examples. This guide is stored on the CD-ROM as a PDF document.
iv
Page 7

Conventions
Convention Description Example
This manual uses the following conventions.
Italic Typeface Used to emphasise a key word,
phrase or message. In addition,
references to other publications
are displayed in italic typeface.
Bracket Bold Text
Typeface
Notes Used to provide additional or
Important Use to provide important
Caution Cautions are statements that
Warning Used to alert users to the
Used to emphasise the
selection of a feature mode or
key.
useful information about a
function or feature.
information.
suggest mechanical damage as
a result of an action.
possibility of personal injury.
Open the Multi-Bypass Tray.
Press [Enter].
NOTE: To ensure best copying quality,
it is recommended this cleaning task is
performed at least once a month.
IMPORTANT: Never use water, thinner
or other organic solvents to clean the slit
glass.
CAUTION: For safety purposes,
always remove the power plug from the
outlet when cleaning the machine.
WARNING: High voltage is present
in the charger section.
Measurements
This guide contains information that corresponds to using both the inch
and metric versions of the machine. The screens and messages shown in
the guide reflect the inch version of the machine. When using the metric
version, refer to the messages on your machine.
ADVANCED OPERATION GUIDE v
Page 8

vi ADVANCED OPERATION GUIDE
Page 9

Legal Information . . . . . . . . . . . . . . . . . . . . . . . . . . . . . . . . . . . . . . . . . . . . . Legal and Safety-i
Introduction
Guides Included . . . . . . . . . . . . . . . . . . . . . . . . . . . . . . . . . . . . . . . . . . . . . . . . . . . . . . . . . . . iv
Conventions . . . . . . . . . . . . . . . . . . . . . . . . . . . . . . . . . . . . . . . . . . . . . . . . . . . . . . . . . . . . . . . v
1 Copy Functions
Original Size . . . . . . . . . . . . . . . . . . . . . . . . . . . . . . . . . . . . . . . . . . . . . . . . . . . . . . . . . . . . . 1-2
Original Placement . . . . . . . . . . . . . . . . . . . . . . . . . . . . . . . . . . . . . . . . . . . . . . . . . . . . . . . . 1-4
Offset Mode. . . . . . . . . . . . . . . . . . . . . . . . . . . . . . . . . . . . . . . . . . . . . . . . . . . . . . . . . . . . . . 1-5
Stapling. . . . . . . . . . . . . . . . . . . . . . . . . . . . . . . . . . . . . . . . . . . . . . . . . . . . . . . . . . . . . . . . . 1-6
Combine Mode . . . . . . . . . . . . . . . . . . . . . . . . . . . . . . . . . . . . . . . . . . . . . . . . . . . . . . . . . . . 1-7
Margin Mode. . . . . . . . . . . . . . . . . . . . . . . . . . . . . . . . . . . . . . . . . . . . . . . . . . . . . . . . . . . . 1-12
Border Erase Mode. . . . . . . . . . . . . . . . . . . . . . . . . . . . . . . . . . . . . . . . . . . . . . . . . . . . . . . 1-13
Continuous Scan. . . . . . . . . . . . . . . . . . . . . . . . . . . . . . . . . . . . . . . . . . . . . . . . . . . . . . . . . 1-14
Auto Rotation . . . . . . . . . . . . . . . . . . . . . . . . . . . . . . . . . . . . . . . . . . . . . . . . . . . . . . . . . . . 1-15
EcoPrint Mode. . . . . . . . . . . . . . . . . . . . . . . . . . . . . . . . . . . . . . . . . . . . . . . . . . . . . . . . . . . 1-16
Auto Selection Mode. . . . . . . . . . . . . . . . . . . . . . . . . . . . . . . . . . . . . . . . . . . . . . . . . . . . . . 1-17
Program Function . . . . . . . . . . . . . . . . . . . . . . . . . . . . . . . . . . . . . . . . . . . . . . . . . . . . . . . . 1-18
Content s
2 Printer Settings
Status Page. . . . . . . . . . . . . . . . . . . . . . . . . . . . . . . . . . . . . . . . . . . . . . . . . . . . . . . . . . . . . . 2-2
e-MPS Function . . . . . . . . . . . . . . . . . . . . . . . . . . . . . . . . . . . . . . . . . . . . . . . . . . . . . . . . . . 2-3
Interface . . . . . . . . . . . . . . . . . . . . . . . . . . . . . . . . . . . . . . . . . . . . . . . . . . . . . . . . . . . . . . . 2-11
Emulation . . . . . . . . . . . . . . . . . . . . . . . . . . . . . . . . . . . . . . . . . . . . . . . . . . . . . . . . . . . . . . 2-18
Font. . . . . . . . . . . . . . . . . . . . . . . . . . . . . . . . . . . . . . . . . . . . . . . . . . . . . . . . . . . . . . . . . . . 2-21
Print Configuration . . . . . . . . . . . . . . . . . . . . . . . . . . . . . . . . . . . . . . . . . . . . . . . . . . . . . . . 2-26
Print Quality. . . . . . . . . . . . . . . . . . . . . . . . . . . . . . . . . . . . . . . . . . . . . . . . . . . . . . . . . . . . . 2-31
Memory Card Operation . . . . . . . . . . . . . . . . . . . . . . . . . . . . . . . . . . . . . . . . . . . . . . . . . . . 2-34
Hard Disk Operation . . . . . . . . . . . . . . . . . . . . . . . . . . . . . . . . . . . . . . . . . . . . . . . . . . . . . . 2-40
RAM Disk Operation . . . . . . . . . . . . . . . . . . . . . . . . . . . . . . . . . . . . . . . . . . . . . . . . . . . . . . 2-41
Paper Handling . . . . . . . . . . . . . . . . . . . . . . . . . . . . . . . . . . . . . . . . . . . . . . . . . . . . . . . . . . 2-44
Other Printer Settings . . . . . . . . . . . . . . . . . . . . . . . . . . . . . . . . . . . . . . . . . . . . . . . . . . . . . 2-48
3 System Settings
Copy Default Settings . . . . . . . . . . . . . . . . . . . . . . . . . . . . . . . . . . . . . . . . . . . . . . . . . . . . . . 3-2
Machine Default Settings . . . . . . . . . . . . . . . . . . . . . . . . . . . . . . . . . . . . . . . . . . . . . . . . . . 3-14
Viewing and Printing the Total Counter. . . . . . . . . . . . . . . . . . . . . . . . . . . . . . . . . . . . . . . . 3-28
Report Output . . . . . . . . . . . . . . . . . . . . . . . . . . . . . . . . . . . . . . . . . . . . . . . . . . . . . . . . . . . 3-30
Language Setting . . . . . . . . . . . . . . . . . . . . . . . . . . . . . . . . . . . . . . . . . . . . . . . . . . . . . . . . 3-32
User Adjustment . . . . . . . . . . . . . . . . . . . . . . . . . . . . . . . . . . . . . . . . . . . . . . . . . . . . . . . . . 3-33
4 Job Accounting
ADVANCED OPERATION GUIDE vii
Page 10

Contents
Job Accounting Mode . . . . . . . . . . . . . . . . . . . . . . . . . . . . . . . . . . . . . . . . . . . . . . . . . . . . . . 4-2
Managing Accounts. . . . . . . . . . . . . . . . . . . . . . . . . . . . . . . . . . . . . . . . . . . . . . . . . . . . . . . . 4-4
Default Settings. . . . . . . . . . . . . . . . . . . . . . . . . . . . . . . . . . . . . . . . . . . . . . . . . . . . . . . . . . 4-12
Using Job Accounting . . . . . . . . . . . . . . . . . . . . . . . . . . . . . . . . . . . . . . . . . . . . . . . . . . . . . 4-15
Appendix
Paper. . . . . . . . . . . . . . . . . . . . . . . . . . . . . . . . . . . . . . . . . . . . . . . . . . . . . . . . . . . . .Appendix-2
Specifications . . . . . . . . . . . . . . . . . . . . . . . . . . . . . . . . . . . . . . . . . . . . . . . . . . . . .Appendix-11
Glossary . . . . . . . . . . . . . . . . . . . . . . . . . . . . . . . . . . . . . . . . . . . . . . . . . . . . . . . . .Appendix-17
viii ADVANCED OPERATION GUIDE
Page 11

1 Copy Functions
This chapter explains how to use the copier functions of the
machine.
• Original Size.................................................................1-2
• Original Placement.......................................................1-4
• Offset Mode..................................................................1-5
• Stapling.........................................................................1-6
• Combine Mode.............................................................1-7
• Margin Mode ..............................................................1-12
• Border Erase Mode....................................................1-13
• Continuous Scan........................................................1-14
• Auto Rotation..............................................................1-15
• EcoPrint Mode............................................................ 1-16
• Auto Selection Mode..................................................1-17
• Program Function.......................................................1-18
ADVANCED OPERATION GUIDE 1-1
Page 12
Copy Functions
Original Size
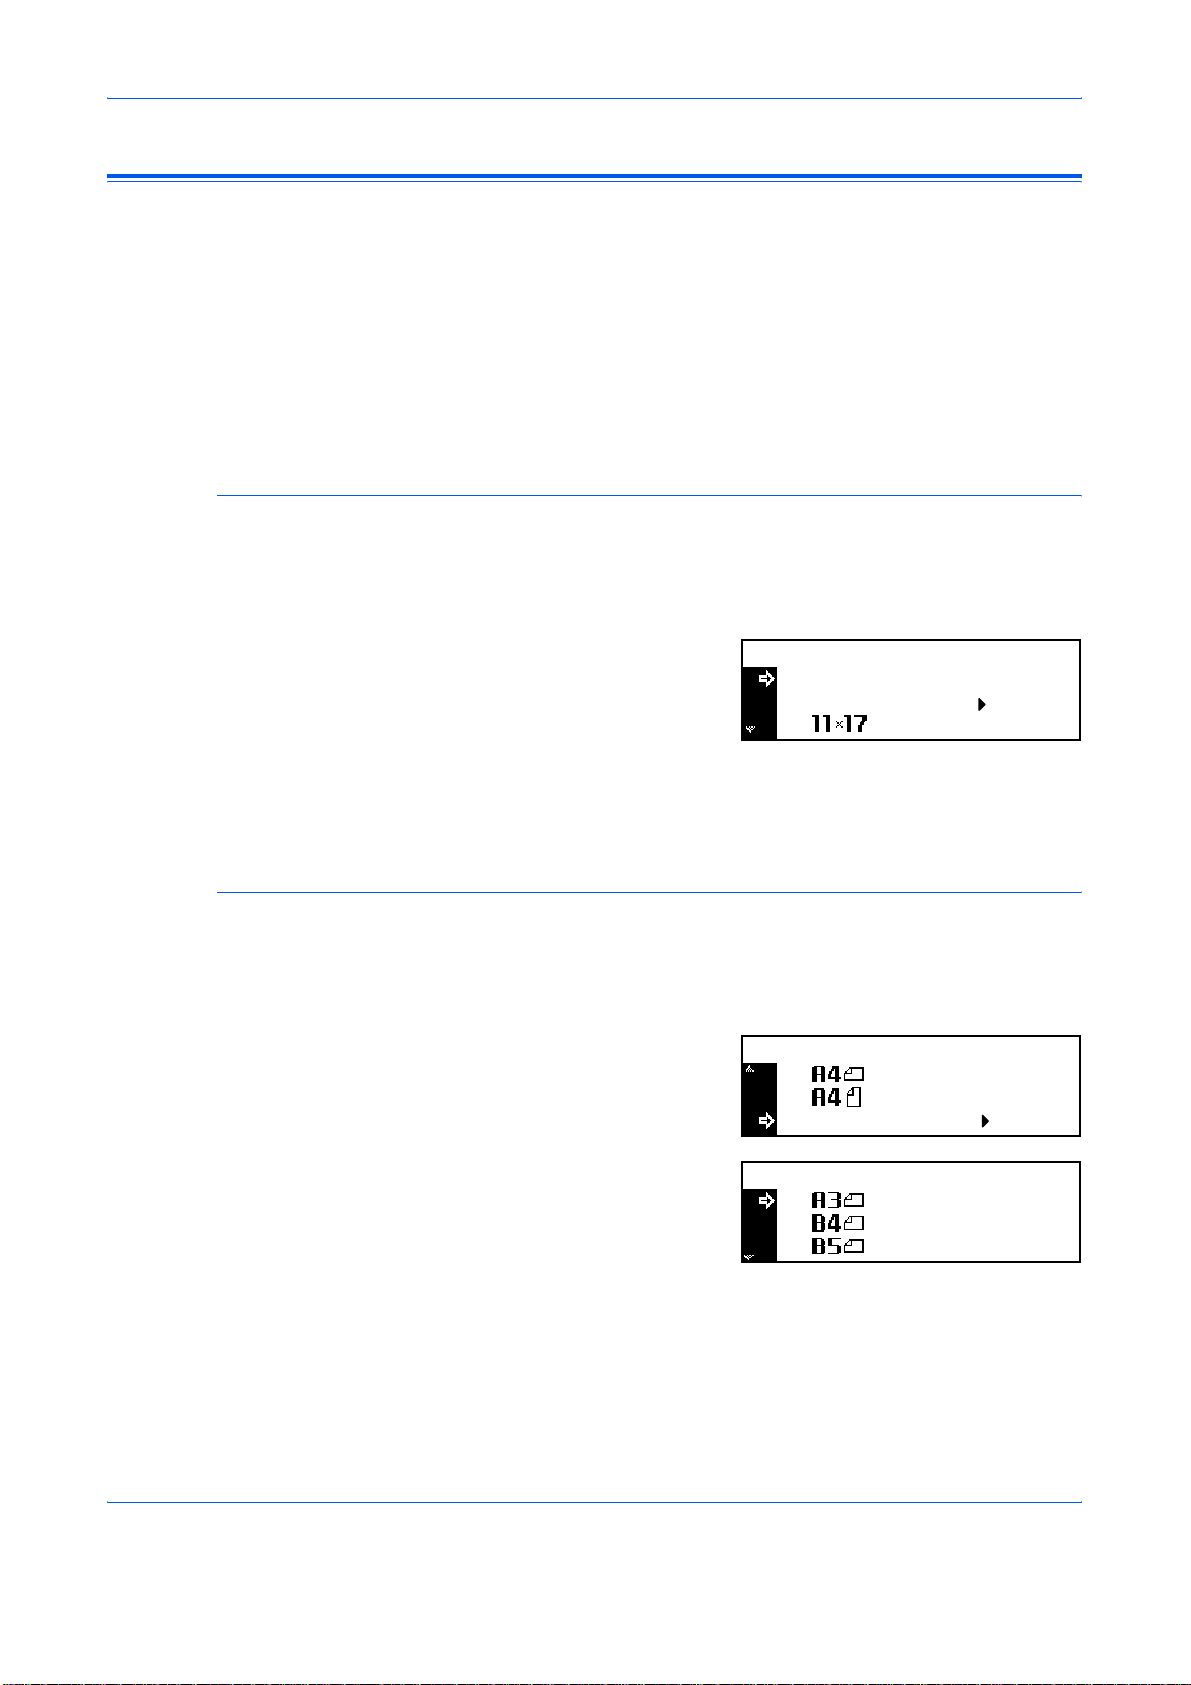
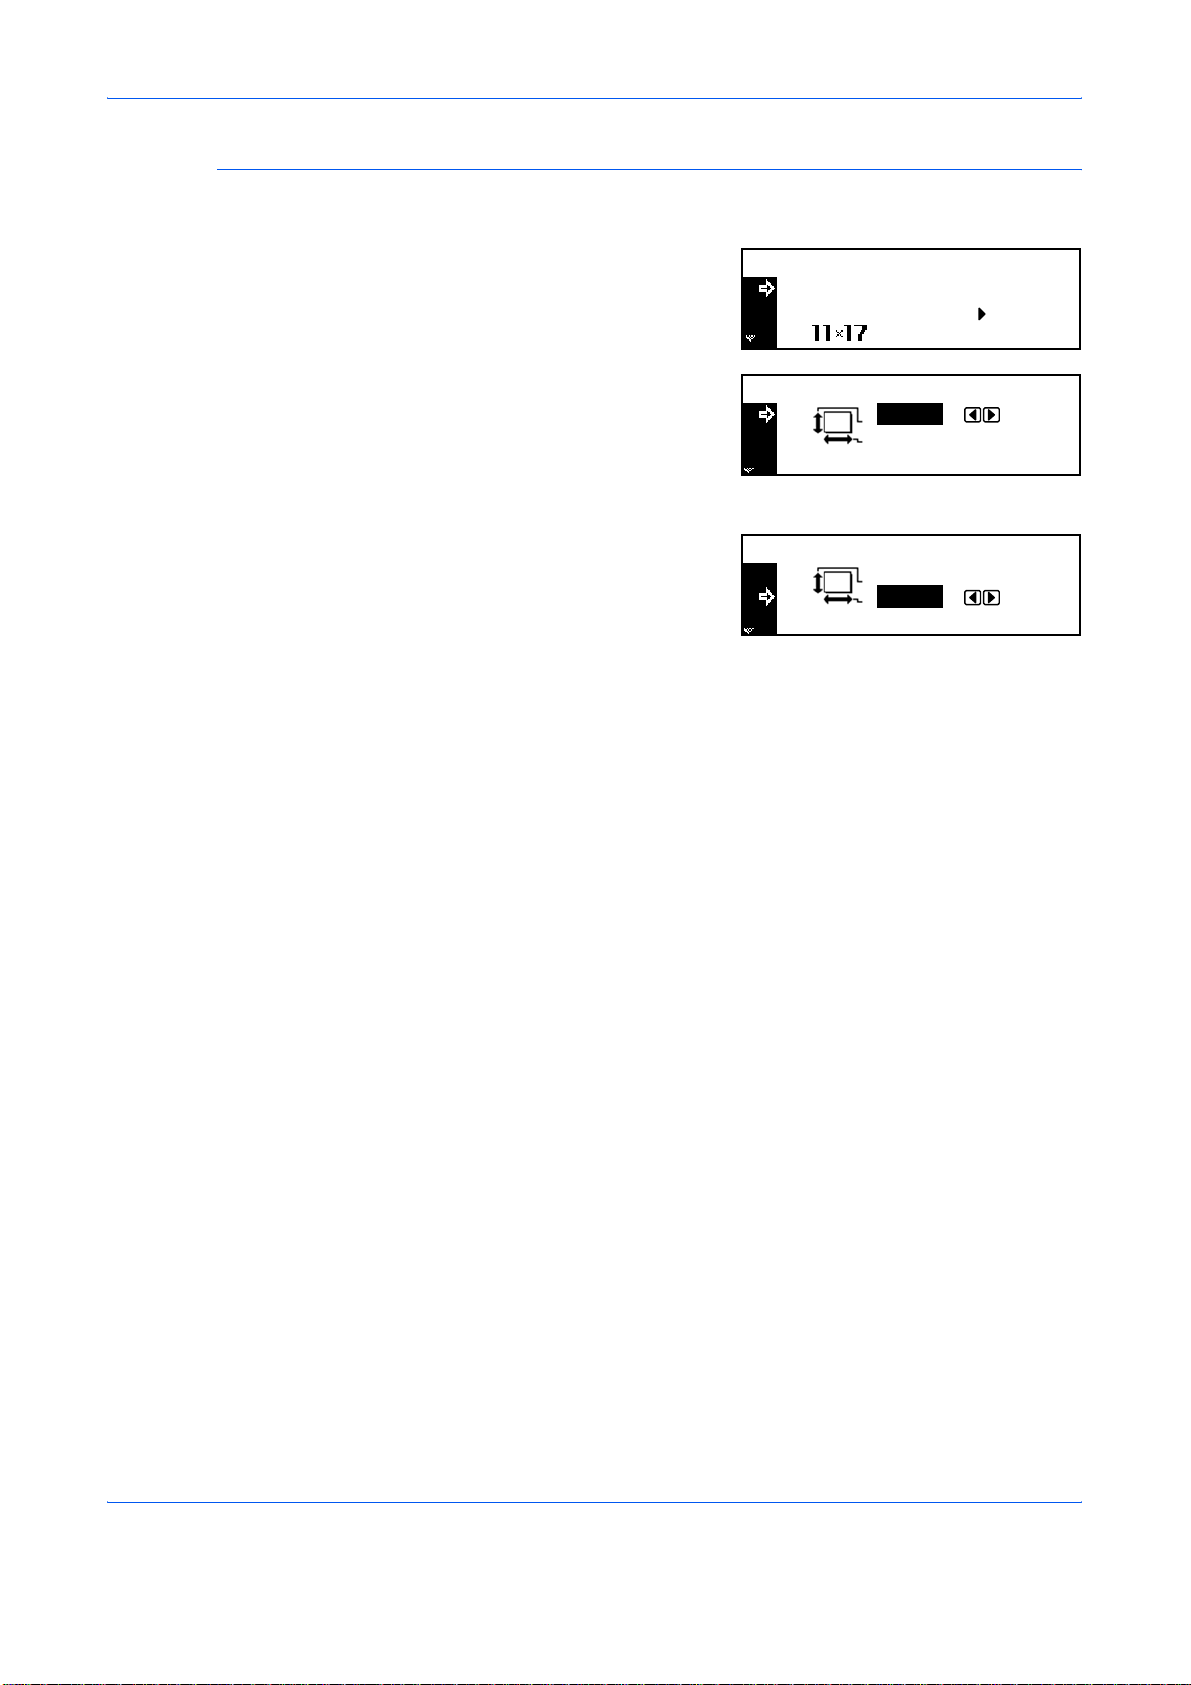
Regular Size
Use Original Size to select the size of original being scanned. The
selection must match the physical size of the original.
The following Original Size options are available:
• Regular Size - use to select a standard original size.
• Other Regular Size - use for additional standard original sizes.
• Input Size - use this option to enter a custom original size if the size
required is not displayed.
Use the following procedure to select a standard original size.
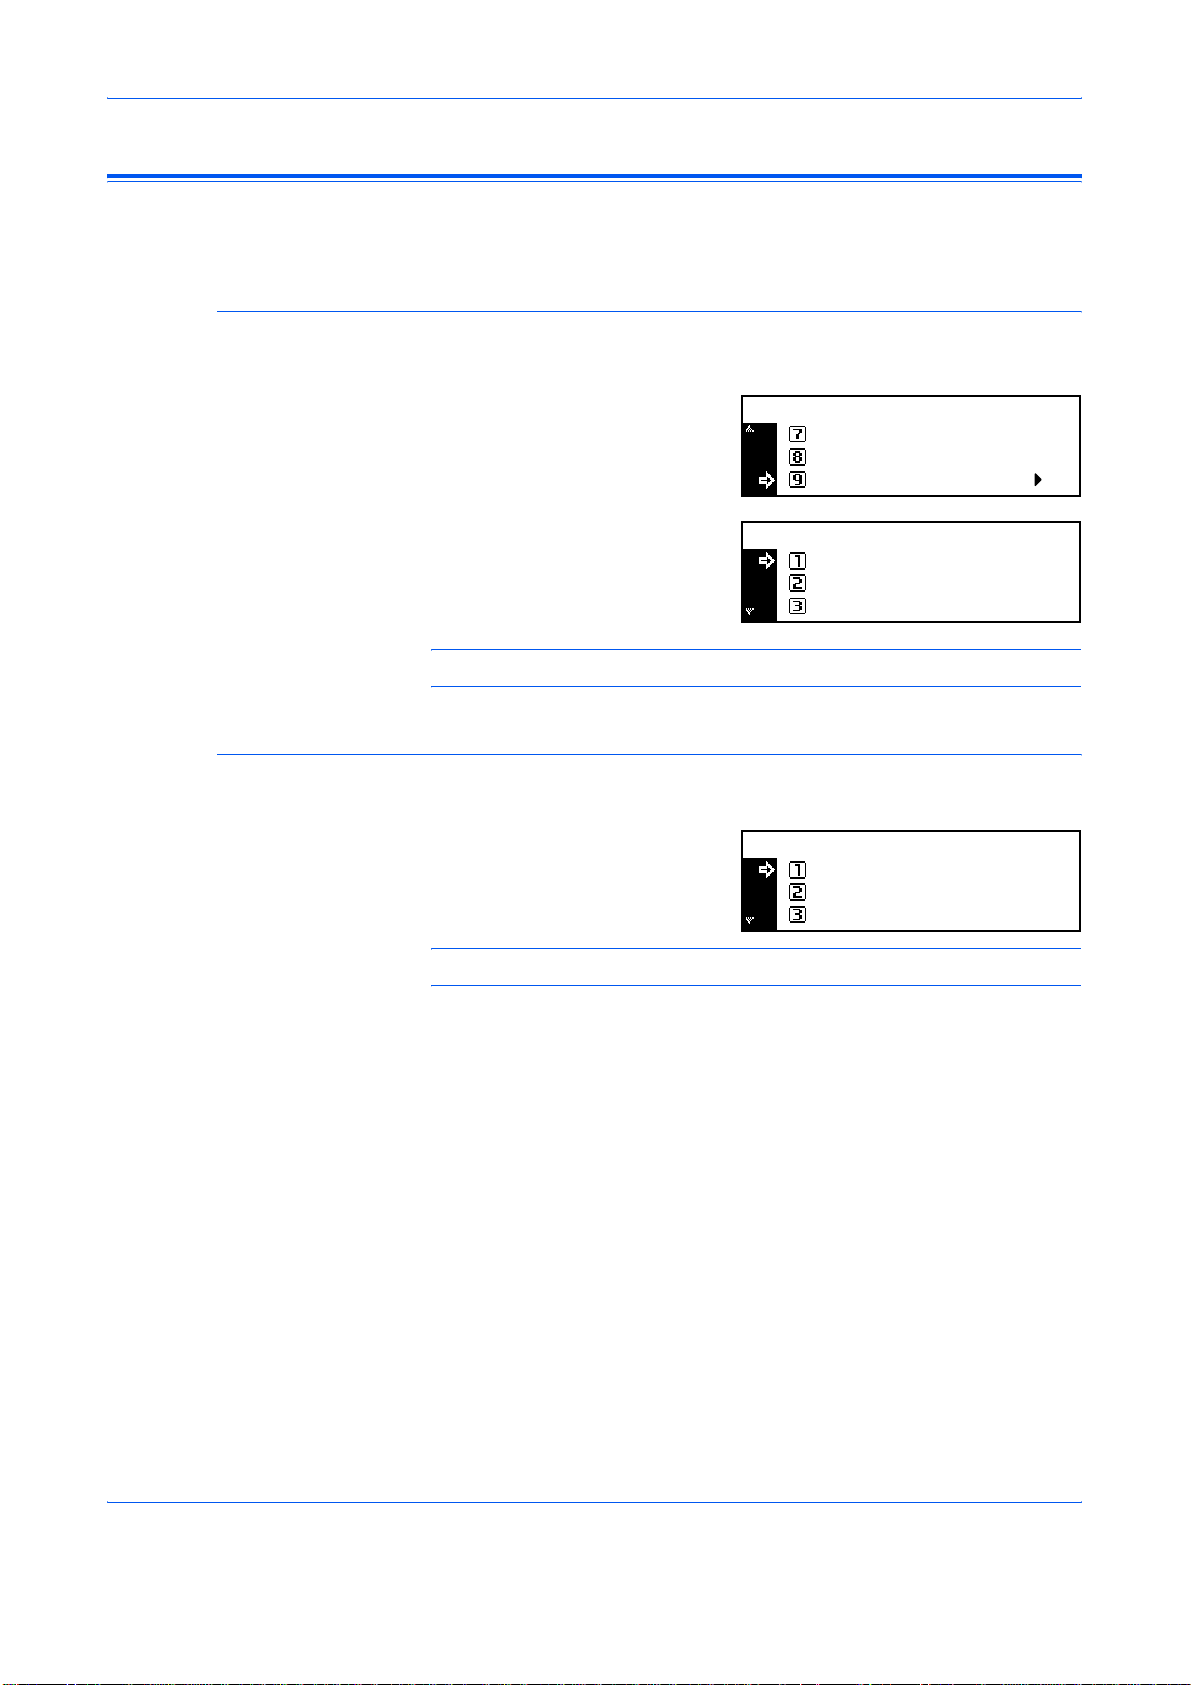
Position the original and press [Original Size].
1
Press S or T to select the
2
original size required and press
[Enter].
Original Size:
Auto
*
Input Size
3
Other Regular Size
1
2
3
4
Select Auto to allow the machine
to automatically select the same size as the original on the platen.
Press [Start]. Copying commences.
Use the following procedure to select additional standard original sizes.
Position the original and press [Original Size].
Press S or T to select Other
Regular Size and press [Enter].
Press S or T to select the
original size required and press
[Enter].
Press [Start]. Copying commences.
Original Size:
Oth er Regul a r Size
Other Regular Size:
1-2 ADVANCED OPERATION GUIDE
Page 13
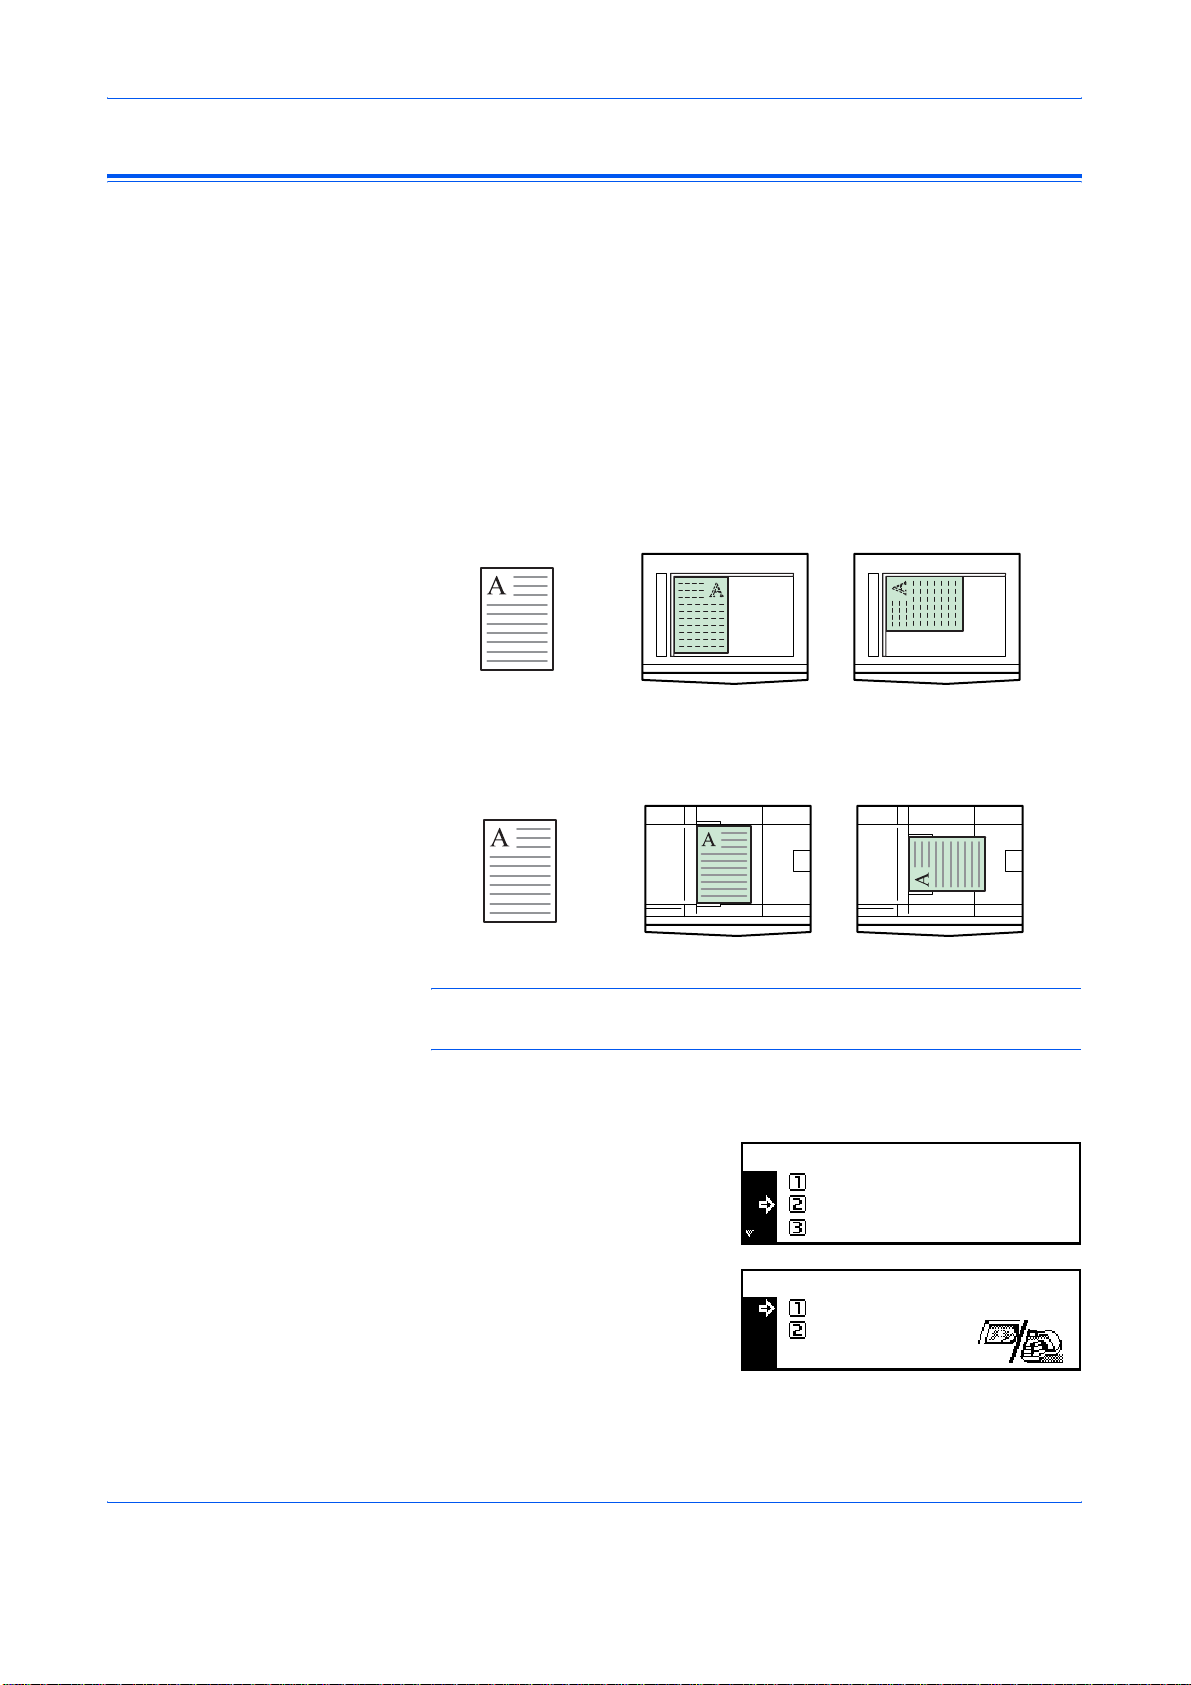
Input Size
Position the original and press [Original Size].
1
Press S or T to select Input Size
2
and press [Enter].
Press < or > to select the vertical
3
size required, 2" to 11
increments (50 to 297 mm in 1
mm increments) can be selected.
Press T to select the horizontal size.
Press < or > to select the
4
horizontal size, 2" to 17" in 1/8"
increments (50 to 432 mm in 1
mm increments) can be selected.
Press [Enter].
5/8" in 1/8"
Original Size:
Auto
*
Input Size
Input Size:
Input Size:
Copy Functions
2"
2"
2"
2"
Press [Start]. Copying commences.
5
ADVANCED OPERATION GUIDE 1-3
Page 14
Copy Functions
Original Placement
You must specify the orientation of the origina l when usin g the follo win g
functions:
- Duplex Copying
- Split Copying (from 2-sided originals)
- Margin mode
- Border Erase mode
- Combine mode
- Auto Selection mode (Optional)
- Stapling (Optional)
When the originals are positioned on the Platen:
Original Rear Left Top
When the originals are loaded in the Document Processor:
Original Rear Left Top
NOTE: To change the default setting for Original Orientation, refer to
Original Orientation, on page 3-20.
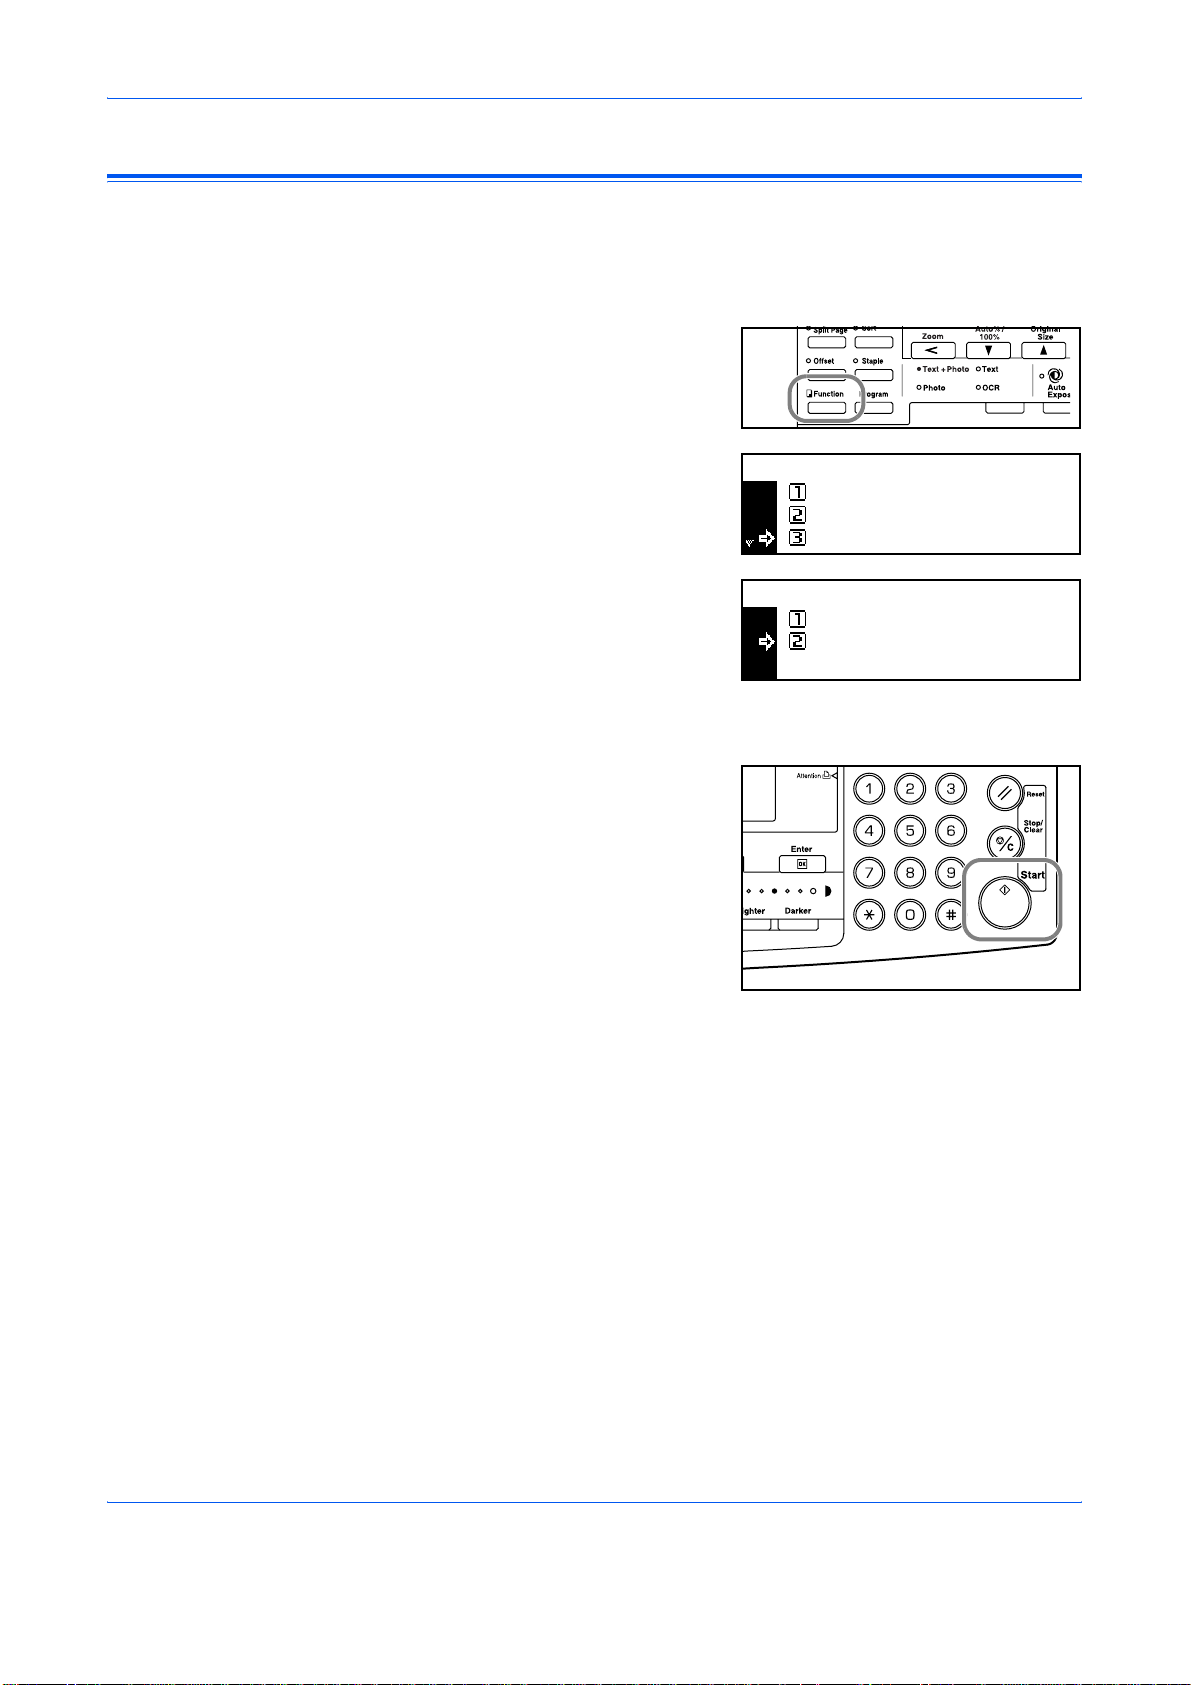
Press [Function].
1
Press S or T to select Orig.
2
direction and press [Enter].
Press S or T to select Rear or
3
Left top and press [Enter].
Function:
End
Orig. Direction ::Rear
Continuous Scan
Orig. Direction:
Rear
*
Left top
Off
1-4 ADVANCED OPERATION GUIDE
Page 15
Offset Mode
Copy Functions
Use this mode to change the orientation of the output at the end of each
set for easy division.
NOTE: If the Document Processor (option) or Finisher (option) is not
installed, use this function with Sort copying.
The paper sizes that can be used for Offset copying are A4, B5 and
11 × 8
1/2"
NOTE: Ensure the Auto Rotation feature is On, refer to Auto Rotation, on
page 1-15.
Position the original and press
1
[Offset].
Press [Sort].
2
Enter the number of copies
3
required and press [Start].
If using the optional Document
Processor, copying completes
automatically.
If using the platen, a message
displays when the next original is
required. Position the next original
and press [Start].
When all originals have been scanned, press [Enter].
ADVANCED OPERATION GUIDE 1-5
Page 16

Copy Functions
Stapling
Copies can be stapled in the upper left or upper right corner.
NOTE: The optional Finisher must be installed.
The orientation of originals and the stapling position is shown below.
Original Copy
Original Copy
Position the original and press
1
[Staple].
Press S or T to select the
2
stapling position and press
[Enter].
Press [Start].
3
If using the optional Document
Processor, copying completes
automatically.
If using the platen, a message
displays when the next original is
required. Position the next original
and press [Start].
Staple:
Left Top
Right T op
When all originals have been scanned, press [Enter].
1-6 ADVANCED OPERATION GUIDE
Page 17
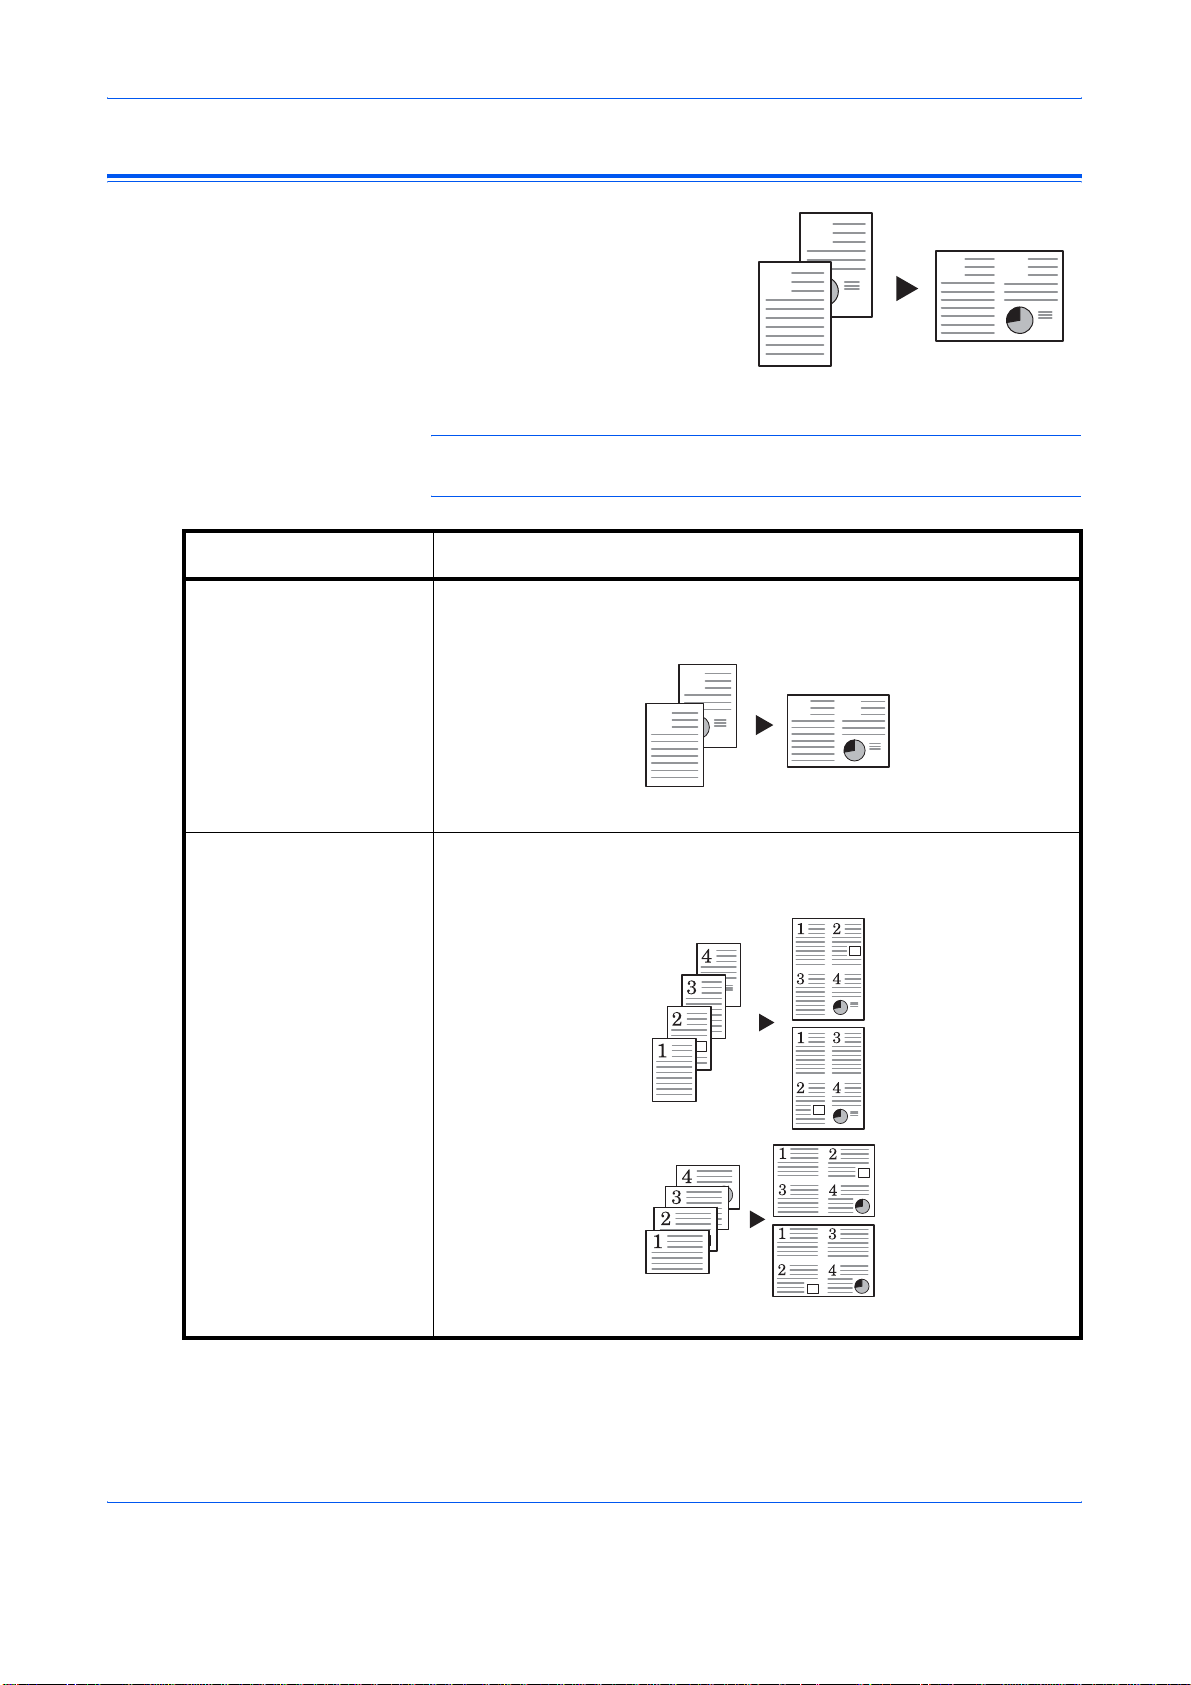
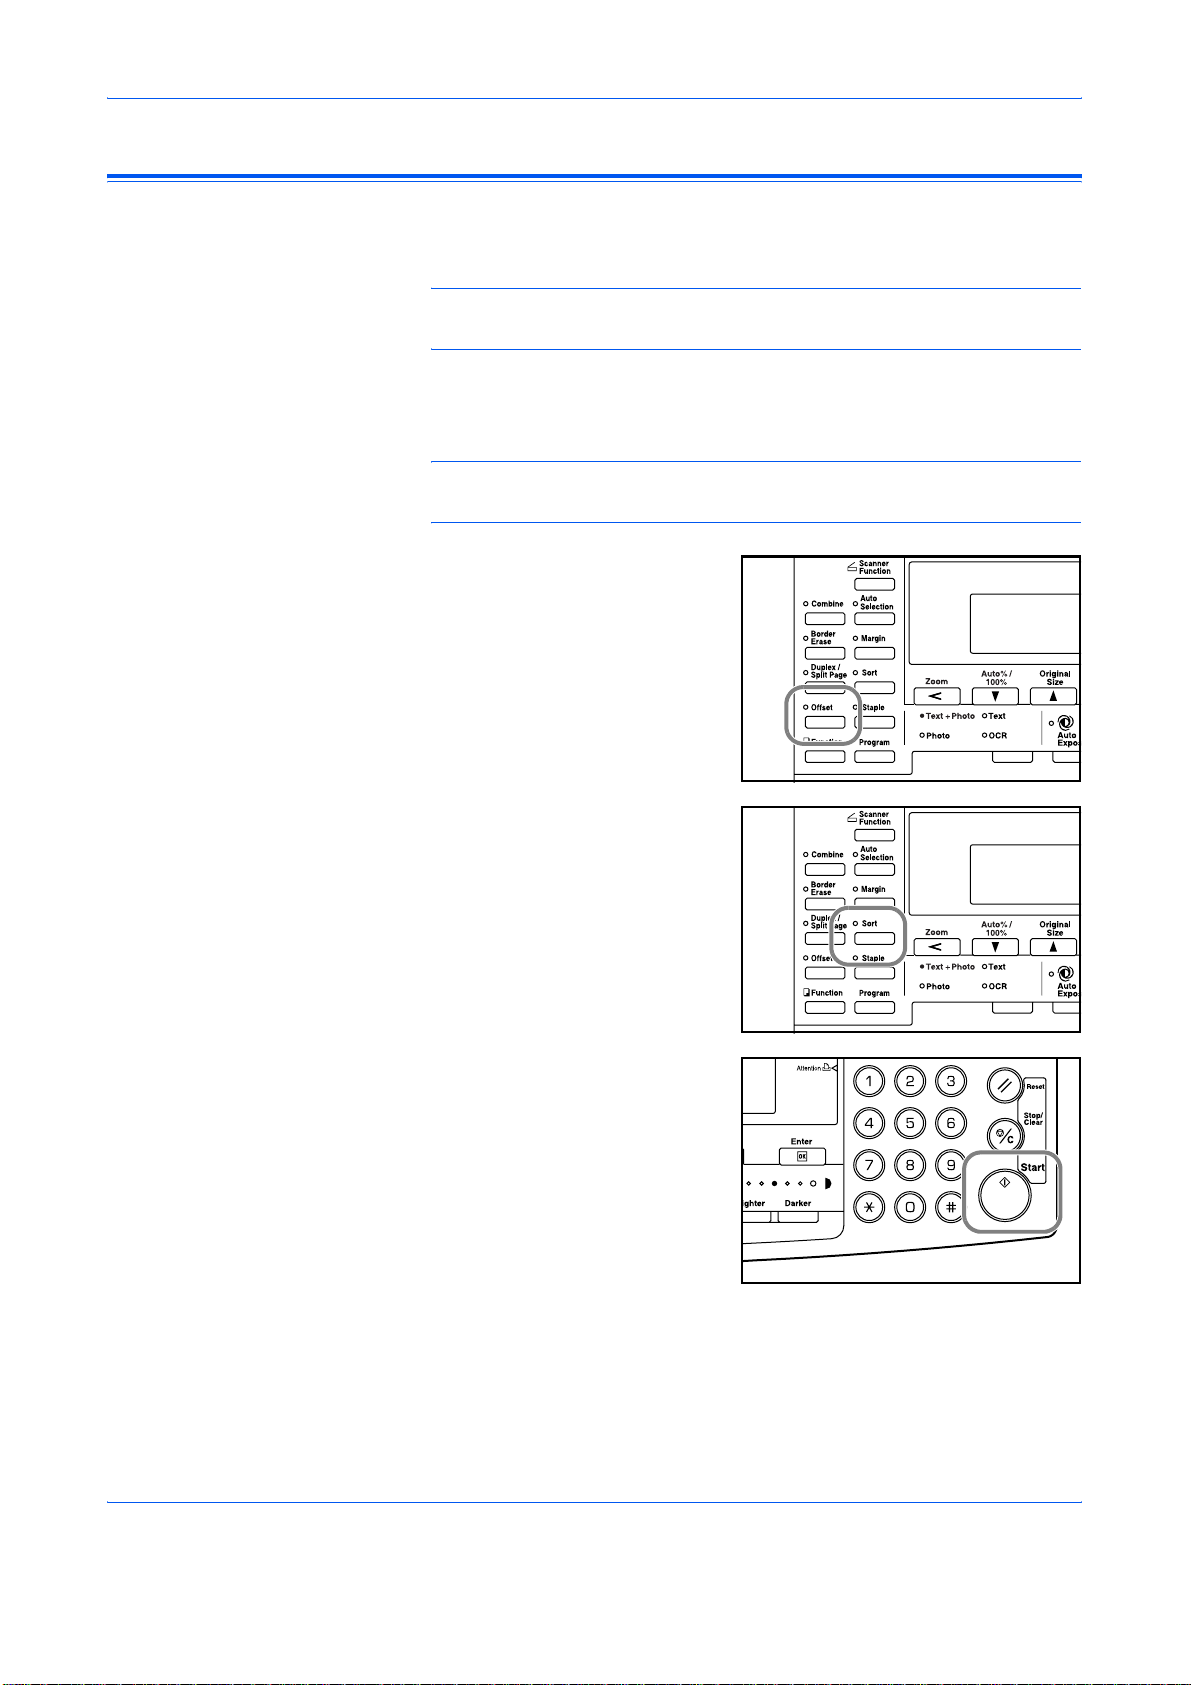
Combine Mode
The images from either 2 or 4
originals can be reduced and
combined onto a single copy. The
Border Line of each original can
also be marked with a solid or
dotted line.
1
2
Copy Functions
1
2
The following Combine modes
are available:
Original
NOTE: Both the Original Size and the Copy Paper Size must be regular
sizes.
Mode Description
2 in 1 Copies two originals onto one sheet. This mode can also be used in
conjunction with Duplex Mode (optional) in order to copy four originals
onto both sides of one sheet.
2
1
2
4 in 1 (Vertical
Arrangement)
4 in 1 (Horizontal
Arrangement)
1
Original Copy
Copies four originals onto one sheet. This mode can also be used in
conjunction with Duplex Mode (optional) in order to copy eight o riginals
onto both sides of one sheet.
Copy
Original Copy
ADVANCED OPERATION GUIDE 1-7
Page 18

Copy Functions
2 in 1
The following illustrations indicate how the orientation of the original will
affect the resulting copies:
Using the Platen
CopyOriginal
CopyOriginal
Using the Document Processor
CopyOriginal
CopyOriginal
NOTE: Ensure that the first page of the originals is scanned first.
1-8 ADVANCED OPERATION GUIDE
Page 19
4 in 1 (Horizontal Arrangement)
The following illustrations indicate how the orientation of the original will
affect the resulting copies:
Using the Platen
Copy Functions
CopyOriginal
Using the Document Processor
NOTE: Ensure that the first page of the originals is scanned first.
CopyOriginal
CopyOriginal
CopyOriginal
ADVANCED OPERATION GUIDE 1-9
Page 20

Copy Functions
4 in 1 (Vertical Arrangement)
The following illustrations indicate how the orientation of the original will
affect the resulting copies:
Using the Platen
CopyOriginal
Using the Document Processor
Original
NOTE: Ensure that the first page of the originals is scanned first.
CopyOriginal
Copy
CopyOriginal
1-10 ADVANCED OPERATION GUIDE
Page 21

Borderline Types
Borderline type
None
Solid
Dotted
The following borderline types are available.
Copy
2 in 1
Copy Functions
4 in 1 (horizontal arrangement)/
4 in 1 (vertical arrangement)
Mark or Cropmark
Using Combine Mode
Position the original and press
1
[Combine].
Press S or T to select the
2
combine option required and
press [Enter].
Press S or T to select the Border
3
Line type and press [Enter].
Combine:
2 in 1
4 in 1 (Z)
4 in 1 (N)
Border Line:
None
Solid
Dotted
ADVANCED OPERATION GUIDE 1-11
Page 22
Copy Functions
Margin Mode
Press [Start].
4
If using the optional Document
Processor, copying completes
automatically.
If using the platen, a message
displays when the next original is
required. Position the next original
and press [Start].
When all originals have been scanned, press [Enter].
The image of the original can be shifted to make a margin (bla nk) space at
the left or top side of the copy. You can set the width of each margin to
1/8" to 3/4" in 1/8" increments (1 mm to 18 mm in 1 mm increments).
NOTE: To set the default value for Margin Width, refer to Margin Width
Default Value, on page 3-11.
Position the original and press
1
[Margin].
Press S or T to select Left
2
Margin or Top Margin and press
[Enter].
Press < or > to select the Margin
3
Width, 1/8" to 3/4" in 1/8"
increments (1 mm to 18 mm in 1
mm increments) can be selected.
Press [Enter].
Press [Start]. Copying commences.
4
Margin:
Left Margin
Top Margin
Margin Width:
1/4" 3/4"
1/8"
1-12 ADVANCED OPERATION GUIDE
Page 23
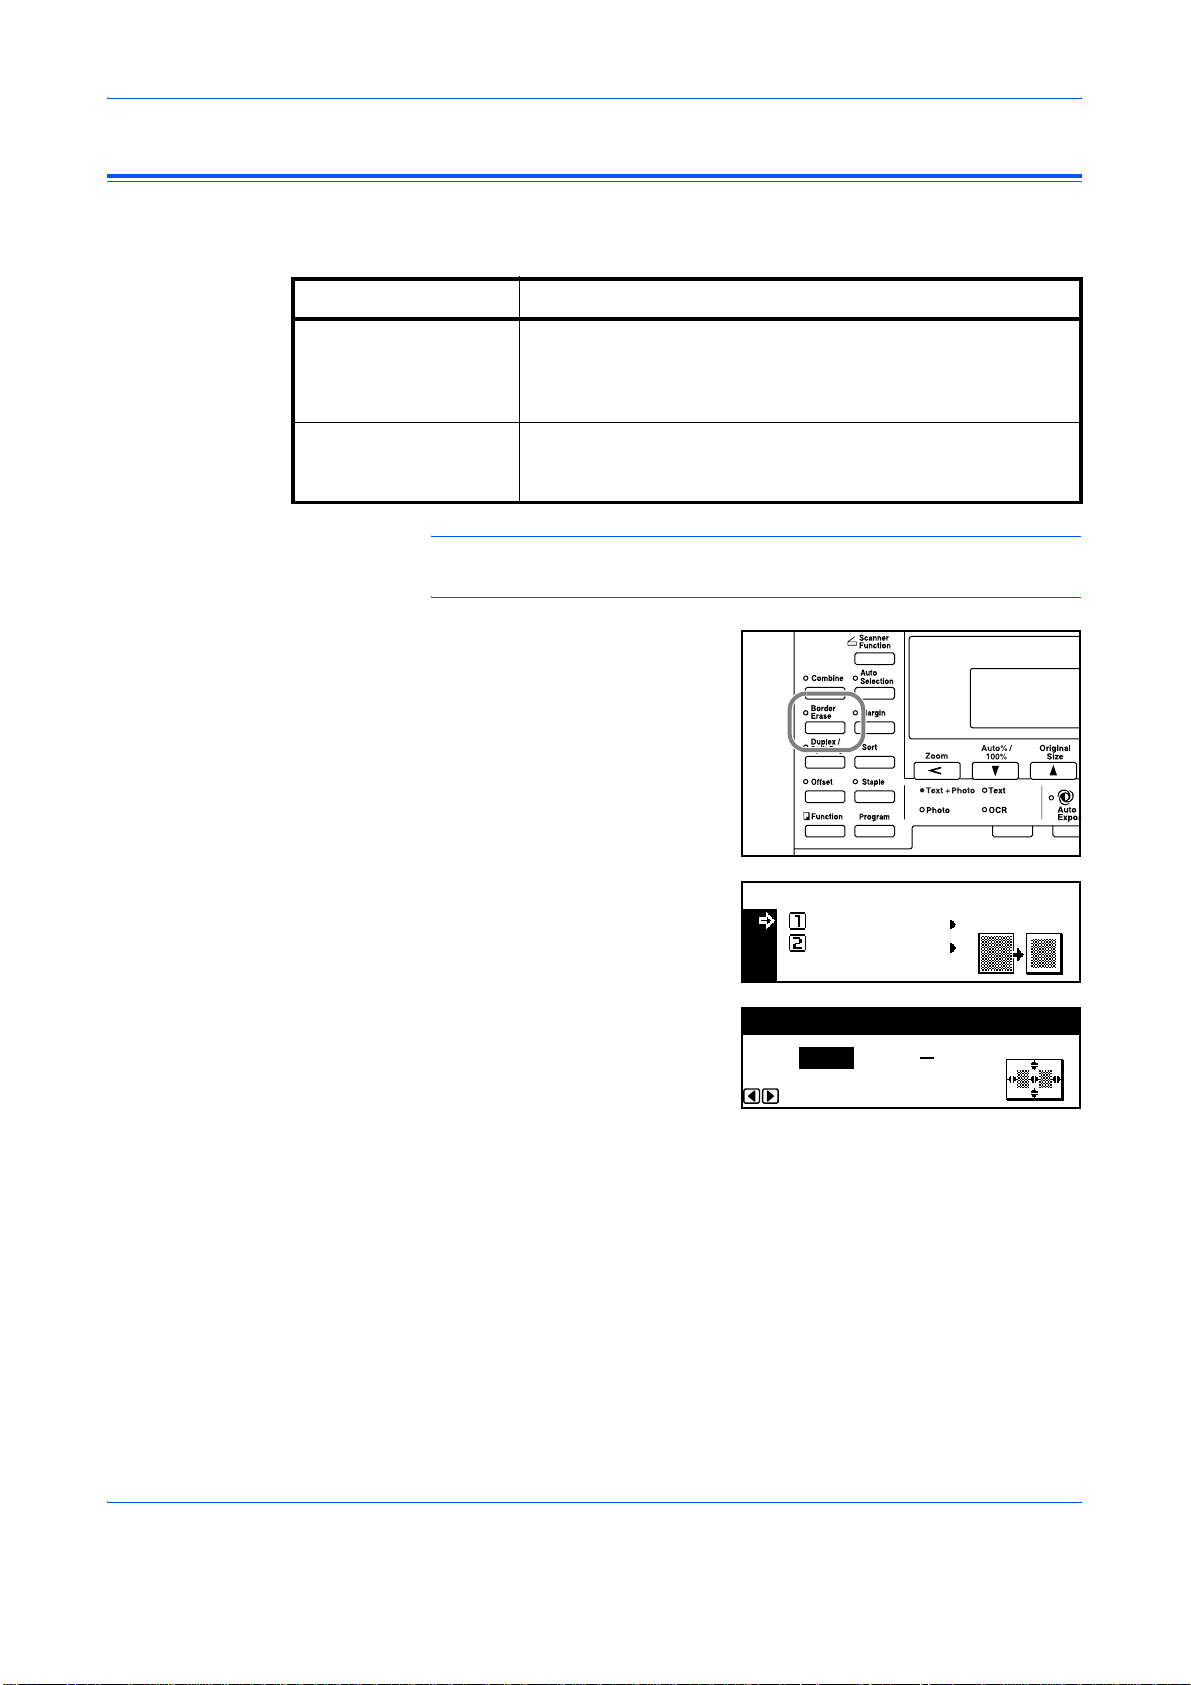
Border Erase Mode
Sheet Erase Use this mode to erase shadows which appear when using
Book Erase Use this mode to produce clean copies from a thick book. You
Shadows that appear around the edges of copies can be erased. The
following modes are available:
Mode Description
sheet originals. You can set the width of the border to be
erased from 1/8" to 3/4" in 1/8" increments (1 mm to 18 mm in
1 mm increments).
can set the width of the border to be erased fr om 1/8" to 3/4" in
1/8" increments (1 mm to 18 mm in 1 mm increments).
NOTE: To set the default value for Border Erase wid th, refer to Border
Erase Width Default Value, on page 3-12.
Position the original and press
1
[Border Erase].
Copy Functions
Press S or T to select Sheet
2
Erase or Book Erase and press
[Enter].
Press < or > to set the Border
3
Erase Width, 1/8" to 3/4" in 1/8"
increments (1 mm to 18 mm in 1
mm increments) can be selected.
Press [Enter].
Press [Start]. Copying commences.
4
Margin:
Bord er Erase:
Left Margin
Sheet Erase
Top Margin
Book Erase
Bord er Erase W idth:
1/4" 3/4"
1/8"
ADVANCED OPERATION GUIDE 1-13
Page 24
Copy Functions
Continuous Scan
Using Continuous Scan, originals can be scanned ind ividually or in blocks
but still be processed as a single job. The originals are scanned into the
machine’s memory until all the originals have been scanned, copies are
then made.
Position the first original(s) and
1
press [Function].
Press S or T to select
2
Continuous Scan and press
[Enter].
Press S or T to select On and
3
press [Enter].
Function:
End
Orig. Direction ::Rear
Continuous Scan
Continuous Scan:
Off
*
On
Off
Press S or T to select End and press [Enter].
4
Press [Start].
5
Position the next original(s) and
press [Start]. Repeat the
procedure to scan the remaining
originals.
When all originals have been
scanned, press [Enter].
Copying commences.
1-14 ADVANCED OPERATION GUIDE
Page 25
Auto Rotation
Copy Functions
Use Auto Rotation to automatically rotate images counterclockwise by 90
degrees, if the orientation of the original is different to the paper load ed in
the cassette.
NOTE: To enable Auto Rotation as the default setting, refer to Auto
Rotation Copy, on page 3-11.
The paper sizes that can be used for Auto Rotation are A4, 11 × 8
smaller sizes
NOTE: A3, B4, Folio, 11 × 17" (Ledger) or 8 1/2 × 14" (Legal) cannot be
used for Auto Rotation.
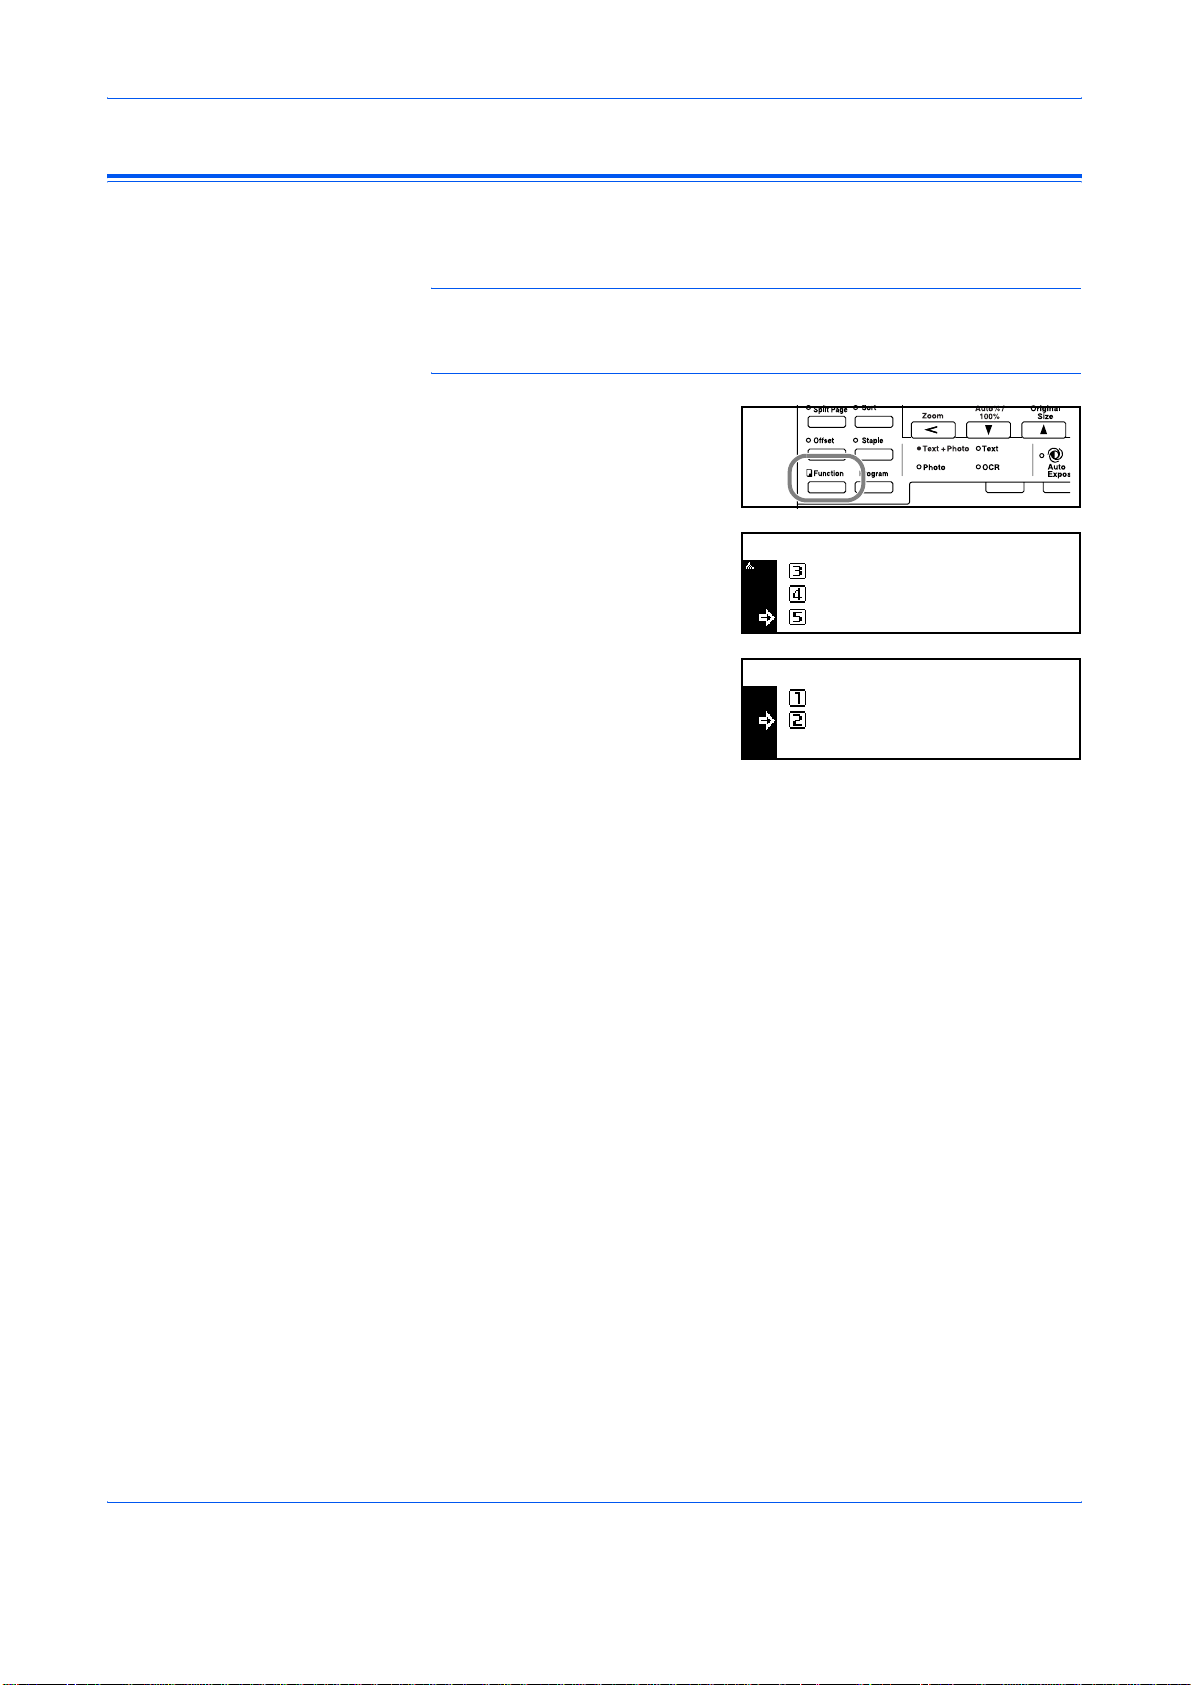
Position the first original(s) and
1
press [Function].
Press S or T to select Auto
2
Rotation and press [Enter].
Press S or T to select On and
3
press [Enter].
Function:
Orig. Direction
Continuous Scan
Auto Rotation
Auto Rotation:
Off
On
*
1/2" or
::Rear
Off
:On
ADVANCED OPERATION GUIDE 1-15
Page 26
Copy Functions
EcoPrint Mode
Ecoprint mode reduces toner consumption. Use this mode when high
quality copies are not necessary, for example, for draft copies.
NOTE: The copy exposure will be a little lighter.
To set the EcoPrint mode as the default setting, refer to EcoPrint Mode,
on page 3-4.
Position the first original(s) and
1
press [Function].
Press S or T to select EcoPrint
2
and press [Enter].
Function:
Continuous Scan
Auto Rotation
EcoPrint
Off
:
On
:
:
Off
Press S or T to select On and
3
press [Enter].
EcoPrint:
*
Off
On
1-16 ADVANCED OPERATION GUIDE
Page 27
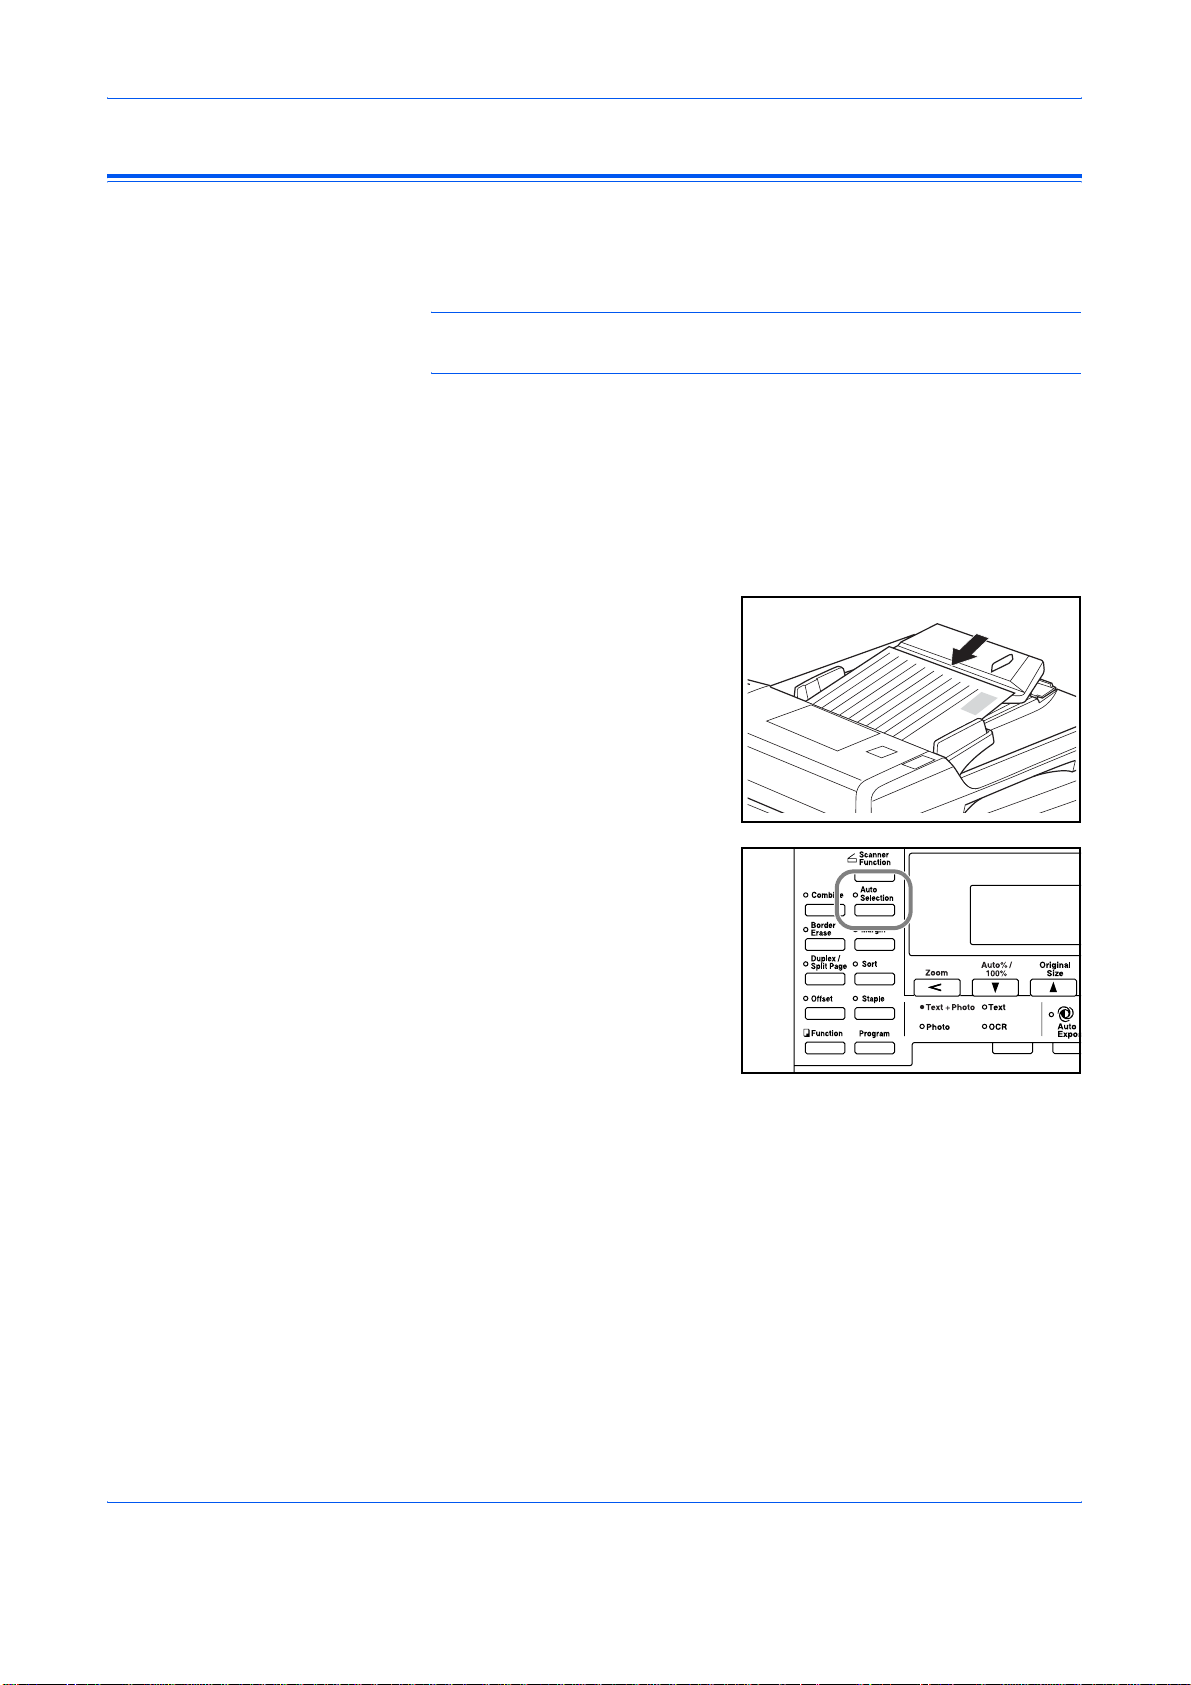
Auto Selection Mode
Copy Functions
If using the optional Document Processor, Auto Selection mode enables
the machine to detect each original size and produce co pies on the sa me
size paper as the original.
NOTE: The maximum number of sheets that can be loaded in the
Document Processor in this mode is 30.
The following original sizes can be used in Auto Selection mode:
• Inch Specification — 11 × 8
8
1/2 × 14" (Legal) and 8 1/2 × 11" (Letter)
• Metric Specification — A3 and A4, folio and A4R, or B4 and B5.
The original width must be the same.
Load the originals in the
1
Document Processor.
Press [Auto Selection].
2
1/2" and 11 × 17" (Ledger) or
Press [Start]. Copying commences.
3
ADVANCED OPERATION GUIDE 1-17
Page 28
Copy Functions
Program Function
Registering a Program
Up to eight combinations of copy modes and functions displayed on the
operation panel can be registered as a single program.
Select the copy options to be registered (for example 5 copies, Sort,
1
Margin) and press [Program].
Press S or T to select Register
2
program and press [Enter].
Press S or T to select the
3
program number required (1 to 8)
and press [Enter].
The program is registered.
Program:
Program #7
Program #8
Register program.
Register program:
Program #1
Program #2
Program #3
Using a Program
1
2
3
NOTE: You can also select the program number using a numer ic key.
Press [Program].
Press S or T to select the
program number required and
press [Enter].
NOTE: You can also select the program number using a numer ic key.
Position the originals and press [Start].
Copies are produced using the settings registered in the program.
Program:
Program #1
Program #2
Program #3
1-18 ADVANCED OPERATION GUIDE
Page 29

2 Printer Settings
This section explains how to change settings which are
required for the printer functions of the machine.
• Status Page..................................................................2-2
• e-MPS Function............................................................2-3
• Interface ......................................................................2-11
• Emulation ...................................................................2-18
• Font............................................................................2-21
• Print Configuration......................................................2-26
• Print Quality................................................................2-31
• Memory Card Operation............................................. 2-34
• Hard Disk Operation...................................................2-40
• RAM Disk Operation...................................................2-41
• Paper Handling...........................................................2-44
• Other Printer Settings.................................................2-48
ADVANCED OPERATION GUIDE 2-1
Page 30
Printer Settings
Status Page
The printer default settings, the memory capacity, and other details are
printed on the Status Page.
Press [Printer].
1
Press S or T to select MENU
2
and press [Enter].
Press S or T to select Print
3
Status Page and press [Enter].
Ready
GO
CANCEL
MENU
Menu
Back
Print Status Page
Interface
Press S or T to select Print and
4
press [Enter].
The Status Page is printed.
Print Status Page
No
Print
2-2 ADVANCED OPERATION GUIDE
Page 31

e-MPS Function
Printer Settings
The following settings are available:
• Quick Copy/Proof-and-Hold
• Private Print/Stored Job
• Virtual Mailbox
• Virtual Mailbox List
• Code Job List
• e-MPS Detail Settings
NOTE: To use the e-MPS functions, the optional Hard Disk must be
installed. For details on e-MPS, refer to the KX Printer Driver Operation
Guide.
NOTE: If the RAM Disk Operation (refer to page 2-41) is switched On,
the e-MPS function can still be used for Proof-and-hold and Private Print
jobs.
Access e-MPS
Press [Printer].
1
Press S or T to select MENU
2
and press [Enter].
Press S or T to select e-MPS
3
and press [Enter].
The e-MPS screen displays.
Select the options required.
Ready
GO
CANCEL
MENU
Menu
Back
Print Status Page
e-MPS
ADVANCED OPERATION GUIDE 2-3
Page 32

Printer Settings
Quick Copy/Proof-and-Hold
Quick Copy and Proof-and-hold are selected from the printer driver.
When a Quick Copy job is received, the machine stores it in memory until
the user enters the number of copies required and prints the job.
When a Proof-and-hold job is received, the machine prints one set and
then stores the job in memory. The user can check the proof, change the
number of copies if required and print the remaining sets.
NOTE: For information about the printer driver options, refer to the KX
Printer Driver Operation Guide.
Access e-MPS, refer to Access e-MPS, on page 2-3.
1
Press S or T to select Quick
2
Copy and press [Enter].
e-MPS
Back
Quick Copy
Private/Stored
Press S or T to select the user
3
name specified by the printer
driver and press [Enter].
Press S or T to select the job
4
name specified by the printer
driver and press [Enter].
Use the numeric keys to enter the
5
number of copies and press
[Enter].
Printing commences.
Deleting Quick Copy/Proof-and-Hold
Quick copy/proof-and-hold jobs stored in memory are deleted
automatically when the power is switched off. Use the following
instructions to delete a job manually.
Select the job to delete, refer to Quick Copy/Proof-and-Hold, on page 2-4.
1
Select User Name
tom
Select JOB
List
Select User Name
Copies
Delete
001:
Press S or T to select Delete and
2
press [Enter].
2-4 ADVANCED OPERATION GUIDE
Select User Name
Copies
Delete
001:
Page 33

Private Print/Stored Job
If Private is selected on the printer driver, the user enters a 4-digit access
code prior to sending the job. The job is then held in memory until the user
enters the same 4-digit access code to enable the job to prin t. The data is
cleared after printing.
If Stored job is selected, there is no restriction on access. The job is printed
and then stored in memory.
NOTE: For information about the printer driver options, refer to the KX
Printer Driver Operation Guide.
Display the e-MPS screen, refer to Access e-MPS, on page 2-3.
1
Press S or T to select Private/
2
Stored and press [Enter].
Printer Settings
e-MPS
Back
Quick Copy
Private/Stored
Press S or T to select the user
3
name specified by the printer
driver and press [Enter].
Press S or T to select the job
4
name specified by the printer
driver and press [Enter].
Use the numeric keys to enter the
5
4-digit access code specified on
the printer driver and press
[Enter].
Use the numeric keys to enter the
6
number of copies and press
[Enter].
Printing commences.
Select User Name
tom
Select JOB
List
List
Enter User ID
Select User Name
Copies
Delete
001:
ADVANCED OPERATION GUIDE 2-5
Page 34

Printer Settings
Virtual Mailbox
Deleting Private Print/Stored Job
Each stored job can be deleted manually as shown below:
Select the job to delete, refer to Private Print/Stored Job, on page 2-5.
1
Press S or T to select Delete and
2
press [Enter].
Virtual Mailbox is selected from the printer driver and is used to store jobs
on the machine. A job will remain in a Virtual Mailbox until the 5-digit
access code (set using KM-NET Printer Disk Manager) is entered to
enable the job to print. When the job is printed the data is deleted from the
mailbox.
NOTE: For information about the printer driver options, refer to the KX
Printer Driver Operation Guide.
Select User Name
Copies
Delete
001:
Display the e-MPS screen, refer to Access e-MPS, on page 2-3.
1
Press S or T to select Print VMB
2
Data and press [Enter].
Press S or T to select the
3
mailbox to print and press
[Enter].
Use the numeric keys to enter the
4
five-digit access code set with the
KM-NET Printer Disk Manager,
press [Enter].
Printing starts. Once printing is complete, the document data in the mailbox
is deleted.
e-MPS
Quick Copy
Private/Stored
Print VMB Data
Print VMB Data
File B001:
001
:F ile B
Enter User ID
2-6 ADVANCED OPERATION GUIDE
Page 35

Virtual Mailbox List
1
2
3
Printer Settings
A list can be printed which shows the current Virtual Mailbox numbers, the
data stored in a mailbox, the size of data stored and other information.
Display the e-MPS screen, refer to Access e-MPS, on page 2-3.
Press S or T to select List of
VMB and press [Enter].
Press S or T to select Print and
press [Enter].
The virtual mailbox list is printed.
e-MPS
Private/Stored
Print VMB Data
List of VMB
List of VMB
No
Print
VIRTUAL MAIL BOX LIST
ADVANCED OPERATION GUIDE 2-7
Page 36

Printer Settings
Code Job List
Permanent code jobs in the hard disk can be printed.
Display the e-MPS screen, refer to Access e-MPS, on page 2-3.
1
Press S or T to select List of
2
code JOB and press [Enter].
Press S or T to select Print and
3
press [Enter].
The code job list is printed.
e-MPS
Print VMB Data
List of VMB
List of Code JOB
List of Code JOB
No
Print
PERMANENT CODE JOB LIST
2-8 ADVANCED OPERATION GUIDE
Page 37

e-MPS Detail Settings
The e-MPS settings such as the maximum number of documents that can
be stored on the hard disk and the capacity assigned to each function, can
be changed.
Maximum Number - Quick Copy Jobs
Display the e-MPS screen, refer to Access e-MPS, on page 2-3.
1
Press S or T to select e-MPS
2
Configuration and press [Enter].
Press S or T to select Quick
3
Copy and press [Enter].
Press < or > to select the
4
maximum number of jobs that can
be stored, 0 to 50 can be selected.
Press [Enter].
e-MPS
List of VMB
List of Code JOB
e-MPS Configuration
e-MPS Configuration
Back
Quick Copy
Temp Code Job Size
Quick Copy
32 50)
(0
Printer Settings
Total Capacity - Temporary Code Jobs
Use to set the total capacity for storage of temporary cod e jobs on the hard
disk.
Display the e-MPS screen, refer to Access e-MPS, on page 2-3.
1
Press S or T to select e-MPS
2
Configuration and press [Enter].
Press S or T to select Temp
3
Code Job Size and press [Enter].
Press < or > to select the capacity
4
for storage of temporary code
jobs, 0 to 9999 MB can be
selected. Press [Enter].
NOTE: The actual maximum size is the size of available hard disk space.
e-MPS
List of VMB
List of Code JOB
e-MPS Configuration
e-MPS Configuration
Back
Quick Copy
Temp Code Job Size
Temporary Code Jo b Size
1550 Mbyte
ADVANCED OPERATION GUIDE 2-9
Page 38

Printer Settings
Total Capacit y - Permanent Code Jobs
Use to set the total capacity for storage of permanent code jobs on the hard
disk.
Display the e-MPS screen, refer to Access e-MPS, on page 2-3.
1
Press S or T to select e-MPS
2
Configuration and press [Enter].
Press S or T to select Perm
3
Code Job Size and press [Enter].
Press < or > to select the total
4
capacity for storage of permanent
code jobs, 0 to 9999 MB can be
selected. Press [Enter].
e-MPS
List of VMB
List of Code JOB
e-MPS Configuration
e-MPS Configuration
Quick Copy
Temp Code Job Size
Perm Code Job Size
Permanent Code Job Size
1550 Mbyte
NOTE: The actual maximum size is the size of available hard disk space.
Total Capacity - Virtual Mailboxes
Use to set the total capacity for storage of virtual mailboxes on the hard
disk.
Display the e-MPS screen, refer to Access e-MPS, on page 2-3.
1
Press S or T to select e-MPS
2
Configuration and press [Enter].
Press S or T to select VMB Size
3
and press [Enter].
Press < or > to select the capacity
4
for storage of virtual mailboxes
(VMB), 0 to 9999 MB can be
selected. Press [Enter].
e-MPS
List of VMB
List of Code JOB
e-MPS Configuration
e-MPS Configuration
Temp Code Job Size
Perm Code Job Size
VMB Si ze
VMB Size
1550 Mbyte
NOTE: The actual maximum size is the size of available hard disk space.
2-10 ADVANCED OPERATION GUIDE
Page 39

Interface
This machine is equipped with a parallel, USB and network interface as
standard.
The following settings are available:
• Parallel Interface
• Network Setting
• IP Address Setting
• Subnet Mask Setting
• Default Gateway
• Network St atus Page Printing
Access the Interface Screen
Press [Printer].
1
Printer Settings
2
3
Parallel Interface
Mode Description
Auto The printer automatically changes its communication mode
Normal The printer uses the standard communication method
Press S or T to select MENU
and press [Enter].
Press S or T to select Interface
and press [Enter].
Setup the options required.
The parallel interface supports bi-directional/high-speed mode. The
transmission/reception modes that can be set are shown below.
according to the connected computer. We recommend you
leave this setting unchanged.
prescribed for Centronics interfaces.
Ready
GO
CANCEL
MENU
Menu
Back
Print Status Page
Interface
High speed This mode enables faster data transmission between the
printer and the computer. Select this mode if printing
problems occur when the printer is connected to a
workstation.
ADVANCED OPERATION GUIDE 2-11
Page 40

Printer Settings
Mode Description
Nibble (high) High speed data communication is used in compliance with
the IEEE 1284 standard.
NOTE: Use a parallel interface cable that complies with the IEEE 1284
standard.
Display the Interface screen, refer to Access the Inter face Screen, on page
1
2-11.
Press S or T to select Parallel
2
and press [Enter].
Press S or T to select the
3
transmission/reception mode
required and press [Enter].
Interface
Back
Parallel
Network
Parallel
Back
Auto
Normal
4
Network Setting
NetWare
1
2
Press [Reset]. The Printer Basic screen displays.
To perform network printing, network setup is required. This section
describes the tasks required for using the network function.
NOTE: Before setting the IP Address, ask your Network Administrator to
obtain the address and prepare it.
Set this option to On if connecting to a NetWare network.
Display the Interface screen, refer to Access the Inter face Screen, on page
2-11.
Press S or T to select Network
and press [Enter].
Interface
Back
Parallel
Network
Press S or T to select NetWare
3
and press [Enter].
2-12 ADVANCED OPERATION GUIDE
Network Setting
Back
NetWare
TCP/IP
Page 41

Press S or T to select On or Off
4
and press [Enter]. If On is
selected, Change # displays.
Press S or T to select Change #
5
and press [Enter].
Press S or T to select the frame
6
mode and press [Enter].
Press [Reset]. The Printer Basic screen displays.
7
EtherTalk
Set this option to On if connecting to an Apple Macintosh computer.
Printer Settings
NetWare
Back
On
Off
NetWare
On
Off
Change #
NetW are Fram e
Back
Auto
802.3
Display the Interface screen, refer to Access the Inter face Screen, on page
1
2-11.
Press S or T to select Network
2
and press [Enter].
Press S or T to select EtherTalk
3
and press [Enter].
Press S or T to select On and
4
press [Enter].
Press [Reset]. The Printer Basic screen displays.
5
Interface
Back
Parallel
Network
Network Setting
NetWare
TCP/IP
EtherTalk
EtherTalk
Back
On
Off
ADVANCED OPERATION GUIDE 2-13
Page 42

Printer Settings
TCP/IP
1
2
3
4
Set this option to On if connecting to a Windows network via TCP/IP.
Display the Interface screen, refer to Access the Inter face Screen, on page
2-11.
Press S or T to select Network
and press [Enter].
Press S or T to select TCP/IP
and press [Enter].
Press S or T to select On and
press [Enter].
Interface
Back
Parallel
Network
Network Setting
Back
NetWare
TCP/IP
TCP/IP
Back
On
Off
DHCP
1
2
3
4
Set this option to On if using DHCP (Dynamic Host Configuration Protocol).
Display the TCP/IP screen, refer to TCP/IP, on page 2-14.
Press S or T to select Change #
and press [Enter].
Press S or T to select DHCP and
press [Enter].
Press S or T to select On and
press [Enter].
TCP/IP
On
Off
Change #
TCP/IP Settin g
Back
DHCP
IP Address
DHCP
Back
On
Off
2-14 ADVANCED OPERATION GUIDE
Page 43

IP Address Setting
1
2
3
Printer Settings
Use the following procedure to register an IP Address to the machine.
Check with your network administrator before performing this procedure.
If you use the following procedure to register the IP Address manually,
ensure DHCP is Off and TCP/IP is On.
NOTE: Any changes made to network settings become valid after you
power the machine off and on again.
Display the TCP/IP screen, refer to TCP/IP, on page 2-14.
Press S or T to select Change #
and press [Enter].
Press S or T to select IP
Address and press [Enter].
TCP/IP
On
Off
Change #
TCP/IP Settin g
Back
DHCP
IP Address
Press S or T to select IP
4
Address and press [Enter].
Use the keypad to enter the
5
address. Enter the first segment
of the IP Address in the
highlighted area and press [#].
Enter the next segment and press
6
[#].
Enter the remaining segments
using the same procedure.
Press [Enter] when the entire address has been entered.
TCP/IP Settin g
Back
DHCP
IP Address
IP Ad dress
0 0..00.
IP Ad dress
10 0..00 .
ADVANCED OPERATION GUIDE 2-15
Page 44

Printer Settings
Subnet Mask Setting
Continue from the previous Step 6 to register the Subnet Mask address.
NOTE: If you are not sure of the appropriate Subnet Mask address,
contact your Network Administrator.
Display the TCP/IP Setting screen.
1
Press S or T to select Subnet
2
Mask and press [Enter].
Enter the Subnet Mask address
3
using the same procedure used
for the IP Address in steps 8 - 9 of
IP Address Setting.
Press [Enter] when the entire address has been entered.
TCP/IP Settin g
DHCP
IP Address
Subnet Mask
Subnet Mask
0 0..00.
Default Gateway
1
2
3
4
Continue from the previous Step 3 to register the Default Gateway.
NOTE: If you are not sure of the appropriate Default Gateway address,
contact your Network Administrator.
Access the TCP/IP Setting screen.
Press S or T to select Gateway
and press [Enter].
Enter the Gateway address using
the same procedure used for the
IP Address in steps 8 - 9 of IP
Address Setting.
Press [Enter] when the entire address has been entered.
When you have entered all the network settings, pr ess [Reset].
The Printer Basic screen displays.
TCP/IP Settin g
IP Address
Subnet Mask
Gatewa y
Gateway
0 0..00.
2-16 ADVANCED OPERATION GUIDE
Page 45

Network Status Page Printing
When printing the Status Page, you can also print the network status page
in succession.
Display the Interface screen, refer to Access the Inter face Screen, on page
1
2-11.
Press S or T to select Network
2
press [Enter].
Press S or T to select Network
3
Status Page and press [Enter].
Press S or T to select On or Off
4
and press [Enter].
Printer Settings
Interface
Back
Parallel
Network
Network Setting
TCP/IP
EtherTalk
Network Status Page
Network Status Page Setting
Back
On
Off
Press [Reset]. The Printer Basic screen displays.
5
ADVANCED OPERATION GUIDE 2-17
Page 46

Printer Settings
Emulation
Emulation Mode Selection
The following settings are available:
• Emulation Mode Selection
• KC-GL Pen Thickness
• KPDL Error Printing
• KPDL (AUTO) Alternative Emulation Selection
NOTE: You can set the emulation for each interface.
Emulation modes that can be used with this machine: PCL6, KC-GL,
KDPL, KDPL (AUTO), Line Printer, IBM Proprinter, Diablo 630, EPSON
LQ-850
If you set KC-GL, you can set the thickness of the pen and page size.
If you set KPDL (AUTO), switching between KPDL and an alternative
emulation mode will be automatically performed according to the print
data.
If you set KPDL or KPDL (AUTO), the details of any error that occurs during
printing can be printed.
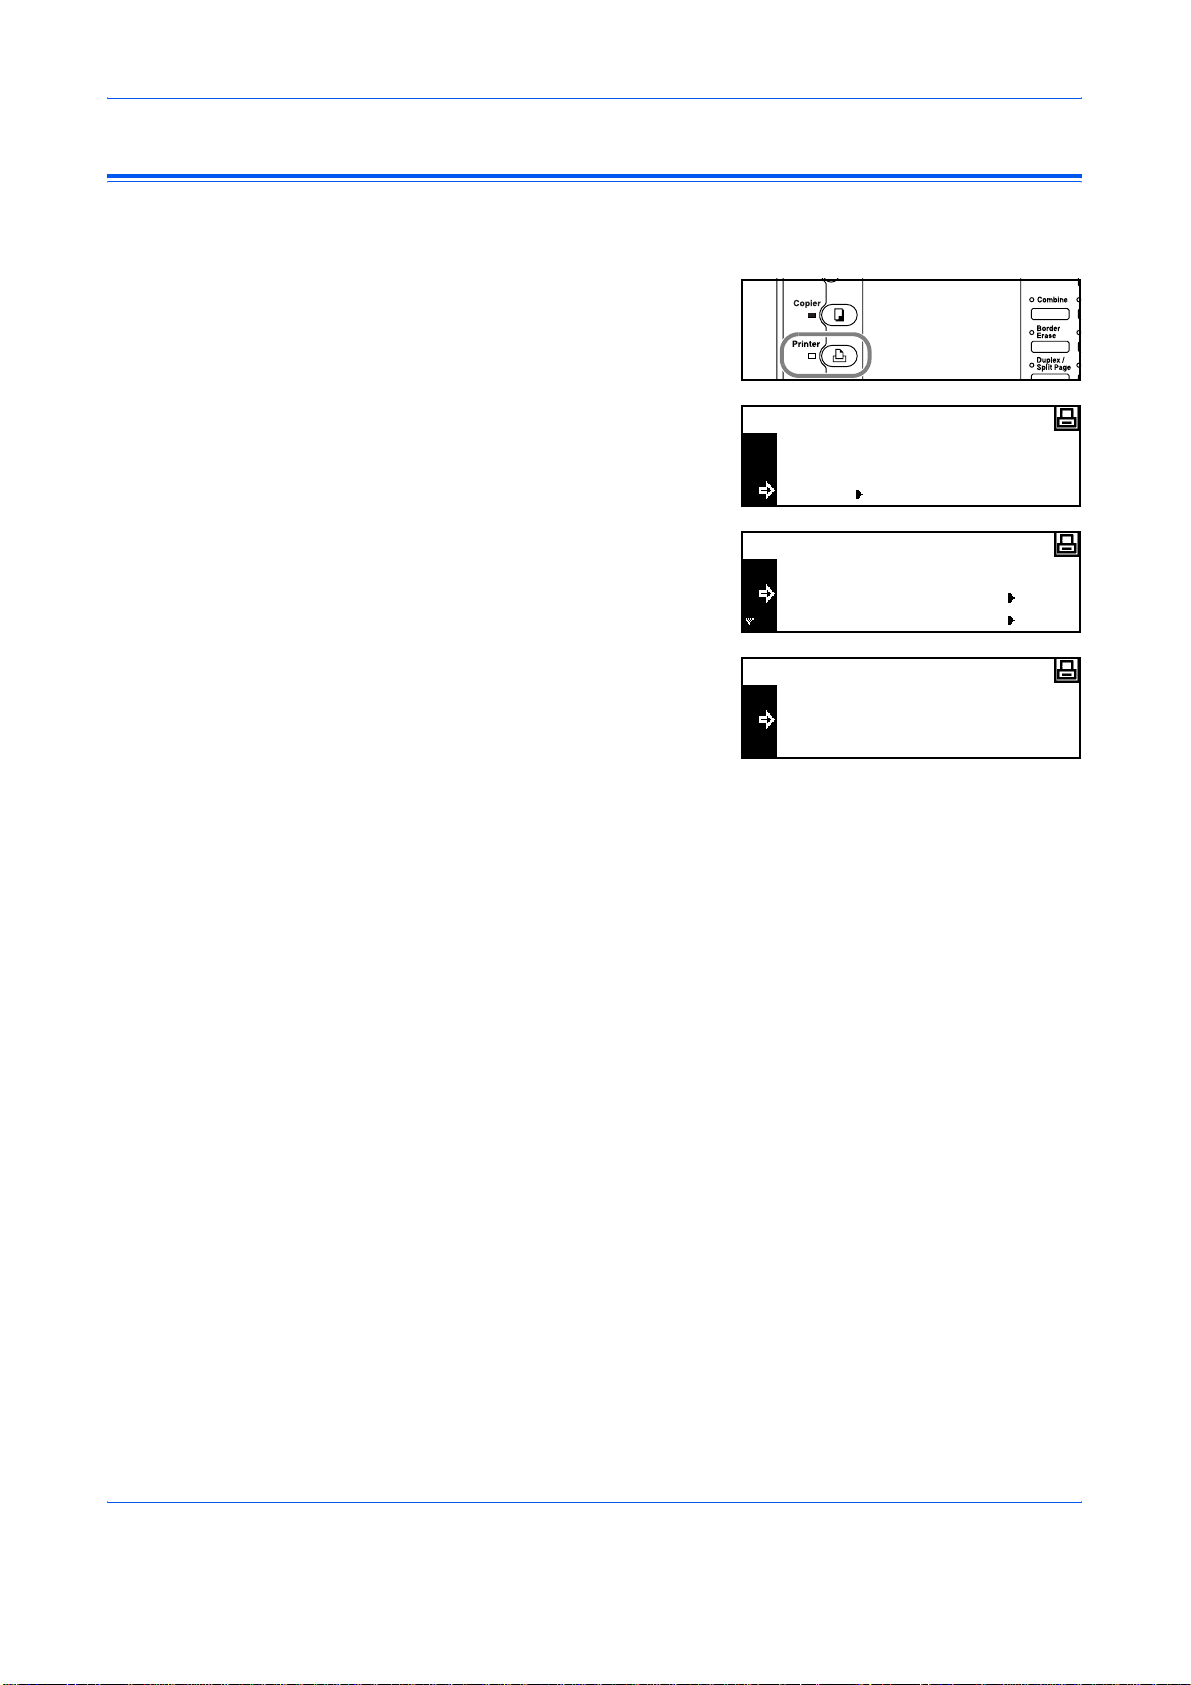
Press [Printer].
1
Press S or T to select MENU
2
and press [Enter].
Press S or T to select Emulation
3
and press [Enter].
Press S or T to select the
4
interface and press [Enter].
Ready
GO
CANCEL
MENU
Menu
Print Status Page
Interface
Emulation
Interface
Back
Parallel
Network
Press S or T to select the
5
emulation mode and press
[Enter].
2-18 ADVANCED OPERATION GUIDE
Emulation
Back
PCL 6
KC-GL
Page 47

If you have selected KC-GL, refer to KC-GL Pen Thickness, on page 2-19.
If you have selected KPDL or KPDL (AUTO), refer to KPDL Error Printing,
on page 2-20.
If you have selected KPDL (AUTO), refer to KPDL (AUTO) Alternative
Emulation Selection, on page 2-20.
KC-GL Pen Thickness
If you have selected KC-GL emulation, you can set the thicknesses of the
eight pens and the page size. Continue the procedure from step 5 of
Emulation Mode Selection to setup.
Press S or T to select KC-GL
1
Pen Adjust and press [Enter].
Press S or T to select the pen
2
required and press [Enter].
Printer Settings
KC-GL
Back
KC-GL Pen Adjust
KC-GL Page Set
KC-GL Pen Adjust
Back
Pen (1)
Pen (2)
Press < or > to select the
3
thickness (number of dots) and
press [Enter].
Press S or T to select Back and press [Enter].
4
Press S or T to select KC-GL
5
Page Set and press [Enter].
Press S or T to select the page
6
size and press [Enter].
NOTE: SPSZ is the size specified with the PRESCRIBE SPSZ
command. For details of the PRESCRIBE commands, refer to the
PRESCRIBE Command Reference Manual.
Press [Reset]. The Printer Basic screen displays.
7
Pen Width
1 99)dot(s)
KC-GL
Back
KC-GL Pen Adjust
KC-GL Page Set
KC-GL Page Set
B1
B0
SPSZ
(01
ADVANCED OPERATION GUIDE 2-19
Page 48

Printer Settings
KPDL Error Printing
KPDL (AUTO) Alternative Emulation Selection
The details of any error that occurs during printing in the KPDL emulation
mode can be printed. Continue the procedure from step 5 of Emulation
Mode Selection to set up.
Press S or T to select Print
1
KPDL Errs and press [Enter].
If On is selected, the details of any
error will be printed.
Press [Reset]. The Printer Basic screen displays.
2
If you set KPDL (AUTO), switching between KPDL and an alternative
emulation mode will be automatically performed according to print data.
Continue the procedure from step 5 of emulation mod e selection to setu p.
Available emulation modes: PCL6, KC-GL, Line Printer, IBM Proprinter,
DIABLO 630, EPSON LQ-850
KPDL
Back
Print KPDL Errs
Press S or T to select Alt.
1
Emulation and press [Enter].
Press S or T to select the
2
emulation mode and press
[Enter].
Press [Reset]. The Printer Basic screen displays.
3
KPDL(AUTO)
Back
Alt. Emu latio n
Print KPDL Errs
Alt. Emulation
Back
PCL 6
KC-GL
2-20 ADVANCED OPERATION GUIDE
Page 49

Font
Printer Settings
You can select the default Font for the current interface. The default Font
can be one of the internal fonts or a font stored in the optional Memory
Card.
The following settings are available:
• Font Selection
•Font Size
• Courier/Letter Gothic Font Character Pitch
• Courier/Letter Gothic Thickness
• Code Set
• Printing a Font List
NOTE: You can set the font for each interface.
Access the Font Screen
Press [Printer].
1
Press S or T to select MENU
2
and press [Enter].
Press S or T to select Font and
3
press [Enter].
Press S or T to select the
4
interface to set and press [Enter].
The Font screen displays.
Select the options required.
Ready
GO
CANCEL
MENU
Menu
Interface
Emulation
Font
Interface
Back
Parallel
Network
ADVANCED OPERATION GUIDE 2-21
Page 50

Printer Settings
Font Selection
NOTE: If optional fonts as well as internal fonts are stored on the
machine, a screen for sel ecting Internal font or Option font displays. Press
S or T to select the font to set.
Display the Font screen, refer to Access the Font Screen, on page 2-21.
1
Press S or T to select Select
2
Font and press [Enter].
Press S or T to select the Font
3
ID and press [Enter].
The font number displays.
Characters displayed before font
numbers indicate the following items.
Font
Back
Select Font
Code S et
Select Font
Font ID
Back
I000
I000
Detail
Display Description
I Internal font
S Downloaded fonts
M Fonts in memory card
H Fonts in RAM disk or optional hard disk
O Fonts in optional ROM
Press < or > to select the font number and press [Enter]. For internal font
4
numbers, refer to Printing a Font List, on page 2-25.
Press [Reset]. The Printer Basic screen displays.
5
2-22 ADVANCED OPERATION GUIDE
Page 51

Font Size
Printer Settings
If you have selected a proportional font as the default font, you ca n set the
font size. If you have selected the Courier font or the Letter Gothic font as
the default font, only the Character Pitch setting displays.
Display the Font screen, refer to Access the Font Screen, on page 2-21.
1
Press S or T to select Select
2
Font and press [Enter].
Press S or T to select Detail an d
3
press [Enter].
Press < or > to select the
4
character size, 4.00 to 999.75
point can be selected. Press
[Enter].
Font
Back
Select Font
Code S et
Select Font
Back
I000
I000
Detail
Font Size Setting
8.50 999.75)Point
(4.00
Press [Reset]. The Printer Basic screen displays.
5
Courier/Letter Gothic Font Character Pitch
You can set the character pitch for the Courier or Letter Gothic font.
Display the Font screen, refer to Access the Font Screen, on page 2-21.
1
Press S or T to select Select
2
Font and press [Enter].
Press S or T to select Detail an d
3
press [Enter].
Press < or > to select the
4
character pitch, 0.44 to 99.99 cpi
can be selected. Press [Enter].
Font
Back
Select Font
Code S et
Select Font
Back
I000
I000
Detail
Font Pitch Setting
10.00 99 .99)CPI
(0.44
Press [Reset]. The Printer Basic screen displays.
5
ADVANCED OPERATION GUIDE 2-23
Page 52

Printer Settings
Courier/Letter Gothic Thickness
You can select the thickness of the Courier or Letter Gothic font from two
types. An example of changing the Courier font thickness is described
below.
Display the Font screen, refer to Access the Font Screen, on page 2-21.
1
Press S or T to select Select
2
Font and press [Enter].
Press S or T to select Courier
3
and press [Enter].
Press S or T to select Regular or
4
Dark and press [Enter].
Font
Back
Select Font
Code S et
Select Font
I000
Detail
Courier
Courier
Back
Regular
Dark
Code Set
Press [Reset]. The Printer Basic screen displays.
5
With the PCL6 emulation, you can select a code set.
Display the Font screen, refer to Access the Font Screen, on page 2-21.
1
Press S or T to select Code Set
2
and press [Enter].
Press S or T to select the Code
3
Setting and press [Enter].
Press [Reset]. The Printer Basic screen displays.
4
Font
Back
Select Font
Code S et
Code Setti ng
IBM PC - 8
PC-855 Serbia
ISO Cyrillic
2-24 ADVANCED OPERATION GUIDE
Page 53

Printing a Font List
1
2
3
Printer Settings
Display the Font screen, refer to Access the Font Screen, on page 2-21.
Press S or T to select List of
Inter. Fonts and press [Enter].
Font
Select Font
Code S et
List of Inter. Fonts
NOTE: If optional fonts as well as internal fonts are stored on the
machine, you can also select List of Option Fonts.
Press S or T to select Print and
press [Enter]. The Font List is
printed.
List of Inter. Fonts
No
Print
Internal Scalable and Bitmapped Fonts List
Font Name Scalable/Bitmap Password Selection [FSET] Font ID
Internal Scalable and Bitmapped Fonts List
Font Name Scalable/Bitmap Password Selection [FSET] Font ID
PRESCRIBE
PRESCRIBE
ADVANCED OPERATION GUIDE 2-25
Page 54

Printer Settings
Print Configuration
Access the Page Set Screen
The following settings are available:
• Number of Copies
•Zoom
• Print Orientation
• Page Protect Mode
• Line Feed (LF) Action
• Carriage Return (CR) Action
•Wide A4
NOTE: You can set the print configuration for each interface.
Press [Printer].
1
Press S or T to select MENU
2
and press [Enter].
Press S or T to select Page Set
3
and press [Enter].
Press S or T to select the
4
interface and press [Enter].
The Page Set screen displays.
Change the options required
using the instructions starting on page 2-27.
Ready
GO
CANCEL
MENU
Menu
Emulation
Font
Page Set
Interface
Back
Parallel
Network
2-26 ADVANCED OPERATION GUIDE
Page 55

Number of Copies
1
2
3
4
Printer Settings
You can set the number of copies to be pr inted, any number fr om 1 to 999
can be selected.
Display the Page Set screen, refer to Access the Page Set Screen, on
page 2-26.
Press S or T to select Copies
and press [Enter].
Press < or > to select the number
of copies,1 to 999 can be
selected. Press [Enter].
Press [Reset]. The Printer Basic screen displays.
Page Set
Back
Copies
Zoom(Reduce)
Copies
1
Zoom
If you specify the Paper Size (original size) and the Output Size, the
machine reduces the image at a preset magnifica tion ratio to print onto the
specified Output Size paper.
Display the Page Set screen, refer to Access the Page Set Screen, on
1
page 2-26.
Press S or T to select Zoom
2
(Reduce) and press [Enter].
Press S or T to select the paper
3
size and press >.
Press S or T to select the output
4
size. The reduction ratio is
automatically set and displayed.
Press [Enter].
Page Set
Back
Copies
Zoom(Reduce)
Zoom(Reduce)
Paper size
Cas sette
Zoom(Reduce)
Paper size
8.5x11
Print size
Cassette 100%
Print size
8.5x11 9898% %
Press [Reset]. The Printer Basic screen displays.
5
ADVANCED OPERATION GUIDE 2-27
Page 56

Printer Settings
Print Orientation
Page Protect Mode
You can select the Print Orientation from Portrait and Landscape.
Display the Page Set screen, refer to Access the Page Set Screen, on
1
page 2-26.
Press S or T to select
2
Orientation and press [Enter].
Press S or T to select Portrait or
3
Landscape and press [Enter].
Press [Reset]. The Printer Basic screen displays.
4
Page Set
Copies
Zoom(Reduce)
Orientation
Orientation
Back
Portrait
Landscape
To maintain the printer memory efficiently, the default settin g of this mode
is Auto. This menu is not usually displayed. If a print overrun error occurs
due to insufficient printer memory, Page Protect is forcibly set to On. After
the print overrun error occurs, reset this setting to Auto.
Display the Page Set screen, refer to Access the Page Set Screen, on
1
page 2-26.
Press S or T to select Page
2
Protect and press [Enter].
Press S or T to select Auto and
3
press [Enter].
Press [Reset]. The Printer Basic screen displays.
4
Page Set
Zoom(Reduce)
Orientation
Page Protect
Page Protect
Back
Auto
On
2-28 ADVANCED OPERATION GUIDE
Page 57

Line Feed (LF) Action
Use to set the action taken by the machine when it receives a Line Feed
code (0AH).
Display the Page Set screen, refer to Access the Page Set Screen, on
1
page 2-26.
Press S or T to select LF Action
2
and press [Enter].
Press S or T to select the action
3
from LF only, CR and LF, and
Ignore LF, and press [Enter].
Printer Settings
Page Set
Orientation
Page Protect
LF Action
LF Action
Back
LF only
- LF only: Performs a line
feed.
- CR and LF: Performs a line feed and carriage return.
- Ignore LF: Does not perform a line feed.
CR and LF
Press [Reset]. The Printer Basic screen displays.
4
Carriage Return (CR) Action
Use to set the action taken by the machine when it receives a Carriage
Return code (0DH).
Display the Page Set screen, refer to Access the Page Set Screen, on
1
page 2-26.
Press S or T to select CR Action
2
and press [Enter].
Press S or T to select the action
3
from CR only, CR and LF, and
Ignore CR, and press [Enter].
- CR only: Performs a
carriage return.
- CR and LF: Performs a carriage return and line feed.
- Ignore CR: Does not perform a carriag e re tu rn .
Page Set
Page Protect
LF Action
CR Action
CR Act ion
Back
CR only
CR and LF
Press [Reset]. The Printer Basic screen displays.
4
ADVANCED OPERATION GUIDE 2-29
Page 58

Printer Settings
Wide A4
The print area of A4 size can be enlarged.
Display the Page Set screen, refer to Access the Page Set Screen, on
1
page 2-26.
Press S or T to select Wide A4
2
and press [Enter].
Press S or T to select On or Off
3
and press [Enter].
Press [Reset]. The Printer Basic screen displays.
4
Page Set
LF Action
CR Action
Wide A4
Wide A4
Back
On
Off
2-30 ADVANCED OPERATION GUIDE
Page 59

Print Quality
Access the Print Quality Screen
The following settings are available:
• KIR Mode
• EcoPrint
• Resolution
•Print Density
Press [Printer].
1
Press S or T to select MENU
2
and press [Enter].
Printer Settings
Ready
GO
CANCEL
MENU
KIR Mode
Press S or T to select Print
3
Quality and press [Enter].
The Print Quality screen displays.
Select the options required.
Smoothing changes the print quality to 2400 dpi equivalent × 600 dpi.
Display the Print Quality screen, refer to Access the Print Quality Screen,
1
on page 2-31.
Press S or T to select KIR Mode
2
and press [Enter].
Press S or T to select On or Off
3
and press [Enter].
Menu
Font
Page Set
Print Quality
Print Quality
Back
KIR Mod e
EcoPrint Mode
KIR Mode
Back
On
Off
Press [Reset]. The Printer Basic screen displays.
4
ADVANCED OPERATION GUIDE 2-31
Page 60

Printer Settings
EcoPrint
EcoPrint mode allows printing with less toner consumption. Use this mode
when high quality printing is not necessary, for example, for draft printing.
Display the Print Quality screen, refer to Access the Print Quality Screen,
1
on page 2-31.
Press S or T to select EcoPrint
2
Mode and press [Enter].
Press S or T to select On or Off
3
and press [Enter].
Press [Reset]. The Printer Basic screen displays.
4
Print Quality
Back
KIR Mod e
EcoPrint Mode
EcoPrint Mode
Back
On
Off
Resolution
With this machine, three types of resolution are available: 300 dpi, 600 dpi,
and Fast 1200 Mode.
Display the Print Quality screen, refer to Access the Print Quality Screen,
1
on page 2-31.
Press S or T to select Resolution
2
and press [Enter].
Press S or T to select Fast 1200
3
Mode, 600 dpi or 300 dpi and
press [Enter].
Press [Reset]. The Printer Basic screen displays.
4
Print Quality
Print Quality
EcoPrint Mode
Resolution
Resolution
Back
Fast1200 Mode
600dpi
2-32 ADVANCED OPERATION GUIDE
Page 61

Print Density
Printer Settings
The print density can be set between five levels, 1 (light) to 5 (dark).
Display the Print Quality screen, refer to Access the Print Quality Screen,
1
on page 2-31.
Press S or T to select Print
2
Density and press [Enter].
Press < or > to select the Print
3
Density and press [Enter].
Press [Reset]. The Printer Basic screen displays.
4
Print Quality
EcoPrint Mode
Resolution
Print Density
Print Density
3
ADVANCED OPERATION GUIDE 2-33
Page 62

Printer Settings
Memory Card Operation
If the optional Memory Card is installed in this machine, Read, Write and
Delete can be performed for different types of data.
The following options are available:
• Reading Font Data
• Reading Macro Data
• Reading Data
• Reading Program
• Writing Data
• Deleting Data
• Deleting Font Data
• Deleting Program Data
• Deleting Macro Data
• Deleting Language Data
• Formatting Memory Card
• Printing a Partition List
Access the Memory Card Screen
Press [Printer].
1
Press S or T to select MENU
2
and press [Enter].
Press S or T to select Memory
3
Card and press [Enter].
The Memory Card screen
displays.
Select the options required.
Ready
GO
CANCEL
MENU
Menu
HARD DISK
RAM Disk Mode
Memo ry Card
2-34 ADVANCED OPERATION GUIDE
Page 63

Reading Font Data
1
2
3
4
Reading Macro Data
1
2
Printer Settings
Display the Memory Card screen, refer to Access the Memory Card
Screen, on page 2-34.
Press S or T to select Read
Fonts and press [Enter].
Press S or T to select OK and press [Enter].
Fonts are read from the Memory Card.
Press [Reset]. The Printer Basic screen displays.
Display the Memory Card screen, refer to Access the Memory Card
Screen, on page 2-34.
Press S or T to select Read
Macro and press [Enter].
Memo r y Card
Back
Read Fonts
Read Macr o
Memo r y Card
Back
Read Fonts
Read Macr o
Reading Data
Press S or T to select OK and press [Enter]. Macros are read from the
3
Memory Card.
Press [Reset]. The Printer Basic screen displays.
4
Display the Memory Card screen, refer to Access the Memory Card
1
Screen, on page 2-34.
Press S or T to select Read Data
2
and press [Enter].
Press S or T to select the data to read and press [Enter].
3
The selected data is read from the Memory Card.
Press [Reset]. The Printer Basic screen displays.
4
Memo r y Card
Read Fonts
Read Macr o
Read Data
ADVANCED OPERATION GUIDE 2-35
Page 64

Printer Settings
Reading Program
Writing Data
Display the Memory Card screen, refer to Access the Memory Card
1
Screen, on page 2-34.
Press S or T to select Read
2
Program and press [Enter].
Press S or T to select the program to read and press [Enter].
3
The selected program is read from the Memory Card.
Press [Reset]. The Printer Basic screen displays.
4
Display the Memory Card screen, refer to Access the Memory Card
1
Screen, on page 2-34.
Press S or T to select Write Data
2
and press [Enter].
Memo r y Card
Read Macr o
Read Data
Read Progra m
Memo r y Card
Read Data
Read Progra m
Write Data
Press S or T to select OK and press [Enter]. GO and CANCEL display.
3
NOTE: If you select CANCEL and press [Enter], data is not written.
Send data from your computer to the machine.
4
When the data is received, the message display changes to Processing
data. When reception is complete, the message display changes to
Waiting.
Press S or T to select GO and press [Enter].
5
The data is written to the Memory Card.
2-36 ADVANCED OPERATION GUIDE
Page 65

Deleting Data
1
2
3
4
Deleting Font Data
1
2
Printer Settings
Display the Memory Card screen, refer to Access the Memory Card
Screen, on page 2-34.
Press S or T to select Delete
Data and press [Enter].
Press S or T to select the data to delete and press [Enter].
The selected data is deleted from the Memory Card.
Press [Reset]. The Printer Basic screen displays.
Display the Memory Card screen, refer to Access the Memory Card
Screen, on page 2-34.
Press S or T to select Delete
Font and press [Enter].
Memo r y Card
Read Progra m
Write Data
Delete Data
Memo r y Card
Write Data
Delete Data
Delete Font
Press S or T to select the font to delete and press [Enter].
3
The selected font is deleted from the Memory Card.
Press [Reset]. The Printer Basic screen displays.
4
Deleting Program Data
Display the Memory Card screen, refer to Access the Memory Card
1
Screen, on page 2-34.
Press S or T to select Delete
2
Program and press [Enter].
Press S or T to select the program to delete and press [Enter].
3
The selected program is deleted from the Memory Card.
Press [Reset]. The Printer Basic screen displays.
4
Memo r y Card
Delete Data
Delete Font
Delete Program
ADVANCED OPERATION GUIDE 2-37
Page 66

Printer Settings
Deleting Macro Data
Deleting Language Data
Display the Memory Card screen, refer to Access the Memory Card
1
Screen, on page 2-34.
Press S or T to select Delete
2
Macro and press [Enter].
Press S or T to select the macro data to delete and press [Enter].
3
The selected macro data is deleted from the Memory Card.
Press [Reset]. The Printer Basic screen displays.
4
Display the Memory Card screen, refer to Access the Memory Card
1
Screen, on page 2-34.
Press S or T to select Delete the
2
language and press [Enter].
Memo r y Card
Delete Font
Delete Program
Delete Macro
Memo r y Card
Delete Program
Delete Macro
Delete the language
Press S or T to select the language data to delete and press [Enter].
3
The selected language data is deleted from the Memory Card.
Press [Reset]. The Printer Basic screen displays.
4
Formatting Memory Card
NOTE: Ensure the Memory Card is formatted using this machine. Any
Memory Card formatted with other equipment cannot be used.
Display the Memory Card screen, refer to Access the Memory Card
1
Screen, on page 2-34.
Press S or T to select Format
2
and press [Enter].
Press S or T to select OK and press [Enter].
3
Memo r y Card
Back
Format
2-38 ADVANCED OPERATION GUIDE
Page 67

Formatting of the Memory Card starts. When formatting is complete,
format information is printed.
Printing a Partition List
Display the Memory Card screen, refer to Access the Memory Card
1
Screen, on page 2-34.
Press S or T to select List of
2
Partitions and press [Enter].
Printer Settings
FORMAT INFORMATION
Memo r y Card
Delete Macro
Delete the language
List of Partition s
Press S or T to select Print and
3
press [Enter].
The partition list is printed.
List of P artitions
No
Print
PARTITION LIST
ADVANCED OPERATION GUIDE 2-39
Page 68

Printer Settings
Hard Disk Operation
Access Hard Disk
If the optional Hard Disk is installed in this machine, Read, Write and
Delete can be performed for different types of data.
The Hard Disk can also be formatted and a Partition List printed.
Press [Printer].
1
Press S or T to select MENU
2
and press [Enter].
Press S or T to select HARD
3
DISK and press [Enter].
The operation procedure for each
item is the same as the Memory
Card operation, refer to Memory Card Operation, on page 2-34.
Ready
GO
CANCEL
MENU
Menu
Page Set
Print Quality
HARD DISK
2-40 ADVANCED OPERATION GUIDE
Page 69

RAM Disk Operation
RAM Disk Functions
Printer Settings
This machine is equipped with RAM Disk functions. The RAM Disk is a
virtual disk unit that uses a part of the memory. If you assign a certain size
of the memory to the RAM Disk, you can use it for electronic sorting (for
reduction of total print time) and storage and reading of data. Also you can
use the e-MPS function (refer to page 2-3).
IMPORTANT: Data written to the RAM Disk is deleted when the machine
is reset or the main power is switched off ({).
The RAM Disk area is assigned from the user available memory.
Consequently, printing speed may be lower or insufficient memory occurs
depending on the RAM Disk setting value.
The RAM Disk functions are disabled as the default setting. To use the
RAM Disk functions, setup as follows.
Press [Printer].
1
Press S or T to select MENU
2
and press [Enter].
Press S or T to select RAM Disk
3
Mode and press [Enter].
Press S or T to select On and
4
press [Enter].
Change # displays.
Press [Reset].
5
Press S or T to select Yes and
6
press [Enter].
The machine restarts.
Ready
GO
CANCEL
MENU
Menu
Page Set
Print Quality
RAM Disk Mode
RAM Disk Mode
Back
On
Off
Do you want to restart?
Yes
No
ADVANCED OPERATION GUIDE 2-41
Page 70

Printer Settings
RAM Disk Operation
Press [Printer].
1
Press S or T to select MENU
2
and press [Enter].
Press S or T to select RAM Disk
3
Mode and press [Enter].
Press S or T to select Change #
4
and press [Enter].
The operation procedure for each
item is the same as the Memory
Card operation, refer to Memory Card Operation, on page 2-34.
Ready
GO
CANCEL
MENU
Menu
Page Set
Print Quality
RAM Disk Mode
RAM Disk Mode
On
Off
Change #
RAM Disk Size
Press [Printer].
1
Press S or T to select MENU
2
and press [Enter].
Press S or T to select RAM Disk
3
Mode and press [Enter].
Press S or T to select Change #
4
and press [Enter].
Press S or T to select RAM Disk
5
Size and press [Enter].
Ready
GO
CANCEL
MENU
Menu
Page Set
Print Quality
RAM Disk Mode
RAM Disk Mode
On
Off
Change #
RAM Disk Mode Se tting
Back
RAM Disk Size
List of Partition s
2-42 ADVANCED OPERATION GUIDE
Page 71

Press < or > to select the RAM
6
disk size, 1 to 1024 Mbyte can be
selected. Press [Enter].
Press [Reset].
7
Press S or T to select Yes and
8
press [Enter].
The machine restarts.
Printer Settings
RAM Di sk size
28 Mbyte
Do you want to restart?
Yes
No
ADVANCED OPERATION GUIDE 2-43
Page 72

Printer Settings
Paper Handling
Access the Paper Handling Screen
The following settings are available:
• Multi-Bypass Tray Mode
• Paper Source
• Duplex Print Mode
• Output Destination
• Override A4/Letter
Press [Printer].
1
Press S or T to select MENU
2
and press [Enter].
Ready
GO
CANCEL
MENU
Press S or T to select Paper
3
Handling and press [Enter].
The Paper Handling screen
displays.
Select the options required.
Multi-Bypass Tray Mode
If you select First, any paper loaded in the Multi-Bypass Tray will be fed.
Display the Paper Handling screen, refer to Access the Paper Handling
1
Screen, on page 2-44.
Press S or T to select Bypass
2
Mode and press [Enter].
Press S or T to select Cassette
3
or First and press [Enter].
Menu
Print Quality
RAM Disk Mode
Paper Handling
Paper Handling
Back
Bypass Mode
Feed Select
Bypass Mode
Back
Cassette
First
Press [Reset]. The Printer Basic screen displays.
4
2-44 ADVANCED OPERATION GUIDE
Page 73

Paper Source
1
2
3
4
Duplex Print Mode
Printer Settings
Use to set the Paper Source to be selected first.
Display the Paper Handling screen, refer to Access the Paper Handling
Screen, on page 2-44.
Press S or T to select Feed
Select and press [Enter].
Press S or T to select the paper
source and press [Enter].
Press [Reset]. The Printer Basic screen displays.
Paper Handling
Back
Bypass Mode
Feed Select
Feed Sel ect
Back
Bypass
Cassett e 1
Use to set the binding position on finished prints for duplex printing.
Setting Binding position
Short Edge Bind Binding at a short edge
Long Edge Bind Binding at a long edge
NOTE: This setting is displayed only if the optional Duplex Unit is
installed.
ADVANCED OPERATION GUIDE 2-45
Page 74

Printer Settings
Output Destination
Display the Paper Handling screen, refer to Access the Paper Handling
1
Screen, on page 2-44.
Press S or T to select Duplex
2
Mode and press [Enter].
Press S or T to select Short
3
edge bind or Long edge bind and
press [Enter].
Press [Reset]. The Printer Basic screen displays.
4
Use to set the paper Output Destination.
Setting Output destination
Paper Handling
Bypass Mode
Feed Select
Dup lex Mode
Duplex Mode
Back
None
Short Edge Bind
Top Tray Main body output tray
Finisher Optional Finisher
Job Separator Optional Job Separator
NOTE: This item is displayed only if the optional Finisher or Job
Separator is installed.
Display the Paper Handling screen, refer to Access the Paper Handling
1
Screen, on page 2-44.
Press S or T to select Stack
2
Select and press [Enter].
Press S or T to select the paper
3
output destination and press
[Enter].
Press [Reset]. The Printer Basic screen displays.
4
Paper Handling
Bypass Mode
Feed Select
Stack Select
Select Output Tray
Back
Top Tray
Finisher
2-46 ADVANCED OPERATION GUIDE
Page 75

Override A4/Letter
1
2
3
4
Printer Settings
The A4 and 8 1/2 × 11" (Letter) sizes can be regarded as the same size.
Display the Paper Handling screen, refer to Access the Paper Handling
Screen, on page 2-44.
Press S or T to select Override
A4/LT and press [Enter].
Press S or T to select On or
Off and press [Enter].
Press [Reset]. The Printer Basic screen displays.
Paper Handling
Feed Select
Stack Select
O verri de A4/L T
Override A4/LT
Back
On
Off
ADVANCED OPERATION GUIDE 2-47
Page 76

Printer Settings
Other Printer Settings
Access the Others Screen
1
You can set the following items for other printer settings.
• Form Feed Timeout
• Received Data Dump
• Printer Function Resetting
• Resource Protect Mode
• Auto Continue
• Duplex Error Detection
• Stapling Error Detection
• Printing a Service Status Page
Press [Printer].
Press S or T to select MENU
2
and press [Enter].
Press S or T to select Others
3
and press [Enter]. The Others
screen displays.
Select the options required.
Ready
GO
CANCEL
MENU
Menu
RAM Disk Mode
Paper Handling
Others
2-48 ADVANCED OPERATION GUIDE
Page 77

Form Feed Timeout
1
2
3
Printer Settings
If this machine does not receive any information indicating the en d of data
after receiving the last data, the machine waits for a certain time without
printing the last page. When the preset time elapses, the machine
automatically performs a form feed. If you set the time to 0, the machine
does not perform a form feed until GO is manually selected.
Display the Others screen, refer to Access the Others Screen, on page 2-
48.
Press S or T to select Form
Feed Time Out and press [Enter].
Press < or > to set the time, 0 to
495 seconds in 5 second
increments can be selected.
Press [Enter].
Others
Back
Form Feed Ti m e-Out
Print HEX-DUMP
Form Feed Time-Out
30 495)sec.
(0
Press [Reset]. The Printer Basic screen displays.
4
Received Data Dump
You can print data received as hexadecimal codes for debugging
programs and files.
Display the Others screen, refer to Access the Others Screen, on page 2-
1
48.
Press S or T to select Print HEX-
2
DUMP and press [Enter].
Press S or T to select OK and
3
press [Enter].
Waiting displays and then the
Printer Basic screen.
Send data to the printer, dump pages are printed.
4
Press S or T to select GO and press [Enter].
5
Others
Back
Form Feed Ti m e-Out
Print HEX-DUMP
Print HEX-DUMP
Back
OK
Press [Reset]. The Printer Basic screen displays.
6
ADVANCED OPERATION GUIDE 2-49
Page 78

Printer Settings
Printer Function Resetting
Resource Protect Mode
This function resets the printer’s temporary settings (such as the current
page orientation and font) to the default sett ing s.
Display the Others screen, refer to Access the Others Screen, on page 2-
1
48.
Press S or T to select Printer
2
Reset and press [Enter].
Press S or T to select OK and
3
press [Enter].
The printer functions are reset.
The Resource Protect Mode protects the resource data such as
downloaded fonts and macros and memorizes the PCL resources even if
the emulation mode is switched off. If you select Permanent, temporary
resources are not protected. If you select Perm/Temp, temporary
resources are protected.
Others
Form Feed Ti m e-Out
Print HEX-DUMP
Printer Reset
Printer Reset
Back
OK
Display the Others screen, refer to Access the Others Screen, on page 2-
1
48.
Press S or T to select Resource
2
Prot and press [Enter].
Press S or T to select Off,
3
Permanent or Perm/Temp and
press [Enter].
Press [Reset]. The Printer Basic screen displays.
4
Others
Print HEX-DUMP
Printer Reset
Resource Pr ot.
Resour ce Prot.
Back
Off
Permanent
2-50 ADVANCED OPERATION GUIDE
Page 79

Auto Continue
Printer Settings
If any of the following error messages ap pear, the error can be cleared and
printing can be continued after the preset recovery time elapses (auto
continue).
• Memory Overflow
• Print overrun
• KPDL error
• File not found
• HARD DISK error
• RAM disk error
• MemoryCard err
• Illegal Account
• Exceeded Max.out
• Account error
• Duplex disabled
•Add Staples
• e-MPS not stored
• Opt. ROM error
You can also set the time that elapses before Auto Continue is activated.
Display the Others screen, refer to Access the Others Screen, on page 2-
1
48.
Press S or T to select Auto
2
Continue and press [Enter].
Press S or T to select On or Off
3
and press [Enter]. If you have
selected On, Change # displays.
To set the time that elapses
4
before Auto Continue is activated,
press S or T to select Change #
and press [Enter].
The Auto Continue (time) screen displays.
Press < or > to select the time, 0
5
to 495 seconds in 5 second
increments can be selected.
Press [Enter].
Others
Printer Reset
Resource Pr ot.
Auto Continue
Auto Continue
Back
On
Off
Auto Continue
On
Off
Change #
Auto Continue (Time)
30 495)sec.
(0
Press [Reset]. The Printer Basic screen displays.
6
ADVANCED OPERATION GUIDE 2-51
Page 80

Printer Settings
Duplex Error Detection
This setting is available if the optional Duplex Unit is installed. You can
select whether or not to display Duplex disabled Press GO when you select
duplex printing and specify a paper type that cannot be used for duplex
printing, such as label.
Setting Processing
On If you select GO, one-sided printing is performed.
If you select CANCEL, printing is canceled.
Off One-sided printing is performed.
Display the Others screen, refer to Access the Others Screen, on page 2-
1
48.
Press S or T to select Finishing
2
Error and press [Enter].
Others
Resource Pr ot.
Auto Continue
Fini shin g E rror
Press S or T to select Proces.
3
Duplex print and press [Enter].
Press S or T to select On or Off
4
and press [Enter].
Press [Reset]. The Printer Basic screen displays.
5
Fini shing Erro r
Back
Proces. D uplex print
Staple Setting
Duplex Print Process
Back
On
Off
2-52 ADVANCED OPERATION GUIDE
Page 81

Stapling Error Detection
You can select whether or not to display Add Staples and Press GO when
staples have run out while stapling is performed.
Setting Processing
On If you select GO, printing is performed without stapling.
If you select CANCEL, printing is canceled.
Off Printing is performed without stapling.
NOTE: This setting is displayed only if the optional Finisher is installed.
Display the Others screen, refer to Access the Others Screen, on page 2-
1
48.
Press S or T to select Finishing
2
Error and press [Enter].
Press S or T to select Staple
3
Setting and press [Enter].
Press S or T to select On or Off
4
and press [Enter].
Press [Reset]. The Printer Basic screen displays.
5
Printer Settings
Others
Resource Pr ot.
Auto Continue
Fini shin g E rror
Fini shing Erro r
Back
Proces. D uplex print
Staple Setting
Staple Setting
Back
On
Off
ADVANCED OPERATION GUIDE 2-53
Page 82

Printer Settings
Printing a Service Status Page
The Service Status Page contains more detailed printer setting information
than the Status Page. This page is mainly used by service personnel for
maintenance. Use the following procedure to print this page if required.
Display the Others screen, refer to Access the Others Screen, on page 2-
1
48.
Press S or T to select Service
2
and press [Enter].
Press S or T to select Print
3
Status Page and press [Enter].
Press S or T to select Print and
4
press [Enter]. The Service Status
page is printed.
Others
Auto Continue
Fini shin g E rror
Service
Service
Back
Print Status Page
Paper Feed
Print Status Page
No
Print
Press [Reset]. The Printer Basic screen displays.
5
2-54 ADVANCED OPERATION GUIDE
Page 83

3 System Settings
This chapter explains the system settings available on the
machine.
• Copy Default Settings...................................................3-2
• Machine Default Settings ........................................... 3-14
• Viewing and Printing the Total Counter......................3-28
• Report Output............................................................. 3-30
• Language Setting.......................................................3-32
• User Adjustment.........................................................3-33
ADVANCED OPERATION GUIDE 3-1
Page 84

System Settings
Copy Default Settings
Initial Mode is the state the machine enters after warm-up or if Reset is
pressed. If no operations are performed for a preset period of time, the
machine returns to initial mode. Any settings that have been selected will
be cleared.
In the factory default setting, paper of the same size as the original is
selected automatically (Auto Paper Selection mode), the copy
magnification ratio is set to 100 %, the number of copies to be m ade is set
to 1 and the Image Quality is set to Text + Photo mode.
Use these instructions to customize the settings to meet your
requirements.
The following settings are available:
• Exposure Mode
• Original Image Quality
• EcoPrint Mode
• Background Color Adjustment
• Paper Selection
• Paper Type in Auto Paper Selection
• Priority Cassette
• Default Magnification
• Auto Exposure Adjustment
• Auto OCR Exposure Adjustment
• Exposure Adjustment for Text + Photo Originals
• Exposure Adjustment for Text Originals
• Exposure Adjustment for Photo Originals
• Sort Copying
• Offset Copying
• Auto Rotation Copy
• Margin Width Default Value
• Border Erase Width Default Value
• Number of Copies Limit
• Black Streaking Reduction Processing
3-2 ADVANCED OPERATION GUIDE
Page 85

Access the Copy Default Screen
Use the following procedure to access the Copy Default screen.
Press [System Menu / Counter].
1
Press S or T to select Copy
2
default and press [Enter].
Use the keypad to enter the 4 digit
3
management code.
NOTE: The factory default management code varies for each model:
16 ppm model = 1600, 20 ppm model = 2000, and 25 ppm model = 2500.
The four-digit management code can be changed. For further information
refer to Administrator Management Code Change, on page 3-25.
System Settings
System Menu / Counter:
Print Report
Job Accounting
Copy Def ault
Enter Pin Co de using # key.
If the code is accepted, the Copy
Default screen displays.
Change the options to the default settings required using the instructions
4
starting on page 3-4.
NOTE: An * (asterisk) against a setting indicates the current setting.
Copy Default:
End
Exposure Mode
Orig Quality
:
Manual
:Text+Photo
ADVANCED OPERATION GUIDE 3-3
Page 86

System Settings
Exposure Mode
Original Image Quality
Set the default Exposure mode to Auto or Manual.
Display the Copy Default screen, refer to Access the Copy Default Screen,
1
on page 3-3.
Press S or T to select Exposure
2
Mode and press [Enter].
Press S or T to select Auto or
3
Manual as the default setting and
press [Enter].
Press [Reset]. The Copier Basic screen returns.
4
Copy Default:
End
Exposure Mode
Orig Quality
Exposure Mode:
Auto
Manual
*
:
Manual
:Text+Photo
EcoPrint Mode
Use to set the default Original Image Quality mode.
Display the Copy Default screen, refer to Access the Copy Default Screen,
1
on page 3-3.
Press S or T to select Orig
2
Quality and press [Enter].
Press S or T to select
3
Text+Photo, Text or Photo as the
default setting and press [Enter].
Press [Reset]. The Copier Basic screen returns.
4
Use to select EcoPrint mode as the default setting.
Display the Copy Default screen, refer to Access the Copy Default Screen,
1
on page 3-3.
Press S or T to select EcoPrint
2
and press [Enter].
Copy Default:
End
Exposure Mode
Orig Quality
Origin al Image Qu alit y:
Text+Photo
*
Text
Photo
Copy Default:
Exposure Mode
Orig Quality
EcoPrint Off::
:
Manual
:Text+Photo
:
Manual
Text+Photo
3-4 ADVANCED OPERATION GUIDE
Page 87

Press S or T to select On to
3
enable Ecoprint Mode as the
default. If you do not wish to use
EcoPrint Mode as the default,
select Off. Press [Enter].
Press [Reset]. The Copier Basic screen returns.
4
Background Color Adjustment
If the Background Color is too dark or light, use this option to adjust it.
Display the Copy Default screen, refer to Access the Copy Default Screen,
1
on page 3-3.
Press S or T to select
2
Background adjst and press
[Enter].
Press < or > to adjust the
3
background color to the required
default. Move right to darken the
background color, or left to lighten
the background color. Press
[Enter].
System Settings
EcoPrint:
Off
*
On
Copy Default:
Orig Quality
EcoPrint
Bac kground Adjst
Bac kground Adjustment:
12
*
::Text+Photo
Off
:
3
453
4
Paper Selection
1
2
3
4
Press [Reset]. The Copier Basic screen returns.
Use to automatically select the cassette that contains the same size paper
as the original, or to have a fixed cassette with priority.
Display the Copy Default screen, refer to Access the Copy Default Screen,
on page 3-3.
Press S or T to select Paper
Select and press [Enter].
Press S or T to select Auto or
Default cassette and press
[Enter].
Press [Reset]. The Copier Basic screen returns.
Copy Default:
EcoPrint
Bac kground Adjst
Paper Select
Paper Select:
Auto
*
Default Cassette
Off::
:
3
Auto
ADVANCED OPERATION GUIDE 3-5
Page 88

System Settings
Paper Type in Auto Paper Selection
Paper selected in Auto Paper Selection mode can be limited to a certain
paper type.
Paper types that can be set: Plain, Transparency, Preprinted, Labels,
Bond, Recycled, Vellum, Rough, Letterhead, Color, Prepunched,
Envelope, Cardstock, Thick paper, High quality, and Custom 1 (to 8)
NOTE: You can select a paper type from the paper types that are
currently set for the cassettes, refer to Paper Type (cassettes 1 to 4), on
page 3-17.
Display the Copy Default screen, refer to Access the Copy Default Screen,
1
on page 3-3.
Press S or T to select Paper type
2
(Auto) and press [Enter].
Copy Default:
Bac kground Adjst
Paper Select
Paper Type(Auto)
3:
:
Auto
:
Plain
Press S or T to select Off or On
3
and press [Enter].
If you have selected On, press S
4
or T to select the paper type
required and press [Enter].
Press [Reset]. The Copier Basic screen returns.
5
Paper Type(Auto):
Off
On
*
Paper Type(Auto):
Plain
Preprinted
3-6 ADVANCED OPERATION GUIDE
Page 89

Priority Cassette
1
2
System Settings
You can select the cassette (1 to 4) that is automatically selected with
priority.
NOTE: For the 16 ppm model, cassettes 2 to 4 are includ ed in the
optional Paper Feeder. For the 20 and 25 ppm models, cassettes 3 and 4
are included in the optional Paper Feeder. This setting displays only if the
optional Paper Feeder is installed.
IMPORTANT: You cannot set the Multi-Bypass Tray as the priority
cassette.
Display the Copy Default screen, refer to Access the Copy Default Screen,
on page 3-3.
Press S or T to select Default
Cassette and press [Enter].
Copy Default:
Paper Select
Paper Type(Auto)
Default C assette
::Auto
Plain
:
Casset.1
Press S or T to select the priority
3
cassette and press [Enter].
Press [Reset]. The Copier Basic screen returns.
4
Default Magnification
Select whether or not to set the Auto Zoom Ratio selection mode when a
cassette is selected.
Display the Copy Default screen, refer to Access the Copy Default Screen,
1
on page 3-3.
Press S or T to select Default
2
Magnif and press [Enter].
Press S or T to select 100% or
3
Auto % and press [Enter].
Default Cassette:
Cassett e 1
*
Cassett e 2
Cassett e 3
Copy Default:
Paper Type(Auto)
Default C assette
Default Magnif.
Default Magnification:
100%
*
Auto %
Plain
:
:
Casset.1
:
100%
Press [Reset]. The Copier Basic screen returns.
4
ADVANCED OPERATION GUIDE 3-7
Page 90

System Settings
Auto Exposure Adjustment
Auto OCR Exposure Adjustment
Adjusts the overall density in Auto Exposure mode.
Display the Copy Default screen, refer to Access the Copy Default Screen,
1
on page 3-3.
Press S or T to select Adj.Auto
2
expos and press [Enter].
Press < or > to adjust the
3
exposure. Move right to darken
the density, or left to lighten it and
press [Enter].
Press [Reset]. The Copier Basic screen returns.
4
Copy Default:
Default C assette
Default Magnif.
Adj. Auto ex pos.
Adjust auto exposure:
Casset.1:
:
100%
:
4
Adjusts the overall density of scanning for OCR when using the optional
Scanner functions.
Display the Copy Default screen, refer to Access the Copy Default Screen,
1
on page 3-3.
Press S or T to select Auto
2
expos.(OCR) and press [Enter].
Press < or > to adjust the
3
exposure. Move right to darken
the density, or left to lighten it and
press [Enter].
Press [Reset]. The Copier Basic screen returns.
4
Copy Default:
Default Magnif.
Adj. Auto ex pos.
Auto expos.(OCR)
Adjust Aut o OCR Densi ty:
100%
4:
4::
3-8 ADVANCED OPERATION GUIDE
Page 91

Exposure Adjustment for Text + Photo Originals
Adjusts the density of the central value in Manual Exposure mode for Text
+ Photo originals.
Display the Copy Default screen, refer to Access the Copy Default Screen,
1
on page 3-3.
Press S or T to select Txt+Photo
2
Dens and press [Enter].
Press < or > to adjust the
3
exposure. Move right to darken
the density, or left to lighten it and
press [Enter].
Press [Reset]. The Copier Basic screen returns.
4
Copy Default:
Text+Photo Orig. Dens. Adj.:
Default Magnif.
Adj. Auto ex pos.
Txt+Photo Dens.
System Settings
100%
4:
4::
Exposure Adjustment for Text Originals
Adjusts the density of the central value in Manual Exposure mode for Text
originals.
Display the Copy Default screen, refer to Access the Copy Default Screen,
1
on page 3-3.
Press S or T to select Txt Ori
2
Density and press [Enter].
Press < or > to adjust the
3
exposure. Move right to darken
the density, or left to lighten it and
press [Enter].
Press [Reset]. The Copier Basic screen returns.
4
Copy Default:
Auto expos.(OCR)
Txt+Photo Dens.
Txt Ori Density
Text Original Density Adjust:
4:
4:
4:
ADVANCED OPERATION GUIDE 3-9
Page 92

System Settings
Exposure Adjustment for Photo Originals
Adjusts the density of the central value in Manual Exposure mode for
Photo originals.
Display the Copy Default screen, refer to Access the Copy Default Screen,
1
on page 3-3.
Press S or T to select Photo Ori
2
Dnsity and press [Enter].
Press < or > to adjust the
3
exposure. Move right to darken
the density, or left to lighten it and
press [Enter].
Press [Reset]. The Copier Basic screen returns.
4
Copy Default:
Txt+Photo Dens.
Txt Ori Density
Photo Ori Dnsity
Photo Original Density Adjust:
4:
4:
4:
Sort Copying
If the optional Document Processor is installed, select whether or not to set
the Sort Copy mode as a default setting.
NOTE: This item is displayed only if the optional Document Processor is
installed.
Display the Copy Default screen, refer to Access the Copy Default Screen,
1
on page 3-3.
Press S or T to select Sort and
2
press [Enter].
Press S or T to select On or Off
3
and press [Enter].
Press [Reset]. The Copier Basic screen returns.
4
Copy Default:
Txt Ori Density
Photo Ori Dnsity
Sort
Sort:
Off
On
*
4:
4:
On:
3-10 ADVANCED OPERATION GUIDE
Page 93

Offset Copying
1
2
3
4
Auto Rotation Copy
System Settings
Use to set Offset Copy mode as the default setting.
Display the Copy Default screen, refer to Access the Copy Default Screen,
on page 3-3.
Press S or T to select Offset and
press [Enter].
Press S or T to select On or Off
and press [Enter].
Press [Reset]. The Copier Basic screen returns.
Copy Default:
Sort On:
Offset
Offset:
Off
*
On
4
:Photo Ori Dnsity
Off:
Use to select Auto Rotation Copy mode as the default setting.
Display the Copy Default screen, refer to Access the Copy Default Screen,
1
on page 3-3.
Press S or T to select Auto
2
Rotation and press [Enter].
Press S or T to select On or Off
3
and press [Enter].
Press [Reset]. The Copier Basic screen returns.
4
Margin Width Default Value
Use to set the default value of Margin Width.
Display the Copy Default screen, refer to Access the Copy Default Screen,
1
on page 3-3.
Copy Default:
Sort On
Offset
Auto Rotation
Auto Rotation:
Off
On
*
:
Off
:
On:
Press S or T to select Margin
2
Width and press [Enter].
ADVANCED OPERATION GUIDE 3-11
Copy Default:
Offset Off:
Auto Rotation
Margin Wid th
On:
1/4":
Page 94

System Settings
y
Border Erase Width Default Value
Press S or T to select the default
3
margin width. You can select from
1/8" to 3/4" in 1/8" increments [1
mm to 18 mm in 1 mm
increments] and press [Enter].
Press [Reset]. The Copier Basic screen returns.
4
Use to set the default value for the Border Erase Width.
Display the Copy Default screen, refer to Access the Copy Default Screen,
1
on page 3-3.
Press S or T to select Border
2
Erase Width and press [Enter].
Press S or T to select the default
3
Border Erase width. You can
select from 1/8" to 3/4" in 1/8"
increments (1 mm to 18 mm in 1
mm increments) and press
[Enter].
Margin Width:
1/4" 3/4"
Copy Default:
Auto Rotation
Margin Wid th
BorderEraseWidth
Bord er Erase W idth:
1/4" 3/4"
1/8"
1/8"
On:
1/4":
1/4":
Press [Reset]. The Copier Basic screen returns.
4
Number of Copies Limit
Use to set the limit for the number of copies that can be selected at a time.
Display the Copy Default screen, refer to Access the Copy Default Screen,
1
on page 3-3.
Press S or T to select Copy Limit
2
and press [Enter].
Use the numeric keys to enter the
3
maximum number of copies (1 to
999) and press [Enter].
Press [Reset]. The Copier Basic screen returns.
4
Copy Default:
Margin Wid th 1/4":
BorderEraseWidth
Copy L imit
Copy Limi t:
999
s
# ke
1/4":
999:Set
Sets
3-12 ADVANCED OPERATION GUIDE
Page 95

Black Streaking Reduction Processing
If black streaks (streaks that are not contained in the original image)
appear on copies from the optional Document Processor, you can make
black streaking less noticeable. Black Streaking Reduction processing
reduces the reproducibility of fine characters, therefore it is recommended
to use the factory default setting.
To use the Black Streaking Reduction processing, first select Weak. If
black streaking is not reduced, select Strong
Display the Copy Default screen, refer to Access the Copy Default Screen,
1
on page 3-3.
Press S or T to select Corr.
2
Black line and press [Enter].
Press S or T to select None,
3
Weak or Strong and press
[Enter].
System Settings
Copy Default:
BorderEraseWidth
Copy L imit
Corr. Black Line
Correct. Fine black line:
None
*
Weak
Strong
1/4":
999:Set
None:
Press [Reset]. The Copier Basic screen returns.
4
ADVANCED OPERATION GUIDE 3-13
Page 96

System Settings
Machine Default Settings
The machine enters Initial Mode after warm-up or if Reset is pressed. The
options and settings which the machine returns to in Initial Mode are the
default settings.
Use these instructions to customize the default settings to meet your
requirements.
The following settings are available:
• Auto Cassette Switching
• Paper Size (cassettes 1 to 4)
• Paper Type (cassettes 1 to 4)
• Multi-Bypass Tray Confirmation Display
• Paper Weight for Paper Type
• Duplex Print for Paper Type
• Custom Paper Type
• Original Orientation
• Auto Sleep Time
• Auto Low Power Time
• Copy Output Destination
• Fax Output Destination
• Default Operation Mode
• Key Sound
• Date and Time
• Display Contrast Adjustment
• Administrator Management Code Change
• Auto Sleep
• Auto Clear
• Auto Clear Time
• Silent Mode
3-14 ADVANCED OPERATION GUIDE
Page 97

Access the Machine Default Screen
Use the following procedure to access the Machine Default screen.
Press [System Menu / Counter].
1
Press S or T to select Machine
2
default and press [Enter].
Use the keypad to enter the 4 digit
3
management code.
NOTE: The factory default management code varies for each model:
16 ppm model = 1600, 20 ppm model = 2000, and 25 ppm model = 2500.
The four-digit management code can be changed. For further information
refer to Administrator Management Code Change, on page 3-25.
System Settings
System Menu / Counter:
Job Accounting
Copy Def ault
Machine Default
Enter Pin Co de using # key.
If the code is accepted, the
Machine Default screen displays.
Change the options to the default settings required using the instructions
4
starting on page 3-4.
NOTE: An * (asterisk) against a setting indicates the current setting.
Machine Def ault:
End
Auto Cassette SW
Paper Size(1st)
:
On
Auto I
:
ADVANCED OPERATION GUIDE 3-15
Page 98

System Settings
Auto Cassette Switching
If multiple cassettes contain the same size paper and the paper in one
cassette runs out during copying, the Automatic Cassette Switching
function will switch paper feed from the empty cassette to another cassette
containing paper of the same size and orientation.
To prohibit switching to a cassette that has a different paper type, select
On/Only Same Paper Type.
NOTE: To use this function on the 16 ppm model, the Optional Paper
Feeder must be installed.
Display the Machine default screen, refer to Access the Machine Default
1
Screen, on page 3-15.
Press S or T to select Auto
2
Cassette SW and press [Enter].
Machine Def ault:
End
Auto Cassette SW
Paper Size(1st)
:
On
Auto I
:
Press S or T to select On/All
3
types of paper, On/Only same
paper type, or Off and press
[Enter].
Press [Reset]. The Copier Basic screen returns.
4
Paper Size (cassettes 1 to 4)
Use to set the paper sizes for cassettes 1 to 4. To detect the paper size
automatically, set to Auto Detection Metric or Auto Detection Inch.
NOTE: For the 16 ppm model, cassettes 2 to 4 are includ ed in the
optional paper feeder. For the 20 and 25 ppm model, cassettes 3 and 4
are included in the optional Paper Feeder. This setting is displayed only if
the optional Paper Feeder is installed.
Display the Machine default screen, refer to Access the Machine Default
1
Screen, on page 3-15.
A Paper Size option is available
2
for each cassette. Press S or T
to select the Paper Size option
required, and press [Enter].
Automatic Cassette Switching:
Off
*
On/All types of paper
On/Only same paper type
Machine Def ault:
End
Auto Cassette SW
Paper Size(1st)
:
On
Aut o I
:
Press S or T to select Auto
3
Detection Metric, Auto Detection
Inch or a paper size and press
[Enter].
3-16 ADVANCED OPERATION GUIDE
Paper Size (1st cassette):
Auto Detection Metric
Auto Detection Inc h
*
Page 99

Press [Reset]. The Copier Basic screen returns.
4
Paper Type (cassettes 1 to 4)
Use to set the paper types for cassettes 1 to 4.
Paper types that can be set: Plain, Preprinted, Bond, Recycled, Rough,
Letterhead, Color, Prepunched, High quality and Custom 1 to 8.
NOTE: For the 16 ppm model, cassettes 2 to 4 are includ ed in the
optional paper feeder. For the 20 and 25 ppm model, cassettes 3 and 4
are included in the optional Paper Feeder. This setting is displayed only if
the optional Paper Feeder is installed.
Display the Machine default screen, refer to Access the Machine Default
1
Screen, on page 3-15.
A Paper Type option is available
2
for each cassette. Press S or T
to select the Paper Type option
required and press [Enter].
System Settings
Machine Def ault:
Paper Si ze(3rd) Auto I
Paper Size(4th) Auto I:
Paper Type(1st) Plain:
:
Press S or T to select the paper
3
type and press [Enter].
Press [Reset]. The Copier Basic screen returns.
4
Multi-Bypass Tray Confirmation Display
Use to select to display the Bypass Paper Size screen when pressing the
Paper Select key to select the Multi-Bypass Tray.
Display the Machine default screen, refer to Access the Machine Default
1
Screen, on page 3-15.
Press S or T to select Check
2
Bypass and press [Enter].
Press S or T to select On or Off
3
and press [Enter].
Paper Type (1st cassette):
Plain
*
Preprinted
Bond
Machine Def ault:
Paper Type(3rd) Plain:
Paper Type(4th) Plain:
Check By pass Off:
Check Byp ass Sizi ng:
Off
*
On
Press [Reset]. The Copier Basic screen returns.
4
ADVANCED OPERATION GUIDE 3-17
Page 100

System Settings
Paper Weight for Paper Type
Use to set the Paper Weight for each Paper Type.
Paper weight types that can be set: Super-Heavy, Heavy3, Heavy2,
Heavy1, Middle3, Middle2, Middle1 and Light.
Display the Machine default screen, refer to Access the Machine Default
1
Screen, on page 3-15.
Press S or T to select P.type
2
(Weight) and press [Enter].
Press S or T to select the paper
3
type and press [Enter].
Press S or T to select the paper
4
weight and press [Enter].
Repeat the procedure to set the
weight for each paper type.
Machine Def ault:
Paper Type(4th) Plain:
Check By pass O ff:
P. Type ( Weight)
Paper type (Paper Weight):
End
Plain Middle 2:
Transparency S. Heavy:
Plain:
Heavy 1
Middle 3
Middle 2
*
:
:
When you have finished changing
5
the settings, press S or T to
select End and press [Enter].
Press [Reset]. The Copier Basic screen returns.
6
Duplex Print for Paper Type
Use to set the use of custom paper (1 to 8) for duplex printing.
Display the Machine default screen, refer to Access the Machine Default
1
Screen, on page 3-15.
Press S or T to select P.type
2
(Duplex) and press [Enter].
Press S or T to select the paper
3
type and press [Enter].
Paper type (Paper Weight):
End
Plain Middle 2:
Transparency :
Machine Def ault:
Check By pass
P. Type ( Weight)
P. Type (2sided)
Select paper type(2 sided):
End
Custom 1 On:
Custom 2 On:
Off:
S. Heavy
3-18 ADVANCED OPERATION GUIDE
 Loading...