

Page 1

Proof Sign-off:
S.Kodama CRE Kawakami
M.Otsuka
editorname
Glossary
The following definitions apply specifically to printers.
automatic roll paper cutter
The built-in paper cutter, which automatically cuts images printed continuously
on roll paper.
Background Printing
When background printing is on, the computer can be used for other operations
while printing a document. When it is off, the computer will suspend all other
operations while printing a document, but print data will be sent to the printer
more quickly.
R4CD000_UK
html.bk Rev. E
GLOSS.FM A5 size
6/10/03
R
banding
The horizontal lines that sometimes appear when printing graphics. See also
“MicroWeave”.
Bluetooth
A wireless technology that enables different devices to communicate without the
need for cable connections.
Borderless printing
A printing mode that allows you to print without margins on all four sides of the
paper.
brightness
The lightness or darkness of an image.
CMYK
Cyan (blue-green), magenta, yellow, and black. These colored inks are used to
create the printed colors in the subtractive system.
Collate
A setting that has the printer print copies of multiple-page documents in
complete sets rather than print copies of the document page by page.
color matching
Generic term for methods of processing color data so that colors displayed on a
computer screen closely match colors in printouts. A variety of color-matching
software or systems are used for different occasions. See also “ColorSync” and
“ICM (Image Color Matching)”.
1
Page 2

L
R4CD000_UK
html.bk Rev. E
GLOSS.FM A5 size
6/10/03
ColorSync
Macintosh software that is designed to help you achieve the color matching. See
also “color matching”.
Contrast
A setting that maximizes or minimizes the difference between the bright and dark
parts of an image.
default
A value or setting that takes effect when the equipment is turned on, reset, or
initialized.
DMA
Direct Memory Access. A data transfer feature that bypasses a computer’s CPU
and allows direct communication between a computer and peripheral devices
(like printers), and between one peripheral device and another.
Proof Sign-off:
S.Kodama CRE Kawakami
M.Otsuka
editorname
Double-Sided Printing
A printing mode that allows you to print on both sides of the paper.
dpi
Dots per inch. The dpi measures the resolution. See also “resolution”.
drive
A memory device, such as a hard disk, CD-ROM, or floppy disk drive. In
Windows, a letter is assigned to each drive for easy management.
driver
Software that sends instructions to a computer peripheral to tell it what to do.
For example, your printer driver accepts print data from your word processor
application and sends instructions to the printer on how to print this data.
Together, the printer driver and printer utilities are referred to as "printer
software". See also “printer software”.
economy printing
Printing in which images are printed with fewer dots to save ink.
Edge Smoothing
Improves the print quality of low-resolution images by smoothing jagged edges
and lines. This setting has no effect on high-resolution images or on text.
EPSON MonitorIV
A utility for Macintosh that allows you to manage print jobs that are in a print
queue. This utility also shows the status of the job currently being printed. (See
“print queue”)
2
Page 3

Proof Sign-off:
S.Kodama CRE Kawakami
M.Otsuka
editorname
EPSON StatusMonitor
A utility for Macintosh that monitors the printer status. If the StatusMonitor
detects a printer error, it will inform you with an error message.
EPSON Status Monitor 3
A utility for Windows that provides printer status information, such as the
amount of ink remaining, and checks for printer errors.
Finest Detail
This printer software setting automatically makes your printouts sharper and
clearer, especially for text. Be aware that this may increase the time required for
printing.
Fit to Page printing
A printing mode that automatically enlarges or reduces the size of your
document to fit the paper size selected in the printer software.
R4CD000_UK
html.bk Rev. E
GLOSS.FM A5 size
6/10/03
R
font
A set of type characters of one style and size.
Gamma
A setting that controls image contrast by modifying the mid-tones and mid-level
grays.
grayscale
A scale of shades of gray from black to white. Grayscale is used to represent colors
when printing with black ink only.
Head Cleaning utility
A utility that cleans the print head, allowing the print head nozzles to deliver ink
properly.
high speed printing
Printing in which the print head prints images in both directions as it moves back
and forth. This provides faster printing.
ICM (Image Color Matching)
The color matching method used by Windows. See also “color matching”
ink cartridge
Contains the ink that your printer uses to print.
ink jet
A method of printing in which each letter or symbol is formed by precisely
spraying ink onto paper.
3
Page 4

L
R4CD000_UK
html.bk Rev. E
GLOSS.FM A5 size
6/10/03
Ink Levels
A graphic display of the amount of ink remaining in each cartridge.
interface
The connection between the computer and the printer. See also “parallel interface”
and “USB interface”.
interface cable
The cable that connects the computer to the printer.
local printer
The printer connected to the computer’s port directly by an interface cable.
margins
The space around the edge of the paper outside of the printable area. See also
“printable area”
Proof Sign-off:
S.Kodama CRE Kawakami
M.Otsuka
editorname
media
Materials upon which data is printed, such as plain paper, envelopes, special
paper, and transparency film.
MicroWeave
Printing in which images are printed in finer increments to reduce the possibility
of banding. See also “banding”.
Mirror Image
This printer software setting flips your printout, left to right.
monochrome
Printing which uses only one color of ink, usually black.
Nozzle Check utility
A utility that checks the print head nozzles to see if they are clogged and need to
be cleaned.
nozzles
Fine tubes in the print head through which ink is sprayed onto the page. Print
quality may decline if the print head nozzles are clogged.
operation check
A method for checking the operation of the printer. When you perform a printer
operation check, the printer prints some information codes followed by a nozzle
check pattern.
4
Page 5

Proof Sign-off:
S.Kodama CRE Kawakami
M.Otsuka
editorname
Orientation
Settings that determine the orientation of your printout. Select between Portrait
(tall) or Landscape (wide).
Pages Per Sheet printing
A printing mode that allows you to print two or four pages on a single sheet of
paper.
parallel interface
An interface that is used for one-to-one connection between a computer and a
printer. See also “interface”.
PhotoEnhance
A printing mode that provides a variety of image correction settings that you can
apply to your photos before printing.
R4CD000_UK
html.bk Rev. E
GLOSS.FM A5 size
6/10/03
R
port
An interface channel through which data is transmitted between devices.
Poster Printing
A printing mode that allows you to enlarge a single document page to cover 4,
9, or 16 printed sheets of paper and put them together to make a poster.
printable area
The area of a page on which the printer can print. It is smaller than the physical
size of the page due to margins.
printer driver
See “driver”.
printer software
The printer software which comes with your printer includes a printer driver and
printer utilities. The printer driver lets you choose from a wide variety of settings
to get the best results from your printer. The printer utilities help you check the
printer and keep it in top operating condition. See also “driver” and “utilities”.
printer utilities
See “utilities”.
Print Head Alignment utility
A utility that aligns the print head so images will print clearly. Used when printed
images are blurry, or when misaligned vertical lines or horizontal bands appear
in the printout.
5
Page 6

L
R4CD000_UK
html.bk Rev. E
GLOSS.FM A5 size
6/10/03
PRINT Image Matching
This system enables stunning printing to be achieved easily through the
combination of a digi tal camera loaded with the PRINT Image Matching function
and a printer that supports su ch matching. Print commands are attached to pho to
data during digital camera photography and the printer adheres to these
commands to print photos with the color match that optimally fulfills the
objectives of the digitally composed shots.
Print Preview
A setting that allows you to see how your document will look before actually
printing it.
print queue
A waiting line in which print jobs that are sent to the printer via network are
stored until they can be printed.
Proof Sign-off:
S.Kodama CRE Kawakami
M.Otsuka
editorname
Profiles
Standards that allow different devices to operate with one another using
Bluetooth wireless technology. Profiles are defined by the uses and features they
al low dev ices to perf orm , s uch a s pri nti ng or sc ann in g f rom a c om pute r. T o sh ar e
this information, the devices must be compatible with the same profile.
Quality Type settings
A number of print quality settings that are available in the printer software.
Reduce/Enlarge Document
A printing mode that adjusts the printed size of your document.
reset
To return a printer to its defaults by turning the printer off and then quickly back
on.
resolution
The number of dots used to represent an image, expressed as (horizontal dots) ×
(vertical dots).
Reverse Order
A setting that allows you to print your documents in reverse order, starting with
the last page.
RGB
Red, green, and blue. These colors, in phosphors irradiated by a cathode ray tube
(CRT) monitor's electron gun, creates the screen colors with additive mixture.
Rotate 180°
A setting that rotates the page to be printed 180 degrees.
6
Page 7

Proof Sign-off:
S.Kodama CRE Kawakami
M.Otsuka
editorname
Saturation
A setting that modifies the vividness of color. The lower the saturation, the duller
the colors. The higher the saturation, the more vivid the colors.
spool
The first step in printing, in which the printer software converts the print data
into codes that your printer understands. This data is then sent directly to the
printer or to the print server.
spool manager
The software that converts print data into codes that your printer understands.
See also “spool”.
sRGB
The color management method used to maintain color consistency between
devices which adhere to the sRGB standard.
R4CD000_UK
html.bk Rev. E
GLOSS.FM A5 size
6/10/03
R
Status Monitor
The software that allows you to check the printer’s status.
USB interface
Universal Serial Bus interface. Enables the user to connect up to 127 peripheral
devices (such as keyboards, pointing devices, and printers) to the computer
through a single, general-purpose port. USB hubs allow you to add additional
ports. See also “interface”.
utilities
Software that allows you to monitor and maintain your printer. Together, u tilities
and the printer driver are referred to as "printer software". See also “printer
software”.
Watermark printing
A printing mode that allows you to print text or an image as a watermark on your
printout.
7
Page 8

L
R4CD000_UK
html.bk Rev. E
GLOSS.FM A5 size
6/10/03
Proof Sign-off:
S.Kodama CRE Kawakami
M.Otsuka
editorname
8
Page 9
Proof Sign-off:
S.Kodama CRE Kawakami
M.Otsuka
editorname
How to Print
Introduction
This section guides you through the procedures for different
kinds of printing.
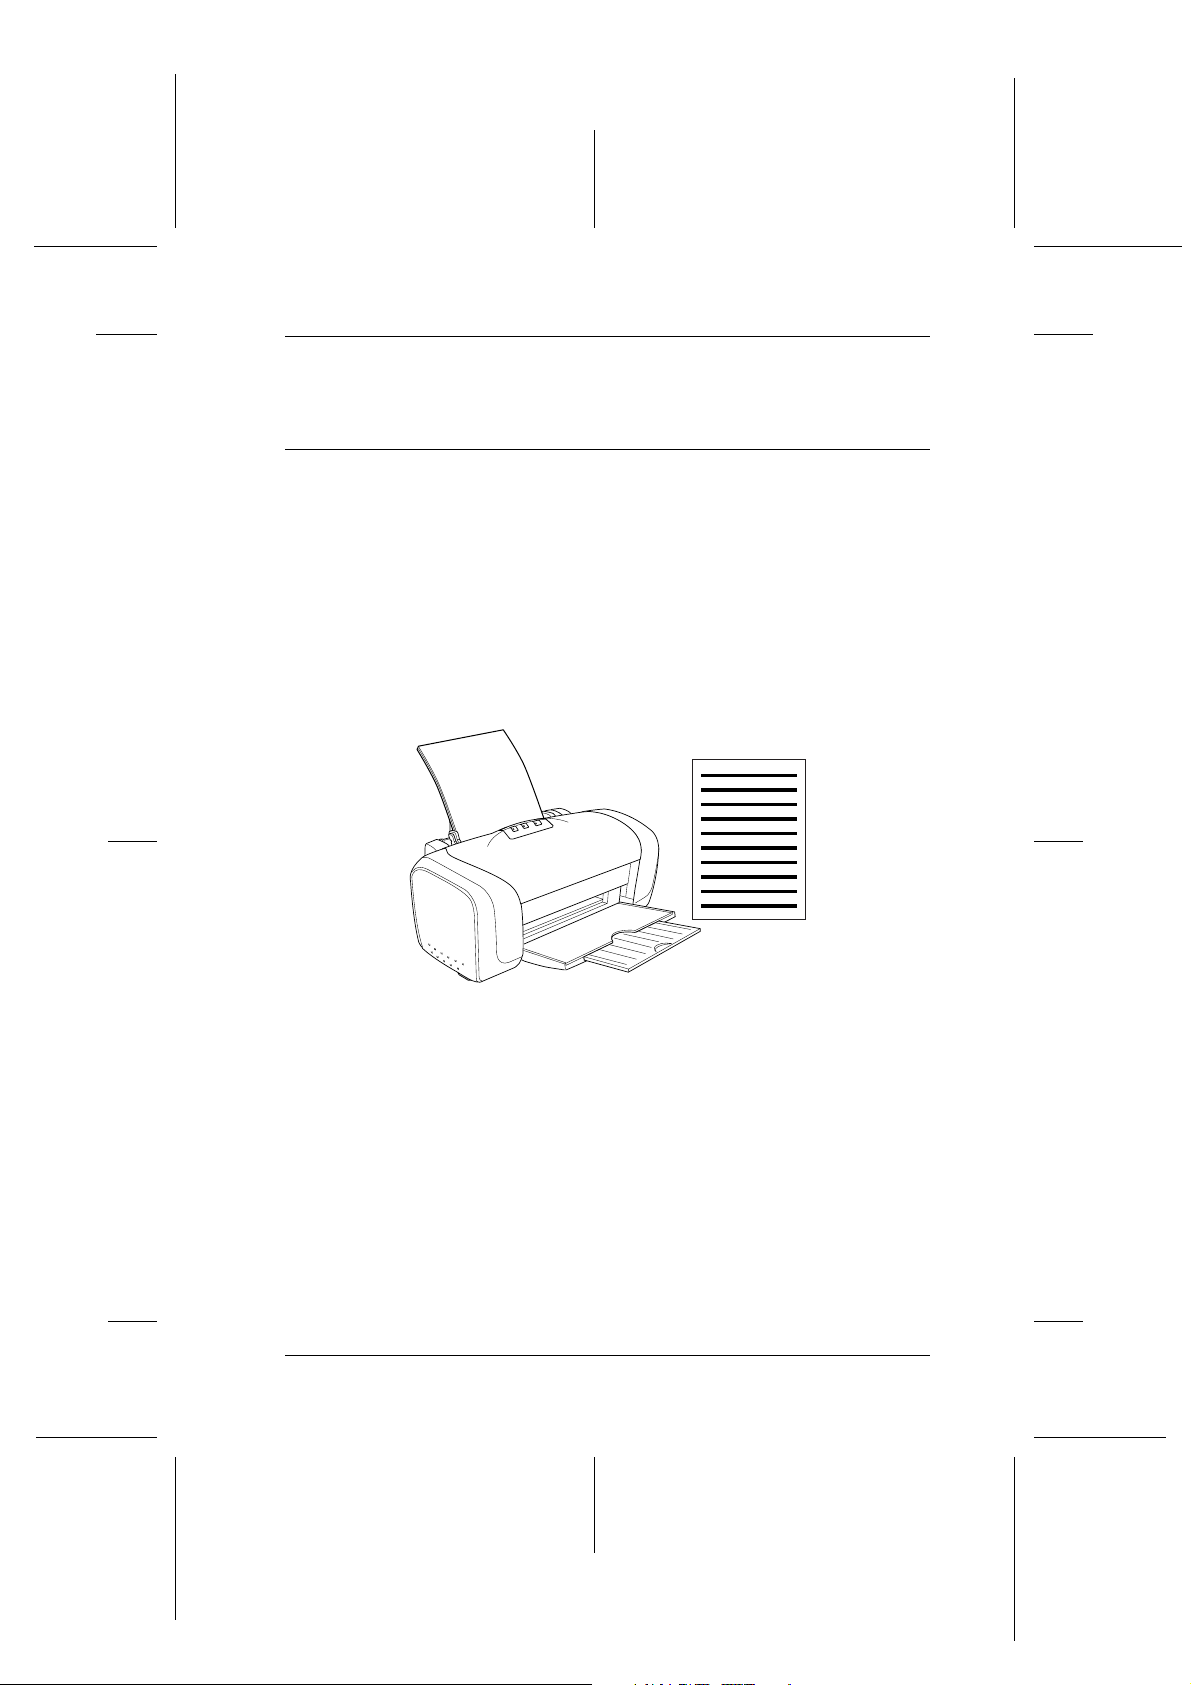
“Printing Text and Web Pages”
Explains how to print documents and images on various sizes or
kinds of single-sheet paper.
R4CD000_UK
html.bk Rev. E
BASIC.FM A5 size
6/10/03
R
9
Page 10
L
R4CD000_UK
html.bk Rev. E
BASIC.FM A5 size
6/10/03
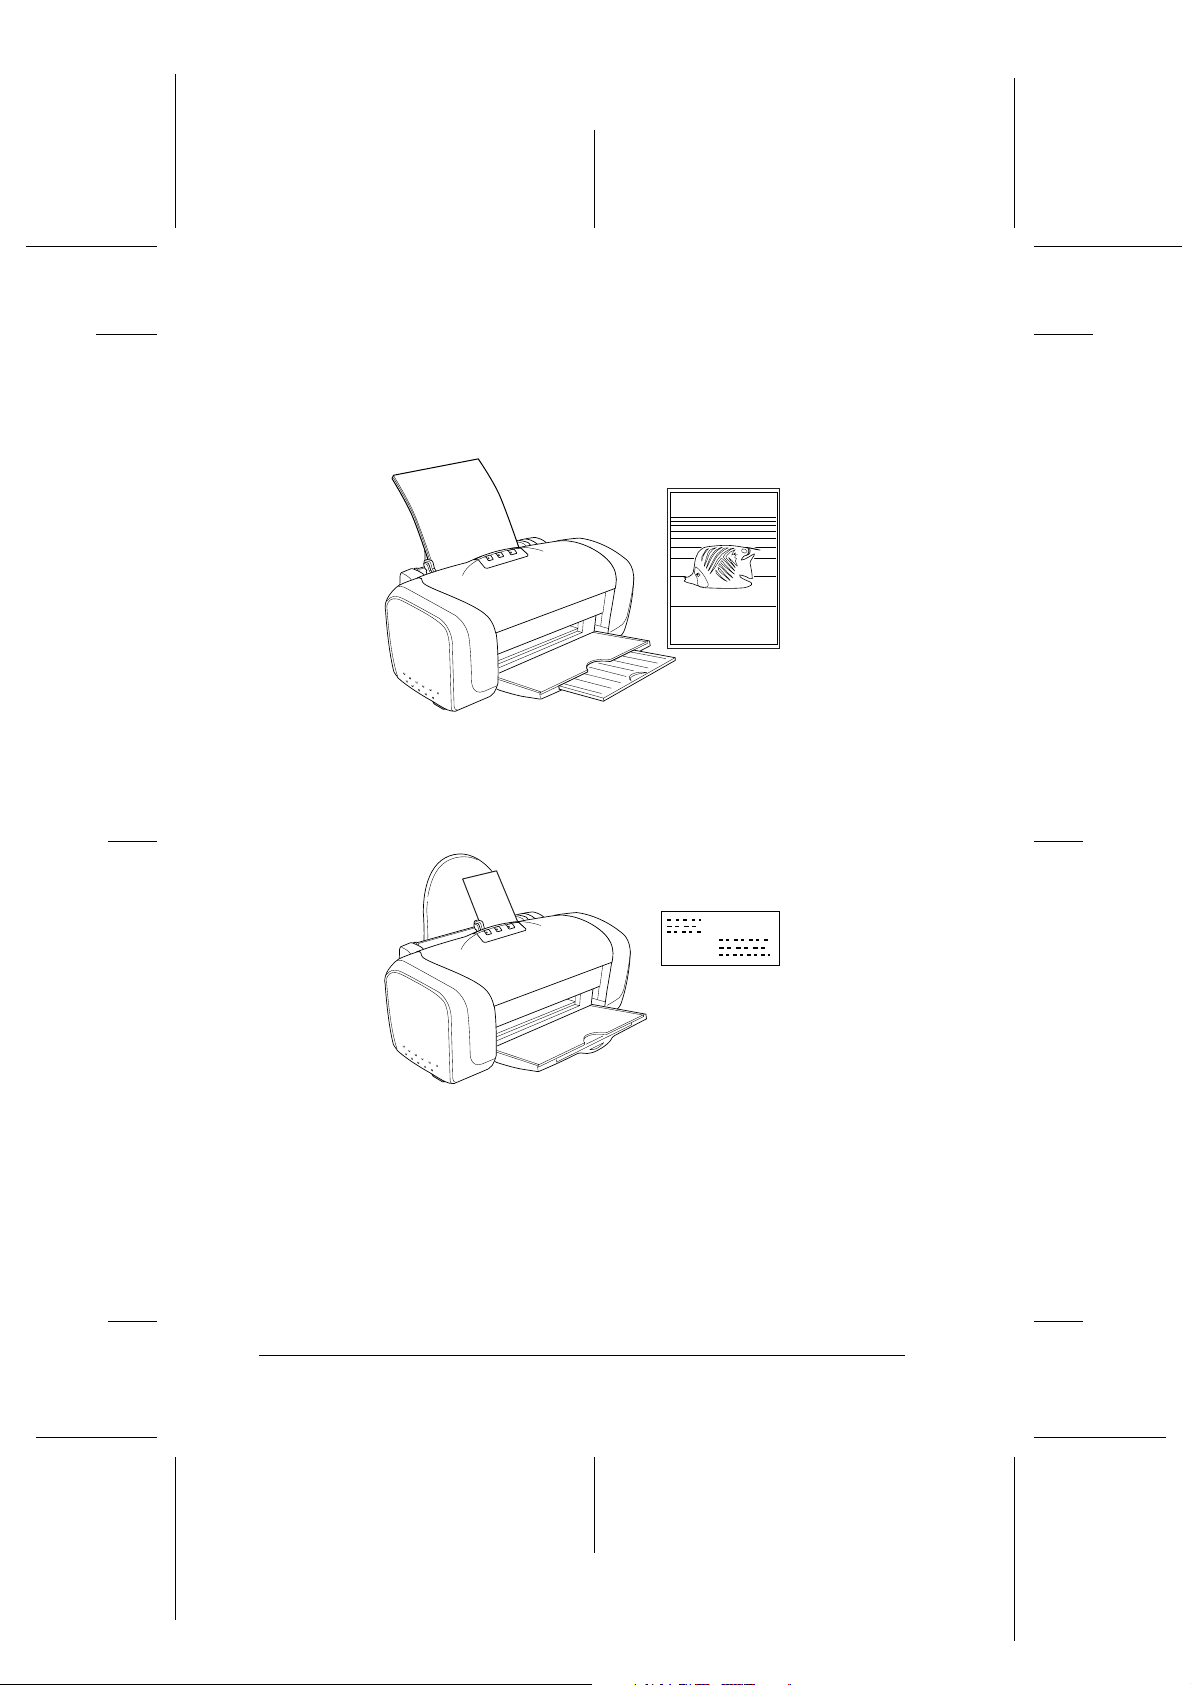
“Printing Photos”
Explains how to print photos on various sizes or kinds of
single-sheet paper.
Proof Sign-off:
S.Kodama CRE Kawakami
M.Otsuka
editorname
“Printing on Envelopes”
Explains how to print on envelopes.
10
Page 11
Proof Sign-off:
S.Kodama CRE Kawakami
M.Otsuka
editorname
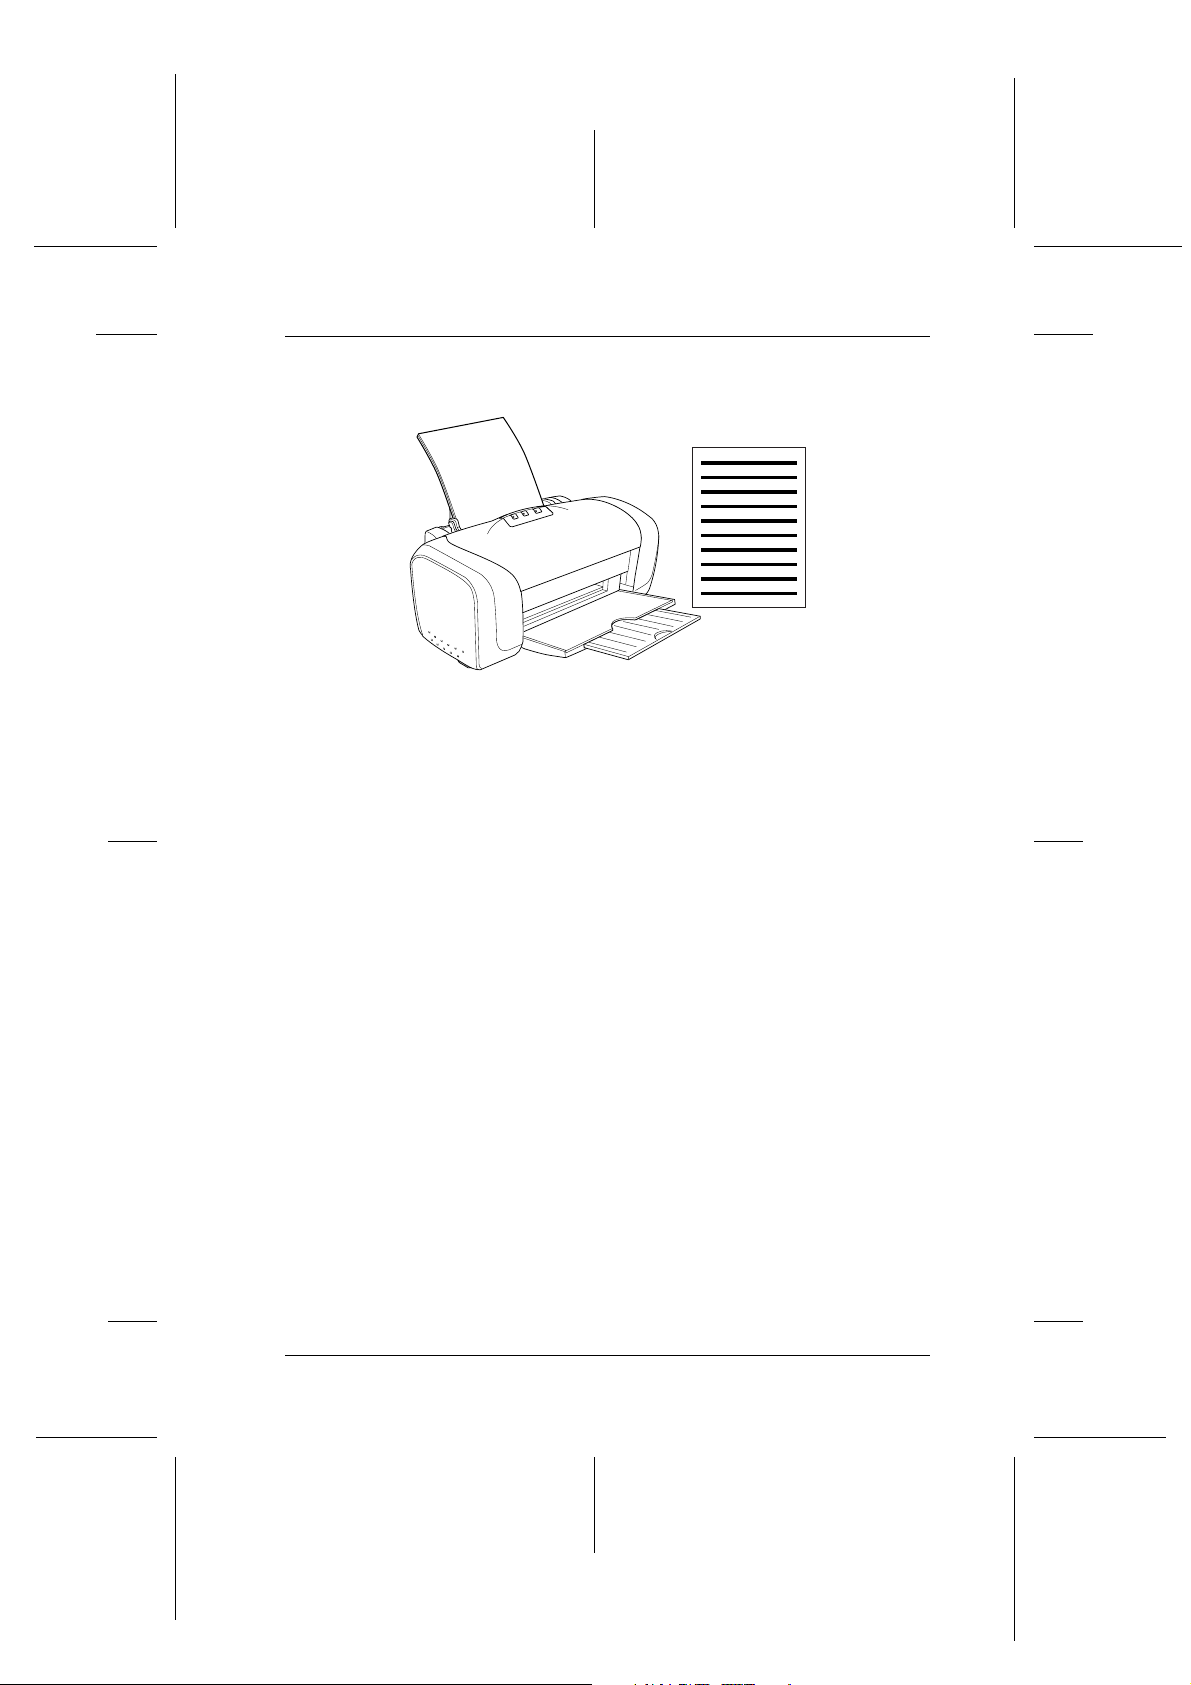
Printing Text and Web Pages
R4CD000_UK
html.bk Rev. E
BASIC.FM A5 size
6/10/03
R
Handling single sheets of paper
Refer to the section below for details on loading single sheets of
paper.
“Loading Single Sheets of Paper”
When using special media, refer to the section below.
“Using Special Media”
Driver settings for Windows
1. Open the file you want to print.
2. Access the printer driver.
“Accessing the Printer Software for Windows”
11
Page 12
L
R4CD000_UK
html.bk Rev. E
BASIC.FM A5 size
6/10/03
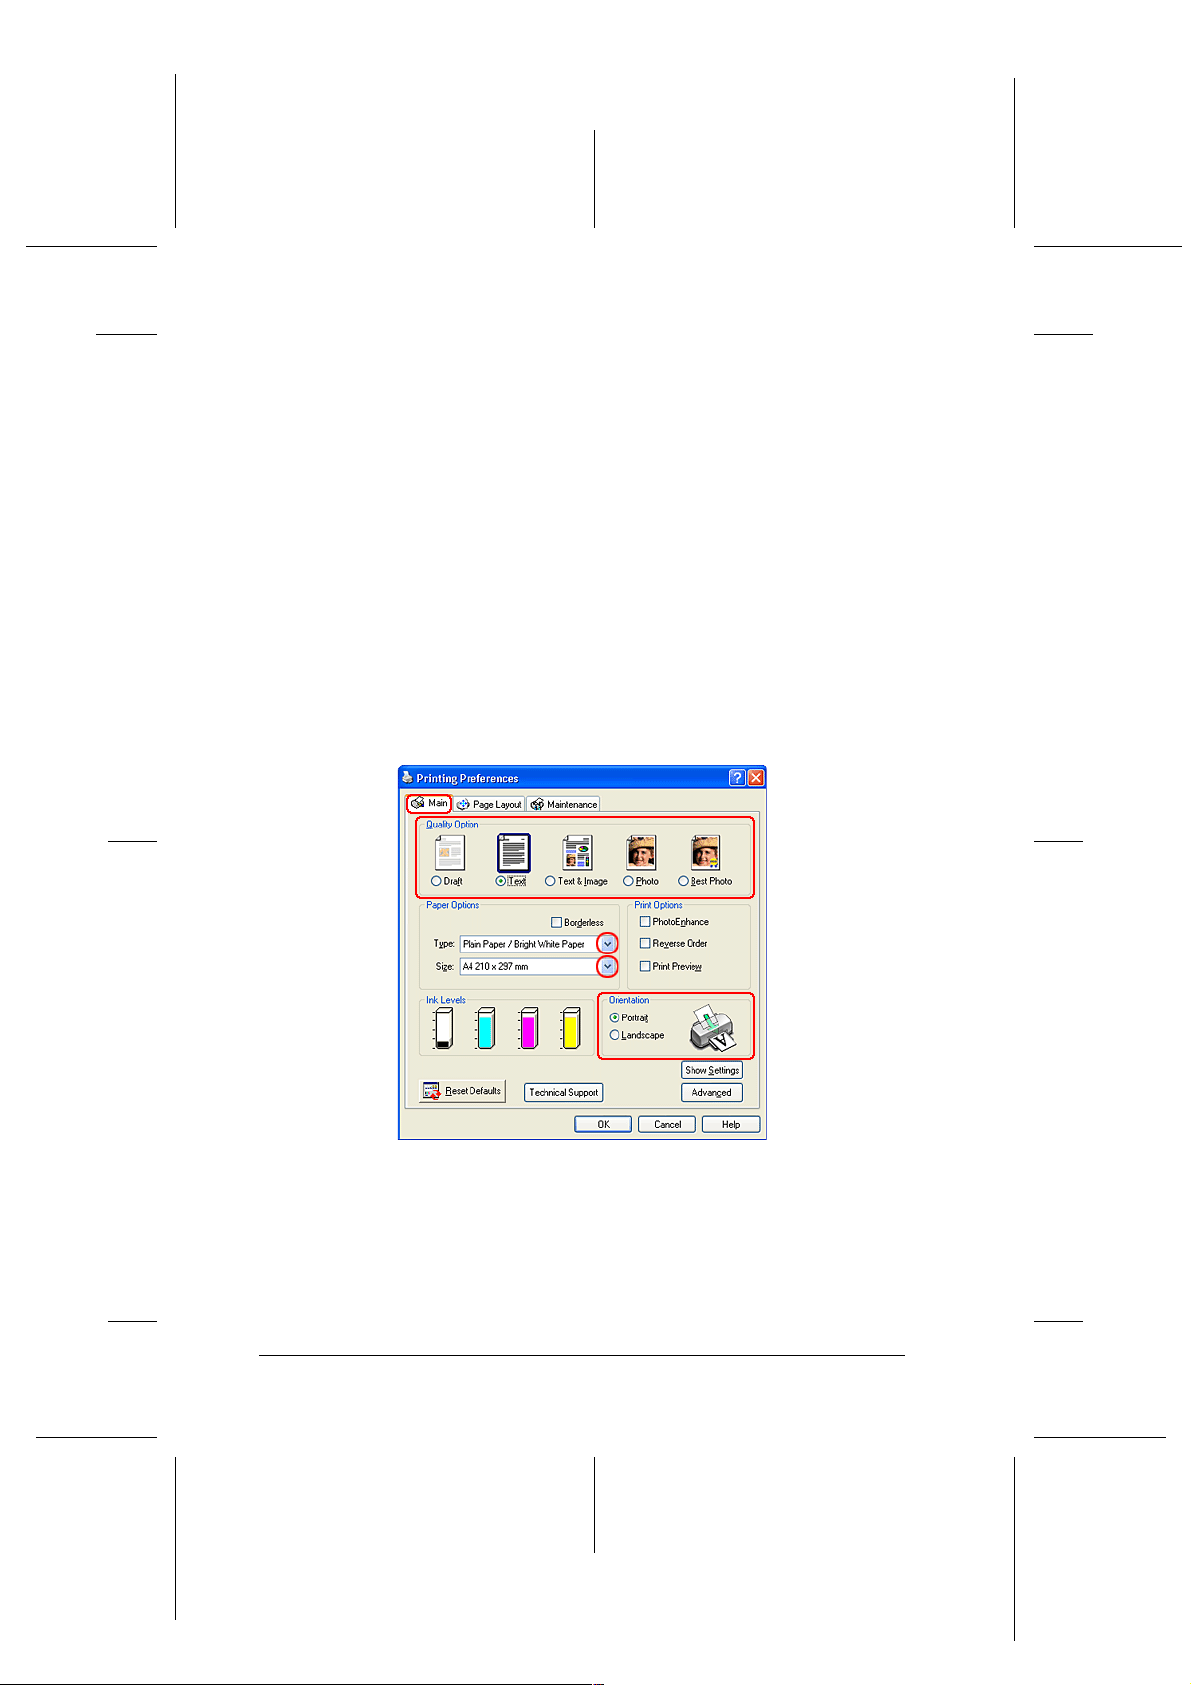
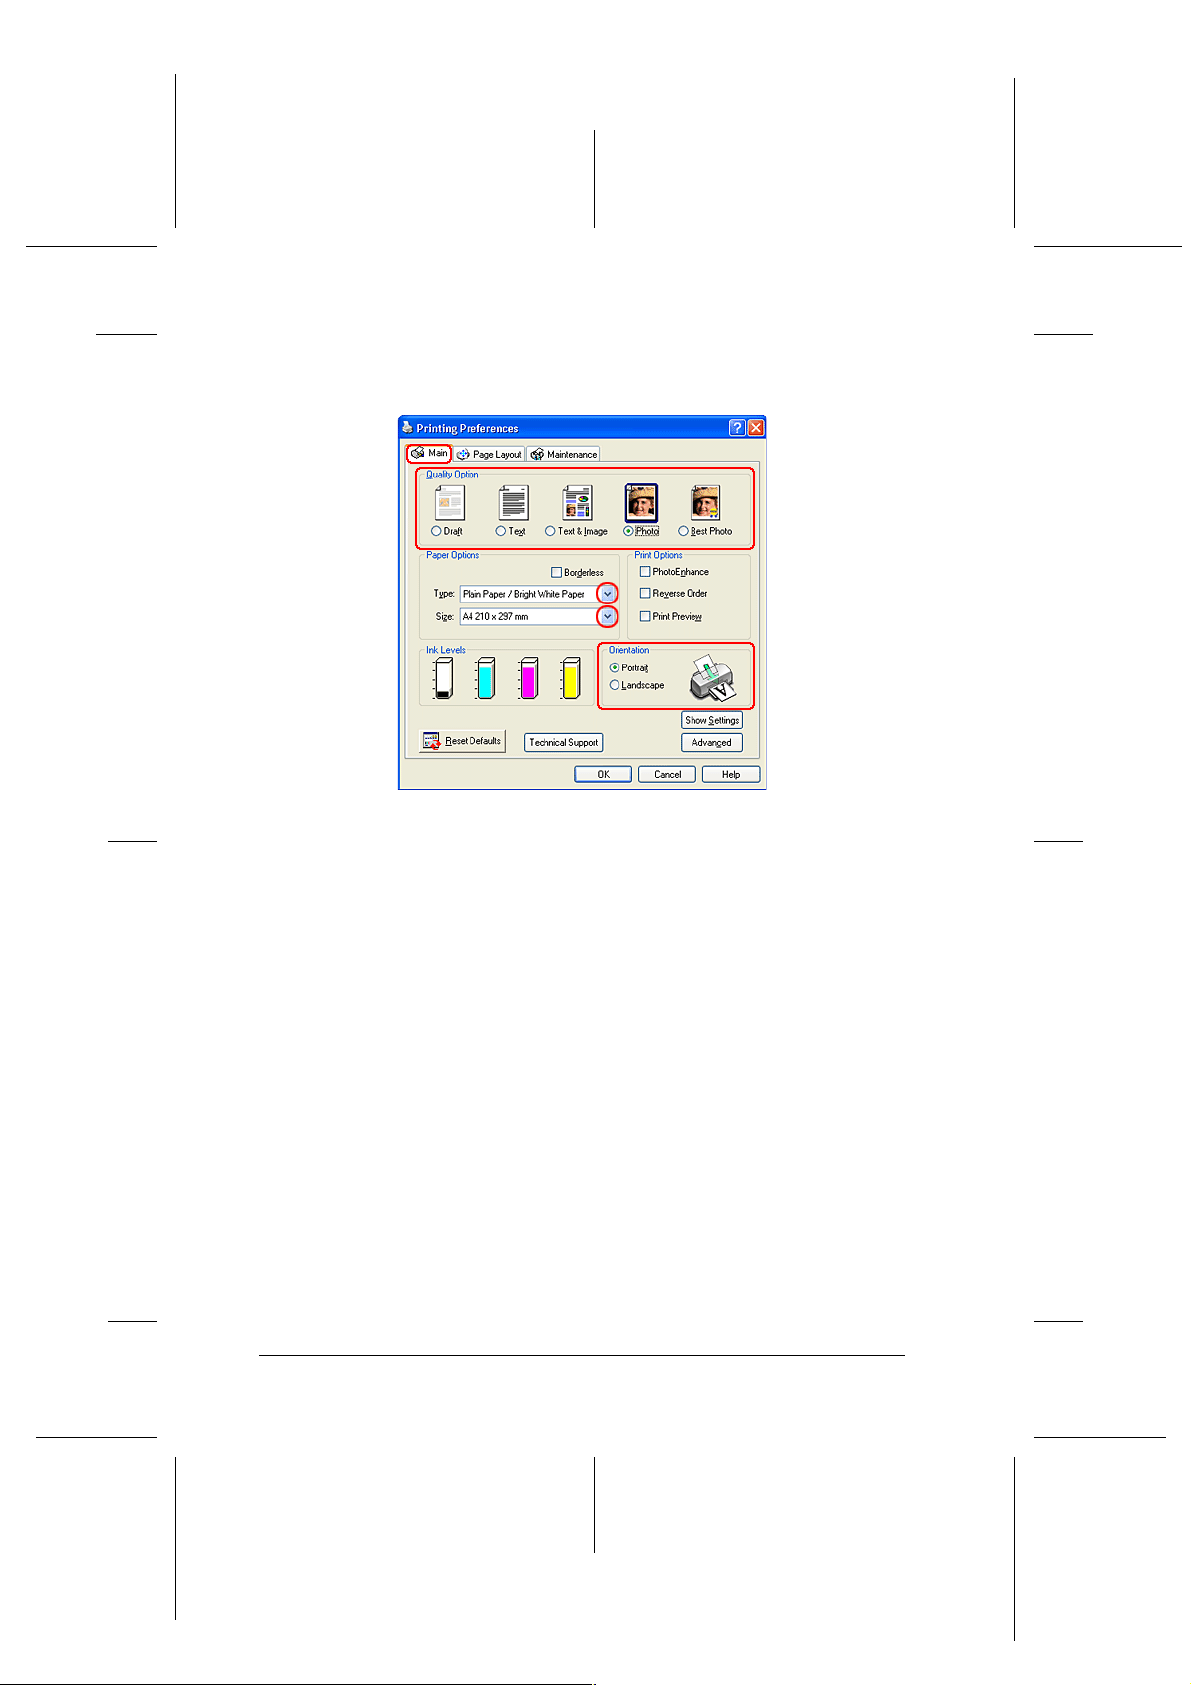
3. Click the Main tab, then make the Quality Option setting. See
the following section for details on the Quality Option
settings.
& See “Quality Option”
4. Make the appropriate Type setting.
“Media Type Settings”
5. Make the appropriate Size setting. You can also define a
custom paper size. For details, see the following section.
“Making User Defined Paper Sizes for Windows”
Proof Sign-off:
S.Kodama CRE Kawakami
M.Otsuka
editorname
6. Select Portrait (tall) or Landscape (wide) to change the
orientation of your printout.
7. Click OK to close the printer driver settings dialog box.
8. Print your data.
12
Page 13
Proof Sign-off:
S.Kodama CRE Kawakami
M.Otsuka
editorname
Driver settings for Mac OS 8.6 to 9.x
1. Open the file you want to print.
2. Access the Page Setup dialog box.
“Accessing the Printer Software for Mac OS 8.6 to 9.x”
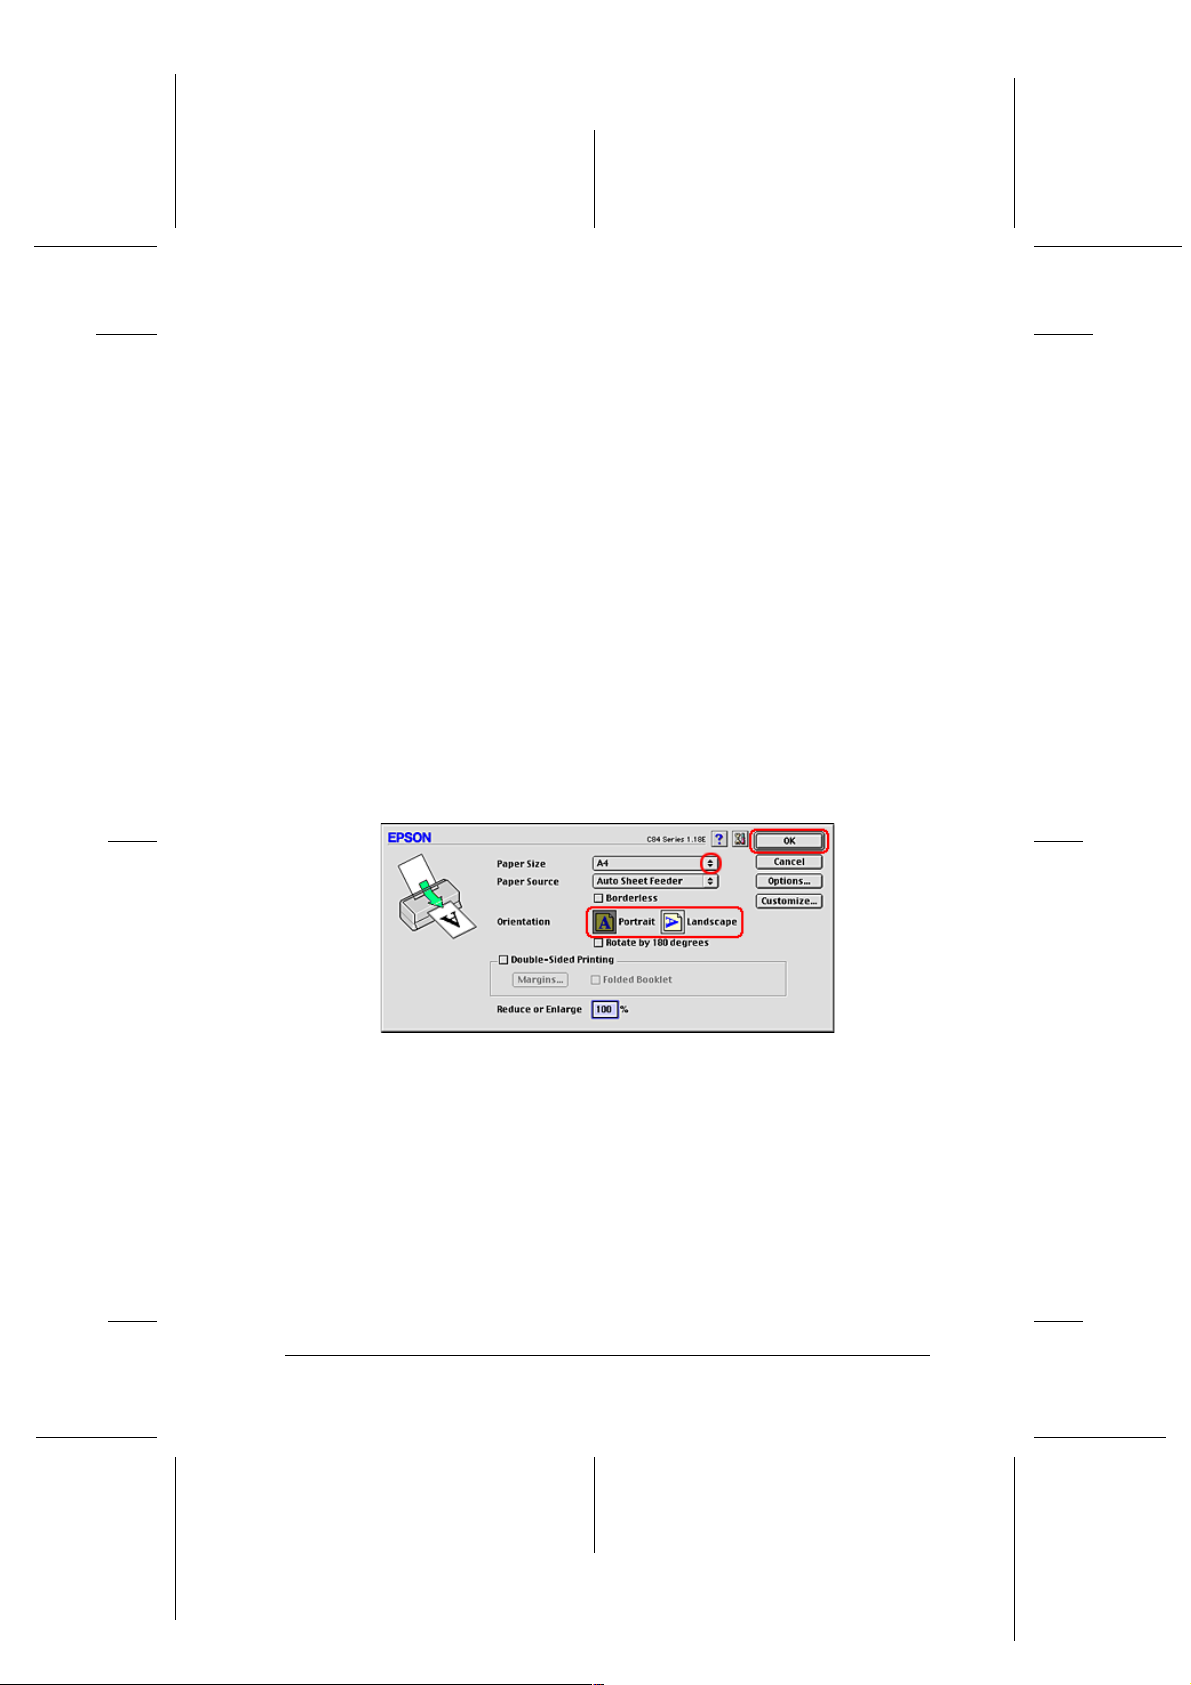
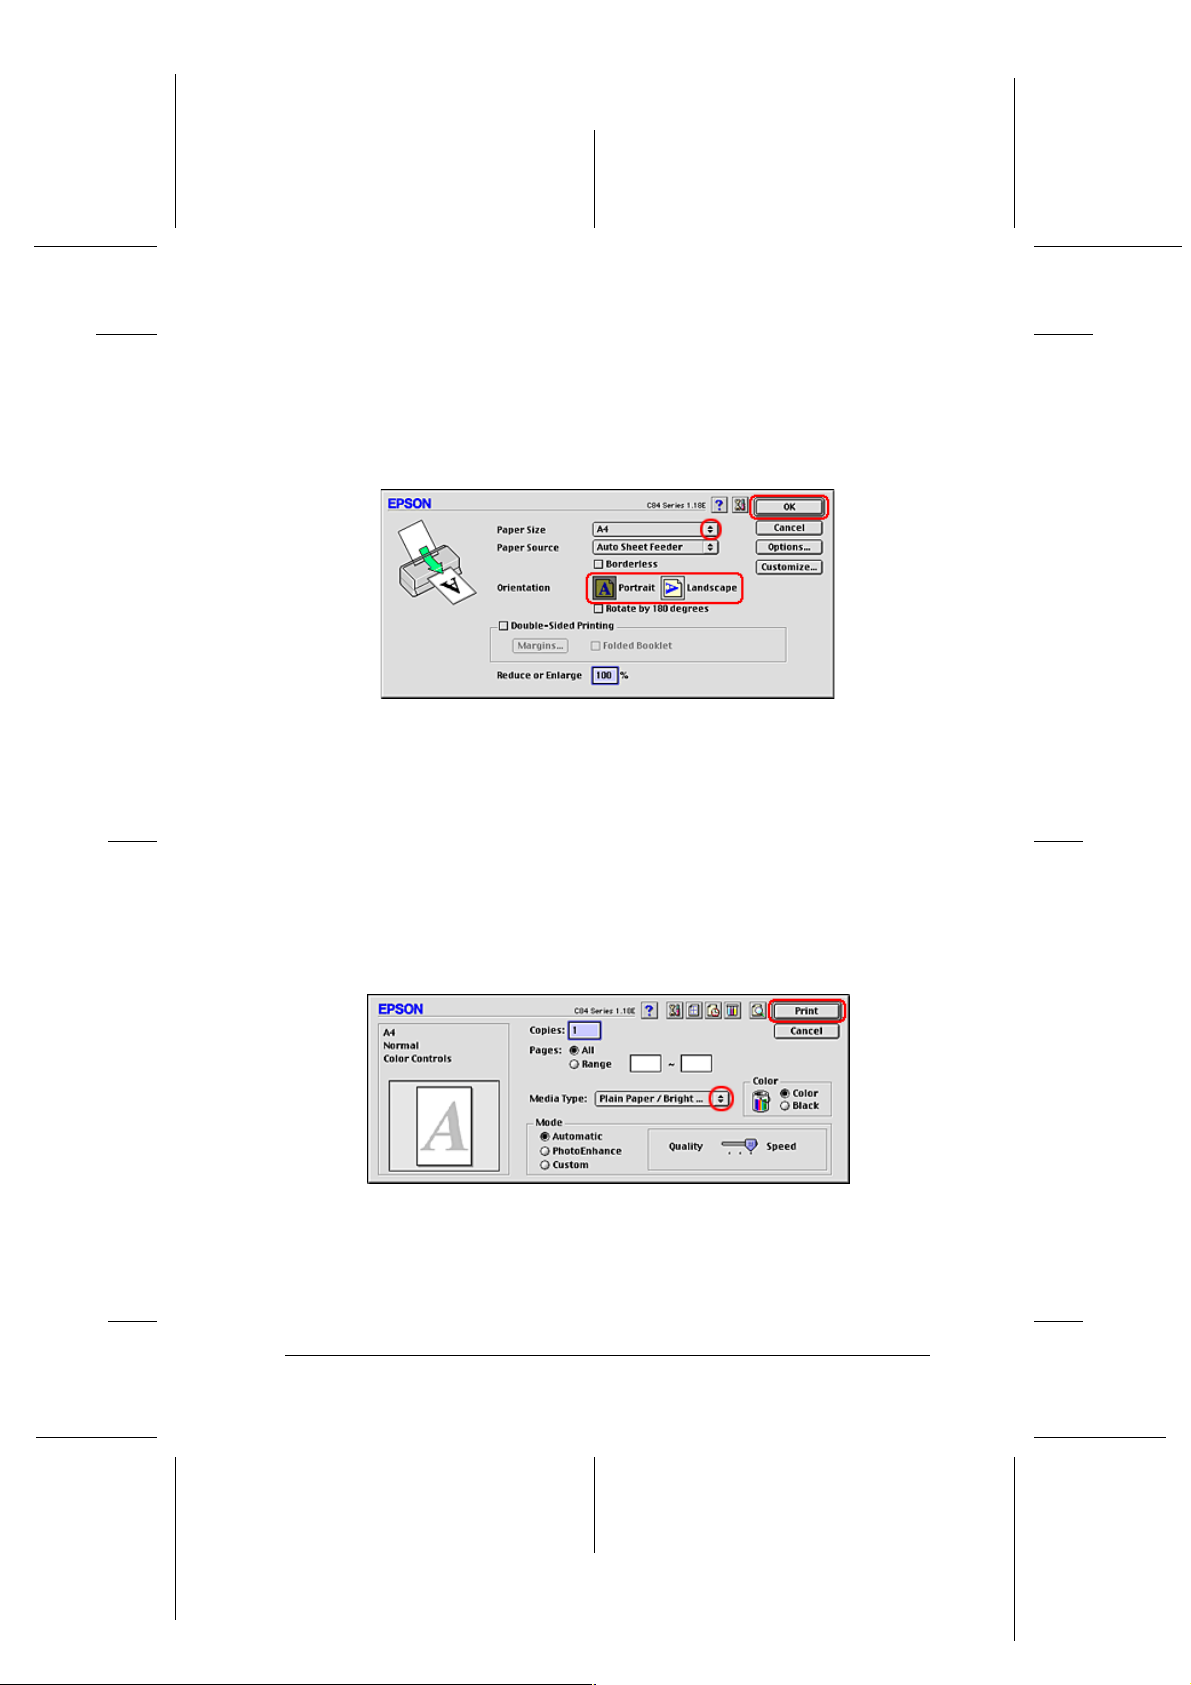
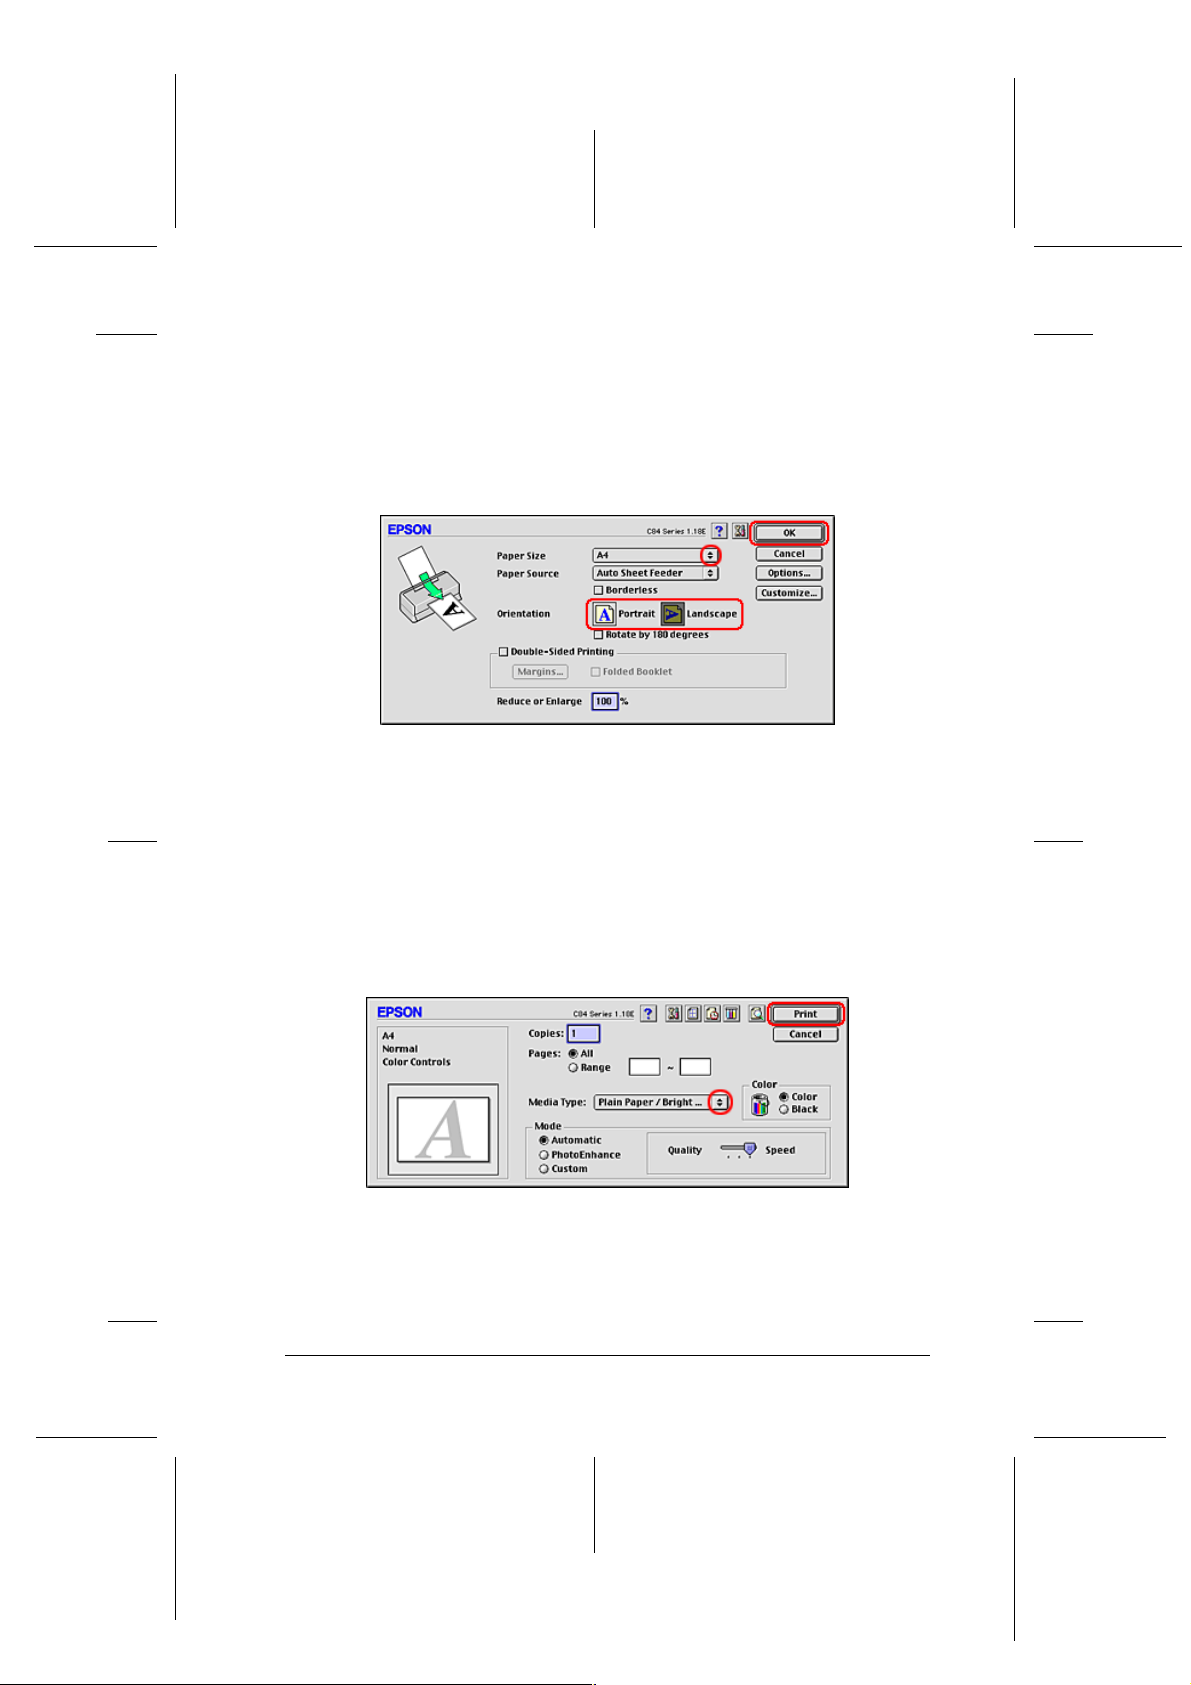
3. Make the appropriate Paper Size setting. You can also define
a custom paper size. For details, see the following section.
“Making User Defined Paper Sizes for Mac OS 8.6 to 9.x”
R4CD000_UK
html.bk Rev. E
BASIC.FM A5 size
6/10/03
R
4. Select Portrait (tall) or Landscape (wide) to change the
orientation of your printout.
5. Click OK to save the settings and close the Page Setup dialog
box.
6. Access the Print dialog box.
“Accessing the Printer Software for Mac OS 8.6 to 9.x”
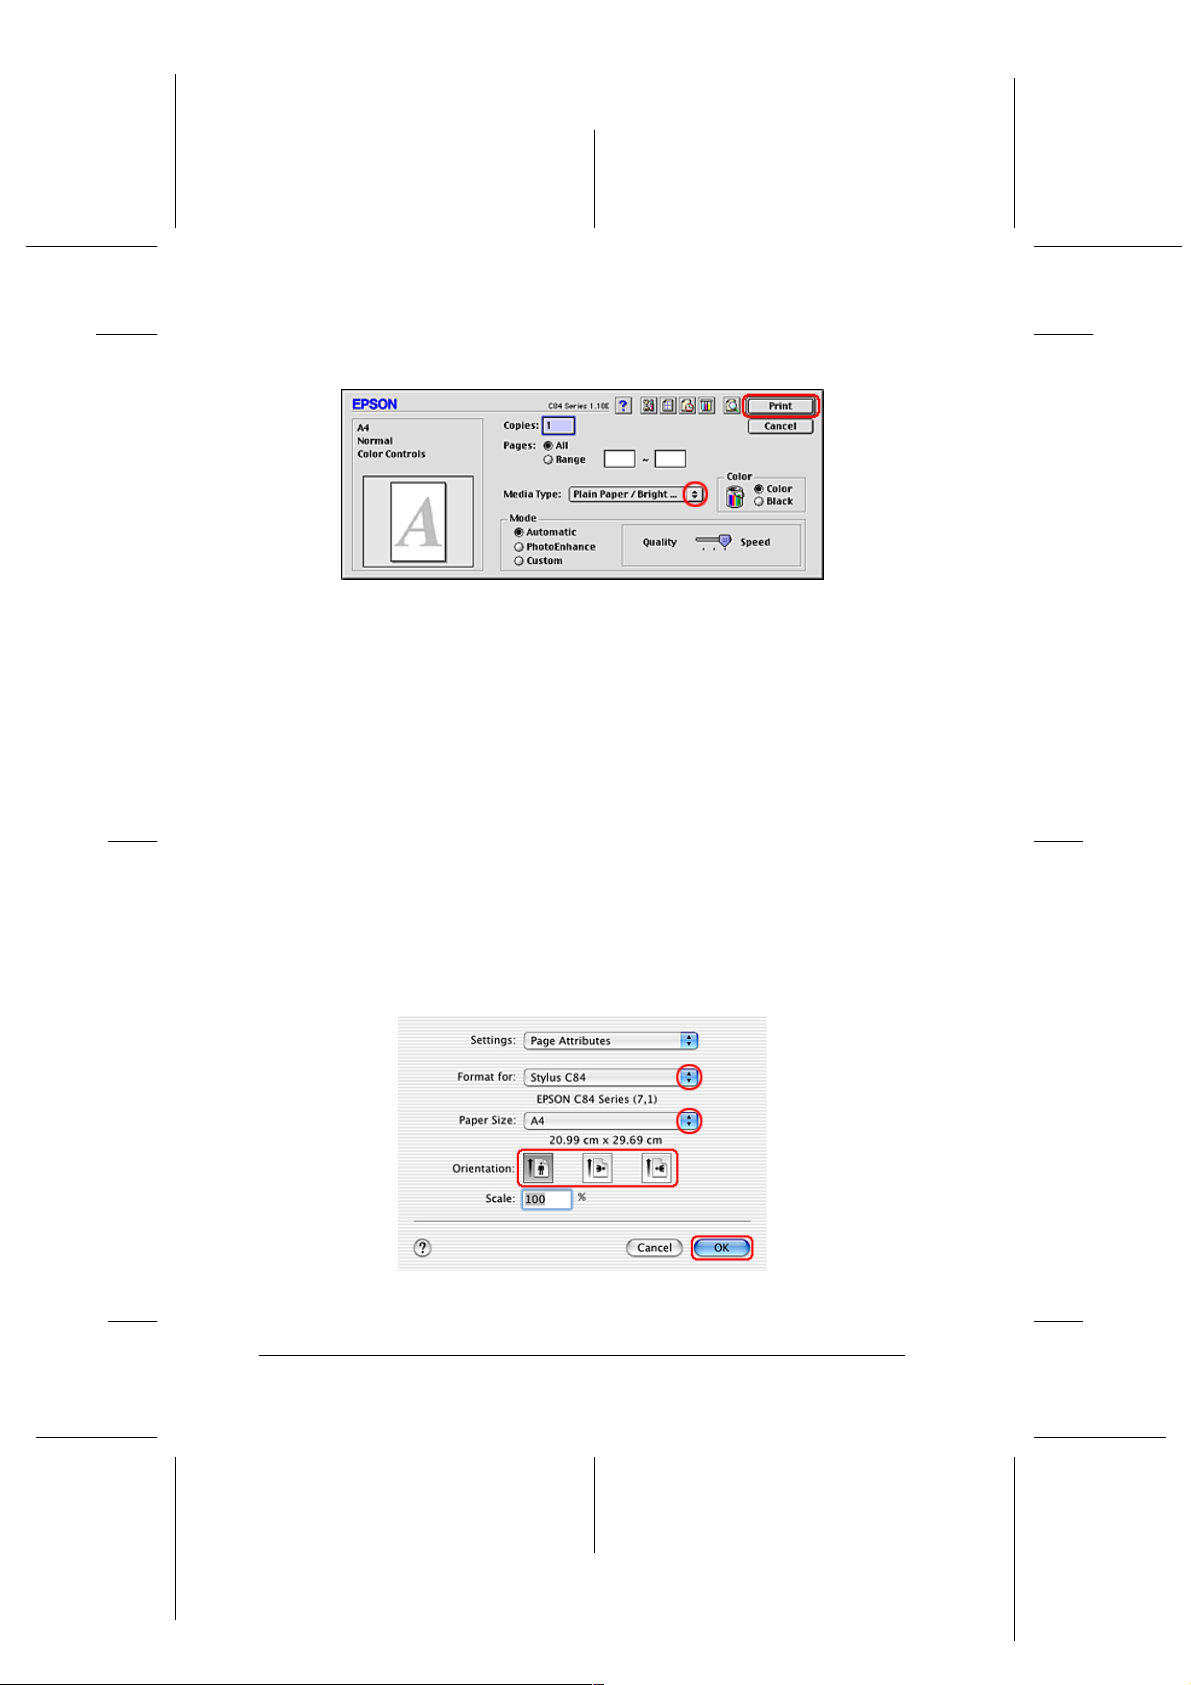
7. Make the appropriate Media Type setting.
“Media Type Settings”
13
Page 14
L
R4CD000_UK
html.bk Rev. E
BASIC.FM A5 size
6/10/03
8. Click Print to start printing.
Driver settings for Mac OS X
Proof Sign-off:
S.Kodama CRE Kawakami
M.Otsuka
editorname
1. Open the file you want to print.
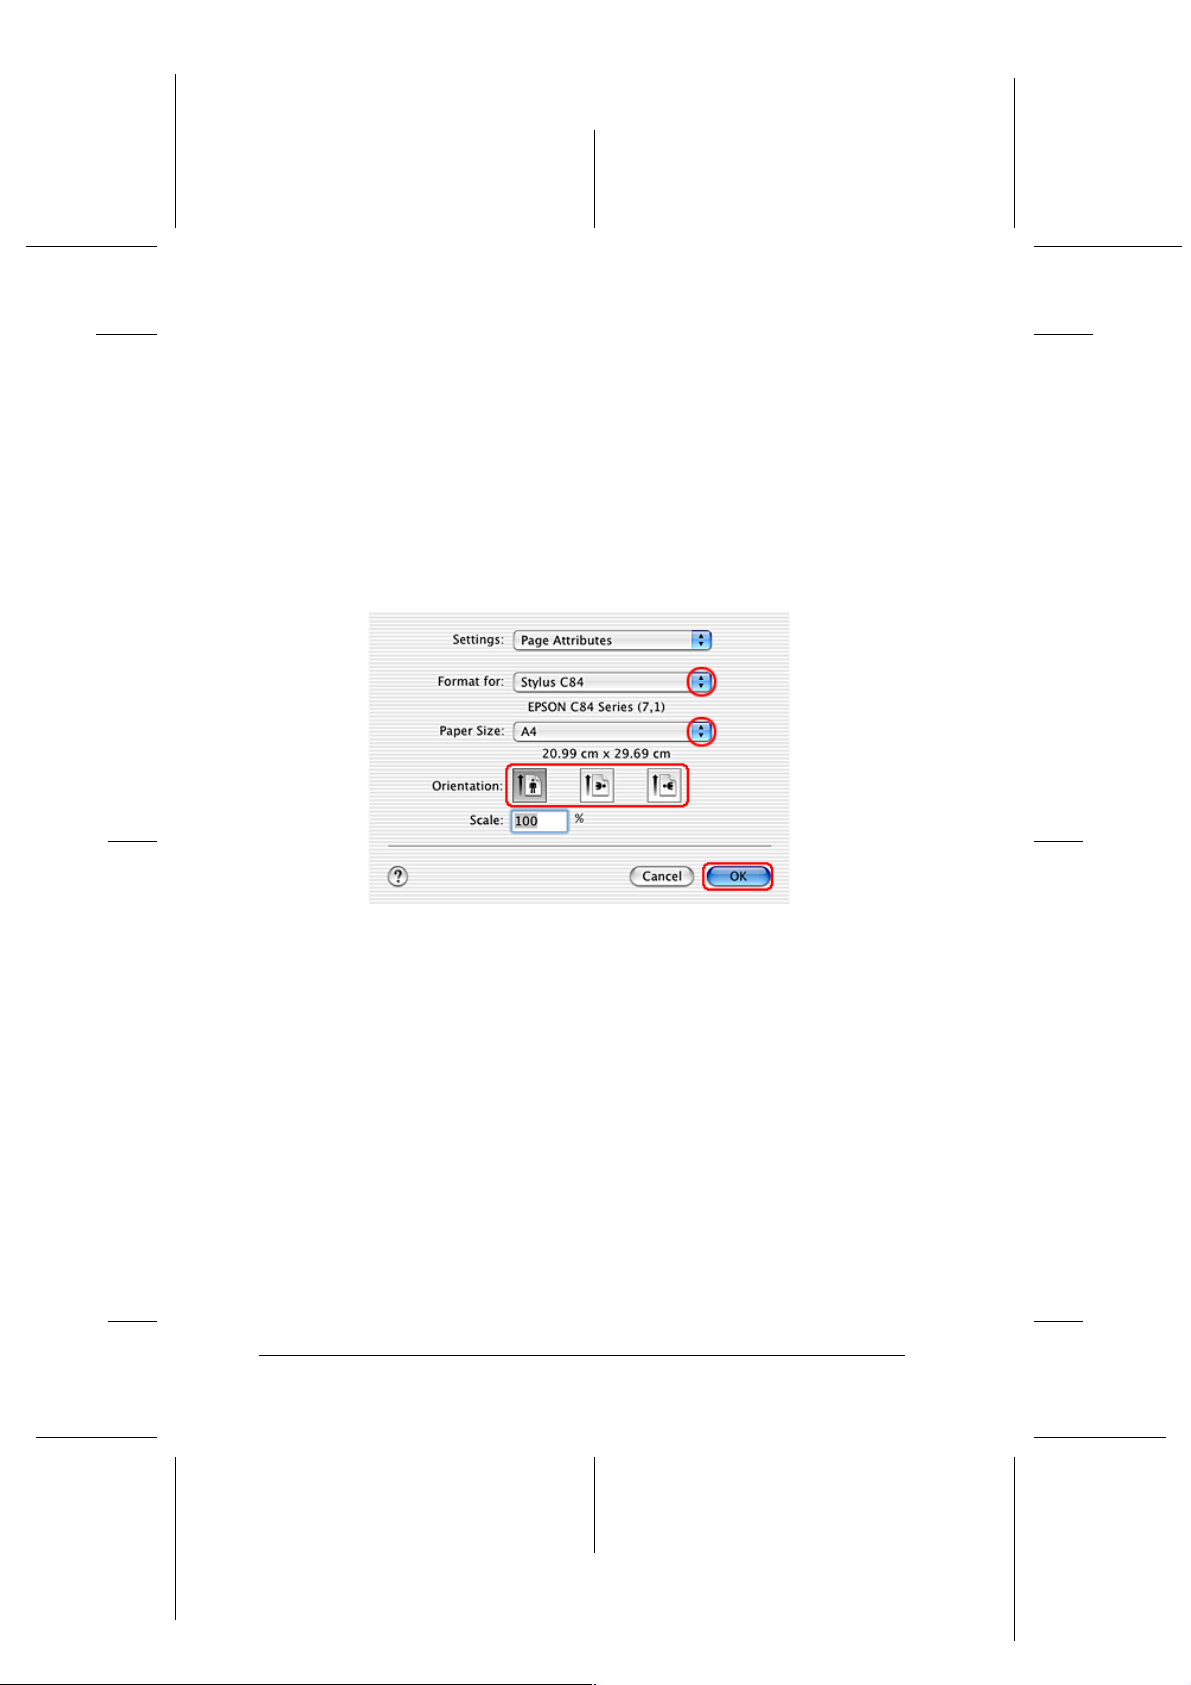
2. Access the Page Setup dialog box.
“Accessing the Printer Software for Mac OS X”
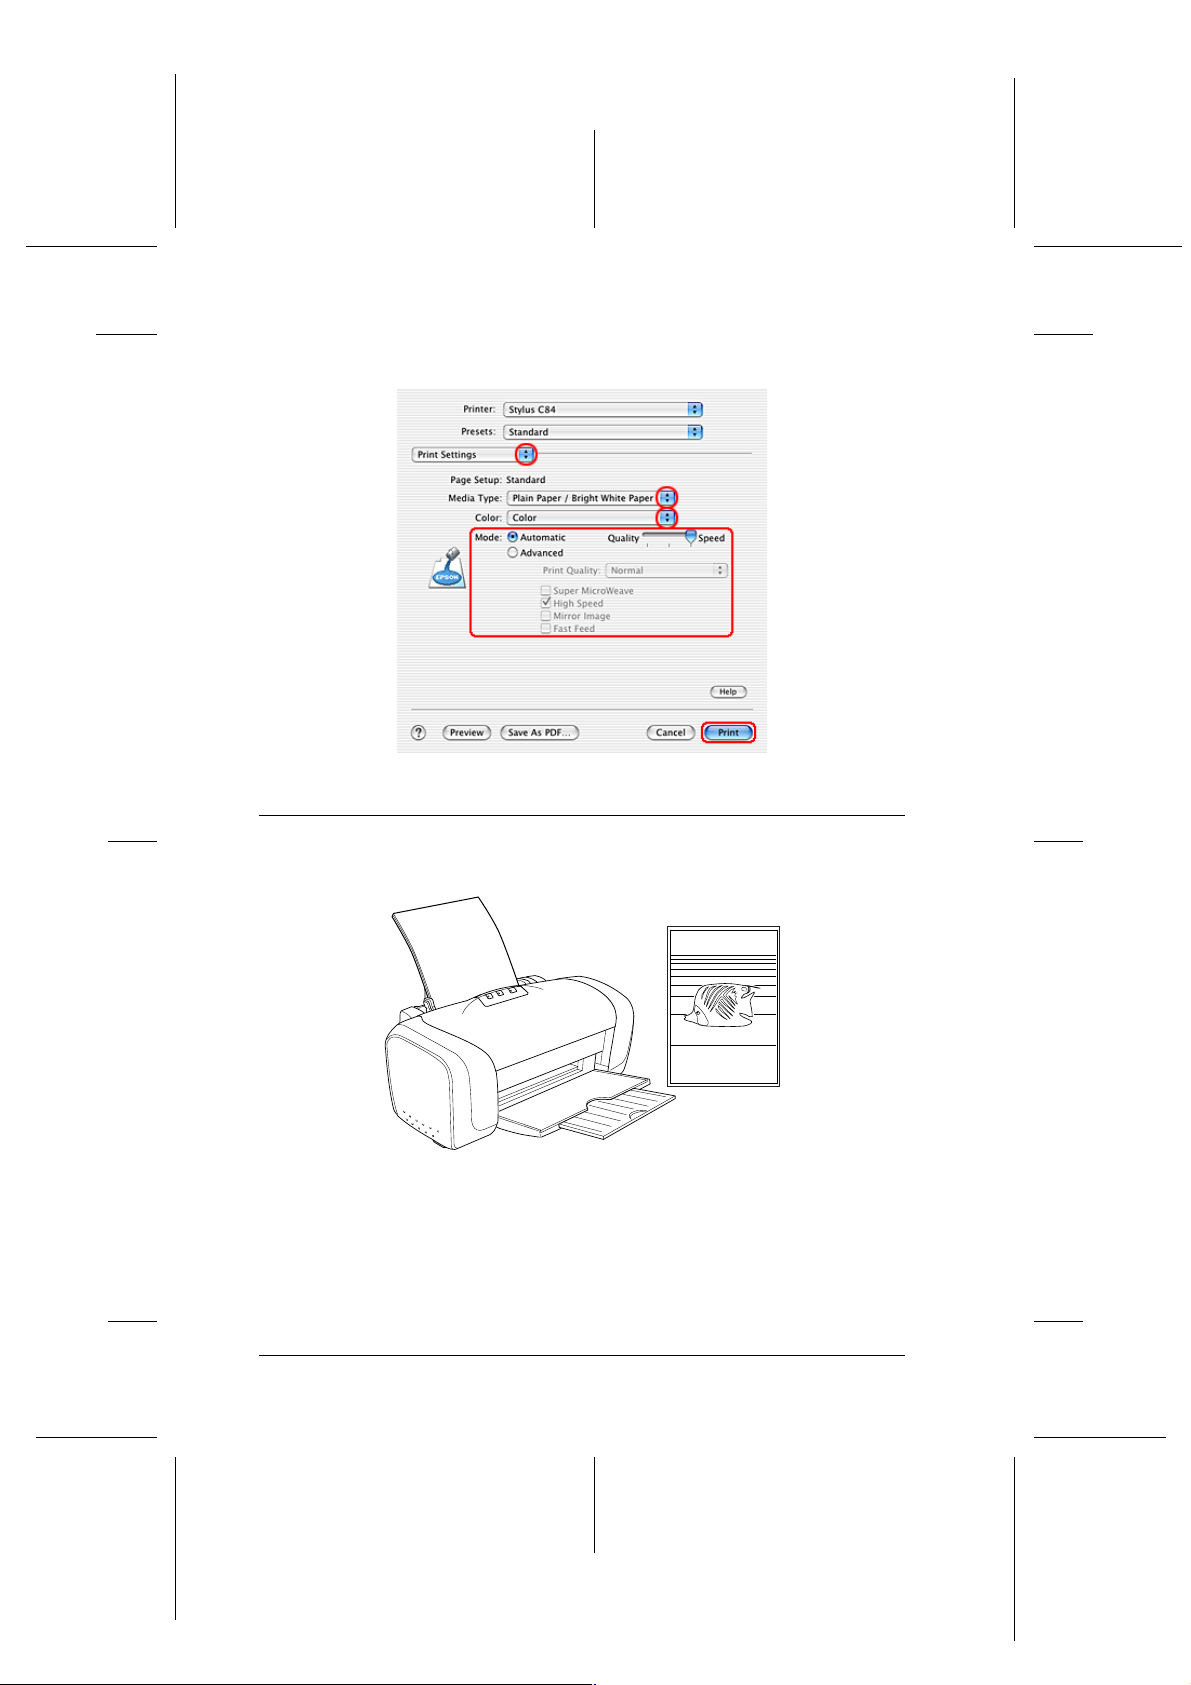
3. Make the appropriate Format for setting. When printing with
standard margins, select Stylus C84.
4. Make the appropriate Paper Size and Orientation settings.
5. Click OK to close the Page Setup dialog box.
14
Page 15

Proof Sign-off:
S.Kodama CRE Kawakami
M.Otsuka
editorname
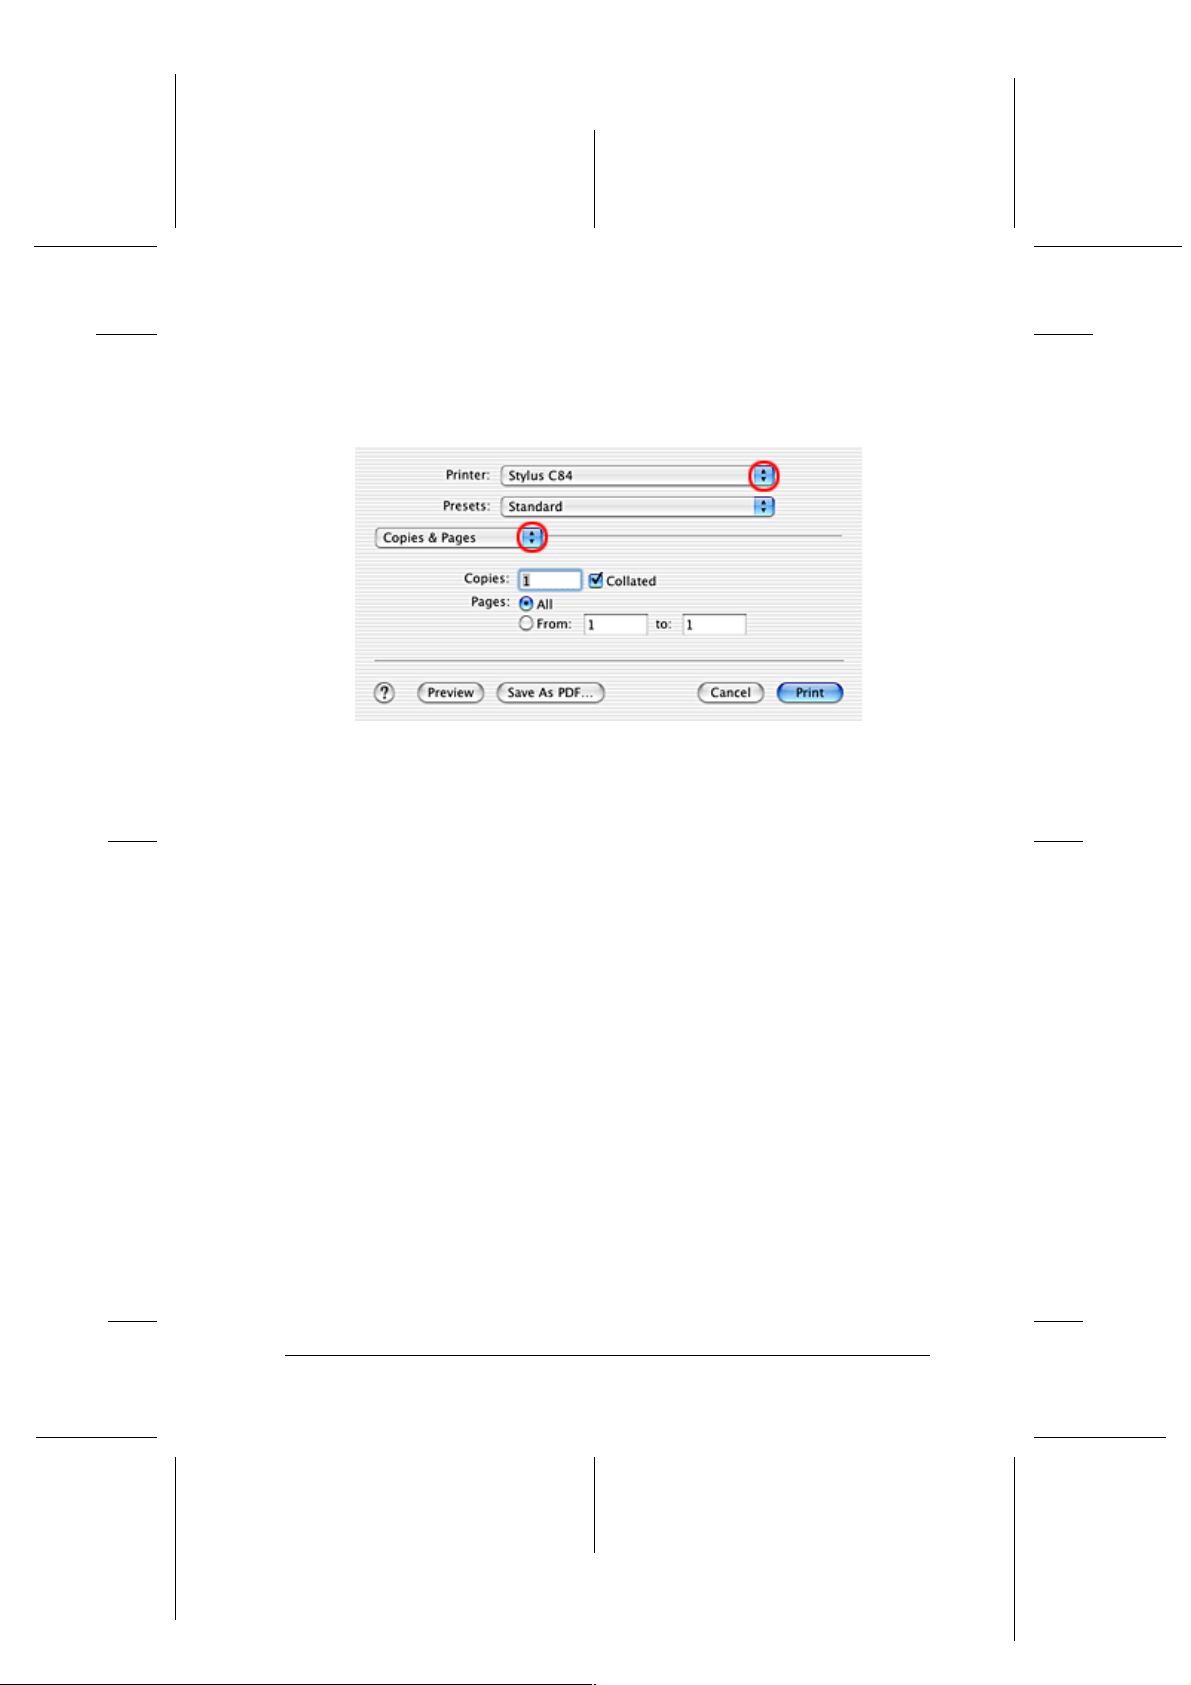
6. Access the Print dialog box.
“Accessing the Printer Software for Mac OS X”
7. Make the Printer setting so that it matches the Format for
setting you made in the Page Setup dialog box in step 3. Then
make the Copies & Pages settings.
Note:
❏ Always match the Format for setting in the Page Setup dialog
R4CD000_UK
html.bk Rev. E
BASIC.FM A5 size
6/10/03
box and the Printer setting in the Print dialog box. Otherwise
the data may not be printed correctly.
R
❏ The Copies & Pages settings available are a standard feature of
Mac OS X. See your operating system’s documentation for
details.
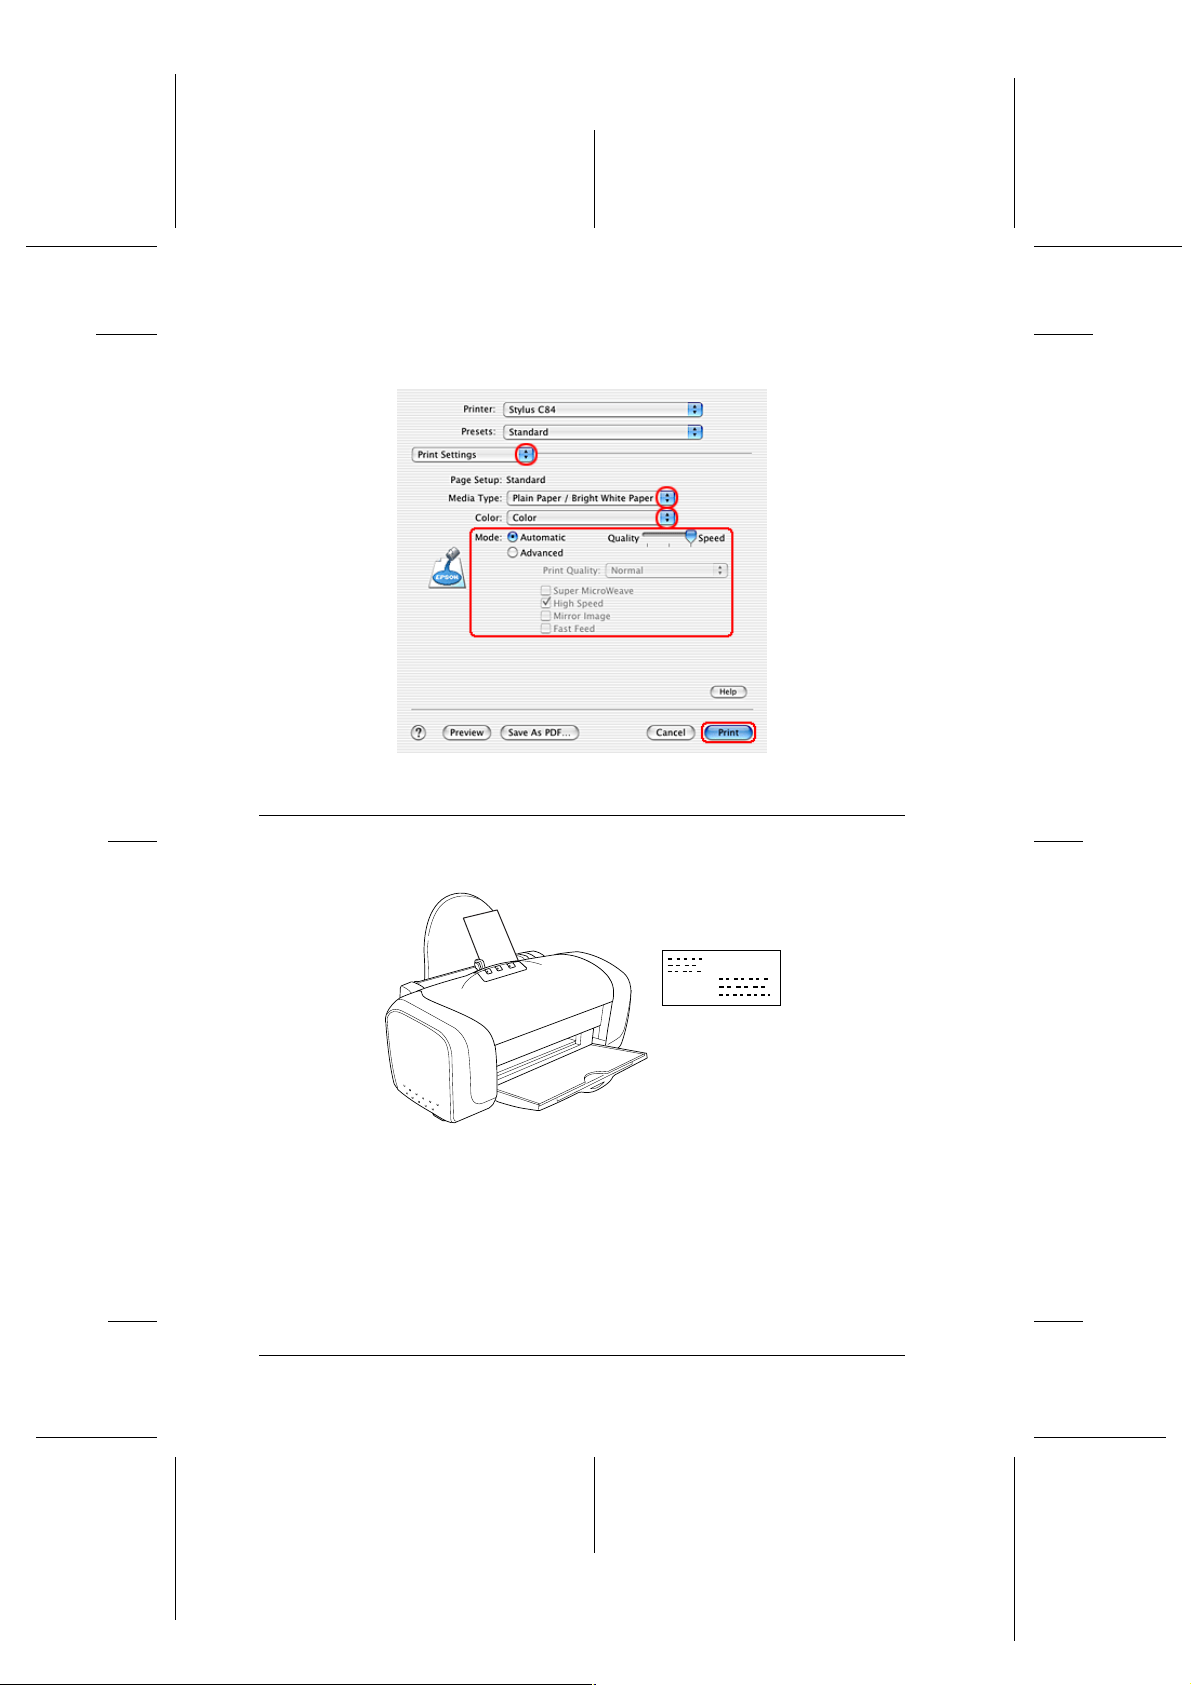
8. Select Print Settings from the pop-up menu.
9. Make the appropriate Media Type, Color, and Mode settings.
& See “Print Settings”
“Media Type Settings”
15
Page 16
L
R4CD000_UK
html.bk Rev. E
BASIC.FM A5 size
6/10/03
10. Click Print to start printing.
Proof Sign-off:
S.Kodama CRE Kawakami
M.Otsuka
editorname
Printing Photos
Handling single sheets of paper
Refer to the section below for details on loading single sheets of
paper.
16
Page 17

Proof Sign-off:
S.Kodama CRE Kawakami
M.Otsuka
editorname
“Loading Single Sheets of Paper”
When using special media, refer to the section below.
“Using Special Media”
Driver settings for Windows
1. Open the file you want to print.
2. Access the printer driver.
R4CD000_UK
html.bk Rev. E
BASIC.FM A5 size
6/10/03
R
“Accessing the Printer Software for Windows”
3. Click the Main tab, then make the Quality Option setting. See
the following section for details on the Quality Option
settings.
& See “Quality Option”
4. Make the appropriate Type setting.
“Media Type Settings”
5. Make the appropriate Size setting. You can also define a
custom paper size. For details, see the following section.
“Making User Defined Paper Sizes for Windows”
17
Page 18
L
R4CD000_UK
html.bk Rev. E
BASIC.FM A5 size
6/10/03
6. Select Portrait (tall) or Landscape (wide) to change the
orientation of your printout.
Proof Sign-off:
S.Kodama CRE Kawakami
M.Otsuka
editorname
7. Click OK to close the printer driver settings dialog box.
8. Print your data.
Driver settings for Mac OS 8.6 to 9.x
1. Open the file you want to print.
2. Access the Page Setup dialog box.
“Accessing the Printer Software for Mac OS 8.6 to 9.x”
3. Make the appropriate Paper Size setting. You can also define
a custom paper size. For details, see the following section.
“Making User Defined Paper Sizes for Mac OS 8.6 to 9.x”
18
Page 19
Proof Sign-off:
S.Kodama CRE Kawakami
M.Otsuka
editorname
4. Select Portrait (tall) or Landscape (wide) to change the
orientation of your printout.
5. Click OK to save the settings and close the Page Setup dialog
box.
R4CD000_UK
html.bk Rev. E
BASIC.FM A5 size
6/10/03
R
6. Access the Print dialog box.
“Accessing the Printer Software for Mac OS 8.6 to 9.x”
7. Make the appropriate Media Type setting.
“Media Type Settings”
8. Click Print to start printing.
Driver settings for Mac OS X
1. Open the file you want to print.
19
Page 20
L
R4CD000_UK
html.bk Rev. E
BASIC.FM A5 size
6/10/03
2. Access the Page Setup dialog box.
“Accessing the Printer Software for Mac OS X”
3. Make the appropriate Format for setting. When printing with
standard margins, select Stylus C84.
4. Make the appropriate Paper Size and Orientation settings.
5. Click OK to close the Page Setup dialog box.
Proof Sign-off:
S.Kodama CRE Kawakami
M.Otsuka
editorname
6. Access the Print dialog box.
“Accessing the Printer Software for Mac OS X”
7. Make the Printer setting so that it matches the Format for
setting you made in the Page Setup dialog box in step 3. Then
make the Copies & Pages settings.
Note:
❏ Always match the Format for setting in the Page Setup dialog
box and the Printer setting in the Print dialog box. Otherwise
the data may not be printed correctly.
20
Page 21
Proof Sign-off:
S.Kodama CRE Kawakami
M.Otsuka
editorname
❏ The Copies & Pages settings available are a standard feature of
R4CD000_UK
html.bk Rev. E
BASIC.FM A5 size
6/10/03
Mac OS X. See your operating system’s documentation for
details.
R
8. Select Print Settings from the pop-up menu.
9. Make the appropriate Media Type, Color, and Mode settings.
& See “Print Settings”
“Media Type Settings”
21
Page 22
L
R4CD000_UK
html.bk Rev. E
BASIC.FM A5 size
6/10/03
10. Click Print to start printing.
Proof Sign-off:
S.Kodama CRE Kawakami
M.Otsuka
editorname
Printing on Envelopes
Handling envelopes
Refer to the section below for loading envelopes.
“Loading Envelopes”
22
Page 23

Proof Sign-off:
S.Kodama CRE Kawakami
M.Otsuka
editorname
Refer to the section below for the printable area.
& See “Printable area”
Driver settings for Windows
1. Access the printer driver.
“Accessing the Printer Software for Windows”
2. Click the Main tab, then make the Quality Option setting. See
the following section for details on the Quality Option
settings.
& See “Quality Option”
R4CD000_UK
html.bk Rev. E
BASIC.FM A5 size
6/10/03
R
3. Select Plain Paper / Bright White Paper as the Type setting.
4. Select the appropriate envelope size from the available Size
settings. You can also define a custom paper size. For details,
see the following section.
“Making User Defined Paper Sizes for Windows”
23
Page 24

L
R4CD000_UK
html.bk Rev. E
BASIC.FM A5 size
6/10/03
5. Select Landscape as the Orientation setting.
Proof Sign-off:
S.Kodama CRE Kawakami
M.Otsuka
editorname
6. Click OK to close the printer driver settings dialog box.
7. Print your data.
Note:
The Economy setting that is offered under Paper & Quality
Options in the Advanced menu is not enabled when printing
envelopes.
Driver settings for Mac OS 8.6 to 9.x
1. Access the Page Setup dialog box.
“Accessing the Printer Software for Mac OS 8.6 to 9.x”
2. Select the appropriate envelope size from the available Paper
Size settings. You can also define a custom paper size. For
details, see the following section.
24
Page 25
Proof Sign-off:
S.Kodama CRE Kawakami
M.Otsuka
editorname
“Making User Defined Paper Sizes for Mac OS 8.6 to 9.x”
3. Select Landscape as the Orientation setting.
4. Click OK to save the settings and close the Page Setup dialog
box.
R4CD000_UK
html.bk Rev. E
BASIC.FM A5 size
6/10/03
R
5. Access the Print dialog box.
“Accessing the Printer Software for Mac OS 8.6 to 9.x”
6. Select Plain Paper/Bright White Paper as the Media Type
setting.
7. Click Print to start printing.
25
Page 26
L
R4CD000_UK
html.bk Rev. E
BASIC.FM A5 size
6/10/03
Note:
The Economy Custom mode and the Economy setting that is
offered under Print Quality in the Advanced dialog box are not
enabled when printing envelopes.
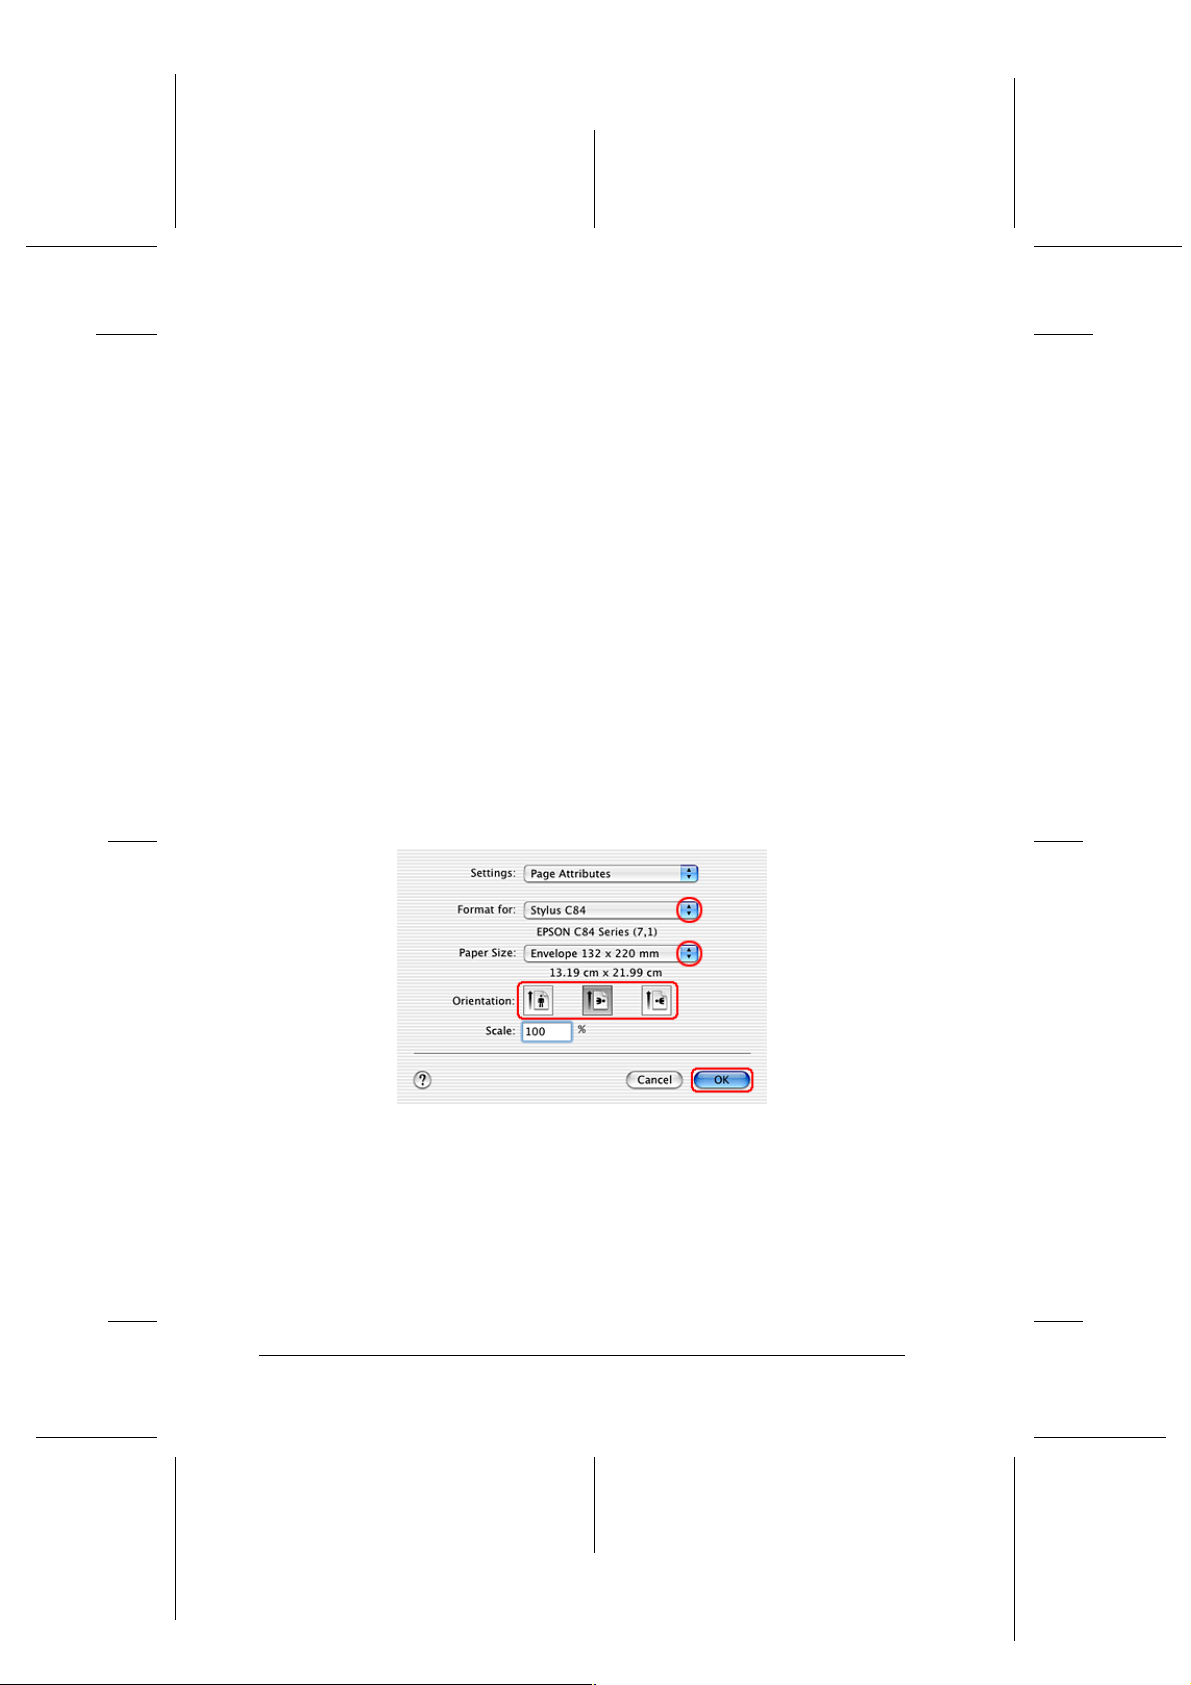
Driver settings for Mac OS X
1. Access the Page Setup dialog box.
“Accessing the Printer Software for Mac OS X”
2. Select Stylus C84 as the Format for setting.
Proof Sign-off:
S.Kodama CRE Kawakami
M.Otsuka
editorname
3. Select the appropriate envelope size as the Paper Size setting.
4. Select Landscape as the Orientation setting.
5. Click OK to close the Page Setup dialog box.
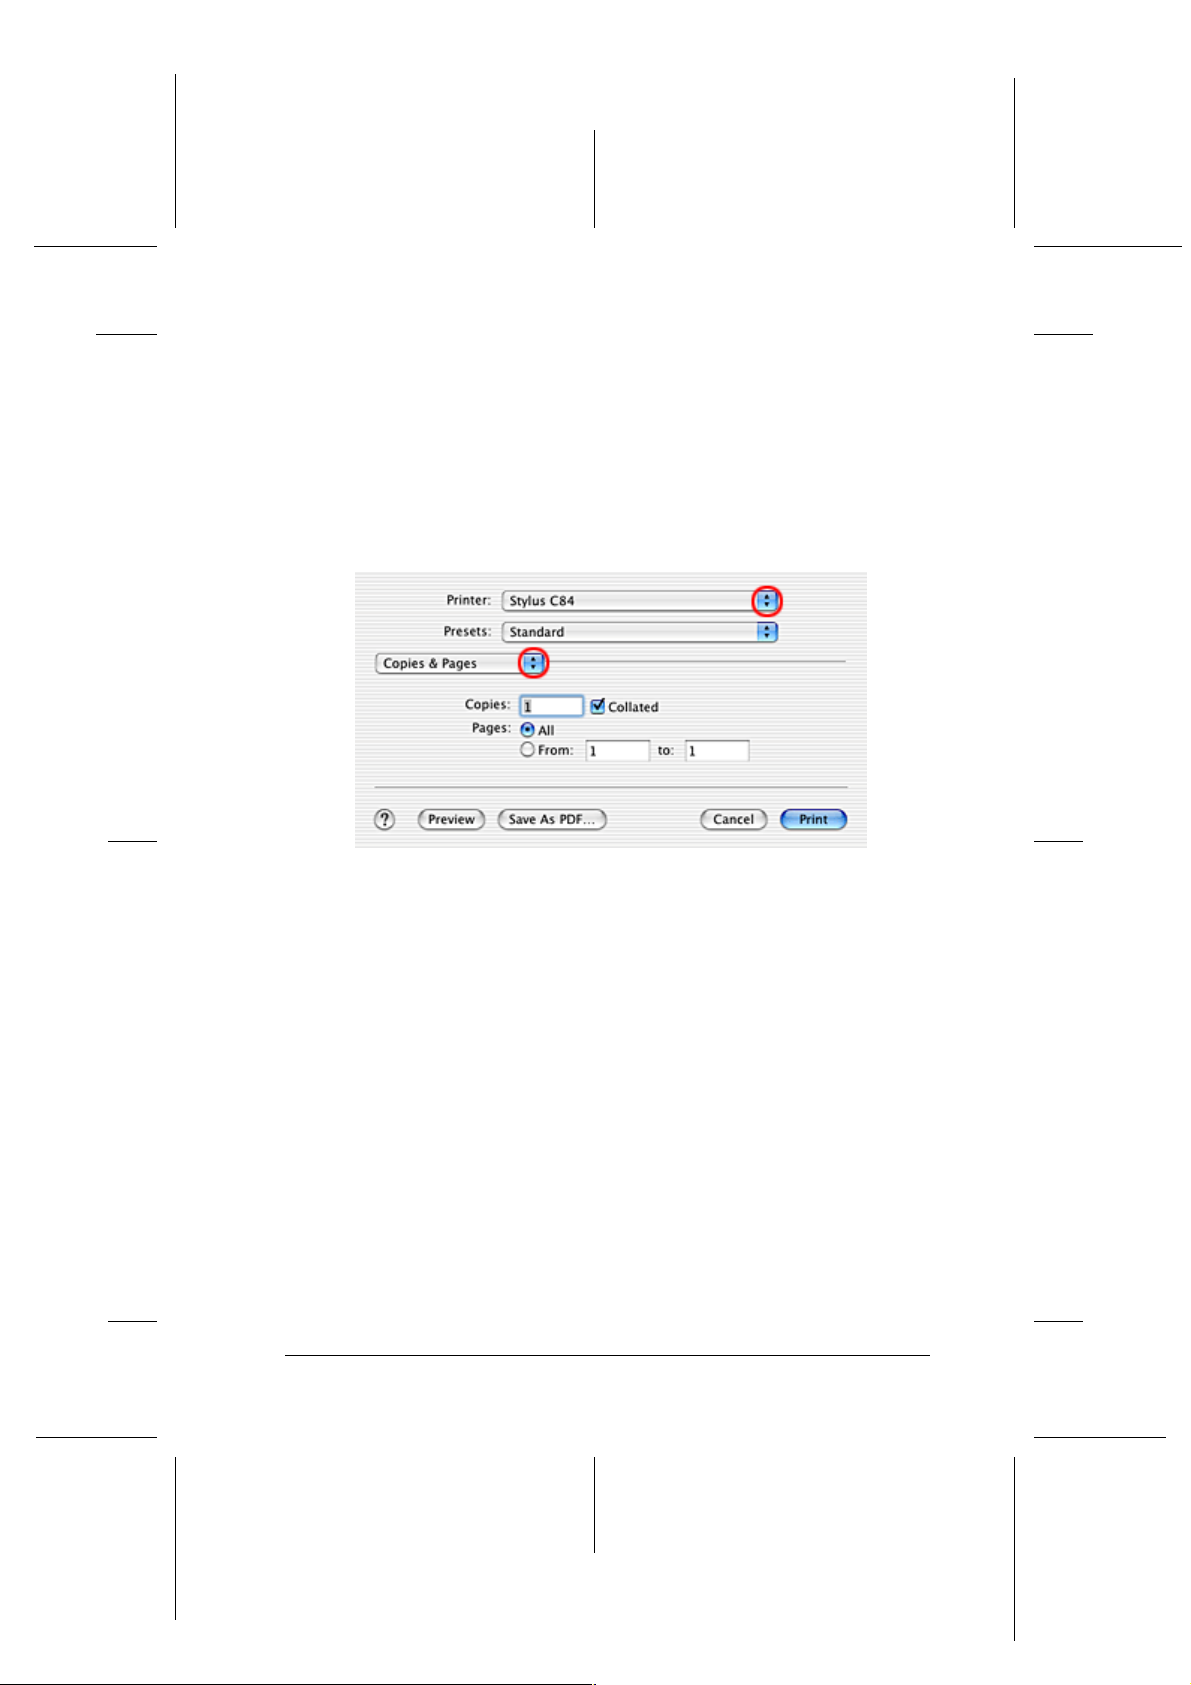
6. Access the Print dialog box.
“Accessing the Printer Software for Mac OS X”
7. Select Stylus C84 as the Printer setting, then make the Copies
& Pages settings.
26
Page 27
Proof Sign-off:
S.Kodama CRE Kawakami
M.Otsuka
editorname
Note:
❏ Always match the Format for setting in the Page Setup dialog
❏ The Copies & Pages settings available are a standard feature of
R4CD000_UK
html.bk Rev. E
BASIC.FM A5 size
6/10/03
box and the Printer setting in the Print dialog box. Otherwise
the data may not be printed correctly.
Mac OS X. See your operating system’s documentation for
details.
R
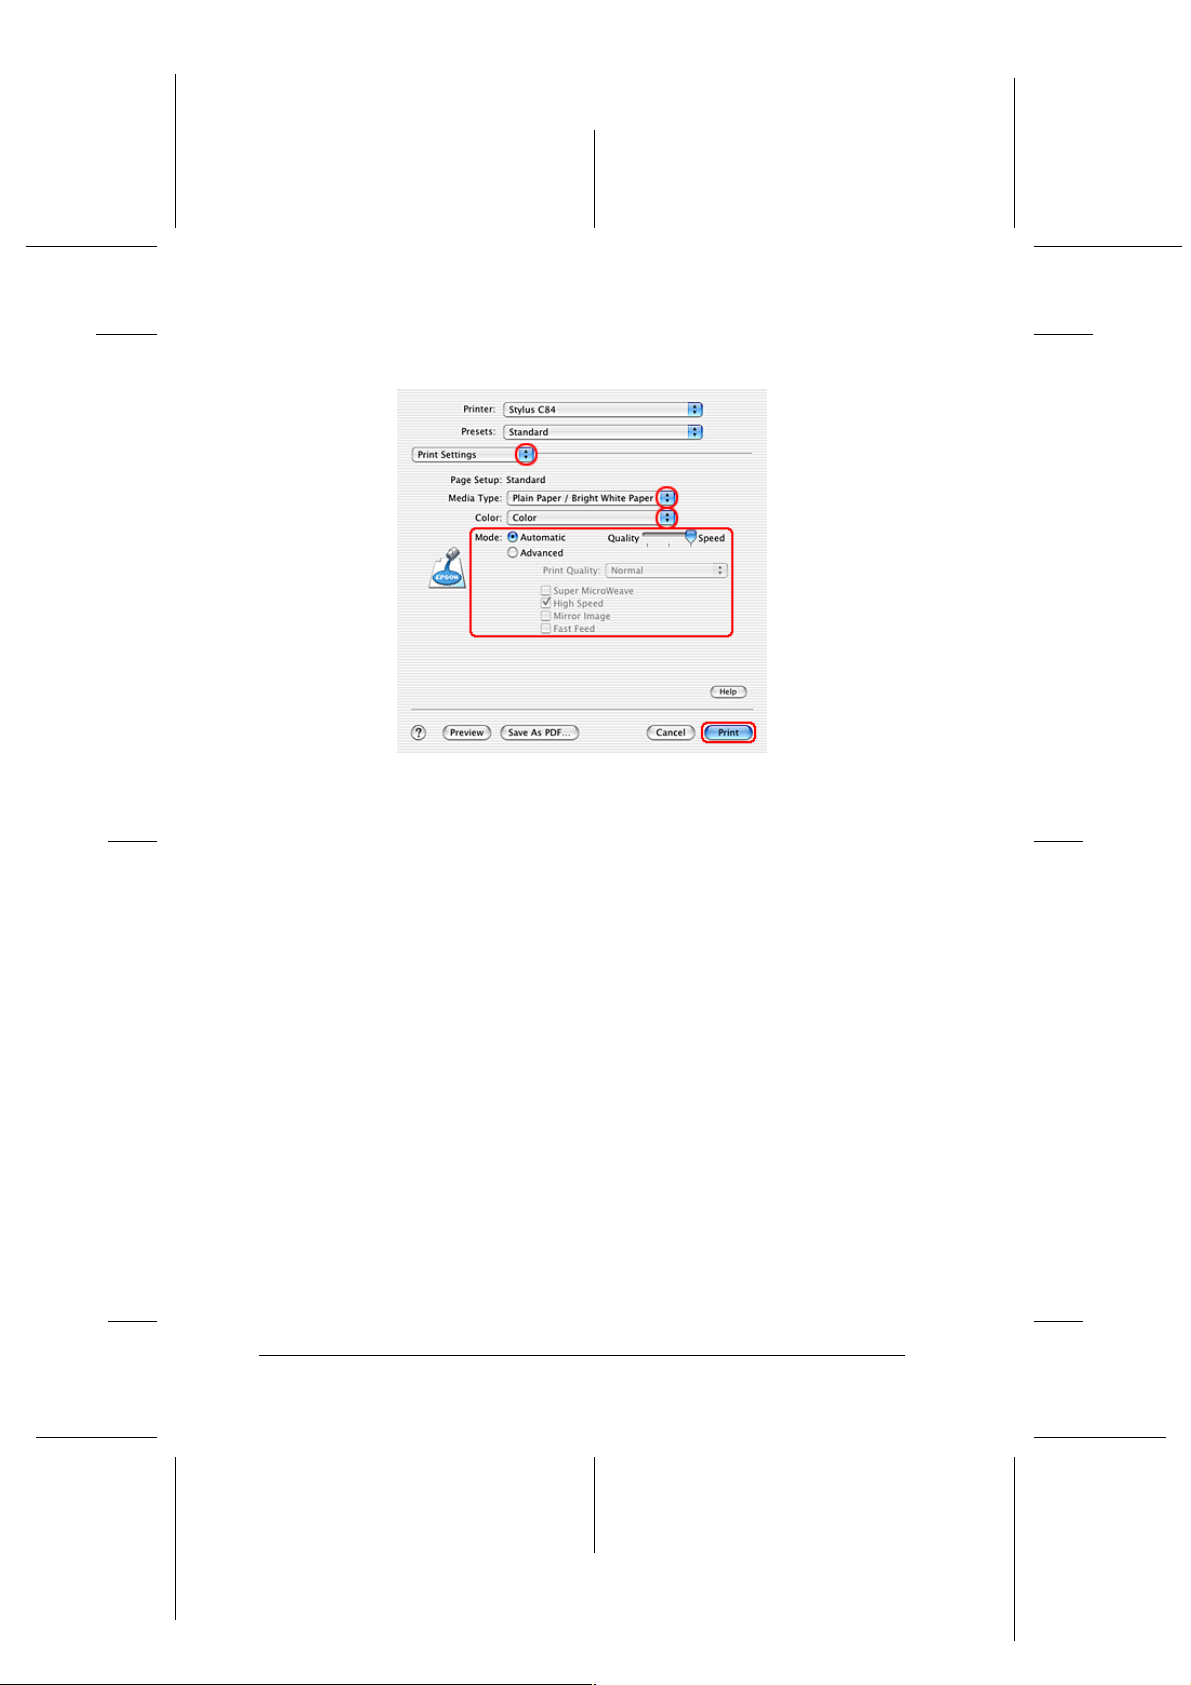
8. Select Print Settings from the pop-up menu.
9. Select Plain Paper/Bright White Paper as the Media Type
setting, then make the appropriate Color and Mode settings.
& See “Print Settings”
27
Page 28
L
R4CD000_UK
html.bk Rev. E
BASIC.FM A5 size
6/10/03
10. Click Print to start printing.
Proof Sign-off:
S.Kodama CRE Kawakami
M.Otsuka
editorname
28
Page 29
Proof Sign-off:
S.Kodama CRE Kawakami
M.Otsuka
editorname
Various Printing Options
Introduction to Various Printing Options
This printer provides you with a variety of different printing
options. You can print in various formats, and you can print using
many different types of paper.
The sections that follow the introduction explain procedures for
each type of printing. Click the title of each printing option to see
more details.
R4CD000_UK
html.bk Rev. E
VARI.FM A5 size
6/10/03
R
“Borderless Printing”
Lets you print without margins on all four sides of the paper.
“Double-Sided Printing”
Lets you print on both sides of the paper.
29
Page 30
L
R4CD000_UK
html.bk Rev. E
VARI.FM A5 size
6/10/03
Note:
This feature is not available with Mac OS X.
Proof Sign-off:
S.Kodama CRE Kawakami
M.Otsuka
editorname
“Fit to Page Printing”
Lets you automatically enlarge or reduce the size of your
document to fit the paper size selected in the printer software.
Note:
This feature is not available with Mac OS X.
30
Page 31

Proof Sign-off:
S.Kodama CRE Kawakami
M.Otsuka
editorname
“Pages Per Sheet Printing”
Lets you print two or four pages on a single sheet of paper.
“Poster Printing”
R4CD000_UK
html.bk Rev. E
VARI.FM A5 size
6/10/03
R
Lets you enlarge material on a single document page to cover 4,
9, or 16 printed sheets of paper, and then make a poster.
Note:
This feature is not available with Mac OS X.
“Watermark Printing”
Lets you print text or an image as a watermark on your printout.
Note:
This feature is not available with Mac OS X.
31
Page 32

L
R4CD000_UK
html.bk Rev. E
VARI.FM A5 size
6/10/03
For example, you can put “Confidential” on an important
document.
Proof Sign-off:
S.Kodama CRE Kawakami
M.Otsuka
editorname
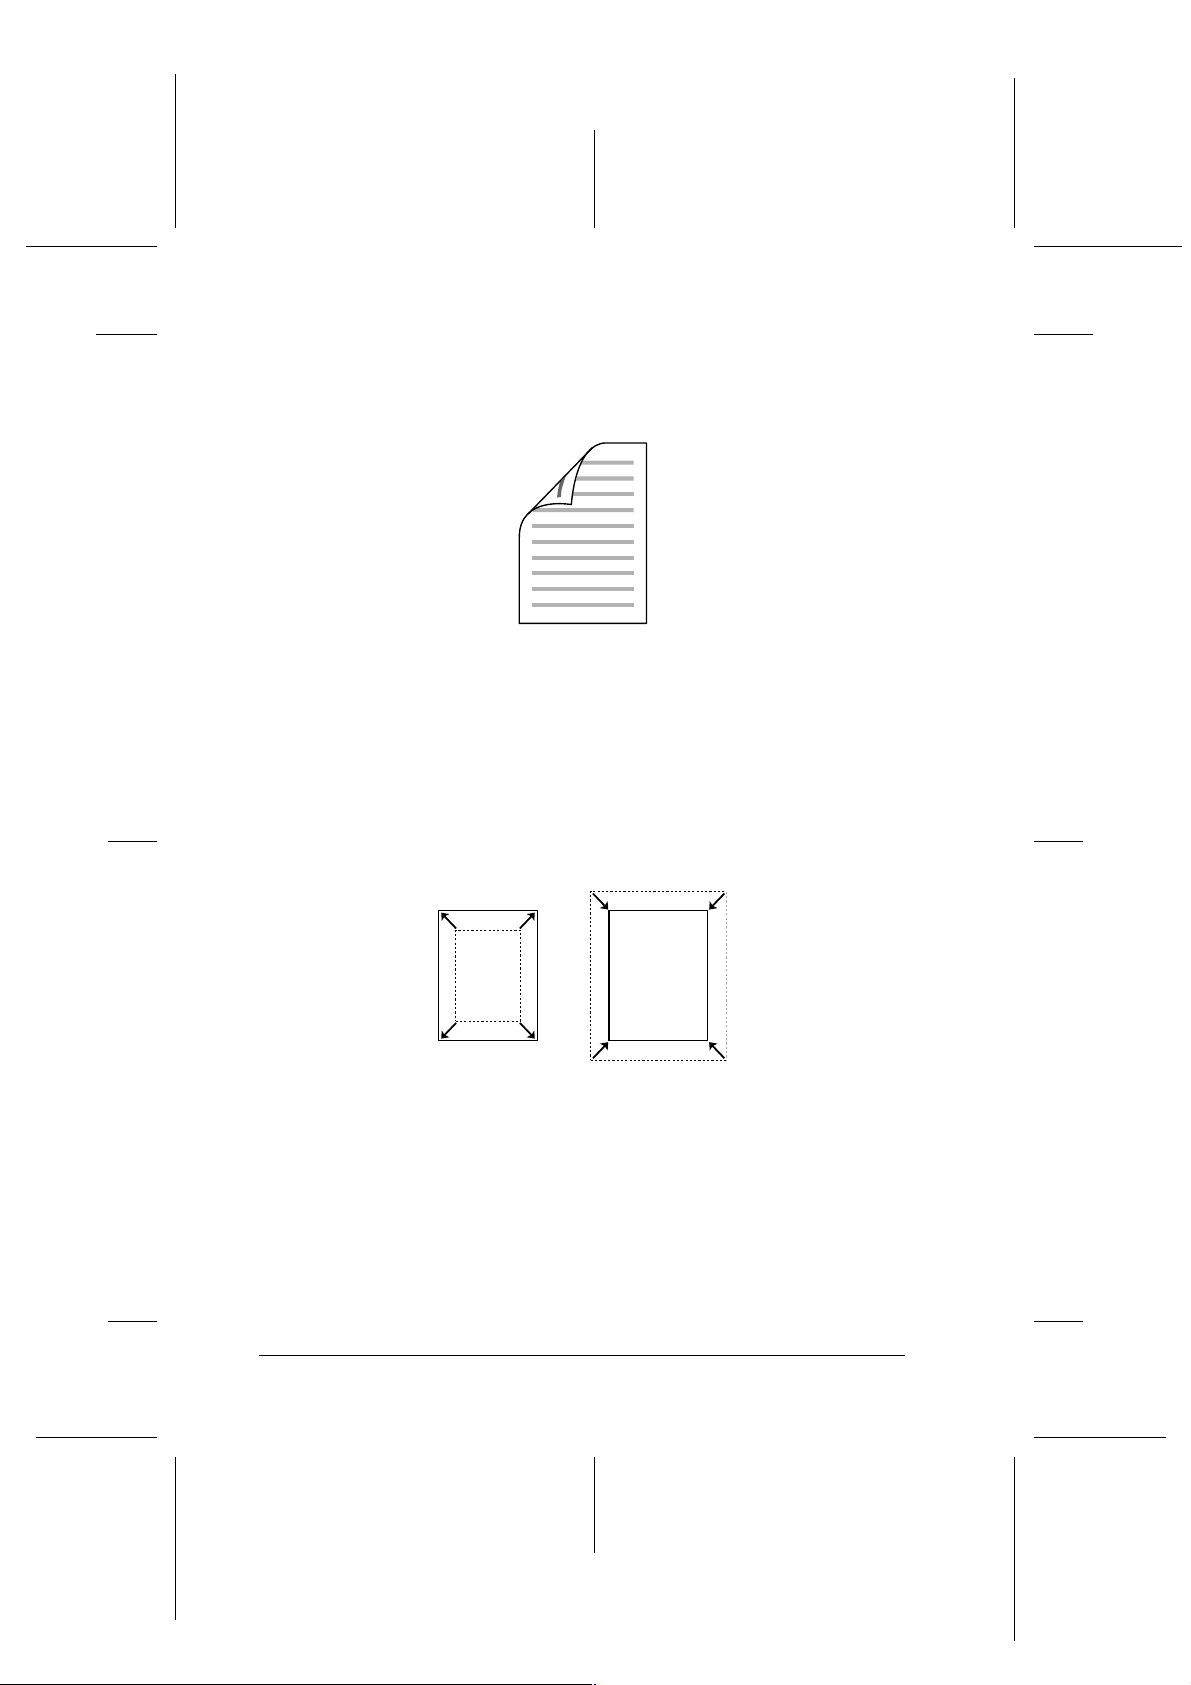
Borderless Printing
This printer allows you to print without margins on all four sides
of the paper. Follow the steps described below for Borderless
printing.
32
Page 33

Proof Sign-off:
S.Kodama CRE Kawakami
M.Otsuka
editorname
Note:
❏ Using EPSON PhotoQuicker included on the CD-ROM is the
easiest and quickest way to create borderless photos with this printer.
EPSON PhotoQuicker also includes a number of features that help
you create outstanding photos. For more details, double-click the
ESC84 Software Guide icon on the desktop to view Photo Print
Software Setup.
❏ EPSON PhotoQuicker is not available for Windows NT 4.0 or Mac
OS X.
❏ This feature is not available for all media and driver settings.
R4CD000_UK
html.bk Rev. E
VARI.FM A5 size
6/10/03
R
Compatible media
You can use the following media with this feature:
DURABrite Photo Paper A4, 100 × 150 mm
DURABrite Ink Glossy Photo Paper Letter, 4 × 6"
Photo Paper A4, Letter, 4 × 6", 100 × 150 mm
Matte Paper - Heavyweight A4, Letter, 8 × 10"
Premium Semigloss Photo Paper A4, Letter
Note:
❏ Printing with this feature takes longer than with normal printing.
❏ Print quality may decline in the top and bottom areas of the printout,
or the area may be smeared when printing on media other than those
listed above. Print a single sheet to check the quality before printing
large jobs.
33
Page 34

L
R4CD000_UK
html.bk Rev. E
VARI.FM A5 size
6/10/03
Preparing the print data
Because this option enlarges the image to a size slightly larger
than the paper size, the portion of the image that extends beyond
the edges of the paper will not be printed.
When creating data in an application for print, you need to adjust
the data to the size of the paper. If your application has margin
settings, make sure they are set to zero before printing.
Loading paper
Proof Sign-off:
S.Kodama CRE Kawakami
M.Otsuka
editorname
After you have selected the media, load it into the printer. Refer
to the following section for details.
“Loading Single Sheets of Paper”
Driver settings for Windows
After you have loaded the media, change your printer driver
settings for Borderless printing.
1. Access the printer driver.
“Accessing the Printer Software for Windows”
2. Click the Main tab, then make the Quality Option setting. See
the following section for details on the Quality Option
settings.
& See “Quality Option”
3. Select the Borderless check box.
4. Make the appropriate Type setting.
34
“Media Type Settings”
Page 35

Proof Sign-off:
S.Kodama CRE Kawakami
M.Otsuka
editorname
5. Make the appropriate Size setting.
R4CD000_UK
html.bk Rev. E
VARI.FM A5 size
6/10/03
R
6. Click OK to close the printer driver settings dialog box.
After finishing all steps above, start printing. Print one test copy
and examine the results before printing an entire job.
Note:
You can control the amount of the image that extends beyond the edges
of the paper during borderless printing. When the Borderless check box
is selected on the Main menu, the Borderless Expansion slider
becomes available on the Page Layout menu.
Driver settings for Mac OS 8.6 to 9.x
After you have loaded the media, change your printer driver
settings for Borderless printing.
1. Access the Page Setup dialog box.
35
Page 36

L
R4CD000_UK
html.bk Rev. E
VARI.FM A5 size
6/10/03
“Accessing the Printer Software for Mac OS 8.6 to 9.x”
2. Make the appropriate Paper Size setting.
3. Select the Borderless check box.
4. Click OK to save the settings and close the Page Setup dialog
box.
Proof Sign-off:
S.Kodama CRE Kawakami
M.Otsuka
editorname
5. Access the Print dialog box.
“Accessing the Printer Software for Mac OS 8.6 to 9.x”
6. Make the appropriate Media Type setting.
“Media Type Settings”
7. Click Print to start printing.
Note:
❏ Print one test copy and examine the results before printing an entire
job.
36
Page 37

Proof Sign-off:
S.Kodama CRE Kawakami
M.Otsuka
editorname
❏ You can control the amount of the image that extends beyond the
edges of the paper during borderless printing. When the Borderless
check box is selected on the Page Setup dialog box, the Borderless
Expansion slider becomes available.
R4CD000_UK
html.bk Rev. E
VARI.FM A5 size
6/10/03
R
Driver settings for Mac OS X
After you have loaded the media, change your printer driver
settings for Borderless printing.
1. Access the Page Setup dialog box.
“Accessing the Printer Software for Mac OS X”
2. Select Stylus C84 (Sheet Feeder - Borderless) as the Format
for setting.
3. Make the appropriate Paper Size and Orientation settings.
37
Page 38

L
R4CD000_UK
html.bk Rev. E
VARI.FM A5 size
6/10/03
4. Click OK to close the Page Setup dialog box.
Proof Sign-off:
S.Kodama CRE Kawakami
M.Otsuka
editorname
5. Access the Print dialog box.
“Accessing the Printer Software for Mac OS X”
6. Select Stylus C84 (Sheet Feeder - Borderless) as the Print
setting, then make the Copies & Pages settings.
Note:
❏ The Copies & Pages settings available are a standard feature of
Mac OS X. See your operating system’s documentation for
details.
38
Page 39

Proof Sign-off:
S.Kodama CRE Kawakami
M.Otsuka
editorname
❏ Always match the Format for setting in the Page Setup dialog
7. Select Print Settings from the pop-up menu.
8. Make the appropriate Media Type, Color, and Mode settings.
& See “Print Settings”
“Media Type Settings”
9. Click Print to start printing.
R4CD000_UK
html.bk Rev. E
VARI.FM A5 size
6/10/03
box and the Printer setting in the Print dialog box. Otherwise
the data may not be printed correctly.
R
Note:
❏ Print one test copy and examine the results before printing an entire
job.
❏ You can control the amount of the image that extends beyond the
edges of the paper during borderless printing.
& See “Expansion”
39
Page 40

L
R4CD000_UK
html.bk Rev. E
VARI.FM A5 size
6/10/03
Double-Sided Printing
There are two types of double-sided printing available. Standard
double-sided printing allows you to print the odd-numbered
pages first. Once these pages are printed, they can be reloaded to
print the even-numbered pages onto the opposite side of the
paper.
Proof Sign-off:
S.Kodama CRE Kawakami
M.Otsuka
editorname
Folded Booklet double-sided printing allows you to make
single-fold booklets. To create it, the pages that appear on the
outside (after the page is folded) are printed first. The pages that
will appear inside the booklet can then be printed after the paper
is reloaded into the printer as shown in the illustration below.
40
Page 41

Proof Sign-off:
S.Kodama CRE Kawakami
M.Otsuka
editorname
R4CD000_UK
html.bk Rev. E
VARI.FM A5 size
6/10/03
R
Single-fold booklet
✽: Binding edge
A booklet can be created by printing pages 1 and 4 on the first
sheet of paper, pages 5 and 8 on the second sheet of paper, and
pages 9 and 12 on the third sheet of paper. After these sheets are
reloaded into the sheet feeder, you can then print pages 2 and 3
on the back of the first sheet of paper, pages 6 and 7 on the back
of the second sheet of paper, and pages 10 and 11 on the back of
the third sheet of paper. The resulting pages can then be folded
and bound together into a booklet.
Note:
❏ This feature is not available with Mac OS X.
❏ This feature is not available when selecting the Borderless check
box on the Main menu (Windows) or in the Page Setup dialog box
(Macintosh).
❏ This feature is not available when the printer is accessed over a
network or is used as a shared printer.
41
Page 42

L
R4CD000_UK
html.bk Rev. E
VARI.FM A5 size
6/10/03
❏ Depending on the media type, stacks of up to 30 sheets can be loaded
into the sheet feeder during double-sided printing.
❏ Only use media types that are suitable for double-sided printing.
Otherwise, the printout quality may deteriorate.
❏ Depending on the media type and the amount of ink used to print
text and images, ink may bleed through to the other side of the paper.
❏ The surface of the paper may be smeared during double-sided
printing.
Proof Sign-off:
S.Kodama CRE Kawakami
M.Otsuka
editorname
Standard double-sided printing for Windows
Follow the steps below to print odd- and even-numbered pages
onto opposite sides of the sheet.
1. Access the printer driver.
“Accessing the Printer Software for Windows”
2. Click the Main tab, then make the Quality Option setting. See
the following section for details on the Quality Option
settings.
& See “Quality Option”
3. Make the appropriate Type setting.
“Media Type Settings”
42
Page 43

Proof Sign-off:
S.Kodama CRE Kawakami
M.Otsuka
editorname
4. Make the appropriate Size setting.
R4CD000_UK
html.bk Rev. E
VARI.FM A5 size
6/10/03
R
5. Click the Page Layout tab, then select the Double-Sided
Printing check box.
6. Click Margins to open the Margins dialog box.
43
Page 44

L
R4CD000_UK
html.bk Rev. E
VARI.FM A5 size
6/10/03
7. Specify the edge of the paper where the binding will be
placed. You can choose Left, Top, or Right.
8. Choose cm or inch as the Unit setting. Then, specify the width
of the binding margin. You can enter any width from 3 mm
to 30 mm, or from 0.12 inches to 1.18 inches.
Note:
The actual binding margin may be different from the specified
settings depending on your application. Experiment with a few
sheets to examine actual results before printing the entire job.
Proof Sign-off:
S.Kodama CRE Kawakami
M.Otsuka
editorname
9. Click OK to return to the Page Layout menu. Then, click OK
to save your settings.
10. Load paper into the sheet feeder, then send the print job from
your application. Instructions for generating the
even-numbered pages will be displayed while the
odd-numbered pages are printed.
“Loading Single Sheets of Paper”
44
Page 45

Proof Sign-off:
S.Kodama CRE Kawakami
M.Otsuka
editorname
11. Follow the on-screen instructions to reload the paper.
R4CD000_UK
html.bk Rev. E
VARI.FM A5 size
6/10/03
R
Note:
❏ The paper may curl during printing due to the amount of ink
used. Should this occur, slightly curl the sheets in the opposite
direction before reloading them into the printer.
❏ Align the sheet stack by tapping its edges against a hard, flat
surface before reloading the stack into the printer.
❏ Follow the instructions provided when reloading the printouts.
Paper jams or improperly placed binding margins may occur if
the printouts are not reloaded correctly.
❏ If a paper jam occurs, refer to the following.
& See “Paper Does Not Feed Correctly”
12. Once the paper is reloaded, click Resume to print the
even-numbered pages.
Standard double-sided printing for Macintosh
Follow the steps below to print odd- and even-numbered pages
onto opposite sides of the sheet.
1. Access the Page Setup dialog box.
45
Page 46

L
R4CD000_UK
html.bk Rev. E
VARI.FM A5 size
6/10/03
“Accessing the Printer Software for Mac OS 8.6 to 9.x”
2. Make the appropriate Paper Size setting.
3. Select the Double-Sided Printing check box.
4. Click Margins.
Proof Sign-off:
S.Kodama CRE Kawakami
M.Otsuka
editorname
5. Specify the edge of the paper where the binding will be
placed. You can choose Left, Top, or Right.
6. Specify the width of the binding margin in the text box. You
can enter any width from 0.12 inch to 1.18 inch or from 0.3 cm
to 3.0 cm.
Note:
The actual binding margin may be different from the specified
settings depending on your application. Experiment with a few
sheets to examine actual results before printing the entire job.
46
Page 47

Proof Sign-off:
S.Kodama CRE Kawakami
M.Otsuka
editorname
7. Click OK to return to the Page Setup dialog box. Then, click
OK to save your settings and close the dialog box.
8. Access the Print dialog box.
R4CD000_UK
html.bk Rev. E
VARI.FM A5 size
6/10/03
R
“Accessing the Printer Software for Mac OS 8.6 to 9.x”
9. Make the appropriate Media Type setting.
“Media Type Settings”
10. Load paper into the sheet feeder, then click Print to start
printing. Instructions for generating the even-numbered
pages will be displayed while the odd-numbered pages are
printed.
“Loading Single Sheets of Paper”
47
Page 48

L
R4CD000_UK
html.bk Rev. E
VARI.FM A5 size
6/10/03
11. Follow the on-screen instructions to reload the paper.
Proof Sign-off:
S.Kodama CRE Kawakami
M.Otsuka
editorname
Note:
❏ The paper may curl during printing due to the amount of ink
used. Should this occur, slightly curl the sheets in the opposite
direction before reloading them into the printer.
❏ Align the sheet stack by tapping its edges against a hard, flat
surface before reloading the stack into the printer.
❏ Follow the instructions provided when reloading the printouts.
Paper jams or improperly placed binding margins may occur if
the printouts are not reloaded correctly.
❏ If a paper jam occurs, refer to the following.
& See “Paper Does Not Feed Correctly”
12. Once the paper is reloaded, click Resume to print the
even-numbered pages.
Folded Booklet double-sided printing for
Windows
Use the following steps to create a folded booklet as described in
the beginning of this section.
48
Page 49

Proof Sign-off:
S.Kodama CRE Kawakami
M.Otsuka
editorname
1. Access the printer driver.
“Accessing the Printer Software for Windows”
2. Click the Main tab, then make the Quality Option setting. See
the following section for details on the Quality Option
settings.
& See “Quality Option”
3. Make the appropriate Type setting.
“Media Type Settings”
R4CD000_UK
html.bk Rev. E
VARI.FM A5 size
6/10/03
R
4. Make the appropriate Size setting.
5. Click the Page Layout tab and select the Double-Sided
Printing check box. Then, select the Folded Booklet check
box.
49
Page 50

L
R4CD000_UK
html.bk Rev. E
VARI.FM A5 size
6/10/03
6. Click Margins to open the Margins dialog box.
Proof Sign-off:
S.Kodama CRE Kawakami
M.Otsuka
editorname
7. Specify the edge of the paper where the binding will be
placed. You can choose Left, Top, or Right.
Note:
When Portrait is selected as the Orientation setting on the Main
menu, the Left or Right binding positions are available. The Top
binding position is available when Landscape is selected as the
Orientation setting.
50
Page 51

Proof Sign-off:
S.Kodama CRE Kawakami
M.Otsuka
editorname
8. Choose cm or inch as the Unit setting. Specify the width of
the binding margin. You can enter any width from 3 mm to
30 mm, or from 0.12 inches to 1.18 inches. The specified
margin width will be used on both sides of the fold. For
example, if a 10-mm margin is specified, a 20-mm margin will
be inserted (a margin of 10 mm will be placed on each side of
the fold).
R4CD000_UK
html.bk Rev. E
VARI.FM A5 size
6/10/03
R
✽: Folding edge
✽✽: Margin
Portrait Landscape
51
Page 52

L
R4CD000_UK
html.bk Rev. E
VARI.FM A5 size
6/10/03
9. Click OK to return to the Page Layout menu. Then, click OK
to save your settings.
10. Load paper into the sheet feeder, then send the print job from
your application. Instructions for printing the inside pages
will be displayed while the outside pages are printed.
“Loading Single Sheets of Paper”
11. Follow the on-screen instructions to reload the paper.
Proof Sign-off:
S.Kodama CRE Kawakami
M.Otsuka
editorname
Note:
❏ The paper may curl during printing due to the amount of ink
used. Should this occur, slightly curl the sheets in the opposite
direction before reloading them into the printer.
❏ Align the sheet stack by tapping its edges against a hard, flat
surface before reloading the stack into the printer.
❏ Follow the instructions provided when reloading the printouts.
Paper jams or improperly placed binding margins may occur if
the printouts are not reloaded correctly.
❏ If a paper jam occurs, refer to the following.
& See “Paper Does Not Feed Correctly”
12. Once the paper is reloaded, click Resume to print the inside
pages.
52
Page 53

Proof Sign-off:
S.Kodama CRE Kawakami
M.Otsuka
editorname
13. Once printing is complete, fold the sheets and bind them
together using a stapler or other binding method.
Folded Booklet double-sided printing for
Macintosh
Use the following steps to create a folded booklet as described in
the beginning of this section.
1. Access the Page Setup dialog box.
R4CD000_UK
html.bk Rev. E
VARI.FM A5 size
6/10/03
R
“Accessing the Printer Software for Mac OS 8.6 to 9.x”
2. Make the appropriate Paper Size setting.
3. Select the Double-Sided Printing check box. Then, select the
Folded Booklet check box.
4. Click Margins.
5. Specify the edge of the paper where the binding will be
placed. You can choose Left, Top, or Right.
53
Page 54

L
R4CD000_UK
html.bk Rev. E
VARI.FM A5 size
6/10/03
Note:
When Portrait is selected as the Orientation setting in the Page
Setup dialog box, the Left or Right binding positions are available.
The Top binding position is supported when Landscape is
selected as the Orientation setting.
6. Specify the width of the binding margin in the text box. You
can enter any width from 0.12 inch to 1.18 inch or from 0.3 cm
to 3.0 cm.The specified margin width will be used on both
sides of the fold. For example, if a 0.1-cm margin is specified,
a 0.2-cm margin will be inserted (a margin of 10 mm will be
placed on each side of the fold).
Proof Sign-off:
S.Kodama CRE Kawakami
M.Otsuka
editorname
54
Portrait Landscape
✽: Folding edge
✽✽: Margin
Page 55

Proof Sign-off:
S.Kodama CRE Kawakami
M.Otsuka
editorname
7. Click OK to return to the Page Setup dialog box. Then, click
OK to save your settings and close the dialog box.
8. Access the Print dialog box.
R4CD000_UK
html.bk Rev. E
VARI.FM A5 size
6/10/03
R
“Accessing the Printer Software for Mac OS 8.6 to 9.x”
9. Make the appropriate Media Type setting.
“Media Type Settings”
10. Load paper into the sheet feeder, then click Print to start
printing. Instructions for printing the inside pages will be
displayed while the outside pages are printed.
“Loading Single Sheets of Paper”
55
Page 56

L
R4CD000_UK
html.bk Rev. E
VARI.FM A5 size
6/10/03
11. Follow the on-screen instructions to reload the paper.
Proof Sign-off:
S.Kodama CRE Kawakami
M.Otsuka
editorname
Note:
❏ The paper may curl during printing due to the amount of ink
used. Should this occur, slightly curl the sheets in the opposite
direction before reloading them into the printer.
❏ Align the sheet stack by tapping its edges against a hard, flat
surface before reloading the stack into the printer.
❏ Follow the instructions provided when reloading the printouts.
Paper jams or improperly placed binding margins may occur if
the printouts are not reloaded correctly.
❏ If a paper jam occurs, refer to the following.
& See “Paper Does Not Feed Correctly”
12. Once the paper is reloaded, click Resume to print the inside
pages.
13. Once printing is complete, fold the sheets and bind them
together using a stapler or other binding method.
56
Page 57

Proof Sign-off:
S.Kodama CRE Kawakami
M.Otsuka
editorname
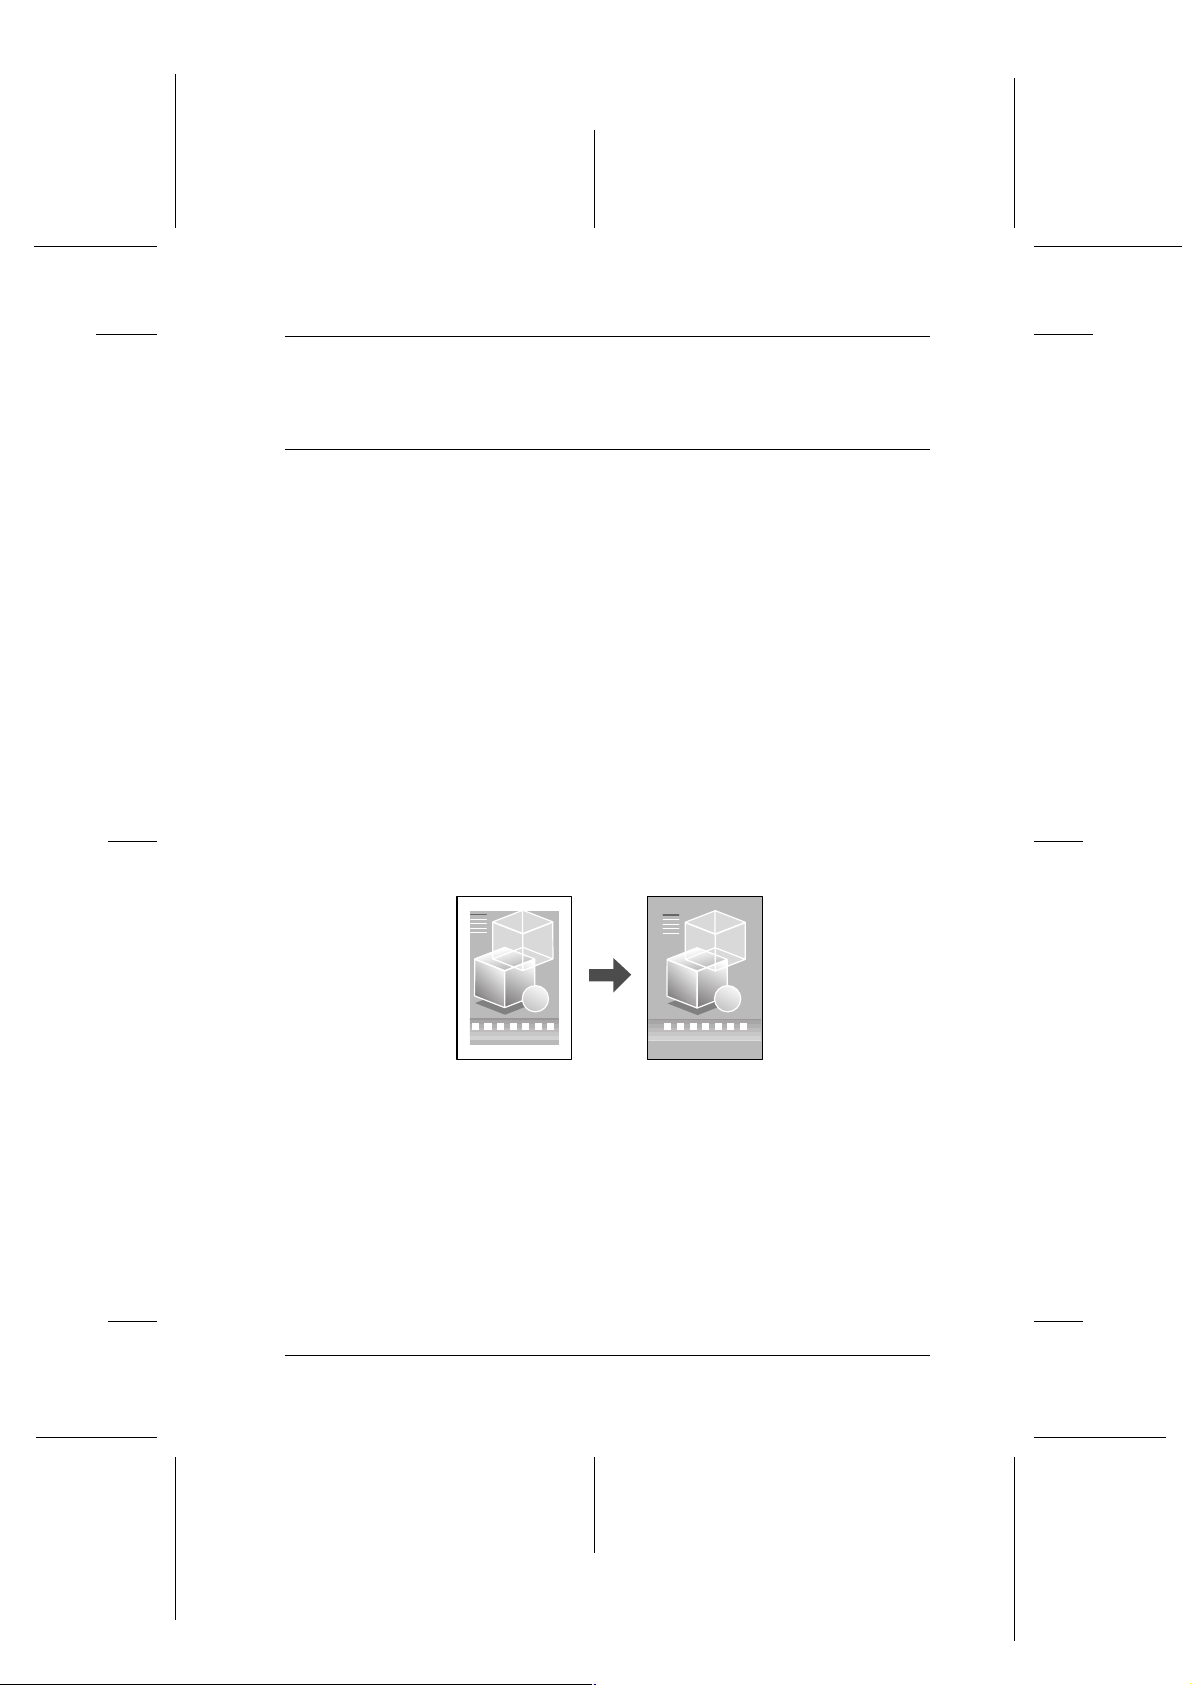
Fit to Page Printing
You can use the Fit to Page printing function when you want to
print, for example, an A4 size document on another size paper.
Fit to Page printing automatically fits images or text you want to
print to the paper size you select in the printer software, or it
allows you to manually resize the image.
R4CD000_UK
html.bk Rev. E
VARI.FM A5 size
6/10/03
R
Note:
❏ This feature is not available with Mac OS X.
❏ This feature is not available when selecting the Borderless check
box on the Main menu (Windows) or in the Page Setup dialog box
(Macintosh).
Loading paper
Load paper into your printer.
“Loading Single Sheets of Paper”
Driver settings for Windows
1. Access the printer driver.
“Accessing the Printer Software for Windows”
57
Page 58

L
R4CD000_UK
html.bk Rev. E
VARI.FM A5 size
6/10/03
2. Click the Main tab, then make the Quality Option setting. See
the following section for details on the Quality Option
settings.
& See “Quality Option”
3. Make the appropriate Type setting.
“Media Type Settings”
4. Make the appropriate Size setting.
Proof Sign-off:
S.Kodama CRE Kawakami
M.Otsuka
editorname
5. Click the Page Layout tab, then select the Reduce/Enlarge
Document check box. You can select the following settings
to change the size of your document.
By Output Paper
Size
By Percentage Allows you to manually reduce or enlarge an
Proportionally enlarges or reduces the size of
your document to make it fit the paper size
selected in the By Output Paper Size list.
image. Click the arrows to select a percentage
between 10 and 400.
58
Page 59

Proof Sign-off:
S.Kodama CRE Kawakami
M.Otsuka
editorname
6. Select the paper size loaded in your printer from the
drop-down list when selecting By Output Paper Size, or use
the arrows to choose a percentage when selecting By
Percentage.
R4CD000_UK
html.bk Rev. E
VARI.FM A5 size
6/10/03
R
7. Click OK to close the printer driver settings dialog box.
After finishing all steps above, start printing.
Driver settings for Mac OS 8.6 to 9.x
1. Access the Page Setup dialog box.
“Accessing the Printer Software for Mac OS 8.6 to 9.x”
2. Make the appropriate Paper Size setting.
59
Page 60

L
R4CD000_UK
html.bk Rev. E
VARI.FM A5 size
6/10/03
3. Click OK to save the settings and close the Page Setup dialog
box.
Proof Sign-off:
S.Kodama CRE Kawakami
M.Otsuka
editorname
4. Access the Print dialog box.
“Accessing the Printer Software for Mac OS 8.6 to 9.x”
5. Make the appropriate Media Type setting.
“Media Type Settings”
6. Click the Layout icon button.
7. Select the Fit to Page check box.
8. Select the paper size loaded in your printer from the Output
Paper Size list.
60
Page 61

Proof Sign-off:
S.Kodama CRE Kawakami
M.Otsuka
editorname
9. Click OK to save the settings and close the Layout dialog box.
R4CD000_UK
html.bk Rev. E
VARI.FM A5 size
6/10/03
R
10. Click Print to start printing.
Pages Per Sheet Printing
Pages Per Sheet printing allows you to print two or four pages on
single sheets of paper.
Note:
This feature is not available when selecting the Borderless check box
on the Main menu (Windows) or in the Page Setup dialog box (Mac OS
8.6 to 9.x).
61
Page 62

L
R4CD000_UK
html.bk Rev. E
VARI.FM A5 size
6/10/03
Loading paper
Load paper into your printer.
“Loading Single Sheets of Paper”
Driver settings for Windows
1. Access the printer driver.
“Accessing the Printer Software for Windows”
Proof Sign-off:
S.Kodama CRE Kawakami
M.Otsuka
editorname
2. Click the Main tab, then make the Quality Option setting. See
the following section for details on the Quality Option
settings.
& See “Quality Option”
3. Make the appropriate Type setting.
“Media Type Settings”
62
Page 63

Proof Sign-off:
S.Kodama CRE Kawakami
M.Otsuka
editorname
4. Make the appropriate Size setting.
R4CD000_UK
html.bk Rev. E
VARI.FM A5 size
6/10/03
R
5. Click the Page Layout tab, select Multi-Page, then select
Pages Per Sheet.
63
Page 64

L
R4CD000_UK
html.bk Rev. E
VARI.FM A5 size
6/10/03
6. Make the following settings for Pages Per Sheet printing.
Proof Sign-off:
S.Kodama CRE Kawakami
M.Otsuka
editorname
2, 4 Prints two or four pages of your document on a
Print Page
Borders
Page Order Allows you to specify the order in which the
single piece of paper.
Prints frames around the pages printed on each
sheet.
pages will be printed on the sheet of paper.
Some settings may be unavailable, depending
on the Orientation setting on the Main menu.
7. Click OK to close the printer driver settings dialog box.
After finishing all of the steps above, start printing.
Driver settings for Mac OS 8.6 to 9.x
1. Access the Page Setup dialog box.
“Accessing the Printer Software for Mac OS 8.6 to 9.x”
2. Make the appropriate Paper Size setting.
3. Click OK to save the settings and close the Page Setup dialog
box.
4. Access the Print dialog box.
64
Page 65

Proof Sign-off:
S.Kodama CRE Kawakami
M.Otsuka
editorname
“Accessing the Printer Software for Mac OS 8.6 to 9.x”
5. Make the appropriate Media Type setting.
“Media Type Settings”
6. Click the Layout icon button.
R4CD000_UK
html.bk Rev. E
VARI.FM A5 size
6/10/03
R
7. Select the Multi-Page check box in the Layout dialog box,
then select Pages per Sheet.
8. Make the following settings for Pages Per Sheet printing.
2 Pages,
4 Pages
Prints two or four pages of your document on a
single piece of paper.
65
Page 66

L
R4CD000_UK
html.bk Rev. E
VARI.FM A5 size
6/10/03
Page Order Allows you to specify the order in which the
pages will be printed on the sheet of paper.
Some settings may be unavailable, depending
on the Orientation setting in the Page Setup
dialog box.
Proof Sign-off:
S.Kodama CRE Kawakami
M.Otsuka
editorname
Print page
frames
Prints frames around the pages printed on each
sheet.
9. Click OK to save the settings and close the Layout dialog box.
10. Click Print to start printing.
Driver settings for Mac OS X
1. Access the Page Setup dialog box.
“Accessing the Printer Software for Mac OS X”
2. Select Stylus C84 as the Format for setting.
3. Make the appropriate Paper Size and Orientation settings.
4. Click OK to close the Page Setup dialog box.
66
Page 67

Proof Sign-off:
S.Kodama CRE Kawakami
M.Otsuka
editorname
5. Open the Print dialog box.
“Accessing the Printer Software for Mac OS X”
6. Select Stylus C84 as the Printer setting, then make the Copies
& Pages settings.
Note:
❏ Always match the Format for setting in the Page Setup dialog
❏ The Copies & Pages settings available are a standard feature of
R4CD000_UK
html.bk Rev. E
VARI.FM A5 size
6/10/03
box and the Printer setting in the Print dialog box. Otherwise
the data may not be printed correctly.
Mac OS X. See your operating system’s documentation for
details.
R
7. Select Layout from the pop-up menu.
8. Make the following settings.
Pages per
Sheet
Layout
Direction
Prints multiple pages of your document on a single
piece of paper. You can choose from 1, 2, 4, 6, 9,
or 16.
Allows you to specify the order in which the pages
will be printed on the sheet of paper.
67
Page 68

L
R4CD000_UK
html.bk Rev. E
VARI.FM A5 size
6/10/03
Border Prints a border around the pages printed on each
sheet. You can choose from None, Single hairline,
Single thin line, Double hairline, or Double thin line.
Note:
The Layout settings available are a standard feature of Mac OS X.
See your operating system’s documentation for details.
Proof Sign-off:
S.Kodama CRE Kawakami
M.Otsuka
editorname
9. Select Print Settings from the pop-up menu.
10. Make the appropriate Media Type, Color, and Mode settings.
& See “Print Settings”
“Media Type Settings”
68
Page 69

Proof Sign-off:
S.Kodama CRE Kawakami
M.Otsuka
editorname
11. Click Print to start printing.
R4CD000_UK
html.bk Rev. E
VARI.FM A5 size
6/10/03
R
Poster Printing
Poster printing allows you to print poster-size images by
enlarging one page to cover several sheets of paper.
Note:
❏ This feature is not available with Mac OS X.
❏ This feature is not available when selecting the Borderless check
box on the Main menu (Windows) or in the Page Setup dialog box
(Macintosh).
69
Page 70

L
R4CD000_UK
html.bk Rev. E
VARI.FM A5 size
6/10/03
Loading paper
Load paper into your printer.
“Loading Single Sheets of Paper”
Driver settings for Windows
1. Access the printer driver.
“Accessing the Printer Software for Windows”
Proof Sign-off:
S.Kodama CRE Kawakami
M.Otsuka
editorname
2. Click the Main tab, then make the Quality Option setting. See
the following section for details on the Quality Option
settings.
& See “Quality Option”
3. Make the appropriate Type setting.
“Media Type Settings”
70
Page 71

Proof Sign-off:
S.Kodama CRE Kawakami
M.Otsuka
editorname
4. Make the appropriate Size setting.
R4CD000_UK
html.bk Rev. E
VARI.FM A5 size
6/10/03
R
71
Page 72

L
R4CD000_UK
html.bk Rev. E
VARI.FM A5 size
6/10/03
5. Click the Page Layout tab, select Multi-Page, then select
Poster Printing. Click the up or down arrow to select 2x2, 3x3,
or 4x4.
Proof Sign-off:
S.Kodama CRE Kawakami
M.Otsuka
editorname
72
Page 73

Proof Sign-off:
S.Kodama CRE Kawakami
M.Otsuka
editorname
6. Click Settings to adjust the way your poster will print. The
Poster Settings dialog box opens.
R4CD000_UK
html.bk Rev. E
VARI.FM A5 size
6/10/03
R
7. Make the following settings.
Print Cutting
Guides
Overlapping
Alignment Marks
Trim Lines Prints border lines on the panels to guide you
Select this check box to turn the cutting guide
options on.
Slightly overlaps the panels and prints alignment
markers so that the panels can be aligned more
precisely.
when trimming the pages.
Note:
If you want to print only a few of the panels without printing the
entire poster, click the panels that you do not wish to print.
8. Click OK to close the Poster Settings dialog box.
After finishing all of the steps above, start printing.
73
Page 74

L
R4CD000_UK
html.bk Rev. E
VARI.FM A5 size
6/10/03
Driver settings for Mac OS 8.6 to 9.x
1. Access the Page Setup dialog box.
“Accessing the Printer Software for Mac OS 8.6 to 9.x”
2. Make the appropriate Paper Size setting.
3. Click OK to save the settings and close the Page Setup dialog
box.
Proof Sign-off:
S.Kodama CRE Kawakami
M.Otsuka
editorname
4. Access the Print dialog box.
“Accessing the Printer Software for Mac OS 8.6 to 9.x”
5. Make the appropriate Media Type setting.
“Media Type Settings”
6. Click the Layout icon button.
74
Page 75

Proof Sign-off:
S.Kodama CRE Kawakami
M.Otsuka
editorname
7. Select the Multi-Page check box in the Layout dialog box,
then select Poster.
R4CD000_UK
html.bk Rev. E
VARI.FM A5 size
6/10/03
R
8. Make the following settings.
1 page covers xx
sheets
Overlapping
Alignment Marks
Trim Lines Prints border lines on the panels to guide
Panel Selection Click the panels you do not need to print,
Specifies how many printed sheets of
paper the enlarged document page will
cover. You can choose from 4, 9, or 16
sheets.
Slightly overlaps the panels and prints
alignment markers so that the panels can
be aligned more precisely.
you when trimming the pages.
then click the OK button to print the
remaining panels.
Note:
If you want to print only a few of the panels without printing the
entire poster, click Panel Selection, click the panels that you do
not wish to print, then click OK.
9. Click OK to save the settings and close the Layout dialog box.
75
Page 76

L
R4CD000_UK
html.bk Rev. E
VARI.FM A5 size
6/10/03
10. Click Print to start printing.
How to make a poster from your printouts
Here is an example of how to make a poster with 2x2 selected
under Poster Printing and Overlapping Alignment Marks
selected as the print cutting guide. Refer to the accompanying
illustrations as well.
Proof Sign-off:
S.Kodama CRE Kawakami
M.Otsuka
editorname
1. Cut off the margin of Sheet 1 along a vertical line through the
center of the top and bottom cross marks, as shown in the
illustration below.
76
Page 77

Proof Sign-off:
S.Kodama CRE Kawakami
M.Otsuka
editorname
2. Place the edge of Sheet 1 on top of Sheet 2 and align the cross
marks, then temporarily tape the two sheets together from the
back side.
3. Cut the taped sheets in two along a vertical line through the
alignment markers (this time, a line to the left of the cross
marks), as shown in the illustration below.
R4CD000_UK
html.bk Rev. E
VARI.FM A5 size
6/10/03
R
4. Align the edges of the paper together using the alignment
markers and tape them from the back side of the paper.
5. Repeat the instructions from step 1 to step 4 to tape Sheets 3
and 4 together.
77
Page 78

L
R4CD000_UK
html.bk Rev. E
VARI.FM A5 size
6/10/03
6. Repeat the instructions from step 1 to step 4 to tape the top
and bottom faces of the paper.
Proof Sign-off:
S.Kodama CRE Kawakami
M.Otsuka
editorname
7. Cut off the remaining margins.
Warning:
Be careful when using sharp tools.
w
78
Page 79

Proof Sign-off:
S.Kodama CRE Kawakami
M.Otsuka
editorname
Watermark Printing
Watermark printing allows you to print a text-based or an
image-based watermark on your document.
R4CD000_UK
html.bk Rev. E
VARI.FM A5 size
6/10/03
R
Note:
❏ This feature is not available with Mac OS X.
❏ This feature is not available when selecting the Borderless check
box on the Main menu (Windows) or in the Page Setup dialog box
(Macintosh).
Loading paper
Load paper into the printer.
“Loading Single Sheets of Paper”
Printing the watermark for Windows
1. Access the printer driver software.
“Accessing the Printer Software for Windows”
79
Page 80

L
R4CD000_UK
html.bk Rev. E
VARI.FM A5 size
6/10/03
2. Click the Main tab, then make the Quality Option setting. See
the following section for details on the Quality Option
settings.
& See “Quality Option”
3. Make the appropriate Type setting.
“Media Type Settings”
4. Make the appropriate Size setting.
Proof Sign-off:
S.Kodama CRE Kawakami
M.Otsuka
editorname
80
Page 81

Proof Sign-off:
S.Kodama CRE Kawakami
M.Otsuka
editorname
5. Click the Page Layout tab, choose the desired watermark
from the Watermark list, then click Settings.
R4CD000_UK
html.bk Rev. E
VARI.FM A5 size
6/10/03
R
6. Specify the necessary settings for the watermark. You can
change the position and size of the watermark by dragging
the image within the preview window at the left of the dialog
box.
7. Click OK to return to the Page Layout menu.
81
Page 82

L
R4CD000_UK
html.bk Rev. E
VARI.FM A5 size
6/10/03
8. Click OK to close the printer driver settings dialog box.
9. Print the data from your application.
Printing the watermark for Mac OS 8.6 to 9.x
1. Access the Page Setup dialog box.
“Accessing the Printer Software for Mac OS 8.6 to 9.x”
2. Make the appropriate Paper Size setting.
Proof Sign-off:
S.Kodama CRE Kawakami
M.Otsuka
editorname
3. Click OK to save the settings and close the Page Setup dialog
box.
4. Access the Print dialog box.
“Accessing the Printer Software for Mac OS 8.6 to 9.x”
5. Make the appropriate Media Type setting.
“Media Type Settings”
82
Page 83

Proof Sign-off:
S.Kodama CRE Kawakami
M.Otsuka
editorname
6. Click the Layout icon button.
7. Select the Watermark check box in the Layout dialog box,
then choose the desired watermark from the Name list.
R4CD000_UK
html.bk Rev. E
VARI.FM A5 size
6/10/03
R
8. Specify the necessary settings for the watermark. You can
change the position and size of the watermark by dragging
the image within the preview window at the left of the dialog
box.
83
Page 84

L
R4CD000_UK
html.bk Rev. E
VARI.FM A5 size
6/10/03
9. Click OK to save the settings and close the Layout dialog box.
Proof Sign-off:
S.Kodama CRE Kawakami
M.Otsuka
editorname
10. Click Print to start printing.
Creating your own watermark for Windows
You can add your own text-based or image-based watermarks to
the watermark list.
84
Page 85

Proof Sign-off:
S.Kodama CRE Kawakami
M.Otsuka
editorname
1. Click Add/Del under Watermark on the Page Layout menu.
The following dialog box appears.
R4CD000_UK
html.bk Rev. E
VARI.FM A5 size
6/10/03
R
2. To use an image file as a watermark, select BMP. Click Browse
to specify the bitmap file you want to use, then click OK. Type
a name for your watermark in the Name text box, then click
Save.
To create a text-based watermark, select Text. Type your text
in the Text text box. The text that you enter will also be used
as the watermark name. If you want to change the watermark
name, type a new name in the Name text box, then click Save.
3. Click OK to return to the Page Layout menu.
85
Page 86

L
R4CD000_UK
html.bk Rev. E
VARI.FM A5 size
6/10/03
4. Click Settings. The following dialog box appears.
Proof Sign-off:
S.Kodama CRE Kawakami
M.Otsuka
editorname
5. Make sure that the appropriate watermark is selected in the
Watermark list, then make Color, Position, Density, Size,
Font, Font Style, and Angle settings. (For details, see online
help.) Your settings are reflected in the display at the left side
of the dialog box.
6. When you finish making settings, click OK.
Creating your own watermark for Mac OS 8.6 to
9.x
You can add your own text-based or image-based watermarks to
the watermark list.
86
Page 87

Proof Sign-off:
S.Kodama CRE Kawakami
M.Otsuka
editorname
1. Click Add/Del beside the Name list. The following dialog box
appears.
2. To use an image file as a watermark, click Add PICT. Specify
the desired image file, then click Open.
R4CD000_UK
html.bk Rev. E
VARI.FM A5 size
6/10/03
R
To create a text-based watermark, click Add Text. Type the
text in the Text text box, select a font and a text style, then click
OK.
87
Page 88

L
R4CD000_UK
html.bk Rev. E
VARI.FM A5 size
6/10/03
3. The image file name or the watermark text appears in the
Mark Name list in the Watermark dialog box. To change the
name of an image watermark, select it from the list, then type
a new name. When a text watermark is selected in the Name
list, you can edit the text or change the font and text style by
clicking Edit Text.
Proof Sign-off:
S.Kodama CRE Kawakami
M.Otsuka
editorname
4. Click OK to add your watermark to the Name list in the
Layout dialog box.
88
Page 89

Proof Sign-off:
S.Kodama CRE Kawakami
M.Otsuka
editorname
Printer Software Settings
For Windows
Printer Software Introduction
Printer driver menus
R4CD000_UK
html.bk Rev. E
SOFTW.FM A5 size
6/10/03
R
The printer software that comes with your printer includes a
printer driver and printer utilities. The printer driver lets you
choose from a wide variety of settings to get the best results from
your printer. The printer utilities help you check the printer and
keep it in top operating condition.
For details on each printer driver setting and utility, see the
following.
& See “Making Settings on the Main Menu”
& See “Making Settings on the Page Layout Menu”
& See “Making Settings on the Maintenance Menu”
Accessing the printer driver
For information on accessing the printer software, see the
following.
“Accessing the Printer Software for Windows”
Note:
The specific features available in the printer software vary depending on
the version of Windows that you are using.
89
Page 90

L
R4CD000_UK
html.bk Rev. E
SOFTW.FM A5 size
6/10/03
Getting more information
Online help provides more information about the printer
software.
& See “Getting Information Through Online Help”
Making Settings on the Main Menu
You can make Quality Option, Paper Options, Print Options,
Orientation, and Advanced settings, and also check the ink levels
on the Main menu. Refer to the appropriate section below.
Proof Sign-off:
S.Kodama CRE Kawakami
M.Otsuka
editorname
Making the Basic settings
90
Page 91

Proof Sign-off:
S.Kodama CRE Kawakami
M.Otsuka
editorname
Quality Option
You can select one of the following quality types.
Draft For economical, high-speed printing.
Text For medium-quality, standard text printing.
Text & Image For high-quality, standard text and graphics printing.
Photo For high-quality photographic printing.
Best Photo For top-quality photographic printing.
R4CD000_UK
html.bk Rev. E
SOFTW.FM A5 size
6/10/03
R
User Defined
(your unique
name)
Paper Options
Borderless Select this check box when you want to print without
Type Select the Type setting that matches the media loaded in
Print using custom settings.
(This option appears when custom settings have been
set in the Advanced menu.)
margins. With this feature, you can print to all four edges
of the paper.
& See “Borderless Printing”
the printer.
The Type setting determines what other settings are
available, so you should always make this setting first.
To find out what media type you are using, find your media
in the Media Type Settings list.
“Media Type Settings”
91
Page 92

L
R4CD000_UK
html.bk Rev. E
SOFTW.FM A5 size
6/10/03
Size Select the paper size that you want to use. You can also
add a custom paper size. To add your own paper size
setting, see the following.
Print Options
PhotoEnhance
Proof Sign-off:
S.Kodama CRE Kawakami
M.Otsuka
editorname
“Making User Defined Paper Sizes for
Windows”
This mode applies image correction settings specially designed
for scanned or digitally captured photos.
Reverse Order
Lets you print your documents in reverse order, starting with the
last page.
Print Preview
Lets you see a preview of your document before printing.
92
Page 93

Proof Sign-off:
S.Kodama CRE Kawakami
M.Otsuka
editorname
When you send a print job to the printer, the Print Preview
window opens, allowing you to make changes before printing.
R4CD000_UK
html.bk Rev. E
SOFTW.FM A5 size
6/10/03
R
The Print Preview toolbar contains several icon buttons to
perform the following functions.
Icon Button name Function
Drag ’n’ Drop Click this button to select and move
Zoom Click this button to enlarge or reduce the
Fit To Screen Click this button to scale the previewed
Maximum
Zoom
Printable Area
On/Off
watermarks.
size of the previewed page.
page so that it fits the size of the window.
This is convenient when you want to see
the entire page at one time.
Click this button to display the previewed
page at the maximum possible zoom
ratio.
Click this button to display or hide the
borderlines which indicate the printable
area. The printer cannot print anything
which is outside of this area.
93
Page 94

L
R4CD000_UK
html.bk Rev. E
SOFTW.FM A5 size
6/10/03
Watermark Click this button to open the Watermark
Proof Sign-off:
S.Kodama CRE Kawakami
M.Otsuka
editorname
dialog box, where you can add
watermarks to the document and
change any of the current watermark
settings.
Reset
Watermark
Settings
Previous Page Click this button to display the page
Next Page Click this button to display the next page
Click this button to return all watermark
settings to what they were when the
EPSON Print Preview dialog box was first
opened.
before the one currently being
previewed.
in the document.
You can also manipulate the document being previewed in the
following ways:
❏ Select and preview individual pages.
❏ Reduce or enlarge the size of the preview window.
❏ Magnify the previewed document. Click Magnify on the
View menu to open the Magnify window, which magnifies
the area of the previewed document that is outlined by the
red box. By dragging the red box, you can change which part
of the document is magnified.
❏ View the individual pages that comprise a poster. The Poster
window opens automatically when you send a print job while
Poster Printing is selected under Multi-Page on the Page
Layout menu. From this window, you can view the individual
panels that make up a poster. You can also open this dialog
box by clicking Poster on the View menu.
❏ Apply watermarks. The watermark that you select will be
displayed on the previewed image.
& See “Watermark Printing”
94
Page 95

Proof Sign-off:
S.Kodama CRE Kawakami
M.Otsuka
editorname
❏ Specify which pages of the document you would like to print.
To add or remove a page, click the page icon in the list at the
left side of the preview window, and then add or remove it
using the commands on the Print Options menu.
After you have previewed the document, click Print to print the
document, or click Cancel to cancel printing.
Orientation
Select Portrait (tall) or Landscape (wide) to change the
orientation of your printout.
R4CD000_UK
html.bk Rev. E
SOFTW.FM A5 size
6/10/03
R
Show Settings
When you click Show Settings, the Current Setting window
appears. To hide the window, click Hide Settings on the Main
menu or Close in the Current Setting window.
Reset Defaults
Click the Reset Defaults button to return the settings to their
factory default values.
95
Page 96

L
R4CD000_UK
html.bk Rev. E
SOFTW.FM A5 size
6/10/03
Advanced
Shows the Advanced menu.
Making the Advanced settings
The settings in the Advanced dialog box give you complete
control over your printing environment. Use these settings to
experiment with new printing ideas or to fine-tune a range of
print settings to meet your individual needs. Once you are
satisfied with your new settings, you can give them a name and
add them to the Custom Settings.
Proof Sign-off:
S.Kodama CRE Kawakami
M.Otsuka
editorname
Note:
❏ Advanced settings are recommended for experienced users only.
Incorrect settings can reduce print speed or quality.
❏ The figures in this procedure are taken from Windows XP. The
Windows Me, 98, 95, 2000, and NT 4.0 figures may differ slightly.
❏ Some settings may not be available, depending on the Paper Source,
Media Type, Color, and Print Quality settings that you make.
❏ The PhotoEnhance feature only affects images, not text or graphs.
For example, if Monochrome is chosen from the Tone list
(available when PhotoEnhance is selected), only the images in a
document will be printed in monochrome. Any colored text or
graphs in the same document will be printed in color.
96
Page 97

Proof Sign-off:
S.Kodama CRE Kawakami
M.Otsuka
editorname
To open the Advanced menu, click Advanced on the Main
menu. If the following Note dialog box appears, click Continue.
R4CD000_UK
html.bk Rev. E
SOFTW.FM A5 size
6/10/03
R
97
Page 98

L
R4CD000_UK
html.bk Rev. E
SOFTW.FM A5 size
6/10/03
Paper & Quality Options
Borderless Select this check box when you want to print without
margins. With this feature, you can print to all four
edges of the paper.
& See “Borderless Printing”
Type Select the Type setting that matches the media
loaded in the printer.
To find out what media type you are using, find your
media in the Media Type Settings list.
Proof Sign-off:
S.Kodama CRE Kawakami
M.Otsuka
editorname
“Media Type Settings”
Note:
The availability of the Print Quality setting depends on
the Media Type setting. Therefore, make the Media
Type setting before you set the Print Quality.
Print Quality Select the print quality from the list.
Size Select the paper size that you want to use. You can
also add a custom paper size. To add your own paper
size setting, see the following.
“Making User Defined Paper Sizes
for Windows”
Orientation
Select Portrait (tall) or Landscape (wide) to change the
orientation of your printout.
Print Options
Reverse order Lets you print your documents in reverse order, starting
with the last page.
98
Page 99

Proof Sign-off:
S.Kodama CRE Kawakami
M.Otsuka
editorname
Fast Feed Increases the speed at which paper is fed into the
R4CD000_UK
html.bk Rev. E
SOFTW.FM A5 size
6/10/03
printer. Fast Feed mode speeds up printing, but also
increases printing noise.
R
High Speed Activates bidirectional printing so your printer prints
Black Ink Only Prints your printout in black and white or grayscale.
Super
MicroWeave
Edge
Smoothing
Print Preview Shows a preview of your document before printing.
both left-to-right and right-to-left. High Speed mode
speeds up printing, but decreases print quality.
Gives you slightly more detail, but print times will be
longer. You can select when selecting Photo RPM from
the Print Quality list under Paper & Quality Option.
Improves the print quality of low-resolution images by
smoothing jagged edges and lines. This setting has no
effect on high-resolution images or on text.
Color Management
Color Controls
For use with the color matching and image enhancement methods
provided by the printer driver. When you select Color Controls,
additional settings appear under Color Management, allowing
you to select a Color Mode setting and adjust the color
enhancement sliders.
Gamma To control image contrast by modifying the midtones
and mid-level grays.
Color Mode EPSON Vivid: Based on your data, enhances color
balance for optimum print results. This setting is
recommended for most print jobs.
Charts and Graphs: Intensifies the colors and lightens
the midtones and highlights of an image. Use this
setting for charts and graphs.
Slide Bars The Color Enhancement slide bars adjust the options
in a range of -25% to +25%. For details on each option,
see the printer driver help.
99
Page 100

L
R4CD000_UK
html.bk Rev. E
SOFTW.FM A5 size
6/10/03
PhotoEnhance
This mode provides a variety of image correction settings that you
can apply to your photos before printing. PhotoEnhance does not
affect your original data.
Note:
❏ This mode is only available when printing 16-, 24-, or 32-bit color
data.
❏ Printing with PhotoEnhance selected may increase the time
required for printing, depending on your computer system and the
amount of data contained in your image.
Proof Sign-off:
S.Kodama CRE Kawakami
M.Otsuka
editorname
Tone:
You can select from the following settings.
Normal Applies EPSON standard tone adjustment to your
document.
Hard Prints in high contrast, which sharpens the printed
Vivid Intensifies the colors and lightens the midtones and
Sepia Applies a sepia tone to your photos.
Monochrome Prints the image in black and white only.
None Makes no tone adjustment to your document.
image.
highlights of an image.
Effect:
You can select from the following settings.
Sharpness Sharpens the overall image, particularly the outlines.
Soft Focus Makes your photos look as if they were taken with a
soft-focus lens.
100
Canvas Makes the image look like a picture painted on canvas.
 Loading...