

Epson BrightLink 450Wi Welcome Kit

Need More Help?
TECHNICAL SUPPORT
PrivateLine
®
1•800•637•7661
BrightLink software, manuals, FAQs, and
more are available at epson.com/support/
brightlinkdownloads (U.S.) or epson.ca/support/
brightlinkdownloads (Canada).
Start Here
This card helps you get started using your new
BrightLink.
1. First use this easy 5-step document.
2. Then pop in the DVD and learn more.
3. Next, visit us at the BrightLink Educator
Resource Center.
4. Need more help? Additional resources are shown
on the right.
DVD containing BrightLink
training videos in this
Welcome Toolkit.
TeamBoard Draw Tips sheet in
this Welcome Toolkit.
BrightLink Quick Guide. A
complete User’s Guide is also
available on the BrightLink CD or
at the BrightLink websites listed
above.
PrivateLine
card, with your individual PIN.
Ask your tech coordinator or call
(562) 276-4394 ( U.S.) or ( 905)
709-3839 (Canada).
®
technical support
BrightLink Educator Resource Center
• Sign up for compimentary webinars
• Watch helpful how-to videos
• Find out about cool free interactive sites
• Book on-site Professional Development courses:
Go to www.epson.com/brightlink (U.S.) or
www.epson.ca/brightlink (Canada)
then click the Educator Resource Center tab.
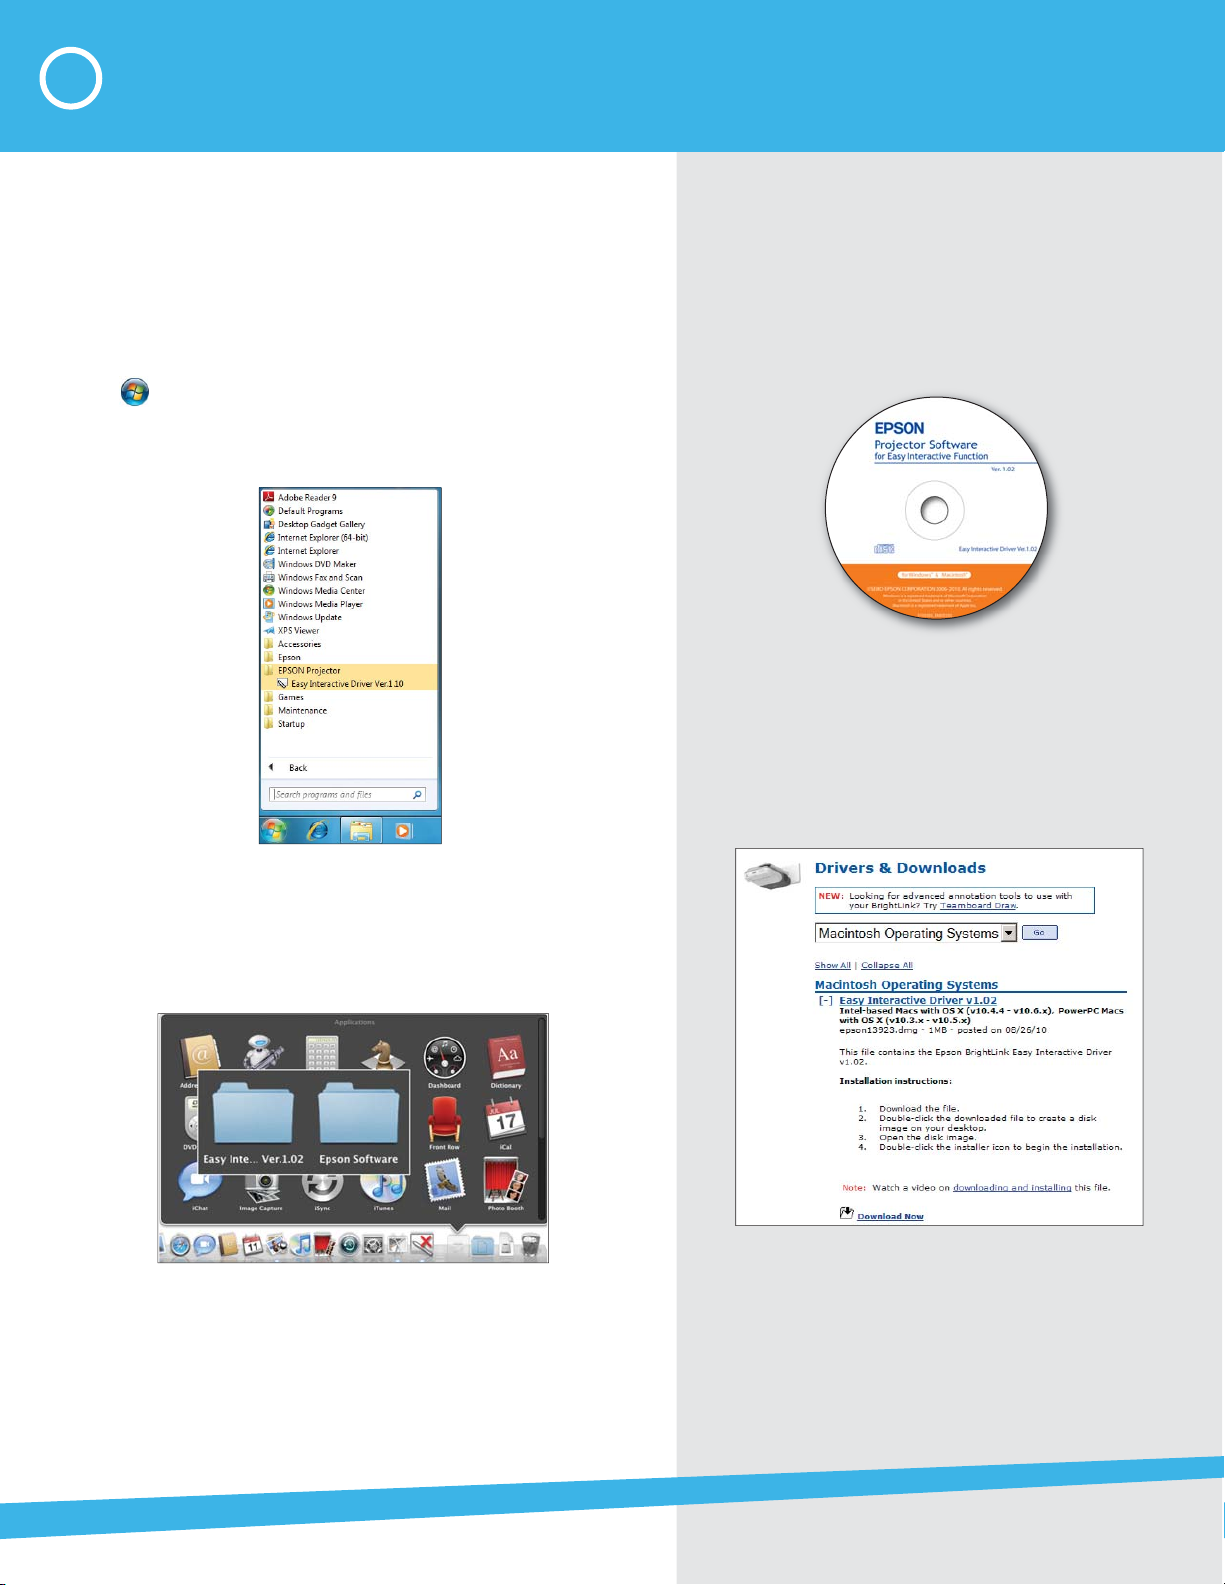
1 Make Sure the Software Is Installed
You need Easy Interactive Driver (EID) to make the pen work with
your projected computer image.
Here’s how to fi nd out if Easy Interactive Driver is already
installed on your computer:
If you are using Windows®:
Select or Start > All Programs or Programs > Epson
Projector > Easy Interactive Driver. If you see Easy Interactive
Driver, the software is installed.
If you need to install Easy Interactive Driver
Do one of the following:
• Use the CD that came with the projector,
labeled “Epson Projector Software for Easy
Interactive Function”
• Download the most up-to-date version from:
epson.com/support/brightlinkdownloads
(U.S.)
epson.ca/support/brightlinkdownloads
(Canada)
You will need Internet access.
If you are using Mac OS® X:
Look for the Easy Interactive Driver folder in the Applications
folder on your hard drive. If you see the Easy Interactive Driver
folder, the software is installed.
If Easy Interactive Driver is not installed, follow the steps in the
next column to install it.
For detailed installation instructions, see the
Quick Guide that came with the projector or
watch the video on your DVD.
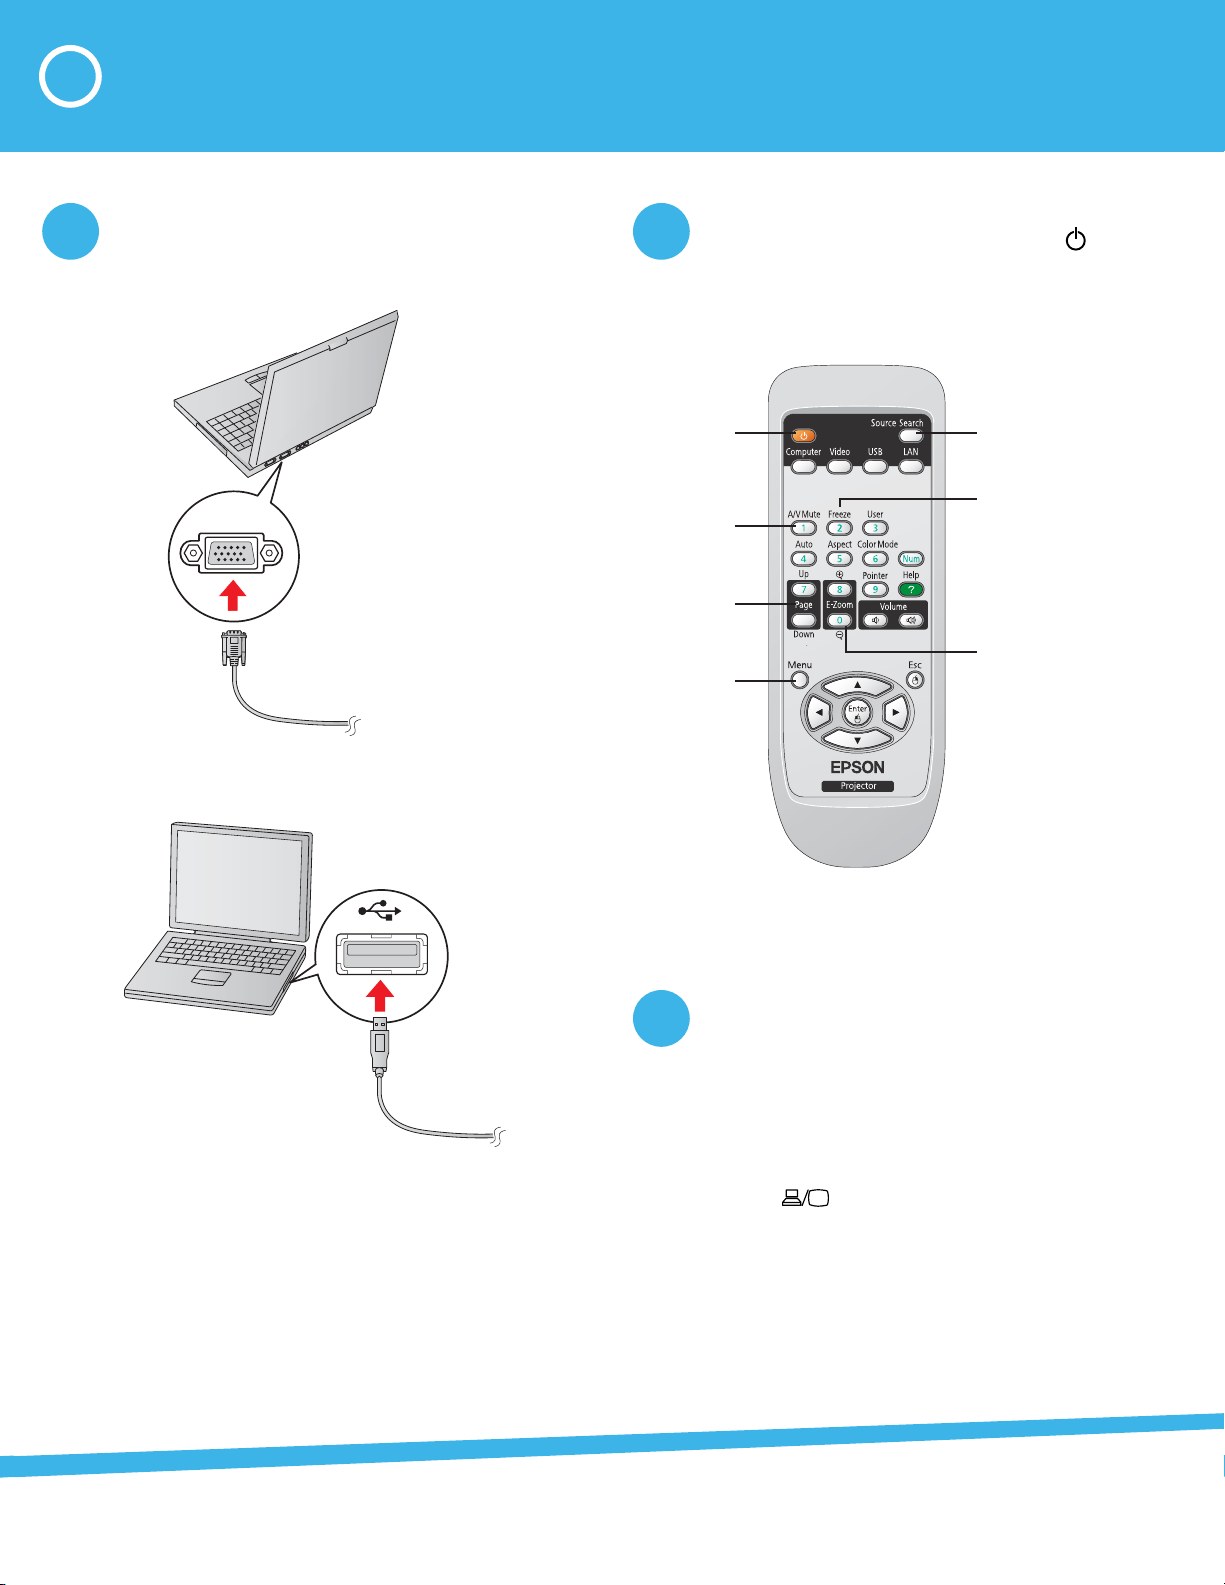
2 Connect Your Computer to the Projector
Connect the VGA computer cable and USB
1
cable to your PC or Macintosh®.
VGA cable
2 Turn on the projector by pressing the power
button on the remote control. You can use other
buttons on the remote to adjust the image.
Turn projector
on/off
Temp or a r ily
turn off image
Page through
documents
Access menu
system for
additional
adjustments
Select from various
image sources
connected to the
projector
Stop video action
Zoom in and out
USB cable
Tip: Want to learn more about using your remote
control? Visit us online at Epson’s Educator
Resource Center for a whole set of short videos.
3 Display an image from your computer. If the
image doesn’t appear, try one of the following:
• On some PC laptops, you may need to hold
down the Fn key on the keyboard and press
F7 or the function key that lets you display on
an external monitor. It may have an icon such
as , or it may be labelled CRT/LCD.
• On a Mac®, you may need to open your
Display Preferences and select Detect
Displays, Show displays in menu bar, or
Mirror Displays.
• Try pressing the Source Search button on
the remote control.
 Loading...