

Page 1

Transparency Unit
The transparency unit (B813182) allows you to scan transparent materials—35 mm
slides, filmstrips, and film up to 8.5 × 11.7 inches (216 × 297 mm) in size. To switch
between scanning transparent materials and normal reflective (paper) documents,
simply insert or remove the reflective document mat that came with the unit. For
instructions on using the reflective document mat, see “Scanning Reflective
Documents” on page 101.
93
Page 2
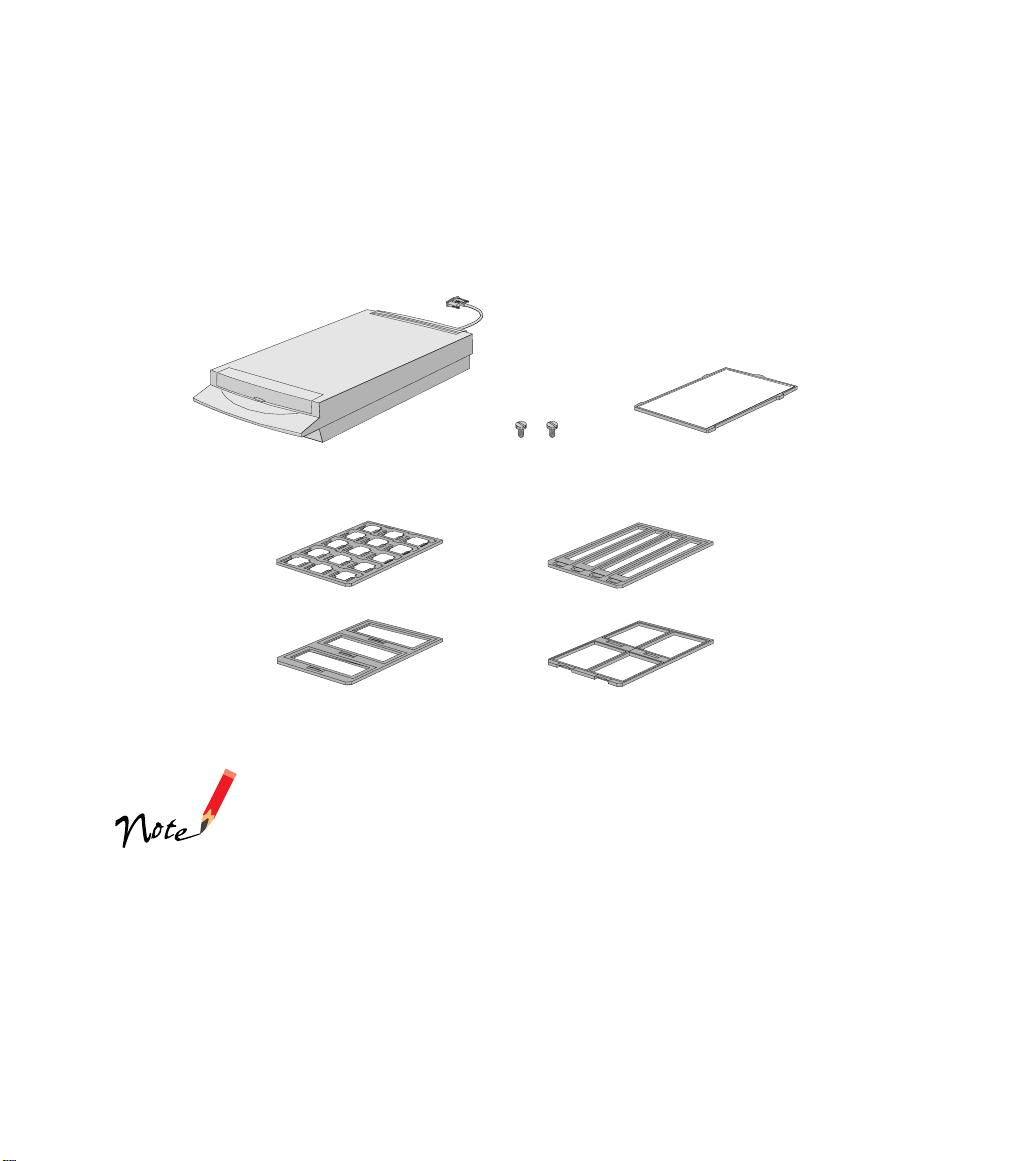
Unpacking the Transparency Unit
Make sure that all of the following items are included in the transparency unit box. If
any items are missing or damaged, contact your EPSON dealer, or contact EPSON at
(562) 276-4382 (in the United States) or (905) 709-3839 (in Canada). Keep all the
packing materials so you can use them for storage when you are not scanning
transparencies.
transparency unit reflective document matscrews
film holders
Use the transparency unit’s pocket to store the reflective
document mat. Don’t store anything else in the pocket.
Page 3

Removing the Shipping Screw
To prevent damage during shipping, a shipping screw is attached to the transparency
unit to secure its lamp assembly. You must remove this screw before using the
transparency unit.
1. Turn the transparency unit so the glass side faces up.
2. Use a Phillips head (cross
head) screwdriver to remove
the shipping screw from the
hole labeled CLAMP, as
shown at right.
3. Install the screw in the
storage hole labeled
STOCK.
Before transporting the scanner,
be sure to reinstall the shipping screw in the hole labeled CLAMP, and slide the
transportation lock at the back of the scanner to the LOCK position.
Installing the Transparency Unit
Follow these steps to install the transparency unit on the scanner.
1. Make sure the scanner is turned off. Then unplug the power cable from the
scanner.
2. Remove the document cover
by grasping the back of the
document cover as shown and
easing the cover up.
3. Make sure the document table
is clean and dust free.
Page 4

4. Position the slots on the
transparency unit’s mounting
bracket over the heads of the
two mounting screws located
at the back of the scanner.
Slide the transparency unit
forward slightly until the two
holes in front of these slots
are aligned with the screw
holes at the back of the
scanner.
5. Insert the two installation
screws that came with the
transparency unit into the screw
holes, then tighten the screws
with a coin.
6. Gently close the transparency
unit.
7. Attach the transparency unit
connector to the OPTION
connector at the back of the
scanner. Tighten the attached
screws to secure the connector.
Page 5

If you haven’t connected the scanner to your computer, continue with “Connecting
the Scanner to Your Computer” on page 25. Then plug the scanner in and turn it on.
See “Step-by-Step Scanning Instructions” on page 57 for scanning instructions. For
more detail on scanning with EPSON TWAIN Pro, see your electronic EPSON
Expression 1600 Software Reference Guide.
Using the Film Guides
You can use the four film guides that came with the TPU to scan 35 mm slides, strips
of 35 mm negative or positive film, 120-size or 220-size format film, and 4 ×
film.
Loading 35 mm film
Follow these steps to load 35 mm positive or
negative film:
1. Place the 35 mm filmstrip guide on a flat
surface and remove the cover from one of
the strip holders.
-inch
5
2. Insert a filmstrip in the holder, and then
close the cover. The glossy (smooth) side of
the film should be facing down, and the
film emulsion layer should be facing up.
3. Repeat steps 1 and 2 for all the film strips
you scan.
Page 6

4. Place the 35 mm filmstrip
guide on the document table,
as shown. Make sure that the
upper and right edges of the
guide are aligned with the
ruled edges of the document
table.
5. Close the TPU and begin
scanning.
Make sure to select TPU for Neg. Film or TPU for Pos. Film as
your Document Source in EPSON TWAIN Pro.
Loading 35 mm slides
Follow these steps to load 35 mm slides:
1. Load slides in the 35 mm slide holder as
shown. Make sure the glossy side of each
slide faces down, and the film emulsion
layer faces up.
2. Position the slide holder on
the document table. The upper
and right edges of the guide
should be aligned with the
ruled edges of the document
table.
3. Close the TPU and begin your
scan.
If you’re using EPSON TWAIN Pro to scan, make sure to
select TPU Pos as your document source.
Page 7

Loading 4 × 5-inch film
×
Follow these steps to load 4
film:
×
1. Place the 4
5-inch film guide on a
flat surface and remove the cover
from one of the film holders.
2. Insert the film in the film holder,
making sure the glossy (smooth)
side of the film faces down and the
film emulsion layer faces up. Then
close the cover.
3. Repeat steps 1 and 2 for all the film
you scan.
×
4. Place the 4
5-inch film guide
on the document table. Make
sure the upper and right edges of
the guide are aligned with the
ruled edges of the document
table.
5-inch
5. Close the TPU and begin your
scan.
If you’re using EPSON TWAIN Pro to scan, make sure to
select TPU Neg or TPU Pos as your document source.
Page 8

Loading 120-size or 220-size (medium format) film
Follow these steps to load 120-size or
220-size format film:
1. Place the 120/220-size film guide on
a flat surface and open the cover for
one of the film holders.
2. Insert the film in the film holder,
making sure the glossy (smooth) side
of the film faces down, and the film
emulsion layer faces up. Then close
the cover.
3. Repeat steps 1 and 2 for all the film
you scan.
4. Place the film guide on the
document table. Align the
upper and right edges of the
guide with the ruled edges of
the document table.
5. Close the TPU and begin your
scan.
If you’re using EPSON TWAIN Pro to scan, make sure to
select TPU Neg or TPU Pos as your document source.
Page 9

Scanning Reflective Documents
To scan reflective documents with the transparency unit installed, insert the reflective
document mat included with the transparency unit.
1. Open the transparency unit.
2. Insert the tabs on the reflective document
mat into the slots on the transparency unit
and slide the mat down until the tabs are
secure.
3. Place your document face down on the
document table and close the transparency
unit.
4. Scan according to instructions in
“Step-by-Step Scanning Instructions” on
page 57.
If there’s a film guide on the document table, remove it
.
 Loading...