

Page 1
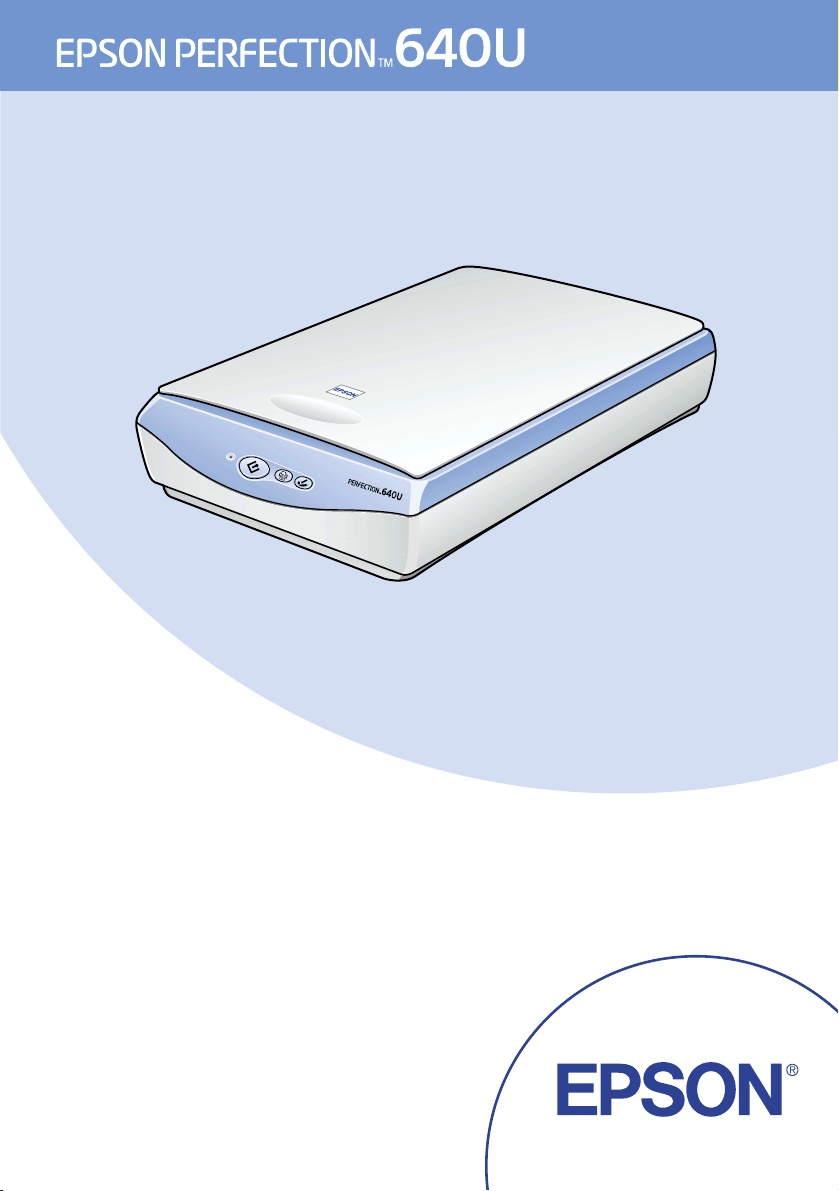
Startup Guide
4012988-00
C01
Page 2

Startup Guide
Startup Guide
Startup GuideStartup Guide
Where to Find Information . . . . . . . . . . . . . . . . . . . . . . . . 2
Safety Instructions . . . . . . . . . . . . . . . . . . . . . . . . . . . . . . 4
Important Safety Instructions . . . . . . . . . . . . . . . . . . . . . . . . . . . 4
Warnings, Cautions, and Notes . . . . . . . . . . . . . . . . . . . . . . . . . 6
For United Kingdom Users . . . . . . . . . . . . . . . . . . . . . . . . . . . . . 7
Setting up the Scanner . . . . . . . . . . . . . . . . . . . . . . . . . . 8
Unpacking the Scanner . . . . . . . . . . . . . . . . . . . . . . . . . . . . . . . . 8
Choosing a Place for the Scanner . . . . . . . . . . . . . . . . . . . . . . . . 9
Getting to Know Your Scanner . . . . . . . . . . . . . . . . . . . . . . . . . 9
Initializing the Scanner . . . . . . . . . . . . . . . . . . . . . . . . . . . . . . . . 10
Connecting the Scanner to Your Computer . . . . . . . . . . . . . . . 12
Installing the Software . . . . . . . . . . . . . . . . . . . . . . . . . . . 14
Installing the Scanner Software for Windows . . . . . . . . . . . . . 14
Installing the Scanner Software for Macintosh . . . . . . . . . . . . 17
Calibrating Your Screen . . . . . . . . . . . . . . . . . . . . . . . . . . . . . . . 19
Using Your Scanner . . . . . . . . . . . . . . . . . . . . . . . . . . . . . 20
Scanning an Image . . . . . . . . . . . . . . . . . . . . . . . . . . . . . . . . . . . . 20
Getting Information from the Online Reference Guide . . . . . 23
English
Page 3

Where to Find Information
Startup Guide (this document)
Describes how to set up and use the scanner. Basic scanning
operations are covered. It also explains how to install and
configure the EPSON scanner software.
Online Reference Guide
Provides basic information about scanning and detailed reference
on settings and functions of EPSON TWAIN and other EPSON
scanner utility software. It includes information on how to
calibrate your system, maintenance and troubleshooting tips,
technical specifications, and customer support information. It
Start/tCopy/sScan)
also describes how to use the buttons (
on the scanner. To access the Online Reference Guide, see
“Getting Information from the Online Reference Guide” on page
23 in this guide.
Information on EPSON Scanner Software (online help)
Provides you with detailed information on EPSON TWAIN. You
can access the online help from the EPSON Scanner folder, or click
Help
the
button in the EPSON TWAIN dialog box.
]
Information on other software
Refer to the respective documentation for the information.
2
Page 4

All rights reserved. No part of this publication may be reproduced, stored in a retrieval
system, or transmitted in any form or by any means, electronic, mechanical, photocopying,
recording, or otherwise, without the prior written permission of SEIKO EPSON
CORPORATION. No patent liability is assumed with respect to the use of the information
contained herein. Neither is any liability assumed for damages resulting from the use of the
information contained herein.
Neither SEIKO EPSON CORPORATION nor its affiliates shall be liable to the purchaser of
this product or third parties for damages, losses, costs, or expenses incurred by purchaser or
third parties as a result of: accident, misuse, or abuse of this product or unauthorized
modifications, repairs, or alterations to this product.
SEIKO EPSON CORPORATION and its affiliates shall not be liable against any damages or
problems arising from the use of any options or any consumable products other than those
designated as Original EPSON Products or EPSON Approved Products by SEIKO EPSON
CORPORATION.
EPSON is a registered trademark of SEIKO EPSON CORPORATION.
IBM and PS/2 are registered trademarks of International Business Machines Corporation.
Apple, Macintosh, Mac, iMac, and Power Macintosh are registered trademarks of Apple
Computer, Inc.
Microsoft and Windows are registered trademarks of Microsoft Corporation in the United
States of America and other countries.
Adobe, PhotoDeluxe, and Acrobat Reader are registered trademarks of Adobe Systems
Incorporated.
English
General Notice: Other product names used herein are for identification purposes only and may be
trademarks of their respective companies.
Copyright © 2000 by SEIKO EPSON CORPORATION, Nagano, Japan.
3
Page 5

Safety Instructions
Important Safety Instructions
Read all these instructions and save them for later reference.
Follow all warnings and instructions marked on the scanner.
❏ Use only the AC adapter model A110B/E that comes with
your scanner. Using any other adapter could cause fire,
electrical shock, or injury.
❏ The AC adapter is designed for use with the scanner with
which it was included. Do not attempt to use it with other
electronic devices unless specified.
❏ Unplug the scanner and the AC adapter before cleaning.
Clean with a damp cloth only. Do not use liquid or aerosol
cleaners.
❏ Do not place the scanner or AC adapter on an unstable
surface, near a radiator or heat source.
❏ Do not use the scanner or AC adapter near water, outdoors,
or handle either device with wet hands.
❏ Use only the type of power source indicated on the AC
adapter's label, and always supply power directly from a
standard domestic electrical outlet.
❏ Connect all equipment to properly grounded electrical
outlets. Avoid using outlets on the same circuit as
photocopiers or air control systems that regularly switch on
and off.
❏ Do not let the power cord become damaged or frayed.
4
Page 6

❏ If you use an extension cord with the scanner, make sure the
total ampere rating of the devices plugged into the extension
cord does not exceed the cord's ampere rating. Also, make
sure the total ampere rating of all devices plugged into the
electrical outlet does not exceed the electrical outlet's ampere
rating.
❏ Except as specifically explained in the scanners guides, do not
attempt to service the scanner and the power cord yourself.
❏ Never disassemble, modify, or attempt to repair the scanner
and the AC adapter.
❏ Unplug the scanner and refer servicing to qualified service
personnel under the following conditions:
If the power cord or plug is damaged.
If liquid has entered the scanner.
If the scanner has been dropped or the case damaged.
If the scanner does not operate normally or exhibits a distinct
change in performance. (Do not adjust controls that are not
covered by the operating instructions.)
English
❏ If you plan to use the scanner in Germany, observe the
following:
To provide adequate short-circuit protection and
over-current protection for this scanner, the building
installation must be protected by a 10 or 16 amp circuit
breaker.
❏ If you are not going to use the scanner, be sure to unplug the
AC adapter from the electrical outlet.
❏ Beware of electrical shock hazards.
❏ Do not insert objects into any openings as they may touch
dangerous voltage points or short out parts.
5
Page 7

❏ Do not expose to water or excess humidity.
❏ Do not place multiple loads on the electrical outlet.
❏ Be sure your AC power cord meets the relevant local safety
standards.
❏ Never insert or disconnect the power plug with wet hands.
❏ Power-supply cords should be protected from abrasion, cuts,
crimping and kinking. Be sure to place your cords to avoid
any damage. Do not place objects on top of the power cord
and the AC adapter or allow the power cord to be stepped on
or run over. You should take special care to try to keep the
power cord straight at the ends and the points where it enters
and leaves the transformer.
❏ Keep out of reach of children.
Warnings, Cautions, and Notes
Warnings must be followed carefully to avoid bodily injury.
w
Cautions must be observed to avoid damage to your equipment.
c
Notes contain important information and useful tips on the operation
of your scanner.
6
Page 8

For United Kingdom Users
The following safety information applies to the AC adapter.
Safety information
English
Warning:
w
As the colours of the wires in the mains lead of this appliance may
not correspond with the coloured markings identifying the
terminals in your plug, proceed as follows:
The blue wire must be connected to the terminal in the plug
marked with the letter N.
The brown wire must be connected to the terminal in the plug
marked with the letter L.
If damage occurs to the plug, replace the cord set or consult a
qualified electrician.
Replace fuses only with a fuse of the correct size and rating.
appliance voltage corresponds to the supply voltage.
Important: The wires in the mains lead fitted to this appliance
are coloured in accordance with the following code:
Blue — Neutral
Brown — Live
Refer to the rating plate for voltage and check that the
7
Page 9

Setting up the Scanner
Unpacking the Scanner
When you unpack your EPSON Perfection 640U, make sure the
following parts are included and not damaged. If you find any
missing or damaged items, contact your EPSON dealer
immediately. (Your EPSON Perfection 640U also comes shipped
with CD-ROMs which contain the driver software to run your
scanner, along with other items necessary to use the scanner.)
scanner
Note:
❏ The AC power cord packed with your adapter is designed to match
the voltage of the country of purchase.
❏ You can use the stand to hold the scanner. For details, see
“Maintenance and Troubleshooting” in your Online Reference
Guide.
stand
USB interface cableAC adapterpower cord
8
Page 10

Choosing a Place for the Scanner
Follow the guidelines below when selecting a location for your
scanner:
❏ Place the scanner close enough to the computer for the
interface cable to reach it easily.
❏ Place the scanner and the AC adapter near an electrical outlet
where the power cord can be easily unplugged.
Note for French-speaking users:
Installez le scanner et l'adapteur près d'une prise électrique
permettant de dé brancher facilement le cordon d'alimentation.
❏ Allow space behind the scanner for the cables.
❏ Keep the scanner away from direct sunlight and strong light
sources.
❏ Avoid places subject to shocks and vibrations.
English
Getting to Know Your Scanner
The scanner has three buttons and one indicator light.
light
Start button
Copy button
Scan button
9
Page 11

Buttons
Button Function
Start Scans and sends the captured image to an assigned
]
Copy Scans and sends the captured image to a copy utility in
t
Scan Scans and sends the captured image to PhotoDeluxe®.*
s
* Before using this feature, make sure you have installed, required software.
See your Online Reference Guide for more details.
application in a single step.*
EPSON SMART PANEL.*
Light
Color Indicator
Green
Red
Status
On Scanner is ready to scan.
Flashing Scanning is in progress.
On Error. See your Online Refer ence Guide.
Flashing
Meaning
Scanner is being initialized.
Initializing the Scanner
Before connecting the scanner to your computer, follow the steps
below to make sure that the scanner is operating properly.
1. Place the scanner on a flat, stable surface.
2. Slide the transportation lock to the right and then connect the
AC adapter to the DC inlet on the back of the scanner.
10
Page 12

3. Connect the AC power cord packed with your scanner to the
AC adapter supplied with your scanner.
DC inlet transportation lock
4. Plug the other end into an electrical outlet.
Caution:
c
5. Make the fluorescent lamp on the carriage turns on, and the
carriage moves slightly.
If the label on the AC adapter does not show the correct
voltage for your country, contact your dealer. Do not plug
in the power cord.
English
The fluorescent lamp and indicator light stay on, meaning the
scanner has completed initialization.
6. Unplug the scanner.
Caution:
c
Whenever you unplug the scanner, wait at least 10 seconds before
plugging it back in.
11
Page 13

Connecting the Scanner to Your Computer
Make sure that your system meets the requirements. (See
“Technical Specifications” in your Online Reference Guide.) Then
connect the scanner to your computer or USB hub as follows:
Note for Macintosh users:
Be sure to install the scanner software before connecting the scanner to
your computer. See “Installing the Software” on page 14 for details.
Note:
If you connect the scanner through more than one hub, your system may
not work properly. In this case, try connecting the scanner directly to
the computer’s USB port. Also, your system may not work properly if
you use a USB cable other than that supplied by EPSON.
1. Connect one end of the cable (Type B) to the USB port on the
back of the scanner.
USB interface connector
2. Connect the other end of the cable (Type A) to the USB port
on your computer, or USB hub.
12
Page 14

Note:
❏ USB cables enable you to connect the scanner whether your
computer is on or off. If you connect the scanner while your
computer is on, the “Add New Hardware Wizard” dialog box (for
Windows) or a message (for Macintosh) appears to prompt you to
install the scanner driver. Follow the instructions “Installing the
Software” on page 14 to install the scanner driver.
❏ Connect the USB cable to your computer, then install or start the
scanner software. Do not connect or disconnect the USB cable while
the scanner software is running.
❏ Make sure no other interface is used.
English
Note for Macintosh users:
If you connect the scanner while your Macintosh
®
is on, a message
appears telling you that the scanner driver needs to be installed
®
(Mac OS
scanner driver from the Internet (Mac OS
OK
(Mac OS
8.X), or a message appears to prompt you to download the
8.X) or
Cancel
(Mac OS 9) and then insert the EPSON
9). When this happens, click
Scanner Software CD in the CD-ROM drive. Then follow the
instructions “Installing the Scanner Software for Macintosh” on page
17 to install the scanner software.
13
Page 15

Installing the Software
Installing the Scanner Software for Windows
After connecting the scanner to your PC, install the scanner
software (EPSON TWAIN) from the CD-ROM.
Note:
❏ If the scanner software is already installed and you are upgrading
your system to Windows
upgrade, and then re-install it using the same steps described in this
section.
❏ Screen displays of Windows 98 are used to represent all versions of
Windows.
1. Make sure that the scanner is plugged in and on.
2. Turn on the PC, and start Windows.
Note:
You do not necessarily have to follow steps 1 and 2 above in that
order. USB cables enable you to connect or remove the scanner to or
from your PC easily, regardless of whether your PC and/or scanner
are on or off.
®
2000, be sure to uninstall it before the
3. When the Add New Hardware Wizard dialog box appears,
insert the scanner software CD in the CD-ROM drive, then
Next
click
c
14
.
Caution:
After inserting scanner software CD in the CD-ROM,
“EPSON Software Setup” box could appear on your screen
if CD-ROM AutoRun feature is activated on your computer.
Do not process software setup at this time, close “EPSON
Software Setup” box then follows step 4.
Page 16

4. Select the
(for Windows 98) or the
device
Search for the best driver for your device
option (for Windows 2000), then click
option
Search for a suitable driver for my
Next
.
5. Make sure only the
then proceed to step 6 (for Windows 98 users) or click
(for Windows 2000 users) before proceeding to step 6.
6. Browse and select or type in the CD-ROM drive letter, the
EPSON
Win98
users) folder as the location. Finally, click
7. Follow the instructions on the screen.
For Windows 2000 users:
When the following dialog box appears, click
folder, the folder of your preferred language, and the
(for Windows 98 users) or
Specify a location
Win2000
check box is selected,
Next
(for Windows 2000
Next (OK)
Yes
.
to continue.
English
Note:
If you click No and stop the installation, follow the instructions on
“Maintenance and Troubleshooting” in your Online Reference
Guide.
8. The EPSON Screen Calibration utility automatically starts.
Follow the instructions on the screen. For details, see page 19.
Note:
If the EPSON Screen Calibration utility does not start
automatically, see your Online Reference Guide to calibrate your
screen after installing the scanner software.
15
Page 17

9. When a dialog box similar to the one shown below appears,
Finish
click
Note:
If necessary, restart your PC.
.
Installing application software
10. Double-click the
11. Double-click the CD-ROM drive icon. A dialog box asking for
your preferred language appears. If no dialog box appears,
double-click the
12. Select your preferred language and click OK.
13. When the following dialog box appears, click
My Computer
Cdsetup.exe
icon.
icon.
Add Software
16
.
Page 18

14. From the list of applications, select those you want to install.
Make sure EPSON SMART PANEL for Scanner and Adobe
PhotoDeluxe are selected for installation.
Note:
Install Adobe Acrobat
®
Reader if it is not already installed.
15. Click OK, then follow the instructions on the screen.
The setup program installs the selected applications.
Note:
❏ If you see README files in the application folders on the CD-
ROM, be sure to read them as they contain up-to-date
information on the applications.
❏ The
Scanners and Cameras
icon appears in Control Panel,
after EPSON TWAIN is installed.
Installing the Scanner Software for Macintosh
Before connecting the scanner to your Macintosh computer,
install the EPSON scanner software (EPSON TWAIN, EPSON
SMART PANEL for Scanner, etc.) from the CD-ROM, as follows:
English
1. Turn on the computer.
Note for Macintosh users:
If you connect the scanner while your Macintosh is on, a message
appears telling you that the scanner driver needs to be installed
(Mac OS
scanner driver from the Internet (Mac OS
click OK (Mac OS
8.X), or a message appears to prompt you to download the
8.X) or
Cancel
9). When this happens,
(Mac OS 9) then follow the
instructions below.
2. Insert the CD in the CD-ROM drive.
17
Page 19

3. Double-click the
The EPSON TWAIN folder contains multiple-language
versions of the software. Double-click the folder of your
preferred language.
EPSON TWAIN
folder.
4. Double-click the
5. When the following dialog box appears, click
follow the instructions on the screen.
When you complete the installation, the EPSON Screen
Calibration utility automatically starts. Follow the
instructions on page 19 to calibrate the screen, and then restart
the computer and continue from step 6 below to install other
software.
EPSON TWAIN L Installer
icon.
Install
and then
6. Double-click the folder that contains the software you want
to install.
The software folder contains multiple-language versions of
the software. Double-click the folder of your preferred
language.
18
Page 20

Note:
❏ Make sure you install EPSON SMART PANEL for Scanner
and Adobe PhotoDeluxe.
❏ Install Adobe Acrobat Reader if it is not already installed.
7. Double-click the installer icon to start the installation
program. Then follow the instructions on the screen.
8. After installing the software, connect the scanner to your
computer as described in “Connecting the Scanner to Your
Computer” on page 12.
Calibrating Your Screen
To calibrate your screen follow the steps below:
1. Look at the screen and move the slider right or left until the
two shades of the gray horizontal stripes match as closely as
possible.
English
r
Note:
View the screen from a short distance.
2. Click OK to finish calibrating your scanner and monitor.
19
Page 21

Screen calibration is not required again unless you change
your monitor.
Using Your Scanner
Scanning an Image
Before scanning a document, remember to respect the rights of
copyright owners. Do not scan published text or images without
first checking the copyright status.
1. Place the scanner on a flat, stable surface. Do not use the stand
when scanning.
2. Plug in the scanner
on.
3. Turn on the computer. Make sure that the scanner's indicator
light
goes on in green but is not flashing.
4. Open the document cover.
5. Place the document on the document table, with the side to
be scanned facing down. Make sure that the document is
carefully aligned.
6. Close the document cover gently so that the document does
not move.
Note:
❏ The area with a width of approximately 3±2 mm from both the
horizontal and vertical guides is not scanned.
❏ Do not place heavy objects on top of the scanner.
. The fluorescent lamp in the carriage turns
20
Page 22

There are two ways to scan; using the buttons (]Start/tCopy/
Scan) on the scanner, or using a TWAIN-compliant application.
s
Scanning by using the three buttons
Note for Windows users:
Depending on the installed application on your PC, when you press the
buttons on the scanner, the EPSON Perfection640 event dialog box may
appear. If this happens, you need to assign EPSON SMART PANEL
for Scanner or other application to each button. For more details, see
your Online Reference Guide.
Using the Start button to scan
1. Press the ]Start button on your scanner. The EPSON SMART
PANEL window appears.
English
2. Click an application icon.
Note:
You can use the Scan for Creativity only if Adobe
is installed.
3. Click
Scan
. The image is automatically scanned.
®
PhotoDeluxe®
21
Page 23

4. Click
Launch PhotoDeluxe...
PhotoDeluxe.
. The scanned image is sent to
Using the Copy button to copy
You can use the tCopy button to scan and copy images. The
document is scanned and then printed automatically in high
quality with a single press of the
For more details, see your Online Reference Guide.
Copy button on the scanner.
t
Using the Scan button to scan
You can use the sScan button to scan an image and then transfer
it to PhotoDeluxe. Pressing the
starts the scanning process and transfers the scanned image to
PhotoDeluxe automatically. For more details, see your Online
Reference Guide.
Scan button on your scanner
s
Scanning with a TWAIN-compliant application
1. Start a TWAIN-compliant application. (The example used
here is PhotoDeluxe.)
22
2. Select
3. Choose
Open Special
Scan Photo
and click OK to open EPSON TWAIN.
Note for Macintosh users:
Most illustrations shown in this section are for Windows, so they
may vary from the actual dialog boxes that appear on your screen.
.
EPSON TWAIN L
from the File menu, and then select
from the Select your input source list
Page 24

4. The following window appears. The progress bar appears,
indicating the document type. If you scan multiple photos,
the number of scanned image will be indicated.
Images are automatically optimized. You can scan easily and
quickly without changing any settings.
If you want to change settings, see your Online Reference Guide.
Getting Information from the Online Reference Guide
English
To learn more about your scanner, see the Online Reference Guide
which includes detailed information on scanning and
troubleshooting.
Note:
A Web browser must be installed on your computer to view the Online
Reference Guide.
23
Page 25

Opening the Online Reference Guide
1. Insert the online guide CD in your CD-ROM drive.
2. For Windows users:
The following dialog box appears. If it does not appear,
double-click the
CD-ROM
the
For Macintosh users:
Double-click
to the one shown below appears.
My Computer
icon. Finally, double-click
EPSON Perfection 640U
icon, and then double-click
PF640U.exe
. A dialog box similar
.
3. Click
To install the Online Reference Guide on your hard disk, click
Install Reference Guide
When the installation is complete, the Reference Guide icon
appears in the EPSON folder (for Windows users) or in the
EPSON Perfection 640U folder (for Macintosh users). Doubleclick the icon to open the guide.
Note:
If your hard disk does not have enough space to install the Online
Reference Guide, view it directly from the CD.
View Reference Guide
and follow the on-screen instructions.
to open the guide.
24
Page 26

Printed in the Netherlands 00.07-55
 Loading...