

Page 1
Epson®MovieMate
User’s Guide
™
25
Page 2

All rights reserved. No part of this publication may be reproduced, stored in a retrieval system, or transmitted in any
form or by any means, electronic, mechanical, photocopying, recording, or otherwise, without the prior written permis-
sion of Seiko Epson Corporation. The information contained herein is designed only for use with this Epson product.
Epson is not responsible for any use of this information as applied to other products.
Neither Seiko Epson Corporation nor its affiliates shall be liable to the purchaser of this product or third parties for dam-
ages, losses, costs, or expenses incurred by purchaser or third parties as a result of: accident, misuse, or abuse of this
product or unauthorised modifications, repairs, or alterations to this product, or (excluding the U.S.) failure to strictly
comply with Seiko Epson Corporation’s operating and maintenance instructions.
Seiko Epson Corporation shall not be liable against any damages or problems arising from the use of any options or any
consumable products other than those designated as Original Epson Products or Epson Approved Products by Seiko
Epson Corporation.
Epson and 3LCD are registered trademarks of Seiko Epson Corporation.
PrivateLine is a registered trademark, MovieMate is a trademark, and Epson Extra Care, Epson Connection and Epson
Store are service marks of Epson America, Inc.
This function has been developed with the permission of Dolby Digital Laboratories. Dolby and the double D symbol are
registered trademarks of Dolby Laboratories.
This function has been developed with the permission of the Digital Theater Systems company. , DTS and DTS
2.0 + DIGITAL OUT are registered trademarks of Digital Theater Systems, Inc.
Pixelworks and DNX are trademarks of Pixelworks, Inc.
The DVD video logo is a trademark.
General Notice: Other product names used herein are also for identification purposes only and may be trademarks of
their respective owners. Epson disclaims any and all rights in those marks.
© 2005 Epson America, Inc. 6/05 CPD-20183
Page 3

Contents
Introduction.......................................................................... 4
Registration and warranty ............................................... 4
Unpacking ....................................................................... 4
Accessories ..................................................................... 4
Parts...................................................................................... 5
Front................................................................................ 5
Back ................................................................................ 5
MovieMate controls ........................................................ 6
Remote control................................................................ 7
Setting Up the Remote Control............................................ 8
Inserting the batteries ...................................................... 8
Remote control usage range............................................ 8
Using this guide ................................................................... 9
Quick Start
Setting Up MovieMate......................................................... 11
Projection distance and image size ................................. 11
Connecting the power cable and turning the power ON. 11
Disc Playback....................................................................... 12
Inserting and playing a disc ............................................ 12
Adjusting the picture and sound ..................................... 13
Stopping playback........................................................... 14
Turning off the power ..................................................... 14
Basic Operations During Playback ...................................... 15
Pausing playback ............................................................ 15
Reverse searching/forward searching ............................. 15
Replaying a scene ........................................................... 16
Skipping .......................................................................... 16
Advancing by frame........................................................ 16
Playing in slow motion ................................................... 17
Pausing with illumination (Break) .................................. 17
Selecting picture quality (Color Mode) .......................... 17
Temporarily stopping the audio (Mute).......................... 17
Advanced Operations
Controlling Playback ........................................................... 18
Changing the brightness of the display window
(Dimmer) ........................................................................ 18
Using DVD menus......................................................... 19
Using PBC (playback control) ........................................ 20
Playing MP3/WMA and JPEG files ............................... 21
Selecting the chapter or track number ............................ 24
Playing from a designated time (time search) ................ 24
Looping playback of a favorite scene
(A-B repeat playback)..................................................... 26
Looping playback (repeat play) ...................................... 27
Playing in the order of your choice (program play)........ 29
Playing back at random (random play)........................... 30
Changing the audio language.......................................... 31
Changing the subtitle display.......................................... 32
Changing the camera angle ............................................. 32
Using the menu bar.......................................................... 33
Selecting Auto-standby and Sleep timer settings ............ 34
Changing from Progressive to Interlaced mode .............. 35
Locking the tray............................................................... 35
Using External Video Equipment......................................... 36
Connecting to other video equipment ............................. 36
Projecting images from external video equipment.......... 37
Using External Audio Equipment ........................................ 38
Listening with headphones.............................................. 38
Connecting to audio equipment with an optical
digital input...................................................................... 39
Connecting a subwoofer.................................................. 39
Selecting the Sound Mode............................................... 40
Adjusting high-pitched tones........................................... 40
Adjusting the audio playback level ................................. 41
Adjusting the audio input level of external
audio equipment .............................................................. 42
Fine-Tuning Your MovieMate
Settings Menu....................................................................... 43
Using the settings menu .................................................. 43
Settings menu options ..................................................... 44
Language codes ............................................................... 46
“Digital Audio Output” settings and output signals........ 46
Country (area) code list ................................................... 47
Picture Quality Menu ........................................................... 48
Using the Picture Quality menu ...................................... 48
Picture Quality menu settings.......................................... 49
Video Information Menu ...................................................... 50
Using the video Information menu.................................. 50
Video Information menu settings .................................... 51
Troubleshooting and Maintenance
Solving problems.................................................................. 52
Reading the indicator lights............................................. 52
Solving problems............................................................. 54
Where to get help ............................................................ 56
Maintenance ......................................................................... 57
Cleaning........................................................................... 57
Replacing the air filter and lamp ..................................... 57
Specifications and Notices
Projection Distance and Screen Size .................................... 60
Specifications / Compliant Resolutions................................ 61
Safety Instructions ................................................................ 63
Use and Storage.................................................................... 66
About Discs .......................................................................... 68
Glossary................................................................................ 70
Epson America, Inc. Limited Warranty ............................... 71
Quick Start
Advanced Operations
Appendix
3
Page 4
Introduction
Your Epson® MovieMate™ 25 is a portable, lightweight home cinema system that delivers high-quality, big-screen enter-
tainment anywhere you want. In less than two minutes, you can set up MovieMate and watch a DVD, play a video game,
or view your favorite photos on an 80-inch screen in the comfort of your own home.
MovieMate offers these outstanding features:
• An 80-inch pull-up screen
• Flexibility to set up in any room (or even outdoors),
from 6.5 feet to 24 feet away from the screen
• DVD resolution of 480p
• Widescreen viewing with 16:9 aspect ratio
• Up to 1200 ANSI lumens of brightness, enough for
viewing in daylight
• 1000:1 contrast ratio, for deep, vibrant images
®
• JVC
• Built-in JVC speakers with 2.1 stereo sound
• Long-life bulb providing up to 3000 hours of use
• Two-year express service warranty
DVD player with Dolby® Digital and DTS
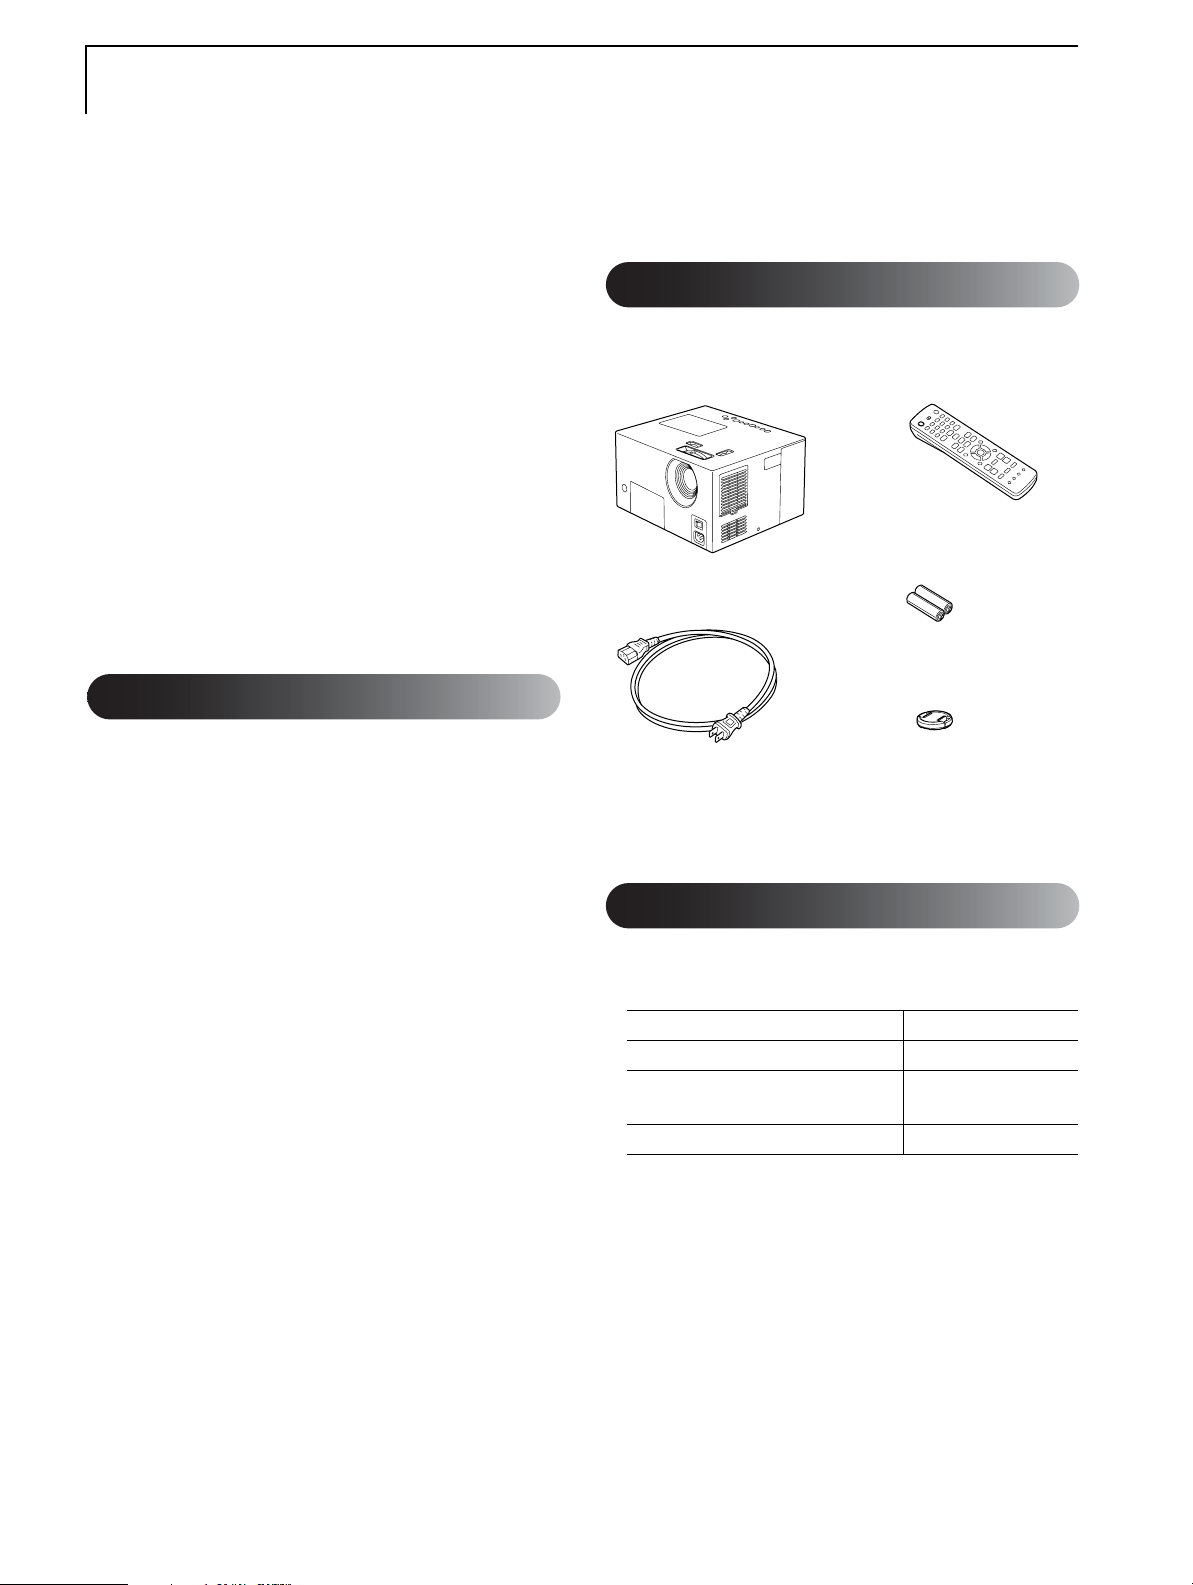
Unpacking
After unpacking your MovieMate, make sure you have
all the parts shown below:
Remote control
MovieMate 25
AA batteries
Registration and Warranty
The Epson MovieMate comes with a basic two-year
carry-in warranty. For details, see page 71.
In addition, for customers who register their projector,
Epson offers free Epson Extra Care
the unlikely event of an equipment failure, you won’t
have to wait for your unit to be repaired. Instead, Epson
will ship you a replacement unit anywhere in the
United States or Canada, usually via overnight delivery.
See your Extra Care Home Service brochure for
details.
To register, simply fill out the registration card that
came with your projector and mail it to Epson. Or you
can register online at http://www.epson.com/webreg.
Registering also lets you receive special updates on
new accessories, products, and service.
SM
Home Service. In
Power cable
Your MovieMate also includes an 80-inch pull-up
screen.
Lens cover
Accessories
Epson provides the following optional accessories and
consumables:
Product Part number
Replacement lamp (ELPLP33) V13H010L33
Replacement air filter
(ELPAF09)
Powered Subwoofer
You can purchase many of these accessories from
your dealer or by visiting the Epson Store
www.epsonstore.com (U.S. sales only). In Canada,
please call (800) 463-7766 for dealer referral.
V13H134A09
SM
at
4
Page 5
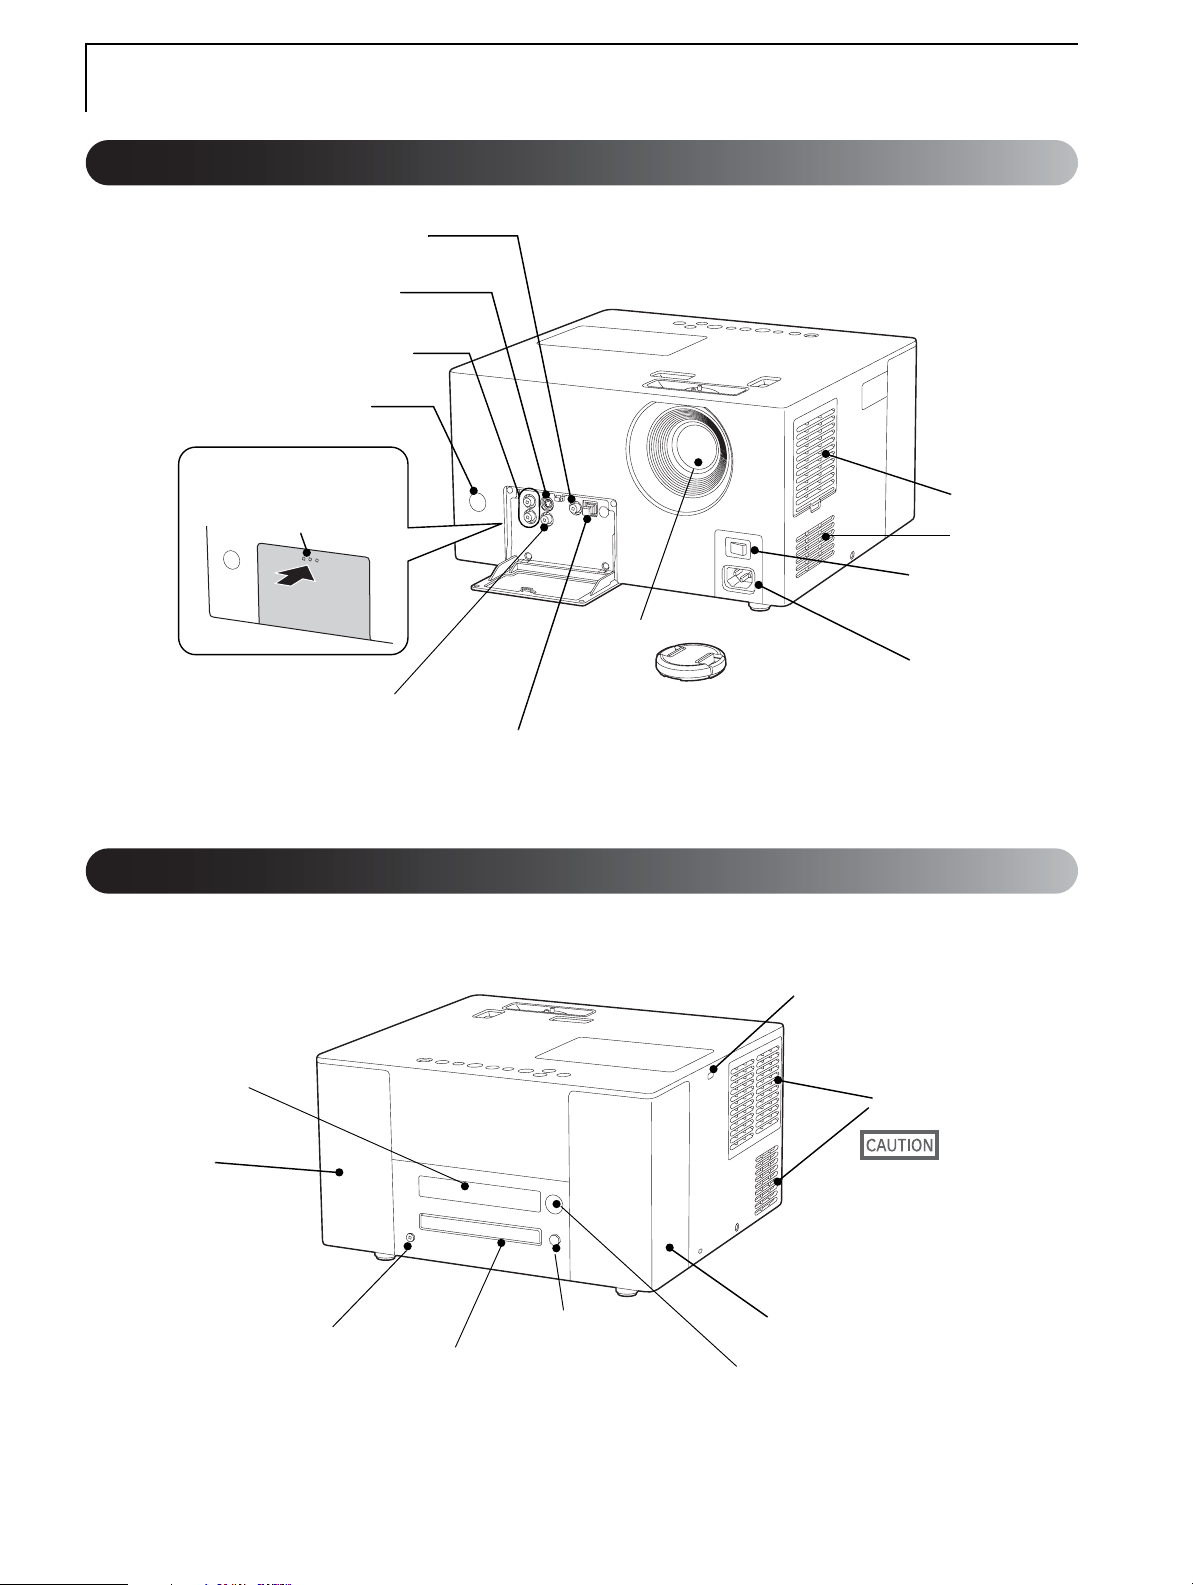
Parts
Front
Subwoofer outpu t port
S-Video input port
Remote control receiver
Audio input port
Press here to open
Back
Display window
Video input port
Air intake
vents
Main power switch
Lens
Power inlet
Lens cover
Optical audio-out port
Lamp cover latch
Air exhaust ve nts
Speaker
Headphone jack
Disc tray
Open/close
button
Do not block the exhaust
vents, and do not touch the
exhaust vent immediately
after projecting, or while
projecting, since it
becomes hot.
Speaker
Remote control receiver
5
Page 6

MovieMate Controls
Focus ring
Zoom ring
Vertical lens shift dial
Status display
indicator
Horizontal lens shift dial
Lamp cover
Skip buttons
Image On
indicator
Image Off
indicator
Source button Stop button
Power button Play/Pause button Break button Image On/Off button
Volume
adjustment
buttons
6
Page 7
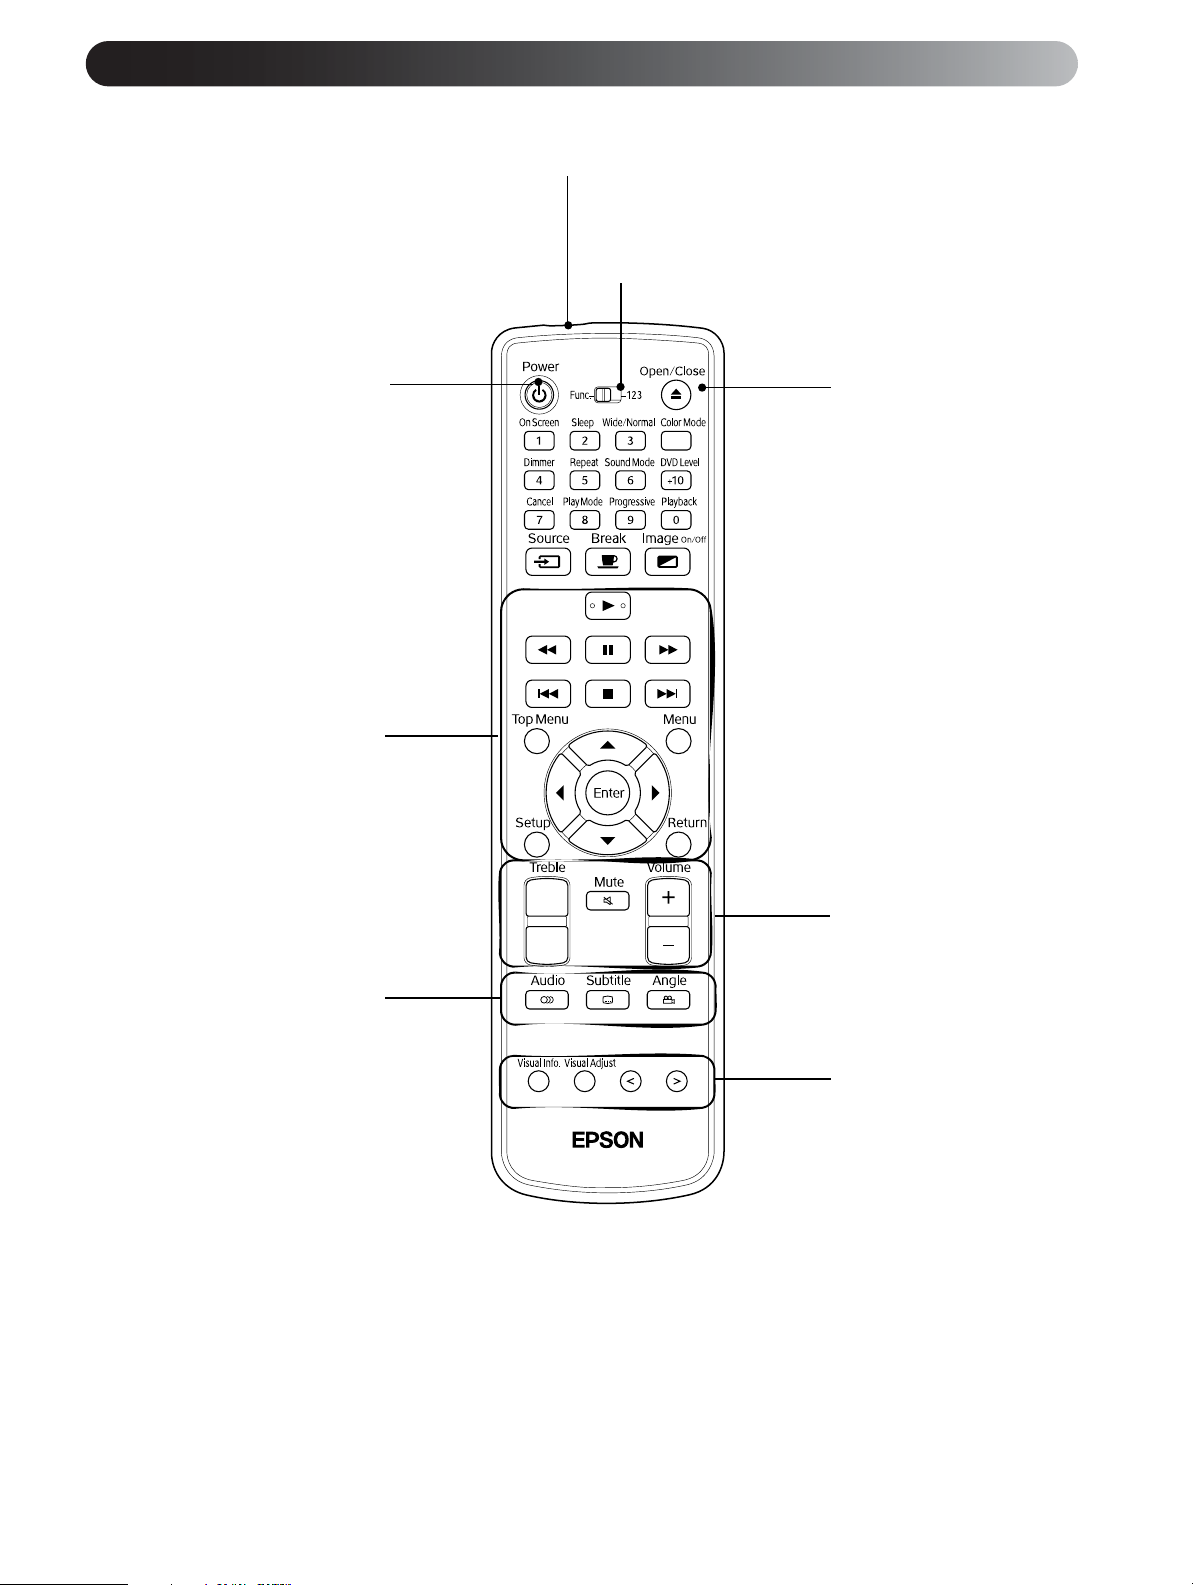
Remote control
Remote control lightemitting area
Function/numerics
toggle switch
Power button
Playback buttons
DVD Tray Open/
Close button
Audio buttons
D VD video butons
Projector adjustment
buttons
7
Page 8
Setting Up the Remote Control
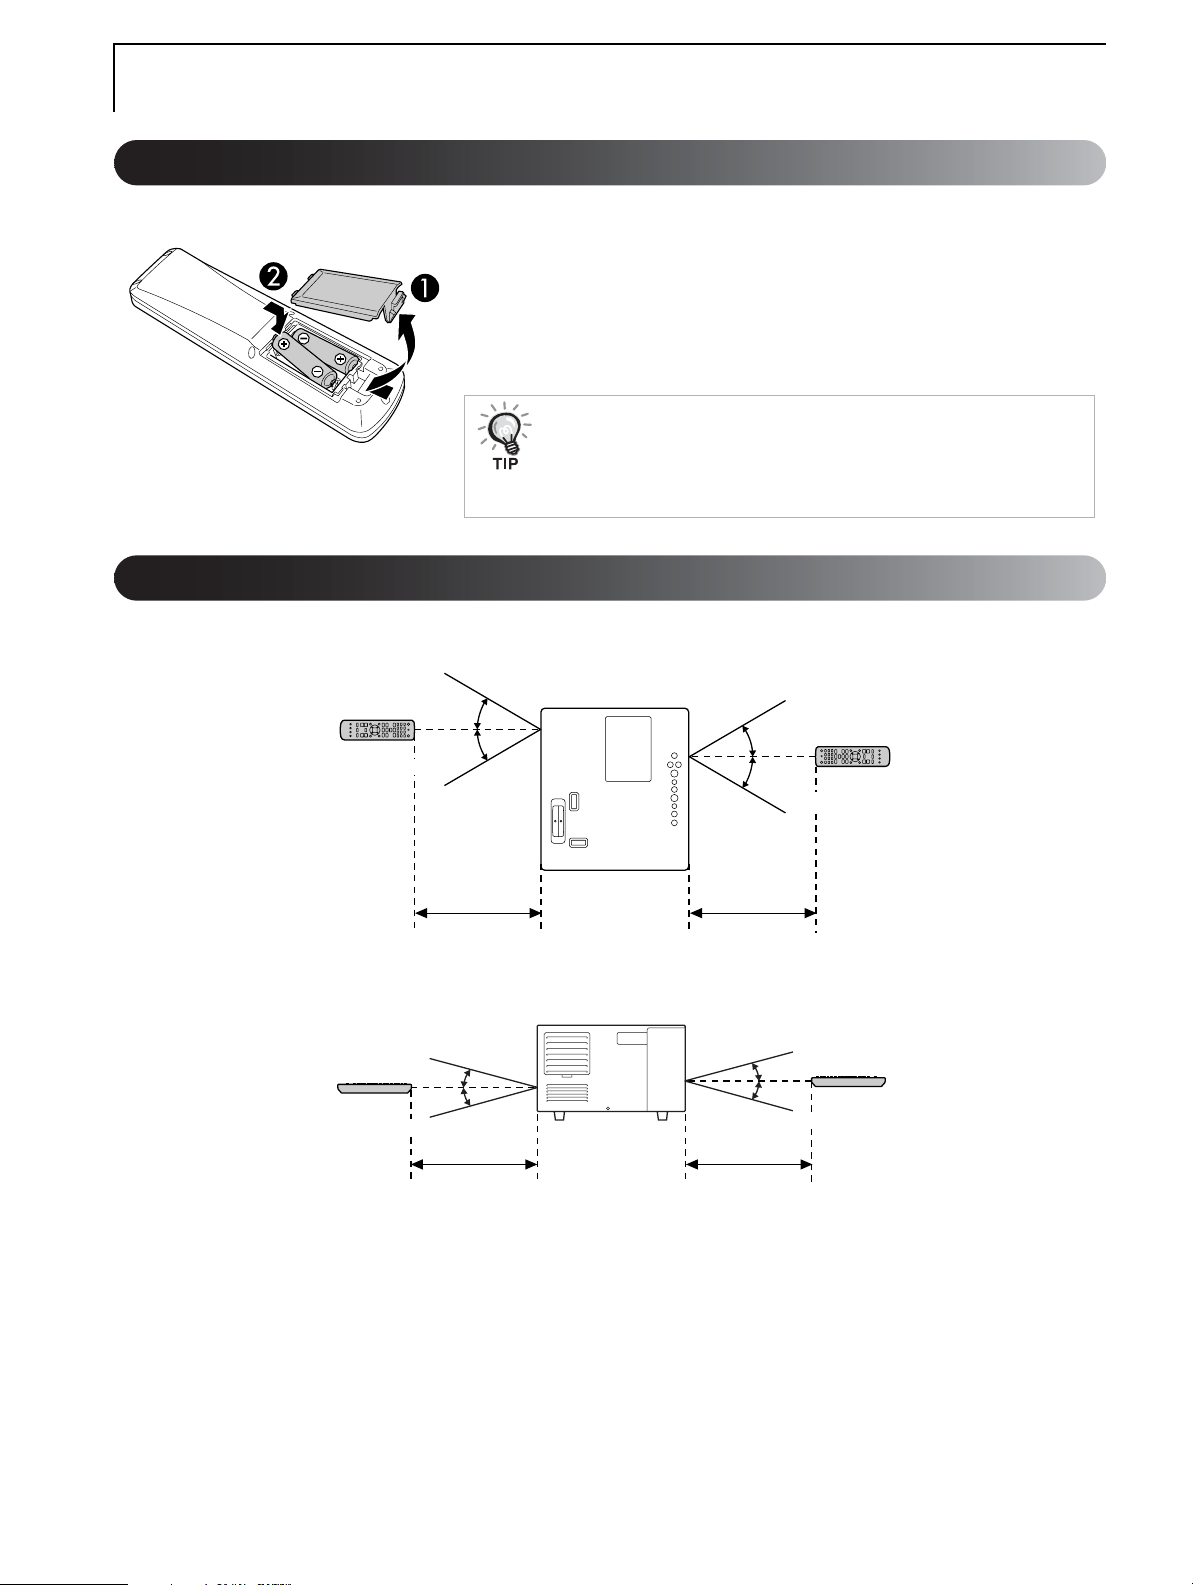
Inserting the batteries
Push in the tab and lift up the cover.
1
Insert the batteries as shown.
2
Close the battery cover.
3
If the remote control response slows down or stops working, change the
batteries. Make sure you have two spare AA-size batteries ready to use
when required. Avoid using the remote control under bright fluorescent
lamps or in direct sunlight.
Remote control usage range
Horizontal range
Approx. 30°
Approx. 30°
Vertical range
Approx. 15°
Approx. 15°
22 ft
22 ft
Approx. 30°
Approx. 30°
22 ft
Approx. 15°
Approx. 15°
22 ft
8
Page 9
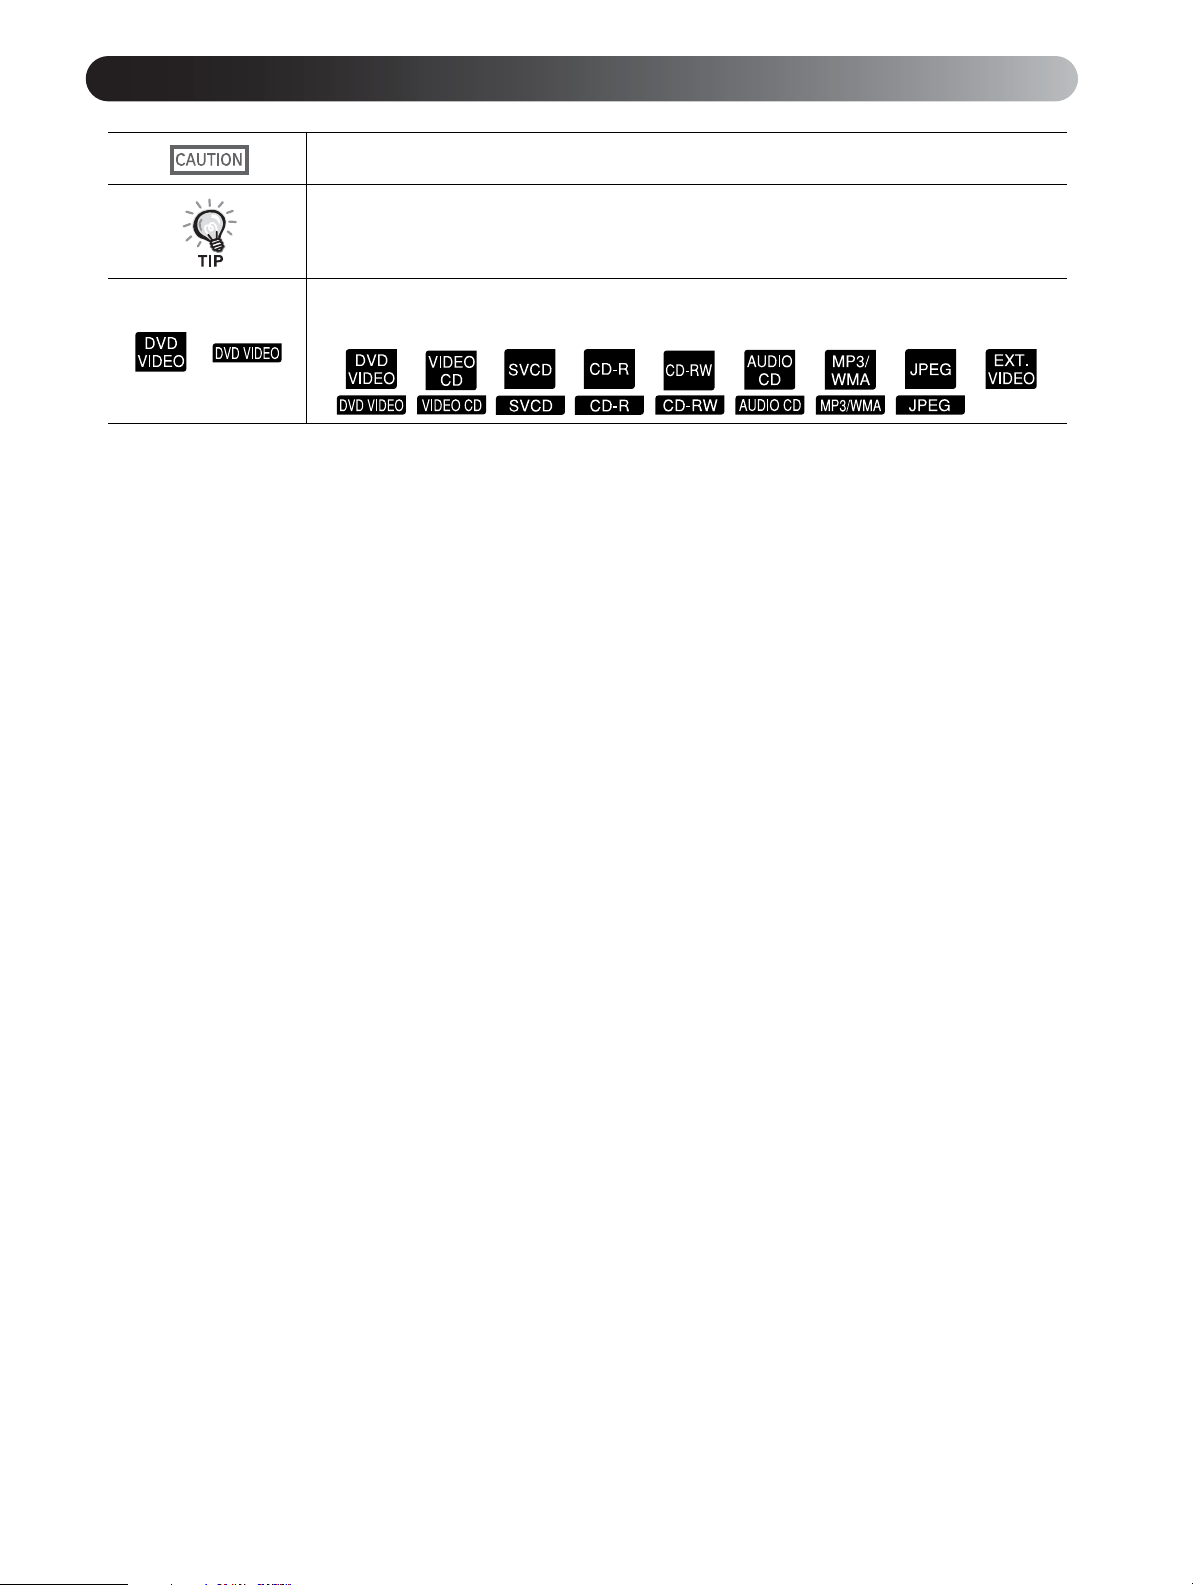
Using this guide
Must be observed to avoid damage or malfunction.
Contains important information and helpful hints.
Some MovieMate functions are available only for certain types of discs. These icons
indicate the applicable types of discs.
Getting More Information
Need additional help? Take advantage of Epson’s automated support services 24 hours a day at http://support.epson.com.
Use this site to download FAQs or product information and e-mail your questions to Epson support.
If you need more help, you can use the Epson PrivateLine
the PrivateLine support card that came with your MovieMate.
®
Support service. Call (800) 637-7661 and enter the PIN on
9
Page 10
Quick Start
10
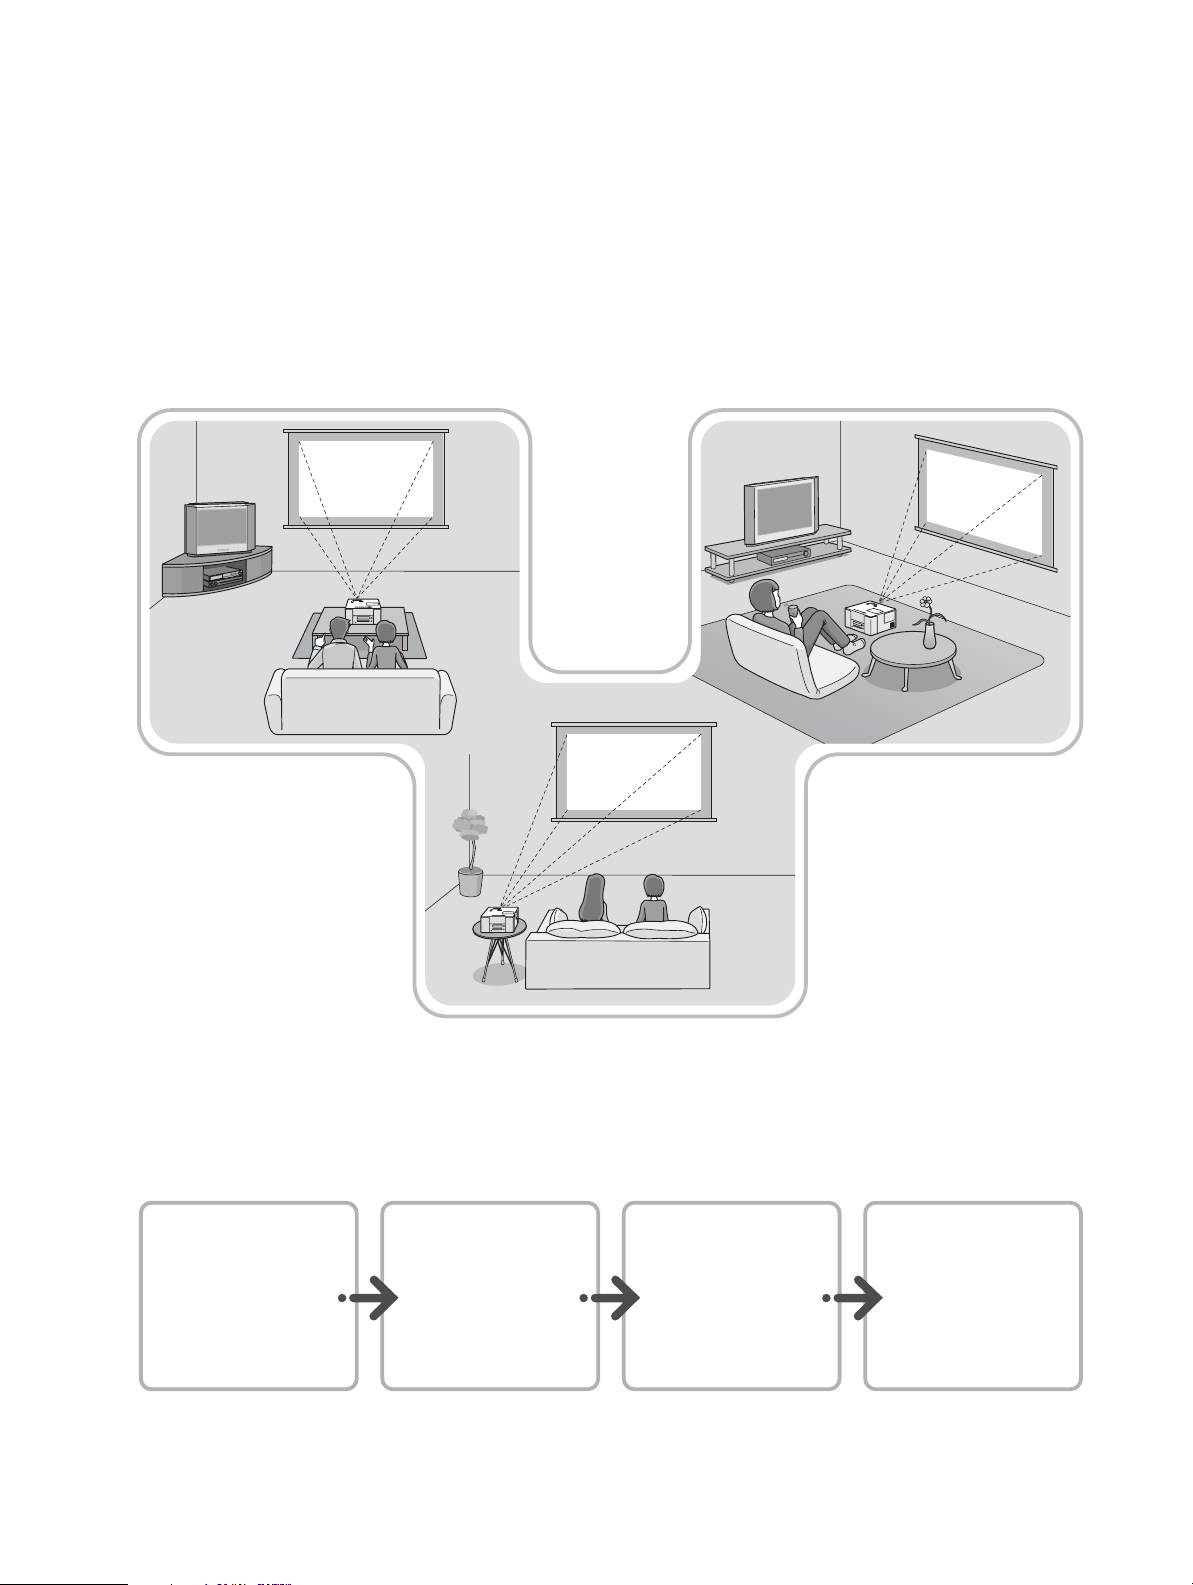
Playing DVDs
You can enjoy your DVDs on the big screen by following these four easy steps.
Position MovieMate
in front of the screen
or a blank wall.
Connect the power
cable and turn on
the main power
switch.
Insert a DVD.
Adjust the picture
position, size, and
audio volume.
Page 11
Setting Up MovieMate
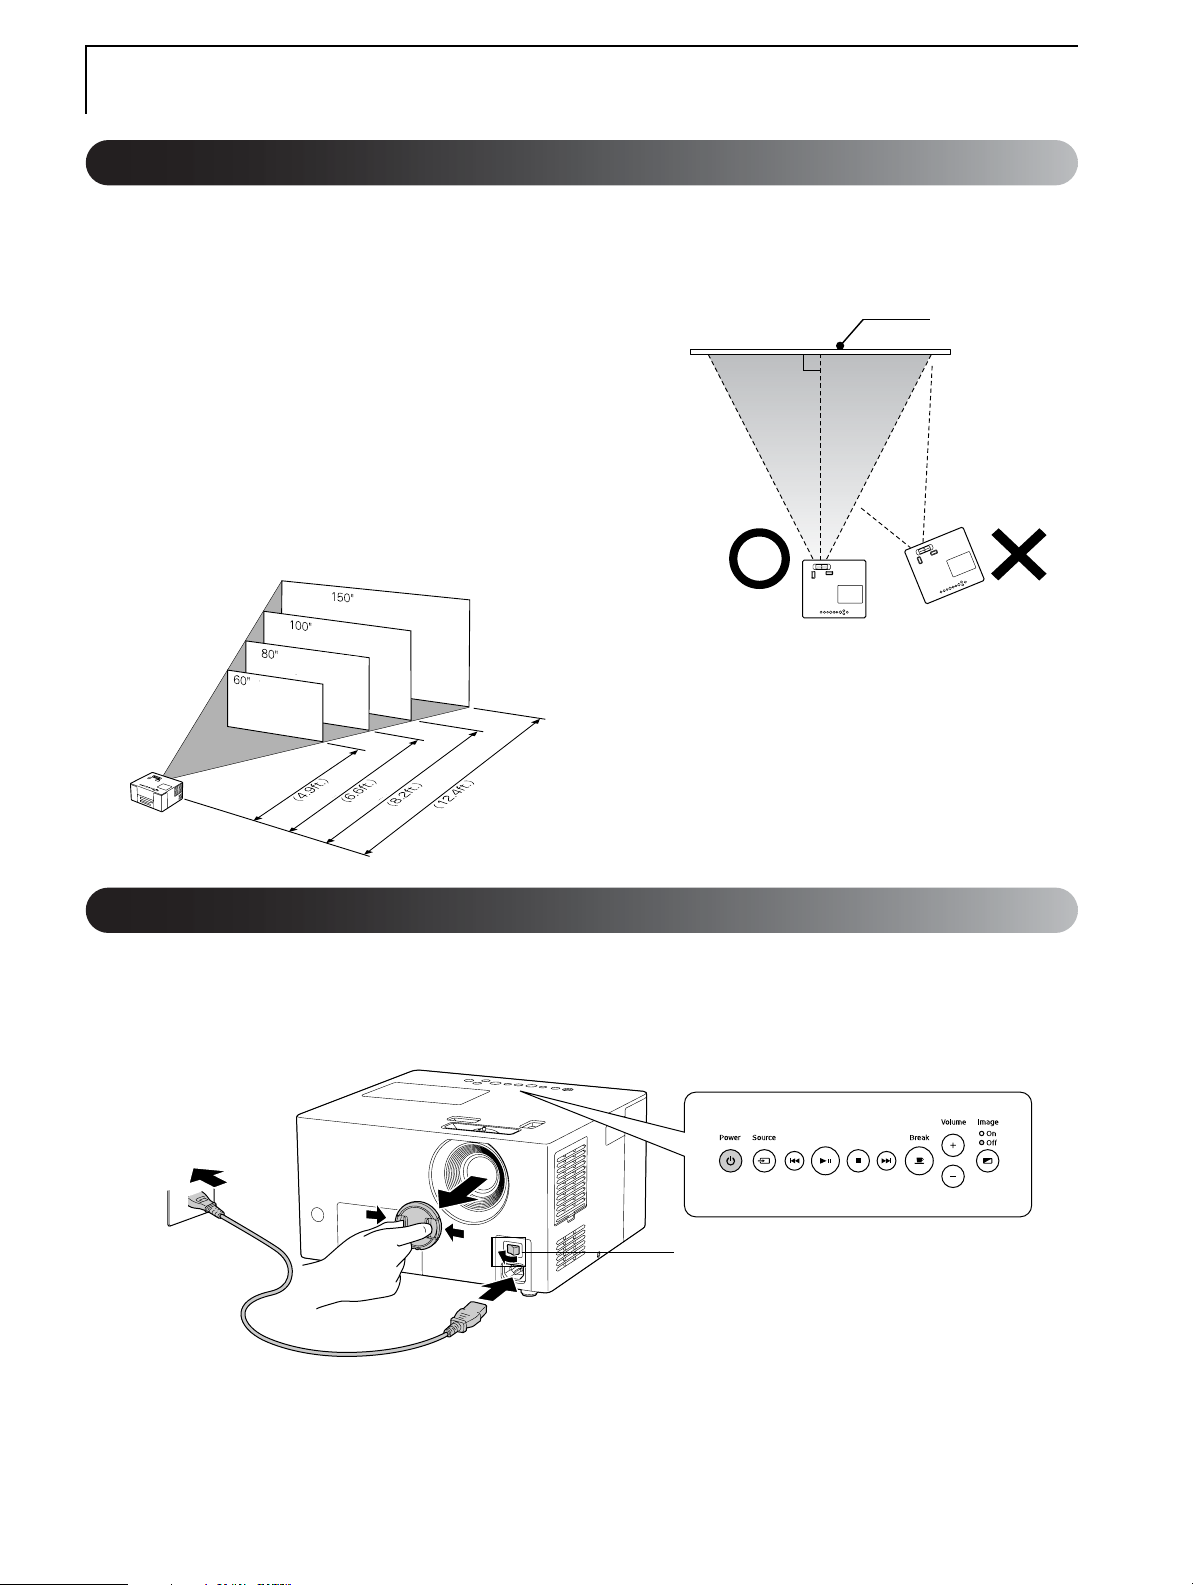
Projection distance and image size
Place MovieMate in a position to project
1
the best size image onto the screen.
The further you place MovieMate away from the
screen, the larger the projected image becomes.
You can project on a wall if you want an image
larger than the size of the screen.
For detailed projection distance values, see
page 60.
You can adjust the position of the projected
image vertically and horizontally by using the
lens shift dial, as described on page 13.
Position MovieMa te so that it is parallel to
2
the screen.
Screen
If MovieMate is not parallel to the screen, the projected
image will be distorted.
Quick Start
Connecting the power cab le and turning the power ON
Remove the lens cover.
1
Connect the power cable.
2
Turn on the main power switch.
3
The Power button light and the Image Off
light turn orange.
Main power switch
11
Page 12
Disc Playback
Inserting and playing a disc
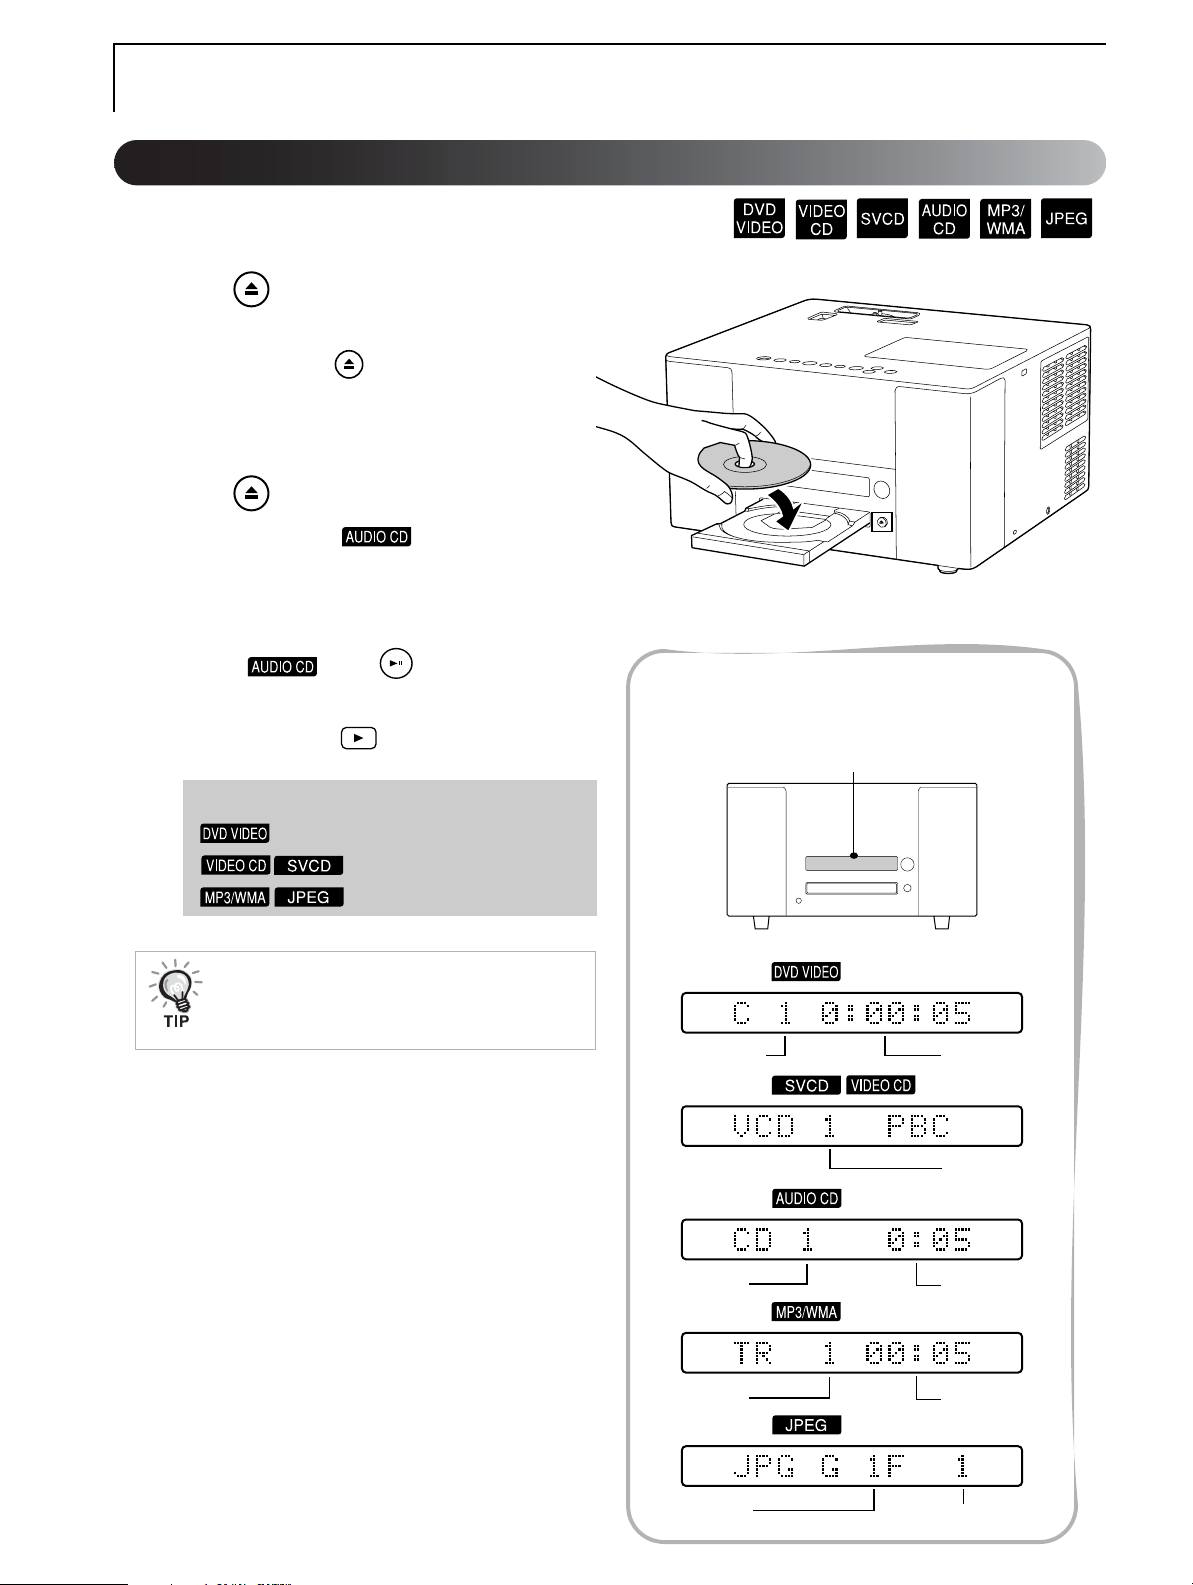
Press to open the disc tray.
1
A beep sounds and the power comes on.
You can also press on the remote control.
Place the disc in the disc tray with th e label
2
facing up.
Press to close the disc tray.
3
For all discs except , the projection lamp
comes on automatically, and projection begins. It
takes a few seconds for the lamp to warm up and
project at full brightness.
To play , press to start audio play-
back. The projection lamp does not turn on.
You can also press on the remote control.
When a menu is displayed:
See page 19
See page 20
See page 21
When using in high altitude areas (above 4,900
feet), set the “High Altitute Mode” to “On.” See
page 51 for instructions.
The display window during
playback
Display window
When playing
Chapter number
When playing
When playing
Elapsed playback
time
Track number
12
Track number
When playing
Track number
When playing
Group number
Elapsed playback
time
Elapsed playback
time
File number
Page 13
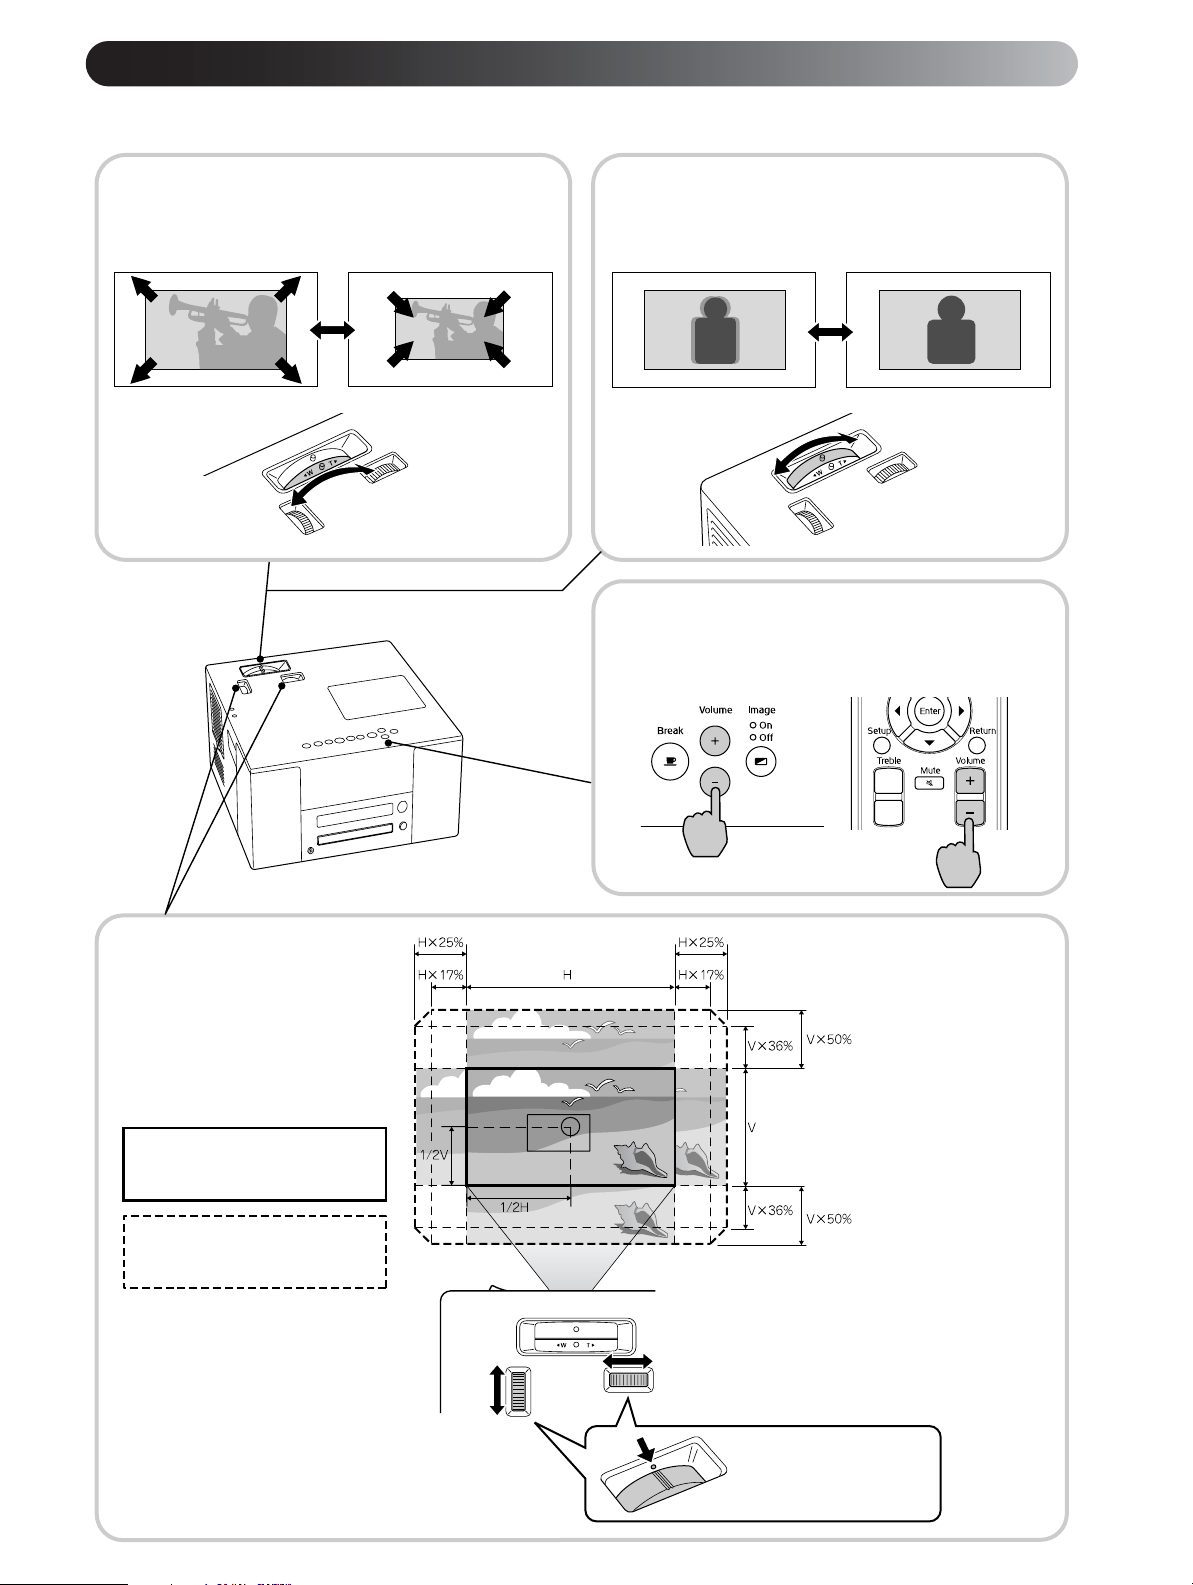
Adjusting the picture and sound
Adjust the image and sound as follows:
Adjusting the size of the
projected image (Zoom ring)
To decrease the size, turn
towards [T].
To increase the size,
turn towards [W].
Setting the focus
(Focus ring)
Adjusting the volume
Using the control
panel
Using the remote
control
Adjusting the image
position (lens shift)
You can move the position of the projected image up, down, left and right,
using the lens shift. The range of
movement is shown in the diagram.
Standard projection position
(when the lens shift dial is
centered)
Adjustable screen shift range
* The clearest image is obtained when both
the horizontal and vertical planes of the lens
shift dial are centered.
moves
down
moves
up
moves
left
* The image cannot be
shifted beyond the
horizontal and vertical
limits.
When shifting the
maximum amount to the
left or right, the vertical
range of the shift is up to
36% of the height of the
screen. When shifting the
maximum amount up or
down on the vertical
plane, the horizontal
range of the shift is up to
17% of the width of the
screen.
moves
right
When the markings meet, the
image is centered.
13
Page 14
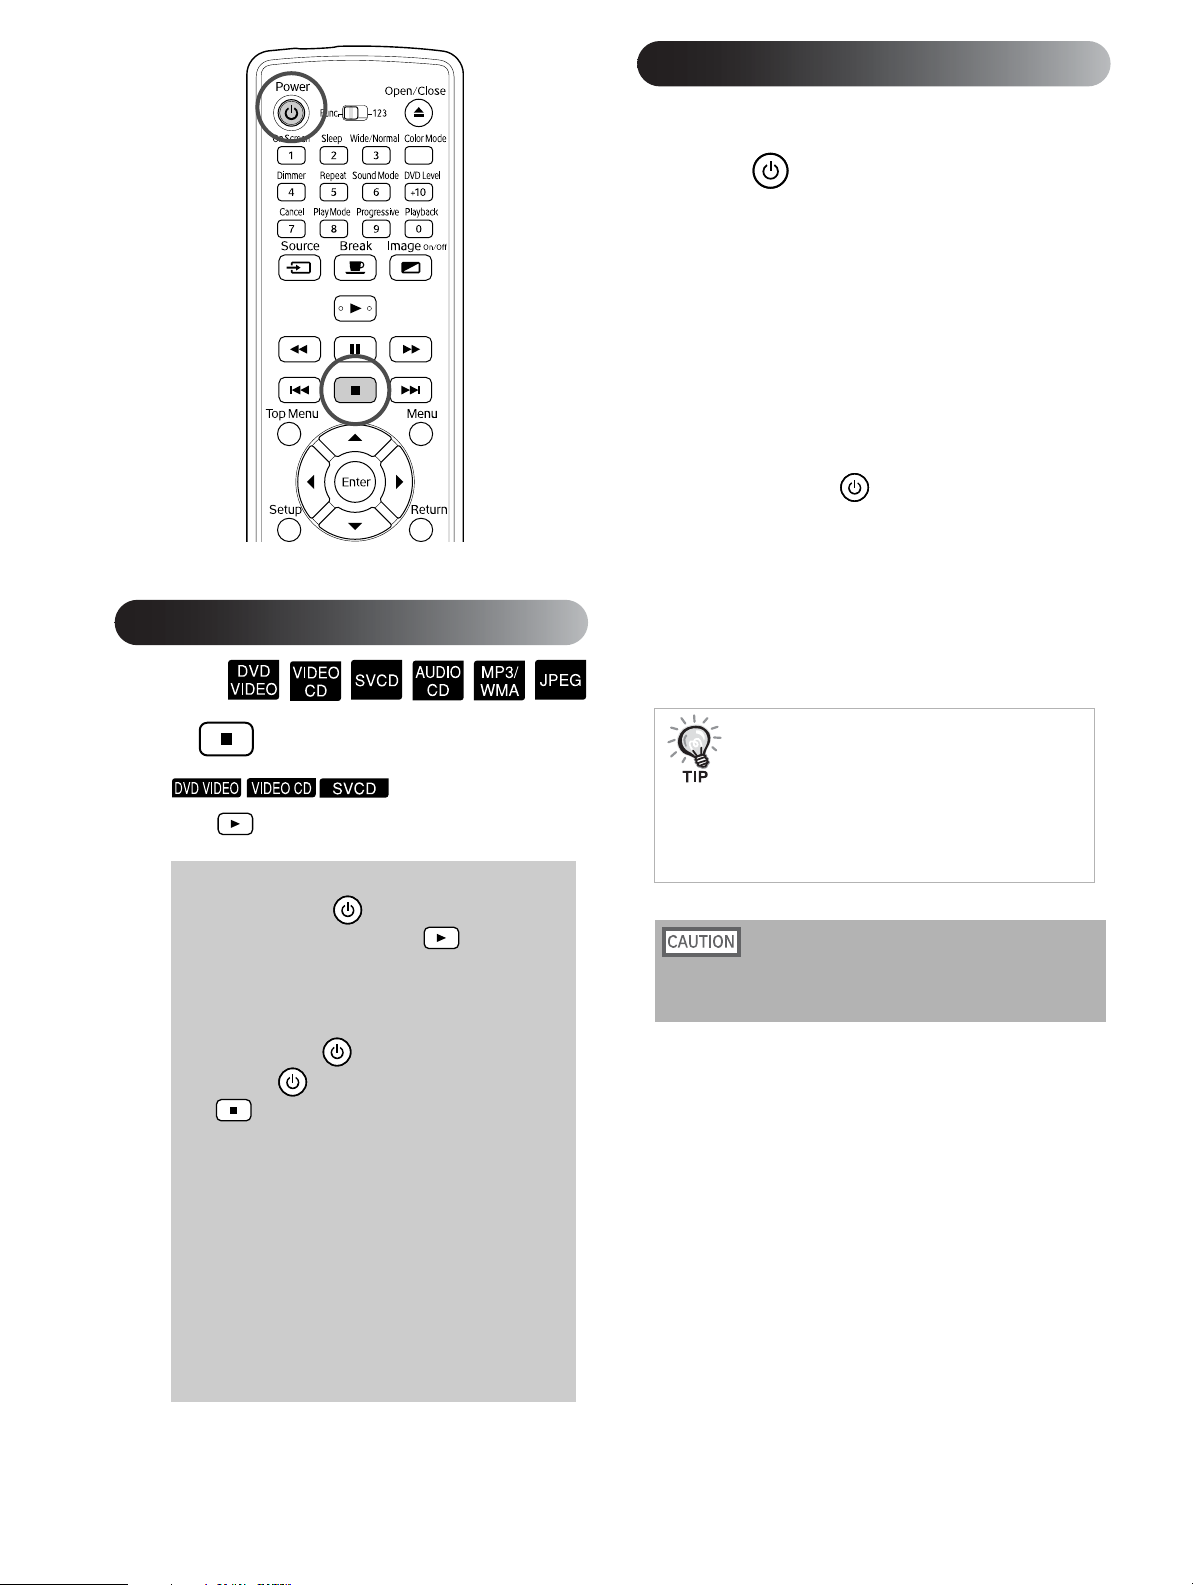
Stopping playback
Turning off the power
Remove the disc from the disc tray.
1
Press .
2
If the lamp was on, the lamp turns off and the
Image Off light flashes orange (during cool-
down).
“Now Cooling” appears in the display window
above the DVD tray.
The confirmation buzzer beeps twice to indicate
that cool-down has completed.
Turn off the main power switch.
3
If you only press to turn off the power,
MovieMate continues using electricity.
Replace the lens cover.
4
Keep the lens cover in place when the projector is
not being used to protect the lens from dirt and
damage.
Press .
To resume playback,
press .
Things to note when using resume
• Even if you press to turn off the power, play-
back resumes when you press .
• Resume cannot be used in the following
situations.
- The disc is removed from the disc tray.
After pressing to turn off the power and
-
pressing to turn the power back on.
is pressed twice.
-
- If the main power switch is turned off.
• Resume cannot be used during program playback
or random playback.
• The position from which playback resumes may
be slightly different from where it was stopped.
• The audio language, subtitle language, and angle
settings are memorized along with the stopping
position.
• It is possible that resume cannot be used if the
disc is stopped when the disc menu is displayed.
The Image Off light flashes orange to indicate
that the internal lamp cooling function (cool-
down) is taking place. The buttons on the remote
control and the main unit are disabled when
cool-down is taking place (approximately 9
seconds).
Do not turn off the power or unplug the unit during cool-
down as this may reduce the lifespan of the lamp.
14
Page 15
Basic Operations During Playback
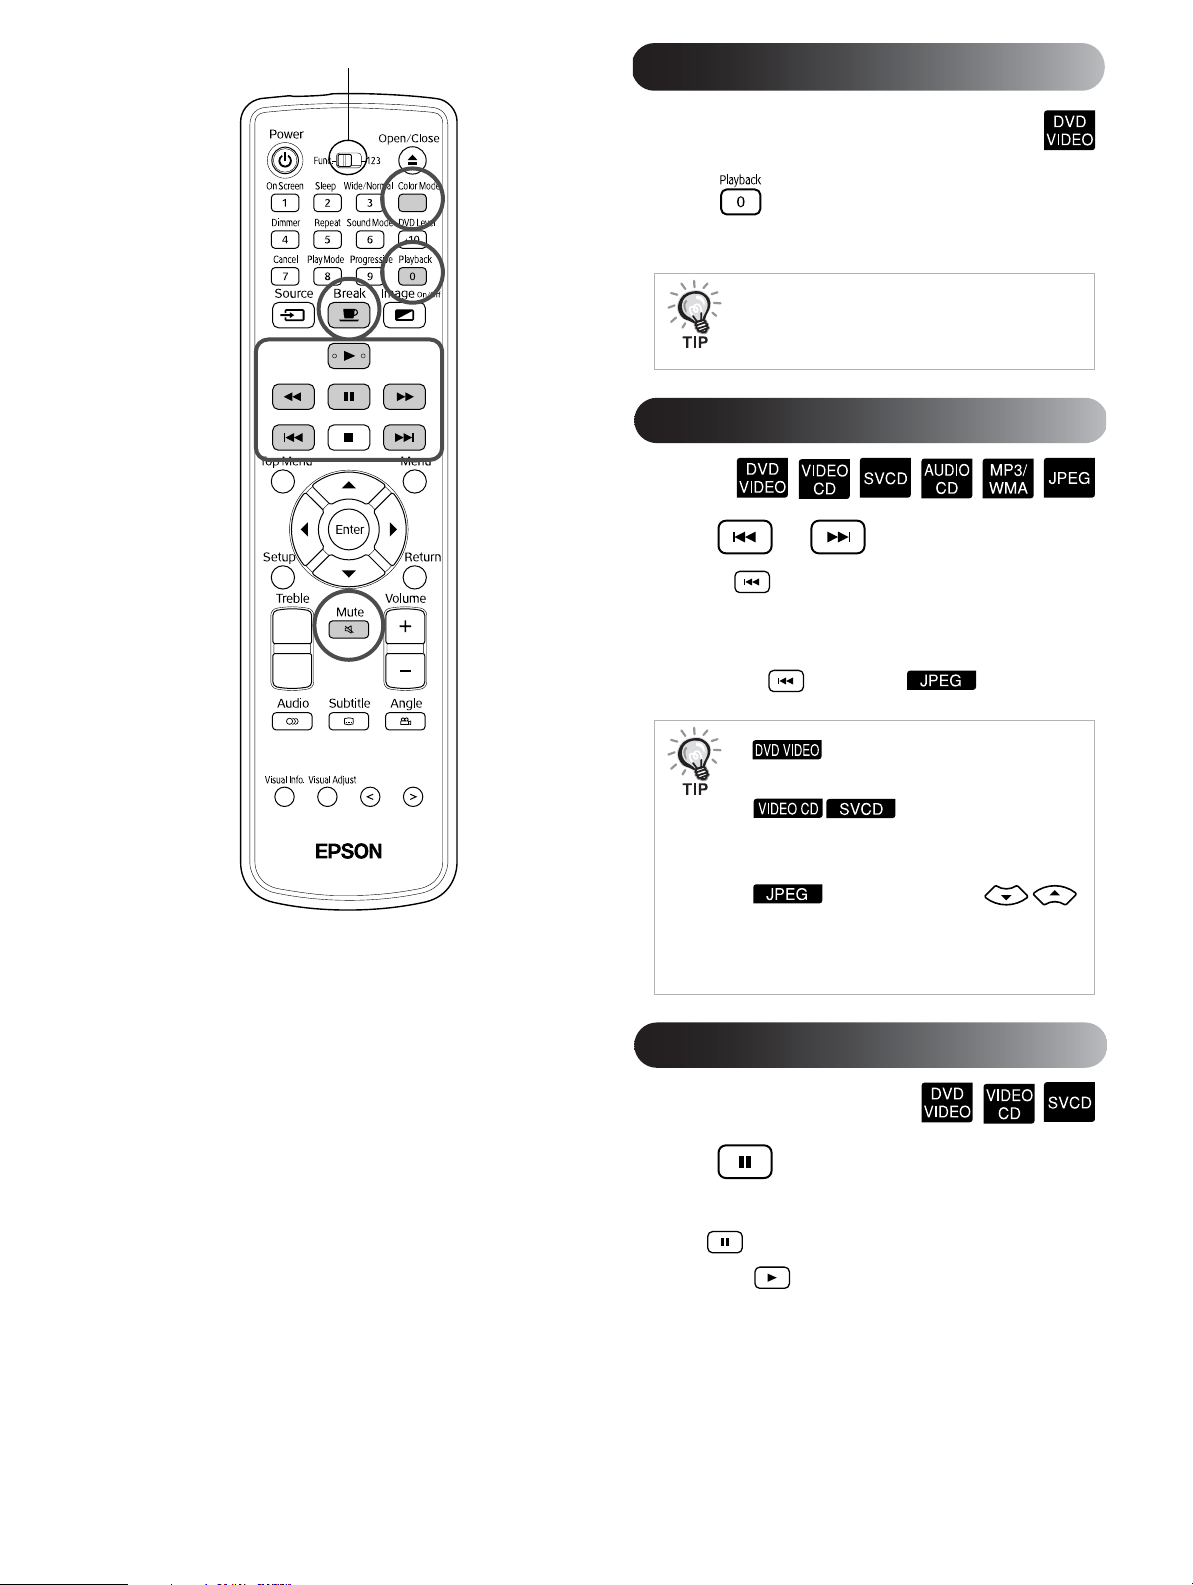
From here on, operations are explained primarily using the buttons on the remote control. If the same button is available
on the MovieMate control panel, you can also use it.
Make sure the switch is set to the [Function] position
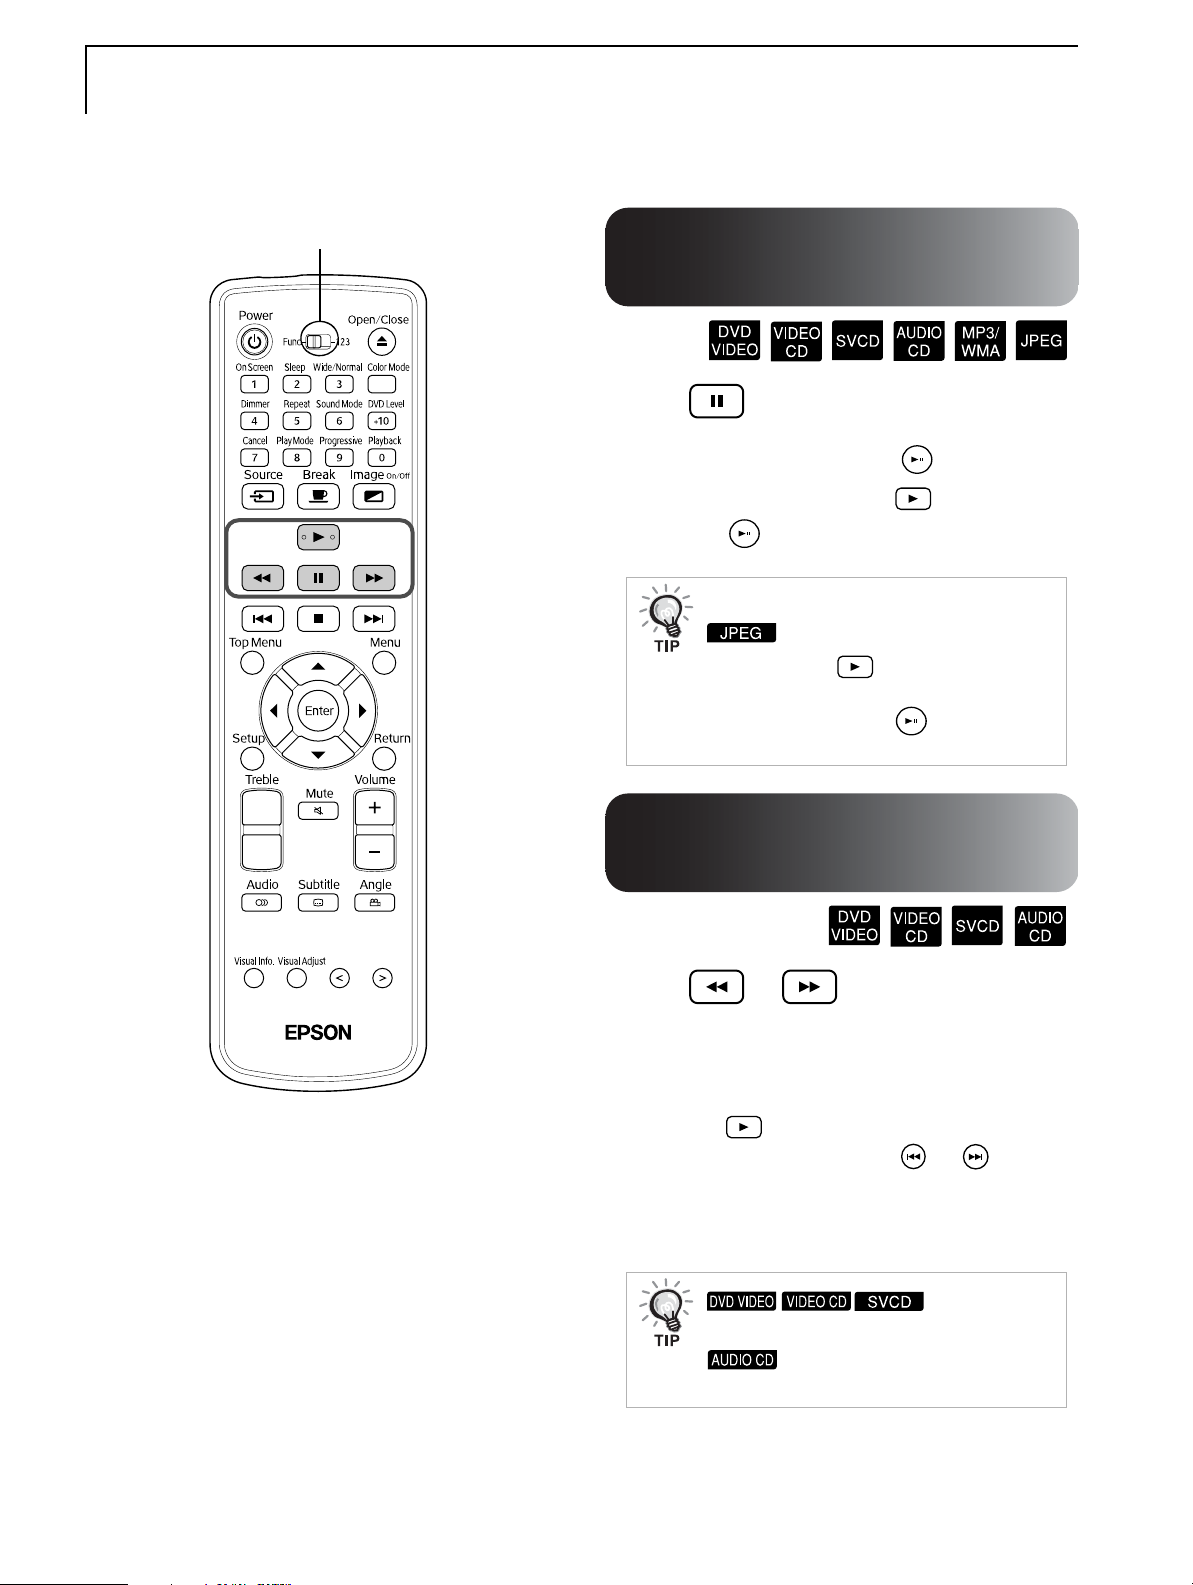
Pausing playback
Press during playback.
• On the control panel, press .
• To resume playback, press .
• Press to toggle between play/pause.
Note the following points when pausing during a
slideshow.
- When you press after pausing, playback
restarts from the beginning of the next file.
- You cannot pause using on the control
panel.
Quick Start
Reverse searching/forward searching
Press or during playback.
• There are 5 levels of reverse/forward search
speed that change each time the buttons are
pressed.
• Press to return to normal playback.
• On the control panel, press or repeat-
edly. The reverse/forward search speed
advances from 5x to 20x.
During forward/
reverse search, sound is not output.
During forward/reverse search, sound
is output intermittently.
15
Page 16
Make sure the switch is set to the [Function] position
Replaying a scene
Press during playback.
MovieMate replays the previous 10 seconds.
• Depending on the type of disc, this operation
may not be possible.
• You cannot return to the previous chapter.
Skipping
Press or during playback.
Press once to return to the start of the chapter
or track being played. After this, playback returns
to the start of the previous chapter/track each time
you press (Except for ).
• You can perform skip operations
during playback.
• You can only perform
skip operations during playback with the PBC
(playback control) function off.
• You can also use the
buttons to skip during playback.
• Depending on the disc, certain operations may
not be possible.
Advancing by frame
Press during paused playback.
• A single frame is advanced each time you press
.
• Press to return to normal playback.
16
Page 17
Playing in slow motion
Press at the point where you want
1
to begin slow motion playba ck. The image
pauses.
Press .
2
• There are 5 levels of playback speed that change
each time you press .
• For slow motion review, press .
There are 5 levels of review speed that change
each time you press .
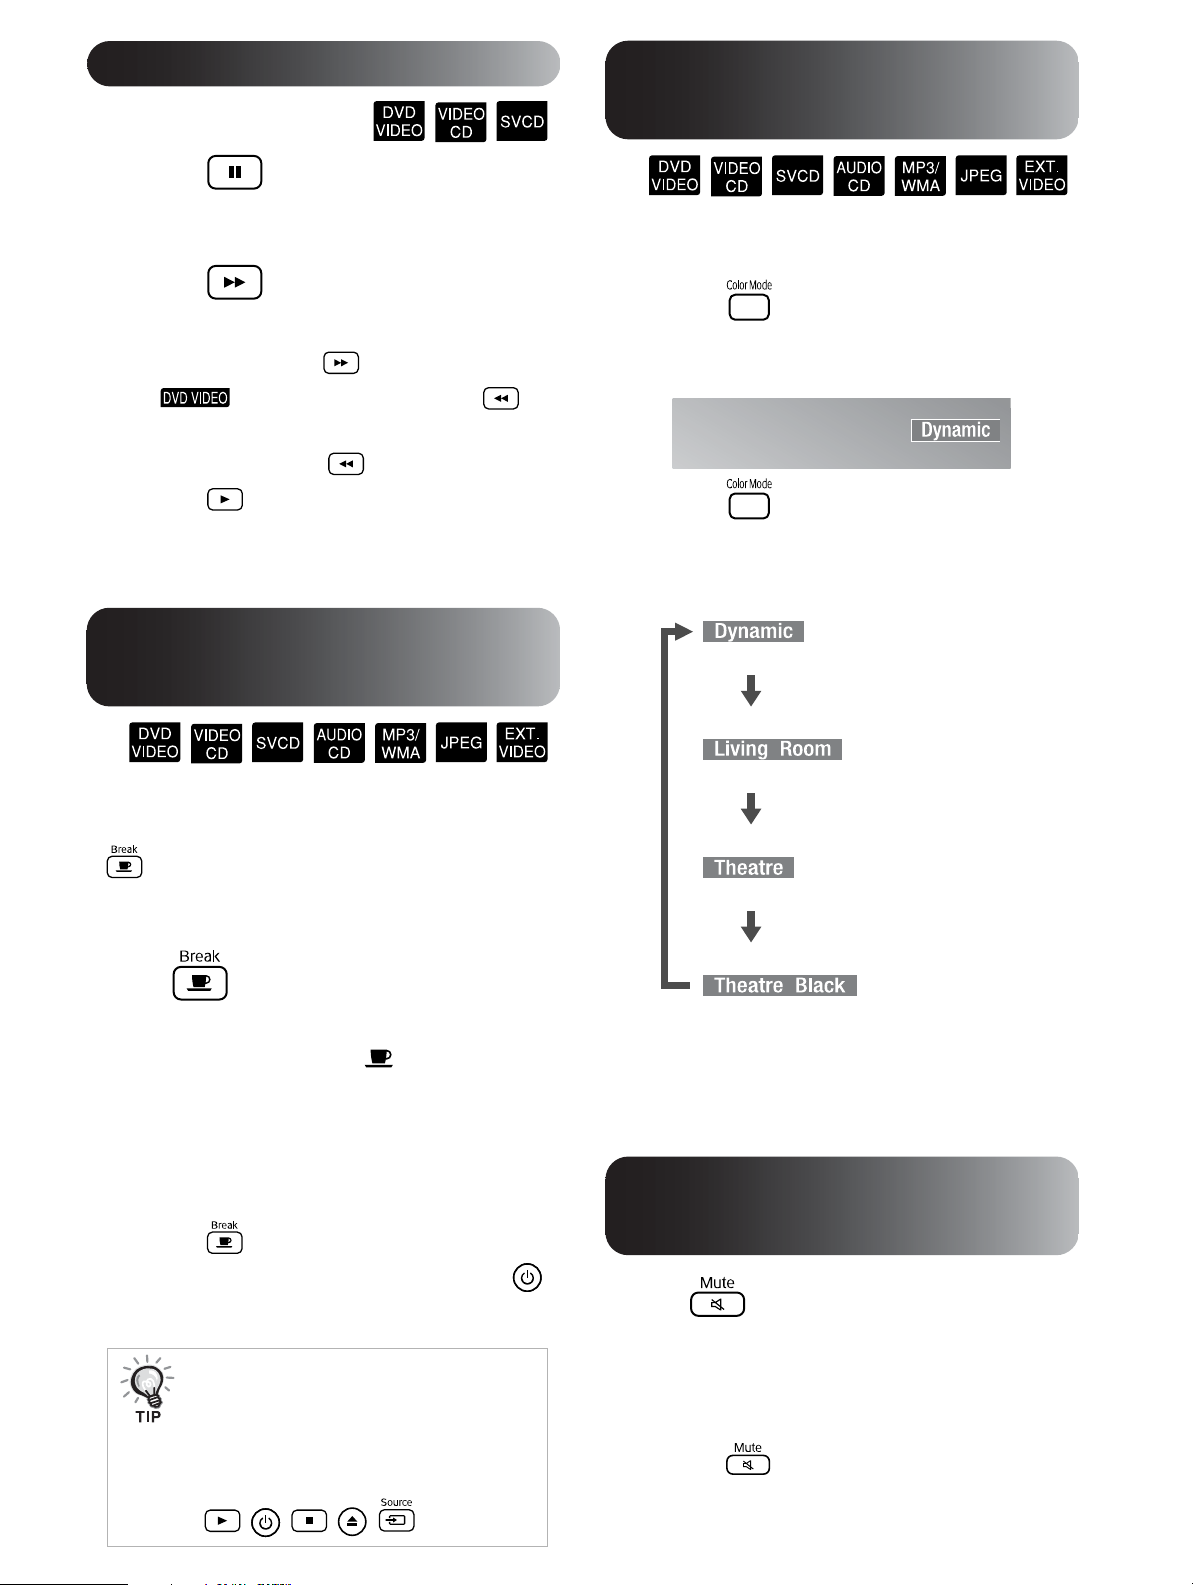
Selecting picture quality (Color Mode)
You can select a color mode that corresponds with the
brightness and other conditions of your room.
Press .
1
The currently selected color mode name is dis-
played on the screen.
Quick Start
• Press to return to normal playback.
• Sound is not output during slow-motion play-
back.
Pausing with illumination (Break)
The break function is useful if you want to get up or
move around during a movie. By simply pressing the
button you can pause the disc and use the light
projected by MovieMate until you can turn the lights
on in the room.
Press during playback.
• The projection lamp remains lit, while the pro-
jected image disappears. flashes in the
lower right corner of the screen.
• The lamp darkens after about five minutes if
MovieMate is left in break mode. After about 30
minutes, the projector power automatically
switches off.
• Press to return to the state before break was
pressed. If the power has switched off, press
to switch the power back on.
• Operations cannot be performed when the disc
menu is displayed.
• When you press any of the following buttons,
break mode is cancelled and the function of
the button you pressed is performed.
, , , ,
Press repeatedly until the desired
2
color mode name appears.
After waiting a few seconds, the color mode
name disappears and the picture quality changes.
Use in bright rooms.
Use in rooms with the
curtains closed. (default
setting)
Use in rooms with the
curtains closed and the
lights out.
Use in completely darkened rooms.
• When you select theater or theater black, the
Epson cinema filter operates automatically and
provides more natural skin tones.
Temporarily stopping the audio (Mute)
Press during playback.
• Sound stops coming from the speakers, head-
phones, and the subwoofer.
• The movie is not paused, and playback
continues.
• Press to return to normal playback. The
former volume is also restored when the projec-
tor power is next switched on,
17
Page 18
Advanced Operations
Controlling Playback
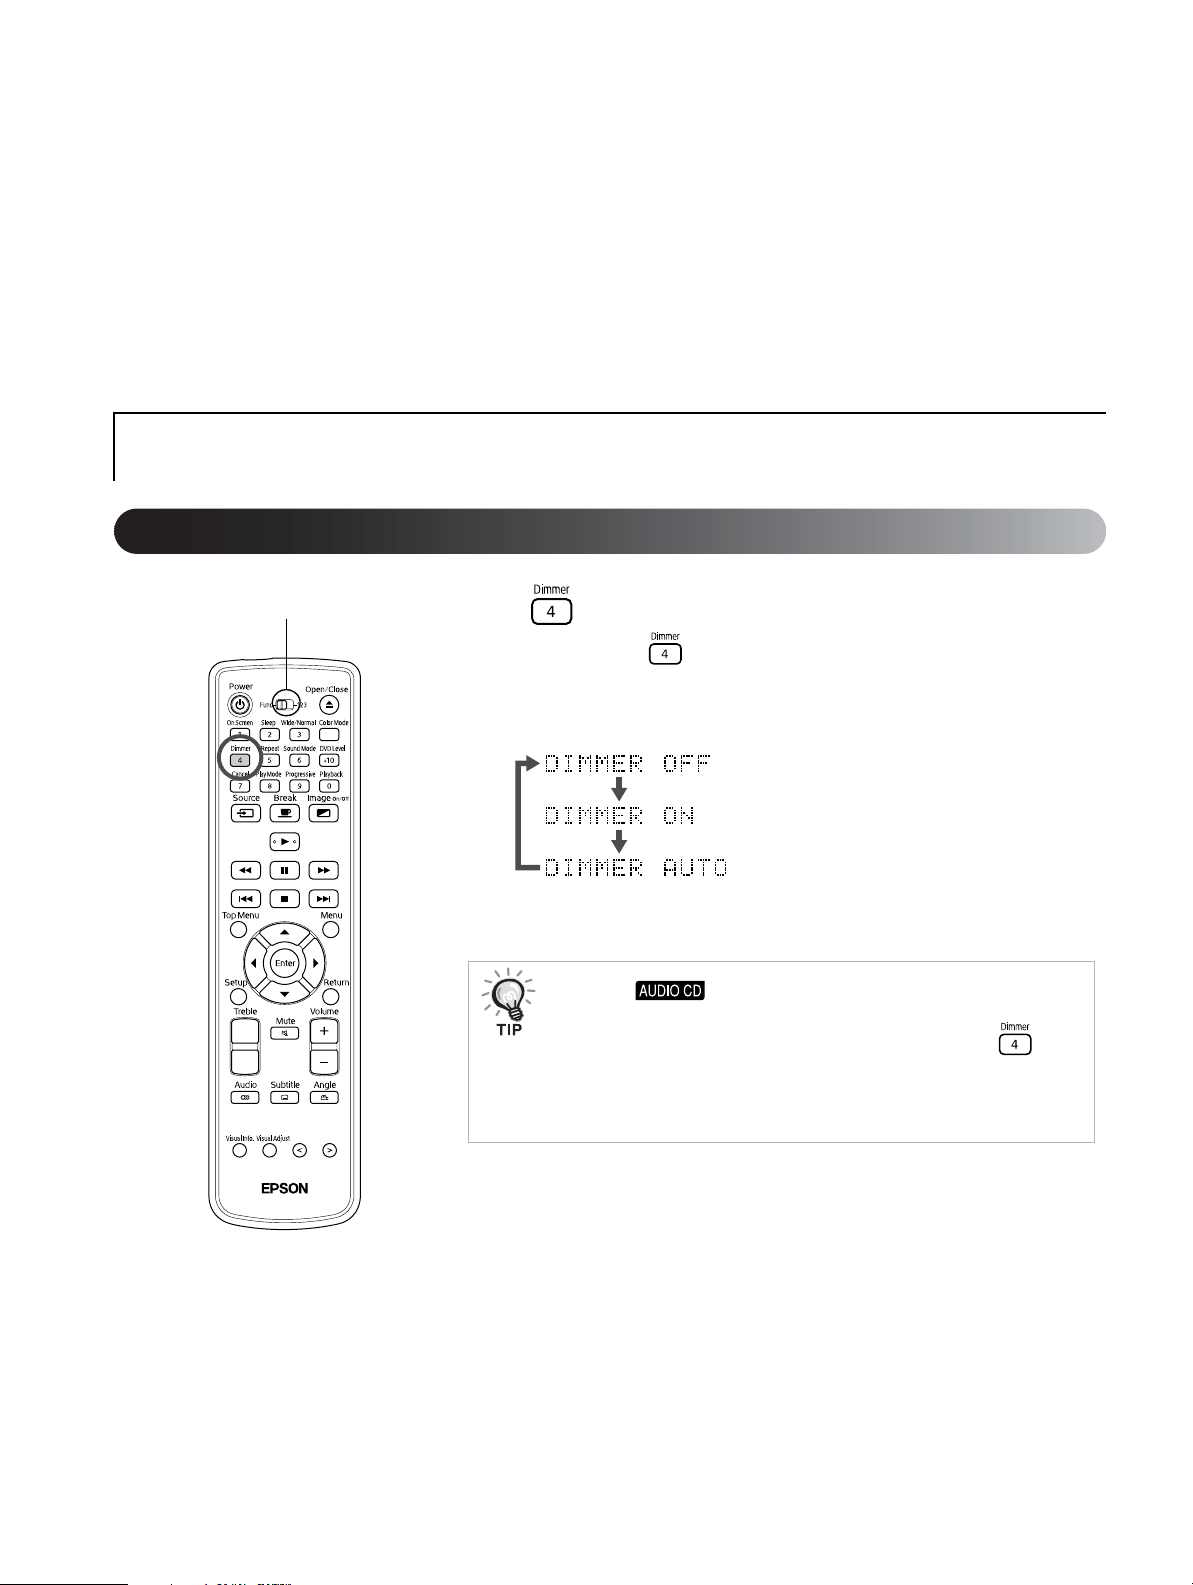
Changing the brightness of the display window (Dimmer)
Make sure the switch is set to the
[Function] position.
Press .
When you press the brightness of the display window and the indi-
cators on the main unit change as shown below. DIMMER AUTO is the
default setting.
The brightness increases.
The brightness decreases.
Darkens during playback and
brightens when paused or stopped.
• When an is inserted, this function is not available, even when
“DIMMER AUTO” is set. It changes to “DIMMER OFF.”
• In standby mode, the brightness cannot be changed, even if is
pressed.
• Once the brightness is changed, it is saved even after the main power
switch is turned off.
18
Page 19
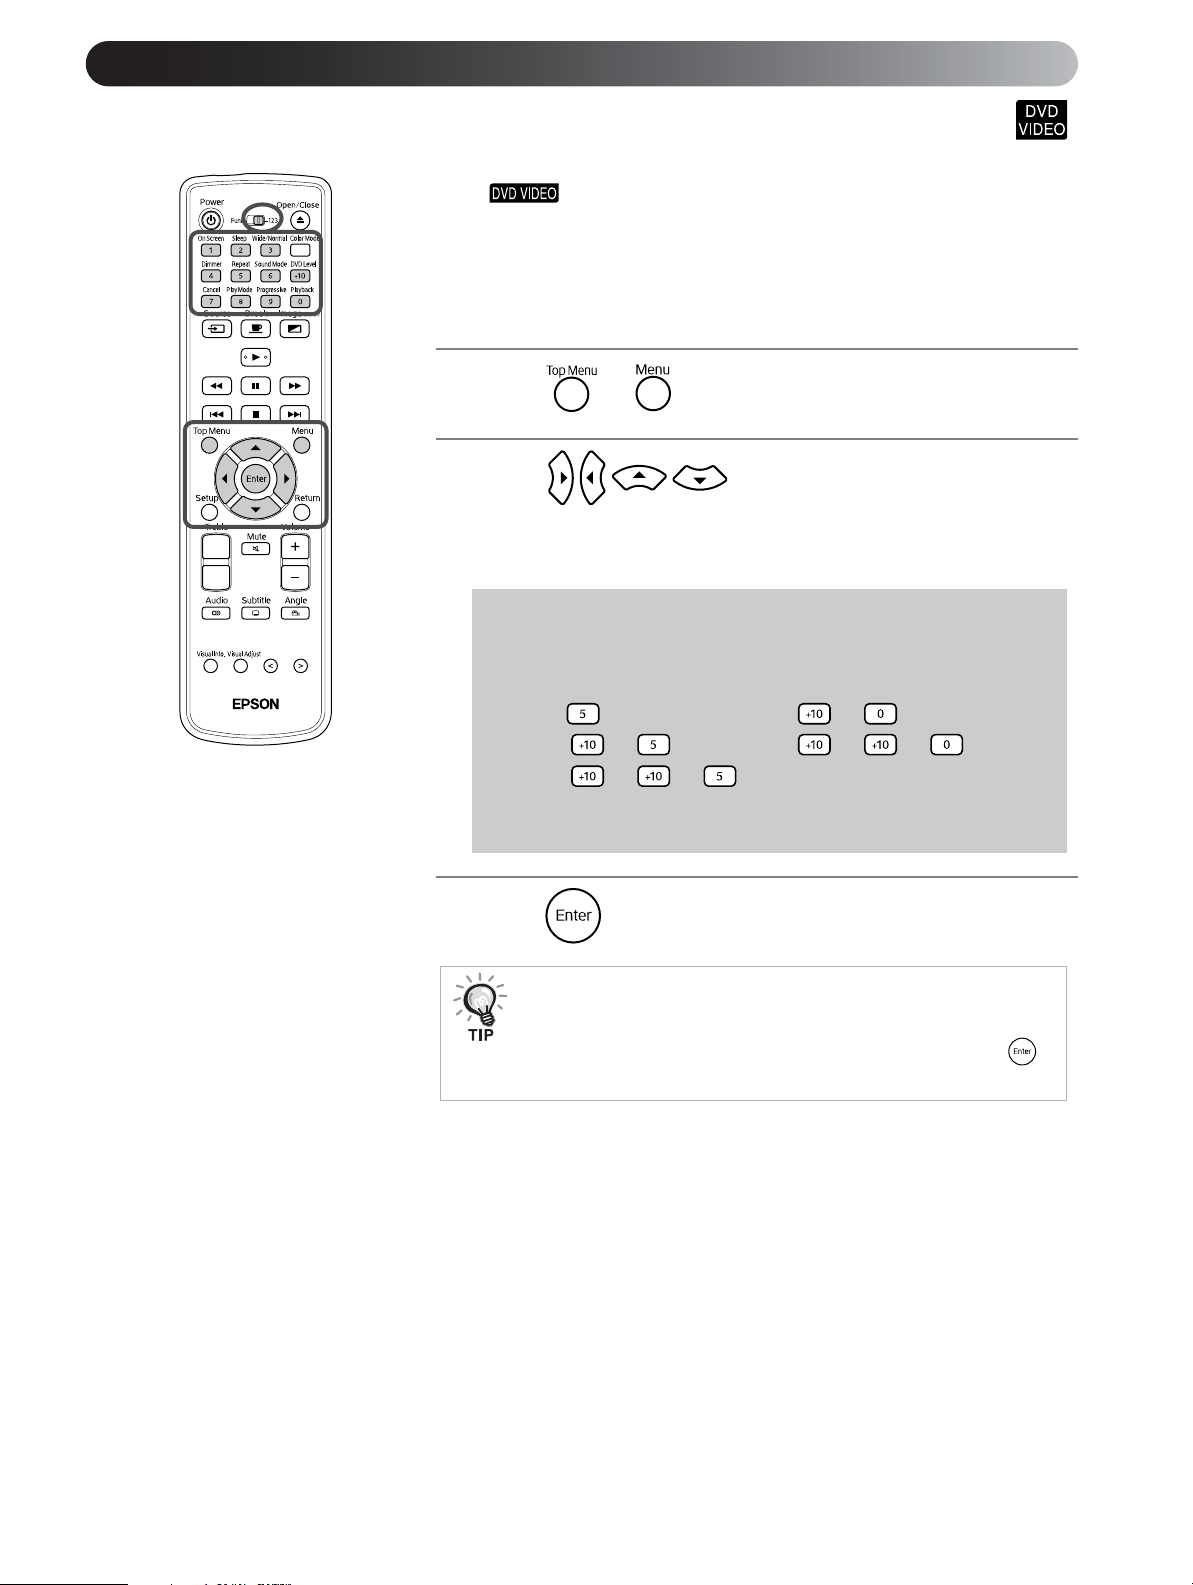
Using DVD menus
Some have one or both of the following types of menus.
Top menu: When multiple titles (video and audio) have been recorded, the
top menu lets you select them.
Menu: You can use menus to select chapters and playback settings such as
angle, audio, and subtitles.
Press or during playback or when stopped.
1
Press to select the item you want to see.
2
You can also select the title number or chapter number directly using the
numeric buttons.
Using the numeric buttons
First, set the function/numerics toggle switch to the [123] position. Then use
the buttons as follows:
5: 10: →
15: → 20: → →
25: → →
Once you have finished entering numbers, return the function/numerics toggle
switch back to the [Function] position.
Press .
3
• Certain discs may not contain a menu. If a menu is not recorded, these
operations cannot be made.
• Depending on the disc, playback may begin automatically, even if is
not pressed.
Advanced Operations
19
Page 20
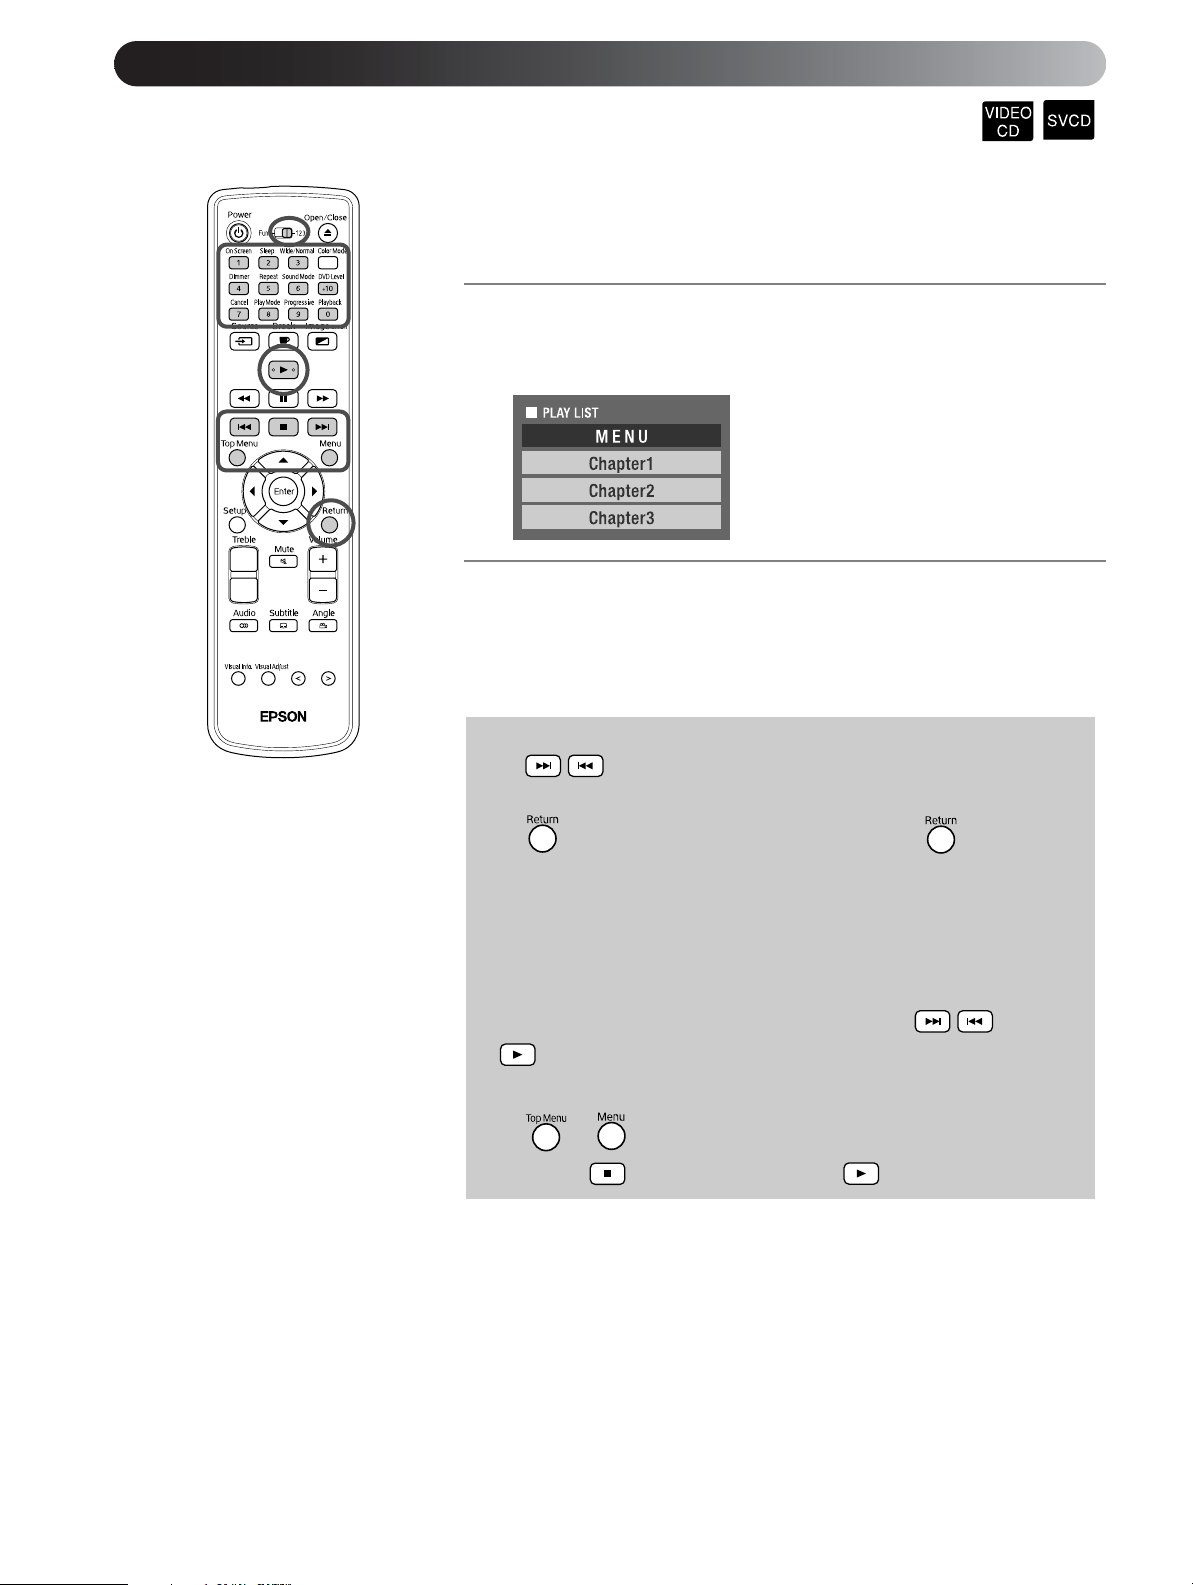
Using PBC (playback control)
When you insert a Video CD with PBC (playback control) enabled, a menu
screen is displayed. You can select the scene or information you wish to see
from this menu.
Insert a Video CD that includes PBC.
1
The following type of menu is displayed.
Select the item you want to see using the numeric buttons.
2
For instructions on using the numeric buttons, see page 19.
The selected contents are played.
To turn to the previous/next page of the menu screen:
Press / when the menu screen is displayed.
To open the menu screen during playback:
Press repeatedly until the menu is displayed. Each time is pressed, the
menu goes back by one step.
To play without using the menu (playback without PBC):
• When the video is stopped, specify the track number that you want to see using
the numeric buttons.
• When the video is stopped, select the track number using / then press
.
To open the menu screen when playing back without PBC:
Press or .
After pressing twice to stop playback, press .
20
Page 21
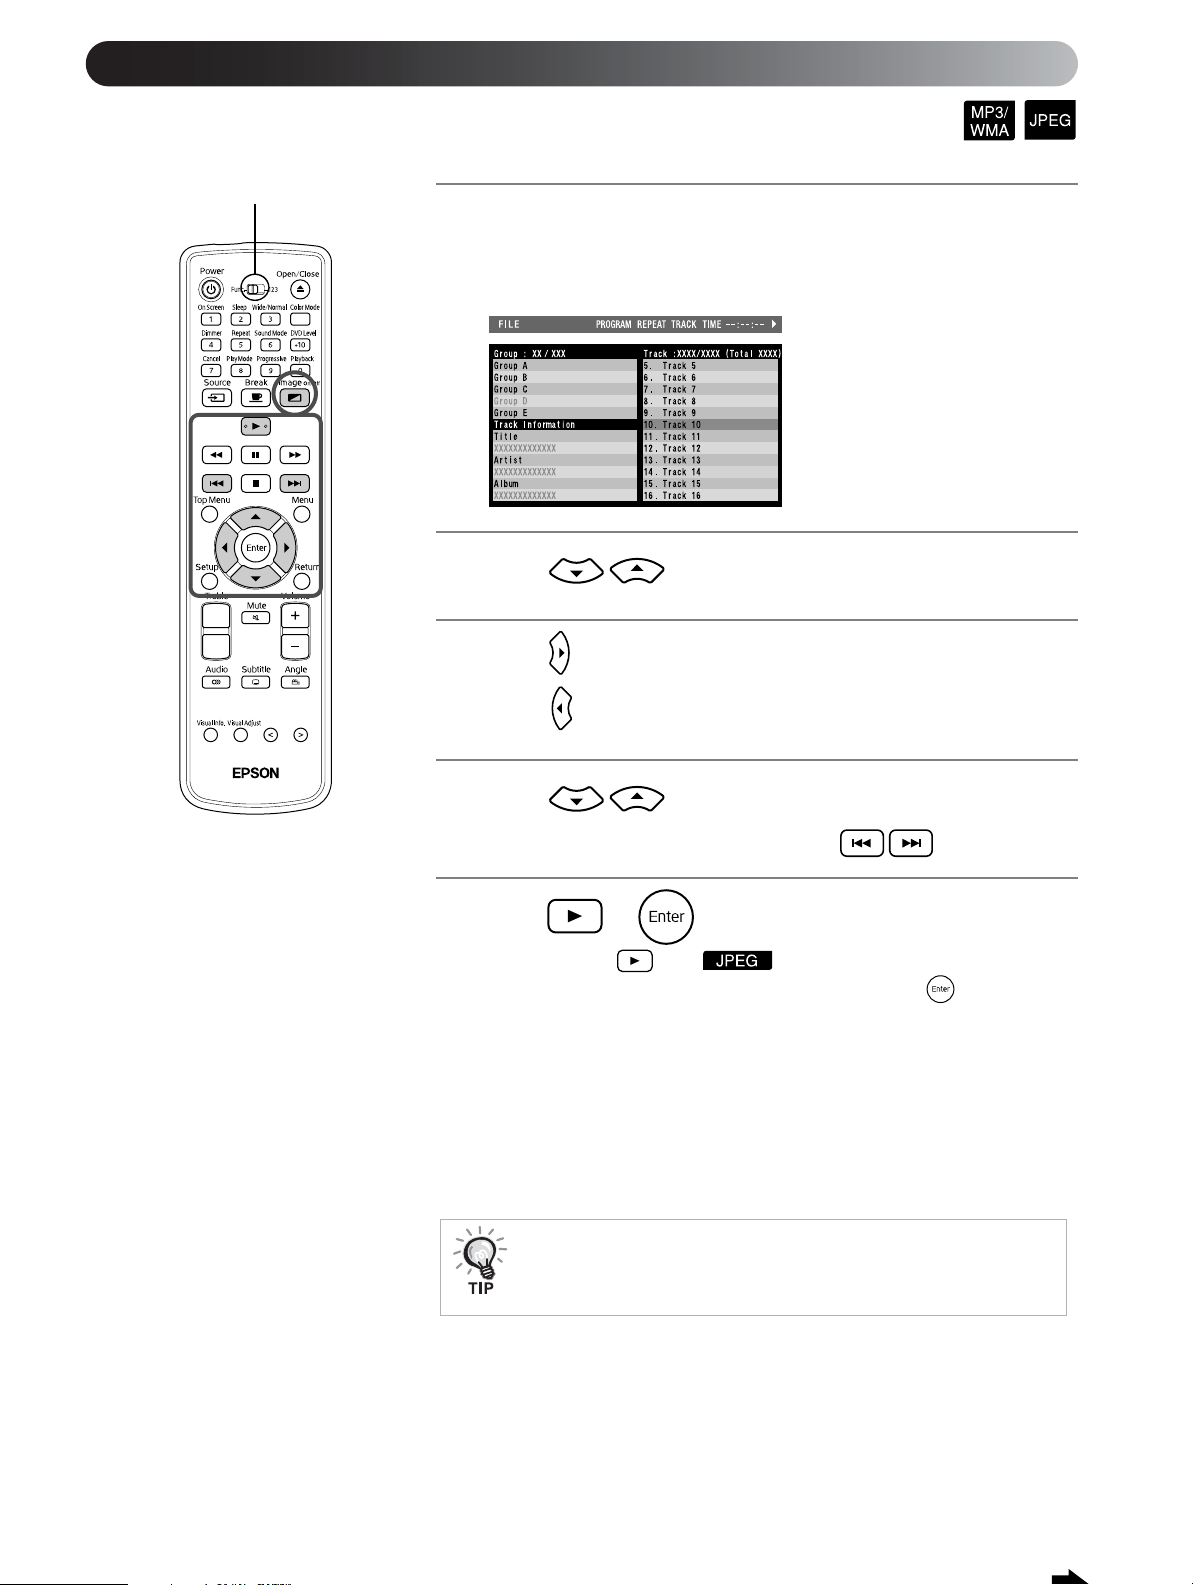
Playing MP3/WMA and JPEG files
Make sure you set the switch to the
[Function] position.
When playing a disc that contains both MP3/WMA files and
1
JPEG files, you see the following kind of group/track (file)
name list.
Press to select the group.
2
Advanced Operations
Press to move the pointer to the track (file) name list.
3
Press to return the pointer to the group name list.
Press to select the track.
4
You can also make the same selection using .
Press or to begin playback.
5
When you press for a , continuous playback begins from
the selected file (slideshow playback). When you press , only the
selected file is played.
• During slideshow playback, each file is displayed for approximately
3 seconds, then the next file is displayed. Once playback of all files is
completed, the slideshow stops automatically.
• You can also select tracks by entering the track number with the
numeric keys. In this case, steps 3-5 are unnecessary.
When playing back a disc on which a mixture of different file types (MP3/
WMA files and JPEG files) has been saved, select the file type to be played
from the File Type video settings menu. For details, see page 44.
21
Page 22

Make sure you set the switch to the
[Function] position.
To play MP3/WMA audio (Image Off)
Once menu selection is complete and the audio begins, press . MovieMate
beeps and the projection lamp turns off so you can enjoy just the music being
played.
Press to turn the lamp back on. Once the lamp has been turned off and when
the Image Off indicator is flashing orange, the lamp does not come back on even if
you press . Wait until the Image Off indicator goes out.
To repeat playback
Press during playback or when stopped.
1
Each time you press , the repeat mode changes as shown in the fol-
lowing table.
Press .
2
Repeat play position
Repeat
mode
Track
*
repeat
Group
repeat
Disc repeat
Repeat
OFF
Disc
Group 1 Group 2
Track 1 Track 2 Track A Track B
Screen
display
not
displayed
Display
window
display
not
displayed
*MP3/WMA files only
When MP3/WMA files are recorded on the disc, repeat play can be per-
formed even during program play and random play.
Repeat mode Screen display
Repeats the track chosen when repeat play was
selected
Repeats all tracks set during program play, or repeats
all tracks in random play
Repeat OFF not displayed not displayed
Display window
display
22
Page 23

Notes on playback
• Depending on the recording and the characteristics of the disc it is possible that
the disc may not be readable, or that reading the disc may take some time.
• The time it takes to read a disc differs depending on the number of groups or
tracks (files) recorded on the disc.
• The order of the group/track (file) name list display and the order displayed on a
PC screen may be different.
• When playing commercially available MP3 discs, it is possible that playback
will be in a different order from the order described on the disc.
• It may take some time to play still pictures containing MP3 files. The timeelapsed is not displayed until playback has begun. Further, there are times when
an accurate elapsed time is not displayed, even once playback has begun.
• It is possible that data that has been processed, edited, or saved using computer
image editing software might not play.
Specifications of files that can be played
To play a CD-R or CD-RW containing MP3/WMA or JPEG files with this
unit, the contents of the disc must conform to the following standards.
MP3/WMA
File system: ISO9660 level 1 or level 2
Discs that have been recorded in the packet write (UDF) format cannot be
read.
Bitrate: MP3: 32 kbps~320 kbps
WMA: 64 kbps - 160 kbps
Sampling frequency: 16 kHz, 22.05 kHz, 24 kHz, 32 kHz, 44.1 kHz, 48 kHz
Filename: Half-width English characters only. Must bear the “.mp3” or “.wma” file
extension. Distinction between upper- and lowercase characters is not per-
formed.
Group (folder) count: up to 99
Track (file) count: up to 1000
Other: It is possible to play multi-session recorded discs.
MovieMate is not capable of Multiple Bit Rate (a file format containing audio
recorded in numerous different bit rates within the one file) playback.
JPEG
File system: ISO9660 level 1 or level 2
Discs that have been recorded in the packet write (UDF) format cannot be
read.
Filename: Half-width English characters only. Must bear the “.jpg” or “.jpeg” file
extension. Distinction between upper- and lowercase characters is not per-
formed.
Total number of pixels: Images containing up to 8192 x 7680 pixels can be read.
However, because it takes time to reproduce files with a resolution exceeding
640 x 480 pixels, it is recommended that images be saved at 640 x 480 pixels.
Group (folder) count: up to 99
Track (file) count: up to 1000
Other: It is possible to play multi-session recorded discs.
Only baseline JPEG is supported.
Monochrome JPEG files cannot be read.
Progressive JPEG and motion JPEG are not supported.
JPEG data created by a digital camera and conforming to the DCF (Design
rule for Camera File system) standard is supported. When certain digital cam-
era functions such as automatic rotation have been used, it is likely that the
data will not comply with the DCF standard. If this is the case, playback may
not be possible.
Advanced Operations
23
Page 24

Selecting the chapter or track n umber
During playback, select the chapter or track number you wish to
play by pressing the numeric buttons.
For details on using the numeric buttons, see page 19.
• Can be used when stopped or when playing back
with PBC off.
• Can also be used when stopped.
• Depending on the disc, certain operations may not be possible.
Playing from a designated time (time search)
Make sure the switch is set to the
[Function] position.
You can play a disc from a specified time position. Depending on the disc, the
start point position varies as follows.
Time elapsed from the start of the title
When executing from stopped: Time elapsed from
the start of the disc
When executing during playback: Elapsed time from the start of the current
track being played
Press twice during playback or when stopped.
1
The following menu bar is projected.
Status bar
Menu bar
• This function can only be used during playback.
• Cannot be used when playing back using the PBC
function.
24
Press until the pointer reaches .
2
Press .
3
Enter the time using the numeric buttons.
4
• Specify the start position in hours/minutes/seconds. You can
leave out the minutes/seconds if desired.
• Specify the start position in minutes/seconds.
Page 25

Entering the time
To play a disc from 0 hours, 23 minutes, and 45 seconds, for example,
Set the Function/Numerics toggle switch to the [123] position.
Press the numeric buttons in the order of → → →
→ .
If you make a mistake, press and delete the incorrect number, then re-
enter the correct number.
Once you have finished entering the time, return the function/numerics
toggle switch back to the [Function] position.
Press .
5
Press once to cancel the menu bar.
6
• If the elapsed time is not displayed in the display window during play-
back with , this function will not work.
• It is also possible that some discs may prohibit time
searching.
• The status bar is not displayed when playing back cinemascope (letter-
box) . Although functions can be set in this state, when it is
necessary to display the status bar, press to return the aspect ratio
to normal. Press to return to the former aspect ratio.
• When playing back in program play or random play modes, this function
will not work.
Advanced Operations
25
Page 26

Looping playback of a favorite scene (A-B repeat playback)
Make sure the switch is set to the
[Function] position.
You can set the playback range (start point to end point) from the menu bar dur-
ing playback.
Press twice during playback.
1
The following menu bar is projected.
• Where possible, this function can be used during playback.
• Cannot be used when playing back using the PBC
function.
Press until the pointer reaches .
2
Press .
3
Press then select .
4
You can also select other repeat modes from here. See page 27
When you reach the scene or track where you want to start,
5
press .
The menu bar icon changes to .
When you reach the scene or track where you want to stop,
6
press .
The menu bar icon changes to and is displayed in the
display window of the main unit. A to B playback begins.
Press once to cancel the menu bar.
7
To cancel A to B playback
Do one of the following:
• Display the menu bar, select , then press twice.
• Press .
• Turn off the main power switch.
26
Page 27

• You cannot specify a range which includes multiple titles or tracks.
• “A-B repeat” cannot be performed at the following times.
- During program play - During random play
- During repeat play - During PBC
• The status bar is not displayed when playing back cinemascope (letter-
box) . Although functions can be set in this state, when it is
necessary to display the status bar, press to return the aspect ratio
to normal. Press to return to the former aspect ratio.
Looping playback (repeat play)
Make sure the switch is set to the
[Function] position.
Depending on the type of disc, you can loop playback within a range of titles,
chapters, or tracks, as in the following table.
Press during playback.
The repeat mode changes whenever you press . The repeat mode
name and icon are displayed on the projected screen and in the display
window.
• Where possible, this function can be used during playback.
• Cannot be used when playing back using the PBC
function.
Repeat play position
Repeat
mode
Chapter
repeat
Title repeat
Title
Chapter 1 Chapter 2 Chapter 3 Chapter 4
Screen
display
Display
window
display
Advanced Operations
Repeat
OFF
Repeat
mode
Track repeat
Repeat all
tracks
Repeat OFF
Repeat play position
Track 1 Tra c k 2 Track 3 Track 4
Screen
display
not
displayed
Display
window
display
not
displayed
27
Page 28

Canceling repeat play
• Press repeatedly until “ ” is displayed on the screen.
• Turn off the power switch on the main unit.
• You cannot use the “Title repeat” function with some DVDs.
•
• Display the menu bar and move the pointer to to select repeat
play. For details, see page 33.
To cancel repeat, press .
Repeat modes available during program play
and random play
Repeat mode Screen display
Repeats the chapter/track designated when repeat
play was selected
Repeats all tracks set during program play, or repeats
all tracks in random play
Repeat OFF
Display window
display
not displayed
28
Page 29

Playing in the order of your choice (program play)
Make sure the switch is set to the
[Function] position.
You can set titles, chapters, and tracks to play in the order of your preference.
Press when stopped.
1
Each time you press , the display window on the main unit changes
as follows. Press repeatedly until “PRGM” is displayed.
Program play
Random play (see page 30)
Normal
display
Set the order according to the follo wing screen explanations.
2
See “Using the numeric buttons” on page 19.
Press .
3
• Playback begins according to the order you set.
Normal playback
Advanced Operations
• Once the set playback is complete, playback ends and “Program” is
displayed.
Canceling set items on the program screen individually
Press to delete set numbers one by one.
Canceling all set items on the program screen
Press .
Set items are also cancelled when the power is switched off.
Resuming normal playback
When stopped, press repeatedly until the display window returns to its nor-
mal display state.
In this case, the contents entered in the program screen remain in memory. Program
play can be executed by pressing again and selecting “PRGM.”
• A maximum of 99 titles, chapters, or tracks can be selected. If you try to
enter more than 99, “FULL” is displayed.
• If the total playback time exceeds 9
hours, 59 minutes and 59 seconds, “--:--” is displayed in the display
window. However, you can continue to perform the set order as it is.
• If you press , instead of setting the chapter or track num-
ber, “ALL” is displayed and all of the chapters and tracks contained in
that title/group are selected.
• If stopped during program play mode, resume play cannot be used.
• Depending on the type of disc, you may not be able to use program play.
29
Page 30

Playing back at random (random play)
Set to the [Function] position before
performing operations
You can choose to play titles or chapters/tracks at random.
The playback order always changes when using random play.
Press when stopped.
1
Whenever you press the display window changes in the following
way. Keep pressing until “RANDOM” is displayed.
Program play (see page 29)
Random play
Normal
display
Press .
2
Once one title or track has finished, another title or track is played ran-
domly.
Normal playback
Resuming normal playback
When stopped, press repeatedly until the display window returns to its nor-
mal display state.
• Random play is cancelled if the following operations are performed.
- The disc tray is opened.
- Power is switched off.
• Even if you press repeatedly during random play, you cannot skip
to the previously played content. It only returns to the start of the current
chapter/track.
• If stopped during random play mode, resume play cannot be used.
30
Page 31

Changing the audio language
When a disc has been recorded with multiple audio signals or languages, you
can switch to the audio signal or language of your preference.
Press during playback.
1
The current audio settings are displayed.
While the audio settings are displayed, press repeat-
2
edly and select the desired setting.
Press to change the setting.
Advanced Operations
Wait a few seconds, or press .
3
• You can also use the menu bar to change the setting. See page 33.
• If a language code (AA, etc.) is displayed, see page 46.
• The meaning of the characters displayed during
playback is as follows.
- ST: Stereo - L: Left channel audio - R: Right channel audio
31
Page 32

Changing the subtitle display
You can choose whether or not to display subtitles for discs that have been
recorded with subtitles. When a disc has been recorded with multiple language
subtitles, you can switch to the available language of your preference.
Press during playback.
1
The current subtitle settings are displayed.
While the subtitle settings are displayed, press
2
repeatedly to select subtitles on or subtitles off. Press
and turn subtitle display on/off.
to select the subtitle language.
If you press repeatedly, you can select the subtitle type
Wait a few seconds, or press .
3
Changing the camera angle
For discs that have been recorded with multiple camera angles, you can switch
from the main angle to a different camera angle, such as from above, or from
the right, during playback.
Press during playback.
1
The current angle is displayed.
While the angle is displayed, press repeatedly and
2
select the desired angle.
32
Press to change the setting.
Wait a few seconds, or press .
3
Page 33

Using the menu bar
Make sure the switch is set to the
[Function] position.
Press twice during playback.
1
The following status bar and menu bar are projected.
Press until the pointer reaches the item you wish to
2
use.
Press .
3
• Press once to cancel the menu bar.
• When playback is stopped, some functions may not work.
Advanced Operations
• The status bar is not displayed when playing back cinemascope (letter-
box) . Although functions can be set in this state, when it is
necessary to display the status bar, press to return the aspect ratio
to normal. Press to return to the former aspect ratio.
Menu bar function list
Select the repeat mode.
See page 27, 28.
Set a time based start point.
See page 24.
only.
During playback, select the chapter number you wish to play using
the numeric buttons.
Set the function/numerics toggle switch to the [123 ] position. Then
enter the number as shown in the following examples.
5: 10: → 20: →
If you make a mistake, enter the correct number again.
Press .
Select the audio language/type.
See page 31.
Select to change the subtitles display.
See page 32.
Select the angle.
See page 32.
33
Page 34

Selecting Auto-standby and Sleep timer settings
A
Make sure the switch is set to the
[Function] position
Auto standby: When playback has finished or has been stopped, or an opera-
tion has not been performed for about 3 minutes, the power switches off auto-
matically.
Sleep timer: Once the set time has elapsed, the power switches off automati-
cally. This prevents unneccesary power being consumed if you fall asleep
while watching a movie.
You cannot use auto standby and sleep timer at the same time.
Press .
• Each time you press , the display window changes as follows.
Press repeatedly until the desired item is displayed.
uto standby is activated.
After 10 minutes have elapsed, the power
switches off.
After 150 minutes have elapsed, the power
switches off.
Sleep timer is cancelled.
• If you select something other than “A. STBY ON,” auto standby is
cancelled.
Setting auto stand-by
“A. STBY” flashes approximately 20 seconds before the power switches off.
Changing the sleep timer
Press repeatedly and select the new time.
Checking the sleep timer setting
Once the sleep timer has been set, press once to view the setting in the dis-
play window.
Canceling the sleep timer
Do either of the following:
Press .
Press repeatedly until “SLEEP OFF” is displayed in the display window.
• Sleep timer settings are not saved. If the power is switched off, the sleep
timer is canceled.
• In external video mode, video is switched off automatically if no signal
is input and no operations are performed for 30 minutes. This function is
performed regardless of the sleep timer settings.
• Auto standby cannot be used in external video mode.
• Auto standby does not work with discs that return to the menu once
playback has completed.
34
Page 35

Changing from Progressive to Interlaced mode
Make sure the switch is set to the
[Function] position.
Locking the tray
For the best image quality, MovieMate uses the Progressive video display
mode. You can change to the Interlaced mode if necessary.
When there is no disc loaded in the disc tray (or when a video is
stopped), press .
Whenever you press the display window display changes in the fol-
lowing way.
All scan lines are displayed in one video
field. This achieves a far superior image
than interlacing.
Traditional video system. A single screen
is made up of two video fields comprising
the odd number of scan lines and the
even number of scan lines, displayed
alternately.
Advanced Operations
You can lock the disc tray so that children cannot interfere with it.
With the power turned on press and hold on the MovieMate
control panel, then press .
• “LOCKED” appears in the display window, and the disc tray is locked.
• To cancel the disc lock, follow the same procedure. “UNLOCKED”
appears in the display window.
35
Page 36

Using External Video Equipment
Connecting to other video equipment
You can connect your MovieMate to devices that have
a video output port, such as:
- VCRs - Game consoles
- Video cameras
If the video equipment you are connecting supports
both S-Video and composite video formats, you can
enjoy higher quality images by using the S-Video
connection.
The composite video format is also called “Video Out.”
• Before connecting, turn off all equipment. Damage
• Do not try to force a cable connector to fit a port
• Close the interface cover when you are not connect-
Connection cables may be included with your
video device, or you may purchase them from an
electronics store. External connection cables are
not included with MovieMate.
may result if you try to connect when the power is
on.
with a different shape. This may cause damage to
MovieMate or to the external device.
ing to external video equipment.
Using the composite video connection
Output
L
Audio
R
Vid eo
To Audio out port
To Audio input port
To Video out port
Video/audio cable
White
Red
Yellow
To Video input port (yellow)
36
Page 37

Using the S-Video connection
RCA audio cable
Output
To Audio out port
L
Audio
R
S-Video
To S-Video out port
White
Red
To Aud io
input port
S-Video cable
Connect with the ▲
facing downwards
To S-Video input port
Projecting images from external video equipment
Remove the lens cover if it is in place.
1
Turn on the MovieMate power switch, then press .
2
Press .
3
“VIDEO” appears in the display window and MovieMate switches to
external video mode.
Switch on the power to the connected video equipment, then
4
start playback.
If the lamp was off, it comes on.
After a moment, the video is projected.
Advanced Operations
To return to the standard built-in DVD player
Press . “DVD/CD” appears in the display window and MovieMate switches
back to DVD mode.
Functions available in external video mode
The following functions are available when you are using external video equipment:
Color Mode (page 17) Wide/Normal (page 57) Sleep (page 34)
Sound Mode (page 40) DVD level (page 41, 42) Break (page 17)
Image On/Off (page 22) Adjusting high pitched tones (page 40) Muting (page 17)
Volume (page 13) Visual information (page 50) Image quality correction (page 48)
Select button (page 48, 50)
37
Page 38

Using External Audio Equipment
Listening with headphones
• When listening with headphones, make sure the volume is not too high. You can damage your hearing when listen-
ing to sounds at high volume over an extended period of time.
• Don’t set the volume too high from the outset. A sudden loud sound may cause damage to your headphones or
your hearing. As a precaution, lower the volume before you switch the power off then raise it gradually after you
switch it back on.
Connect your headphones as shown below.
To jack
Headphones
Once you have connected your headphones to the headphone jack, sound does not come from the speakers. If MovieMate
is connected to a sub-woofer, sound also stops coming from the sub-woofer.
38
Page 39

Connecting to audio equipment with an optical digital input
You can connect to AV amplifiers and equipment capable of making digital recordings when they are equipped with a
digital audio input port. You will need an optical digital audio cable, which may be included with your equipment or can
be purchased from an electronics dealer.
When connecting the cable, remove the protective cap, align the shape, and insert firmly.
Apply the cap when not in use to prevent dust from entering the port.
Digital recorder
AV amplifier
• You can change the signal being output from the Optical Audio-Out port by using the “Digital OUT” setting in the set-
tings menu. For detailed output signal information, see page 46.
• The settings menu “D. Range Compression” setting is invalid when connecting to an amplifier with a built-in Dolby
Digital decoder. For details, see page 45.
To optical digital
input port
Optical digital cable
To Optical Audio-Out port
Connecting the optional subwoofer
You can enjoy more powerful bass by connecting to the optional subwoofer.
For connection and usage instructions, refer to the User’s Guide provided with the subwoofer.
Advanced Operations
Optional Epson powered subwoofer (actual
product may look slightly different)
RCA cable (included with the
subwoofer)
To Subwoofer out port
39
Page 40

Selecting the Sound Mode
Make sure the switch is set to the
[Function] position.
You can obtain enhanced audio from the speakers by activating the JVC origi-
nal sound system function.
Press .
Each time you press , the display window display changes as fol-
lows. Press repeatedly until the desired mode is displayed.
Select the mode that produces the best sound for
the disc you are playing.
Cancels the JVC original sound system
(default setting)
Adjusting high-pitched tones
This feature, which adjusts the volume of high-pitched tones, is available only
when audio is being input from external video equipment.
raises
lowers
40
Page 41

Adjusting the audio playback level
Make sure the switch is set to the
[Function] position.
The default audio setting plays DVDs at a higher volume than other discs. You
can adjust this default setting if necessary.
Press during playback.
Each time you press , the display window changes as follows. As
you listen to the audio being played, press repeatedly until the setting you
want is displayed.
Standard
Middle
High (default setting)
Advanced Operations
• The setting is only effective when is played. It does not affect
the output level from the Optical Audio-Out port.
• This operation can also be performed when the video is stopped or
paused.
41
Page 42

Adjusting the audio input level of external audio equipment
Make sure the switch is set to the
[Function] position.
You can adjust the audio input level of equipment connected to the Audio port.
Press and switch to the external video mode.
1
Press and hold for approximately 2 seconds.
2
Each time you press and hold , the display window changes as
follows.
For normal use (default setting)
Use this setting when the input level from external
equipment is too low and the audio is difficult to hear.
42
Page 43

Fine-Tuning Your MovieMate
Settings Menu
You can adjust the MovieMate settings to suit your viewing environment.
Using the settings menu
The Settings menu allows you to change the language, audio and video
options, and more. This section describes how to use the menu.
When a video is stopped, or when there is no disc loaded in
1
the disc tray, press .
The following settings menu is displayed.
Press to mov e the pointer to the icons at th e top right
2
and select the menu group.
Video settings menu
Language settings menu
Press to select the item to be set.
3
Audio settings menu
Other settings menu
Press to display the options in a pull-down menu.
4
43
Page 44

5
To return to the previous menu level, press .
Settings menu options
Boldface indicates the default.
Language settings menu
Item Settings
Menu Language
Select the language for the DVD video menu.
Audio Language
Select the language for the DVD video
soundtrack.
Subtitle Language
Select the language for the DVD video
subtitles.
On-screen language
Select the language for displaying the menus
(Settings, Picture Quality, Video Information).
Press to select the item, then press .
For “AA” and other language codes, see the “Language Code List”
on page 46.
These settings become available when settings have been recorded
on the disc itself. When settings have not been recorded, the setting
contents become available. If the selected language has not been
recorded on the disc, the default language for that disc is used.
ENGLISH
FRENCH
SPANISH
Video settings menu
Item Settings
Video Source Auto: The image source (video/film) is determined automatically.
Film: Suitable for film, or video images that have been recorded
with the progressive scan method.
Video: Suitable for video images.
Screensaver
Select whether or not to fade out the projected
screen after a still picture has been displayed
for around 5 minutes and no operation has
been performed.
File Type
Select which format to play when a disc
containing both MP3/WMA and JPEG files is
inserted.
On: Fades out.
Off: Does not fade out.
Audio: Plays only MP3/WMA files.
Photo: Plays only JPEG files.
When you change this setting, it does not take effect until you open
and close the disc tray, or switch the power off and then on.
44
Page 45

Audio settings menu
Item Settings
Digital Audio Output
Select the output signal according to the
equipment connected to the Optical AudioOut port.
For detailed signal information, see page 46.
Downmix
Toggles the signal from the Optical AudioOut port between [Digital Audio Output] and
[PCM only]. The audio signal from the builtin speaker and the headphone jack is also
changed.
D. (Dynamic) Range Compression
Corrects the variation in the way we hear loud
and quiet sounds when playing back at low
volume.
Only available for DVD videos that have been
recorded in Dolby Digital.
PCM only: Use when connected to equipment that is only
compliant with Linear PCM (Pulse Coded
Modulation).
DOLBY DIGITAL/PCM: Use when connected to a Dolby Digital
Decoder or when connected to equipment with this
function.
Stream/PCM: Use when connected to a DTS/Dolby Digital
Decoder, or when connected to equipment with these
functions.
Dolby Surround: Use when connecting to equipment with built-in
Dolby Pro-Logic decoder.
Stereo: Use when connecting to standard equipment.
Auto: D. Range Compression is performed automatically.
On: D. Range Compression is always on.
Other settings menu
Item Settings
Resume
Selects whether to resume playback from the
point where it was stopped or from the
beginning of the chapter.
On-screen Guide
Selects whether to display the on-screen
guide.
Parental Lock
Sets the parental lock that cuts extreme scenes
from the DVD video and replaces them with
other scenes.
On: Resumes playback from the point where it was stopped.
Off: Playback starts from the beginning.
On: Displayed.
Off: Not displayed.
Country code: Select US. For a list of country codes, see page 47.
Set level: The smaller the numerical value, the greater the
restriction. When None is selected, Parental Lock is
disabled.
Password: Make sure you set a four digit password using the
remote control numeric buttons (1-9, 0). The
password set here is input upon playback or the
next time you make changes to settings. If you
forget the password, input 8888. If the wrong
password is entered three times, the settings menu
closes.
EXIT: Exits the parental lock settings.
45
Page 46

Language codes
Code Language Code Language Code Language Code Language
AA Afar GD Scots Gaelic MK Macedonian SN Shona
AB Abkhazian GL Galician ML Malayalam SO Somali
AF Afrikaans GN Guarani MN Mongolian SQ Albanian
AM Ameharic GU Gujarati MO Moldavian SR Serbian
AR Arabic HA Hausa MR Marathi SS Siswati
AS Assamese HI Hindi MS Malay (MAY) ST Sesotho
AY Aymara HR Croatian MT Maltese SU Sundanese
AZ Azerbaijani HU Hungarian MY Burmese SV Swedish
BA Bashkir HY Armenian NA Nauru SW Swahili
BE Byelorussian IA Interlingua NE Nepalese TA Tamil
BG Bulgarian IE Interlingua NL Dutch TE Telugu
BH Bihari IK Inupiak NO Norwegian TG Tajik
BI Bislama IN Indonesian OC Occitan TH Thai
Bengali
BN
Bangla
BO Tibetan JI Yiddish PA Punjabi TL Tagalog
BR Breton JW Javanese PL Polish TN Setswana
CA Catalan KA Georgian PS Pashto, Pushto TO Tongan
CO Corsican KK Kazakh PT Portuguese TR Turkish
CS Czech KL Greenlandic QU Quechua TS Tsonga
CY Welsh KM Cambodian RM Rhaeto-Romance TT Tatar
DA Danish KN Kannada RN Kirundi TW Twi
DZ Bhutani KO Korean (KOR) RO Rumanian UK Ukranian
EL Greek KS Kashmiri RU Russian UR Urdu
EO Esperanto KU Kurdish RW Kinyarwanda UZ Uzbek
ET Estonian KY Kirghiz SA Sanskrit VI Vietnamese
EU Basque LA Latin SD Sindhi VO Volapuk
FA Persian LN Lingala SG Sangho WO Wolof
FI Finnish LO Laotian SH Serbo-Croatian XH Xhosa
FJ Fijian LT Lithuanian SI Singhalese YO Yoruba
FO Faroese LV Latvian, Lettish SK Slovak ZU Zulu
FY Frisian MG Malagasy SL Slovenian
GA Irish MI Maori SM Samoan
IS Icelandic OM (Afan) Oromo TI Tigrinya
IW Hebrew OR Oriya TK Turkmen
46
“Digital Audio Output” settings and output signals
Playback Disc
Stream/PCM Dolby Digital/PCM PCM Only
48 kHz, 16/20/24 bit
Linear PCM DVD video
96 kHz Linear PCM DVD video
DTS DVD video DTS bit stream 48 kHz 16 bit linear PCM
Dolby digital DVD video Dolby digital bit stream
Audio CD Video CD SVCD 44.1 kHz, 16 bit stereo linear PCM/48 kHz, 16 bit linear PCM
DTS Audio CD DTS bit stream 44.1 kHz, 16 bit linear PCM
MP3/WMA disc 32/44.1/48 KHz, 16 bit linear PCM
“Digital Audio Output” Settings
48 kHz, 16 bit stereo linear PCM
48 kHz, 16 bit stereo linear
PCM
Page 47

Country (area) code list
AD Andorra ET Ethiopia LC Saint Lucia SD Sudan
AE United Arab Emirates FI Finland LI Liechtenstein SE Sweden
AF Afghanistan FJ Fiji LK Sri Lanka SG Singapore
AG Antigua and Barbuda
AI Anguilla LS Lesotho SI Slovenia
AL Albania
AM Armenia LU Luxembourg SK Slovakia
AN Netherlands Antilles FO Faroe Islands LV Latvia SL Sierra Leone
AO Angola FR France LY Libyan Arab Jamahiriya SM San Marino
AQ Antarctica FX France, Metropolitan MA Morocco SN Senegal
AR Argentina GA Gabon MC Monaco SO Somalia
AS American Samoa GB United Kingdom MD Moldova, Republic of SR Suriname
AT Austria GD Grenada MG Madagascar ST Sao Tome and Principe
AU Australia GE Georgia MH Marshall Islands SV El Salvador
AW Aruba GF French Guiana ML Mali SY Syrian Arab Republic
AZ Azerbaijan GH Ghana MM Myanmar SZ Swaziland
BA Bosnia and Herzegovina GI Gibraltar MN Mongolia TC Turks and Caicos Islands
BB Barbados GL Greenland MO Macau TD Chad
BD Bangladesh GM Gambia MP Northern Mariana Islands
BE Belgium GN Guinea MQ Martinique
BF Burkina Faso GP Guadeloupe MR Mauritania TG Togo
BG Bulgaria GQ Equatorial Guinea MS Montserrat TH Thailand
BH Bahrain GR Greece MT Malta TJ Tajikistan
BI Burundi
BJ Benin MV Maldives TM Turkmenistan
BM Bermuda GT Guatemala MW Malawi TN Tunisia
BN Brunei Darussalam GU Guam MX Mexico TO Tonga
BO Bolivia GW Guinea-Bissau MY Malaysia TP East Timor
BR Brazil GY Guyana MZ Mozambique TR Turkey
BS Bahamas HK Hong Kong NA Namibia TT Trinidad and Tobago
BT Bhutan
BV Bouvet Island NE Niger TW Taiwan
BW Botswana HN Honduras NF Norfolk Island
BY Belarus HR Croatia NG Nigeria
BZ Belize HT Haiti NI Nicaragua UA Ukraine
CA Canada HU Hungary NL Netherlands UG Uganda
CC Cocos (Keeling) Islands ID Indonesia NO Norway
CF Central African Republic IE Ireland NP Nepal
CG Congo IL Israel NR Nauru US United States
CH Switzerland IN India NU Niue UY Uruguay
CI Cote d’lvoire
CK Cook Islands OM Oman
CL Chile IQ Iraq PA Panama
CM Cameroon IR Iran (Islamic Republic of) PE Peru
CN China IS Iceland PF French Polynesia
CO Colombia IT Italy PG Papua New Guinea VE Venezuela
CR Costa Rica JM Jamaica PH Philippines VG Virgin Islands (British)
CU Cuba JO Jordan PK Pakistan VI Virgin Islands (U.S.)
CV Cape Verde JP Japan PL Poland VN Viet Nam
CX Christmas Island KE Kenya
CY Cyprus KG Kyrgyzstan
CZ Czech Republic KH Cambodia PN Pitcairn
DE Germany KI Kiribati PR Puerto Rico WS Samoa
DJ Djibouti KM Comoros PT Portugal YE Yemen
DK Denmark KN Saint Kitts and Nevis PW Palau YT Mayotte
DM Dominica
DO Dominican Republic QA Qatar ZA South Africa
DZ Algeria KR Korea, Republic of RE Reunion ZM Zambia
EC Ecuador KW Kuwait RO Romania Z R Zaire
EE Estonia KY Cayman Islands RU Russian Federation ZW Zimbabwe
EG Egypt KZ Kazakhstan RW Rwanda
EH Western Sahara
ER Eritrea SB Solomon Islands
ES Spain LB Lebanon SC Seychelles
Falkland Islands
FK
(Malvinas)
Micronesia
FM
(Federated States of)
South Georgia and the
GS
South Sandwich Islands
Heard Island and
HM
McDonald Islands
British Indian Ocean
IO
Territory
Korea, Democratic
KP
People’s Republic of
Lao People’s Democratic
LA
Republic
LR Liberia SH Saint Helena
LT Lithuania SJ Svalbard and Jan Mayen
French Southern
TF
Territories
MU Mauritius TK Tokelau
NC New Caledonia TV Tuvalu
Tanzania, United
TZ
Republic of
United States Minor
UM
Outlying Islands
NZ New Zealand UZ Uzbekistan
Vatican City State
VA
(Holy See)
Saint Vincent and the
VC
Grenadines
Saint Pierre and
PM
Miquelon
PY Paraguay YU Yugoslavia
SA Saudi Arabia
VU Vanuatu
Wallis and Futuna
WF
Islands
47
Page 48

Picture Quality Menu
You can adjust the brightness, contrast, and other values of the projected image.
Using the Picture Quality menu
Press during projection.
1
The following menu is displayed.
Press repeatedly until the item that you want to
2
change is displayed.
The menu item changes as follows whenever is pressed.
Brightness → Contrast → Color Saturation → Tint → Sharpness → Key-
stone → Exit Picture Quality menu
Press to make your adjustments.
3
Press .
4
The adjustment closes and the Picture Quality menu disappears.
To return to the previous setting in a menu, press .
48
Page 49

Picture Quality menu settings
Setting Item Setting Contents
Brightness Adjusts the image brightness.
Contrast Adjusts the difference between light and shadow in the image.
Color Saturation Adjusts the color saturation for the image.
Tint Only displayed when an NTSC signal is being input.
Adjusts the image tint.
Sharpness Adjusts the image sharpness.
Keystone If the screen is not positioned vertically, the projected image is distorted in the shape of a
keystone. You can correct keystone distortion as follows:
49
Page 50

Video Information Menu
You can view status information and select “Video Signal,” “High Altitude Mode,” and “Lamp-Hours Reset.”
Using the video Information menu
Press during projection.
1
The following Information is displayed.
Press repeatedly until the item that you want to confirm
2
or change is displayed. The menu item changes as follows
whenever is pressed:
Information → Video Signal → High Altitude Mode → Lamp-Hours
Reset → Exit video Information menu
Press to make your adjustments.
3
Press .
4
The adjustment closes and the video Information menu disappears.
To return to the previous setting in a menu, press .
50
Page 51

Video Information menu settings
Setting Item Setting Contents
Information
Displays the
current status.
Video Signal Sets the signal format of the TV or other video equipment connected to the Video input port or
High Altitude
Mode
Lamp-Hours
Reset
Lamp Hours: Accumulated usage time of the lamp. 0H is displayed for 0-10 hours. Displayed in
units of 1 hour for 10 hours and above. The display changes to yellow text when it
is time to change the lamp.
Source: Displays whether standard DVD images are being projected, or images from
external video equipment are being projected.
Video Signal: Displays the format of the video signal being input.
the S-Video input port. At the time of purchase, this is set to “Auto” so the video signal is
recognized automatically. If interference appears in the projected images or no images appear
when you select “Auto,” select the appropriate signal manually.
When using MovieMate in high altitude areas (above 4,900 feet), select ON.
If the lamp has been replaced, make sure you initialize this setting to restart the timer.
51
Page 52

Troubleshooting and Maintenance
Solving problems
Reading the indicator lights
You can check MovieMate’s status using the indicators
on the top panel.
Check the following table and follow the steps to rem-
edy the problem.
If all indicators are switched off, make sure the power
cable is connected correctly and the main power switch
is turned on.
52
Page 53

When flashes green / orange alternately
Error
: flashing green/orange alternately
: lit :flashing : off
Red
Red
Red
Red
Red
Internal error
Turn the main power switc h off t hen o n. If
the indicator status does not change once
has been pressed and the power
switched on . . .
Fan related error/Sensor error
Disconnect the power cable from the electrical
outlet and contact Epson as described on
page 56.
High temperature error
(overheating)
The lamp turns off automatically and
projection stops. After MovieMate is in
this state for around 40 seconds and
then enters standby mode, check the
two items listed to the right.
If the power was turned off, turn the main
power switch back on again.
• Place MovieMate at least 8
inches away from the wall.
• Clean the air filter as
described on page 57.
Lamp error/Lamp fails to light up/Lamp cuts out /Lamp cover open
Check if the lamp is broken. See page 58.
Reinsert the lamp, then turn on the main
The lamp is not broken
power switch and press .
If the indicator status
does not change
once has been
pressed and the
power turned on . . .
If the condition is not
fixed once the lamp
is re-inserted . . .
The lamp is broken
Contact Epson as described on page 56.
When the or indicators flash orange
High-speed cooling in
Orange
Green
Orange
Green
progress
You can continue projecting in
this state. MovieMat e sto p s
automatically if subsequent
high temperatures are registered.
Lamp replacement notification
Replace the lamp as soon as possible.
If you continue using MovieMate, it is possible that the lamp may explode. See page 58.
Check the two items listed below.
• Place MovieMate at least 8
inches away from the wall.
• Clean the air filter as described
on page 57.
Warning
: lit : flashing : off
If there is no improvement
when you press and
switch the power on, discontinue use and disconnect the
power cable from the electrical
outlet. Contact Epson as
described on page 56.
53
Page 54

When the or indicators are off
Normal
: lit : flashing : off
MovieMate is ready to be used.
In warm-up mode, pressing or has no effect.
Do not turn off the power or unplug the cable during warm-up, as this
may reduce the lifespan of the lamp.
Green GreenGreen
Standing by
OrangeOrange
Warming up
(about 20 seconds)
Projection in
Green GreenGreen
Green Orange
Green GreenGreen
Progress
Cooling down
(about 9 seconds)
Break
The operation of all remote control and MovieMate buttons is suspended during cool-down.
MovieMate enters standby mode once cool-down has completed.
Do not turn off the power or unplug the cable during cool-down, as this
may reduce the lifespan of the lamp.
Press to return to normal playback.
Solving problems
If MovieMate is not functioning normally, check the following notes before requesting repairs. If MovieMate fails to
improve, contact Epson as described on page 56.
When this happens . . . Check the following:
Reference
page
Power does not turn on Is the main power switch in the on position? page 11
Disconnect and reconnect the power cable. page 11
Is MovieMate cooling down? page 54
If the indicator goes on and off when you touch the power cable, turn
page 56
off the main power switch, then disconnect and reconnect the power
cable. If MovieMate fails to improve, it is possible that the power cable
has been damaged. Stop using MovieMate, disconnect the power cable
from the electrical outlet, and contact Epson.
No images appear Is the Image Off indicator lit orange? page 22
You cannot play DVD videos if the disc region code does not
-
correspond to the region code label on the side of this unit.
page 37
Press to switch to DVD.
Is the lamp burned out? page 53
Images are fuzzy or out of
focus
Has the focus been adjusted? page 13
Is the lens cover in place? page 11
Is the projector at the correct distance? page 60
Could there be condensation on the lens? -
Images appear dark Is the color mode appropriate to the usage environment? page 17
Is the lamp due for replacement? page 58
Is the screensaver running? page 44
54
Page 55

The remote control does not
work
No sound can be heard or
the sound is faint.
The audio distorts Is the volume too loud? page 13
The audio/subtitle language
cannot be changed
Subtitles do not appear If there are no subtitles on the disc, they are not displayed. -
Is the Function/Numerics toggle switch in the [1 2 3] (numerical input)
position?
Depending on the disc, certain operations are prohibited. -
Are the batteries dead, or have the batteries been inserted correctly? page 8
Has the volume been adjusted to the minimum setting? page 13
Is mute mode active? Press .
Is the DVD level setting set to [DVD LEVEL 1]? page 41
If multiple languages are not recorded on the disc, they cannot be
changed.
Is the subtitle language set to “Off”? page 32
When you use A-B repeat, subtitles may not be displayed before and
after point A and point B.
page 19
-
-
-
Solving problems using external video equipment
When this happens . . . Check the following:
No images appear Is the power for the connected equipment turned on?
Switch on the power to the connected equipment then start playback.
When signals have been connected to both the S-Video input port and
the Video input port, only the S-Video signal is available. If you want to
watch the video equipment connected to the Video input port,
disconnect the cable from the S-Video input port.
“Signal not supported” is
displayed
“No signal” is displayed Are the cables connected correctly? page 36, 37
The signal is distorted If an extension cable is used, electrical interference may affect the
Image is cut off (too large)
or too small
Image colors are not right In the video Information menu, set the “Video Signal” to the signal
If you cannot project even when the “Video Signal” is set to “Auto” in
the video Information menu, set to the signal format appropriate to the
equipment.
Is the power to the connected equipment turned on?
Switch on the power to the connected equipment then start playback.
Press to switch to the connected equipment.
signals. Connect amplification equipment and check.
MovieMate automatically recognizes and projects the aspect ratio for
the input signal. If the aspect ratio is not projected correctly, press
and select the aspect ratio appropriate to the input signal.
format appropriate to the equipment.
Reference
page
page 37
-
page 51
page 37
page 37
-
-
page 51
55
Page 56

Where to get help
Epson provides technical assistance 24 hours a day at http://support.epson.com. Here you can
access troubleshooting information, download product documentation, and receive technical advice
through e-mail.
To use the Epson PrivateLine Support service, call (800) 637-7661 and enter the PIN on the Epson
PrivateLine Support card that came with your MovieMate. This is the fastest way of speaking to a live
representative, and it’s free. This service is available 6
day, for the duration of your warranty period.
You may also speak with a projector support specialist by dialing one of these numbers:
AM to 6 PM, Pacific Time, Monday through Fri-
U.S.: (562) 276-4394, 6
Canada: (905) 709-3839, 6 AM to 6 PM, Pacific Time, Monday through Friday
Toll or long distance charges may apply.
Before you call, please have the following information ready:
Product name (Epson MovieMate 25)
Product serial number (located on the bottom of MovieMate)
Description of the problem
You can purchase the powered subwoofer and other accessories from an authorized Epson dealer . To
find the nearest dealer, please call 800-GO-EPSON (800-463-7766). To purchase online, visit
www.epsonstore.com (U.S. sales only). In Canada, please call (800) 463-7766 for dealer referral.
AM to 6 PM, Pacific Time, Monday through Friday
56
Page 57

Maintenance
Cleaning
Cleaning the air filter
You need to clean the air filter when dust builds up or
you see the message “The projector is overheating.
Make sure nothing is blocking the air vents, and clean or
replace the air filter.” Use a small vacuum cleaner
designed for computers or other office equipment, as
shown. If you don’t have one, gently clean the filter
using a very soft brush, such as an artist’s paintbrush.
If dust collects on the air filter, it can cause the internal tem-
perature to rise, and this can lead to problems with operation
and shortening of the optical engine’s service life. It is rec-
ommended that you clean these parts at least once every
three months. Clean them more often than this if using the
MovieMate in particularly dusty environments.
Cleaning MovieMate
Clean the surface by wiping it gently with a soft cloth.
If MovieMate is particularly dirty, moisten the cloth
with water containing a small amount of neutral deter-
gent, and then wring the cloth nearly dry before using
it. Then wipe MovieMate again with a soft, dry cloth.
Do not use volatile substances such as wax, alcohol, or thinner
to clean MovieMate’s surface. These can cause MovieMate to
warp and make the coating finish peel off. Never spray clean-
ers directly on MovieMate.
Cleaning the projection lens
Use a cannister of compressed air to remove dust. To
remove dirt or smears, use lens cleaning paper to gently
wipe the lens.
Do not rub the lens with harsh materials or subject the lens to
shocks, as it can easily become damaged.
Replacing the air filter and lamp
Replace the air filter when it gets dirty or broken.
Replace the lamp when you see the message “Replace the lamp” or when the projected image gets darker or starts to
deterioriate.
• In order to maintain the initial brightness and image quality, the lamp replacement message is displayed after about 1900 hours of use
has passed. The time at which this message is displayed will vary depending on the color mode settings and the conditions under which
this unit has been used.
• If you continue to use the lamp after this period, the possibility of the lamp breaking becomes greater. When the lamp replacement
message appears, replace the lamp with a new one as soon as possible, even if it is still working.
• Depending on the characteristics of the lamp and on the way it has been used, the lamp may become darker or stop working before
the lamp warning message appears. You should always have a spare lamp ready in case it is needed (part # V13H010L33).
• Contact Epson for a spare lamp.
57
Page 58

Page 59

Page 60

Specifications and Notices
Projection Distance and Screen Size
Refer to the following tables and place MovieMate in a position which allows the best possible projection for your
screen size or the projected image size you want.
Projection Distance (feet)
16:9 Screen Size (inches)
30 26 x 15 2.4 - 3.7
40 35 x 20 3.2 - 4.9
60 51 x 28 4.9 - 7.4
80 71 x 39 6.6 - 9.9
100 87 x 47 8.2 - 12.4
120 106 x 59 9.9 - 14.9
150 130 x 75 12.4 - 18.6
Minimum Maximum
(Zoom Adjustment Wide) - (Zoom Adjustment Tele)
Projection Distance (feet)
4:3 Screen Size (inches)
30 24 x 18 2.9 - 4.5
40 32 x 24 4.0 - 6.0
60 47 x 35 6.0 - 9.0
80 63 x 47 8.0 - 12.1
100 79 x 59 10.1 - 15.2
120 94 x 71 12.1 - 18.2
150 118 x 91 15.1 - 22.8
Minimum Maximum
(Zoom Adjustment Wide) - (Zoom Adjustment Tele)
60
Page 61

Specifications / Compliant Resolutions
Product name Epson MovieMate 25
Dimensions 13.4 in. wide x 7.1 in. high x 12.2 in. deep (excluding feet)
Panel size 0.55-inch wide
Display method Polysilicon TFT active matrix
Resolution 409,920 pixels (854 (W) x 489 (H) dots) x 3
Focus adjustment Manual
Zoom adjustment Manual (approx. 1:1.5)
Lens shift Manual (vertical maximum approximately 50%, horizontal maximum approximately 25%)
Lamp (light source) UHE lamp, 135 W, Model No. ELPLP33
100-240 VAC 50/60 Hz 2.6 - 1.2 A
Power supply
Operating
temperature
Storage
temperature
Weight Approximately 15.4 lb
Connectors
Speaker
Audio output
Readable disc
types
Power consumption
Operating: 230 W (100 to 120 V area), 220 W (200 to 240 V area)
Standby: 6 W (100 to 120 V area), 9 W (200 to 240 V area)
41° - 95° F (No condensation)
14° - 140° F (No condensation)
Audio port 1 RCA pin jack
Input
Output
Output sound wave pressure level 79 dB/Wm
Maximum input (JIS) 10W Rated impedance 4Ω
Analog
audio
output
Digital
audio
output
DVD video, Video CD, SVCD, Audio CD, CD-R/RW (Audio CD, Video CD, SVCD, MP3/WMA,
JPEG format), DVD-R/RW (DVD video format)
S-Video port 1 Mini DIN 4-pin
Video port 1 RCA pin jack
Subwoofer port 1 RCA pin jack
Optical Audio-Out port 1 Square optical jack
Headphone jack 1 3.5 mm mini-jack
1 speaker system: Practical, maximum output 10W + 10W (10% THD JEITA/4Ω)
1 headphone system: 12 mW/32Ω
Acceptable impedance 16Ω - 1kΩ
1 subwoofer system (L+R): 0.25 Vrms/27 kΩ
Dynamic range 70 dB (JEITA) or more
Total harmonic distortion rate 0.5% (JEITA) or less
Light: -21dBm to -15 dBm
Pixelworks DNXTM IC is installed in this unit.
61
Page 62

Composite Video/S-Video
Signal Resolution
TV (NTSC) 640 × 480
TV (PAL, SECAM) 768 × 576
Safety
Safety
USA
UL60950 Third Edition
UL60065 Seventh Edition
Canada
CSA C22.2 No.60950
CSA C22.2 No.60065
Aspect Mode
Normal Wide
640 × 480
(4:3)
640 × 480
(4:3)
EMC
USA
FCC Part 15B Class B (DoC)
Canada
ICES-003 Class B
854 × 480
(16:9)
854 × 480
(16:9)
62
Page 63

Safety Instructions
Important information
Read the following important information about your
MovieMate.
This symbol is intended to alert the user
to the presence of important operating
and maintenance (servicing) instructions
in the literature accompanying the unit.
Important safety information
Warning:
To reduce the risk of fire or electric shock, do not expose
this apparatus to rain or moisture.
Warning:
Never look into the projector lens when the lamp is
switched on as the bright light can damage your eyes.
Never let children look into the lens when it is on.
Warning:
Never open any covers on the projector except the lamp
cover. Dangerou s electrical voltages inside the projector
can cause severe injury. Except as specifically directed in
the User's Guide supplied, do not attempt to service this
product yourself. Refer all servicing to qualified service
personnel.
Warning:
Keep the plastic bags for the projector, accessories and
optional parts out of the reach of children. Children covering their heads with bags may result in death by suffocation. Be particularly careful around small children.
Class 1 LASER Product
Caution:
Do not open the top cover. There are no user serviceable
parts inside the unit.
Caution:
When you replace the lamp, never touch the new bulb
with your bare hands. The invisible residue left by the oil
on your hands may shorten the bulb life. Use a cloth or
gloves to handle the new bulb.
Important safety instructions
Follow these safety instructions when setting up and
using the projector :
• Read these instructions.
• Keep these instructions.
• Heed all warnings.
• Follow all instructions.
• Do not use this apparatus near water.
• Clean only with dry cloth.
• Do not block any ventilation openings. Install in
accordance with the manufacturer’s instructions.
• Do not install near any heat sources such as radiators,
heat registers, stoves, or other apparatus (including
amplifiers) that produce heat.
• Do not overide the safety purpose of the polarized or
grounding-type plug. A polarized plug has two
blades with one wider than the other. A grounding
type plug has two blades and a third grounding
prong. The wide blade or the third grounding prong
are provided for your safety. If the provided plug
does not fit into your outlet, consult an electrician for
replacement of the obsolete outlet.
• Protect the power cord from being walked on or
pinched particularly at plugs, convenience recepta-
cles, and the point where they exit from the unit.
• Only use attachments/accessories specified by the
manufacturer.
• Use only with a cart, stand, tripod, bracket, or table
specified by the manufacturer, or sold with the unit.
When moving the unit on a cart, be careful to avoid
tipping the cart over and causing injury.
This symbol is intended to alert the user
to the presence of uninsulated “danger-
ous voltage” within the product’s enclo-
sure that may be of sufficient magnitude
to constitute a risk of electric shock to
persons.
• Unplug this unit during lightning storms or when
unused for long periods of time.
• Refer all servicing to qualified service personnel.
Servicing is required when the unit has been dam-
aged in any way, such as the power-supply cord or
plug is damaged, liquid has been spilled or objects
have fallen into the apparatus, the apparatus has been
63
Page 64

exposed to rain or moisture, does not operate nor-
mally, or has been dropped.
• Do not expose this unit to water or place objects con-
taining liquids on this unit.
• Do not place the source of a naked flame, such as a lit
candle, on this unit.
• Connect this unit to an earthed electrical outlet.
• Ensure there is at least 8 inches between the exhaust
vent and any walls, etc.
• Ensure there is at least 4 inches between the air
intake vent and any walls, etc.
• Do not project when the lens cover is on.
It is possible that the lens cover may melt from the
heat and cause burns or injuries.
To interrupt the projection, press [Video On/Off] dur-
ing projection.
• Do not leave this unit or the remote control with its
batteries installed in such places as the inside of a car
with the windows closed, in direct sunlight, near the
intake/exhaust of an air conditioner or heater, or in
places where the temperature rises above normal.
This may have a negative effect upon the internal
parts of this unit and cause heat deformation or fire.
• When unplugging the power plug/power connector,
do not pull on the power cable.
Make sure you grasp the plug or connector part, then
unplug.
• Do not set the volume too high from the outset.
A loud sound may be produced suddenly that may
cause damage to the speaker or your hearing. As a
precaution, lower the volume before you switch off
this unit then raise it gradually after you switch it
back on.
• When using headphones, do not turn the volume up
too loudly.
You may adversely affect your hearing when listen-
ing at loud volumes over extended periods of time.
• When maintaining this unit, remove the power plug/
power connector form the wall outlet.
If not, you run the risk of an electric shock.
• Do not place the projector on an unstable cart, stand,
or table.
• Use the type of power source indicated on the projec-
tor. If you are not sure of the power available, consult
your dealer or local electricity company.
• Place the projector near a wall outlet where the plug
can be easily unplugged.
• Check the specifications of the power cable. Using
an inappropriate power cable could result in fire or
electric shock.
The power cable supplied with the projector is
intended to comply with power supply requirements
for the country of purchase.
If using the projector overseas, check the power sup-
ply voltage and outlet shape that conform to the local
standards, and purchase a proper power cable in the
country.
• Take the following precautions when handling the
plug. Failure to comply with these precautions could
result in fire or electric shock.
− Do not insert the plug into an outlet with dust
present.
− Insert the plug firmly into the outlet.
− Do not handle the plug with wet hands.
• Do not overload wall outlets, extension cables, or
integral convenience receptacles. This can cause fire
or electric shock.
• Do not place the projector where the cable can be
stepped on. It may result in fraying or damage to the
plug.
• Unplug the projector from the wall outlet before
cleaning. Use a damp cloth for cleaning. Do not use
liquid or aerosol cleaners.
• Do not block the slots and openings in the projector
case. They provide ventilation and prevent the pro-
jector from overheating. Do not place the projector
on a sofa, rug, or other soft surface, or in a closed-in
cabinet unless proper ventilation is provided.
• Never push objects of any kind through cabinet slots.
Never spill liquid of any kind into the projector.
• Unplug the projector from the wall outlet and refer
servicing to qualified service personnel under the fol-
lowing conditions:
− When the power cable or plug is damaged or
frayed.
− If liquid has been spilled into the projector, or it
has been exposed to rain, water, or excessive
humidity.
− If it does not operate normally when you follow the
operating instructions, or if it exhibits a distinct
change in performance, indicating a need for
service.
− If it has been dropped or the housing has been
damaged.
• The internal projector components consist of many
glass parts such as the lens and projection lamp.
The lamp is fragile, and can easily break. If the lamp
breaks, handle the projector with extreme care to
avoid injury from broken glass, and contact Epson
for a replacement.
64
Page 65

Particular care should be taken when the projector is
mounted on the ceiling, as small pieces of glass may
fall down when the lamp cover is removed. Be very
careful not to allow such pieces of glass to get into
the eyes or mouth.
• Material or paper may get stuck against the air filter
underneath the projector while it is in use. Remove
anything from underneath the projector that might
get stuck against the air filter in this way.
• Never try to remove the lamp immediately after use.
Doing so will result in serious burns. Before remov-
ing the lamp, turn off the power supply and wait
approximately one hour to allow the lamp to cool
completely.
• A mercury lamp with high internal pressure is used
as the projector’s light source. Mercury lamps may
make a loud noise when they break. Handle the lamp
with extreme care while observing the following.
If the following points are not observed, injury or
poisoning may result.
− Do not damage the lamp or subject it to any
impacts.
− Do not use the lamp after the lamp replacement
period has elapsed. Once the lamp replacement
period has elapsed, the possibility of the lamp
breaking becomes greater. When the lamp replace-
ment message appears, replace the lamp with a
new one as soon as possible.
− The gases inside mercury lamps contain mercury
vapor. If the lamp breaks, immediately ventilate
the room to prevent the gases that are released
when the lamp breaks from being inhaled or com-
ing into contact with the eyes or mouth.
− Do not bring your face close to the projector while
it is in use, in order to prevent the gases that are
released when the lamp breaks from being inhaled
or coming into contact with the eyes or mouth.
− If the lamp breaks and needs to be replaced with a
new lamp, contact Epson to carry out the replace-
ment. If the lamp breaks, pieces of broken glass
may get scattered around inside the projector.
− Particular care should be taken when the projector
is mounted on the ceiling, as small pieces of glass
may fall down when the lamp cover is removed. If
cleaning the projector or replacing the lamp your-
self, be very careful not to allow such pieces of
glass to get into the eyes or mouth.
If the lamp breaks and gas from the lamp or frag-
ments of broken glass are inhaled or get into the
eyes or mouth, or if any other ill effects are
noticed, immediately seek medical advice.
• Consult your local, state, or federal regulations
regarding proper disposal of the lamp and do not
place in the trash.
• If there is an electrical storm, do not touch the power
plug; otherwise you may receive an electric shock.
• If using a remote control that takes batteries, keep
these batteries out of the reach of children. Batteries
are choking hazards and can be very dangerous if
swallowed.
If the batteries are swallowed, seek medical assis-
tance immediately.
• When replacing batteries, take the following precau-
tions.
− Replace the batteries as soon as they run out.
− If the batteries leak, wipe away battery fluid with a
soft cloth. If fluid gets on your hands, wash imme-
diately.
− Do not expose batteries to heat or flame.
− Dispose of used batteries according to local
regulations.
− Remove the batteries if you won’t be using the pro-
jector for a long period of time.
• Do not stand on the projector or place heavy objects
on it.
WARNING: The cord included with this product con-
tains chemicals, including lead, known to the State of
Califonia to cause birth defects or other reproductive
harm. Wash hands after handling. (Provided in accor-
dance with Proposition 65 in Cal. Health & Safety
Code §25249.5 et seq.)
65
Page 66

Use and Storage
Take note of the following advice in order to prevent malfunction and damage.
Notes on handling and storage
• Use and store this unit within the operating temperature range and storage temperature range
as specified in this manual.
• Do not install the unit in a place prone to vibr ation or shock.
• Do not install the unit close to television, radio or
video equipment that generates magnetic fields.
This may have a negative effect when projecting the
playback of audio and video with this unit, and may
cause this unit to malfunction. In the event that such
symptoms occur, move the unit further away from
any television, radio and video equipment.
• Do not install this machine on an incline.
• Do not move this unit during playback.
This may damage the disc or cause malfunction.
• Avoid using or storing this unit in cigarette or
other smoke filled places, or in rooms containing
a large amount of dust.
This may cause degradation of the image quality.
• Do not touch the projection lens with your bare
hands.
If fingerprints or marks are left on the face of the
lens, the image will not be projected clearly. Make
sure the lens cover is securely in place when not in
use.
• Epson will not be held responsible f or damage
arising from projector or lamp failure outside the
range of that which is covered in your warranty
terms.
Condensation
If you move this unit from a cold place into a warm
room, or, if the room in which this unit is installed is
heated rapidly, condensation (moisture) may form
internally or on the lens surface. If condensation forms,
it may not only cause incorrect operation such as weak-
ening of the image, but also damage the disc and/or
parts. In order to prevent against condensation, set up
this unit in the room approximately one hour before it
is to be used. If by some chance condensation does
form, turn on the main power switch then wait 1-2
hours before use. Do not use the lamp during this time.
Lamp
This product includes a lamp component that contains
mercury. Please consult your state and local regulations
regarding disposal or recycling. Do not put in the trash.
MovieMate uses a mercury lamp with a high internal
pressure as its light source. Mercury lamps have the
following characteristics.
• Lamp brightness decreases once the rated lamp usage
time has passed.
• When the lamp reaches the end of its life, it may enter
a state where it will no longer light, or it may explode
with a loud noise due to impact, deterioration, or the
expiration of its usage time.
• Depending on the individual difference of each lamp
and the conditions of use, there is a considerable
difference in the time it takes for the lamp to reach the
end of its life. Make sure you have a replacement lamp
available.
• The potential for the lamp to explode increases once
the lamp usage time has been exceeded.
When the lamp replacement message appears,
promptly replace the lamp with a new one.
LCD panel
• Although the liquid crystal panel is made using very
precise high technology, you may see some black
pixels, or pixels that are always lit red, blue, or
green.You may also be able to see lines with irregular
brightness or color.
These are normal characteristics of liquid crystal
panels, and are not indicative of any malfunction. Be
aware of this fact.
66
Page 67

When moving this unit
Copyright
• Make sure the lens cover is securely in place.
• Remove any discs and close the disc tray.
• Hold the projector as shown in the following
illustration.
Be careful not to damage the mesh co vering the
speakers. Lift the unit as shown:
Transportation cautions
• Many glass and precision parts are used within
this unit. In order to prevent impact during transportation, re-use the box and protective packaging you received at the time of purchase.
If you no longer have the original packing, protect the outside of this unit with shoc k absorbing
material to protect it from impact, place it inside
a stong box and make sure it is clearly labeled
for the transportation of precision equipment.
• Take off the lense cap and wrap it.
• If using a courier service for transportation,
inform them that this unit contains precision
equipment and should be handled accordingly.
* Your warranty does not cover any damages that may
occur to this product during transportation.
• This unit is equipped with Macrovision copy protection.The intellectual property rights to the
patent of this copy protection technology are
owned by the Macro vision Company of America,
and others. When employing this technology, a
license is required from the Macrovision company. The Macrovision company does not
authorise the use of this technology e xce pt f o r a
limited range of intended purposes, including
home use. Further, remodeling, disassembly,
and reverse engineering are prohibited.
• Reproduction of a disc for the purposes of
broadcast, projection in public, public musical
performance, or rental (regardless of compensation, remuneration, or lack thereof) with out the
permission of the copyright owner, is strictly
prohibited.
67
Page 68

About Discs
Readable disc types
The following discs can be played.
DVD video Audio CD
Video CD/SVCD (Super Video CD)
PBC (Playback control) equipped Video CD (version 2.0
compliant).
CD-R/CD-RW
Only discs recorded in the following formats can be repro-
duced.
• Audio format (finalized)
• Video CD format
• SVCD format
• MP3/WMA, JPEG discs recorded in accordance with
ISO9660 standard
DVD-R/DVD-RW
Only discs recorded in the DVD video format (finalized)
can be reproduced.
• Depending on how a DVD-R, DVD-RW, CD-R,
or CD-RW has been recorded, or if a disc is
dirty, smeared, scratched, or warped, some
discs may not be readable, or playback may
take some time.
• Only the audio of the following discs can be
reproduced.
•MIX-MODE CD •CD-G •CD-EXTRA
•CD TEXT
Unreadable disc types
• The following discs cannot be played. It is possible to damage the speaker with the noise generated if these discs are played back by mistake.
•DVD-R/DVD-RW recorded in the VR format
•DVD-ROM •CD-ROM •PHOTO CD
•DVD+R •DVD+RW •DVD-RAM
•DVD audio •SACD •DVD−R DL
• Round discs with a diameter other than 8 cm or
12 cm
• Specially made non-circular (heart, polygon
shaped, and so on) discs
• You cannot play DVD videos if the disc region
code does not correspond to the region code
label on the side of this unit.
• The performance and tonal quality of copy-control CD discs that do not conform to the compact
disc (CD) standard cannot be guaranteed with
this unit.
CDs that conform to the CD standard will bear
the following compact disc logo mark. Check
what is displayed on the packaging of the audio
disc.
• This unit conforms to the NTSC, PAL, and
SECAM television signal formats.
• In the case of DVD video, SVCD, and Video CD,
playback functions ma y be limited b y t he intentions of the software producers. As this unit pla ys
back the contents of a disc according to the intentions of the software producers, certain functions
may not work if performed. Refer to the att ached
user information of the disc being played.
Disc Handling
• Avoid touching the playback side with your bare
hands.
• Make sure y ou store discs in their cases when
not in use.
• Avoid storing your discs is places with high
humidity or in direct sunlight.
• If the playback surface of the disc is dirty with
dust or fingerprints, the video and audio quality
may deteriorate. When the playback surface is
dirty, gently wipe the disc clean with a soft dry
cloth, starting from the center of the disc then
moving outwards.
• Do not use cleaning products such as benzine,
or anti-static products designed for analog
records.
• Do not glue paper or stickers onto a disc.
68
Page 69

DECLARATION of CONFORMITY
According to 47CFR, Part 2 and 15
Class B Personal Comput ers and Peripherals; and/or
CPU Boards and Power Supplies used with Class B
Personal Computers
We: EPSON AMERICA, INC.
Located at: 3840 Kilroy Airport Way
MS: 3-13
Long Beach, CA 90806
Tel: 562-290-5254
Declare under sole responsibility that the product identified herein, complies with 47CFR Part 2 and 15 of the
FCC rules as a Class B digital device. Each product marketed, is identical to the representative unit tested
and found to be compliant with the standards. Records maintained continue to reflect the equipment being
produced can be expected to be within the variation accepted, due to quantity production and testing on a
statistical basis as required by 47CFR 2.909. Operation is subject to the following two conditions : (1) this
device ma y not cause harmful interference, and (2) this device must accept any interference received,
including interference that may cause undesired operation.
Trade Name: Epson
Type of Product: Projector
Model: EMP-TWD1
FCC Compliance Statement
For United States Users
This equipment has been tested and found to comply with the limits for a Class B digital device, pursuant to
Part 15 of the FCC Rules. These limits are designed to provide reasonable protection against harmful
interference in a residential installation. This equipment generates, uses, and can radiate radio frequency
energy and, if not installed and used in accordance with the instructions, may cause harmful interference to
radio or television reception. However, there is no guarantee that interference will not occur in a particular
installation. If this equipment does cause interference to radio and television reception, which can be
determined by turning the equipment off and on, the user is encouraged to try to correct the interference by
one or more of the following measures.
• Reorient or relocate the receiving antenna.
• Increase the separation between the equipment and receiver.
• Connect the equipment into an outlet on a circuit different from that to which the receiver is connected.
• Consult the dealer or an experienced radio/TV technician for help.
WAR NING
The connection of a non-shielded equipment interface cable to this equipment will invalidate the FCC
Certification or Declaration of this device and may cause interference levels which exceed the limits
established by the FCC for this equipment. It is the responsibility of the user to obtain and use a shielded
equipment interface cable with this device. If this equipment has more than one interface connector, do not
leave cables connected to unused interfaces. Changes or modifications not expressly approved by the
manufacturer could void the user’s authority to operate the equipment.
69
Page 70

Glossary
JPEG
A file format used for saving image files. Most photographs
taken with digital cameras are saved in the JPEG format.
MP3
The abbreviated form of “MPEG1 Audio Layer-3,” a standard
for audio compression. It enables the size of the data to be
greatly reduced, while maintaining a high sound quality.
NTSC
The abbreviated form of the “National Television Standards
Committee”, and given to one of the analog color television
wave transmission systems. This system is used in Japan, the
USA and Latin America.
PAL
The abbreviated form of “Phase Alteration by Line,” and given
to one of the analog color television wave transmission systems. This system is used in China, Western Europe, with the
exception of France, and in other African and Asian countries.
SECAM
The abbreviated form of “SEquential Couleur A Memoire,”
and given to one of the analog color television wave transmission systems. This system is used in France, Eastern Europe,
the former Soviet Union, the Middle East and some African
nations.
Optical digital out
Converts the audio signal into a digital signal and enables it to
be transmitted along optical fiber. An advantage is that interference is not produced, unlike conventional means, where external interference is picked up by the cable.
Playback control (PBC)
A method for playing back Video CDs. You can select the
screen or information you want to see from the menu screen
displayed.
Disc related terms
Title/Chapter/Track
A movie on a DVD is divided into units called titles, which
may contain any number of chapters. Video and Audio CDs are
divided into units called tracks.
DVD video
Title 1 Title 2
Chapter 1 Chapter 2 Chapter 1 Chapter 2
WMA
The abbreviated form of “Windows Media Audio,” an audio
compression technology developed by Microsoft.® You can
encode WMA data using Windows Media Player Ver.7, 7.1,
Windows Media Player for Windows XP, or the Windows
Media Player 9 Series.
Windows Media and the Windows logo, are trademarks or registered trademarks of the Microsoft Corporation of America, in
America and in other countries.
When encoding WMA files, please use applications that have
been certified by the Microsoft Corporation of America. If you
use an application that has not been certified, it is possible that
it may not operate correctly.
Aspect ratio
The ratio between an image’s length and its height. HDTV
images have an aspect ratio of 16:9 and appear elongated. The
aspect ratio for standard images is 4:3.
Cool-down
A process to enable the lamp to cool down from the high temperatures attained during projection. Performed automatically
when this unit is turned off. Do not remove the power plug during cool-down. If cool-down is not performed correctly, the
lamp or internal structure of the main unit can overheat which
may reduce the lifespan of the lamp or cause damage to this
unit. Cool-down is complete once the main unit beeps twice.
Video CD/Audio CD
Track 1 Track 2 Track 3 Track 4
Parental Lock
For age restriction. There are also display level settings for
when a DVD video contains material which is unsuitable for
viewers of a young age.
Dynamic Range
Shows the ratio of minimum and maximum audio level values
recorded to a disc in decibels (dB). The dynamic range values
indicate what detailed signals can be reproduced by various
equipment.
70
Page 71

Epson America, Inc. Limited Warranty
Basic Two-Year Warranty and 90-Day Lamp Warranty
What Is Covered: Epson America, Inc. (“Epson”)
warrants to the original end user customer that the
Epson product enclosed with this limited warranty
statement, if purchased and used in the United States or
Canada, conforms to the manufacturer’s specifications
and will be free from defects in workmanship and
materials for a period of two (2) years from the date of
original purchase (except that the warranty period is 90
days for projector lamps). For warranty service, you
must provide proof of the date of original purchase.
What Epson Will Do To Correct Problems: Should your
Epson projector require service during the warranty
period, Epson will, at its option, exchange or repair the
projector without charge for parts or labor. If Epson
authorizes an exchange for the defective unit, Epson
will ship a replacement projector to you, freight
prepaid, to an address in Canada or the U.S. (excluding
Puerto Rico and U.S. Possessions). Shipments to other
locations will be made freight collect. You are
responsible for securely packaging the defective unit
and returning it to Epson within five (5) working days
of receipt of the replacement. Epson requires a debit or
credit card number to secure the cost of the
replacement projector in the event that you fail to
return the defective one. If your projector is being
repaired by carry-in warranty service, please bring the
product securely packaged in its original container or
an equivalent to your Epson Dealer or Epson Customer
Care Center. Epson will, at its option, repair or replace
on an exchange basis the defective unit, without charge
for parts or labor. When warranty service involves the
exchange of the product or of a part, the item replaced
becomes Epson property. The exchanged product or
part may be new or previously repaired to the Epson
standard of quality, or, at Epson’s option, may be
another model of like kind and quality. Exchange or
replacement products assume the remaining warranty
period of the product covered by this limited warranty,
except that each replacement lamp carries the limited
90-day warranty stated above.
What This Warranty Does Not Cover: This warranty
covers only normal use of the product in the United
States and Canada. 24-hour-per-day use of this product
causes unusual strain and is not considered normal use.
This warranty does not cover consumables (e.g., fuses),
other than lamps. This warranty does not apply to
refurbished or reconditioned products, and this
warranty is not transferable. Epson is not responsible
for warranty service should the Epson label or logo or
the rating label or serial number be removed or should
the product fail to be properly maintained or fail to
function properly as a result of misuse, abuse, improper
installation, neglect, improper shipping, damage
caused by disasters such as fire, flood, and lightning,
improper electrical current, software problems,
interaction with non-Epson products, or service other
than by an Epson Authorized Servicer. Postage,
insurance, or shipping costs incurred in presenting your
Epson product for carry-in warranty service are your
responsibility. If a claimed defect cannot be identified
or reproduced in service, you will be held responsible
for costs incurred.
THE WARRANTY AND REMEDY PROVIDED
ABOVE ARE EXCLUSIVE AND IN LIEU OF ALL
OTHER EXPRESS OR IMPLIED WARRANTIES
INCLUDING, BUT NOT LIMITED TO, THE
IMPLIED WARRANTIES OF MERCHANTABILITY
OR FITNESS FOR A PARTICULAR PURPOSE.
SOME LAWS DO NOT ALLOW THE EXCLUSION
OF IMPLIED WARRANTIES. IF THESE LAWS
APPLY, THEN ALL EXPRESS AND IMPLIED
WARRANTIES ARE LIMITED TO THE
WARRANTY PERIOD IDENTIFIED ABOVE.
UNLESS STATED HEREIN, ANY STATEMENTS
OR REPRESENTATIONS MADE BY ANY OTHER
PERSON OR FIRM ARE VOID. EXCEPT AS
PROVIDED IN THIS WRITTEN WARRANTY,
NEITHER EPSON AMERICA, INC. NOR ITS
AFFILIATES SHALL BE LIABLE FOR ANY LOSS,
INCONVENIENCE, OR DAMAGE, INCLUDING
DIRECT, SPECIAL, INCIDENTAL OR
CONSEQUENTIAL DAMAGES, RESULTING
71
Page 72

FROM THE USE OR INABILITY TO USE THE
EPSON PRODUCT, WHETHER RESULTING FROM
BREACH OF WARRANTY OR ANY OTHER
LEGAL THEORY. IF THE REMEDY ABOVE FAILS,
EPSON’S ENTIRE LIABILITYSHALL BE LIMITED
TO A REFUND OF THE PRICE PAID FOR THE
EPSON PRODUCT COVERED BY THIS LIMITED
WARRANTY.
In Canada, warranties include both warranties and
conditions.
Some jurisdictions do not allow limitations on how
long an implied warranty lasts, and some jurisdictions
do not allow the exclusion or limitation of incidental or
consequential damages, so the above limitations and
exclusions may not apply to you. This warranty gives
you specific legal rights, and you may also have other
rights, which vary from jurisdiction to jurisdiction.
To locate the Authorized Epson Servicer nearest you,
call the Epson Connection
SM
at (800) 637-7661 + PIN
or (562) 276-4394 in the U.S. and (905) 709-3839 in
Canada, or write to: Epson America, Inc., P.O. Box
93012, Long Beach, CA 90809-3012.
72
Page 73

Index
A
A.STBY (auto standby), 34
A-B repeat, 26
Accessories, 4
Air filter, 57 to 59
Air vents, 5
Angle, 32
Aspect ratio, 55, 62, 70
Audio
changing language, 31
external equipment, 39
level, 41 to 42
volume, 13
Audio input level setting, 42
Audio input port, 5
Audio settings menu, 45
B
Batteries, remote control, 8
Break, 17
Brightness, 49
Buttons, 6
C
Camera angle, 32
Chapter, 24, 70
Cleaning, 57
Color Mode, 17
Color Saturation, 49
Composite video equipment, 36
Contrast, 49
Country codes, 47
D
D. (Dynamic) Range Compression, 45
Declaration of Conformity, 69
Digital Audio Output, 45 to 46
Dimmer, 18
Disc
formats, 68
inserting, 12
tray, 5, 35
Display window, 5, 12, 18
Dolby Digital, 45
Downmix, 45
DVD level, 41, 42
DVD menus, 19
E
Epson
accessories, 4
Home Service, 4
PrivateLine Support, 56
technical support, 56
warranty, 71
External equipment
audio, 38 to 39, 42
video, 36 to 37
F
Fan problems, 53
File Type, 44
Focus adjustment, 13
Focus ring, 6
Frame, advancing, 16
G
Glossary, 70
Group/track (file) name, 21
H
Headphone jack, 5
Headphones, 38
Help, 56
High Altitude Mode, 51
Home Service, 4
Horizontal lens shift dial, 6
I
Image On/Off, 22
Image size and position, 13
Indicator lights, 52 to 54
Interlaced mode, 35
J
JPEG files, 21 to 23
K
Keystone setting, 49
L
Lamp
cautions, 66
cover, 5
problems, 53
resetting timer, 58
replacing, 57 to 59
Lamp Hours, 50 to 51
Language settings menu, 44
Language
audio, 31
codes, 46
subtitle, 32
LCD panel, 66
Lens
cleaning, 57
location, 5
Lens shift, 13
Lights, 52 to 54
Lock, tray, 35
Looping, 26
M
Main power switch, 5, 11
Menus
DVD, 19
Picture Quality, 48 to 49
Settings, 43 to 45
73
Page 74

Menu bar, 33
MovieMate
advanced operations, 18 to 42
basic operations, 10 to 17
cleaning, 57
distance from screen, 11
handling and storage, 66
maintenance, 57 to 59
moving, 67
specifications, 60 to 62
troubleshooting, 52 to 55
turning off, 14
turning on, 11
MP3 files, 21 to 23
Muting, 17
O
On-screen Guide, 45
On-screen language, 44
Open/close button, 5
Optical audio-out port, 5
Other settings menu, 45
Overheating, 53
P
Parental Lock, 45
Parts, 5
Pausing, 15
PBC (playback control), 20
Picture Quality menu, 48 to 49
Power inlet, 5
Power switch, 11
Problems, solving, 54 to 56
Program play, 29
Progressive mode, 35
Projection distance, 11, 60
R
Random play, 30
Remote control, 7 to 8
Repeat playback, 26 to 28
Replacing
air filter, 57 to 59
lamp, 57 to 59
Replaying a scene, 16
Resetting the lamp operating time, 58
Resume setting, 45
Resuming playback, 14 to 15
Searching, 15, 24
Sensor problems, 53
Settings menu, 43 to 45
Sharpness, setting, 49
Skipping, 16
Sleep timer, 34
Slideshow playback, 21
Slow motion, 17
Sound, adjusting, 13
Sound Mode, 40
Source button, 6
Speakers, 5
Specifications, 60 to 62
Standby mode, 54
Status bar, 24
Stopping playback, 14
Subtitles, 32
Subwoofer, connecting, 39
SVCD, 68
S-Video input port, 5, 37
T
Technical support, 56
Time search, 24 to 25
Tint setting, 49
Track, selecting, 24
Transporting MovieMate, 67
Tray lock, 35
Treble, adjusting, 40
Turning off, 14
Turning on, 11
V
Vertical lens shift dial, 6
Video
external, 36 to 37
stopping, 14
Video Information menu, 50 to 51
Video input port, 36
Video settings menu, 44
Video Signal, 51
Video Source setting, 44
Volume, 13
W
Warranty, 71
Where to get help, 56
WMA files, 21 to 23
S
Safety instructions, 63 to 67
Screensaver, 44
Screen size, 11, 60
74
Z
Zoom adjustment, 13
Zoom ring, 6
Page 75

Page 76

Epson MovieMate 25
 Loading...