

Page 1
Multi Photo and Business Card Feeder
Setup Guide
Set Up Your Scanner
First open the box containing the Epson® Perf ection® 2480 Photo scanner and set
4051186-00 XXX
it up following the instructions on its Start Here sheet. Be sure to install all the
software from the scanner CD-ROM as instructed.
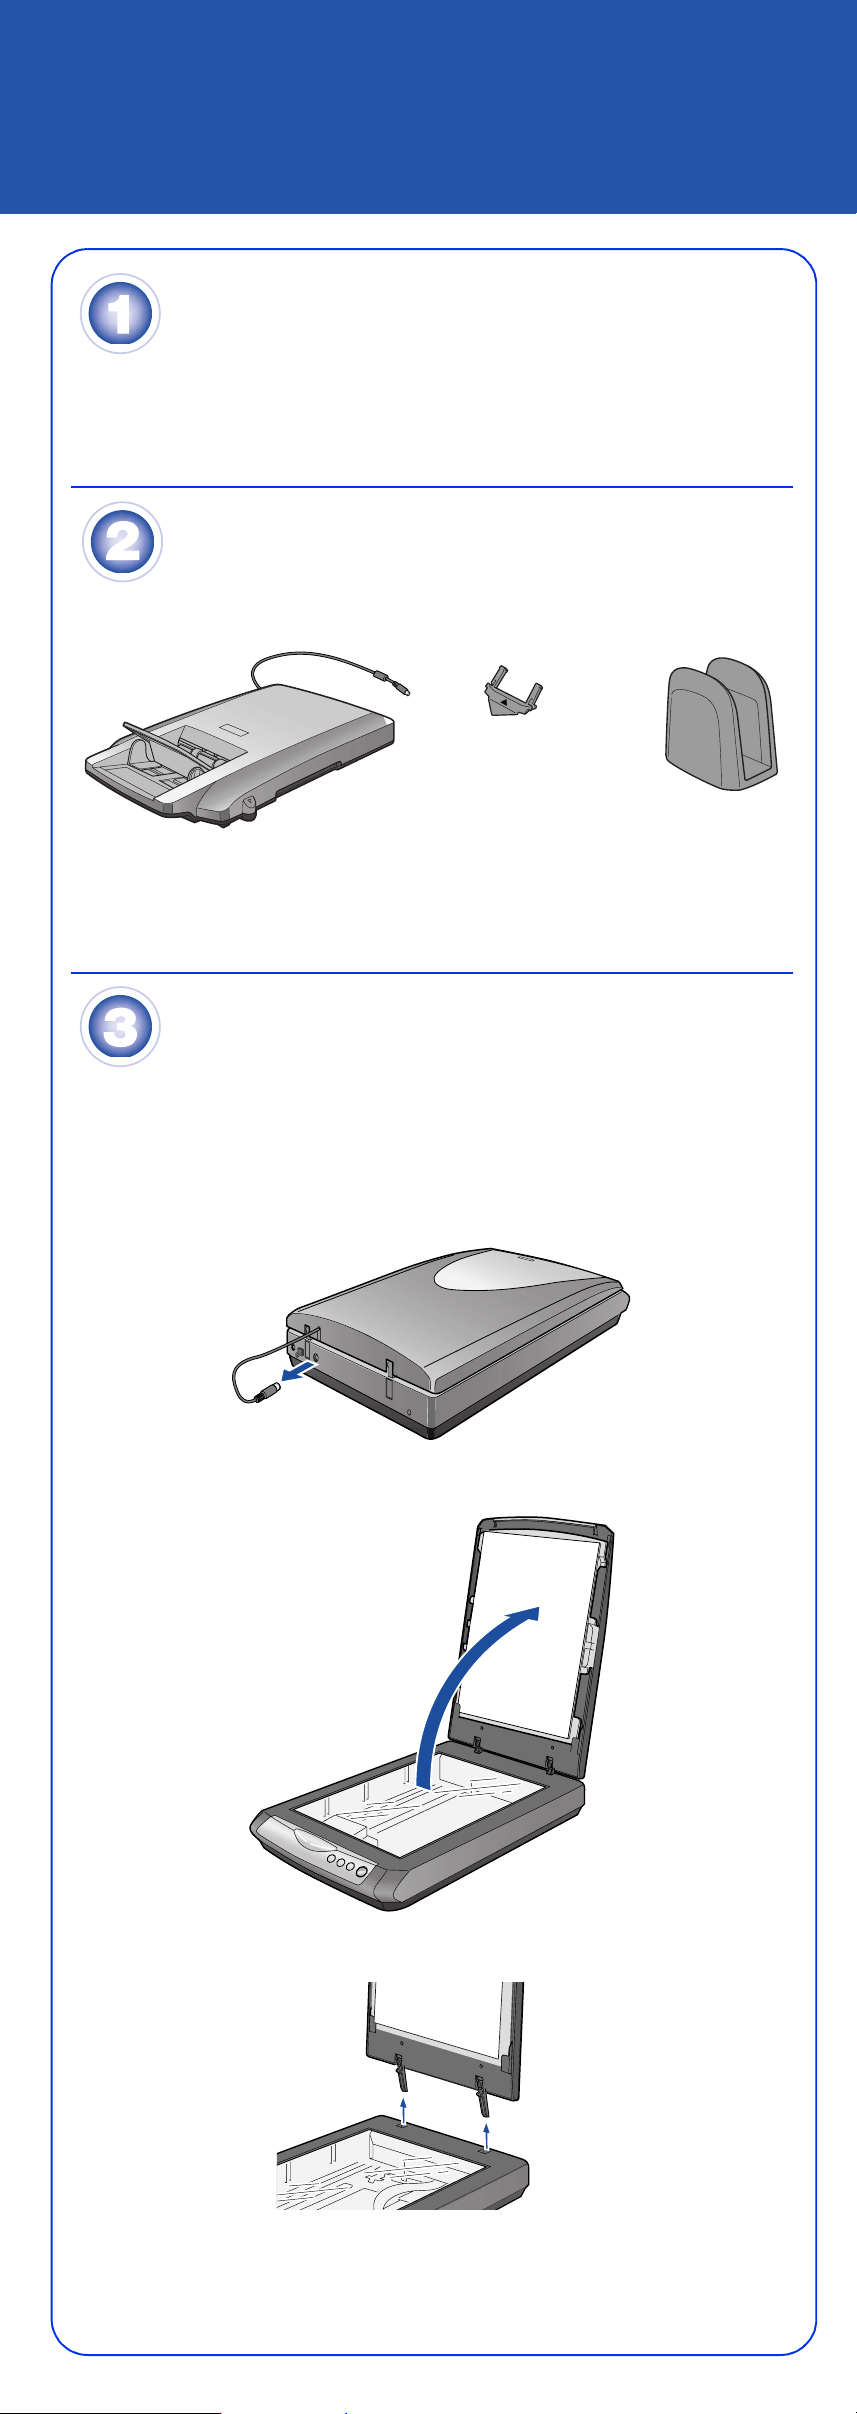
Unpack the Feeder
1 Make sure you have all the parts shown below:
Spare paper path guide
(see your scanner
Reference Guide for
instructions on using this)
Multi Photo and Business Car d Feeder
Stand for feeder
(when not in use)
2 Remove all the packing tape from the parts.
Install the Feeder
1 Turn off your scanner by unplugging it from its power cord.
Note: Make sure you unlocked the transportation lock on your scanner.
See the Start Here sheet that came with your scanner for instructions.
2 Disconnect the cover cable from the scanner.
3 Open the scanner cover.
4 Pull the scanner cover straight up to remove it.
Page 2
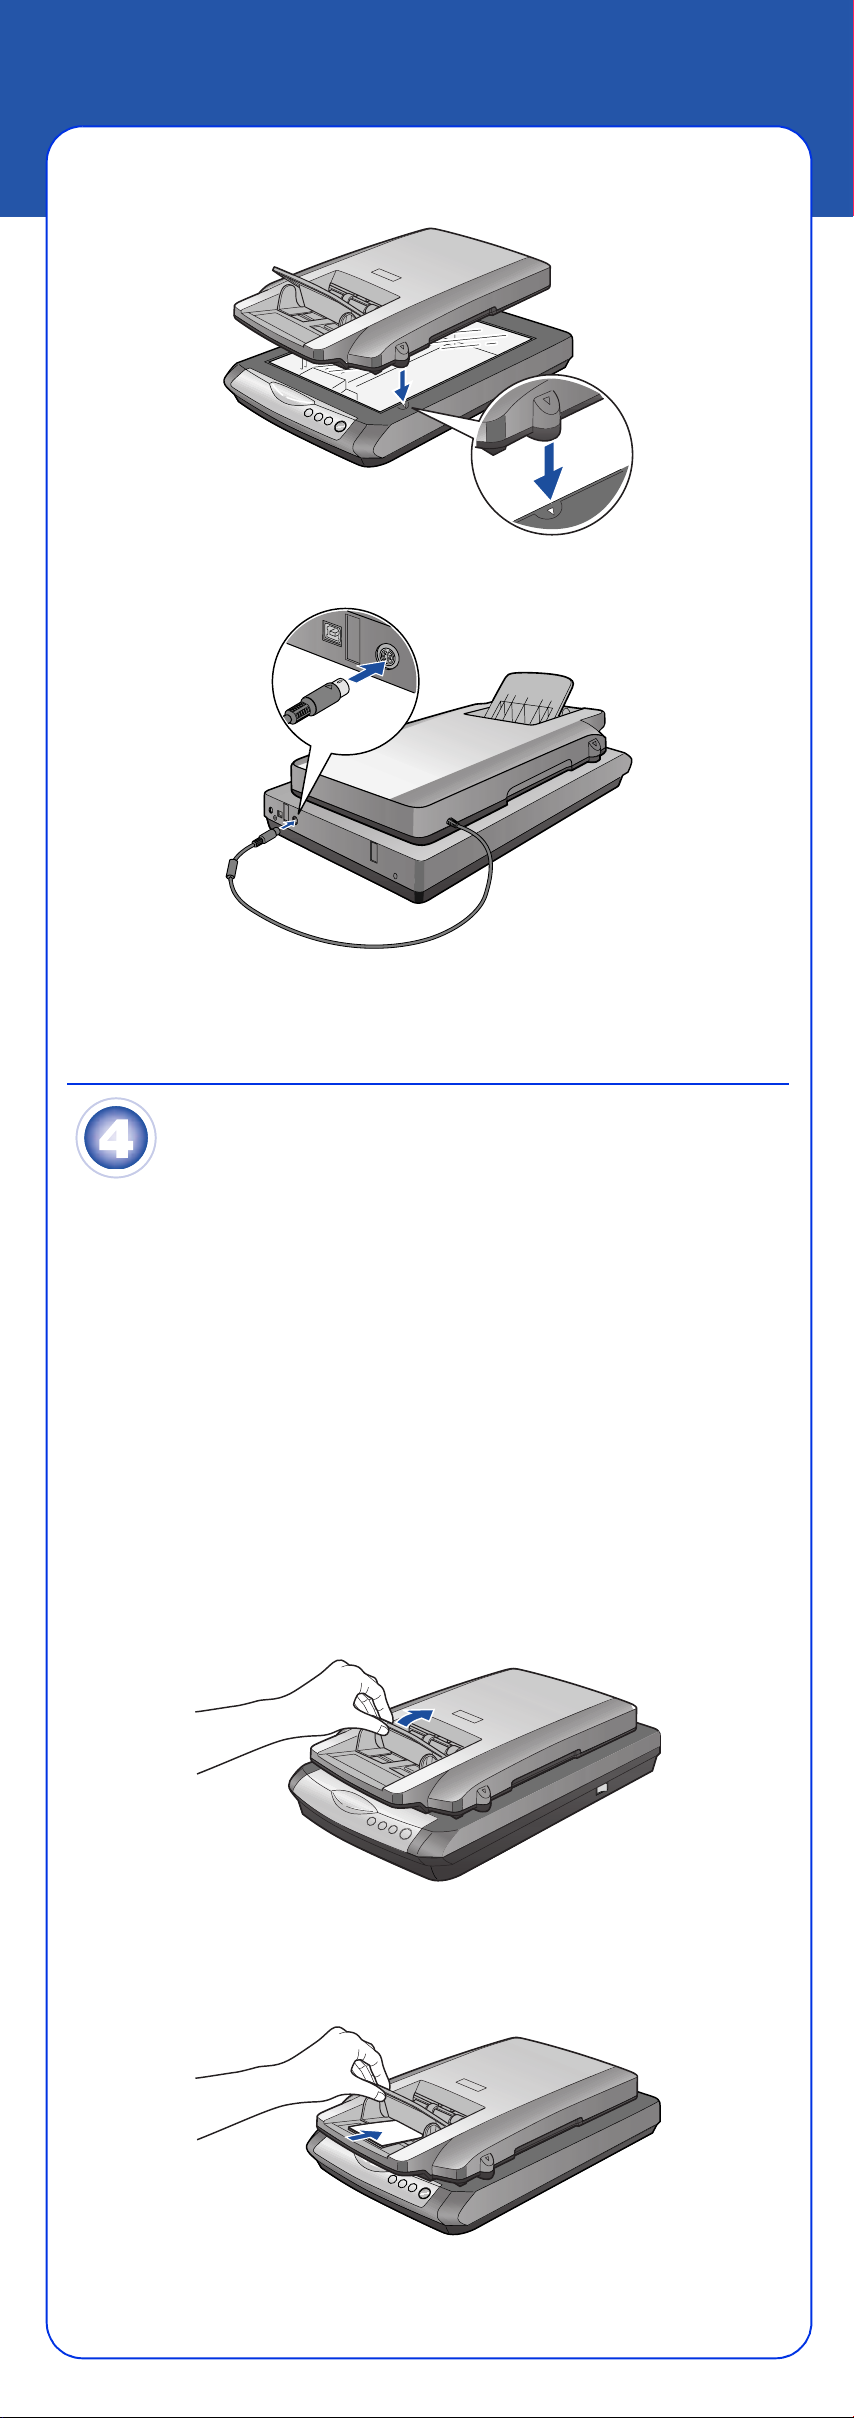
5 Place the Multi Photo and Business Card Feeder on the scanner and fit the
tabs on its sides into the semicircles on the sides of the document table.
6 Connect the feeder cable to the scanner’s Option port.
7 Plug in the scanner’s power cord. The scanner turns on and the ] Start light
flashes green. It stops flashing and stays on green when the scanner is
ready.
Load Cards or Photos
Before loading business cards or photos in the feeder, make sure they meet these
requirements:
• Their width is from 2 to 4 inches and their length is from 3.2 to 6 inches.
• All the photos or cards (up to 24 at a time) are the same size.
• They ar e n ot pri nte d on a dot ma t rix, la se r, or ink jet printer o r by a P o la ro id
camera.
• They are not dusty, ripped, wrinkled, folded, stapled, clipped, carbon-coated,
multi-part, or bound, and have no holes or other cut out areas.
Caution: Always use the document table to scan important, valuable, or one-of-akind photos or business cards. Dust, friction, or a feed jam may cause damage to
the photo or business card if you load it in the feeder.
WARNING: Keep your hair, clothes, and hands away from the feeder’s input tray.
You may hurt yourself, damage the scanner, or both.
®
1 Lift up the output tray slightly and hold it up.
2 Load up to 24 business cards or photos into the feeder—FACE DOWN and
short edge first—as far as they go. Place landscape-oriented business cards
and photos with the top edge facing left. Place portrait-oriented business
cards and photos top edge first.
Page 3

3 Lower the output tray and slide the guides so they are against the sides of
your b usiness cards or photos.
Note: If your business cards or photos are narrower than the guides, lift up
the output tray, slide them against the left guide, and lower the output tray
again.
Scan Cards or Photos
Scanning Business Cards
1 Double-click the Presto! BizCard 4.1 icon on your desktop. You see a
window like this:
Scan icon
Note: On a Macintosh, you need to set up your scanning preferences.
Click File > Preferences, then click the Quick Scan option to turn it on.
Click OK and continue with step 2.
2 Double-click the scan icon on the BizCard window.
The feeder loads the first business card, previews it, scans it, ejects it, and
loads the next card. This process repeats for all the loaded cards.
BizCard then reads the business card images and converts them into
editable text. It displays the results in a BizCard window like this:
You may need to edit the recognized text, depending on the business card you’re
scanning. See the BizCard Help utility or the on-screen BizCard User’s Guide for
instructions.
Note: Double-click the Perf 2480_2580 Reference Guide icon on your desktop
for additional information on your Multi Photo and Business Card Feeder and your
scanner software.
Page 4

Scanning Photos
1 Double-click the EPSON Smart Panel icon on your desktop. You see a
window like this:
Scan and
Save icon
2 Double-click the Scan and Save icon. You see a file saving window like this:
3 Select a location for your scanned photos, a file name prefix, and a file type.
When you’re finished, click the Scan and Save button.
The feeder loads the first photo, previews it, scans it, ejects it, and loads the
next photo. This process repeats for all the loaded photos.
Your photos are saved in the location you specified and then opened in
ArcSoft
To modify your photos, create projects, or print your photos, see the
PhotoImpression Help utility.
®
PhotoImpression.™ You see a window like this:
Note: Double-click the Perf 2480_2580 Reference Guide icon on your desktop
for additional information on your Multi Photo and Business Card Feeder and your
scanner software.
Epson is a registered trademark and Epson Smart Panel is a trademark of Seiko Epson Corporation.
Perfection is a registered trademark of Epson America, Inc.
General Notice: Other product names used herein are for identification purposes only and may be trademarks of their
respective owners. Epson disclaims any and all rights in thos e marks.
© 2004 Epson America, Inc. 7/04 CPD-18507
Printed in XXXXXX XX.XX-XX
 Loading...