

Page 1

DVD Player with Remote Control
OWNER'S MANUAL
SB329
Copyright 2004 Viacom International Inc. All Rights Reserved. Nickelodeon,
SpongeBob SquarePants and all related titles, logos and characters are
trademarks of Viacom International Inc. Created by Stephen Hillenburg.
Page 2
Welcome...…
Warning
Emerson Radio Corp. has produced this audio/video product
under license from Nickelodeon. We have taken great care to
make sure your unit was in perfect working order when it left
our factory.
Thank you for purchasing this Compact Audio/Video System.
This state of the art system includes everything you need
to experience digital video and audio in the comfort of
your own living room. The only thing you need to add is
your own TV. We have designed this system to be easy
to set up, and even easier to use. But please, review this
manual before you operate your system. Have it handy
while you are setting the system up. Keep it available for
future reference in the unlikely event that you encounter
any unexpected problems. The manual begins with a
description of the important controls on the main unit and
the remote. It then explains how to connect your TV, and
how to operate the DVD/CD player. If you follow the
instructions carefully you can have the system up and
operating in less than an hour.
All of the optional system settings have been preset at our
factory for correct operation of the system in North America.
All you have to do is insert a disk, sit back, and enjoy a great
audio/video experience.
Eventually you may want to change some of the optional
settings. A description of all the optional settings, and
instructions for changing them, is found in the second half of
the manual.
This system was designed to provide you with many
years of reliable operation with a minimum of care and
maintenance. Every component in your system was in
perfect working condition when it left our factory. If you
experience any problems with the set up or operation of
this system please review the Trouble Shooting Guide at the
end of this manual before you contact your dealer or the
Emerson Customer Service Department.
To prevent fire or shock hazard, do not
expose the unit to rain or moisture.
To avoid electrical shock, do not open the
cabinet.
Refer servicing to qualified service personnel
only.
The AC cord must only be changed at qualified
service facility.
• This appliance is classified as a CLASS 1 LASER product.
• The CLASS 1 LASER PRODUCT MARKING is located on
the rear panel.
• This product contains a low power laser device. To ensure
continued safety, do not remove any cover or attempt
to again access to the inside of the product. Refer all
servicing to qualified personnel only.
This product incorporates copyright protection technology
that is protected by method claims of certain U.S. patents
and other intellectual property rights owned by Macrovision
Corporation and other rights owners. Use of this copyright
protection technology must be authorized by Macrovision
Corporation, and is intended for home and other limited
viewing uses only unless otherwise authorized by Macrovision
Corporation. Reverse engineering or disassembly is prohibited.
Apparatus Claims of U.S. Patent Nos. 4,631,603, 4,819,098,
4,907,093, 5,315,448 and 6,516,132 licensed for limited
viewing uses only.
Caution
Refer servicing to qualified service personnel only.
The rating label and caution marking is located at the bottom
of the unit.
0 1
This symbol is intended to alert the user
of the presence of uninsulated “dangerous
voltage” within the product enclosure that may
be of sufficient magnitude to constitute a risk of
electric shock to persons.
This symbol is intended to alert the user to
the presence of important operating and
maintenance (servicing) instructions in the
literature accompanying the applicance.
The symbol for class II (Double insulation)
Spongebob SB329_engP01-12.p65 7/5/06, 2:08 PM1
Page 3
IMPORT ANT SAFETY INSTRUCTIONS
Before using the unit, be sure to read all operating instructions carefully. Please note that these are general precautions
and may not pertain to your unit. For example, this unit may not have the capability to be connected to an outdoor
antenna.
1. READ INSTRUCTIONS
All the safety and operating instructions should be read before the product is operated.
2. RETAIN INSTRUCTIONS
The safety and operating instruction should be retained for future reference.
3. HEED WARNINGS
All warning on the product and in the operating instructions should be adhered to.
4. FOLLOW INSTRUCTIONS
All operating and use instructions should be followed.
5. CLEANING
Unplug this product from the wall outlet before cleaning. Do not liquid cleaners or aerosol cleaners. Use a damp cloth for
cleaning.
6. ATTACHMENTS
Do not use attachments not recommended by the product’s manufacturer as they may cause hazards.
7. WA TER AND MOISTURE
Do not use this product near water- for example, near a bathtub, washbowl, kitchen sink, or laundry tub, in a wet basement,
or near a swimming pool.
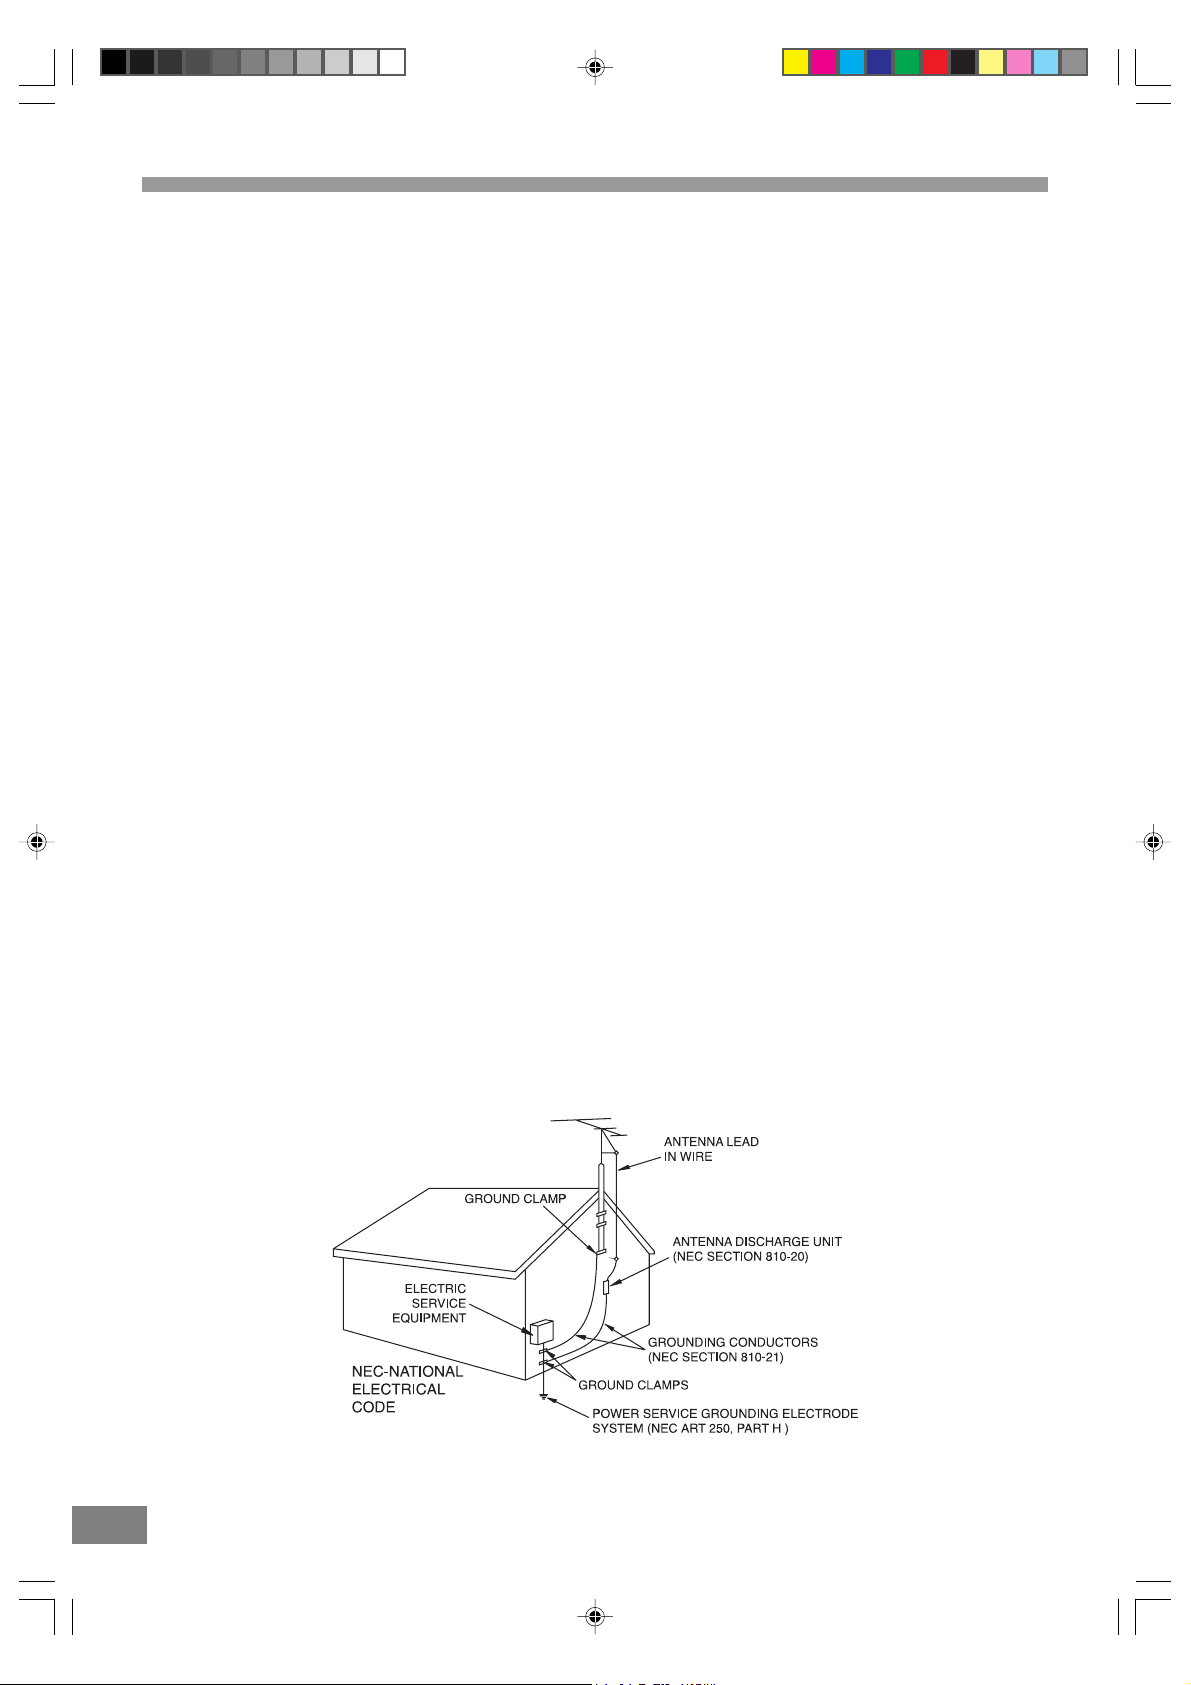
8. ACCESSORIES
Do not place this product on an unstable cart, stand, tripod, bracket, or table. The product may
fall, causing serious injury and serious damage to the product. Use only with a cart, stand,
tripod, bracket, or table recommended by the manufacturer or sold with the product. Any
mounting of the product should follow the manufacturer’s instructions, and should use a
mounting accessory recommended by the manufacturer.
8A. An appliance and cart combination should be moved with care. Quick stops, excessive force,
and uneven surface may cause the appliance and cart combination to overturn.
9. VENTILATION
Slots and openings in the cabinet and in the back or bottom of the cabinet are provided for ventilation and to ensure reliable
operation of the product and to protect it from overheating. These openings must not be blocked or covered. The openings
should never be blocked by placing the product on a bed, sofa, rug, or other similar surface. This product should never be
placed near or over a radiator or heat source. This product should not be placed in a built-in installation such as a bookcase
or rack unless proper ventilation is provided or the manufacturer’s instructions have been adhered to.
10. POWER SOURCES
This product should be operated only from the type of power source indicated on the marking label. If you are not sure of
the type of power supply to your home, consult your appliance dealer or local power company. For products intended to
operate from battery power, or other sources, refer to the operating instruction.
11. GROUNDING OR POLARIZATION
This product is equipped with an alternating-current line plug (a plug having one blade wider than the other). This plug will
fit into the power outlet only one way. This is a safety feature. If you are unable to insert the plug fully into the outlet, try
reversing the plug. If the plug should still fail to fit, contact your electrician to replace your obsolete outlet.
Do not defeat the safety purpose of the polarized plug.
12. POWER-CORD PROTECTION
Power-supply cords should be routed so that they are not likely to be walked on or pinched by items placed upon or
against them, paying particular attention to cords at plugs, convenience receptacles, and the point where they exit from
the appliance.
13 . LIGHTNING
To protect your product from a lightning storm, or when it is left unattended and unused for long periods of time, unplug it
from the wall outlet and disconnect the antenna or cable system. This will prevent damage to the product due to lightning
and power-line surges.
14. POWER LINES
An outside antenna system should not be located in the vicinity of overhead power lines or other electric light or power
circuits, or where it can fall into such powerlines or circuits. When installing an outside antenna system, extreme care
should be taken to keep from touching such power lines or circuits as contact with them might be fatal.
Spongebob SB329_engP01-12.p65 7/5/06, 2:08 PM2
2
Page 4
IMPORT ANT SAFETY INSTRUCTIONS (CONTINUED)
15. OVERLOADING
Do not overload wall outlets and extension cords as this can result in a risk of fire or electric shock.
16. OBJECT AND LIQUID ENTRY
Never push objects of any kind into this product through openings as they may touch dangerous voltage points or short out
parts that could result in fire or electric shock. Never spill or spray any type of liquid on the product.
17. OUTDOOR ANTENNA GROUNDING
If an outside antenna is connected to the product, be sure the antenna system is grounded so as to provide some
protection against voltage surges and built-up static charges. Section 810 of the National Electric Code, ANSI/NFPA 70,
provides information with respect to proper grounding of the mast and supporting structure, grounding of the lead-in
wire to an antenna discharge product, size of grounding conductors, location of antenna discharge product, connection
to grounding electrodes, and requirements for grounding electrode.
18 . SERVICING
Do not attempt to service this product yourself as opening or removing covers may expose you to dangerous voltage or
other hazards. Refer all servicing to qualified service personnel.
19. REPLACEMENT PARTS
When replacement parts are required, be sure the service technician uses replacement parts specified by the
manufacturer or those that have the same characteristics as the original part. Unauthorized substitution may result in
fire, electric shock or other hazards.
20. SAFETY CHECK
Upon completion of any service or repairs to this product, ask the service technician to perform safety checks to
determine that the product is in proper operating condition.
21. WALL OR CEILING MOUNTING
The product should be mounted to a wall or ceiling only as recommended by the manufacturer.
22. DAMAGE REQUIRING SERVICE
Unplug the product from the wall outlet and refer servicing to qualified service personnel under the following conditions:
a. When the power-supply cord or plug is damaged.
b. If liquid has been spilled, or objects have fallen into the product.
c. If the product has been exposed to rain or water.
d. If the product does not operate normally by following the operating instructions. Adjust only those controls that are
covered by the operating instructions, as an adjustment of other controls may result on damage and will often require
extensive work by a qualified technician to restore the product to its normal operation.
e. If the product has been dropped or the cabinet has been damaged.
f. When the product exhibits a distinct change in performance - this indicates a need for service.
23. HEAT
The product should be situated away from heat sources such as radiators, heat registers, stoves, or other products
(including amplifiers) that produce heat.
24. NOTE TO CA TV SYSTEM INSTALLER
This reminder is provided to call the CATV system installer’s attention to Article 820-40 of NEC that provides guidelines for
proper grounding and, in particular, specifies that the cable ground shall be connected to the grounding system of the
building, as close to the point of cable entry as practical.
2 3
Spongebob SB329_engP01-12.p65 7/5/06, 2:08 PM3
Page 5

IMPORT ANT SAFETY INSTRUCTIONS (CONTINUED)
Any use of the controls or an adjustment to the procedures other than those specified herein may result in hazardous radiation.
TO REDUCE THE RISK OF ELECTRIC SHOCK, DO NOT REMOVE COVER (OR BACK). THERE ARE NO USER-SERVICEABLE
PARTS INSIDE. PLEASE REFER ANY SER VICING TO QUALIFIED SER VICE PERSONNEL.
WARNING: Changes or modifications to this unit not expressly approved by the party responsible for compliance could void the
FCC NOTICE:
This equipment has been tested and found to comply with the limits for a Class B digital device, pursuant to part 15 of the FCC
Rules. These limits are designed to provide reasonable protection against harmful interference in a residential installation.
This equipment generates, uses, and can radiate radio frequency energy and, if not installed and used in accordance with
the instructions, may cause harmful interference to radio communications.
However, there is no guarantee that interference will not occur in a particular installation. If this equipment does cause harmful
interference to radio or television reception, which can be determined by turning the equipment off and on, the user is
encouraged to try to correct the interference by one or more of the following measures:
• Consult the dealer or an experienced radio/TV technician for help.
FCC CAUTION:
To assure continued compliance, follow the attached installation instructions and use only shielded cables when
connecting to other devices. Also, any changes or modifications not expressly approved by the party responsible for
compliance could void the user’s authority to operate the equipment.
user's authority to operate the equipment.
Spongebob SB329_engP01-12.p65 7/5/06, 2:08 PM4
4
Page 6
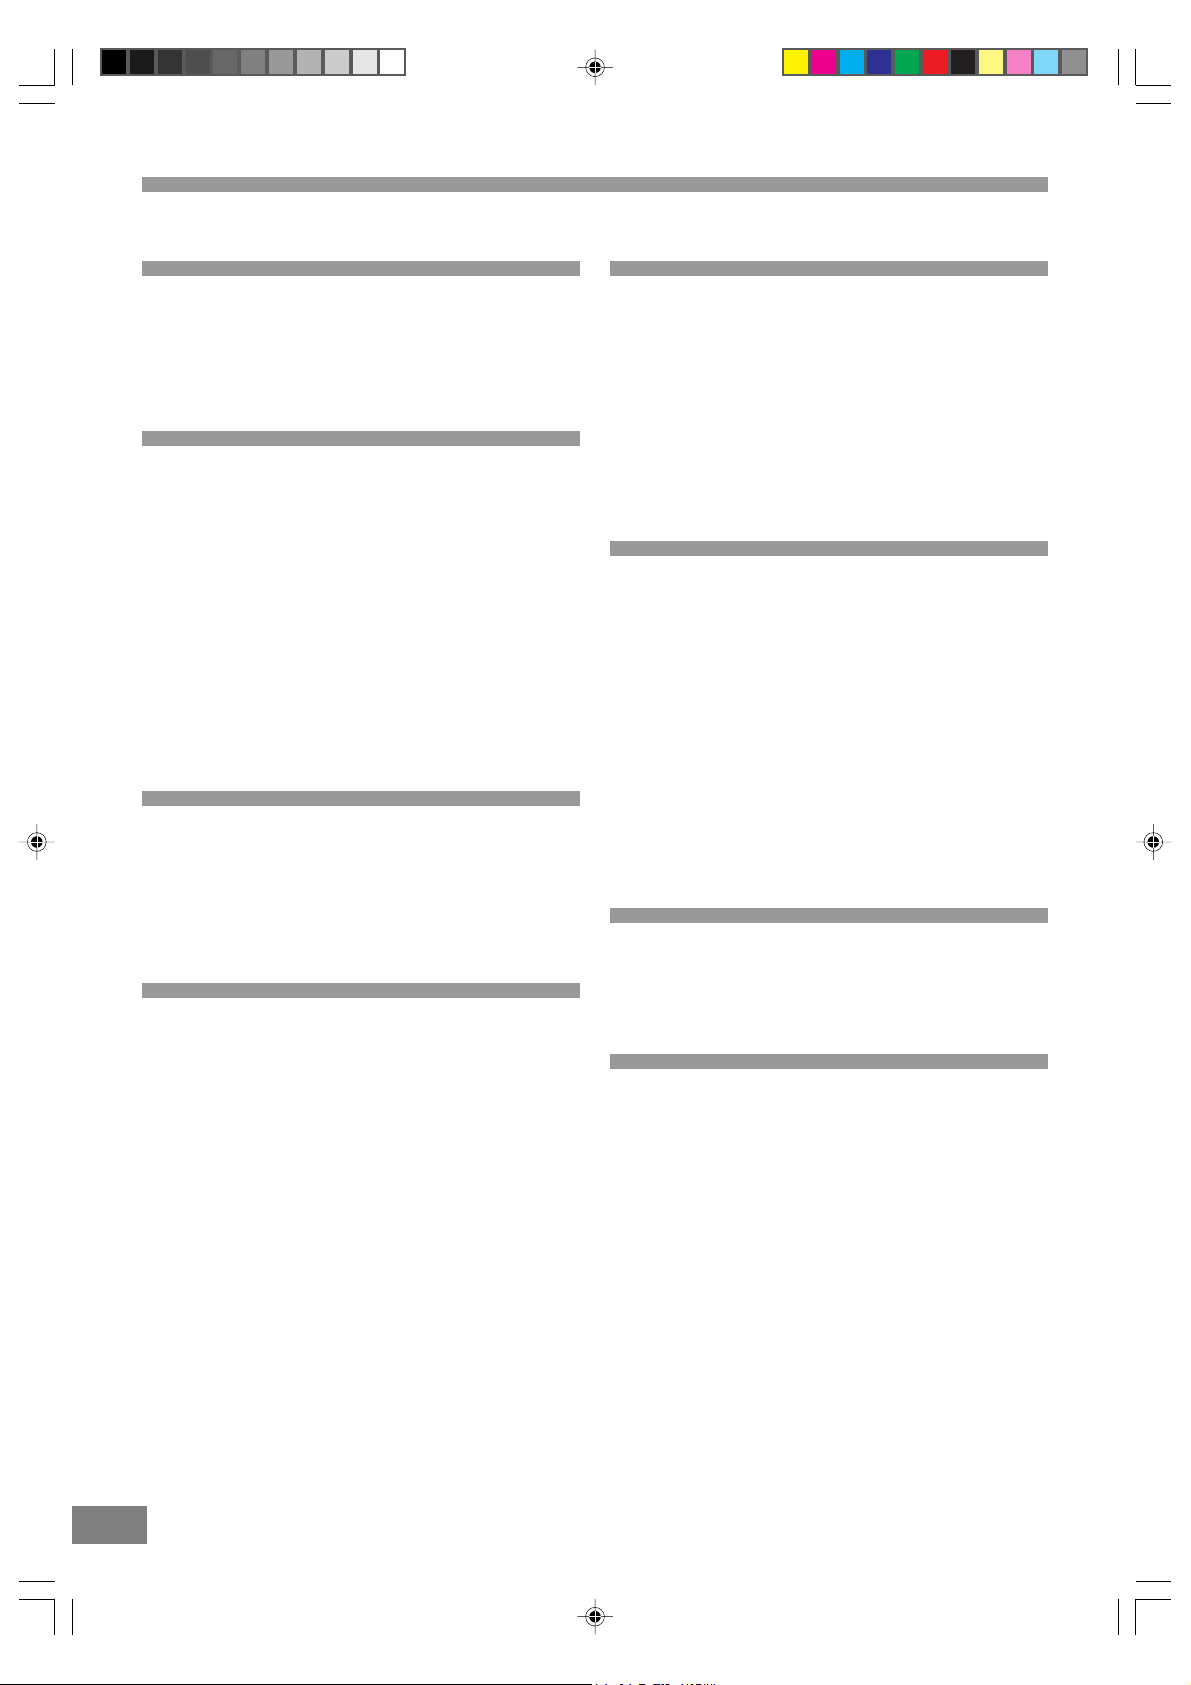
Table of Conte nts
Warnings and Cautions
Welcome ...............................................................................................1
UL Safety Instructions ..................................................................1-3
FCC Notice ............................................................................................4
FCC Caution .........................................................................................4
Basic System Information
Index ....................................................................................................5
Location of Controls & Indicators ..........................................................6
Location of Jacks and T erminals ...........................................................7
Remote Control .....................................................................................8
Important Safeguards and Precautions ................................................9
Features of This System ....................................................................10
Important Information Regarding This Manual ....................................10
High Quality Digital Audio .....................................................................10
Compatible with a wide range of DVD Digital Audio Output Formats
............................................................................................................10
Locale Management Information .....................................................10
Types of Discs That Can be Played on This System ............................1 1
Notes on Disc Handling ..................................................................12
Installations and Connections
Unpacking ....................................................................................13
Inserting Batteries into the Remote Control .......................................13
Protect Your Furniture ...................................................................13
TV and Optical Component Connections ..........................................14
Connecting the AC power Cord ........................................................14
DVD Playback
Basic Play ....................................................................................15
Skipping Chapters or Tracks ...........................................................16
Slow-motion play by remote control only ..........................................16
Selecting Scenes by Chapter Number .............................................16
Selecting a Start Point using the Title Time Code ................................17
Selecting a Start Point using the Chapter Time Code..........................17
Repeat Play ..................................................................................17
Repeat sections between two specific points (Repeat A-B) ...........18
Random Play ................................................................................18
Changing the Audio Output Signal Audio CDs ...................................18
CD-R/RW playback ...........................................................................19
Picture CD Operation ....................................................................19
Convenient Functions
Changing Audio Soundtrack Language ...............................................20
Viewing from another angle ...............................................................20
Clearing & Displaying of Subtitles ........................................................20
Changing Subtitle Language ...............................................................21
Selection of Titles ...............................................................................21
Using a DVD Menu ..............................................................................21
Audio CD Playback ..............................................................................22
Basic Play ...........................................................................................22
When the unit is not in use ..................................................................22
Setting and Adjustments
TV Display ...........................................................................................23
TV Type ..............................................................................................23
Angle Mark ..........................................................................................23
On Screen Display Language .............................................................24
Captions .............................................................................................24
Screen Saver .....................................................................................24
Downmix ............................................................................................25
Dynamic ..............................................................................................25
Audio ..................................................................................................25
Subtitle ...............................................................................................26
Disc Menu ...........................................................................................26
Parental ..............................................................................................26
Password ..........................................................................................27
Other Functions
Zoom ..................................................................................................27
Common Procedure ............................................................................27
Key Lock ............................................................................................27
Additional Information
Troubleshooting .......................................................................28-29
Contact Customer Service ..................................................................29
Warranty ............................................................................................30
4 5
Spongebob SB329_engP01-12.p65 7/5/06, 2:08 PM5
Page 7
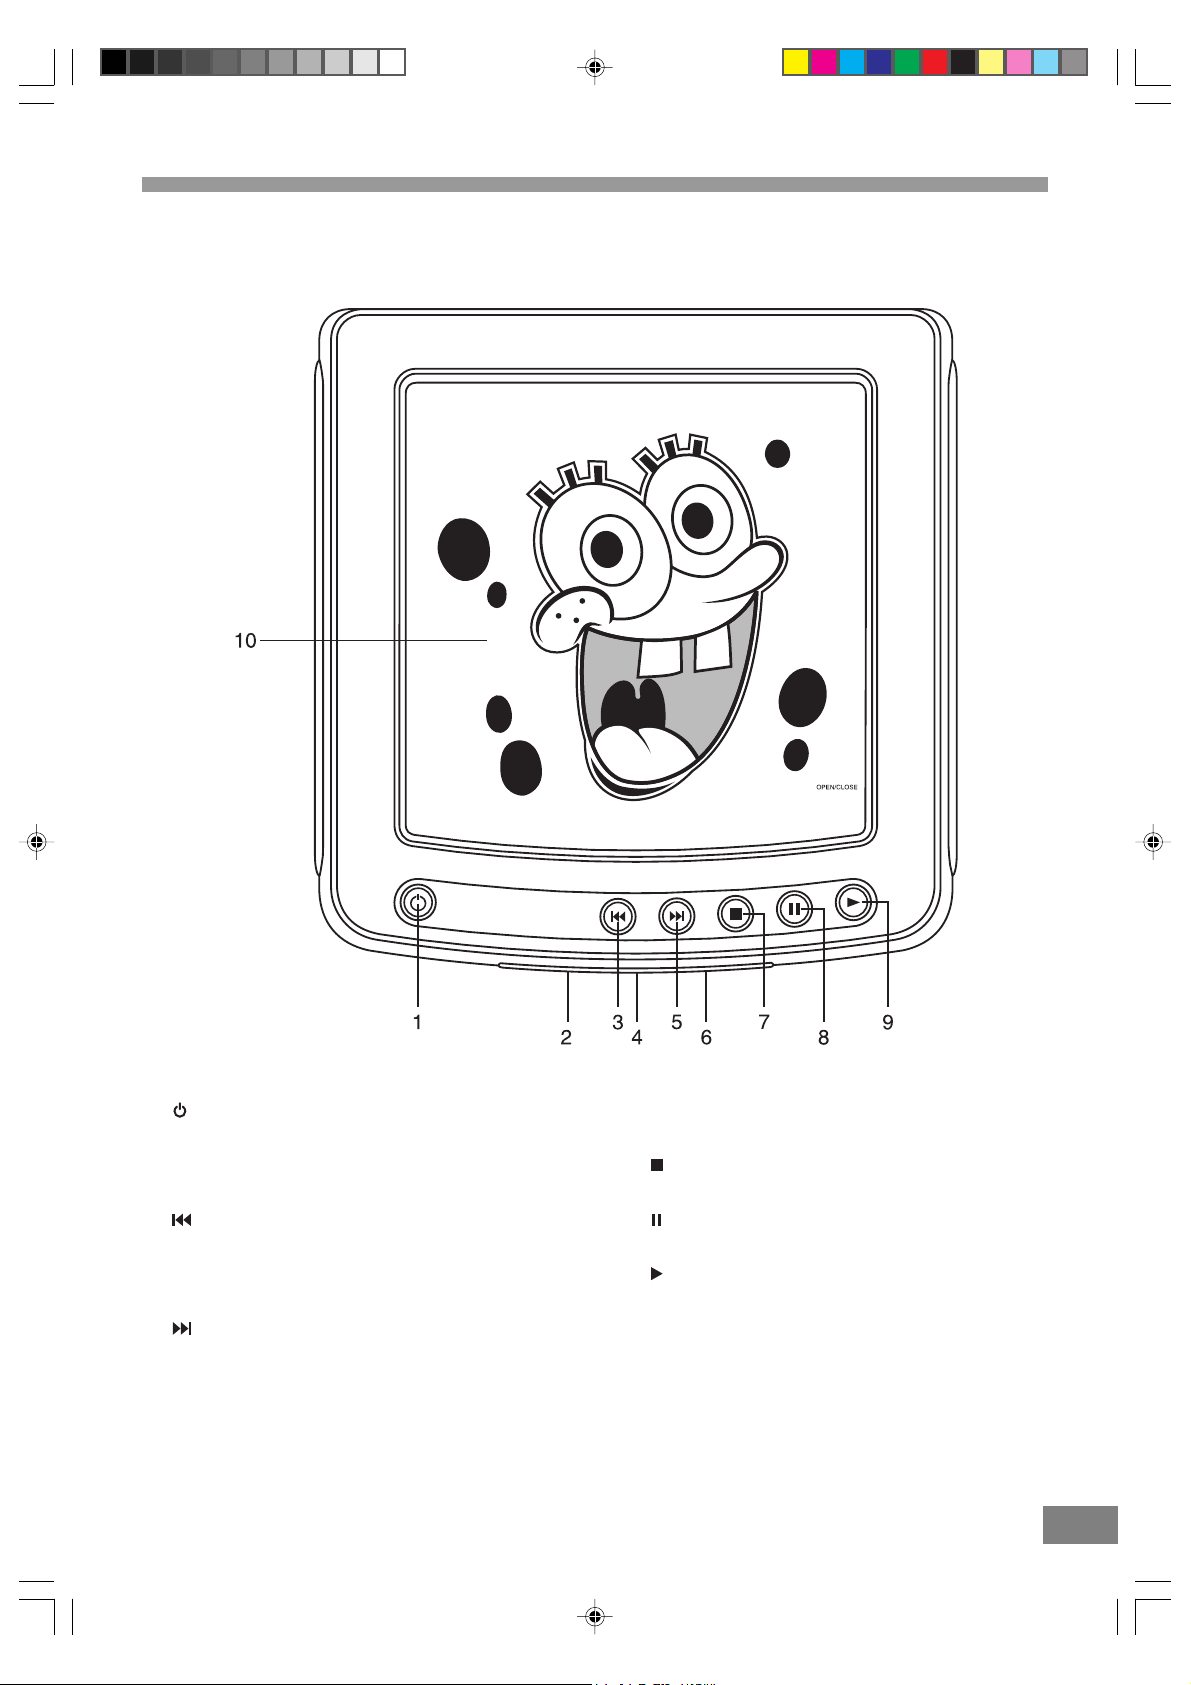
LOCATION OF CONTROLS AND INDICATORS
MAIN UNIT (Front View)
1.) Standby Button.
Turns the system 'On/Off'.
2.) ST ANDBY LED Indicator .
Lights up to indicate standby mode.
3.) Skip Reverse Button.
Skip to previous chapter.
4.) IR Remote Sensor Indicator .
Flashes when receiving signal from remote control.
5.) Skip Forward Button.
Skip to next chapter.
Spongebob SB329_engP01-12.p65 7/5/06, 2:08 PM6
6.) Remote SENSOR.
Receives the commands from the remote control.
7.) Stop Button.
Stop playing the disc.
8.) Pause Button.
Press to pause playback.
9.) Play Button.
Press to begin playback.
10.) Disc Compartment.
6
Page 8
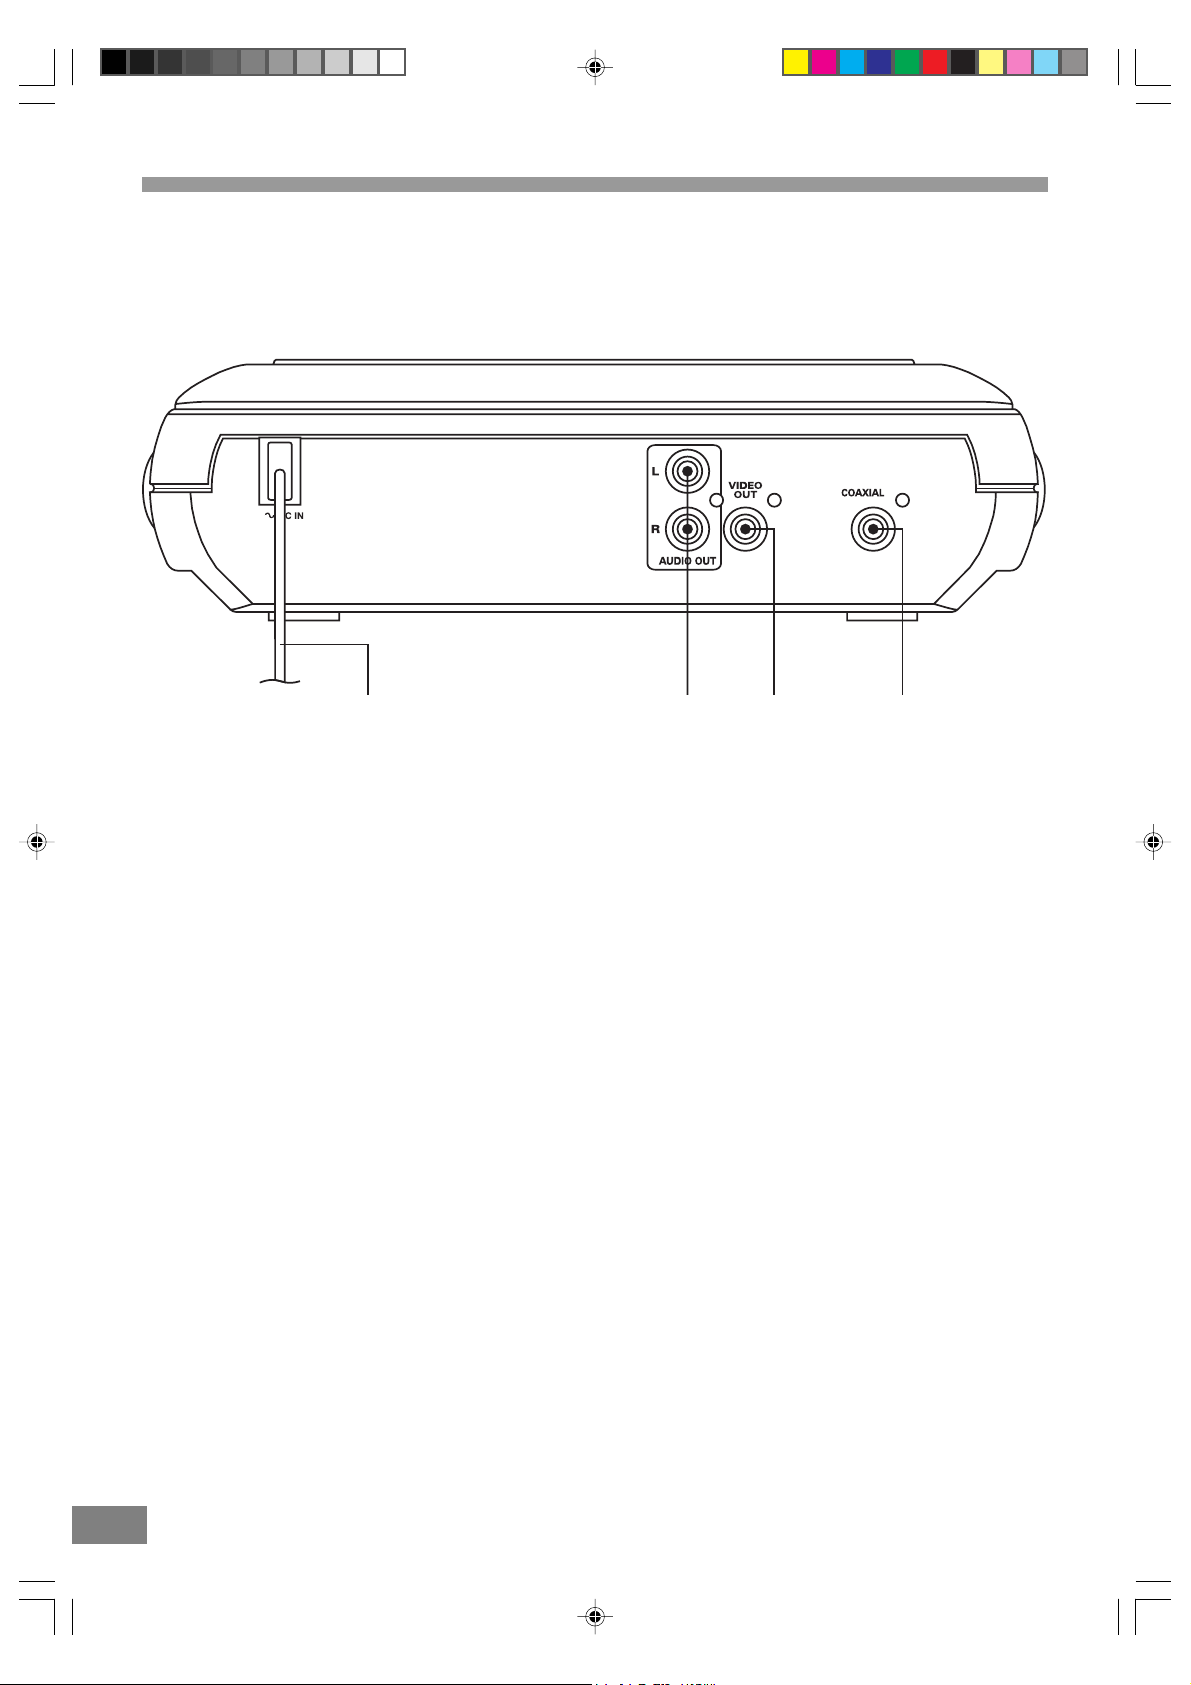
LOCATION OF JACK AND TERMINALS
MAIN UNIT (Back Panel)
1
1.) AC Power Cord.
2.) AUDIO OUT L/R Jacks.
3.) VIDEO OUT Jack.
4.) COAXIAL Digital Out Jack.
2
34
6 7
Spongebob SB329_engP01-12.p65 7/5/06, 2:08 PM7
Page 9
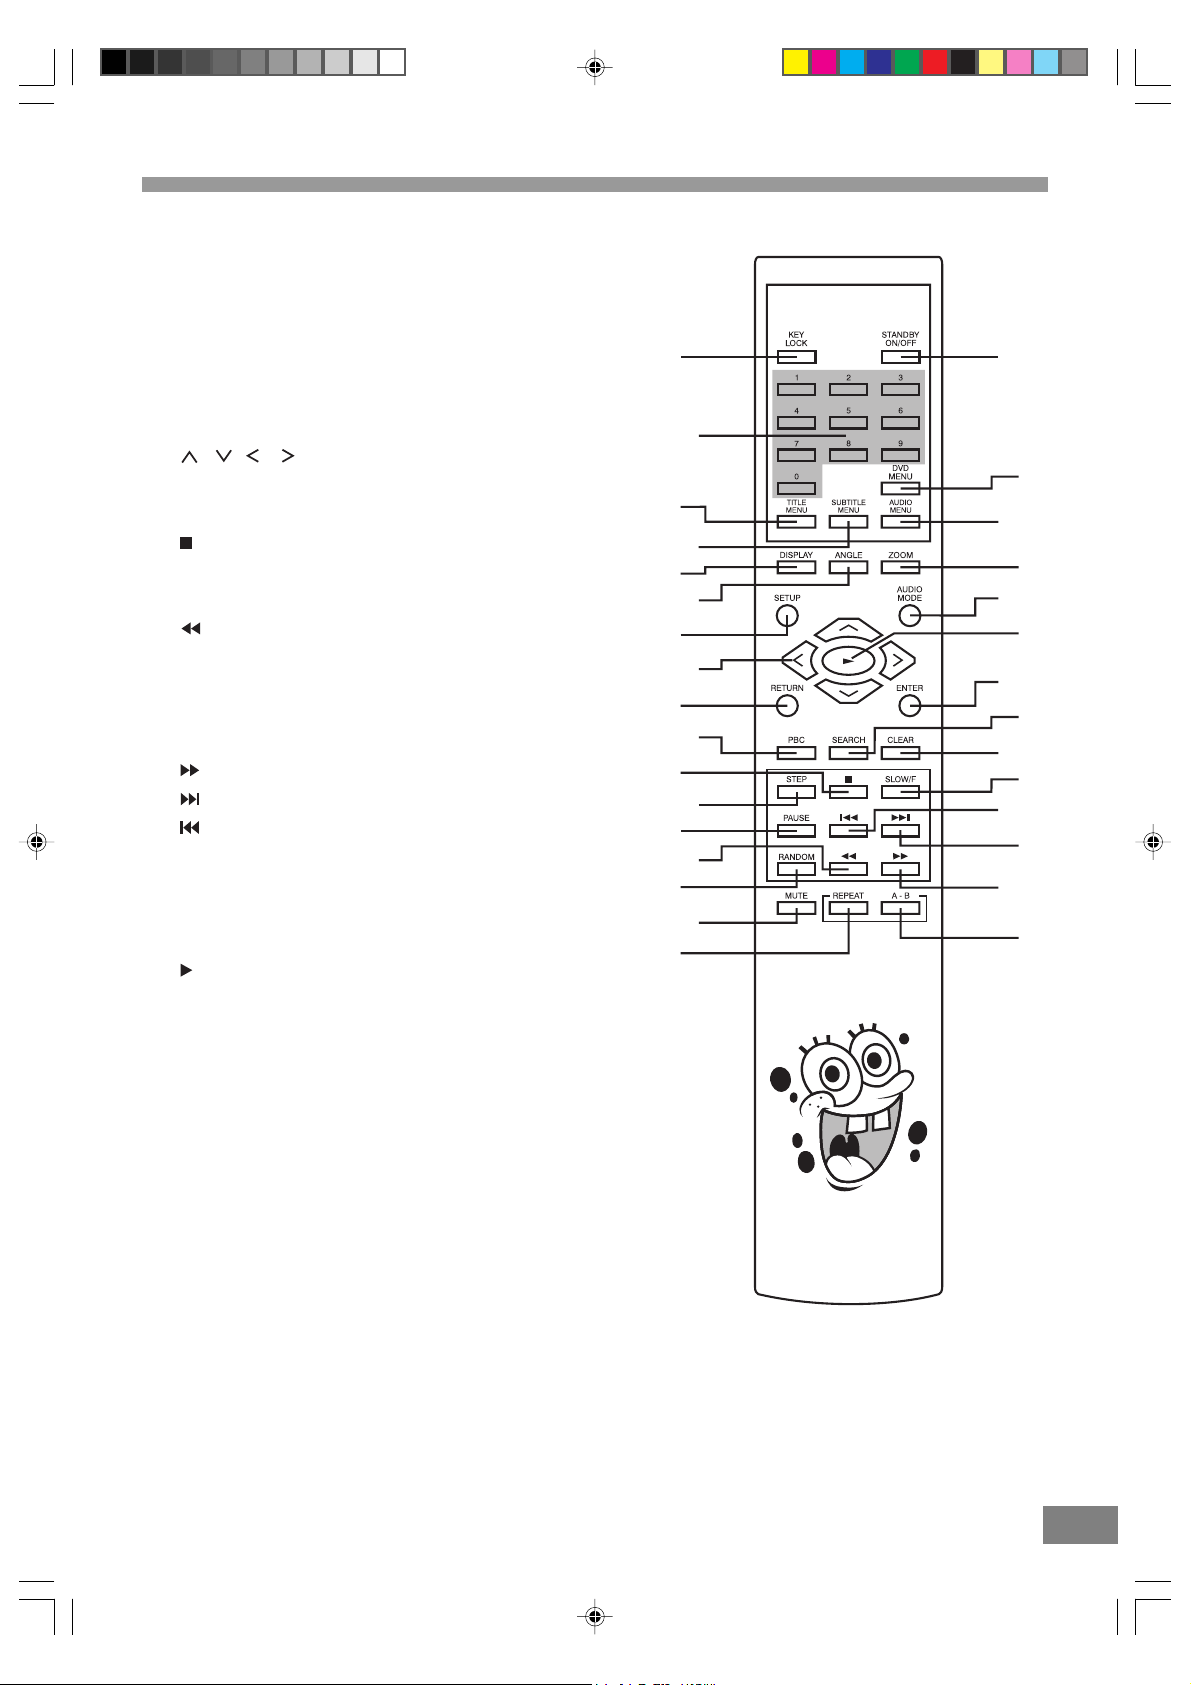
REMOTE CONTROL
1.) KEY LOCK Button.
2.) Numeric (0-9) Buttons.
3.) TITLE MENU Button.
4.) SUBTITLE MENU Button.
5.) DISPLA Y Button.
6.) ANGLE Button.
7.) SETUP Button.
8.) / / / Navigation Buttons.
9.) RETURN Button.
10.) PBC Button.
1 1. ) STOP Button.
12.) STEP Button.
13.) P AUSE Button.
14.) Search Reverse Button.
15.) RANDOM Button.
16.) MUTE Button.
17.) REPEA T Button.
18.) A-B Repeat Button.
19.) Search Forward Button.
20.) Skip Forward Button.
21.) Skip Reverse Button.
22.) SLOW/F Button.
23.) CLEAR Button.
24.) SEARCH Button.
25.) ENTER Button.
26.) Play Button.
27.) AUDIO MODE Button.
28.) ZOOM Button.
29.) AUDIO MENU Button.
30.) DVD MENU Button.
31.) ST ANDBY ON/OFF Button.
11
13
15
17
1
31
2
30
3
29
4
5
6
7
8
9
10
28
27
26
25
24
23
22
12
14
21
20
19
16
18
Spongebob SB329_engP01-12.p65 7/5/06, 2:08 PM8
8
Page 10

Important Safeguards and Precautions
Power Cord Protection
To avoid any malfunctions of the unit, and to protect against
electric shock, fire or personal injury, please observe the
following:
• Hold the plug firmly when connecting or disconnecting the
AC power cord.
• Keep the AC power cord away from heating appliances.
• Never put any heavy object on the AC power cord.
• Do not attempt to repair or reconstruct the AC power cord
in any way.
Location and Handling
• Air vents are provided in the cabinet to prevent excessive
temperatures inside the unit. Do not place this unit in
closed spaces, cover it, or otherwise block the vents.
• Do not place this unit in direct sunlight, or near heat
sources.
• Keep this unit away from strong magnetic objects.
• Do not insert or drop anything into this unit through the
air vents as this could cause serious damage possibly
resulting in fire.
• Do not place any object containing water or other liquids
on this unit. In the event that liquid should enter the
cabinet, unplug this unit immediately and contact the
retailer or service center immediately.
• Do not remove the cabinet. Touching parts inside the
cabinet could result in electric shock and / or damage to
the unit.
• Do not use the unit in a car. The operation can not
guaranteed.
Non-Use Periods
• When the unit is not being used, turn the unit off.
• When left unused for a long period of time, the unit should
be unplugged from the household AC outlet.
No Fingers or Other Objects Inside
Do not put any foreign object on the disc tray.
Stacking
Place the unit in a horizontal position, and do not place
anything heavy on it.
Condensation
Moisture may form on the pickup lens in the following
conditions:
• Immediately after a heater has been turned on.
• In a steamy or very humid room.
• When the unit is suddenly moved from a cold environment
to a warm one.
If moisture forms inside this unit, it may not operate properly.
In this case, turn on the power and wait about one hour for the
moisture to evaporate.
On Adjusting V olume
Do not turn up the volume while listening to a portion with
very low level inputs or no audio signals. If you do, the
speakers may be damaged when a peak level portion is
played.
If There is Noise Interference on the TV While a
Broadcast is Being Received
Depending on the reception condition of the TV, interference
may appear on the TV monitor while you watch a TV
broadcast and the unit is left on. This is not a malfunction of
the unit or the TV. To watch a TV broadcast, turn off the unit.
Service
• Do not attempt to service the unit yourself.
• Please call 1-800-898-9020 for the name of the nearest
service center.
Copyright
Audio-visual material may consist of copyrighted works which
must not be recorded without the authority of the owner of
the copyright. Please refer to relevant laws covering copyright
protection.
Copy protection
This DVD player supports Macrovision copy protection.
On DVD discs that include a copy protection code, if the
contents of the DVD disc are copied using a VCR, the copy
protection code prevents the videotape copy from playing
normally.
Recommended measures for Optimum Performance
This unit is a precision device that is constructed using
extremely accurate technology. Soiling or friction affecting
the pickup lens or disc drive can impair the image
I
n the worst case, neither video nor audio will be played back.
To obtain optimum picture quality, the player should be
checked (cleaning and replacement of some parts) every
1,000 hours. Note that this period varies depending on the
environment (temperature, humidity, dust, etc..) in which the
player is used.
quality.
Do not attempt to clean the pickup lens yourself.
Notes:
• Periodically inspect for damage, if damaged properly
repair the DVD player before use.
• Adult supervision recommended.
8 9
Spongebob SB329_engP01-12.p65 7/5/06, 2:08 PM9
Page 11

Features of This System
• DVD player with Dolby Digital* Audio output.
• Compatible with DVD, CD-R/RW, KODAK PHOTO CDs and CD discs.
• DVD navigation functions.
• On screen display menu.
• Full function remote control.
* Manufactured under license from Dolby Laboratories. “Dolby”, “AC-3”, “Pro Logic” and the double-D symbol are
trademarks of Dolby Laboratories. Confidential Unpublished Works. ©1992-1997 Dolby Laboratories, Inc. All rights
reserved.
Important Information Regarding This Manual
• The types of functions and operations that can be used for a particular disc vary depending on the features of that
disc. In some cases, these functions and operations may differ from the descriptions given in this Operations
Manual. In this event, follow the instructions given on the screen. This Operations Manual only covers basic disc
operations.
• For some operations, the "INVALID KEY" statement may appear on the screen. This indicates that the operation
described in this Operations Manual is not available on the disc in the player.
• The drawings about the TV screen used in this Operations Manual are purely for the purposes of explanation. The actual
displays may differ slightly from what are shown here.
High Qua lity Digital Audio
• With the linear PCM sound of 48 kHz /16 bit through 96 kHz / 20 bit, audio quality exceeding that of audio CDs is possible.
Compatible with a wide range of DVD Digital Audio Output Formats
DVDs are recorded in one of four types of digital audio formats (as of October 1998). The digital audio output jack of this
player can output Dolby Digital*, MPEG, and linear PCM digital bitstreams.
Locale Management Information:
This DVD player is designed and manufactured to respond to the Locale Management Information that is recorded on a
DVD disc. If the Locale number described on the DVD disc does not correspond to the Locale number of this DVD player,
this DVD player cannot play that disc.
Spongebob SB329_engP01-12.p65 7/5/06, 2:08 PM10
10
Page 12

TYPES of DISCS That Can be Played on This System
This player can playback discs bearing any of the following marks:
EDIV
O
12cmdisc/8cmdisc
DVDs
Note-1
• DVD players and discs are designed with region numbers
which dictate the regions in which a disc can be played. If
the region number on the disc you want to play does not
match the region number in your DVD player, you will
not be able to play the disc. If you try to play the DVD, the
message “WRONG REGION” will appear on the screen
display.
The region number for this DVD player is .
The region code of this player is printed on the rear of the unit.
Note-2
• The specific playback functionality for some DVD and
video CD discs is determined by the disc manufacturer.
Because this DVD player plays disc data in accordance
with the disc manufacturer’s guidelines, some functions
may not be available on some discs. Be sure to read the
instructions provided with the disc.
The “Prohibited” statement displayed during DVD player
operation indicates that such manufacturer imposed
restrictions apply.
Audio CDs
12cmdisc/8cmdisc
Support CD, CD-R/RW
KODAK PHOTO CD
Icons used on DVD discs
Sample Icons:
Glossary of Disc Terms
• Title (DVD)
The longest sections of picture or a music piece on a DVD,
a movie, etc., for a picture piece on a video disc; or an
album, etc., for a music piece on an audio disc. Each title
is assigned a title number enabling you to locate the title
you want.
• Chapter (DVD)
Sections of a picture or a music piece that are smaller
than titles. A title is composed of several chapters. Each
chapter is assigned a chapter number enabling you to
locate the chapter you want. Some discs may not contain
chapters.
10 11
Spongebob SB329_engP01-12.p65 7/5/06, 2:08 PM11
Note-3
• The audio on a DVD disc recorded in MPEG version 2.0
format may not play properly on some discs, only the
image will appear in this case.
Discs that Cannot be Played
• You cannot play CD-G, CD-EXTRA, CD-ROM and DVD-ROM
discs.
• You cannot play illegally produced discs.
• You cannot play scratched discs.
• You cannot play discs that are dusty, soiled or marked with
fingerprints.
• Track (Audio CD)
Sections of a music piece on an audio CD. Each track is
assigned a track number enabling you to locate the track
you want.
Page 13

Notes on Discs
Disc handling precautions
• T o keep the disc clean, handle the disc by its edge. Do not touch the surface.
• Do not stick paper or tape on the disc.
If there is glue (or a similar substance) on the disc, remove the glue completely before using the disc.
• Do not expose the disc to direct sunlight or sources such as hot air ducts, or leave it in a car parked indirect
sunlight as there can be considerable rise in temperature inside the car.
• After playing, store the disc in its case.
• Do not write on the label side with a ball-point pen or other writing utensils.
• Be careful not to drop or bend the disc.
Disc cleaning precautions
• Before playing, clean the disc with a cleaning cloth. Wipe the disc from the center out.
• Do not use solvents such as benzine, thinner, commercially available cleaners or anti-static spray intended for vinyl
LPs.
Disc installing precautions
• Do not install more than 1 disc on disc tray.
• Do not place the disc on the tray up-side down.
• Do not try to close the disc tray when the disc is not installed and centered properly.
12
Spongebob SB329_engP01-12.p65 7/5/06, 2:08 PM12
Page 14

Installation
This section describes how to connect the system to a TV monitor with audio/video input jacks. You cannot connect this system
to a TV monitor which does not have a video input connector. Be sure to turn off the power of each component before making
the connections.
Unpacking
Check that you have the following items:
• Main unit (1).
• Remote control (1).
• Audio/Video cable (4 feet x 1).
• Owner’s Manual (1).
Inserting Batteries into the Remote
Control
You can control the system using the supplied remote.
Insert two "AA" batteries by matching the + and - on the
batteries with the markings in the battery compartment.
When using the remote, point it at the remote sensor on
the front panel of this system.
Protect Your Furniture
This model is equipped with non-skid rubber 'feet' to prevent
the product from moving when you operate the controls.
These 'feet' are made from non-migrating rubber material
specially formulated to avoid leaving any marks or stains on
your furniture. However certain types of oil based furniture
polishes, wood preservatives, or cleaning sprays may cause
the rubber 'feet' to soften, and leave marks or a rubber
residue on the furniture. To prevent any damage to your
furniture we strongly recommend that you purchase small
self-adhesive felt pads, available at hardware stores and
home improvement centers everywhere, and apply these
pads to the bottom of the rubber 'feet' before you place the
product on fine wooden furniture.
12 13
Spongebob SB329_engP13-24.p65 7/5/06, 2:09 PM13
Notes:
• Do not leave the remote in an extremely hot or humid
place.
• Do not use a new battery with an old one.
• Do not drop any foreign object into the remote casing,
particularly when replacing the batteries.
• Do not expose the remote sensor to direct sunlight or
lighting apparatuses. Doing so may cause a malfunction.
• If you do not use the remote for an extended period of
time, remove the batteries to avoid possible damage
from battery leakage and corrosion.
• Use only the size and type of batteries specified.
• Be sure to follow the correct polarity when installing the
batteries as indicated in the battery compartment.
Reversed batteries may cause damage to the device.
Do not mix different types of batteries together (e.g.
Alkaline and Carbon-zinc) or old batteries with fresh
ones.
Page 15

TV and Optional Component
Connections
Required cords
• Video cord for connecting a TV set (included).
• Audio cords (included).
When connecting a cord, be sure to match the color-coded
pins to the appropriate jacks on the components.
Notes:
• TV Connection-Normal (Connection Cable Included):
To view the video from DVD discs on your TV set connect
the Video Out jack of this system to the Video ln jack of
your TV set. The Video jacks are usually colored yellow.
Use the included video cable with yellow plugs on each
end.
TV
• TV Connection-Audio (Connection Cables Included):
Connect the Left/Right audio output jacks of your system
to the Left/Right audio input jacks of the TV set.
• External Decoder Connection-Not Required:
The Coaxial Digital Audio output jack allows digital audio
signals to be fed to an external Dolby Digital decoder if
desired. The Coaxial digital audio connection cable is not
included.
Connecting the AC Power Cord
Notes:
• The Power Requirement is: AC 120V, 60Hz.
• Connecting to power other than the one listed above may
damage the system or cause abnormal operation.
• Before connecting the AC power cord of this system to a
wall outlet, connect the speakers and other component
cables to the system.
• Connect the AC power cords of your TV and any optional
connect to a wall outlet.
AUDIO
IN
AV Amplifier with a
Dolby Digital Decoder
VIDEO
IN
RL
COAXIAL
IN
Spongebob SB329_engP13-24.p65 7/5/06, 2:09 PM14
14
Page 16

DVD Playback
Preparations
• Switch on the TV set power and select "Video" as the TV
input.
• Switch on the stereo system's power if the player has
been connected to a stereo system.
Basic Play
1. Press down on the disc compartment lid (OPEN/CLOSE)
to open the disc compartment.
2. Place a disc into the disc compartment.
Hold the disc without touching either of its surfaces and
with the printed title side facing up. Align it with the guides
and place it in its proper position.
3. Close the disc compartment.
4. Press the PLAY 4 button if the movie has not started
automatically.
STANDBY DISC COMPARTMENT
PLAY
• If the disc has one or more titles recorded on it, a menu
screen will appear on the TV screen after a few moments.
5. Select the preferred title by using the ( < , > , Ù , Ú )
Navigation buttons, followed by the ENTER button, or press
the number button corresponding to the menu.
• Play of the seleted title now commences.
When the menu continues onto another screen
After step 3 on previous page, press SKIP :.
• To return to the previous menu screen, press SKIP 9.
• For further details, refer also to the disc jacket.
Stopping play and returning to the menu screen
Press the DVD MENU button.
• Play is suspended and the menu screen is displayed.
When the unit is not in use
When the unit is not in use, remove the disc and press the
STANDBY button to turn off the power. The STANDBY
indicator will illuminate.
Notes:
• The disc continues to rotate while the menu is displayed
even after the player has finished playing a particular item.
When no further selections are to be played, be sure to
press the STOP < button to clear the menu display.
• If the disc is placed in upside down, the On Screen
Display will indicate "NO DISC".
PLAY
STEP
PAUSE
NUMBER
BUTTONS
DVD
MENU
NAVIGATION
BUTTONS
ENTER
STOP
SKIP /
For your reference
• When " " appears on the TV screen while a button is
being operated, it means that the corresponding
operation is prohibited by the player.
Stopping play
• Press the STOP < button.
For your convenience
• When play is stopped, the unit records the point when
STOP < was pressed (RESUME function). Press PLAY 4
again and play will resume from this point. When the tray
is opened or STOP < is pressed again, the RESUME
function will be cleared. The RESUME function works only
with discs for which the elapsed playing time appears
during playback.
Still picture
Press the PAUSE button during play.
To return to normal play
Press PLAY 4.
Frame advance
• Press the PAUSE button to advance to still picture mode.
• Press STEP until the desired frame is displayed. The
disc is advanced one frame each time the STEP button
is pressed.
14 15
Spongebob SB329_engP13-24.p65 7/5/06, 2:09 PM15
Page 17
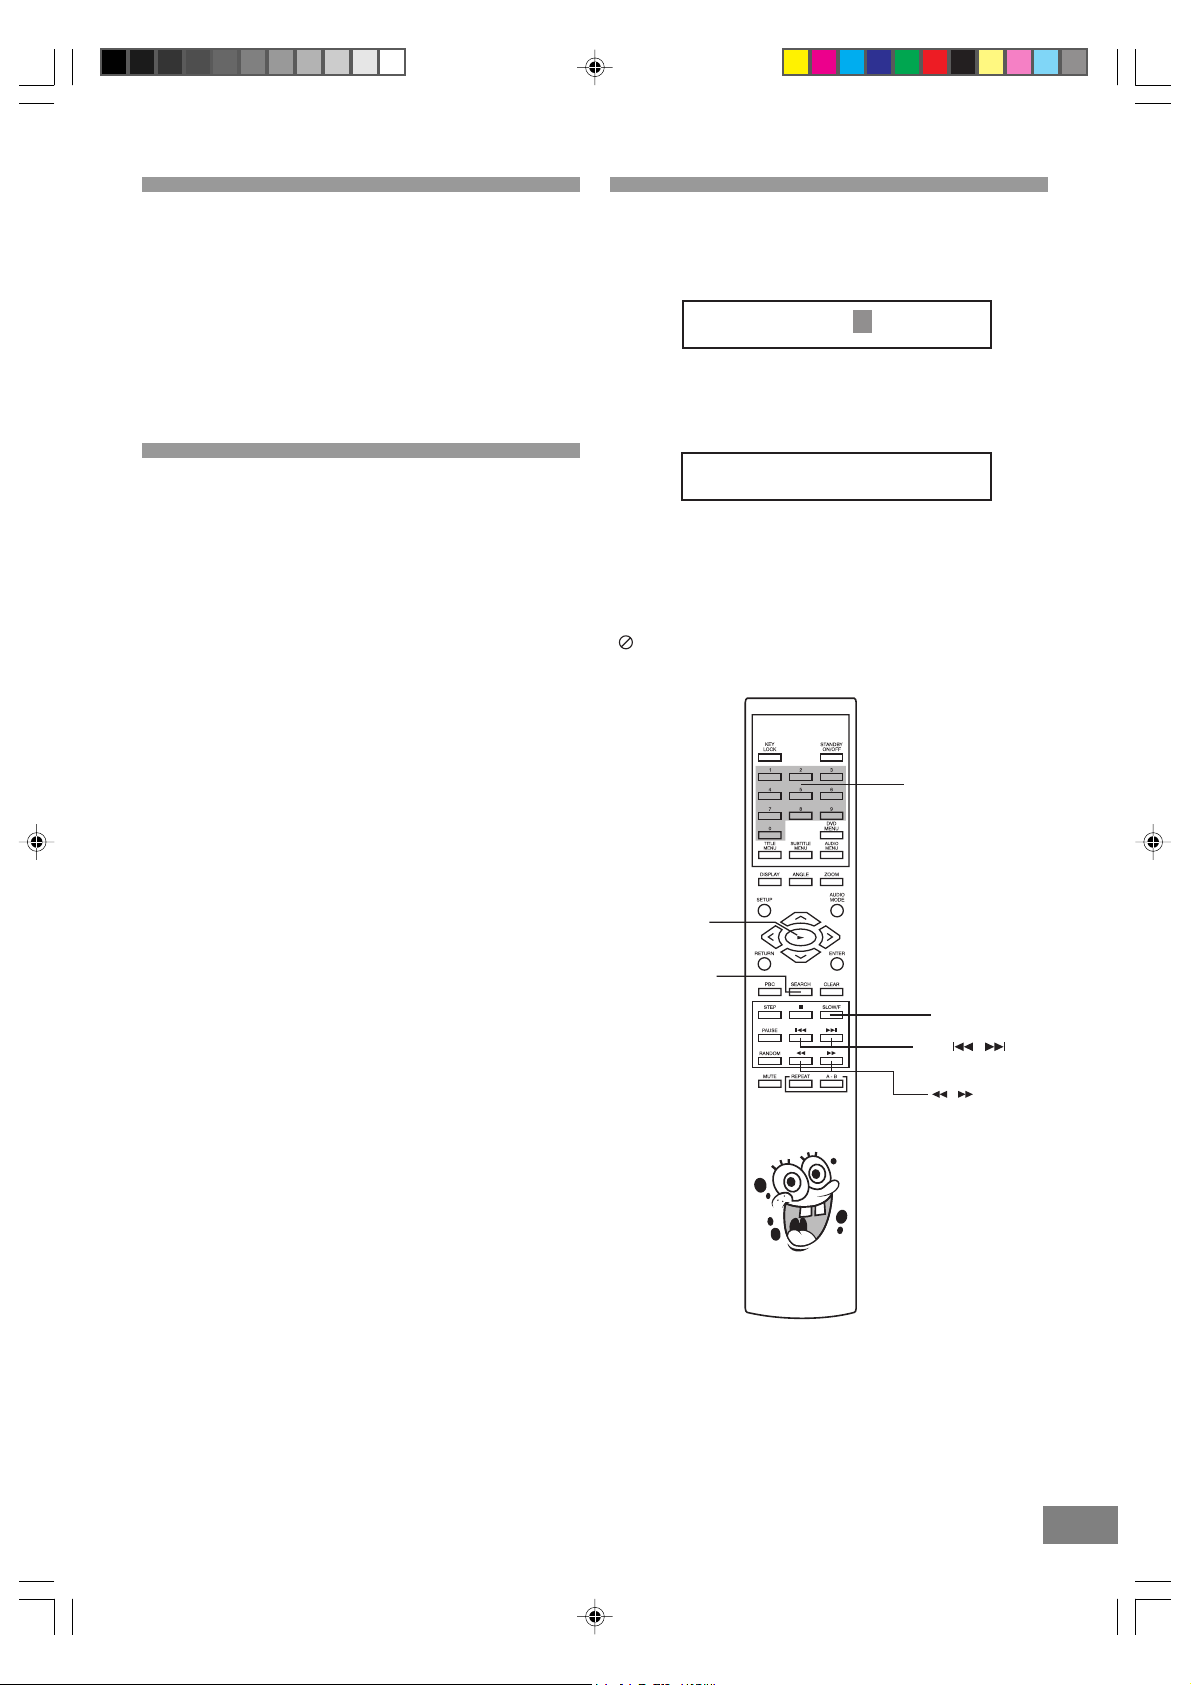
Skipping Chapters or Tracks
Skipping ahead
Press SKIP : during play.
• A chapter is skipped each time the button is pressed.
Skipping back
Press SKIP 9 during play.
Selecting Scenes by Chapter Number
Example: Starting play from Chapter 03.
1. Press the SEARCH button during play.
TT 01/03 CH /06
2. Press the Number button(s) to select the preferred
chapter.
Example: Press ' 0 ' , ' 3 '.
Slow-motion Play by Remote Control
Only
Press the SLOW/F button during play. Each time you press
the button, the speed changes from: 1/2, 1/4, 1/8, 1/16.
To return to normal play
• Press PLAY 4 button.
Search: rapid advance-rapid reverse
Press the SEARCH 7 or 8 button(s). Each time you press
the button, the speed change from: x2, x4, x8, x16.
BACKWARD x2 7 = Fast Reverse 1
BACKWARD x4 7 = Fast Reverse 2
BACKWARD x8 7 = Fast Reverse 3
BACKWARD x16 7 = Fast Reverse 4
FORWARD x2 8 = Fast Forward 1
FORWARD x4 8 = Fast Forward 2
FORWARD x8 8 = Fast Forward 3
FORWARD x16 8 = Fast Forward 4
To return to normal play
• Press the PLAY 4 button.
TT 01/03 CH 03/06
3. Play now commences from Chapter 03.
Note: Depending on the disc used, it may not be possible to
perform these operations during DVD menu play.
For your reference
" INPUT INVALID" appears on the TV monitor if the
number selected does not exist on the disc.
NUMBER
BUTTONS
PLAY
SEARCH
SLOW/F
SKIP /
Spongebob SB329_engP13-24.p65 7/5/06, 2:10 PM16
/
16
Page 18
Selecting a Start Point using the Title
Time Code
Example: Viewing after 1 hour 3 minutes have elapsed from
the title start.
1. Press the SEARCH button twice during play.
TT 01/03 T : :
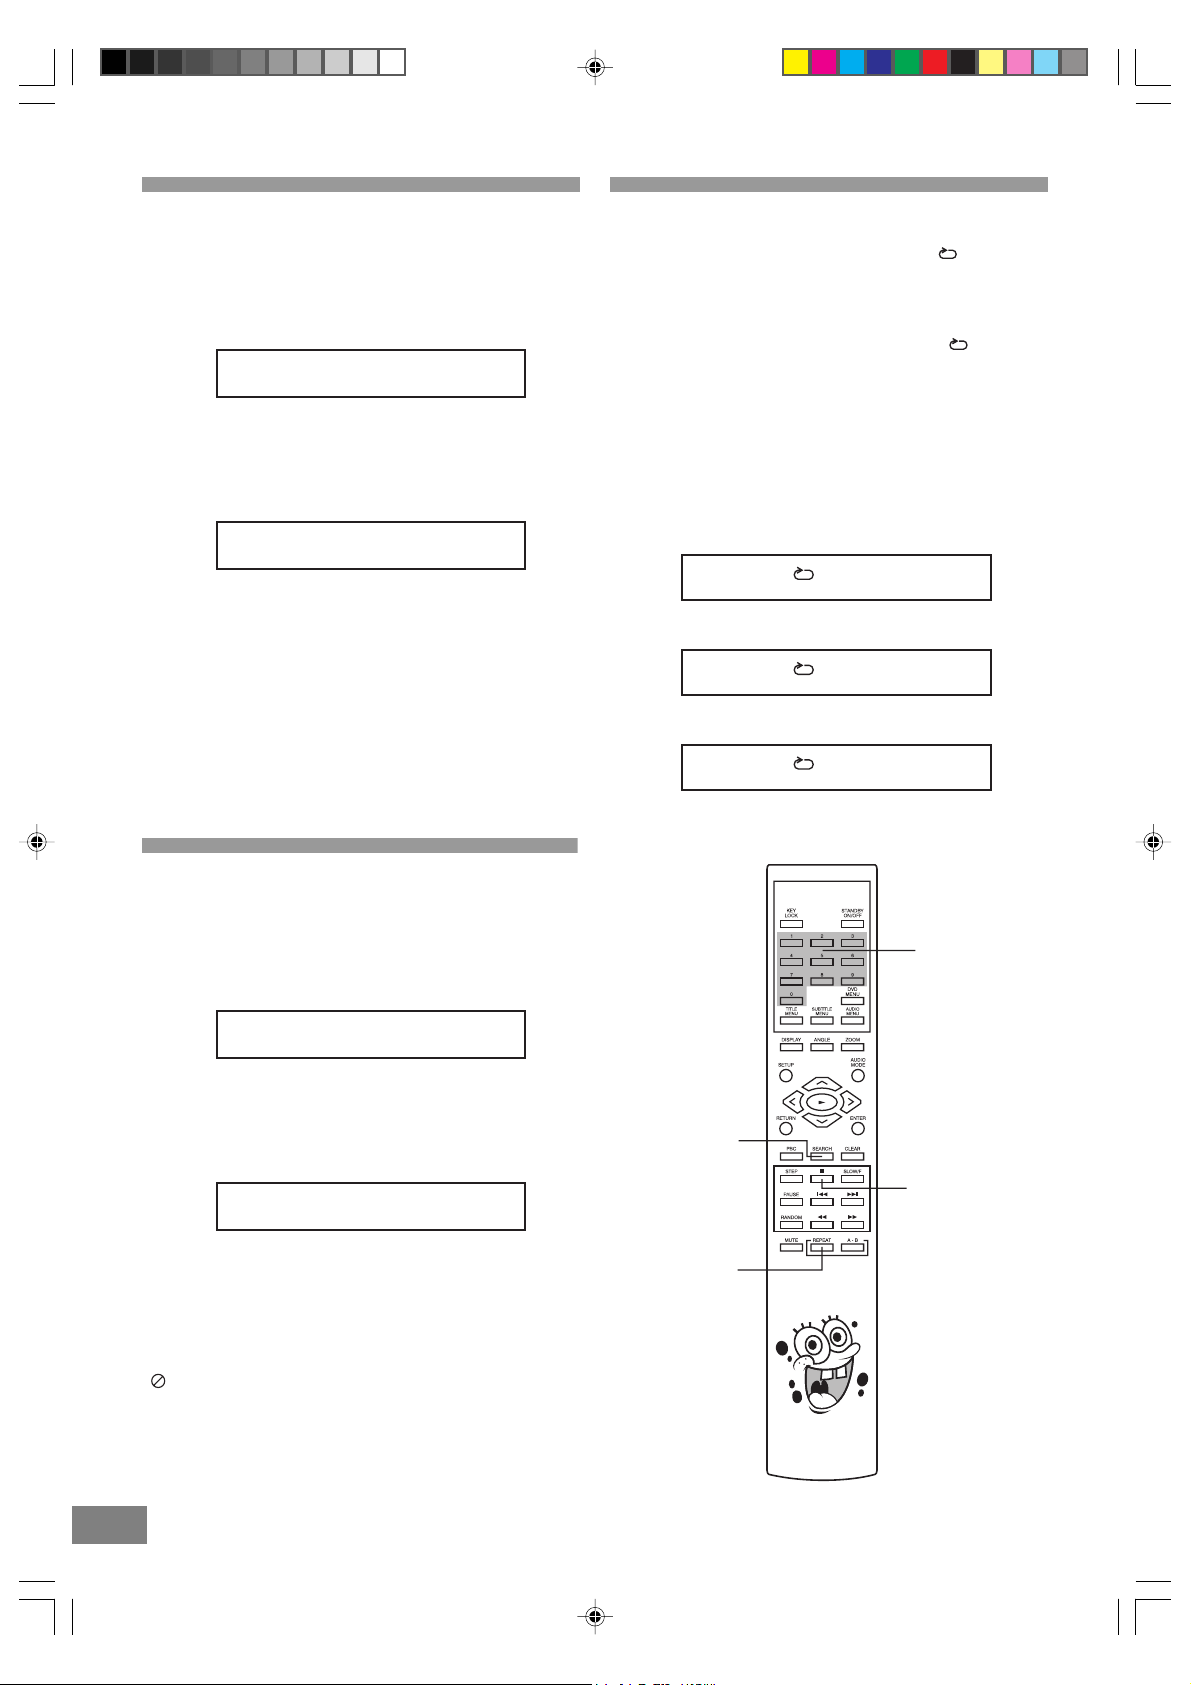
Repeat Play
1. Press the REPEAT button once and " Track" will
appear on the TV screen and the unit will repeat the
selected track / file continuously until the STOP < button
is pressed.
2. Press the REPEAT button twice and " ALL" will
appear on the TV screen and the unit will repeat the
CD continuously until the STOP < button is
whole
pressed.
2. Press the Number button(s) to specify the starting
position.
Example: To specify "1 hour 3 min.00sec.", press ' 1 ', ' 0 ',
' 0 ', ' 3 ', ' 0 ', and ' 0 '.
TT 01/03 T 1:03:00
3. Play now commences from the specified position.
Notes:
• This operation works only with discs for which the elapsed
playing time appears during playback.
• For some discs, play may not start from the specified
position even when the steps above have been performed
correctly.
• Depending on the disc used, it may not be possible to
perform these operations during DVD menu play.
Selecting a Start Point using the
Chapter Time Code
Example: Viewing after 1 hour 3 minutes have elasped from
the chapter start.
1. Press the SEARCH button thirdly during play.
3. Press the REPEAT button again to resume normal
playback.
Repeat viewing
1. Press the REPEAT button during play as follow:
Chapter
REPEAT x1 = Repeat Chapter
Title
REPEAT x2 = Repeat Title
Off
REPEAT x3 = Repeat Of f
Note: Repeat play may not work correctly with some DVDs.
NUMBER
BUTTONS
16 17
Spongebob SB329_engP13-24.p65 7/5/06, 2:10 PM17
CH 01/06 T : :
2. Press the Number button(s) to select the preferred
chapter.
Example: To specify 1 hour 3 min 00 sec, press ' 1 ', ' 0 ',
' 3 ', ' 0 ', ' 0 '.
CH 01/06 T 1:03:00
3. Play now commences from Title 2.
Note: Depending on the disc used, it may not be possible to
perform these operations during DVD menu play.
For your reference
" INPUT INVALID" appears on the TV screen if the
number selected does not exist on the disc.
SEARCH
STOP
REPEAT
Page 19

Repeat sections between two specific
points (Repeat A - B)
1. Press the REPEAT A - B button during play at the point
where repeat play is to commence (A).
A
2. Press the REPEAT A - B button again at the point where
repeat play is to be concluded (B).
Changing the Audio Output Signal
Audio CD's
1. Press the AUDIO MODE button repeatedly to choose
between MONO LEFT, MONO RIGHT, MIX MONO, and
STEREO.
MONO LEFT MONO RIGHT
AB
Repeat play of the selection between points A and B starts
automatically. The section from point A to point B will play
repeatedly.
To return to normal play
• Press the REPEAT A - B button again.
Note: Some subtitles recorded around point A or B may
fail to appear.
Random Play
1. Press the RANDOM button after loading the disc.
RANDOM
2. Press the STOP < button to turn Random Play OFF.
OFF
• To cancel Random mode, press RANDOM button.
STEREO MIX MONO
• MONO LEFT and MONO RIGHT modes will combine the
original stero signal into one mono signal (use this mode
when playing on a mono TV).
• MIX MONO mode allows you to mix the left or right
channel into 1 mono signal.
• These functions work only for discs recorded with these
features.
AUDIO
MODE
STOP
Spongebob SB329_engP13-24.p65 7/5/06, 2:10 PM18
RANDOM
REPEAT A-B
18
Page 20
CD-R/RW Playback
Important Information
The DVD player in this system can play normal audio
CDs, recordable CDs (CD-Rs), re-writable CD's (CD-RWs).
However, because of the non-compatibility of certain
ripping/burning software used to record CDs, and the
quality of the blank discs used for recording, 100%
playability of CD-RW cannot be guaranteed. This is not an
indication of any problem with your system.
• When a normal audio CD, a CD-R, or a CD-RW disc is
loaded in the player the "CD" indicator will light.
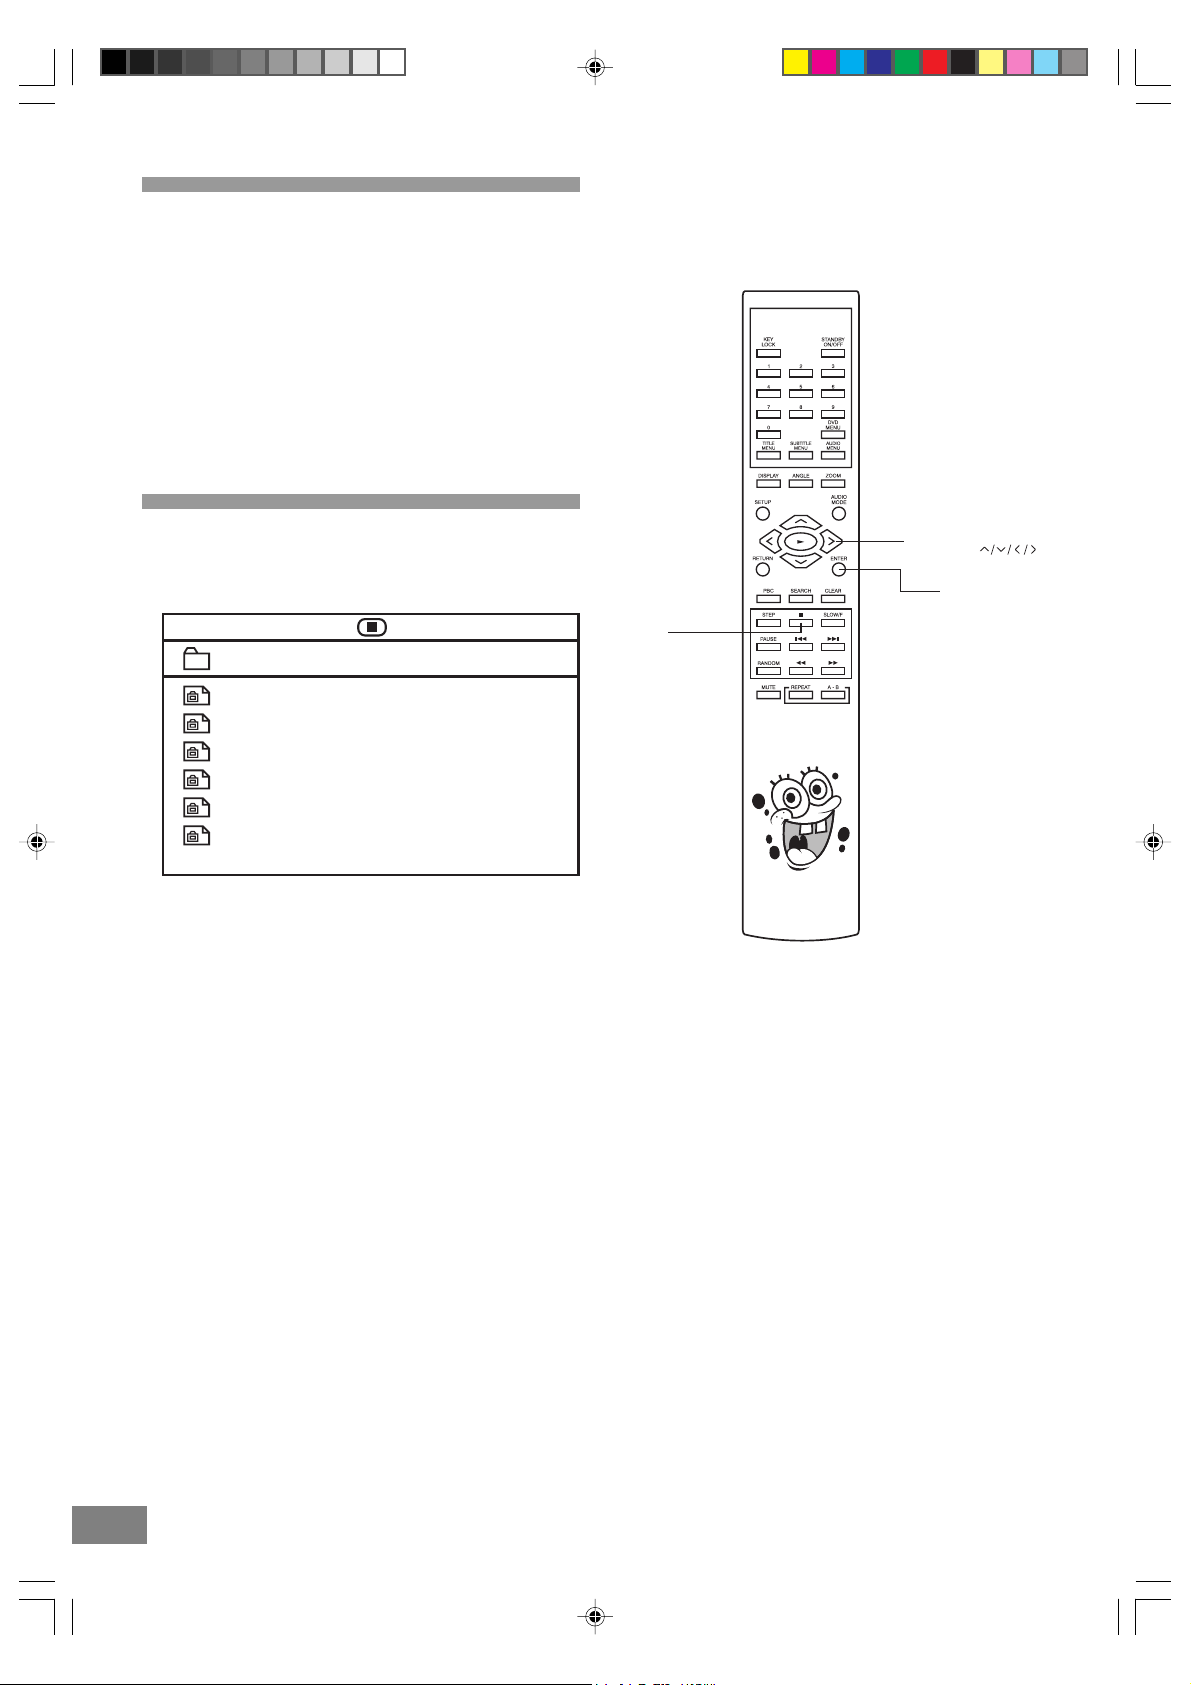
Picture CD Operation
1. After loading a picture CD disc into the disc tray, the picture
CD menu will appear on the TV screen.
00:00 00:00
/
001_00A
002_0A
003_1A
004_2A
005_3A
006_4A
2. Press the ( Ù , Ú ) Navigation buttons to select your
desired folder.
3. Press the ENTER button to confirm your selection and
start the playback of picture CD disc.
NAVIGATION
BUTTONS
ENTER
STOP
18 19
Spongebob SB329_engP13-24.p65 7/5/06, 2:10 PM19
Page 21
Convenient Functions
Changing Audio Soundtrack
Language
It is possible to change the audio soundtrack language from
English to a different language, if available. (This operation
works only with discs on which multiple audio soundtrack
languages are recorded.)
1. Press the AUDIO MENU button during play.
2. Press the AUDIO MENU button repeatedly to select the
preferred language.
For your reference
• The choice of languages is limited to those that are
available on the disc being played. All discs do not have
all languages available.
• When the power is turned on or the disc is removed, the
language heard is the one selected initially. If this
language is not recorded on the disc, only the language
available on the disc will be heard.
• The unit is factory preset to ENGLISH.
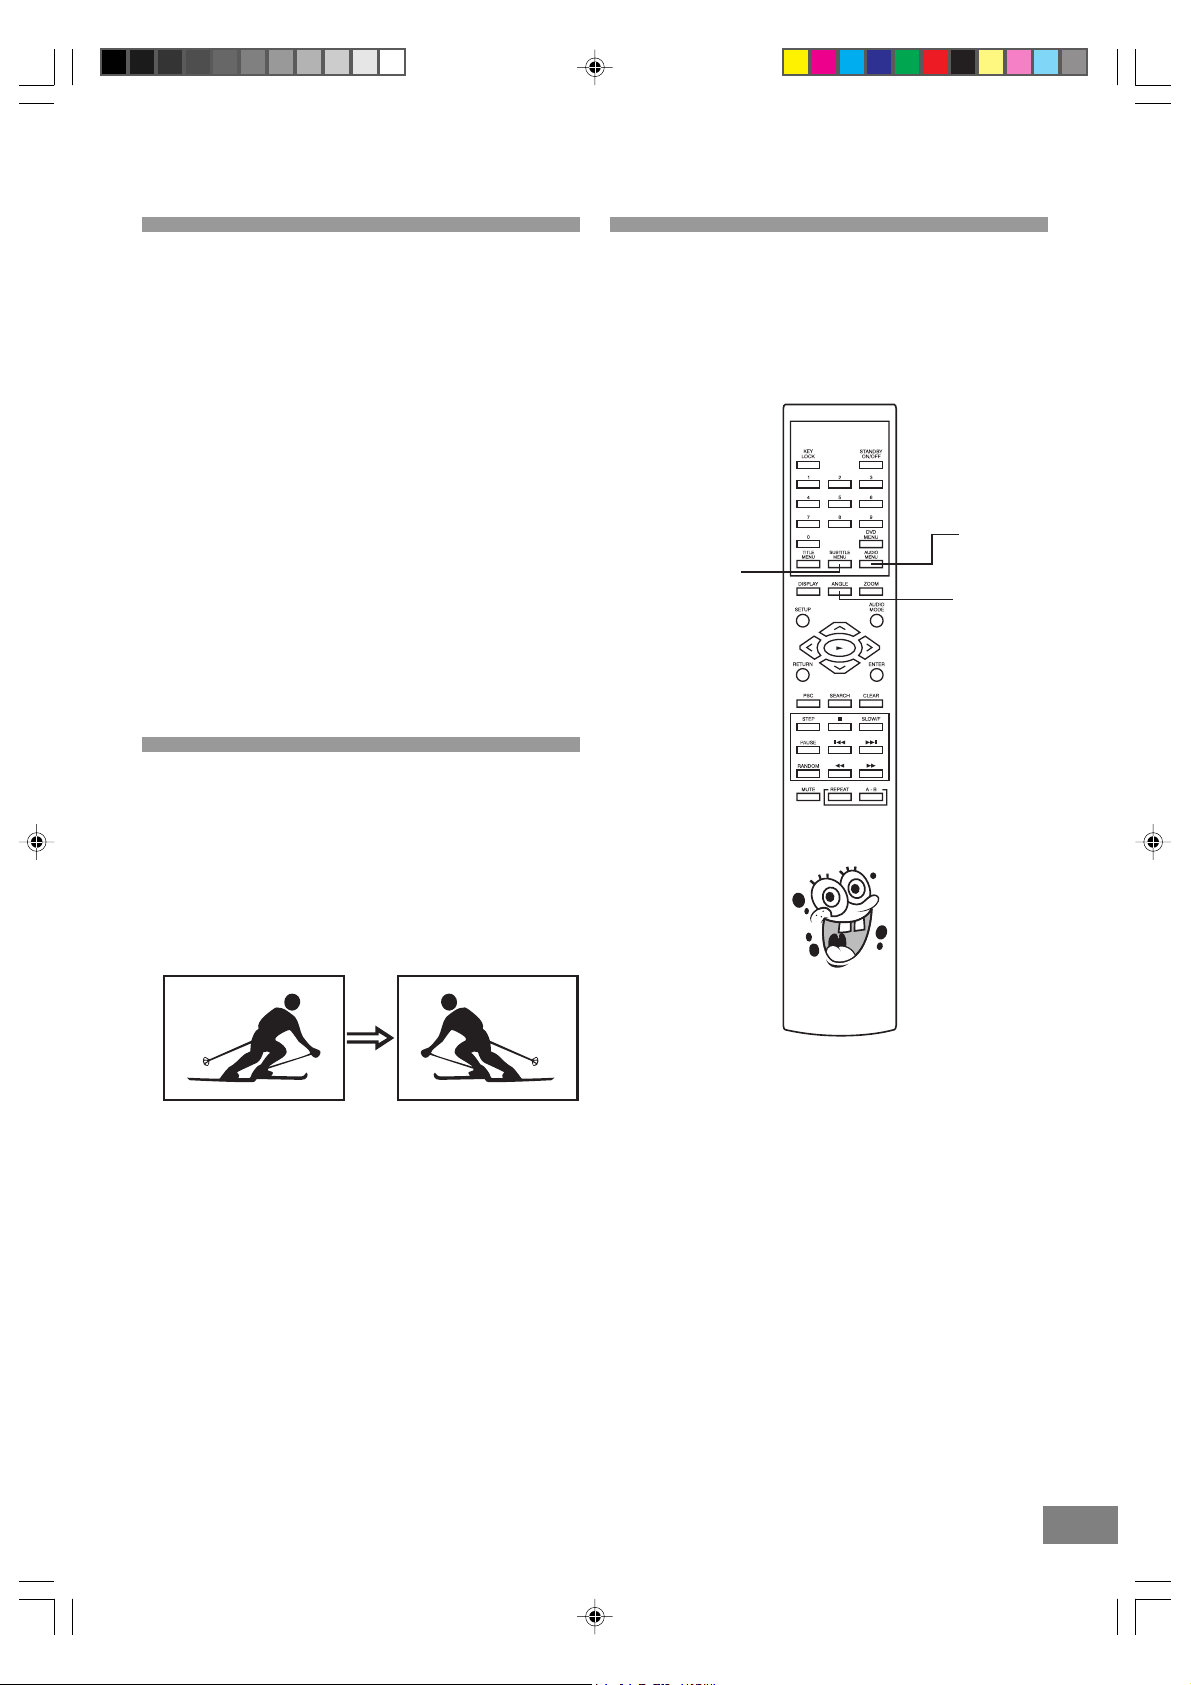
Viewing from another angle
Some DVD discs may contain scenes which have been shot
simultaneously from a number of different angles. For these
discs, the same scene can be viewed from each of these
different angles using the ANGLE button. (The recorded
angles differ depending on the disc used.)
1. Press the ANGLE button during play.
Clearing & Displaying of Subtitles
If a disc has subtitles recorded on it, they can either be
displayed or cleared on the TV screen. (This operation
works only with discs on which the subtitle language is
recorded.)
• Press the SUBTITLE MENU button during play.
AUDIO
MENU
SUBTITLE
MENU
ANGLE
2. Press the ANGLE button to select the preferred angle.
Note: This function will only work on discs where different
angles have been recorded.
20
Spongebob SB329_engP13-24.p65 7/5/06, 2:10 PM20
Page 22
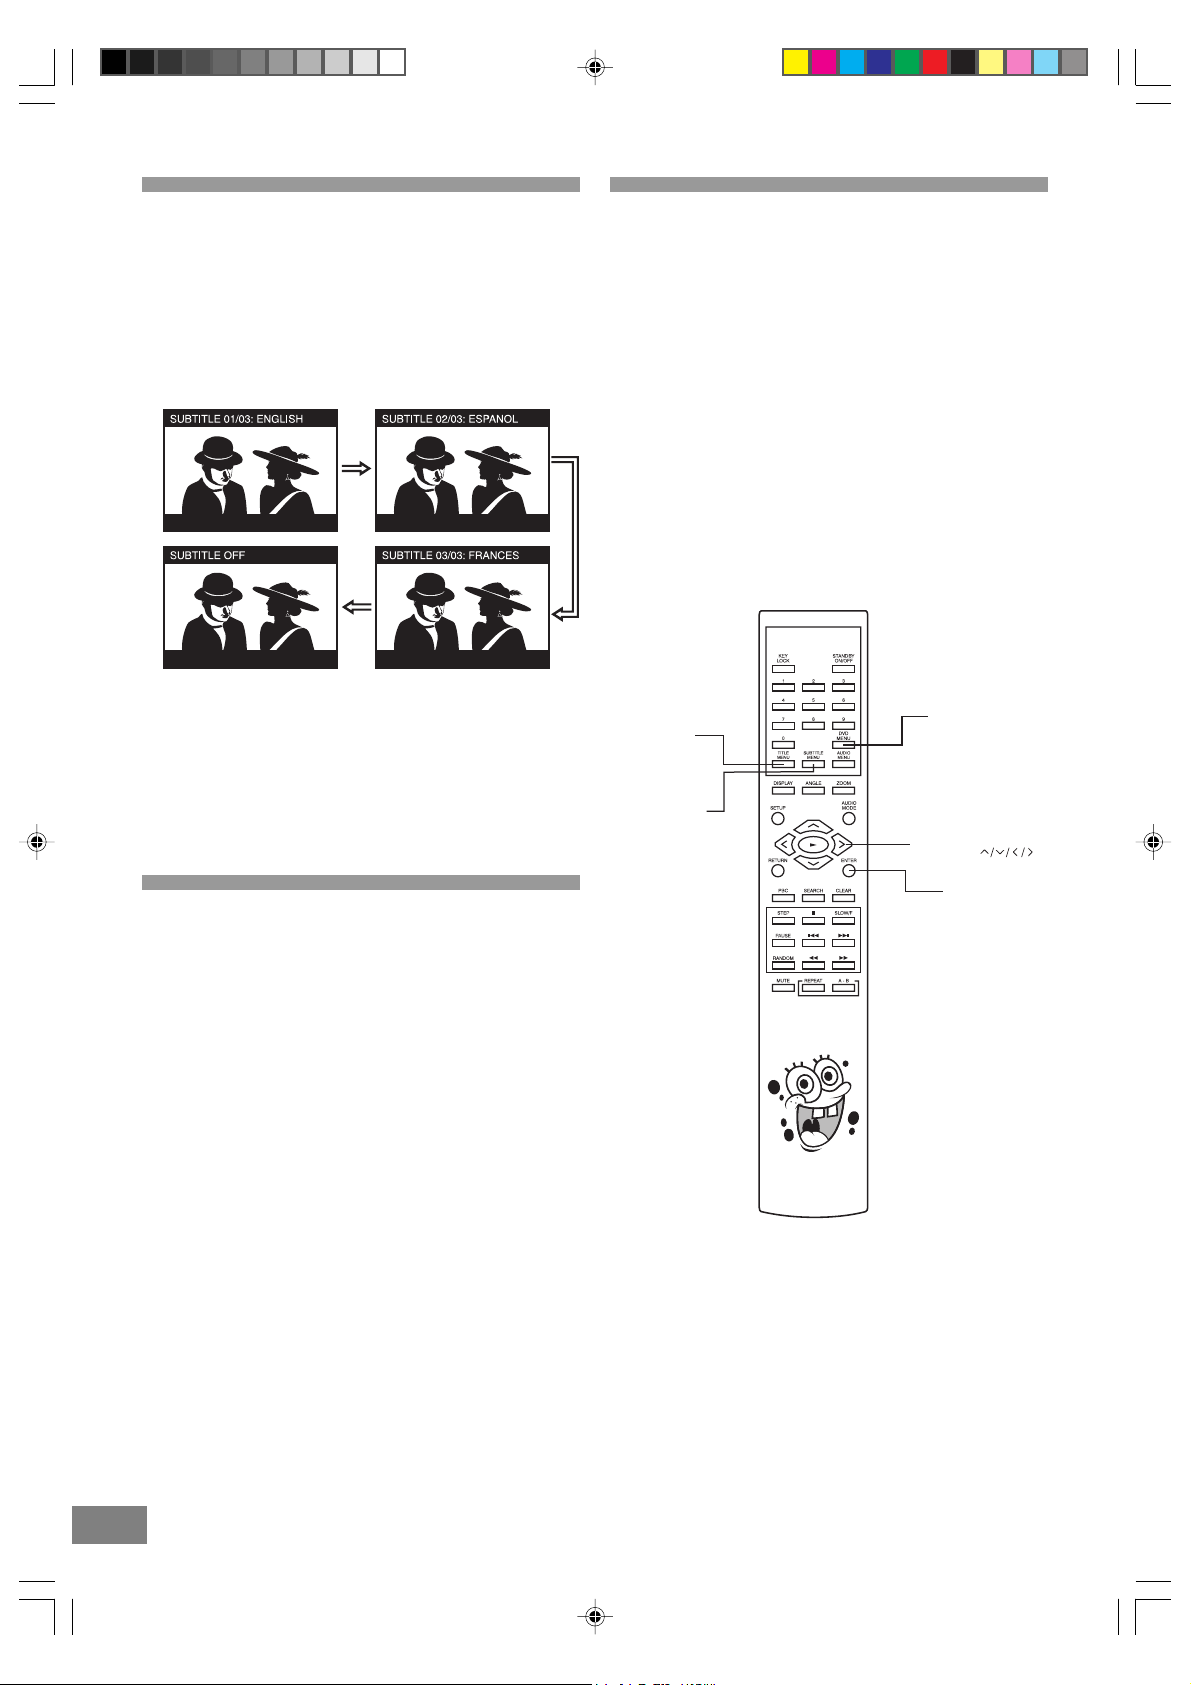
Changing Subtitle Language
It is possible to change the subtitle language from English
to a different language, if available. (This operation works
only with discs on which multiple subtitle languages are
recorded.)
1. Press the SUBTITLE MENU button during play.
2. Press the SUBTITLE MENU button repeatedly to select
the preferred language.
Using a DVD Menu
Some DVD discs have unique menu structures called DVD
menus. For example, DVDs programmed with complex
contents provide guide menus and those recorded with
various languages provide menus for audio and subtitle
language. Although the DVD menu's contents and operation
differ from disc to disc, the following explains the basic
operation when this feature is used.
1. Press the DVD MENU button during play. The DVD menu
available on the disc is now displayed.
2. Press the ( < , > , Ù , Ú ) Navigation buttons to select the
preferred menu.
3. Press the ENTER button. The selected item is now
executed.
When the menu continues onto another screen
Repeat step 2 and 3.
Notes:
• In some cases, the subtitle language is not changed
immediately to the selected one.
• When the power is turned off or the disc is removed,
subtitles appear in the language selected at the initial
settings. If this language is not recorded on the disc, they
will appear in the disc's priority language.
Selection of Titles
Some DVDs may have more than 1 movie (Title) on them. If
the disc has a title menu recorded on it, the TITLE MENU
button can be used to select the desired title. (The details of
operation differ depending on the disc used.)
1. Press the TITLE MENU button during play. A list of titles on
the disc is now displayed.
2. Press the ( < , > , Ù , Ú ) Navigation buttons to select the
preferred title.
3. Press the ENTER button. The selected title now starts
playing.
TITLE
MENU
SUBTITLE
MENU
DVD
MENU
NAVIGATION
BUTTONS
ENTER
20 21
Spongebob SB329_engP13-24.p65 7/5/06, 2:10 PM21
Page 23

Audio CD Playback
Preparation
• Switch on the TV set power and select "Video" as the TV
input.
• Switch on the stereo system's power if the player has
been connected to a stereo system.
Still Picture (P AUSE/STILL)
• Press the PAUSE button during play.
Audio CD
• The player will be placed in the pause mode.
To return to normal play
• Press PLAY 4 button.
Basic Play
1. Press down on the disc compartment lid (OPEN/CLOSE)
to open the disc compartment.
2. Place a disc into the disc compartment.
Hold the disc without touching either of its surfaces and
position it with the printed title side facing up. Align it with
the guides and place it in its proper position.
3. Press the PLAY 4 button.
Note: Make sure the TV type is set to NTSC (factory default).
When the unit is not in use
When the unit is not in use, remove the disc and press
the STANDBY button to turn off the power. The STANDBY
indicator will illuminate.
Notes:
• The disc continues to rotate while the menu is displayed
even after the player has finished playing a particular item.
When no further selections are to be played, be sure to
press the STOP < button to clear the menu display.
• If the disc is placed in upside down, the On Screen
Display will indicate "NO DISC".
STANDBY DISC COMPARTMENT
PLAY
PAUSE
PLAY
STOP
For your reference
• When " " appears while a button is being operated,
it means that the corresponding operation is prohibited
by the player.
For your convenience
When play is stopped, the unit records the point where
STOP < was pressed. Press PLAY 4 again, and play will
resume from this point. When the tray is opened, the
RESUME function will be cleared. The RESUME function
works only with discs for which the elapsed playing time
appears during playback.
22
Spongebob SB329_engP13-24.p65 7/5/06, 2:10 PM22
Page 24

Settings and Adjustments
Once the initial setup has been completed, the player can
always be operated under the same conditions. The settings
will be retained in the memory, until the settings are changed.
4. Use the ( > ) Navigation button followed by the
( Ù , Ú ) Navigation buttons to select between NTSC,
and PAL modes.
5. Press the ENTER button.
6. Using the ( < , > , Ù , Ú ) Navigation buttons and press
ENTER to exit and save setting.
TV Display
1. Press the SETUP button to enter the Setup Menu.
2. Use the ( < , > ) Navigation buttons to select General.
3. Use the ( Ù , Ú ) Navigation buttons to move the cursor to
the TV Display item.
4. Use the ( > ) Navigation button followed by the ( Ù , Ú )
Navigation buttons to select between Normal/PS (Pan &
Scan), Normal/LB (Letterbox), and Wide formats.
Normal/PS (Pan & Scan):
Video material formatted in the P AN & SCAN style is played
in that style (the left and right edges are cut off).
Normal/LB (Letterbox):
Video material not formatted in the Letterbox style is played
in the Pan & Scan style.
Wide:
Select this for a wide screen TV set.
5. Press the ENTER button.
6. Using the ( < , > , Ù , Ú ) Navigation buttons and press
ENTER to exit and save setting.
General
- - General Setup Page - -
TV Display
TV Type
Angle Mark
OSD Lang
Captions
Screen Saver
Audio
PS
NTSC
ON
ENG
ON
ON
PreferenceDolby
Normal/PS
Normal/LB
Wide
General
- - General Setup Page - -
TV Display
TV Type
Angle Mark
OSD Lang
Captions
Screen Saver
Set TV Standard
Audio
PS
NTSC
ON
ENG
ON
ON
NTSC
PAL
PreferenceDolby
Angle Mark
1. Press the SETUP button to enter the Setup Menu.
2. Use the ( < , > ) Navigation buttons to select General.
3. Use the ( Ù , Ú ) Navigation buttons to move the cursor to
the Angle Mark item.
4. Use the ( > ) Navigation button followed by the ( Ù , Ú )
Navigation buttons to select between On and Off modes.
This only works when there is an angle mark on the
disc.
Note: Select "On" the screen shows the angle mark when
playing a DVD.
Select "Off" the angle mark is not shown.
5. Press the ENTER button.
6. Using the ( < , > , Ù , Ú ) Navigation buttons and press
ENTER to exit and save setting.
22 23
Spongebob SB329_engP13-24.p65 7/5/06, 2:10 PM23
Set TV Display Mode
TV Type
1. Press the SETUP button to enter the Setup Menu.
2. Use the ( < , > ) Navigation buttons to select General.
3. Use the ( Ù , Ú ) Navigation buttons to move the cursor to
the TV Type item.
General
- - General Setup Page - -
TV Display
TV Type
Angle Mark
OSD Lang
Captions
Screen Saver
Set Angle Mark
Audio
PS
NTSC
ON
ENG
ON
ON
PreferenceDolby
On
Off
Page 25

On Screen Display Language
1. Press the SETUP button to enter the Setup Menu.
2. Use the ( < , > ) Navigation buttons to select General.
3. Use the ( Ù , Ú ) Navigation buttons to move the cursor to
the OSD Lang item.
4. Use the ( > ) Navigation button followed by the ( Ù , Ú )
Navigation buttons to select between English, German,
Spanish and French on screen display languages.
5. Press the ENTER button.
6. Using the ( < , > , Ù , Ú ) Navigation buttons and press
ENTER to exit and save setting.
General
Audio
- - General Setup Page - -
TV Display
TV Type
Angle Mark
OSD Lang
Captions
Screen Saver
PS
NTSC
ON
ENG
ON
ON
Closed Caption
PreferenceDolby
On
Off
General
- - General Setup Page - -
TV Display
TV Type
Angle Mark
OSD Lang
Captions
Screen Saver
Set OSD Language
Audio
PS
NTSC
ON
ENG
ON
ON
PreferenceDolby
English
Spanish
German
French
Captions
1. Press the SETUP button to enter the Setup Menu.
2. Use the ( < , > ) Navigation buttons to select General.
3. Use the ( Ù , Ú ) Navigation buttons to move the cursor to
the Captions item.
4. Use the ( > ) Navigation button followed by the
( Ù , Ú ) Navigation buttons to select between On and
Off modes.
• Select this option when some newer DVD movies
include closed captioning for hearing impaired viewers.
Note: Select "On" to switch on the captioning feature that
describes other sounds being heard together with
the dialog.
Select "Off" the closed captions will not appear.
5. Press the ENTER button.
6. Using the ( < , > , Ù , Ú ) Navigation buttons and press
ENTER to exit and save setting.
Screen Saver
1. Press the SETUP button to enter the Setup Menu.
2. Use the ( < , > ) Navigation buttons to select General.
3. Use the ( Ù , Ú ) Navigation buttons to move the cursor to
the Screen Saver item.
4. Use the ( > ) Navigation button followed by the
( Ù , Ú ) Navigation buttons to select between ON and
OFF modes.
Note: If you turn the screen saver on, the screen saver
image appears when you leave the system in pause
or stop mode for more than 1 minute. The screen
saver is useful to prevent your display from becoming
damaged.
5. Press the ENTER button.
6. Using the ( < , > , Ù , Ú ) Navigation buttons and press
ENTER to exit and save setting.
General
- - General Setup Page - -
TV Display
TV Type
Angle Mark
OSD Lang
Captions
Screen Saver
Screen Saver
Audio
PreferenceDolby
PS
NTSC
ON
ENG
ON
ON On
Off
Spongebob SB329_engP13-24.p65 7/5/06, 2:10 PM24
24
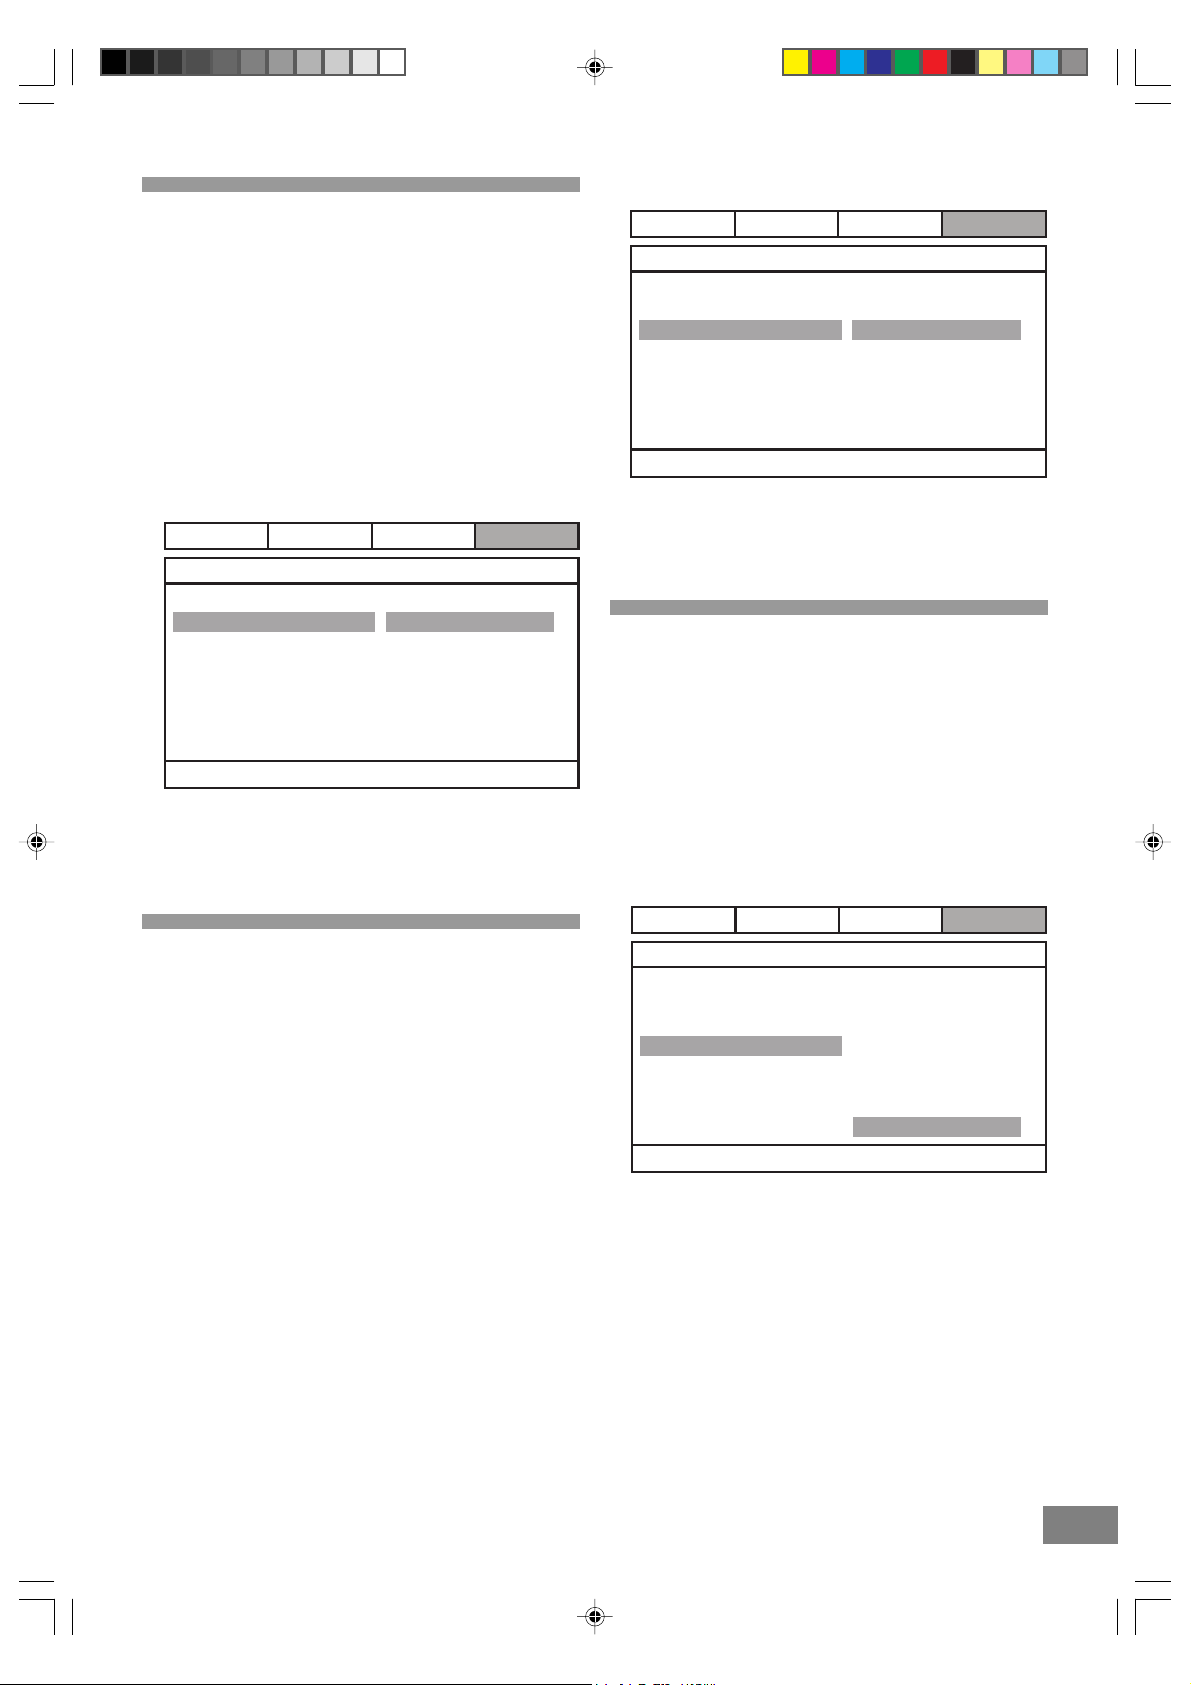
Page 26

Downmix
1. Press the SETUP button to enter the Setup Menu.
2. Use the ( < , > ) Navigation buttons to select Audio.
3. Use the ( Ù , Ú ) Navigation buttons to move the cursor to
the Downmix item.
4. Use the ( > ) Navigation button followed by the ( Ù , Ú )
Navigation buttons to select between LT/RT, Stereo
modes.
LT/RT: The front speakers are in theatrical LT/RT downmix
mode.
Stereo: The front speakers are in Stereo Downmix mode.
5. Press the ENTER button.
6. Using the ( < , > , Ù , Ú ) Navigation buttons and press
ENTER to exit and save setting.
General
Audio Dolby
- - Dolby Digital - -Setup
Dynamic
Dynamic Range Compression
Preference
FULL
3/4
1/2
1/4
OFF
General
Audio
PreferenceDolby
- - Speaker Setup Page - -
Downmix LT/RT
Stereo
Set Downmix Mode
Dynamic
1. Press the SETUP button to enter the Setup Menu.
2. Use the ( < , > ) Navigation buttons to select Dolby.
3. Use the ( Ù , Ú ) Navigation buttons to move the cursor to
the Dynamic item.
4. Use the ( > ) Navigation button followed by the ( Ù , Ú )
Navigation buttons to select between Full and off levels
and 3/4 to 1/4 in between..
Note: Select your desired Dynamic Range Compression
Rate (DRC) to adjust linear compression rate to
obtain the different compression results of the
signals.
5. Press the ENTER button.
6. Using the ( < , > , Ù , Ú ) Navigation buttons and press
ENTER to exit and save setting.
Audio
1. Press the SETUP button to enter the Setup Menu.
2. Use the ( < , > ) Navigation buttons to select Preference.
3. Use the ( Ù , Ú ) Navigation buttons to move the cursor to
the Audio item.
4. Use the ( > ) Navigation button followed by the
( Ù , Ú ) Navigation buttons to select between
English, French, Spanish, German, and Japanese audio
soundtrack languages*.
5. Press the ENTER button.
6. Using the ( < , > , Ù , Ú ) Navigation buttons and press
ENTER to exit and save setting.
General
Audio
- - Preference Page - -
Audio
Subtitle
Disc Menu
Parental
Password
Preferred Audio Language
* Actual available audio languages depend on the disc
used.
ENG
ENG
ENG
Dolby
English
French
Spanish
German
Japanese
Preference
24 25
Spongebob SB329_engP25-31.p65 7/5/06, 2:10 PM25
Page 27
Subtitle
1. Press the SETUP button to enter the Setup Menu.
2. Use the ( < , > ) Navigation buttons to select Preference.
3. Use the ( Ù , Ú ) Navigation buttons to move the cursor to
the Subtitle item.
4. Use the ( > ) Navigation button followed by the ( Ù , Ú )
Navigation buttons to select between English, French,
Spanish, German, or Japanese subtitles*. or turn
subtitles Off.
5. Press the ENTER button.
6. Using the ( < , > , Ù , Ú ) Navigation buttons and press
ENTER to exit and save setting.
General
- - Preference Page - -
Audio
Subtitle
Disc Menu
Parental
Password
Preferred Subtitle Language
* Actual available subtitle languages depend on the disc
used.
Audio
ENG
ENG
ENG
Dolby
English
French
Spanish
German
Japanese
Off
Preference
General
Audio
Dolby
Preference
- - Preference Page - -
Audio
Subtitle
Disc Menu
Parental
Password
ENG
ENG
ENG English
French
Spanish
German
Japanese
Preferred Menu Language
* Actual available menu languages depend on the disc
used.
Parental
1. Press the SETUP button to enter the Setup Menu.
2. Use the ( < , > ) Navigation buttons to select Preference.
3. Use the ( Ù , Ú ) Navigation buttons to move the cursor to
the Parental item.
4. Use the ( > ) Navigation button followed by the ( Ù , Ú )
Navigation buttons to select one of the 8 rating levels.
5. Press the ENTER button to confirm your desired level.
6. Using the ( < , > , Ù , Ú ) Navigation buttons and press
ENTER to exit and save setting.
Disc Menu
1. Press the SETUP button to enter the Setup Menu.
2. Use the ( < , > ) Navigation buttons to select Preference.
3. Use the ( Ù , Ú ) Navigation buttons to move the cursor to
the Disc Menu item.
4. Use the ( > ) Navigation button followed by the
( Ù , Ú ) Navigation buttons to select between
English, French, Spanish, German, and Japanese
Menu languages*.
5. Press the ENTER button.
6. Using the ( < , > , Ù , Ú ) Navigation buttons and press
ENTER to exit and save setting.
General
- - Preference Page - -
Audio
Subtitle
Disc Menu
Parental
Password
Set Parental Control
Audio
ENG
ENG
ENG
Dolby
1 KID SAF
2G
3PG
4PG13
5 PGR
6R
7 NC17
8 ADULT
Preference
Spongebob SB329_engP25-31.p65 7/5/06, 2:11 PM26
26
Page 28

Password
Notes:
• The password is factory preset to "1234".
Common Procedure
1. Press the DISPLAY button repeatedly during play to
display elapsed time of title, chapter, track, etc.
1. Press the SETUP button to enter the Setup Menu.
2. Use the ( < , > ) Navigation buttons to select Preference.
3. Use the ( Ù , Ú ) Navigation buttons to move the cursor to
the Password item.
4. Press the Number button(s) to enter a 4-Digit factory
preset password "1234" into the player.
5. Press the ENTER button.
6. Using the ( < , > , Ù , Ú ) Navigation buttons and press
ENTER to exit and save setting.
General
Audio
Dolby
Preference
- - Preference Page - -
Audio
Subtitle
Disc Menu
ENG
ENG
ENG
Parental
Password
Change
Change Password
Notes:
• To change password, enter preset password "1234" and
press ENTER button. Use navigation buttons to go back
to password box and enter your own 4-digit password
and press ENTER button.
• Default function is disabled on the unit.
If you forget your own password, enter super password
"1369" to unlock control. The password "1369" becomes
your password, unless you change it.
Title Elapsed TT01/03 CH01/06
0:04:05
TT01/03 CH01/06
0:04:35
TT01/03 CH01/06
0:04:55
TT01/03 CH01/06
0:04:55
KEY LOCK
This feature allows you to lock all the controls on the front
panel of the main unit to prevent others, especially children,
from operating the unit without the remote handset. To
activate the Key Lock feature press the KEY LOCK button
on the remote control. The "KEY LOCK ON" statement will
appear on the TV screen and all front panel controls,
including the Power button will be locked. To unlock the
front panel controls press the KEY LOCK button on the
remote control again. The "KEY LOCK OFF" statement will
appear on the TV screen to indicate the unlock action.
KEY
LOCK
DISPLAY
ZOOM
26 27
Spongebob SB329_engP25-31.p65 7/5/06, 2:11 PM27
Other Functions
This chapter describes how to use some functions contained
in system.
ZOOM
1. Press the ZOOM button to change the size of the screen
between 2x, 3x, 4x, and off zoom.
NAVIGATION
BUTTONS
Page 29

Additional Information
Troubleshooting
If you experience any of the following difficulties while
using the system, use this troubleshooting guide to
help you remedy the problem. Should any problem
persist, consult your nearest service center by calling
1-800-898-9020.
No power.
• Is the power cord firmly plugged into the power outlet?
• One of the safety mechanisms may be operating. In this
event, unplug the player from the power outlet briefly and
then plug it in again.
No picture.
• Check that the system is connected securely.
• The video connecting cord is damaged. Replace it with a
new one.
• Make sure you connect the system to the video input
connector on the TV. (see page 14)
• Make sure you turn on the TV.
• Make sure you select the video input on the TV so that you
can view the pictures from this system.
Noise (interference) appears in the picture.
• Clean the disc.
• If video from this system has to go through your VCR to
get to your TV, the copy-protection applied to some DVD
programs could affect picture quality.
The aspect ratio of the screen cannot be changed even
though you set “TV SYSTEM” in the SETUP menu when
you play a wide picture.
• The aspect rate is fixed on your DVD disc.
• Depending on the TV, you may not be able to change the
aspect ratio.
There is no sound or only a very low-level sound is heard.
• The audio connecting cord is damaged. Replace it with a
new one.
• The system is in pause mode or in slow-motion play mode,
or fast forward or fast reverse is performed
• Press PLAY (4) to return to normal play mode.
The remote does not function.
• Remove any obstacles between the remote control and
the system.
• Move the remote control closer to the system.
• Point the remote control at the remote sensor on the front
panel.
• Replace all the batteries in the remote control with new
ones if they are weak.
• Check that the batteries are loaded correctly.
The disc does not play.
• Insert a disc.
• Insert the disc correctly with the playback side facing down
on the disc tray.
• Clean the disc. (see page 12)
• The system cannot play CD-ROMs, etc. (see page 11)
Insert a DVD or a CD disc.
• Check the region code of the DVD disc. (see page 11)
• Moisture has condensed inside the system. Remove the
disc and leave the system turned on for about an hour.
(see page 9)
The system starts playing the DVD automatically.
• The DVD features the auto playback function.
Playback stops automatically.
• Depending on the disc, the auto pause signal is recorded.
While playing such a disc, the system stops playback at
the signal.
Stopping playback, Search, Slow-motion play, repeat play
or Program play, etc., cannot be done.
• Depending on the disc, some of the above operations
may not be available.
Messages do not appear on the TV screen in the language
you want.
• Select the language for OSD in SETUP menu. (see page
24) The disc must have the language you selected, if not,
other language will be selected.
Severe hum or noise is heard.
• Move your TV away from the audio components.
• The plugs and jacks are dirty. Wipe them with a cloth
slightly moistened with alcohol.
• Clean the disc.
Spongebob SB329_engP25-31.p65 7/5/06, 2:11 PM28
The language for the sound cannot be changed when you
play a DVD.
• Multilingual sound is not recorded on the DVD.
• Changing the language for the sound is prohibited on the
DVD.
28
Page 30

Troubleshooting (Continued)
The language for the subtitles cannot be changed when
you play a DVD.
• Multilingual subtitles are not recorded on the DVD.
• Changing the language for the subtitles is prohibited on
the DVD.
The subtitles cannot be turned off when you play a DVD.
• Depending on the DVD, you may not be able to turn the
subtitles off.
The angles cannot be changed when you play a DVD.
• Multi-angles are not recorded on some DVDs.
• Change the angles when the angle marks appears on
the TV screen. (see page 20)
• Changing the angles is prohibited on some DVDs.
The system does not operate properly.
• Static electricity, etc., may affect the system’s operation.
Disconnect the AC power cord once, then connect it again.
28 29
Spongebob SB329_engP25-31.p65 7/5/06, 2:11 PM29
The serial number of your system can be found on a label on the back panel of the
main unit, and also on the display carton. Please record the serial number in the
space below. You may need to refer to this number if your system ever needs to be
serviced.
Model No.: SB329
Serial No.:
Page 31

EMERSON RADIO CORP .
LIMITED WARRANTY
What does this warranty cover? Any manufacturing defects in original material, including original parts and
workmanship, under normal use and conditions.
For how long? For a period of ninety (90) days for labor and for a period of one (1) year for parts, from the date of original
purchase in the U.S.
What will we do? If you need service under this warranty, and you provide us with the dated proof of purchase, we will
provide repair service at no charge for labor and parts, for the time periods set forth above, at an authorized Depot Repair
Facility, or replace the product in our discretion.
How do you make your warranty claim? If it becomes necessary to repair your unit, you can obtain the name and mailing
location of a Depot Repair Facility by dialing 1-800-695-0098. You should pack your unit in a well-padded heavy
corrugated box, enclose your check or money order payable to the Depot Repair Facility in the amount of $9.00 to cover
the return shipping and handling costs, and enclose a copy of your proof of purchase (warranty service will not be
provided without a dated proof of purchase).
Finally, you should ship the unit prepaid via UPS or parcel post (insured).
What does your warranty not cover? Y our warranty does not cover the following:
Damage from negligence, misuse, abuse, accident, or failure to follow operating instructions.
Use of product in a commercial application or rentals.
Changes or repairs by anyone other than an authorized Depot Repair Facility.
Damage because your unit is improperly connected to the equipment of other manufacturers.
Unit on which the serial number has been defaced, modified or removed.
Damage to equipment not properly connected to the product.
Cost incurred in shipping your unit to and from an authorized Depot Repair Facility.
Ordinary adjustments which you can perform as outlined in the owner’s manual.
Signal reception problems caused by external antenna or cable systems.
Products purchased, used, serviced, or damaged outside of the United States.
Damage to compact discs or cassettes.
What other limitations apply to you warranty?
THIS WARRANTY IS NOT-TRANSFERABLE AND APPLIES ONLY TO THE ORIGINAL PURCHASER AND DOES NOT
EXTEND TO SUBSEQUENT OWNERS OF THE PRODUCT. THIS WARRANTY IS VALID ONLY IN THE UNITED STATES OF
AMERICA. ANY APPLICABLE IMPLIED WARRANTIES, INCLUDING THE WARRANTY OF MERCHANTABILITY, ARE
LIMITED IN DURATION TO A PERIOD OF THE EXPRESSED WARRANTY AS PROVIDED ABOVE BEGINNING WITH THE
DATE OF ORIGINAL PURCHASE AT RETAIL AND NO WARRANTIES, WHETHER EXPRESSED OR IMPLIED, SHALL
APPLY TO THE PRODUCT THERE AFTER. WE MAKE NO WARRANTY AS TO THE FITNESS OF THE PROFDUCT FOR
ANY PARTICULAR PURPOSE OR USE.
THE EXTENT OF OUR LIABILITY UNDER THIS LIMITED WARRANTY IS THE REPAIR OR REPLACEMENT PROVIDED
ABOVE AND IN NO EVENT WILL OUR LIABILITY EXCEED THE PURCHASE PRICE PAID BY THE PURCHASER OF THE
PRODUCT. UNDER NO CIRCUMSTANCES WILL WE BELIABLE FOR ANY LOSS, DIRECT, INDIRECT, INCIDENTAL,
SPECIAL, OR CONSEQUENTIAL DAMAGE ARISING OUT OF OR IN CONNECTION WITH THE USE OF THIS PRODUCT.
How does state law apply to your warranty?
THIS WARRANTY GIVES YOU SPECIFIC LEGAL RIGHTS, BUT YOU MAY ALSO HAVE OTHER RIGHT WHICH VARY
FROM STATE TO STATE. SOME STATES DO NOT ALLOW LIMITATIONS ON IMPLIED WARRANTIES OR EXCLUSION
OR LIMITATION OF INCIDENTAL OR CONSEQUENTIAL DAMAGE, SO THESE RESTRICTIONS MAY NOT APPLY TO YOU.
DVD399
Spongebob SB329_engP25-31.p65 7/5/06, 2:11 PM30
30
Page 32

30 31
Spongebob SB329_engP25-31.p65 7/5/06, 2:11 PM31
EMERSON
PART NO.: 21-2069B
607-02 Printed in China
 Loading...