

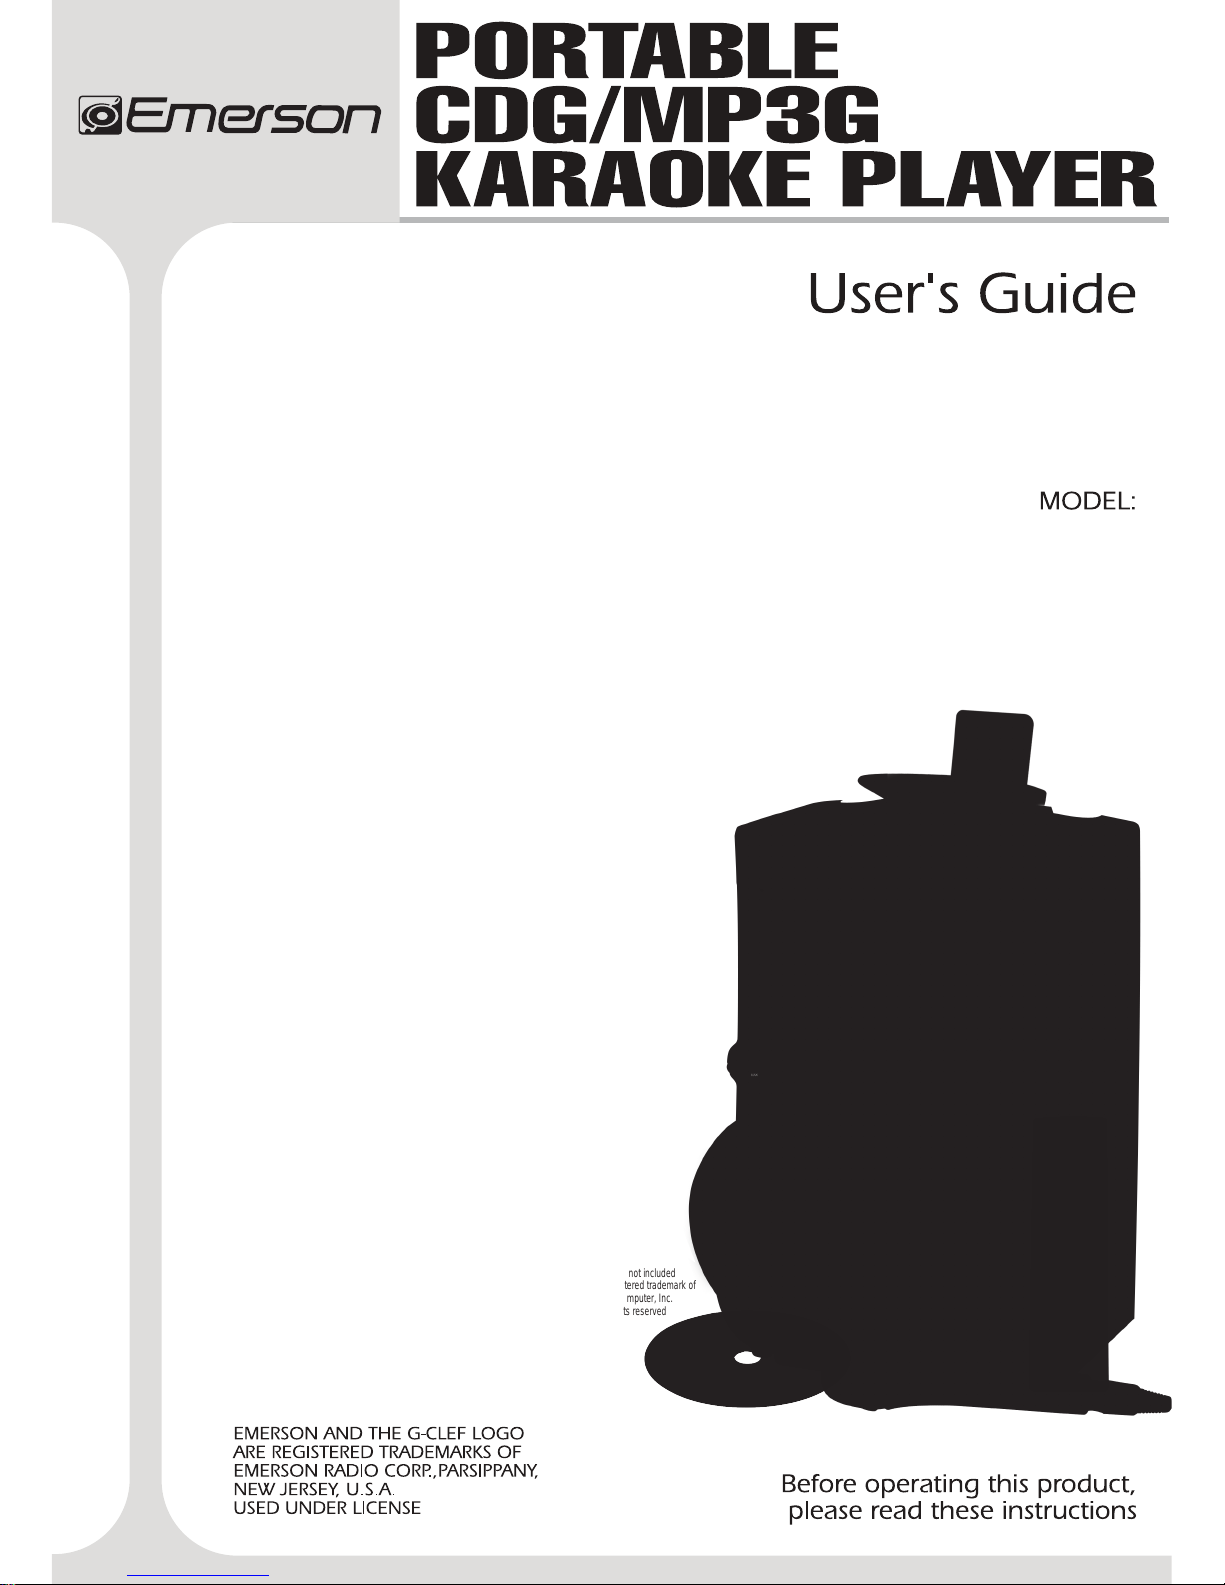
GQ756
MP3/
iPod
®
not included
iPod
®
is a registered trademark of
Apple Computer, Inc.
All rights reserved


What’s in the Giftbox?
MP3/iPOD®
Holder x 1
Microphone x 1GQ756 x1 RCA Cables x 1
AC
Adaptor x 1
Remote
Control x 1
AUX Cable x 1
Warranty Card x 1
Disc x 1 Users Manual x 1
GQ756
MP3/
iPod® not included
iPod
®
is a registered trademark of
Apple Computer, Inc.
All rights reserved
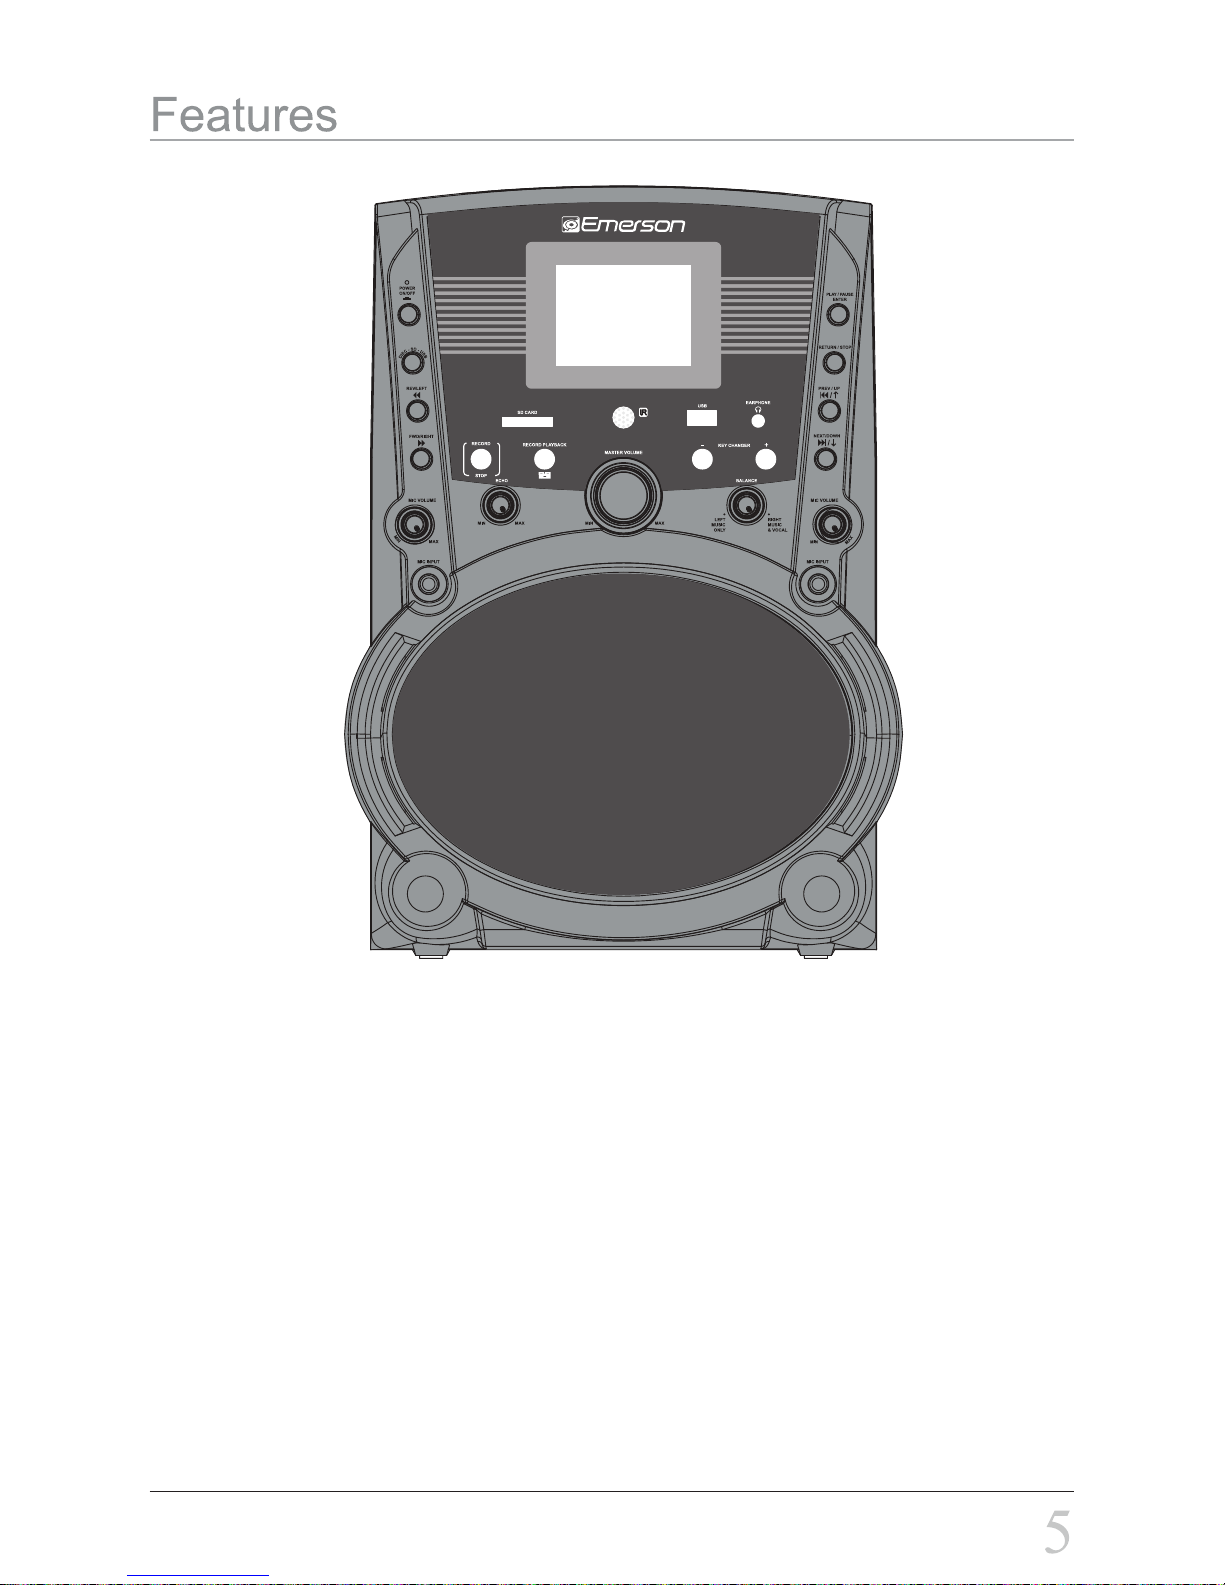
• CD/CDG/MP3/MP3G Karaoke Player
• Mix and Record Music, Voice
• 4" TFT Color Screen
• Peak Power 20W Speaker
• Instant Record Playback
• USB 2.0 and SD Card Slot
• Digital Echo
• Treble and Bass Control
• Music & Vocal Balance Control
• iPod® and MP3 Player Compatible
• USB Charger for MP3/iPod
®
• Video Out and Audio In/Out
• AC/DC Adaptor (100-240V Range)
• 12V Car Adaptor (optional)
• Two microphone inputs
12
13
14
15
16
17
18
19
20
21
9
22
11
23
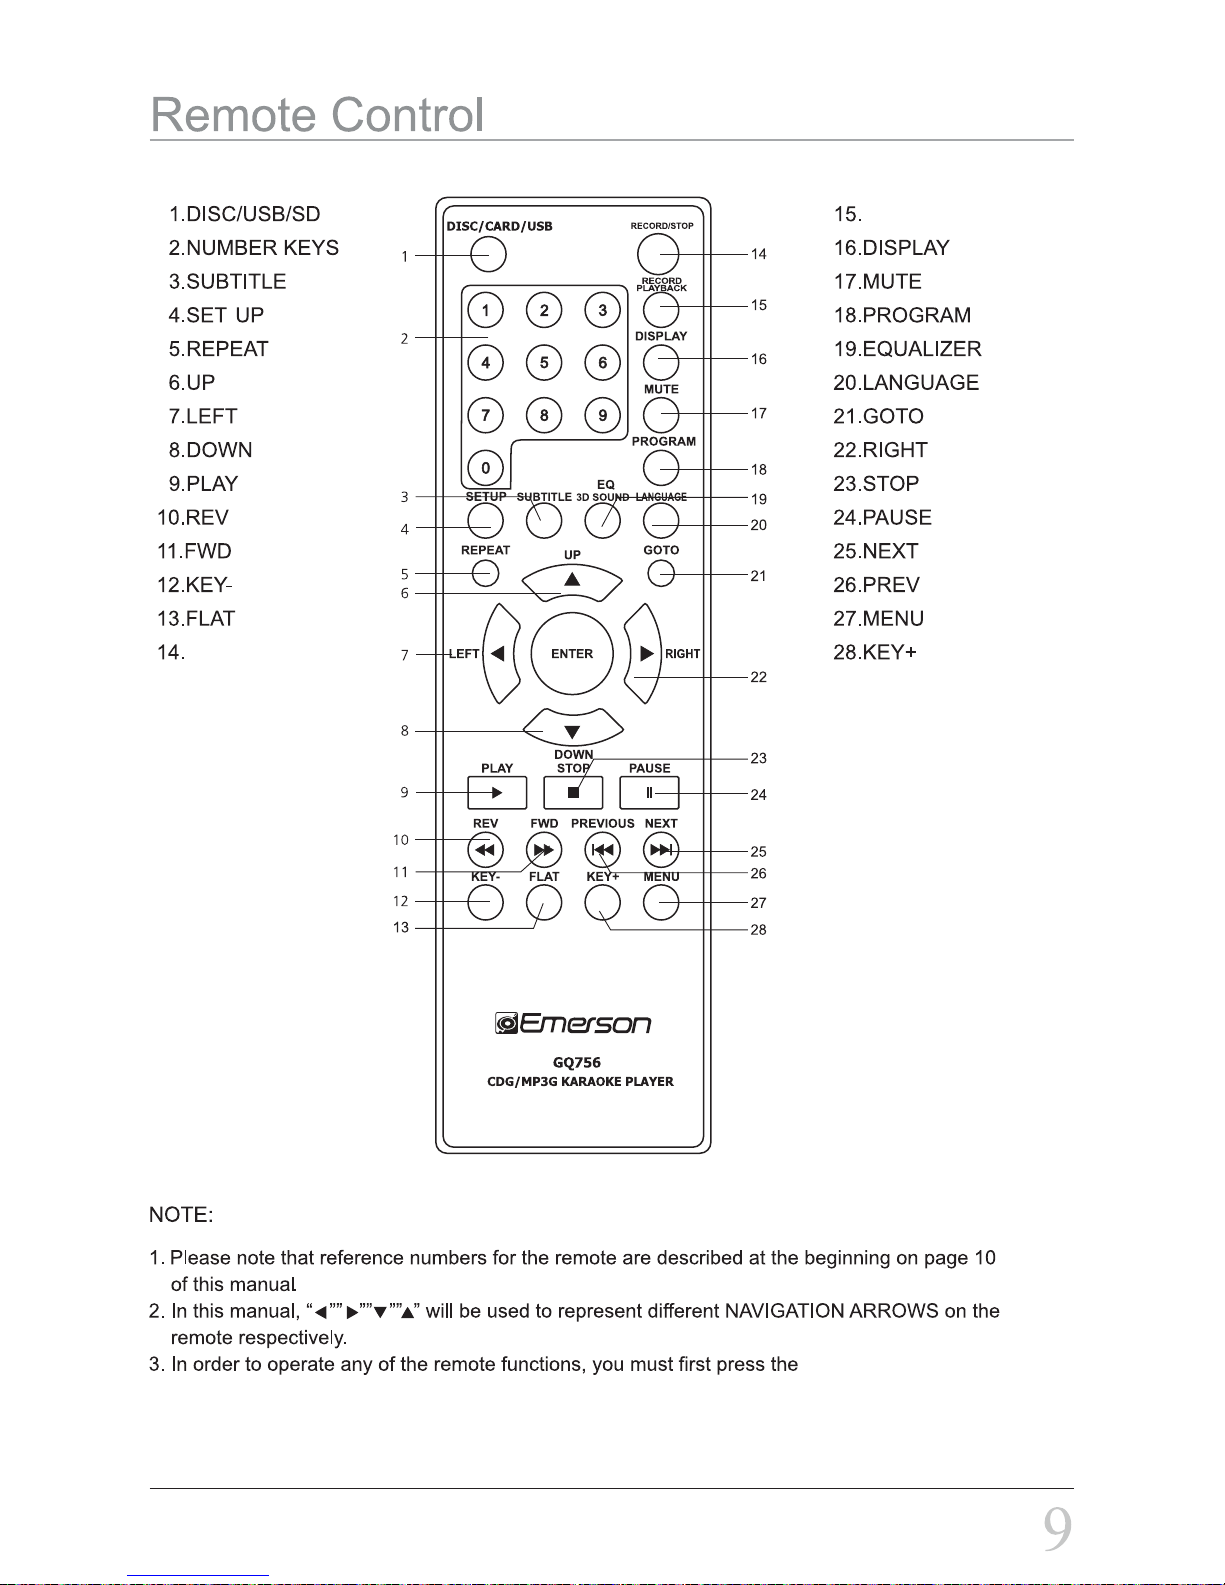
1
2
3
4
5
6
7
8
9
10
11
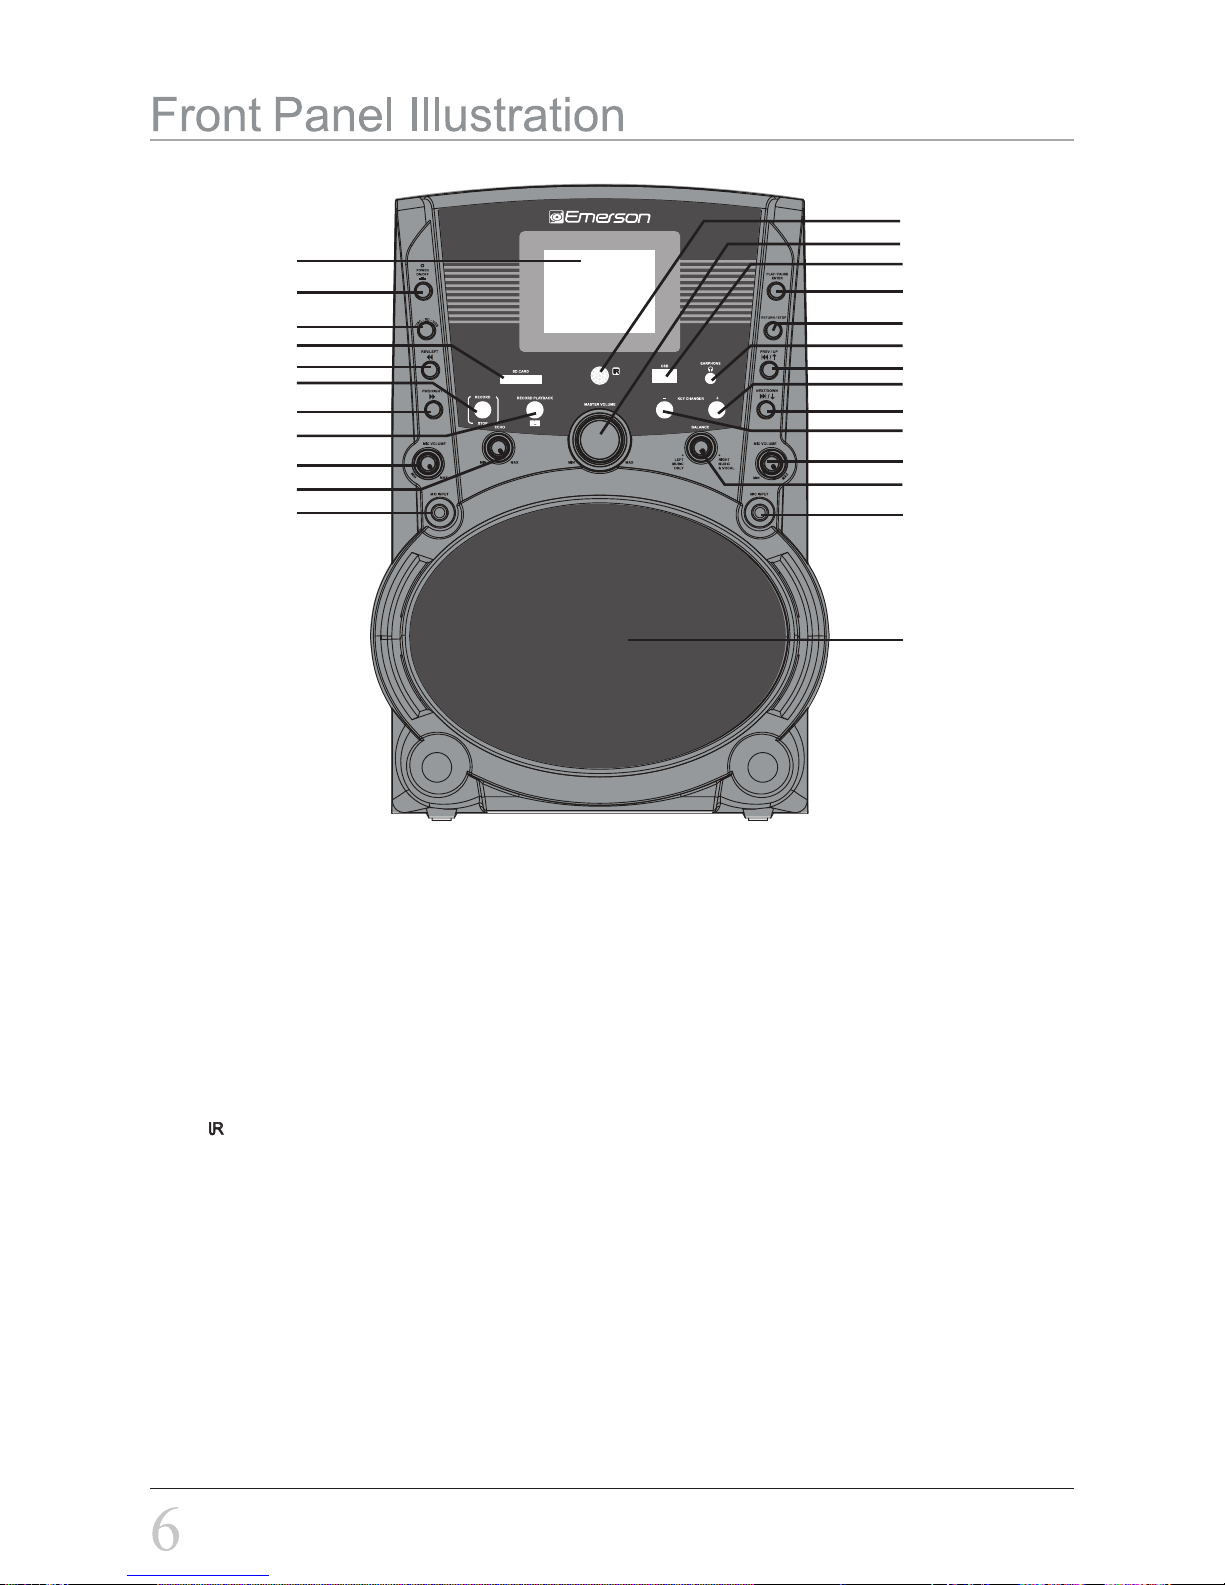
1. TFT Screen
2. POWER ON/OFF buon
3. DISC-SD-USB: Choose content source Disc, SD or USB
4. SD CARD: SD slot to accommodate SD cards
5. REV/LEFT: REVERSE, or Navigate LEFT in the menu
6. RECORD/STOP: Record start & stop
7. FWD/RIGHT: FORWARD or Navigate RIGHT in the menu
8. RECORD PLAYBACK: Playback the recorded track
9. MIC VOLUME: Microphone volume control
10. ECHO: ECHO control
11. MIC INPUT: Microphone input jacks (LEFT and RIGHT)
12. LED: Remote control infrared receiver
13. MASTER VOLUME: Music volume control
14. USB: USB slot to accommodate USB
15. PLAY/PAUSE/ENTER: Select a menu item / play or pause a song
16. RETURN/STOP: Return in menu secon or Stop playing
17. EARPHONE: Standard 3.5mm earphone Jack
18. PREV/UP: PREVIOUS song or Navigate UP in the menu
19. KEY CHANGER +: Raise the tone
20. NEXT/DOWN: NEXT song or Navigate DOWN in the menu
21. KEY CHANGER -: Lower the tone
22. BALANCE: MUSIC ONLY/MUSIC & VOCAL
23. SPEAKER: Audio speaker

1. AUX IN JACK
2. VIDEO OUT
3. AUDIO LEFT OUT
4. AUDIO RIGHT OUT
6. DC12V INPUT
7. AUX IN ON/OFF
8. CD DOOR OPEN/CLOSE: Eject or open disc door.
8
1
2
3 4
5
6
7
Top and Rear Panel Illustration
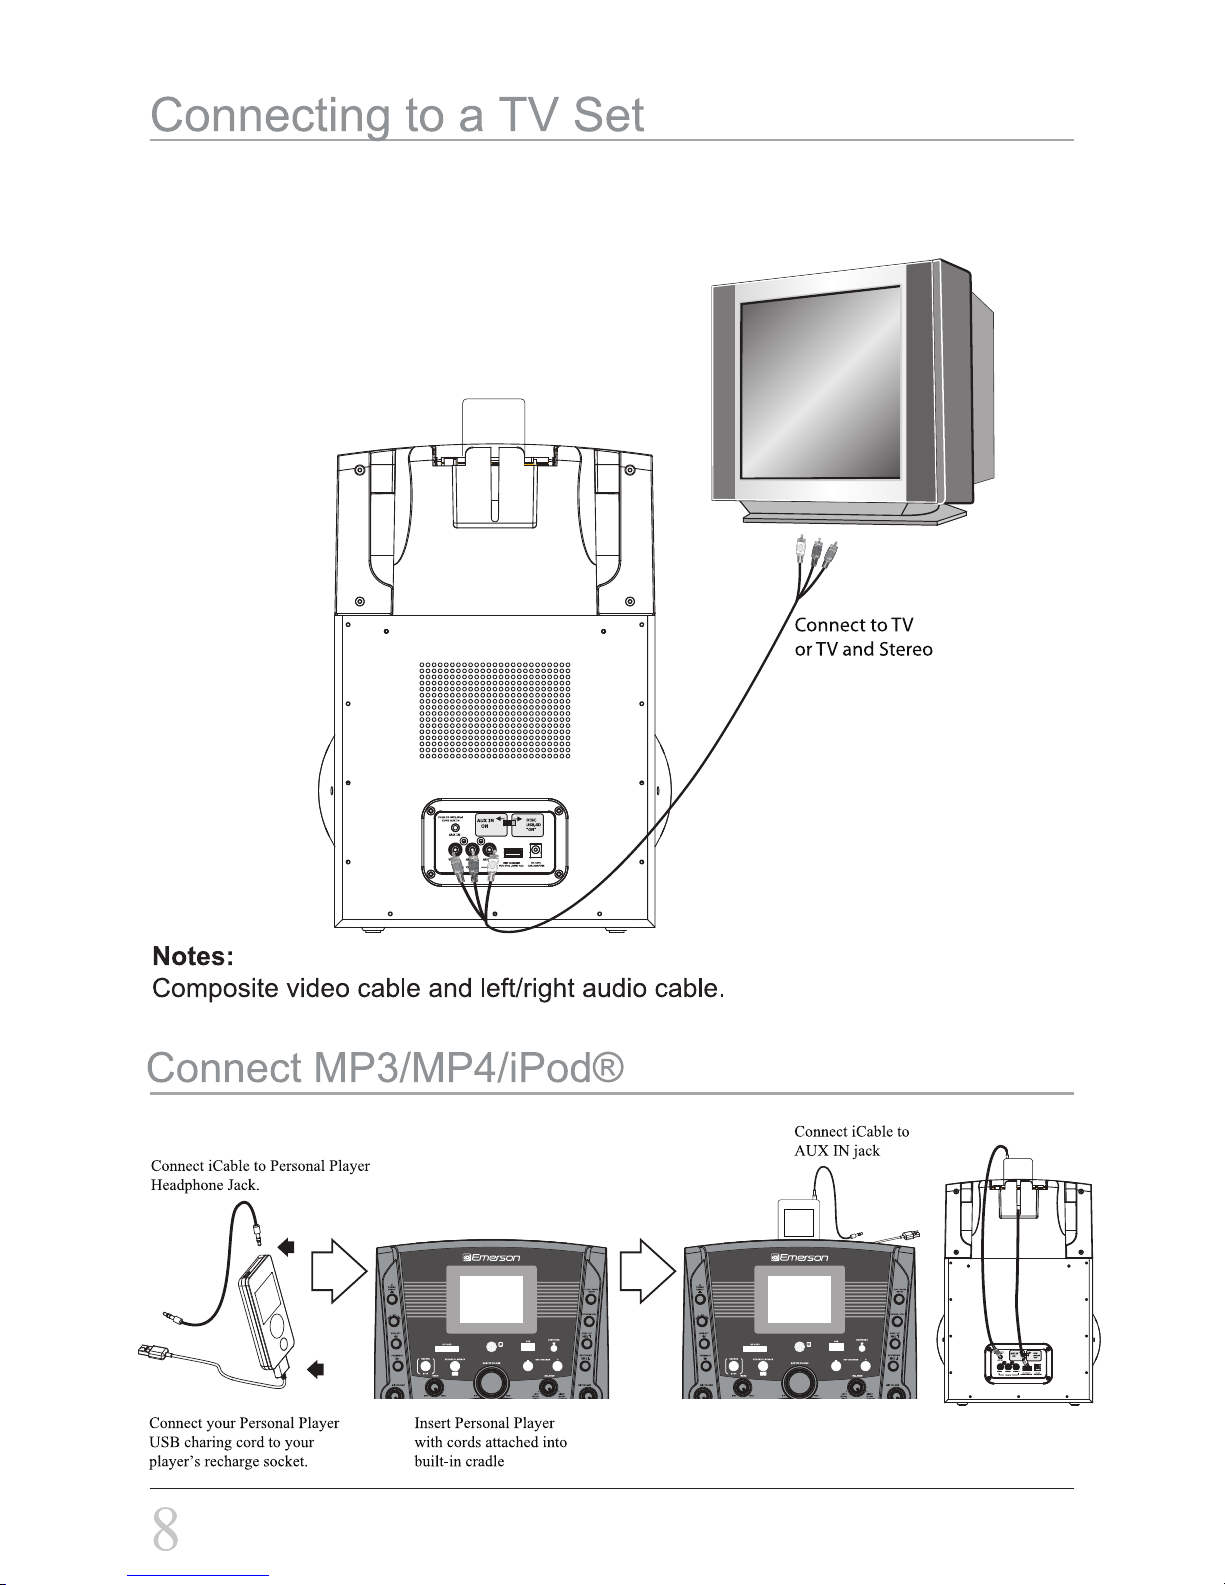
Connect USB charge cord (not included)
to the USB port
(Back view)
To watch lyrics on your TV screen, connect yellow (video), red (audio) and white (audio) RCA ends
into matching color jacks on TV. To view lyrics, you must select an input channel on your TV like
Video 1, Video 2, Aux, etc. It will never be channels 2, 3, 4, 5, etc.
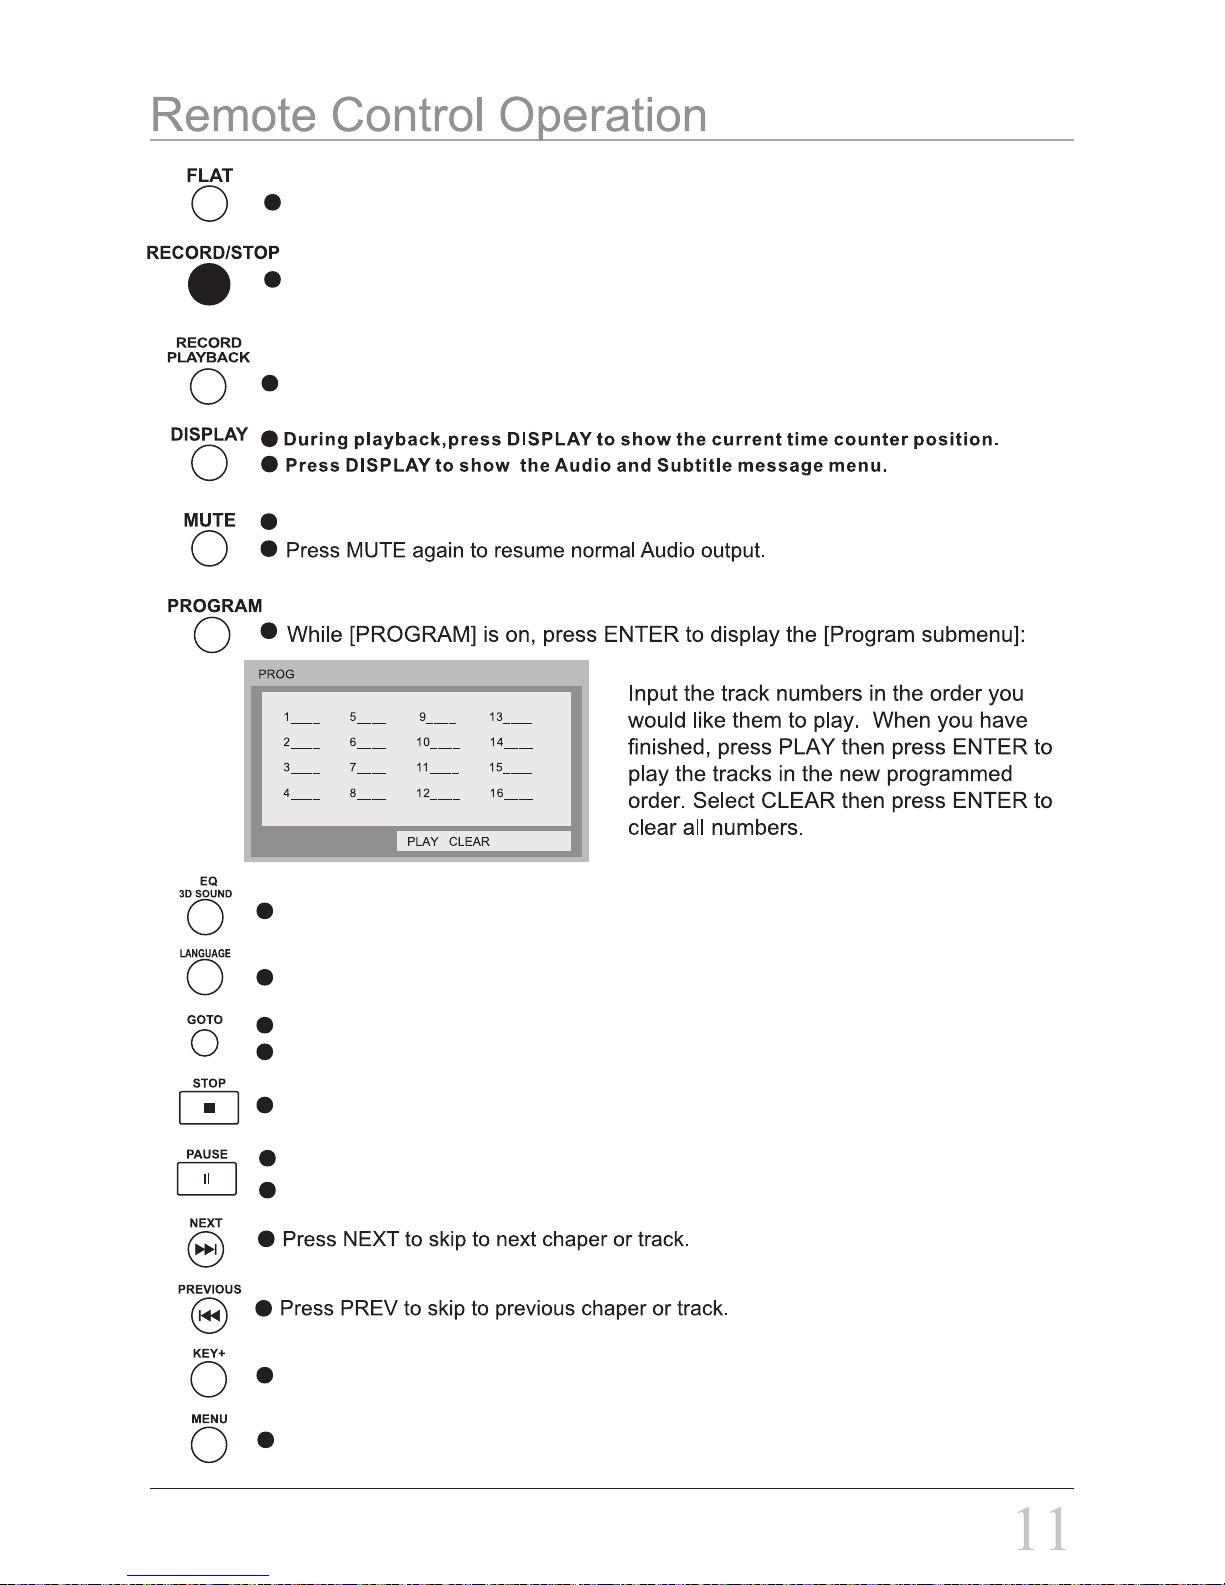
RECORD/STOP
RECORD PLAYBACK
POWER ON/OFF
button on the Karaoke player.
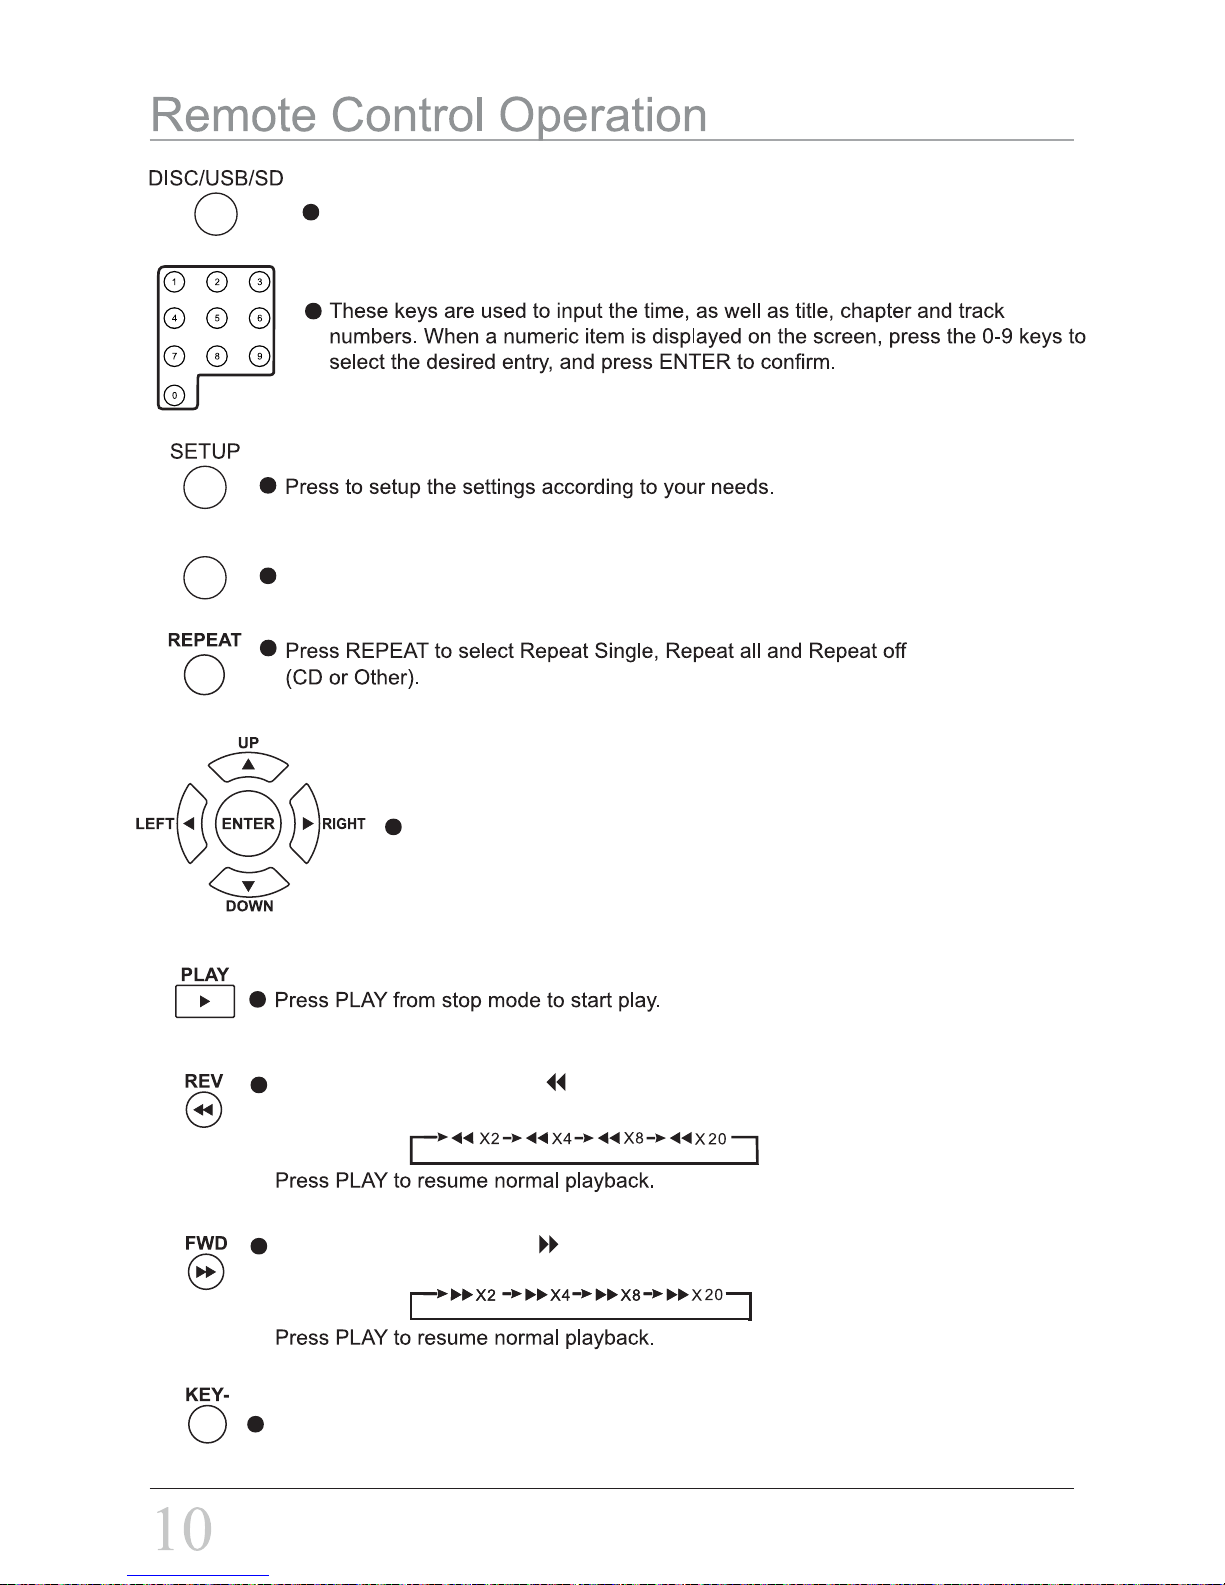
SUBTITLE
Press to display the subtitles.(Only applicable in movie, depends on your download file.)
Navigation buttons and confirm button.
Transpose the music key down.
During CD playback, press to scan reverse, Press time to time, The player will
fast review the content at 2,4,8 and 20 times normal speed as follows:
During CD playback, press to scan forward. Press time to time, The player will
fast forward the content at 2,4,8 and 20 times normal speed as follows:
Press DISC/USB/SD to choose Disc, SD card or USB.
Press STOP once during playback to stop and back to song list.
Press PAUSE during playback to pause playback.
Press again to resume the music.
Transpose the music key up.
In the Moive mode, press MENU to return to the main menu.
This key is set the different sound effect of the music.
To show the movie language.(Depends on your download file.)
During playback, press GOTO show the current time counter position.
When you play a video file, press GOTO can set the desire playing time.
Set the music key as normal.
Press this button to listen the music that you just recorded.
This button is to mute the Audio output.
Record your vocal and music to the USB or SD card.
Note: USB or SD card must be inserted before start recording.
(AAA 1.5Vx2, not included)
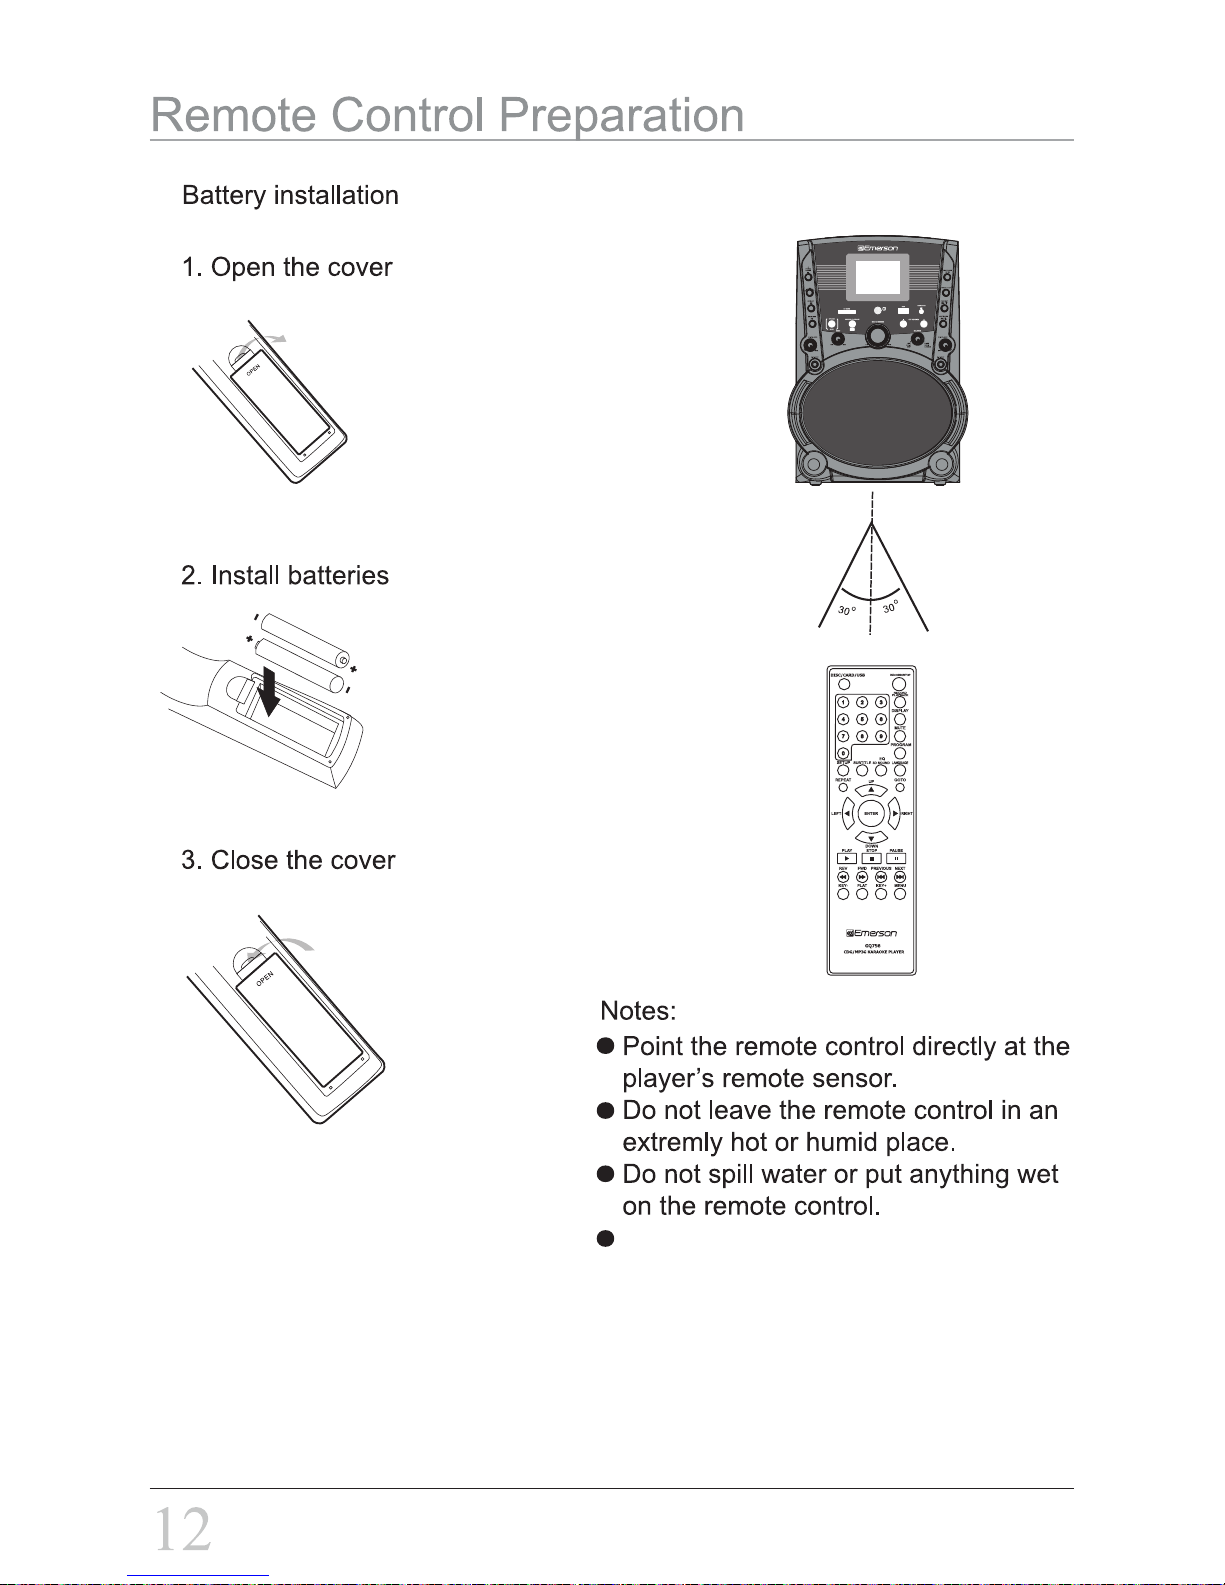
Using the remote control
When this machine will not be used for
an extended period of time, please
remove all batteries from the Battery
Compartment.

Play SD Card and USB
Play Music
View Photo
X
USB MP3
Before you do this, make sure you have download the music (MP3,MP3G format) to your SD card
or USB. Plug the SD card or USB to the machine, Press “DISC/SD/USB” to select your desire
device, Then the screen will shows:
Before you do this, make sure you have download the image (JPG. format) to your SD card or
USB (The operation same as “Play Music”) . And the screen will shows:
01.1 JPG
1 JPG 04.01.JPG
02.2 JPG
1 JPG 04.01.JPG
Current file name.
Current directory name.
Current file name.
Current directory name.
The frame shows it is in music mode.
Press PLAY
or ENTER
button
Press PLAY
or ENTER
button to show
full screen.
Press to select
the file, then
you can review it.
04.01
The frame shows it is in photo mode.
Press ENTER or PLAY to play the current file select by the cursor.

Play SD Card and USB
Watch Movie
Before you do this, make sure you have download the movie (AVI. format) to your
SD card or USB (The operation same as “Play Music”). And the screen will shows:
Current file name.
Current directory name.
The frame shows it is in movie mode.
Press “DISPLAY” button to show its information.
Press PLAY
or ENTER
button to play
the movie
01.01AVI
01AVI 04.01.AVI
02.01AVI
X
USB AVI

Record Operation Procedures
4.Press “RECORD PLAYBACK” to listen the song you just recorded.
X
USB MP3G
X
USB
REC 8%
> > >
REC 8%
> > >
02.RECORD
A. In MP3G mode:
B. In CDG mode:
.Playing
. Recording . Recording finished
.Playing
. Recording . Recording finished
2. Press the red RECORD/STOP button --> screen shows “ USB Ready or SD Card
Ready”.
1. Load Disc, SD card or USB, select song Title from the song list and press PLAY, the
unit plays. (This unit supports the MP3, MP3+G, CD, CD+G format’s song.)
3. User can start singing into the Microphone and record. When finished, Press
RECORD/STOP to stop Recording.
When recording, the screen shows the below:
X
CDG
X
CDG
X
CDG

Playback the Recorded File
1. Press “RECORD PLAYBACK” just right after your recording.
2. Press DISC/SD/USB button to select USB or SD mode.
A
B. Select RECORD folder, then press ENTER.
--> Screen shows all tack No.
C. Use the nevigation buttons to pick the identical track number when the Song/Vocal was recorded,
Press ENTER to play.
Current file name
Current file name
Recorded tracks

If you have any questions, please consult the troubleshooting guide below.
* Use the SD Card which meets
SD standards. If not, it may
cause the Karaoke to
malfunction.
* Gently insert the
SD Card label
surface facing front.
Front of Karaoke
* Compliant card type: SDHC Card, SD Card, miniSD Card, miniSDHC Card, microSD Card, microSDHC Card
(requiring miniSD Card/miniSDHC Card/microSD Card/microSDHC Card adapter)
* If a miniSD Card, miniSDHC Card, microSD Card or microSDHC Card is used, insert/remove it together with the
adapter.

Accessories
RCA cables x 1
AUX cable x 1
Remote Control x 1
User’s Manual x 1
Warranty Card x 1
Holder for MP3/iPod® x 1
Demo Disc x 1
Microphone x 1
3.0kg


AC522


AC193

GM5272010


 Loading...