

Page 1
Instruction Manual
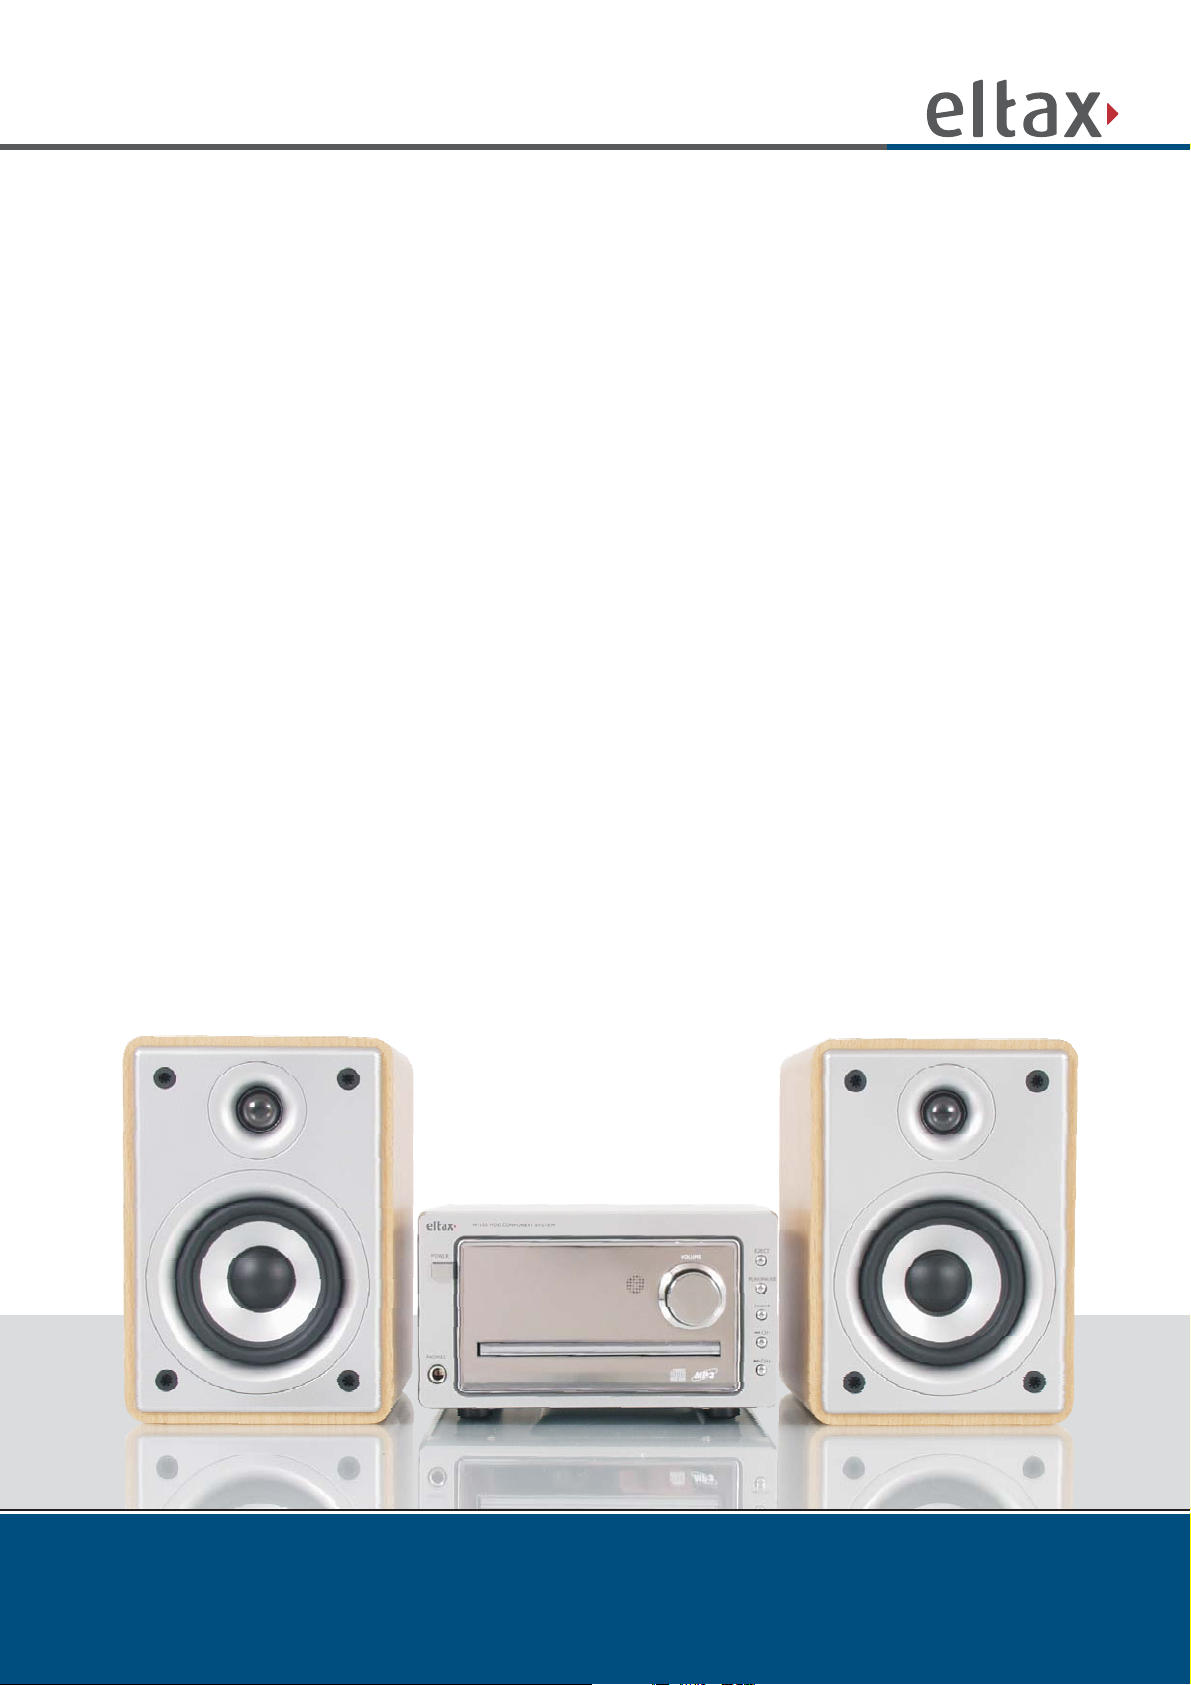
M-100 Mini Component System
Page 2

Service information
Congratulations with Your purchase !
To get the most out of your new product we recommend that you follow our guidance below. We recommend that
you read the manual thoroughly to get the most out of your purchase.
We have done our outmost to make sure that the product live up to your expectations. Should you still need help
with installation etc. we suggest that you visit our home page .
www.eltax.com
On our home page under support you'll find >FAQ< Frequently Asked Question, where you'll find answers to most
questions.
On our home page you can also download the manual in other languages.
Remember to keep the original receipt of your purchase, in case of need for service during the warranty period.
If you, contrary to expectations, should need service for your new product, you shall hand in the product to the
dealer from whom you have purchased it.
Remember to keep the original packaging if the product shall be handed in for service.
The product is to be returned in original and otherwise secure packaging, to avoid damaging the product during
transportation.
02
Page 3

Content
Service information 2
Content 3
Important safety notices 4
Front- and rear-panel 6
Remote control 7
System connection 8
Basic operation 9
Radio operation 11
Trouble shooting 12
Technical specifications 13
Own notes 14
03
Page 4

Important safety notices
WARNING: IT IS IMPORTANT THAT YOU STUDY AND OBSERVE BOTH THE INSTRUCTIONS IN THIS
MANUAL AND THE INSTRUCTIONS ON THE DEVICE. KEEP THIS MANUAL FOR FUTURE USE.
This device was developed and made with a view to providing maximum safety for the user. Incorrect use of the
device may cause electric shock or fire. The protection built into this device will protect the user if the procedure
below is observed in connection with installation, use and repair. This device is fully electronic and contains no
parts which can be repaired by the user.
THE HOUSING MUST NOT BE REMOVED. RISK OF DANGEROUS VOLTAGE. ONLY SKILLED TECHNICIANS
ARE ALLOWED TO REPAIR THE DEVICE.
Read the manual
On unpacking the device, please read the manual
carefully and observe all instructions given.
Power Supply
Only the power supply indicated on the rating plate
must be used for this device. If you are not sure which
power supply you have, please contact the distributor
or the local electricity supplier.
Earthing or polarization
If the plug cannot be inserted properly into the socket,
or if the plug does not fit, the device must not be used
in your country.
Ventilation
The housing is provided with slots and openings to
ensure ventilation and reliable operation and protect
the device against overheating. Do not block or cover
these openings. The openings must never be blocked,
for example by placing the device on a bed, a sofa, a
carpet or similar surface.
Water and moisture
The device must not be placed close to water, such as
bath tub, wash basin, kitchen sink or wash tub, in a
damp cellar or close to a swimming pool, etc.
Cleaning
Unplug the device before cleaning. Do not use liquid
detergents and aerosol cleaning agents. Use a dry
cloth.
Power cords
Wiring must be organised to prevent people from
stepping on the cables and to avoid pinching by
objects placed on or beside them. Take special care
around sockets and plug boxes and where the cable
leaves the device.
Overloading
Make sure that sockets, extension flexes and plug
boxes are not overloaded as this may lead to fire or
electric shock.
Heat
Do not place the device near sources of heating such
as radiator, register, stove or other heat-producing
devices (including amplifiers).
04
Page 5

Important safety notices
Lightning
Unplug the device for additional protection during
thunder or when the device is not used for prolonged
periods. This will prevent damage to the device from
lightning and surges.
Penetration of objects and liquid
Never push any objects through the openings into the
device, as they may touch dangerous voltage points or
short circuit parts and cause fire or electric shock. Do
not spill liquid on the DVD player.
Accessories
The device must not be placed on unstable surfaces
such as a trolley, stand, tripod, shelf or table.
The device may fall and injure children or
adults or be damaged. Use only trolley,
stand, tripod, shelf or table which are very
stable or provided with the device. The
Device must be installed in accordance with the
manufacturer's instructions and by means of installation
equipment recommended by the manufacturer.
If the device is placed on a trolley, the trolley must be
moved carefully. Sudden stops, unnecessary force and
uneven surfaces may cause the trolley to turn over.
Disc drive
Keep your hands off the drive when it closes to avoid
trapping your fingers.
Loads
Do not place heavy loads on the DVD player, and do
not step on it. The load may fall and cause serious
injury or damage to the device.
Discs
Do not use scratched, deformed or repaired discs.
Such discs will break easily and may cause serious
injury and damage to the device.
Damage
Unplug the device and contact skilled technicians in the
following cases:
A) If power cord or plug is damaged.
B) If liquid has been spilled on the device or objects
have fallen into the device.
C) If the device has been exposed to rain or water.
D) If the device does not work properly after
adhering to the instructions in the user manual.
Make only the setups mentioned in the manual, as
incorrect setup may cause damage and will often
make it difficult for a skilled technician to make the
device work properly again.
E) If the device has been dropped or damaged in any
other way.
F) When the operation of the device changes
drastically, the device requires service.
Service
Do not attempt to carry out any service work yourself.
By opening or removing the housing, you will be
exposed to dangerous voltage, etc. Any service work
should be carried out by skilled technicians.
Spare parts
If spare parts are required, make sure that the
technician uses spare parts specified by the
manufacturer or with the same characteristics as the
original component. Unauthorised spare parts may
cause fire, electric shock, etc.
Safety check
After service or repairs on the DVD player, ask the
service technician to carry out a safety check to ensure
that the device is ready for use.
05
Page 6

Front- and rear-panel
M-100 MINICOMPONENT SYSTEM
POWER
PHONES
12
891011
VOLUME
EJECT
7
PLAY/PAUSE
6
INPUT
5
CH-
4
CH+
3
1 Headphone output
2 Disc loader
3 CH+ / Next
4 CH- / Previous
5 Input selector
6 Play / Pause
7 Eject
8 Volume button
9 Remote control sensor
10 VFD display
11 Power button
12 Audio 1 input
13 FM antenna input
14 Audio 2 input
15 AM antenna input
16 Right speaker output
17 Left speaker output
18 AC power input
12 13 14 15 16 17 18
SPEAKERS (4-16 )Ω
FM AM
AUDIO INPUT
L
R
ANTENNA
AUDIO1 AUDIO2
MINI COMPONENT SYSTEM
MODEL: M-100
POWER SOURCE: 220-240V~50/60Hz
POWER CONSUMPTION: 50W MAX
ITEM NO.:
SERIAL NO.:
© Eltax A/S Denmark
Developed and Designed in Denmark
www.eltax.com
RIGHT
LEFT
220-240V
~50/60 Hz
06
Page 7

1 Mute
2 0-9 digits
3 Save
4 Search
5FM/AM
6CD
7 Pause
8 Stop
9 CH- / Previous
10 Tune- / Fast reverse
11 Eject
12 +10
13 Mono
14 Frequency
15 Audio 1
16 Audio 2
17 Volume increase / decrease
18 Play
19 Shuffle
20 CH+ / Next
21 Tune+ / Fast forward
Remote control
10
1
2
3
4
5
6
7
8
9
11
12
13
14
15
16
17
18
19
20
21
07
Page 8

System connection
Note:
!
Please connect the cable firmly!
!
Please connect the power after all other connections have been made!
!
Before each connection, Please disconnect the main power supply!
!
Please do not press the power button with a rapid frequency. The main power switch must be turned of
for minimum 3 seconds before it is turned on again.
MINICOMPONENT SYSTEM
MODEL:M-100
POWERSOURCE: 220-240V~50/60Hz
POWERCONSUMPTION: 50W MAX
ITEMNO.:
SERIALNO.:
Satellite receiver
White
Red
Audio input
White
Red
FM
AUDIOINPUT
AUDIOINPUT
12
L
R
AUDIO1 AUDIO2
12
L
R
AUDIO1 AUDIO2
FM AM
ANTENNA
FM AM
ANTENNA
AM
MINICOMPONENT SYSTEM
MODEL:M-100
POWERSOURCE: 220-240V~50/60Hz
POWERCONSUMPTION: 50W MAX
ITEMNO.:
SERIALNO.:
©Eltax A/S Denmark
Developedand Designed in Denmark
www.eltax.com
MINICOMPONENT SYSTEM
MODEL:M-100
POWERSOURCE: 220-240V~50/60Hz
POWERCONSUMPTION: 50W MAX
ITEMNO.:
SERIALNO.:
©Eltax A/S Denmark
Developedand Designed in Denmark
www.eltax.com
SPEAKERS(4-16 )Ω
RIGHT
SPEAKERS(4-16 )Ω
RIGHT
220-240V
~50/60Hz
LEFT
220-240V
~50/60Hz
LEFT
PC
White
Red
Audio input
White
Red
08
Page 9

Basic operation
Preparation
!
Before turning the M-100 mini component system on, check that all connections are correct and reliable. Plug
the AC powercord into a corresponding AC outlet.
!
Press POWER on the front panel.
Volume adjustment
Press the VOLUME and buttons on the remote or turn the volume button on the front panel to turn the
volume up and down.
Note:
Do not keep the volume at maximum level for longer periods to ensure the longevity of the unit.
Mute
Press the MUTE-button on the remote once, and the sound will be muted.
Press the MUTE-button once again to restore the sound at the last used level.
Input selection
Press the INPUT-button on the front panel or the AUDIO 1- or AUDIO 2-buttons on the remote to select the
AUDIO 1 or AUDIO 2 inputs.
Press the FM/AM-button on the remote or the front panel to select TUNER. Press the FM/AM-button once again to
change between the FM and AM band.
Press the PLAY/PAUSE-button on the front panel or the CD-button on the remote to select cd mode. The unit will
start playing if the is a disc inserted.
Eject
Press the EJECT-key on the remote control or on the front panel to open the disc tray, and put the prefered disc in
the disc tray. Press EJECT once again to close the disc tray. The disc will automatically start playing.
Note:
The printed side of the disc must be faced upward!
Play/Pause
To start playing a disc, press the PLAY-button on the remote, or the PLAY/PAUSE-button on the front panel once.
To stop a disc from playing temporarily, press the PAUSE-button on the remote or the PLAY/PAUSE-button on the
front panel. To start playing again after pause, press the PLAY-button on the remote, or the PLAY/PAUSE-button
on the front panel.
09
Page 10

Basic operation
Fast forward and fast reverse
During playback press the TUNE- / << (fast reverse)- or the TUNE+ / >> (fast forward)-button for fast forward or
reverse playback. Each time the “TUNE- / <<” or “TUNE+ / >>” button is pressed, the speed increase. The will
continue happening until the “TUNE- / <<” or “TUNE+ / >>”-button is pressed 5 times in a row, and the playback
speed will return to normal.
It is also possible to return to normal playback speed by pressing the PLAY-button on the remote or the
PLAY/PAUSE-button on the front panel.
Song selection
Press the “CH+ / >>I”-button on the remote or the frontpanel to step to the next track on the disc. The previous
track will stop playing.
Press the “CH- / I<<”-button on the remote or the frontpanel to step to the previous track on the disc.
Selecting track with the 0-9 digits
When playing a disc. Press the 0-9 digits on the remote to select a track on the disc between track 1 and 9.
If you wish to play a track between number 10 and 19, press the +10-button on the remote once and then the
prefered 0-9 digit.
If you wish to play a track between number 20 and 29, press the +10-button on the remote twice and then the
prefered 0-9 digit.
If you wish to play a track between number 30 and 39, press the +10-button on the remote three times and then
the prefered 0-9 digit.
Etc.
Mp3 playback
When playing Mp3 tracks, press the 0-9 digits and the +10 button on the remote to play the prefered tracks. It is
also possible to select tracks with the CH+ / >>I or the CH- / I<< on the remote or the front panel.
Random playback
During CD or Mp3 playback press the SHUFFLE-button on the remote to play the tracks randomly.
Press the SHUFFLE-button once again the return to normal playback.
10
Page 11

Radio operation
FM/AM radio operation
1. Enter the Tuner function by pressing the FM/AM-button on the remote or on the front panel. The tuner will start
in the last known state. Press the FM/AM-button again to change between the FM and AM band.
2. Search stations:
A) To directly input the frequency, press the FREQUENCY-button on the remote, and then enter the prefered
frequency via the 0-9 digits on the remote.
B) To autosearch all frequencies press the SEARCH-button on the remote. The unit will now search the FM
band in 0,05MHz steps, and the AM band in 9KHz steps. During autosearch all stations that has been found
automatically will be stored. Press the SEARCH-button once again to stop the autosearch.
C) To search station on at the time press the TUNE+/>>- or the TUNE-/<<-button on the remote. The unit will
then search the selected band until it finds a station. The unit will search the FM band in 0,05MHz steps, and
the AM band in 9KHz steps.
3. Saving presets
Once a frequency has been found, by either autosearch or manual search, press the SAVE-button on the
remote, and the frequency will be saved on the chosen preset. A little padlock will be shown in the display when
the frequncy has been saved to a preset. If you want to save the frequency 92,9MHz to preset 23, choose
preset 23 by pressing the +10-button on the remote twice and then the 3-button on the remote. Press the
FREQUENCY-button on the remote and press929omtheremote. Press the SAVE-button to store the preset.
4. Choosing a preset.
Once the prefered radio stations has been stored as presets, they can be chosen by either pressing the
CH+/>>I or the CH-/I<< buttons, to step on preset up or down at the time, or the prefered station can be
selected directly by using the 0-9 digits and the +10 button. If you want to listen to preset number 26, press the
+10-button on the remote twice, and then press the 6-button on the remote.
5. Stereo and mono sound selection
To change between MONO and STEREO during FM playback, press the MONO-button on the remote. The unit
will always start up in stereo if possible. When stereo is chosen, a little borken circle will be shown in the
display. If the signal is not strong enough, stereo cannot be chosen.
Note:
Stereo is not available in AM.
Note:
To obtain the best possible reception, move the included FM or AM antenna untill the strongest signal is found.
11
Page 12

Troubleshooting
Please check the schematic below before requesting service.
On our home page under support you'll find >FAQ< Frequently Asked Question, where you'll find
answers to most questions.
Common sympton Possible cause Remedy
No function Mains power is not connected Connect to mains power outlet
No playback No disc is inserted Insert a disc.
www.eltax.com
Power is OFF Turn the power ON.
Disc is upside down. Reload disc.
The label side should face
upward.
Dirty disc Clean disc surface.
Deformed/scratched disc Replace disc.
Condensation in unit Turn power on for 1-2 hours
before using the unit.
Sound in one or more Poor or missing cable connection Check connections
channel(s) is missing
The remote doesn’t work The batteries are weak or dead Change the batteries
The batteries are not installed Install the batteries according
properly to the marks in the battery
compartment
The remote is not aimed at the Aim the remote at the sensor
sensor
Something is blocking the path Clear the path between the
between the remote and the remote and the sensor.
Sensor
12
Page 13

Technical specifications
CD player
Compatible Discs CD, Mp3
Connections
Connections 2 x stereo RCA inputs
FM and AM antenna input
Amplifier
Audio signal noise ratio: 70dB A weight
Frequncy response: 20Hz-20KHz +/- 3dB
Audio output power: 2 x 20W Music power
FM Tuner
Tuning Range 87.5-108MHz
S/N Ratio >46dB
Monophonic >46dB
Stereo >50dB (DIN)
Selectance 50dB
THD
Monophonic 2%
Stereo 3%
Frequency Response 30Hz-10kHz +/- 1dB
Stereo Resolution 35dB (1kHz)
≡
30dB (100Hz-10kHz)
AM Tuner
Tuning Range 522-1620KHz
S/N Ratio 35dB
THD 3%
Remote Control
Transmitter Infrared Ray
Signal Range Approximately 15'
Power Source 2 "AAA" Batteries
General
Power Supply AC 220-240V/50~60Hz
Consumed Power 50W
13
Page 14

Own notes
14
Page 15

Own notes
15
Page 16

For further information please visit our website:
www.eltax.com
Item no. 40131
 Loading...