

Page 1

DVD-Player
Operation manual
Page 2
DV-300 DivX
DVD-Player
Bedienungsanleitung
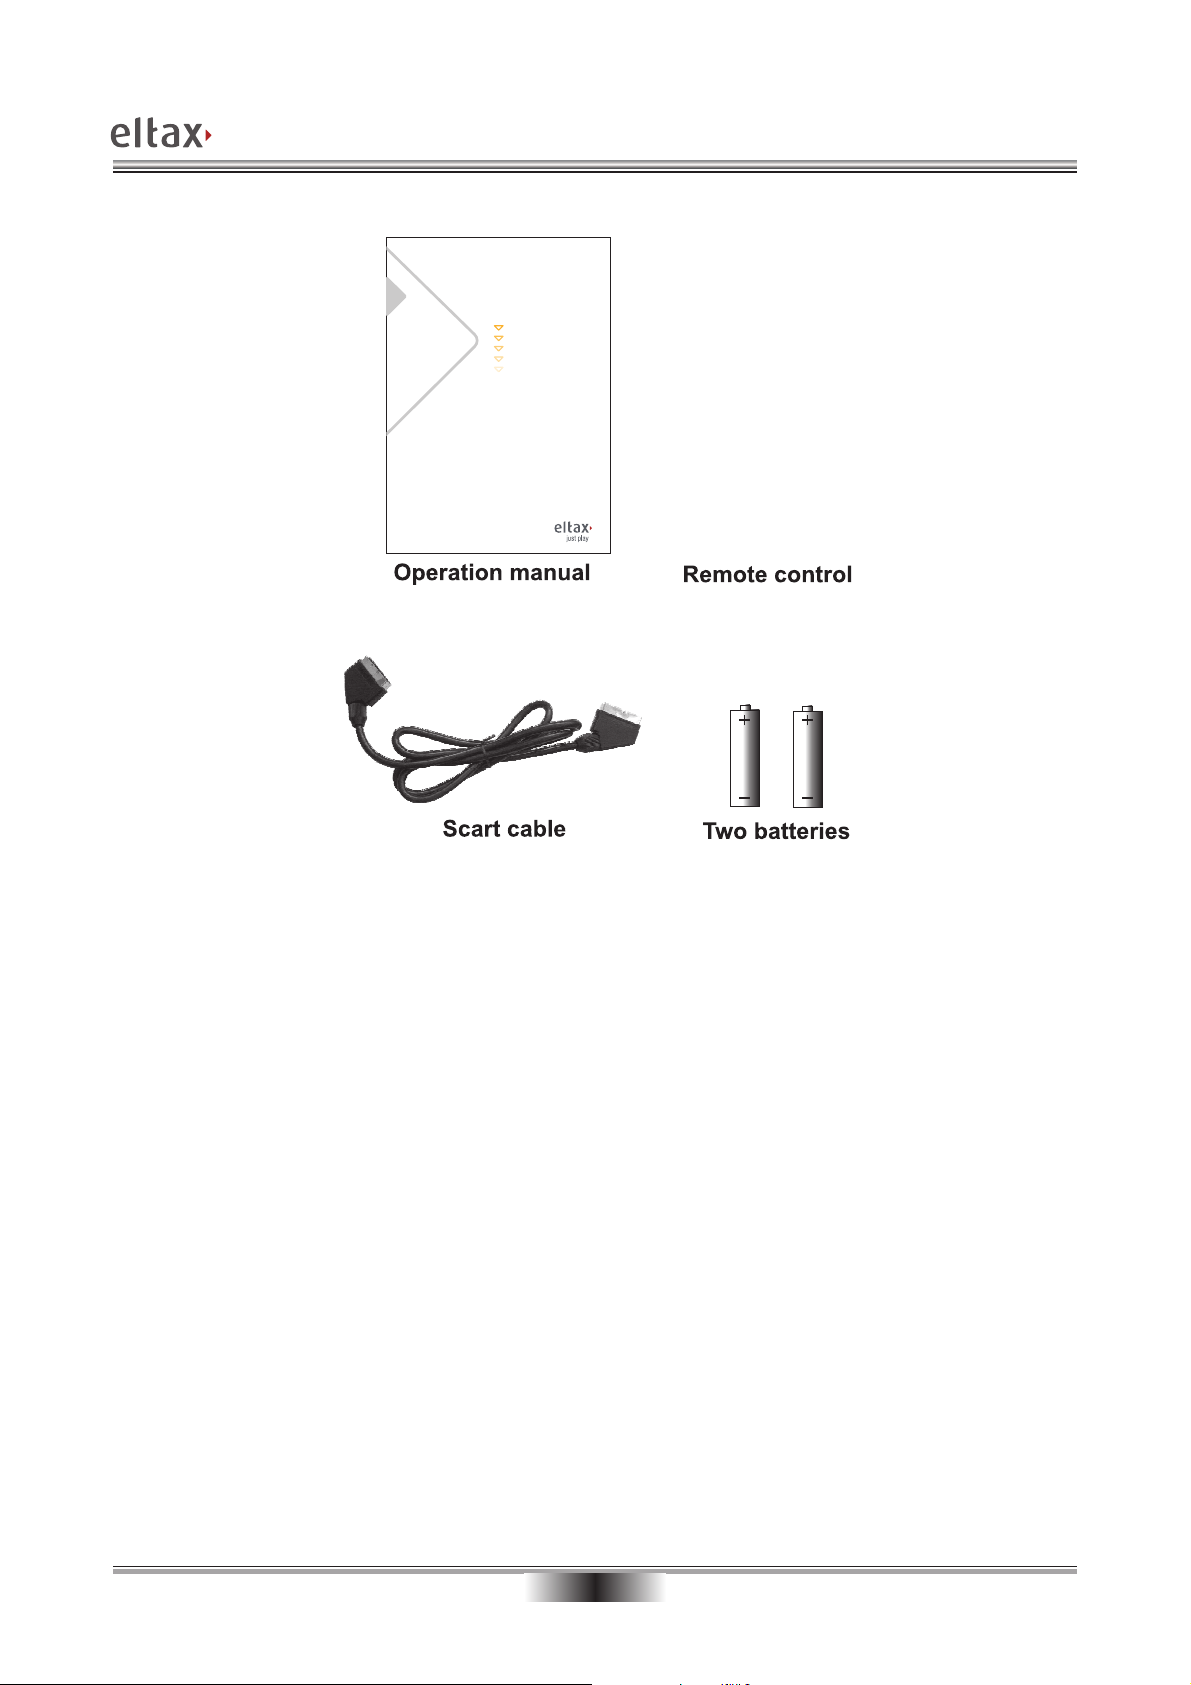
ACCESSORIES
01
Page 3

Before use
Accessories 1
Table of contents 2
Safety precautions 3
Important safety notices 4
Important information 6
Suitable discs 7
Disc protection 8
Control and connection
Normal connection 9
Front panel 11
Remote control 12
TABLE OF CONTENTS
Programme 14
Zoom 15
NTSC/PAL 15
Volume and Mute 15
Mode 15
Menu 15
Title 15
Angle 15
Audio 15
Special features
JPEG 16
Mp3 discs 16
Normal playback
Preparation 13
Normal playback 13
Pause 13
Stop playback 13
Rewind and forward 13
Fast forward and rewind 13
Advanced playback
V. Mode 14
OSD 14
Subtitle 14
Step 14
Time 14
Repeat 14
A-B repeat 14
Reference
System setup 17
Troubleshooting 21
DVD characteristics 22
DVD, special functions 23
Functions supported by DVDs 23
Technical data 24
Rights 25
Own notes 26
02
Page 4

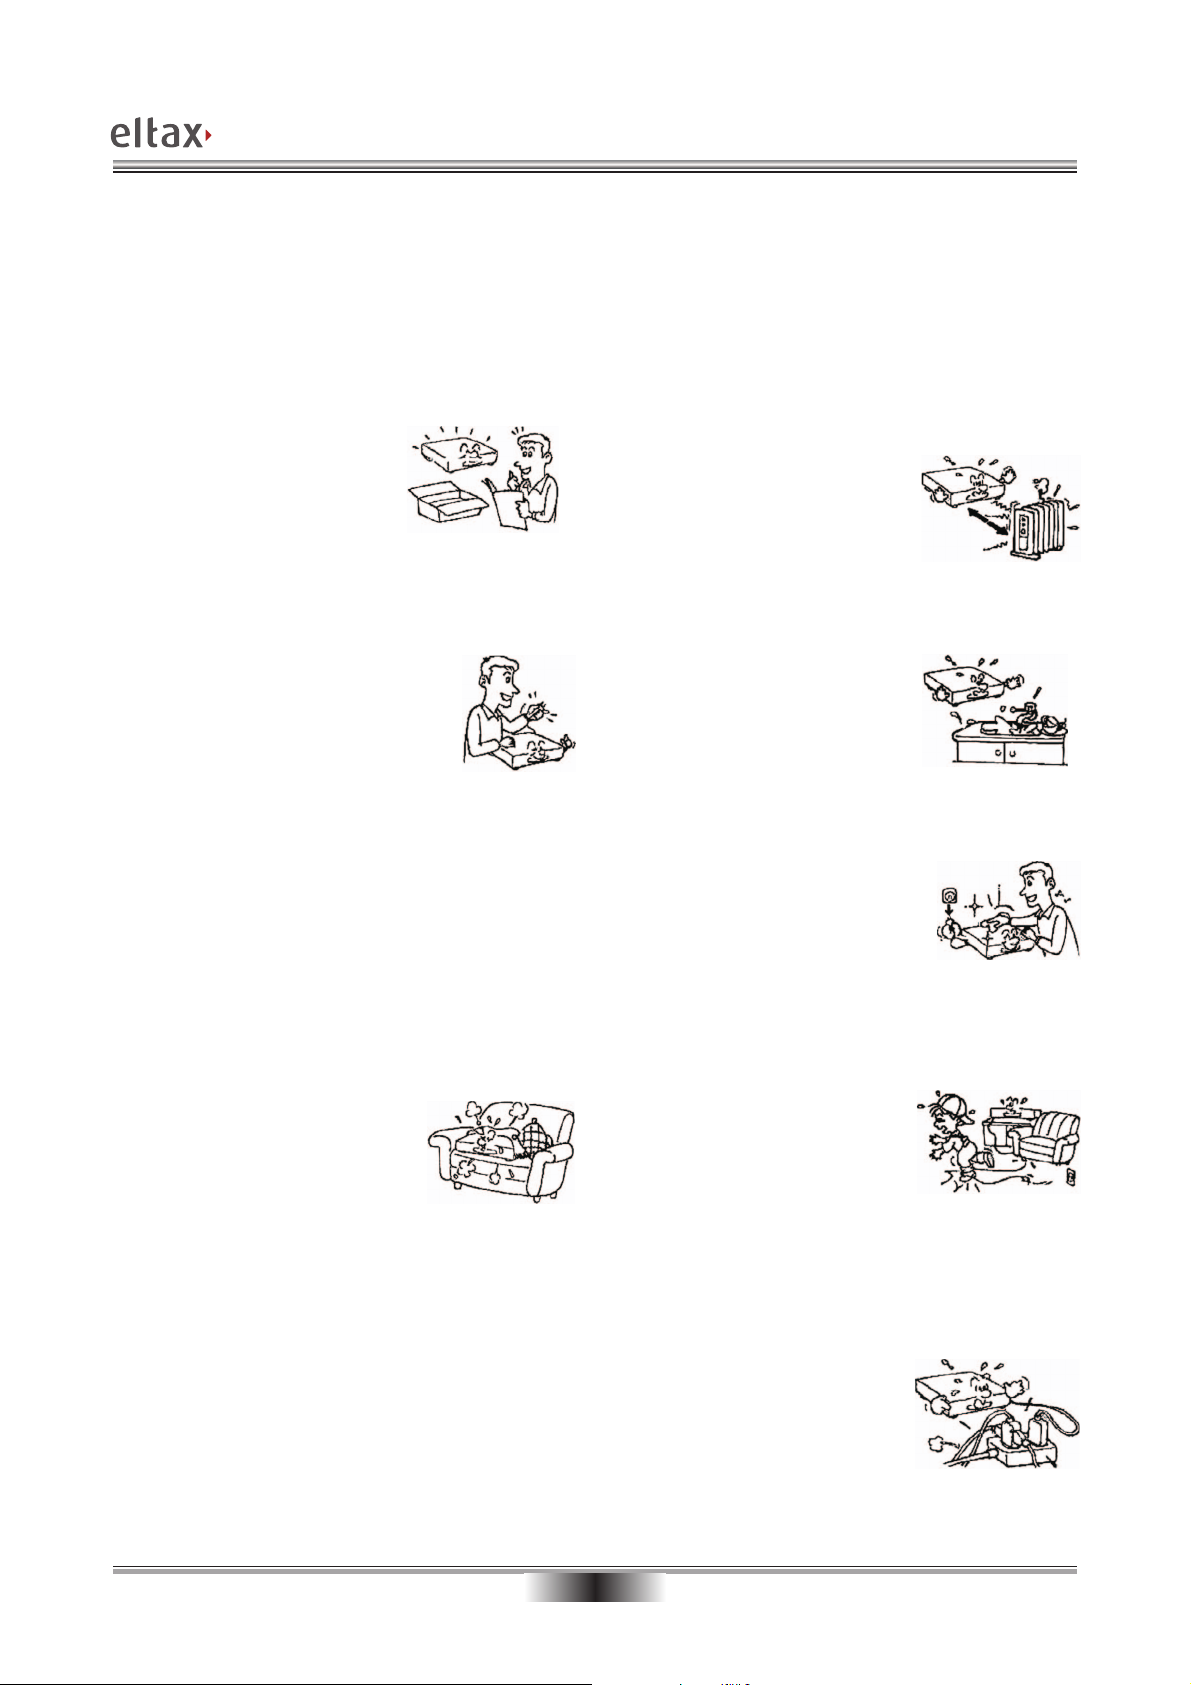
SAFETY PRECAUTIONS
A triangle with a lightning symbol draws the user's attention
to “dangerous voltage” without insulation in the housing
which may be high enough to entail a risk of electric shock.
A triangle with an exclamation mark draws the user's
attention to important instructions for use and maintenance
in the accompanying manual which should be studied.
Symbol for Class II (double insulation).
WARNING:
CAUTION:
TO MINIMISE THE RISK OF FIRE AND ELECTRIC SHOCK,DO NOT EXPOSE
DEVICE TO RAIN OR MOISTURE. DO NOT OPEN THE HOUSING AS IT
CONTAINS DANGEROUS VOLTAGE. ONLY SKILLED TECHNICIANS ARE
ALLOWED TO CARRY OUT REPAIR AND SERVICE.
If the power cord plug is to be replaced, it is important that the replacement is identical
to the plug to be replaced, or that the new plug has been recommended by the
manufacturer.
TO AVOID THE RISK OF ELECTRIC SHOCK, IT IS IMPORTANT TO INSERT THE
PLUG CORRECTLY INTO THE SOCKET.
This DVD player includes a laser system.
There is a risk of dangerous radiation from the laser beam if buttons, controls and
procedures are not used or carried out as described in this manual. To avoid contact
with the laser beam, do not open the device.
DO NOT LOOK DIRECTLY INTO THE LASER BEAM.
03
Page 5
IMPORTANT SAFETY NOTICES
WARNING: IT IS IMPORTANT THAT YOU STUDY AND OBSERVE BOTH THE INSTRUCTIONS IN THIS MANUAL AND
THE INSTRUCTIONS ON THE DEVICE. KEEP THIS MANUAL FOR FUTURE USE.
This device was developed and made with a view to providing maximum safety for the user. Incorrect use of the device
may cause electric shock or fire. The protection built into this device will protect the user if the procedure below is
observed in connection with installation, use and repair. This device is fully electronic and contains no parts which can be
repaired by the user.
THE HOUSING MUST NOT BE REMOVED. RISK OF DANGEROUS VOLTAGE. ONLY SKILLED TECHNICIANS ARE
ALLOWED TO REPAIR THE DEVICE.
Read the manual
On unpacking the device,
please read the manual
carefully and observe all
instructions given.
Power supply
Only the power supply indicated on the
rating plate must be used for this
device. If you are not sure which power
supply you have, please contact the
distributor or the local electricity
supplier.
Earthing or polarization
If the plug cannot be inserted properly into the
socket, or if the plug does not fit, the device must
not be used in your country.
Ventilation
The housing is provided with slots and
openings to ensure ventilation and reliable
operation and protect the device against
overheating. Do not block or cover these
openings. The openings must never be
blocked, for example by placing the device
on a bed, a sofa, a carpet or similar surface.
Heat
Do not place the device near
sources of heating such as
radiator, register, stove or other
heat-producing devices (including
amplifiers).
Water and moisture
The device must not be placed
close to water, such as bath
tub, wash basin, kitchen sink or
wash tub, in a damp cellar or
close to a swimming pool, etc.
Cleaning
Unplug the device before
cleaning. Do not use liquid
detergents and aerosol cleaning
agents. Use a dry cloth.
Power cords
Wiring must be organised to
prevent people from stepping on
the cables and to avoid pinching
by objects placed on or beside
them. Take special care around
sockets and plug boxes and
where the cable leaves the
device.
Overloading
Make sure that sockets,
extension flexes and plug
boxes are not overloaded as
this may lead to fire or electric
shock.
04
Page 6
IMPORTANT SAFETY NOTICES
Lightning
Unplug the device for additional
protection during thunder or when
the device is not used for prolonged
periods. This will prevent damage to
the device from lightning and surges.
Penetration of objects and liquid
Never push any objects through the
openings into the device, as they may
touch dangerous voltage points or
short circuit parts and cause fire or
electric shock. Do not spill liquid on
the DVD player.
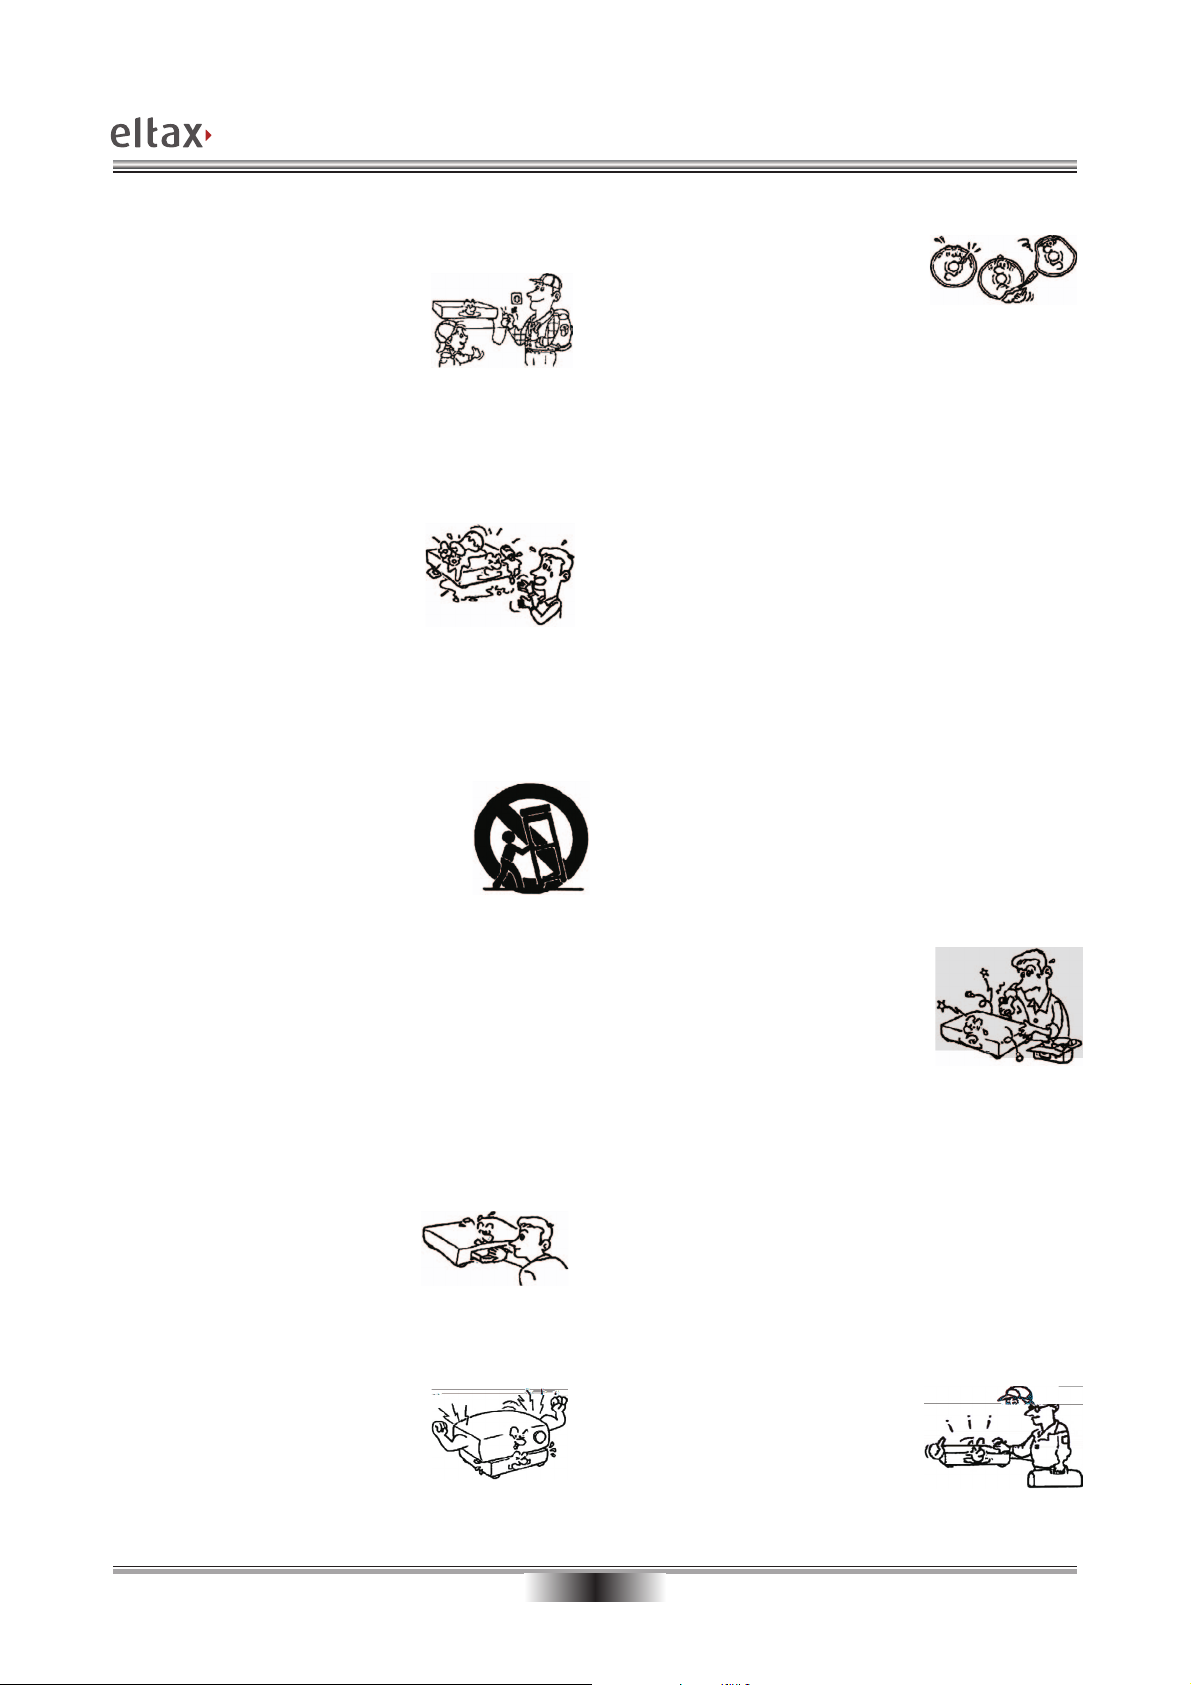
Accessories
The device must not be placed on unstable surfaces
such as a trolley, stand, tripod, shelf or table.
The device may fall and injure children or
adults or be damaged. Use only trolley,
stand, tripod, shelf or table which are very
stable or provided with the device. The
Device must be installed in accordance with the
manufacturer's instructions and by means of installation
equipment recommended by the manufacturer.
If the device is placed on a trolley, the trolley must be
moved carefully. Sudden stops, unnecessary force and
uneven surfaces may cause the trolley to turn over.
Discs
Do not use scratched, deformed or
repaired discs. Such discs will break
easily and may cause serious injury
and damage to the device.
Damage
Unplug the device and contact skilled technicians in the
following cases:
A) If power cord or plug is damaged.
B) If liquid has been spilled on the device or objects
have fallen into the device.
C) If the device has been exposed to rain or water.
D) If the device does not work properly after
adhering to the instructions in the user manual.
Make only the setups mentioned in the manual, as
incorrect setup may cause damage and will often
make it difficult for a skilled technician to make the
device work properly again.
E) If the device has been dropped or damaged in any
other way.
F) When the operation of the device changes
drastically, the device requires service.
Service
Do not attempt to carry out any
service work yourself. By opening or
removing the housing, you will be
exposed to dangerous voltage, etc.
Any service work should be carried
out by skilled technicians.
Disc drive
Keep your hands off the drive
when it closes to avoid trapping
your fingers.
Loads
Do not place heavy loads on the
DVD player, and do not step on it.
The load may fall and cause
serious injury or damage to the
device.
Spare parts
If spare parts are required, make sure that the
technician uses spare parts specified by the
manufacturer or with the same characteristics as the
original component. Unauthorised spare parts may
cause fire, electric shock, etc.
Safety check
After service or repairs on the DVD
player, ask the service technician to
carry out a safety check to ensure
that the device is ready for use.
05
Page 7

IMPORTANT INFORMATION
Handling instructions
The DVD player's top and back panel may
become warm after prolonged use. This is not due
to a defect.
When the DVD player is not used, remove the
disc and turn off the device.
If the DVD player is not used for a long period, its
function may deteriorate. Therefore, the DVD
player should be turned on and used now and
then.
Protect the power cord
Follow the instructions below to avoid irregular
function, electric shock, fire, or injury:
Hold the plug firmly when inserting it into the
socket
Avoid heat-producing devices
Do not place objects on the power cord
Do not carry out service work on or change the
power cord
Condensation
Condensation may occur in the following cases:
When the DVD player is moved directly from a
cold to a warm place.
When the DVD player is used in a room where
the radiator has just been switched on or where
the cold air from the air condition plant is directed
at the device.
If the DVD player is used in the summer in a
warm and humid room just after it has been
removed from an air conditioned room.
If there is steam or a high level of humidity in the
room.
In case of condensation, the DVD player will not
work properly. Remove the disc and turn off the
device. Unplug the device and leave it for 2-3
hours. The DVD player will then have adapted to
the environment and any condensation will have
disappeared.
Positioning
Do not place the device in any of the following
places:
In sunlight, close to heat-producing devices and
in a closed trolley
At high temperatures (40ºC or above) or high
relative humidity (90% or more)
In dirty places as some internal parts may be
damaged
Do not put your fingers or any
other objects into the device
Touching the internal parts is dangerous and may
cause injury or damage. Do not open the
housing.
Do not place foreign matter on the drive.
Interference
Placing the DVD player near a television set,
radio or video player may cause poor picture and
sound quality. In that case, move the DVD player
further from television set, radio or video player.
NOTE:
An Ø may appear on the screen when the
device is turned on. This means that the
required operation is not available.
06
Page 8
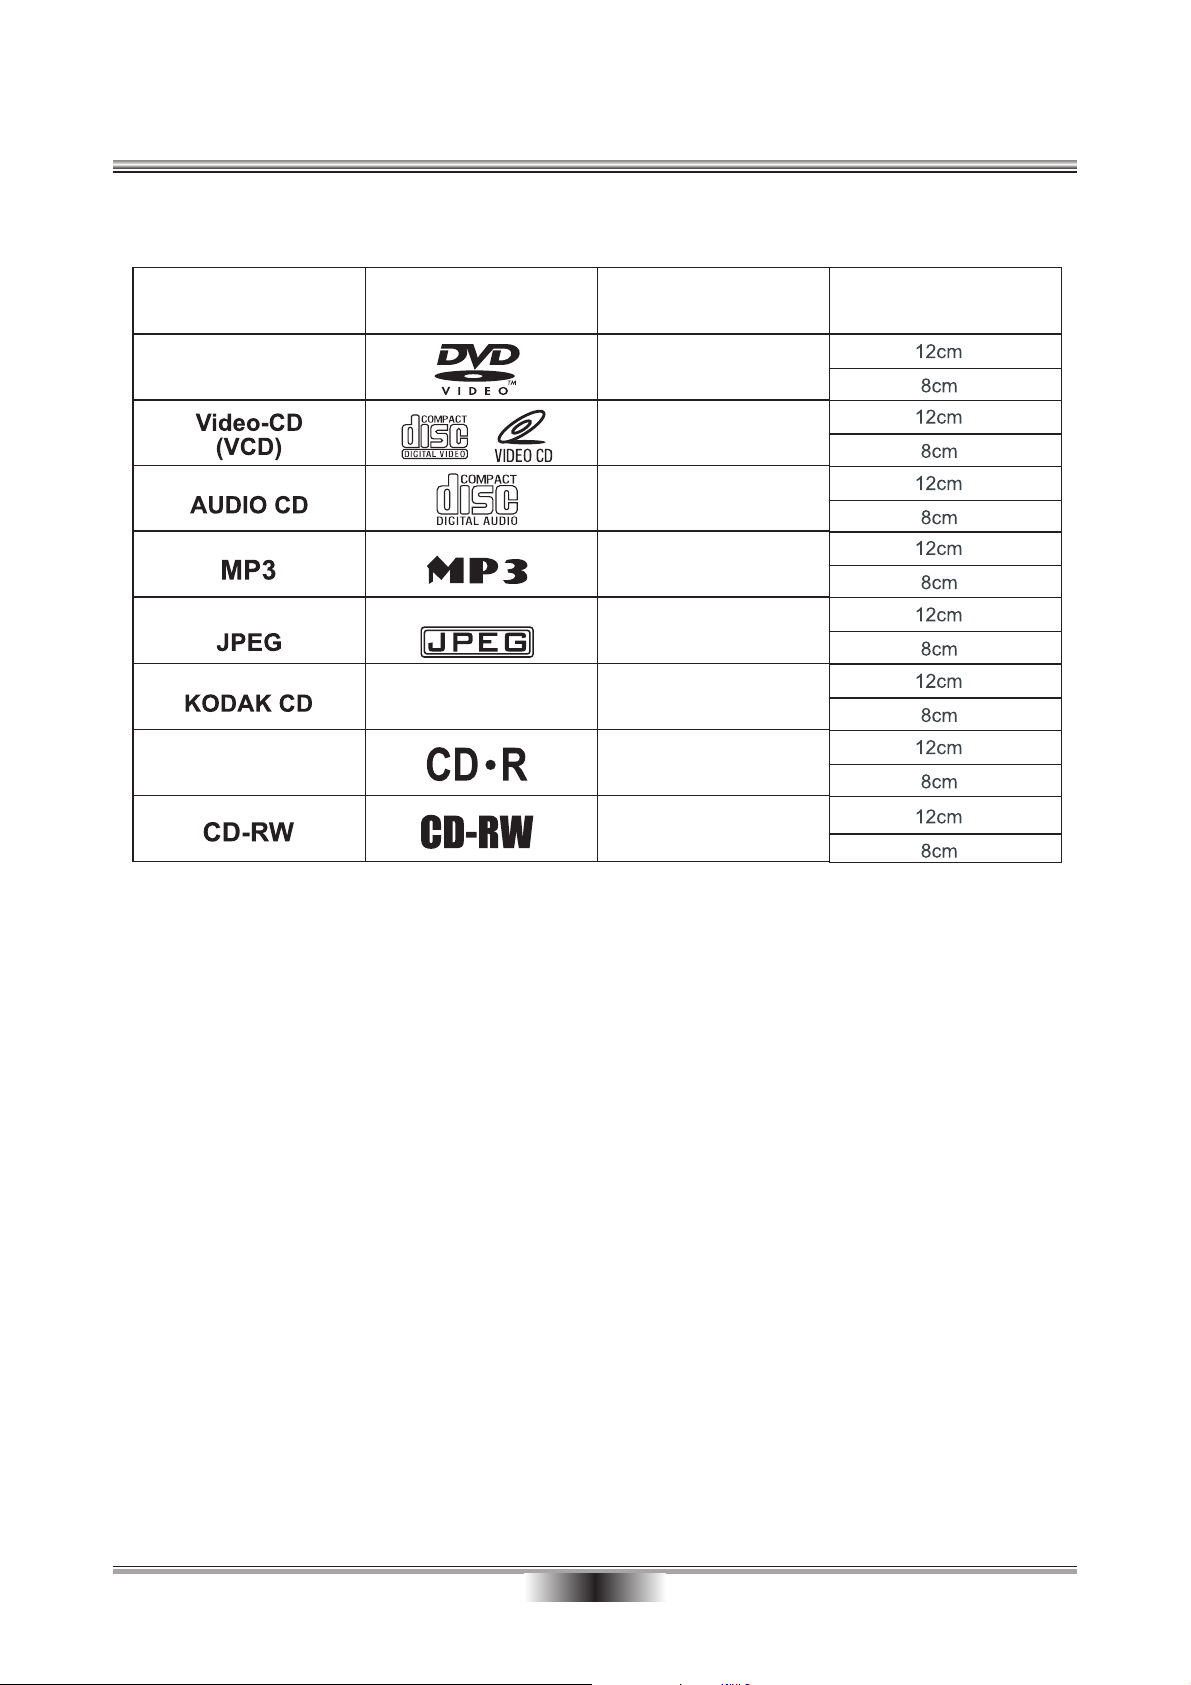
The following discs can be used:
SUITABLE DISCS
07
Page 9
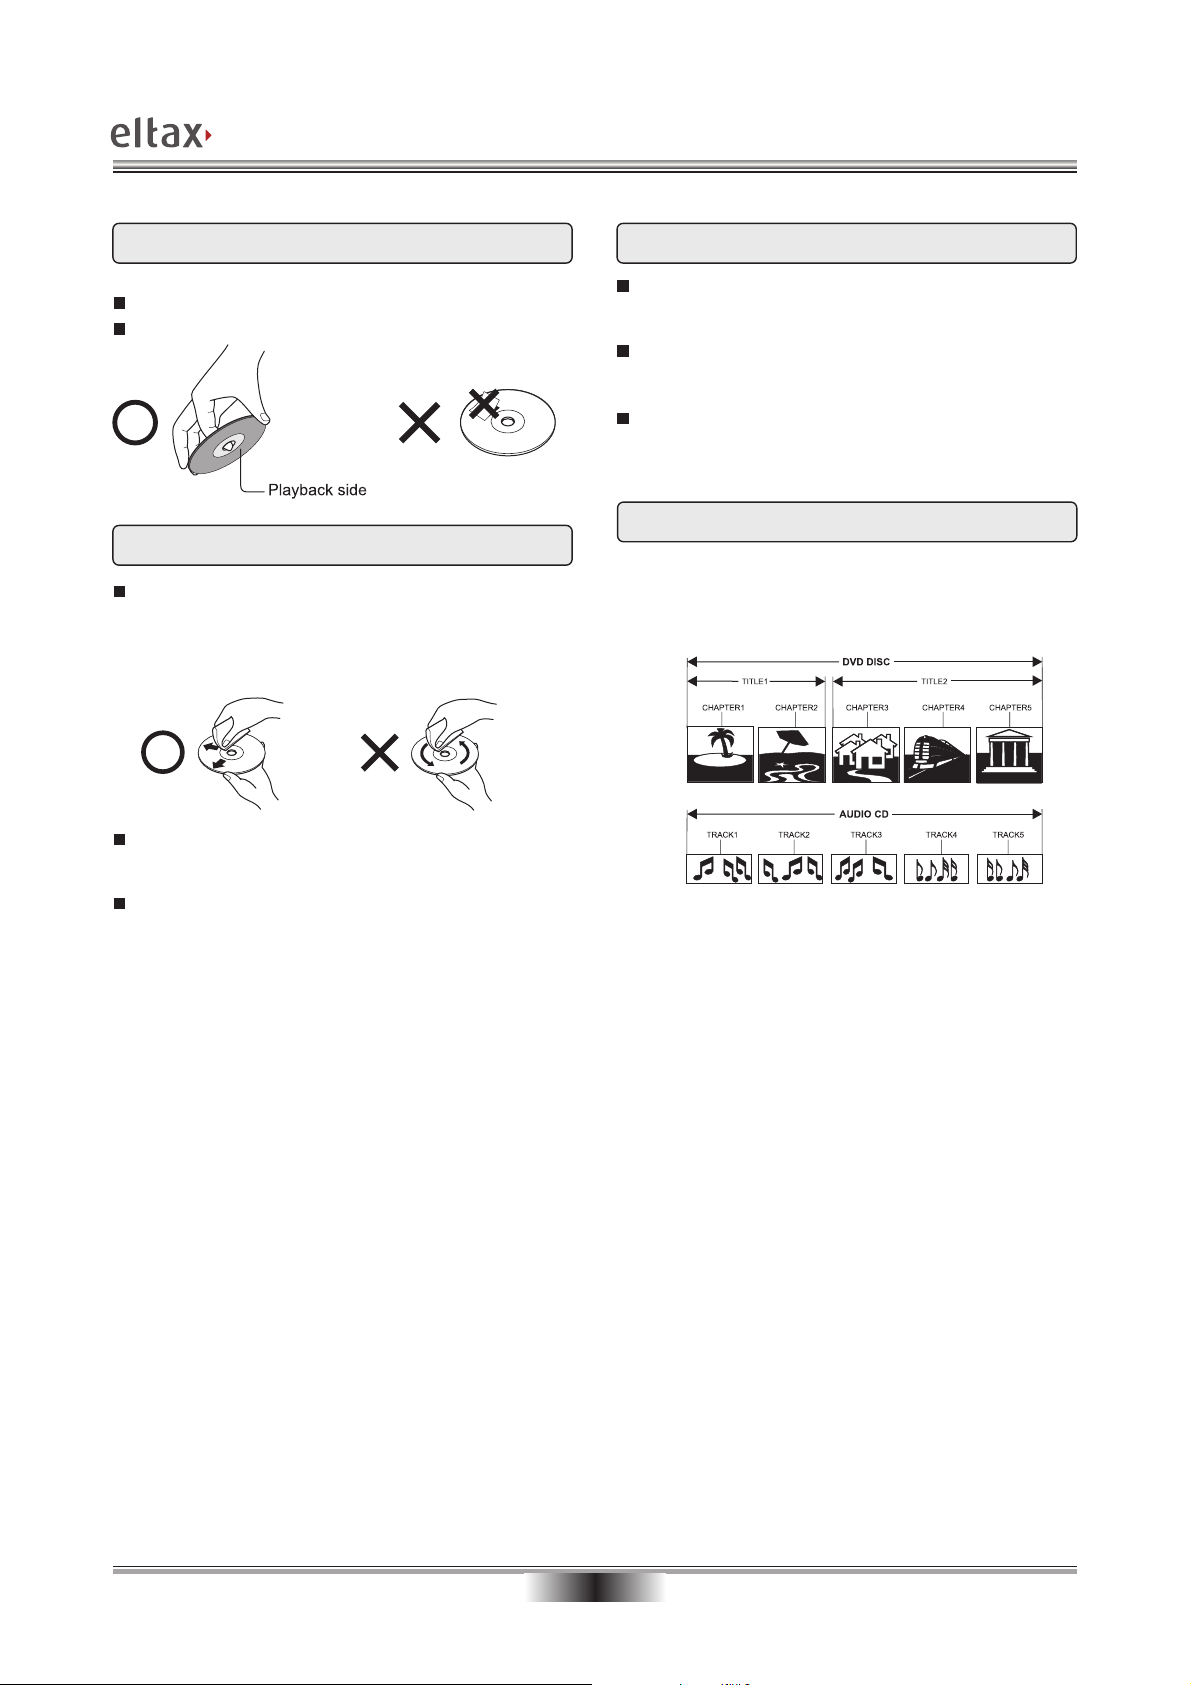
DISC PROTECTION AND ACCESSORIES
Disc handling
Do not touch the playback side of the disc
Do not put paper or tape on the disc
Cleaning the discs
Finger prints and dust may cause poor sound
and picture quality. Wipe the disc with a dry, soft
cloth. Wipe from the centre out. The disc should
always be clean.
Storing the discs
Do not store the discs where they may be
exposed to direct sunlight or where they are close
to sources of heat.
Do not store the discs where they may be
exposed to moist or dust, for example in a
bathroom or close to a humidifier.
Store the discs standing in a cassette. If the
cassettes are stacked or an object is placed on
the cassettes, the discs may become uneven.
Organisation of discs
Normally, DVD discs are divided into titles, and the
titles are then divided into chapters. Music CDs are
divided into tracks.
If the dust cannot be removed with a soft cloth,
wipe the disc carefully with a moist cloth and then
with a dry cloth.
Do not use any type of solvents such as thinner,
petrol, commercial detergents and anti-static
spray for vinyl records. These may damage the
disc.
Each title, chapter and track has been given a
number, designated title number, chapter number
and track number, respectively.
08
Page 10

Back panel
Normal connection
NORMAL CONNECTION
Connection to television set through scart cable
S-VIDEO
SCART OUT
Connection to television set through A/V cable
COAXIAL
DV-300DivX
POWER SOURCE: 100-240V ~ 50/60Hz
11047.01
If the TV-set has S-video input, the DVD player can be connected with an Svideo cable. When using an S-video cable, don't use the yellow video cable.
Note: Downmix must be set at STEREO to make the audio track fit a TV and
not a surround system (see page 18).
09
Page 11

NORMAL CONNECTION
O
Connection to an analogue surround system and a TV with a component
YUV video input.
Note: Downmix must be set at 5.1 to make the audio track fit the analogue
surround receiver (see page 18).
Connection to amplifier with digital audio input and TV-set
SW
SR
CEN
5.1 CH AUDIO OUT
LRFRFL
Cb/Pb
If the receiver is provided with coaxial input, the DVD player can be connected
with a coaxial cable. When a coaxial cable is used, don't use the optic cable.
Y
Cr/Pr
P
S-VIDEO
VIDEO
YUV
SCART OUT
COAXIAL
To COAXIAL
type digital
audio input
Coaxial cable
10
Page 12

Front panel
FRONT PANEL
1. Power
2. Standby LED
3. Display
4. Infrared receiver
5. Open/Close
6. Play/Pause
7. Stop
8. Previous
9. Next
10. DVD tray
11
Page 13

Remote control
1
2
3
4
5
6
7
8
9
10
11
12
13
14
15
16
17
REMOTE CONTROL
No.: Function Page
STANDBY 13
18
19
20
21
22
23
24
25
26
27
28
29
30
31
32
1.
A-B 14
2.
REPEAT 14
3.
MUTE --
4.
CLEAR --
5.
DISPLAY 14
6.
VOLUME + --
7.
PAUSE/STEP 13/14
8.
VOLUME - --
9.
MENU 15
10.
TITLE 15
11.
SCROLL UP 19
12.
SCROLL LEFT 19
13.
PREVIOUS 13
14.
FAST REVERSE 13
15.
0-9 DIGITS --
16.
TIME 14
17.
OPEN/CLOSE 13
18.
PROGRAM 14
19.
VIDEO MODE (MODE) 15
20.
PRO LOGIC II --
21.
ANGLE 15
22.
SUBTITLE 15
23.
AUDIO 15
24.
STOP 13
25.
SETUP 19
26.
PLAY 13/19
28.
SCROLL RIGHT 19
29.
SCROLL DOWN 19
30.
NEXT
31.
FAST FORWARD 13
32.
ZOOM 15
33.
13
Installation of batteries
1. Remove the cover
2. Insert batteries. Make
sure that the terminals
correspond to the
symbols shown.
3. Replace the cover
Note:
The batteries must be placed correctly.
Do not recharge, heat, open or short-circuit the
batteries. Do not throw the batteries into open
fire.
Do not mix different types of batteries or old and
new batteries.
If the remote control does not work properly, or if
the range is reduced, all batteries should be
replaced.
Using the remote control
Range: about 5 m from the front
part of the remote control.
Angle: about 30º in either
direction from the front part of
the remote control.
Do not expose the DVD
player's sensor to strong
sources of light, such as
direct sunlight or other types
of light. This may disable the
use of the remote control.
Note:
Aim the remote control at the DVD player's sensor.
Do not drop or expose the remote control to other
types of impact.
Do not store the remote control in a very warm or
moist place.
Do not expose the remote control to water or any
other liquid.
Do not disassemble the remote control.
12
Page 14

NORMAL PLAYBACK
Preparation
When you wish to watch a DVD film, switch on the
TV-set and choose the video input connected to the
DVD player.
When you wish to listen to the disc from the audio
system, switch on the audio system and choose the
input connected to the DVD player.
Normal playback
1. Press Standby at the front panel to switch on the
DVD player. The start logo appears on the TV
screen. If the disc drive already contains a disc, the
playback will start as soon as the DVD player is
switched on.
2. Press the OPEN/CLOSE button to open the disc
drive and insert a disc.
Discs come in two different sizes. Place the disc
correctly in the disc drive. If the disc does not fit into
the opening, the disc may be damaged and the
device may not work properly.
Do not insert discs which are not suitable for this
type of DVD player.
3. Press the OPEN/CLOSE button to close the disc
drive; the playback will now start.
Press the PLAY button if the playback does not start
automatically.
4. Some discs will start by presenting a menu. Use the
cursor button on the remote control to choose
among the different items, then press PLAY.
Alternatively, you can enter the number of the
function in question.
Stop playback
1. Press the STOP button to stop the playback. The
start logo will reappear on the TV screen. Some
discs offer the possibility of resuming playback
from the same spot, for example DVDs and music
CDs.
2. Press PLAY to continue playback where the
playback was stopped, or from the start.
3. Press STOP twice the stop the playback
completely.
Previous and next
During playback, press PREV I<< to go back to the
start of the chapter. Press PREV again to go back to
the chapter before that, etc. (please note: this function
depends on the disc format and may vary from one
disc to the other).
With each activation of NEXT >>Iduring playback, the
device will skip the current chapter and go on to the
next.
Fast forward/reverse
1. Press F.FWD >> to go fast forward on the disc. The
speed changes every time F.FWD >> is pressed.
2. Press PLAY to revert to normal playback.
3. Press F.REV << to go fast backward on the disc.
The speed changes every time F.REV << is
pressed.
4. Press PLAY to revert to normal playback.
Pause
1. Press PAUSE/STEP to stop playback (still picture).
The sound will be deactivated in still mode.
2. Press PLAY to continue normal playback.
13
Page 15

ADVANCED PLAYBACK
IMPORTANT
All descriptions refer to DVDs. Function and display may vary if other types of discs are used.
VIDEO MODE
The video output can be set to “YUV”, "CVBS”,
or “RGB”.
OSD (On Screen Display)
Press DISP to switch between “title played”, “title
left”, “chapter played”, “chapter left”, and “display
off”.
SUBTITLE
When SUBTITLE is pressed, the display shows
“SUBTITLE 01/XX XXXXX”. "01" designates the
language number, "XX" the total number of
languages, and “XXXXX” designates the
country's language (the number of languages
depends on the disc). A selection of up to 32
languages is available on the screen.
STEP
Press STEP to step a single frame/picture
forward during playback. Pres PAUSE/STEP
several times to step several frames/pictures
forward.
Press PLAY to resume playback
TIME
REPEAT
Press REPEAT once to choose on-screen which
chapter to repeat. Press once more to choose
the title to be repeated, and press a third time to
choose to repeat all, and four times to cancel the
repetition.
A-B REPEAT
Press A-B RPT to set up the starting point and
again to set the stop point and complete the set-up.
The section between A and B will be repeated.
Press the button a third time to cancel.
PROGRAMME
Press PROG to enter programme mode. Enter the
number at the desired programme on track or title
and chapter and move the cursor to START to start
the programme. If you wish to cancel the function,
press STOP and then PLAY.
TIME (search)
Press TIME once, to view the search menu, and
press once more to cancel the function. In the
search menu, use the UP/DOWN- and DIGITbuttons to make the desired choice. Press the
PLAY button to confirm the choice.
If you press the TIME key once, the search menu is displayed and if you press the key once more, the
function is cancelled. In the search menu, the desired option can be selected by means of the UP/DOWN
key, the number keys and PLAY. Press PLAY to confirm your choice. The Time Menu comprises the
following:
Title:
Chapter:
Audio:
Subtitle:
Angle:
TT Time:
CH Time:
Repeat:
Time Disp.:
: The Time Menu is only active during DVD playback. Otherwise the TIME key is a GOTO function
Note
where you can enter the desired point in time that you wish to go to.
Shows how many titles the disc includes, and which title is shown.
Shows how many chapters the disc includes, and which chapter is shown.
Shows which audio track is heard, and which audio tracks the disc includes.
Shows which subtitle language is used, and the languages that are available.
Shows how many camera angles that are used, and the number of camera angles available.
Shows the total time of the title concerned.
Shows the total time of the track concerned.
Shows which repeat mode has been selected
Shows which display mode has been selected.
Menu
Title
Chapter
Audio
Subtitle
01/25
22/28
5.1 CH English
5.1 CH English
Off
Title Elapsed 1:50:04
Title Elapsed 1:50:04Bitrate 54Bitrate 54
14
Page 16

ADVANCED PLAYBACK
ZOOM
Press this button to enlarge the picture. The size of
the picture changes every time the button is
pressed.
NTSC/PAL
Choose between PAL, NTSC, and multi through the
setup menu. In the multi function, the device will find
the right system.
VOLUME and MUTE
Press the volume + button to increase the volume
and the volume - button to reduce the volume. When
MUTE is pressed once, the sound will disappear.
Press once more to restore the sound.
MODE
Press the MODE button to change between the video
outputs.
MENU
Press this button to see the main menu and make
the desired choice. (This button can be used for
DVDs with multi-layer menu. Make the desired
choice).
TITLE
On some DVDs, the title menu will be shown when
this button is pressed. Numbers can also be used to
choose the desired tracks.
ANGLE
When watching sports, concerts or a play, press this
button to see the same action from different angles.
(Applies to discs with this function. Some discs were
recorded from several angles, and the desired angle
can be selected, for example from the front, from the
side, the whole picture or from outside).
AUDIO
(selecting audio channel)
Press this button to choose between different
types of sound reproduction, such as:
Audio: 1/2: AC3 2 CH English
Audio: 2/2: AC3 5.1 CH English
15
Page 17

SPECIAL FEATURES
Playing JPEG files
JPEG files contain picture information which can be encoded by micro computer software and transmitted to the
TV screen via a video output interface. This function is useful in many contexts. For example teachers can
change pictures to be shown in the classroom to JPG files by means of a digital camera or a scanner which are
often used within the IT world and transfer the pictures to CD-R discs. This will make things easier for the pupils
when the teachers play the discs via a TV set or other types of equipment in the classroom. It reduces the
repetitive work for the teachers, and the discs are easy to store (information on discs can be stored for more than
100 years). By means of a digital camera or scanner, families can transfer pictures to CD-R discs. If, for example,
a picture requires 100K bytes, one disc will hold about 6000 pictures. Manufacturers can show their customers
pictures of their products one by one.
Note: The actualcontents vary from one type ofdisc to the other.
1. When a JPEG discis loaded in the DVD-player, an automatic slideshow will be launched.
Each picture will be displayed and scaledto fit the screen.
Press STOP to enter the file library.
Use the SCROLL key to navigate the pictures, and press PLAY to display a picture.
When the a picture has been chosen, the slide show will resume with the next picture in the library.
2. Press SCROLL to rotate the picture. These operations are allowed only when a picture is being
displayed normally and will be cancelled automatically when a new picture is displayed.
3. Press ZOOM to execute the zoom function and select the zoom enlarging scale with I<< and >>I.
In zoom mode, press the SCROLL buttons to move the picture on the screen. With zoom mode off,
the next picture will be scaled to fit the screen.
Press PLAY to cancel the zoom mode and resume the slide show.
JPEG limitations
- JPEG files containing CMYK colors is not supported by this DVD-player.
- The range of pixels should not be exceeding 3840 X 3840 pixels, in order to achieve the best
Performance.
Mp3 discs
MP3 is an audio compression mode using level 3 of the international MPEG standard, whereby the sound
signal is compressed at the ratio of 12:1. An MP3 disc can record music for playback over 600 minutes or
record over 170 songs in a sound quality that fully matches the sound quality of CDs.
How to play an MP3 disc
When playing an MP3 disc, you can choose between the following two file menus by pressing the PROG key:
FILE LIST and FOLDER LIST.
1. FOLDER LIST
First the menu is displayed, then press the arrow keys UP/DOWN and LEFT/RIGHT and then PLAY to
select subdirectory and music.
2. FILE LIST
Here you select the files to be played by pressing the arrow keys UP/DOWN and LEFT/RIGHT and then
PLAY or by pressing the number keys and PLAY for direct selection. If the entered number is not
Available, the message ”INPUT INVALID” will be displayed.
PLAY MODE
Five different play modes are available: FOLDER, SINGLE, REPEAT ONE, REPEAT FOLDER, and
SHUFFLE.
When you press REPEAT during playback, you can choose between the following play modes:
1. FOLDER: Plays the entire music menu in normal order.
2. SINGLE: Plays one music track.
3. REPEAT ONE: Plays one music track several times.
4. REPEAT FOLDER: Plays the entire music menu several times.
5. SHUFFLE: Plays music tracks in random order.
16
Page 18

SYSTEM SETUP
DVD SETUP MENU
When you press the SETUP key on the remote
control, the setup menu will be displayed.
When you have entered the setup menu, press
the Scroll buttons to navigate and select the
item desired. When you have selected an item,
press PLAY to confirm the entry and go to the
sub-menu.
GENERAL SETUP
This menu is used for setting up the TV screen
format, video functions and DVD functions
with the options "TV DISPLAY", "ANGLE
MARK", "OSD LANGUAGE", "CAPTIONS",
“SCREENSAVER” and "LAST MEMORY".
TV DISPLAY
Here you select the format of the TV to which
the DVD is connected.
NORMAL/PS
4:3Pan&ScanforanormalTV.
NORMAL/LB
4:3 Letterbox for a normal TV.
WIDE
16:9 Wide screen for a widescreen TV.
ANGLE MARK
When a DVD enabling multiple camera angles is
used, the user can select a certain camera angle
by means of the ANGLE key on the remote control.
However, the function must be activated first. The
ANGLE MARK setting must be “ON”, if you want
the unit to support multiple camera angles.
OSD LANGUAGE
This function allows you to select a language
for the setup menu and for the screen display.
You can choose between English, French,
German, Spanish, Danish and Dutch. (Some
versions of the unit may feature more or fewer
languages.)
Note: Available aspect ratios will be printed on
the back of the DVD packaging.
Some DVDs are recorded in the cinema
widescreen format (16:9) and others in the
standard format (4:3). Some DVDs are
recorded in both formats and may thus feature
the Pan Scan function. If available, the Pan
Scan function will allow the 4:3 format to fill out
the entire screen. However, a part of the picture
will be cut off in both sides.
Film
format
4:3
16:9
TV
screen
Normal
4:3
Full view
Letterbox
16:9
Wide screen
CAPTIONS
Closed captions (CC) is a standardised method
used to code text into a NTSC TV signal.A DVD
may include Closed Captions. If a DVD title has
a (CC) mark on the back of the packaging, you
can set captions to “ON” and read the written
headlines on the TV screen. The unit is preset
to ”ON”.
17
Page 19

SYSTEM SETUP
SPDIF SETUP
Here you set up the digital sound format that
comes from the co-axial or optical output on the
back panel. This signal is used when the unit is
connected to a digital surround receiver.
Closes the digital outputs.
OFF:
RAW:
digital signal.
PCM:
be necessary to activate this function if the
digital surround receiver cannot recognise the
sound format.
Opens for the pure, non-modulated
Stands for Pulse Code Modulation. It may
AUDIO SETUP
Includes Downmix setup, SPDIF setup, Dolby
Digital setup and HDCD setup.
DOWNMIX
Here the analogue sound format is selected.
LPCM OUTPUT
Here the digital output format is selected. If
48KHz is selected, the sampling frequency will
be converted to 48KHz. If 96KHz is selected,
the sampling frequency of the digital signal will
not be converted.
18
Page 20

SYSTEM SETUP
DYNAMIC RANGE COMPRESSION
To avoid disturbing the neighbours at night, you
can use this function to reduce the sound
effects volume without changing the original
tone.
HDCD
This function is used to select sampling
frequency for HDCDs. However, the function is
only active when playing HDCD format discs.
.. HDCD Setup Page ..
Filter X1 Off
X1
X2
CVBS
: Composite video output through the
Scart output.
: RGB output through the Scart output.
RGB
Component
: Component video output through
the component video outputs on the back panel.
Note
: This output may allow both Interlace
Scan and Progressive Scan. You switch
between IS and PS by means of the MODE key
on the remote control.
PREFERENCE SETUP
This menu item includes TV type, audio
language, subtitles, disc menu language,
parental control and default settings.
TV TYPE
Here you select the TV system used in the
country in which you live.
: Europe
PAL
MULTI
places. If not, the unit must be set according to
the TV system used.
NTSC
In the TV manual you can see which TV system
is used.
: This setting is often available in both
:The USA
Filter
OFF
: HDCDs will be played like normal audio CDs.
1X (44.1K) or 2X (88.2K)
: HDCDs will be played at
a sampling frekquency of 44.1KHz or 88.2KHz if
possible. (This setting depends on the contents of
the disc).
VIDEO SETUP
SCART OUT
Here the desired video output is selected.
However, note that component video output is
not possible through the Scart output.
CVBS
RGB
Component
AUDIO
Used to select the desired dubbing/audio
language for the DVD film.
Note
: This is only possible if the disc supports
the audio language in question.
19
Page 21

SUBTITLE LANGUAGE
Used to select the desired subtitle language for
a DVD film.
Note
: This is only possible if the disc supports
the subtitle language in question.
SYSTEM SETUP
PARENTAL CONTROL
This function is used to limit children’s
watching of films with “adult scenes”. Parental
control varies from film to film and is indicated
on the film cover.
20
Page 22

TROUBLESHOOTING
This troubleshooting guide may help you find a possible cause of and solution to a problem. If there are still
problems, please contact the local service centre or distributor.
PROBLEMS AND POSSIBLE SOLUTIONS
PROBLEM POSSIBLE SOLUTION
No power supply Check that the plug has been inserted properly
into the socket.
Check the connection between DVD player and
No picture
No sound
Thediscisnotplayed
Does not react to signals
from the remote control
Picture interference
No reaction when buttons
are pressed
TV set.
Check that the TV set is working properly.
Check the connection between DVD player and
any other connected units.
Check that TV set and amplifier are working
properly and adjusted correctly.
Check that the disc has been inserted correctly.
Clean the disc.
Remove any objects blocking the signal
between remote control and DVD player.
Check that the remote control is aimed at the
front panel sensor.
Check batteries and replace as required.
Check the disc for dust and scratches.
Clean or replace the disc.
Turn off the device, wait for ten seconds and
turn it on again.
Power drop-out, power cuts, etc.
Turn off the device, wait for ten seconds and
turn it on again.
21
Page 23

DVD CHARACTERISTICS
The DVD player is your ticket to a home cinema. Every single technical detail in this technology is better than in
any other previous AV equipment. This brand new digital technology compresses the A/V effect from the cinema
down on a disc with a diameter of 12 cm, i.e. the size of a CD. Particularly by means of Dolby Digital and DTS, it
is possible to achieve excellent digital surround sound. The DVD player can also be used with the existing CDs,
CD-Rs and CD-RWs (however, it cannot be used with all CD-RW discs).
Comparison between DVDs and other discs:
Encode
method
Capacity
Playing Time
Disc diameter
Horizontal
resolution
Singleside
singlelayer
4.7G
133
minutes
DVD LD
Digital/MPEG
Double
-side
single
-layer
8.5G
242
minutes
More than 500 line
Singleside
doublelayer
9.4G
266
minutes
12cm/8cm 12cm/8cm
Doubleside
doublelayer
17G
484
minutes
Analog
Single-side
60 minutes
double-side
120 minutes
30cm/20cm
No more than
430 line
SVCD
Digital
650MB 650MB 650MB
45 minutes
12cm 12cm
No more than
350 line
VCD CD
Digital/
MPEG
74 minutes 74 minutes
No more than
250 line
Digital
I
Picture
proportion
Subtitle
Language
Sound quality
Multiple kinds
32 kinds
8 kinds
48KHz, 96KHz/
6, 20, 24bit
One kind
16 kinds
at most
4 kinds
at most
44.1KHz/
22
16bit
One kind
4 kinds
4 kinds
at most
44.1KHz/
16bit
One kind
2 kinds 2 kinds
44.1KHz/
16bit
44.1KHz/
16bit
Page 24

DVD, SPECIAL FEATURES
Parental control
This device allows parental control if the DVD has a
specific certification. This function allows you to
prevent your children from watching things which you
consider inappropriate for them. Refer to the DVD
certification and the accompanying information to find
out if it carries a certification.
Adjusting the size on the TV screen
It is possible to adjust the TV screen in different
ways (see the table).
Picture format
on Disc
4:3
Pan Scan
4:3
Support of many different languages
The DVD player allows you to choose among up to 8
different languages and 32 different subtitles for one
DVD.
Support of many different camera
angles
You can choose yourself, from which camera angle
you wish to watch the DVD.
TV Screen Size
16:9
Letter-box Wide Screen
16:9
Functions supported by DVDs
DVDs support many different functions and can be
used independent on type of DVD player and
manufacturer. Below is a list of the functions are
supported by this DVD player.
Regional code and signal system
Dolby digital surround sound
DTS output
Number of languages
Picture formats
Parental control
Camera angles
Closed Caption
Number of subtitle languages
23
Page 25

System and output
TECHNICAL DATA
VF Signal
system
Frequence
response
Audio S/N ratio
Video/Picture
Audio
Audio output
Video output
NTSC/PAL
CD: 4Hz-20KHz(EIAJ)
DVD: 4Hz-22KHz(48KHz)(Sample result) 4Hz-44KHZ(96KHz)(Sample result)
>92dB
MPEG1; MPEG2
MPEG1, MPEG2, PCM, DOLBY DIGITAL, DTS, ANALOG STEREO
Electric level output: 2.0Vp-p
Electric level output: 1Vp-p
General data
Power
Power
consumption
Dimensions
(HxWxD)
Weight
Operating
temperature
Operating
humidity
Note: We reserve the right to make changes without notice.
220V-240V~ 50Hz
25W
56 x 430 x 260mm
4.0 kg
oooo
5 C to 35 C (41 F to 95 F)
5% to 90%
24
Page 26

RIGHTS
This device includes copyright protected technology covered by various American patents and other
intellectual property rights owned by Macrovision Corporation and others. Use of this copyright protected
technology is only allowed after prior approval from Macrovision Corporation, and the device is only to be
used for the showing of films in private homes and other limited areas, unless otherwise approved by
Macrovision Corporation. Reverse construction or demounting is not allowed.
The consumer's attention is attracted to the fact that not all high-definition TV sets are fully compatible with
this device and this may cause picture interference.
In case of problems of the type 525 and 625 progressive scan, the consumer is recommended to switch to
"standard definition". If you have any questions regarding the compatibility of your TV set with this 525p
and 625p DVD player, please contact our customer service.
Made under licence from Dolby Laboratories. “Dolby” and the double D-symbol are trademarks of Dolby
Laboratories. Confidential, unpublished material.
Copyright 1992-1997 Dolby Laboratories. All rights reserved.
“DTS” and “DTS Digital Out” are trademarks of Digital Theater Systems, Inc.
25
Page 27

OWN NOTES
26
Page 28

Item No.: 40048
 Loading...