

Page 1
Quick Start Guide
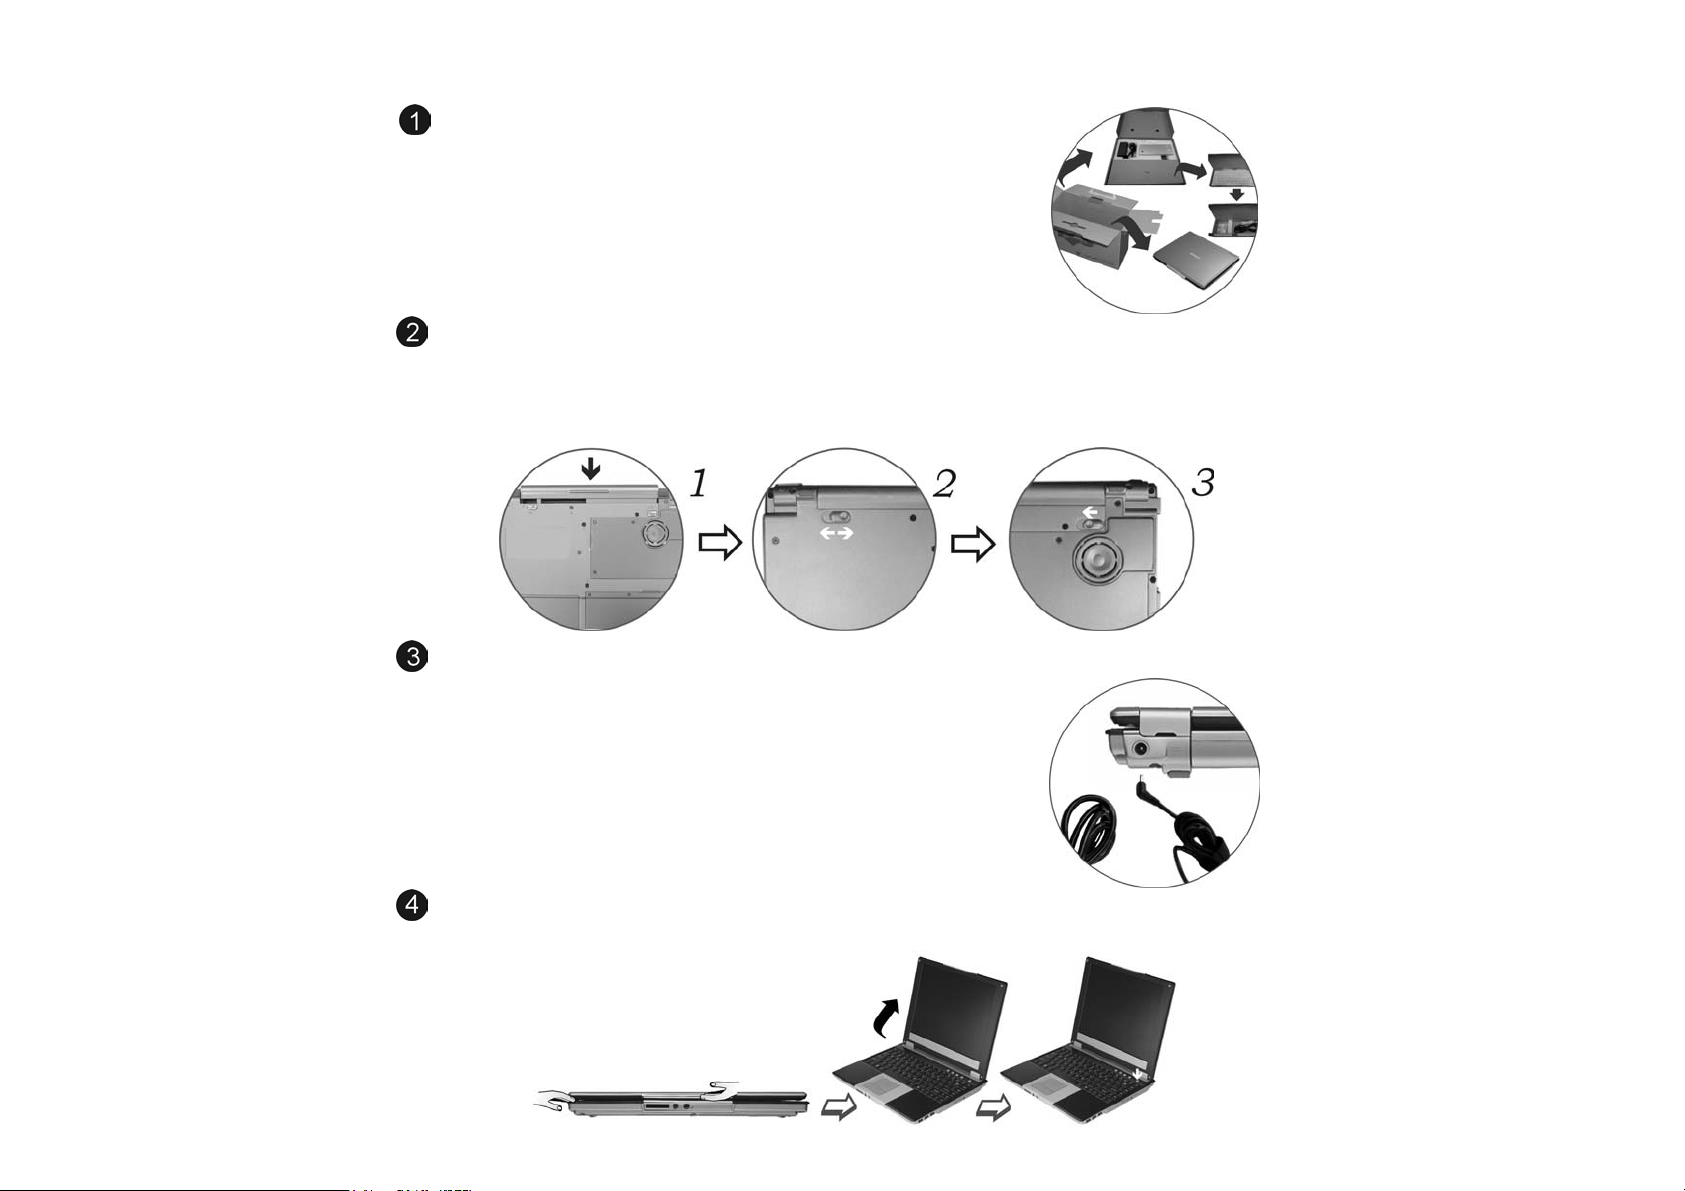
Packing List
The Notebook comes securely packaged in a sturdy cardboard shipping carton.
Upon receiving your Notebook, open the carton and carefully remove the
contents. If anything is missing or damaged, please contact your Notebook dealer
immediately.
Installing the Battery
Before starting your notebook for the first time, you should install your battery. Remove the battery from the accessories box and
start installing the battery. Angle the battery into the bay. Push the battery into its compartment until it clicks. You will hear a click
sound from the battery release latch indicating that the battery is correctly inserted. Slide the battery lock into inner direction to
completely lock and hold the battery firmly. Battery life will vary depending on your hardware specifications and software
configuration.
Connecting the power supply
The installation of the adaptor is very easy. Follow the instructions shown on the
illustration; connect the AC adapter to the DC-IN connector on the rear side of
the computer.
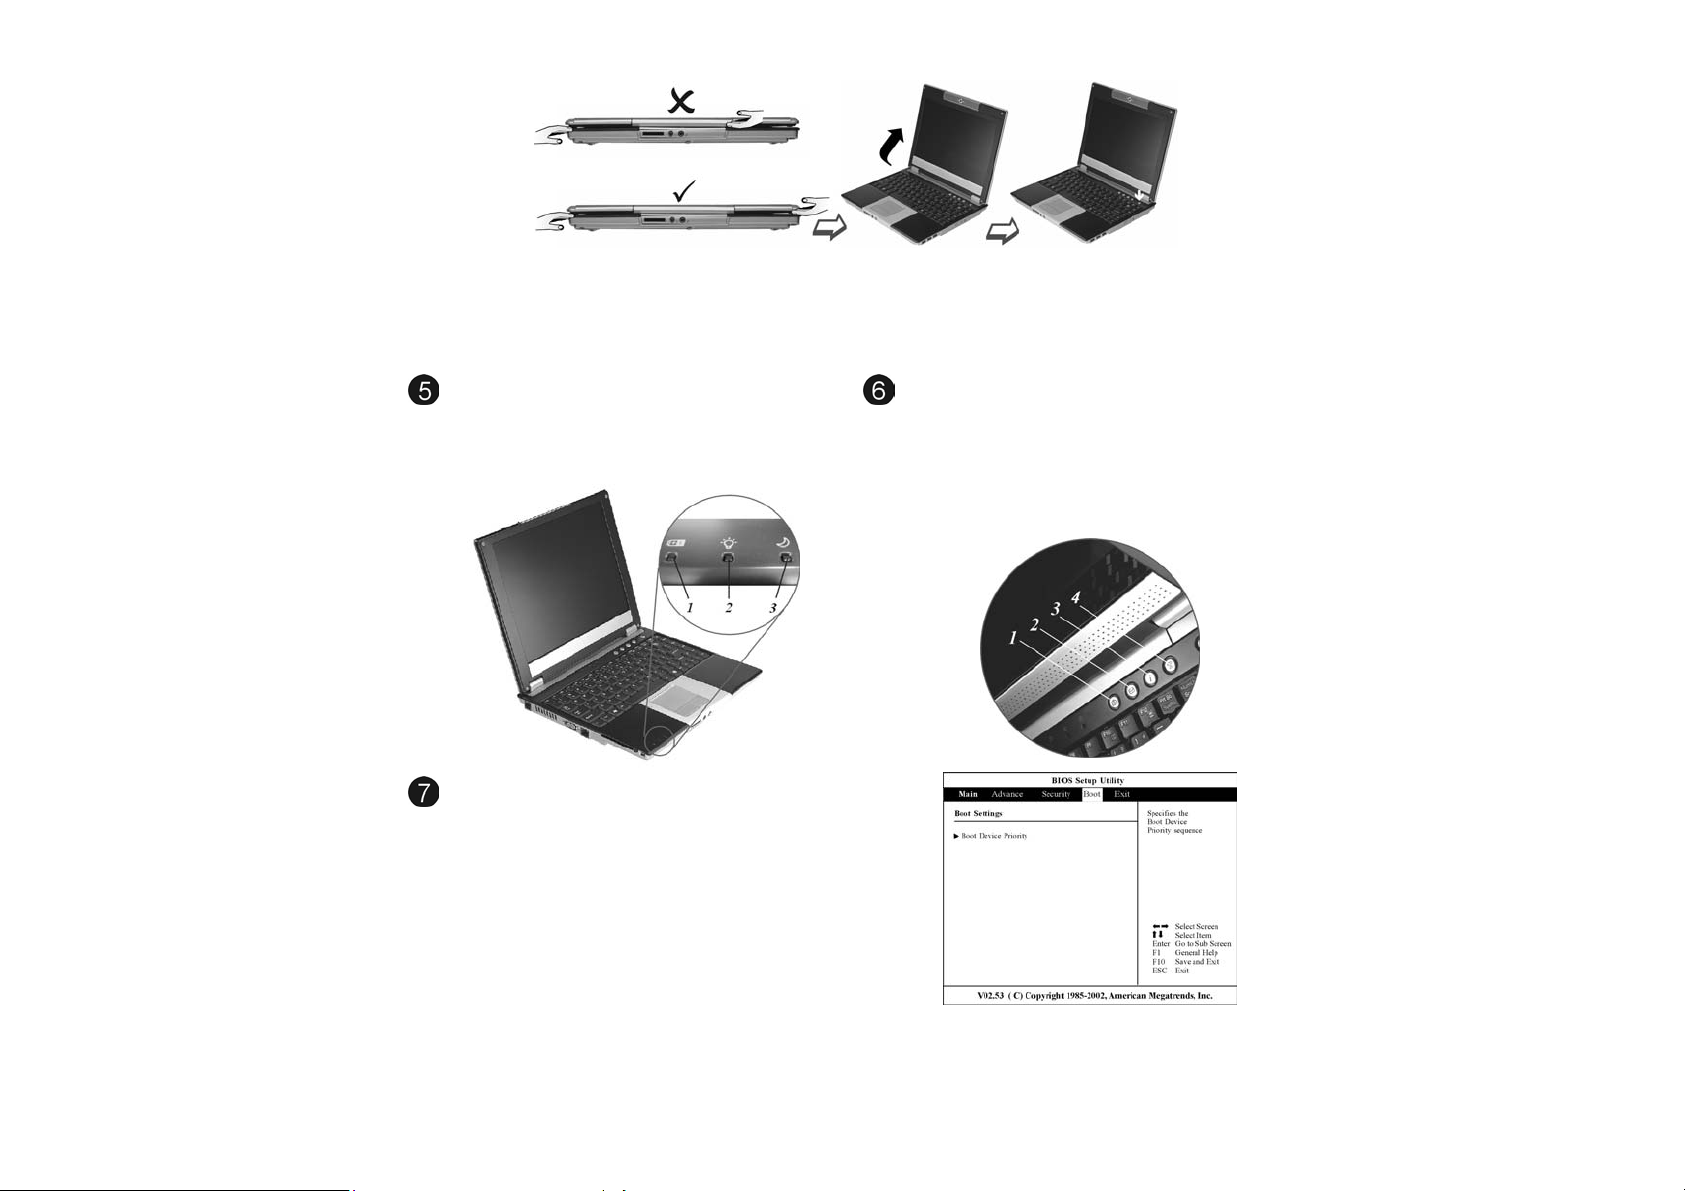
Opening the LCD Panel
SSttaannddaarrdd VVeerrssiioonn
Page 2
OOppttiioonnaall VVeerrssiioonn ((WWiitthh BBuuiilltt--iinn CCaammeerraa))
Please don’t raise the LCD panel from the middle part since this is where the camera is located. The camera is a
sensitive device that a strong pull might cause damage to it.
When closing the computer, raise down the LCD panel carefully with both hands assisting the panel until it touches
down. Try not to slam the display since there is a magnetic sensor on the lower right hand of the LCD panel (inside the
speaker) that will detect the “Lid Switch IC” and shut down the system automatically when it is aligned at 45 degree
angle.
LED Indicators
Locate the three LED at the left of the notebook computer.
st
indicator shows the battery is in charging status. The
The 1
2nd indicator shows when the system is power on while the 3
rd
indicator shows when the system enter the suspend mode.
Installing the Operating System
Before installing the OS, you need to set the CD/DVD as the
boot device. Follow the instructions to set CD-ROM as the
boot unit. Turn on the computer, when the text or logo
appears, press [Del] or the [Delete] key until the system
enters the BIOS Setup screen, you may now make the
necessary changes.
After entering the BIOS Setup screen, use the [] or []
keys on the keyboard to select the Boot Menu, press the
“Enter” key and select the option for "1
press “Enter” to set the option as CD/DVD/Combo.
st
Boot Device", then
Using Shortcut Buttons
If you have installed the Windows operation system from
Microsoft, you can use the system Shortcut Buttons to:
Launch the camera application by pressing the Camera
Button (1)(Optional). Launch the default mail program by
pressing the E-mail Button (2). Launch the default browser by
pressing the Internet Button (3). Launch the wireless
application by pressing the Wireless Button (4).
Page 3

Installing the Drivers
To make installation of the drivers easier, we offer an auto
installation method for the Microsoft Windows XP system. To
install the driver for the system, the attached CD disk contains
the driver installation, users manual.
Follow the step-by-step procedures to execute the "AutoRun"
application by selecting the topic of "Setup". The drivers will
be installed in the system automatically. During the
installation, it is very normal that the system may restart.
Connecting External Devices
To expand your computing capabilities, you can add a variety of external devices to your computer. You may, for example, want
to add a mouse, modem or a printer. The computer is equipped with several interface ports, including an enhanced parallel
(printer) port, an S-Video port and USB ports. These are provided as a means of connecting peripheral devices to the computer.
Upgrading your Memory
Turn off the computer and disconnect the AC adapter and all peripherals. Turn the notebook over so that the rear ports
are facing you and locate the memory module compartment.
Remove the screws that secure the RAM module compartment cover and set it aside in a safe place.
If you need to install a higher capacity module, gently push the edge clips on both sides to release the module. Angle
the card slightly upward and gently slide it from its edge connector slot. Store the card in the anti-static bag that contains
your new module(s).
To install the new memory card, hold the card with its gold edge connector toward the edge connector slot of the
compartment. To help you orient the cards, the edge connector has been made with two unequal-length sections. You
will only be able to insert the card in one direction.
Insert the edge connector into the slot. The gold edge connector of the card should not be visible when the card is fully
inserted.
Press the card downward where you should hear an audible click as the latches of the connector secure the card in
place.
Once the module is properly seated, you can replace the cover on this compartment. Replace and tighten the screw.
Page 4

How to Install WinDVD
This computer comes with legal DVD player software, WinDVD. It is designed especially for this computer and cannot be used
on other machines. Do not make copies, or install it in other machines. Because it is free of charge, we do not provide any after
sales service for WinDVD.
IInnssttaallllaattiioonn
Before using WinDVD to play movies, please insert the enclosed driver’s CD-ROM into the CD-ROM. The system will start the
installation program automatically. Click and select the “Application” tab at the lower end of the display. Select the “InterVideo
WinCinema” and click on the “Setup” to start with the installation.
HHooww ttoo uussee WWiinnDDVVDD
After installing WinDVD, the system will restart. On the Windows desktop, you will see the WinDVD icon. Just double
click on this icon and WinDVD will start. Now you can enjoy any DVD movie played by WinDVD.
Setting up the Wireless Connection
To start with the setup, be sure that the “Wireless” button on top of the keyboard is lighted in blue color. Press it once to get the
system connected when the button is lighted in blue color; the system is not connected when the button is not lighted. Please
refer to an experience technician to solve this problem.
1. From “Start”, click on the " My Network Places " icon and click the "View Network Connection".
1.
Select the “Wireless Network Connection” item from the “Network Connections” display window.
22..
From the “Wireless Network Connection Status” display window, click on the “Properties” button.
33..
Select the “Wireless Networks” tab and enable the “Use Windows to configure my wireless network Settings”. Click
44..
“OK”.
A small icon will display on your lower right end of the Windows display.
55..
Click on the icon and select the setting for the available network shown on the list and click on the “Connect” button.
66..
For more detail on the Network key, please refer to your local ISP provider and follow the procedures describe in the
“ISP Installation Guide” to proceed with the installation.
Page 5

Executing the Video Conference (Optional)
Press on the “Camera” button atop the system
keyboard to run the “Capture” application of “BisonCap”.
You can also click on the “BisonCap” icon on the Windows
screen display to run the capture application.
After the “BisonCap” window is displayed on your screen, you
can now start executing the video conferencing application.
Use the File/Devices/Options/Capture Menu Commands to
allow you to capture images and configure it either for
business presentation or educational resources.
TToo CCaappttuurree SSttiillll IImmaaggee
Press on the “Camera” button to capture the image shown on
your “BisonCap” window and the captured window will be
displayed on top of the original window.
From the “File” Menu Commands, click on the “Save As”
button/command to save the captured image.
You will have to press the button for 0.5 second to launch the
application. The first time you press the button will launch the
application while the second time is to snap. There are only 20
pictures for you to decide whether to save or cancel the
captured picture.
TToo CCaappttuurree AAVVII IImmaaggeess
From the “Capture” Menu Commands, click on the “Start Capture” button/command to start and “Stop Capture” function
to stop capturing the image file as shown on the illustration.
From the “File” Menu Commands, click on the “Set Capture File” button/command to set the save directory and video file
name. The file is saved in AVI type and can be played in “Media Player” or any video player.
 Loading...