

Page 1

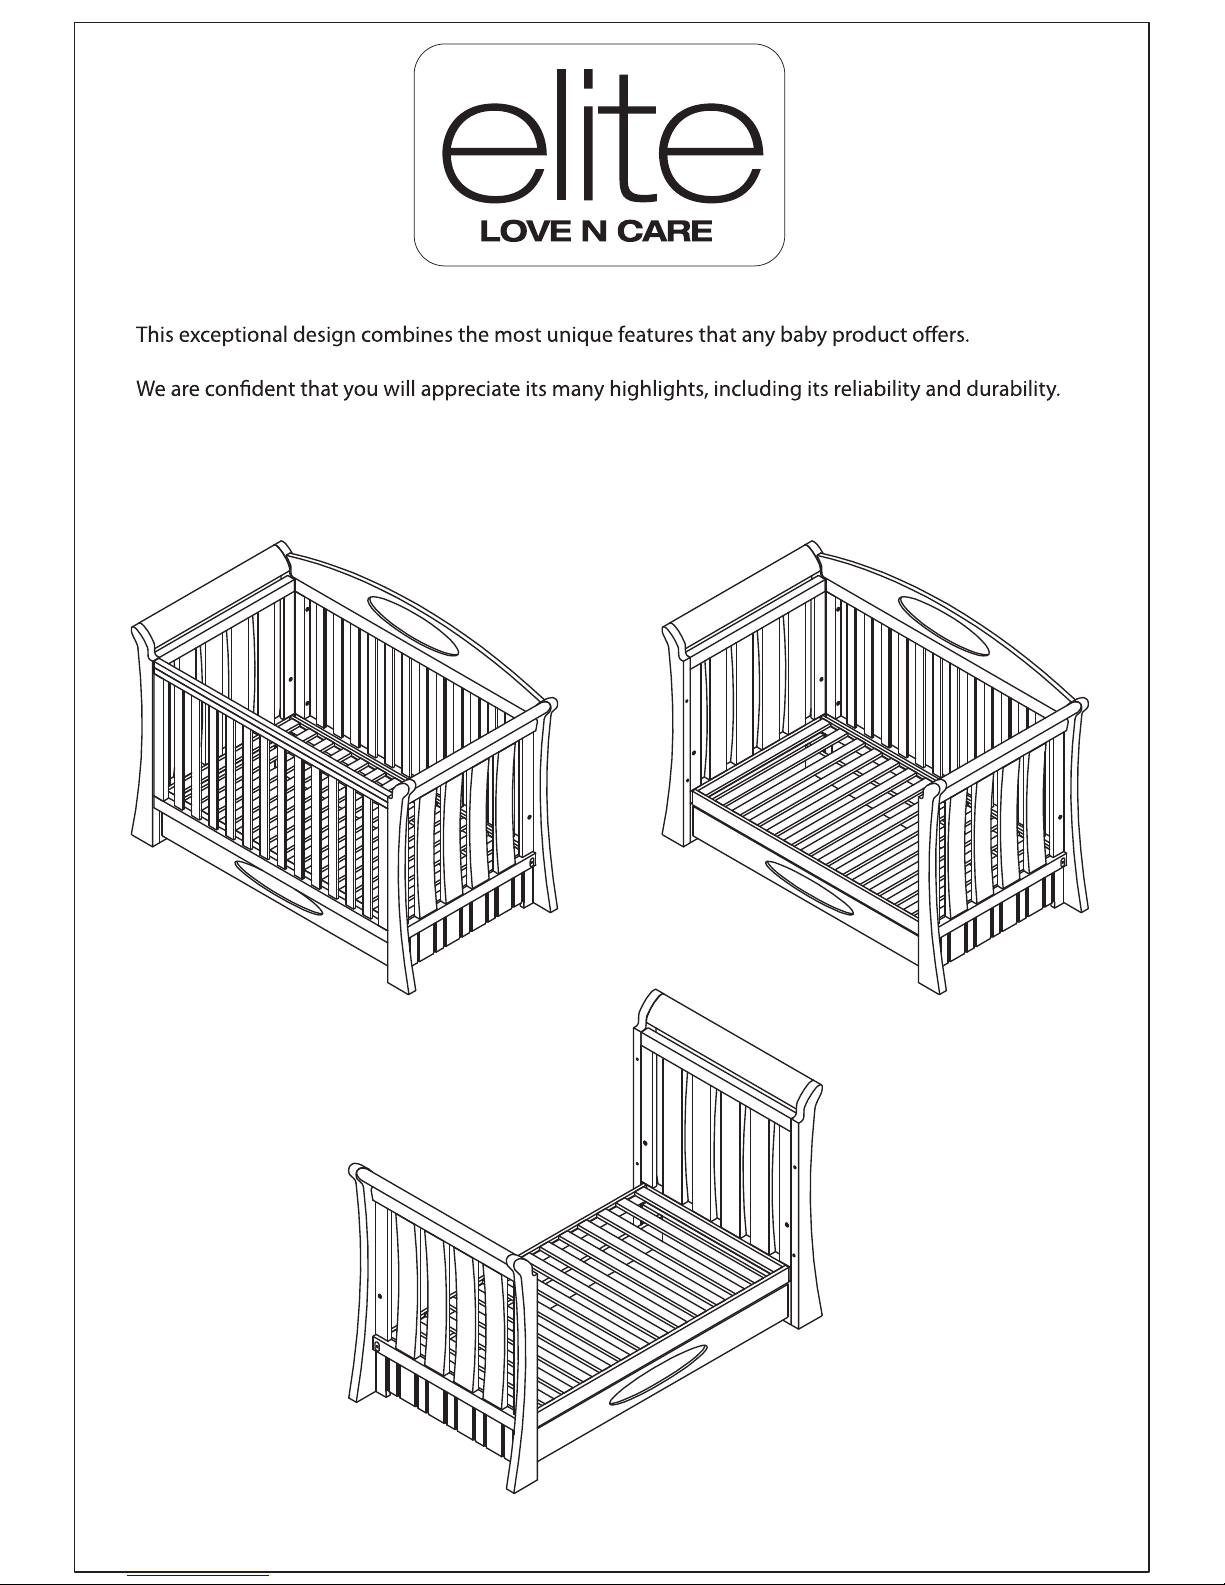
REGAL COT
HK 30
PLEASE KEEP THESE INSTRUCTIONS FOR FUTURE REFERENCE
Page 2
Congratulations on your new quality Love N Care product from our exclusive range of baby products.
Your new product has been manufactured to comply with the Highest Quality Standards and comes
with a 12-month warranty.
As you will soon learn there are many more great features about your new Love N Care product.
Page 3

Safety guidelines and instructions must always be followed before making use of this product,
please retain these instructions for future reference.
This product complies with product standard:
AS/NZS 2172:2010 Cots for household use - Safety Requirements
WARNING
This cot has been designed for a child up to 25kg
Do not leave your child unattended when the dropside is in the lower position
RECOMMENDED MATTRESS SIZE: This cot has been manufactured for use with a mattress which measure
760mm wide by 1310mm long and 130mm in thickness.
sides and ends of the cot will not exceed 40mm. This is to minimize the risk of a childs limb becoming
is greater than 500mm with the mattress base in the lower position to minimise the risk of a child climbing
or falling out of the cot.
WARNING TO PREVENT FALLS, THE MATTRESS BASE OF THIS COT SHOULD BE ADJUSTED TO THE
LOWEST POSITION BEFORE THE CHILD CAN SIT UP.
The manufacturers assembly instructions must be followed in detail to ensure all the safety features of the
cot are not compromised.
Please ensure that the cot is placed at a reasonable distance from curtains, blinds, heaters and power points.
Please keep medication, string, elastic,small toys or small items, such as money out of reach from any
position in the cot.
WARNING: TO PREVENT FALLS, THE MAXIMUM MATTRESS THICKNESS SHOULD NOT EXCEED 130mm.
Page 4

Parts List
A Left End 1pc
B Right End 1pc
C Back Top Cap 1pc
D Fixed Side 1pc
E Mattress Base 1pc
F Front Top Cap 1pc
G Drop Side 1pc
H Support Rail 2pcs
I Drawer Front 1pc
J Drawer Side Left 1pc
K Drawer Side Right 1pc
L Drawer Back 1pc
M Drawer Bottom 1pc
N Drawer Bottom Rail 1pc
Page 5
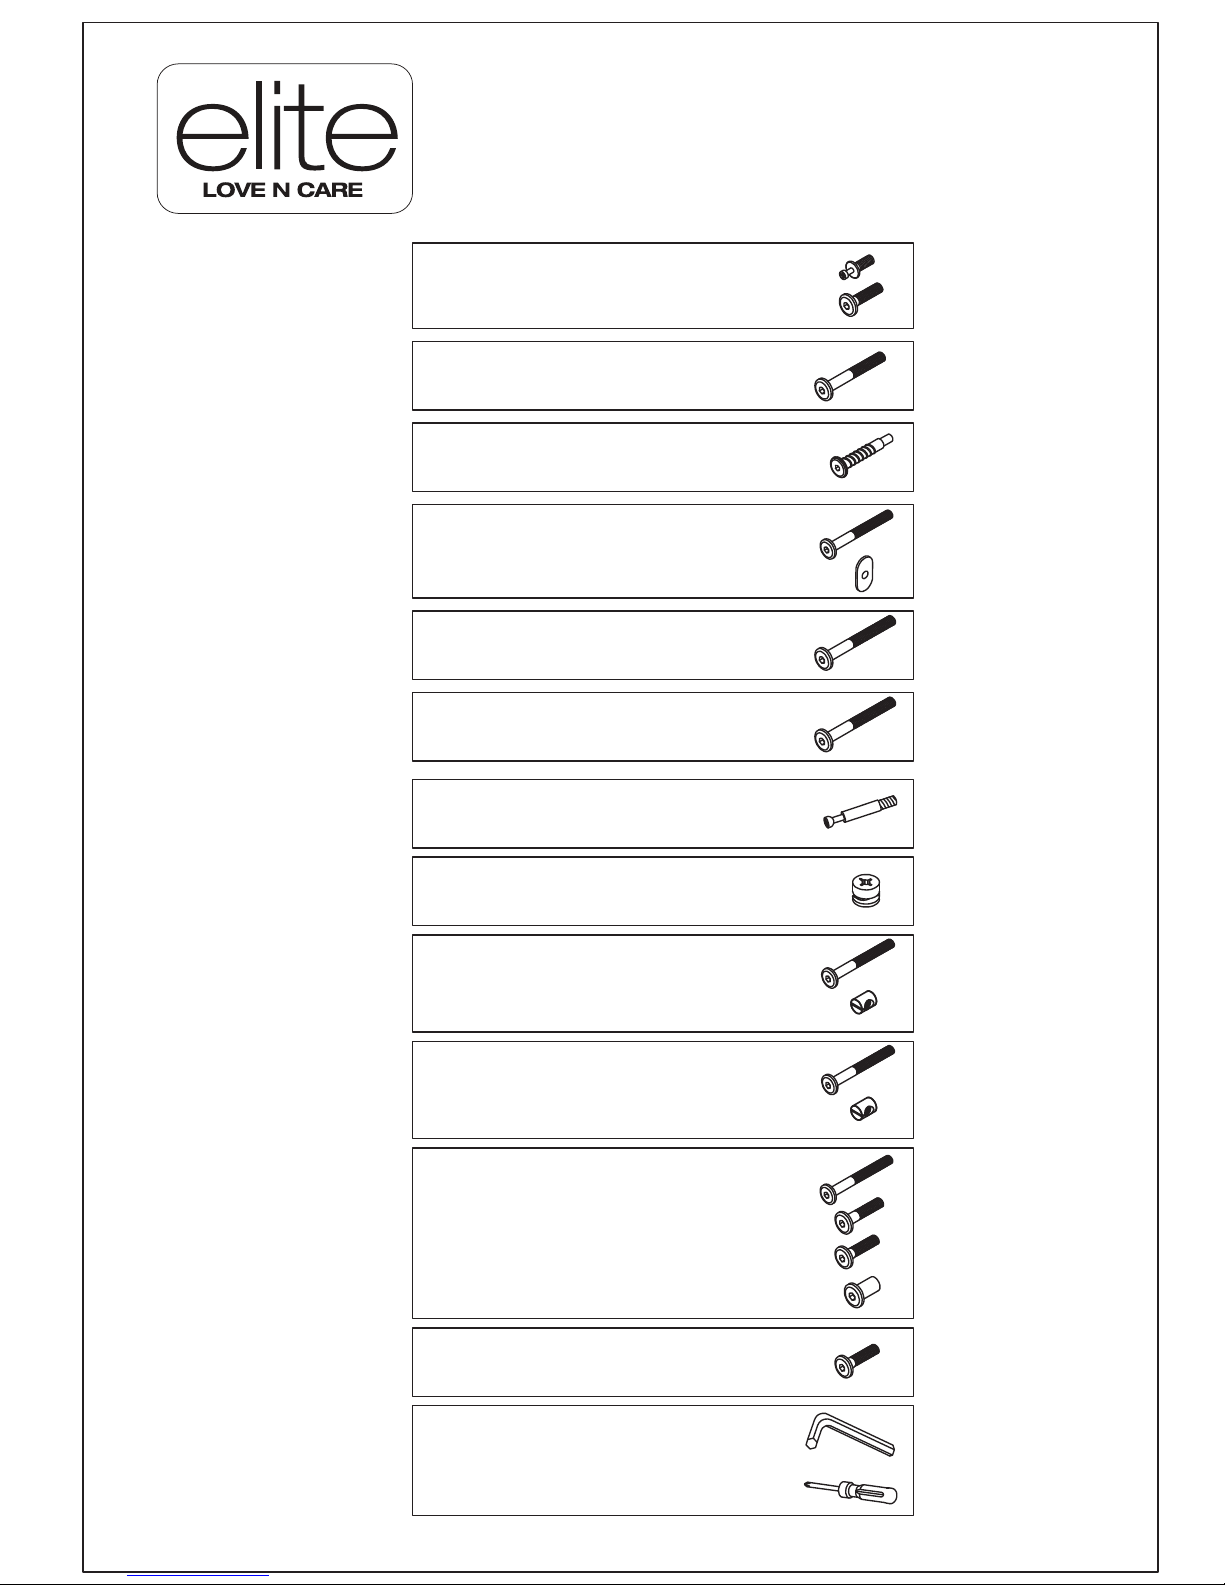
Parts List
(1) Nail x4
(2) M6x25mm x8
(3) M6x50mm x4
(4) Bolt x2
(3) M6x50mm x4
(5) Iron Plate x4
(6) M6x70mm x4
(6) M6x70mm x4
(7) 6x44mm Metal Dowel Screw x2
(8) 15x12mm Cam Lock x2
(3) M6x50mm x2
(9) Nut x2
(3) M6x50mm x2
(9) Nut x2
(3) M6x50mm x4
(2) M6x25mm x4
(10) M6x12mm x4
(11) M6 x4
(10) M6x12mm x8
(12) Allen Key x1
(13) Screwdriver x1
Step 1
Step 2
Step 3 +4
Step 5
Step 6
Step 7
Step 8
Step 9
Step 10
Step 12
Mattress
Sofa
Tools
Page 6

A
B
H H
1
13
2
12
F
G
3
12
FIG 1.
FIG 2.
FIG 3.
Step 1 Setting up the ends
1. Screw in the Nails (1) on the ends as shown in fig 1.
2. Attach the 2 support rails (H) to the left end (A) and
right end (B) using 8pcs bolts (4) with allen key (13)
Step 2 Attaching the teething rail to the dropside
Attach the front top cap (F) to dropside (G) using 4pcs bolts (6) with allen key
(12) as shown in fig 3.
Page 7

A
G
B
1
1
A
B
G
4
4
4
12
FIG 4.
FIG 5.
FIG 6.
Step 3 Attaching the dropside
To attach the dropside (G)
place it on the assembled nails,
start with the top assembled nail
as shown in fig 4 and then the lower nail as shown in
fig 5. Repeat for each end of the dropside.
Step 4 Attaching the dropside to the ends
Screw in the bolts (4) into the dropside and tighten with the allen key (12)
as shown in fig 6.
Page 8

A
E
B
5
3
12
FIG 7.
6
12
C
D
Step 5 Attaching the base to the ends and dropside
Attach the mattress base (E) to the left end (A) and right end (B), using 4pc
iron plates (5) and 4pcs bolts (3) with allen key (12) as shown in fig 7.
Step 6 Assembling the fixed side
Attach the back top cap (C) to
the fixed side (D) using 4pcs bolts
(5) with allen key (12) as shown in
fig 8.
FIG 8.
Page 9

A
C
D
G
B
6
12
FIG 9.
I
L
13
7
FIG 10.
Step 7 Attaching the fixed side to the cot
Screw in the bolts (6) into the fixedside (D) and tighten with the allen key (12)
as shown in fig 9.
Step 8 Assembling the drawer
attach 2pcs metal dowel screw (7) to drawer front (I) and drawer back (L)
using screwdriver (13) as shown in fig 10.
Page 10

I
N
L
8
FIG 11.
I
N
L
K
3
12
9
FIG 12.
Step 9 Attaching the side on the drawer
Attach the drawer bottom rail (N) to drawer front (I) and drawer back (L) with
2pcs cam locks (8) and tighten with screwdriver (13) as shown in fig 11.
Step 10 Attaching ends on the drawer
Attach the drawer side right (k) using 2pcs (3) bolt with 2pcs nut (9) inserted into
the sides (I) and (L),Then tighten with allen key (12) as shown in fig 12.
Page 11

I
N
K
L
M
I
K
L
J
3
12
9
FIG 13.
Step 11 Inserting the drawer base
Insert the drawer bottom (M) to drawer front (I) and drawer back (L)
Step 12 Attaching the ends to the drawers
Attach the drawer side left (J) to drawer front (I) and
drawer back (L) using 2 bolts (3) and nuts (9) and tighten
with allen key (13)
Page 12

Attach the drawer on the runners located under the base.
Step 13 Attaching the drawer to the assembled cot
Page 13

Using the dropside
Page 14

12
11
10
3
12
12
2
5
11
FIG 14.
FIG 15.
FIG 16.
Adjusting the mattress base
Before raising the mattress base to the highest position,
take out the bolts and nuts (11 and 10) as shown in fig 14.
Attach 4pc bolts (3) to the left and right sides
to fix the mattress base to the cot. Tighten with
allen key as shown in fig 15.
Attach 4 pcs bolt and cap (2 and 11) and iron
plates (5) to fill out the holes (fig 16)
Warning: Please ensure the unused mattress
base mounting holes on the end panels are
blanked off with the supplied blanking screws
and tightened to prevent finger entrapment
and swallowing hazards.
Page 15

1
13
10
12
10
12
FIG 17.
FIG 18.
FIG 19.
Converting cot to Sofa
You will need to first loosen the base
screw (10) with allen key (12) fig 18.
Then you will need to remove the
(4) bolt from the dropside and lift
the dropside of the nails.
The you should uncrew the nail (fig 17)
then tighten the base with the (10)
bolts using allen key (12)
Convert Sofa to Junior Bed
1. Remove the fixed side
2. attach the (10) screws into the hole as shown in fig 19.
Page 16

Page 17

Page 18

Head Office:
Love N Care Pty Ltd.
297-299 Canterbury Rd, Revesby
NSW 2212 Australia
Contact No: 02 9774 4655
Fax: 02 9774 4633
Email: info@lovencare.com.au
Website: www.lovencare.com.au
Contact Us
 Loading...