

Page 1
WORLDBUILDER
Instruction Manual
Before You Begin... If you haven't already done so, please review the README.txt file
included with this version of Worldbuilder for important disclosures and information, as
well as the basics on getting started with the software.
© 2007 Electronic Arts Inc. Electronic Arts, EA, the EA logo, Command & Conquer, and Command & Conquer 3
Tiberium Wars are trademarks or registered trademarks of Electronic Arts Inc. in the U.S. and/or other
countries. All rights reserved. All other trademarks are the property of their respective owners.
CONTENTS
INTRODUCTION .................................................................................................. 3
KEY FEATURES .................................................................................................4
NEW AND IMPROVED FEATURES........................................................................5
GETTING STARTED ...........................................................................................5
BASIC TOOL CONVENTIONS.............................................................................6
NOTE TO BEGINNING MAP DESIGNERS..............................................................6
NOTE TO ADVANCED MAP DESIGNERS.............................................................6
GETTING STARTED............................................................................................... 8
ELEMENTS OF A MAP.......................................................................................8
THE DESKTOP................................................................................................11
Page 1
Page 2

ORKING WITH MAP FILES.............................................................................13
W
COMMAND REFERENCE................................................................................... 16
MENUS.........................................................................................................16
TOOLBAR .....................................................................................................29
STATUS BAR ..................................................................................................35
LAYERS LIST...................................................................................................36
OBJECT PROPERTIES......................................................................................36
LAYING OUT A MAP......................................................................................... 40
BASIC DESIGN DECISIONS..............................................................................40
MAP DESIGN ISSUES......................................................................................43
GAME BALANCE: THE FUN FACTOR................................................................43
LAYOUT DOS AND DON’TS ............................................................................45
CREATING A MULTIPLAYER MAP...................................................................... 48
A FEW EXTRA STEPS FOR SKIRMISH MAPS........................................................ 54
BUILDING SINGLE-PLAYER MAPS..................................................................... 55
TUTORIAL: HOW TO........................................................................................... 56
PLAYERS, TEAMS, AND THE BUILD LIST ............................................................. 66
PLAYER LIST ..................................................................................................66
BUILDING TEAMS...........................................................................................67
SCRIPTS............................................................................................................. 72
CREATING AND EDITING SCRIPTS ....................................................................72
ORGANIZING YOUR SCRIPTS ..........................................................................75
SCRIPTING VARIABLES....................................................................................76
SCRIPTING TUTORIAL......................................................................................80
DEBUGGING..................................................................................................... 89
DEBUGGING OBJECTS...................................................................................89
FIXING TEAMS...............................................................................................89
REPAIRING TEXTURE ERRORS...........................................................................90
SCRIPT DEBUGGER ........................................................................................91
OPTIMIZING YOUR MAP................................................................................... 93
ELEMENTS TO OPTIMIZE..................................................................................93
IMPROVING PERFORMANCE IN WORLDBUILDER ...............................................95
GLOSSARY........................................................................................................ 97
Page 2
Page 3

INTRODUCTION
Welcome to Command & Conquer 3 Tiberium Wars Worldbuilder. This development
toolset is used by Electronic Arts designers to create single-player mission s and
multiplayer maps for Command & Conquer 3 Tiberium Wars, and now it’s available to
you. The fully-featured 3D environment gives you complete visual controls and a wide
array of options to get the details of your maps exactly as you want them. Building game
maps is easier than ever—the Worldbuilder’s tool suite lets you rapidly prototype your
creations and then jump directly into the game to play them.
N
OTE: The Worldbuilder tool is provided on an "as-is" basis. Electronic Arts (EA) does not
provide Technical or Customer Support for the Worldbuilder tool. You may only use the
Worldbuilder tool pursuant to the terms and conditions of the EA Tools & Materials End
User License (“License”).
EA TOOLS & MATERIALS END USER LICENSE
Electronic Arts Inc, and its subsidiaries, affiliates and licensors (collectively, "EA") grants
you a non-transferable non-exclusive license to download and/or install and use one copy
of the software tool (“Tool”) and/or materials (“Materials”) (collectively the “Tools &
Materials”) solely for your personal noncommercial use in connection with EA’s products,
in accordance with the terms below.
EA owns all of the rights, title and interest in the Tools & Materials. You may not alter any
of EA’s trademarks or logos, or alter or remove any of EA’s trademark or copyright
notices included in or with the Tools & Materials or EA’s products. Your right to use Tools
& Materials is limited to the license grant above, and you may not otherwise copy,
display, distribute, perform, publish, modify, create works from, or use any of the Tools &
Materials. Without limiting the preceding sentence, you may not modify, reverse
engineer, disassemble, license, transfer, distribute, create works from, or sell the Tool, or
use the Tools & Materials to further any commercial purpose. Without limiting the
foregoing, you may not use the Tools & Materials to promote another product or
business, or on any site that operates or promotes a server emulator.
You may include materials created with the Tools & Materials on your personal
noncommercial website for the noncommercial benefit of the fan community for EA’s
products and provided that if you do so, you must also post the following notice on your
site on the same web page(s) where those materials are located:
“This site is not endorsed by or affiliated with Electronic Arts, or its licensors. Trademarks
are the property of their respective owners. Game content and materials copyright
Electronic Arts Inc. and its licensors. All rights reserved.”
You will not represent that your site is endorsed or approved by or affiliated with EA or
our licensors or that any other content on your site is endorsed or approved by or
affiliated with EA or our licensors.
THESE TOOLS & MATERIALS ARE PROVIDED “AS IS” WITHOUT ANY WARRANTIES
OF ANY KIND, EXPRESS OR IMPLIED. EA SPECIFICALLY DISCLAIMS ANY
WARRANTIES OF FITNESS FOR A PARTICULAR PURPOSE, MERCHANTABILITY
AND NONINFRINGEMENT.
ANY USE YOU CHOOSE TO MAKE OF THESE TOOLS & MATERIALS IS
UNDERTAKEN BY YOU ENTIRELY AT YOUR OWN RISK. EA DOES NOT WARRANT
Page 3
Page 4

THAT THESE TOOLS & MATERIALS WILL NOT CAUSE DAMAGE TO YOUR
COMPUTER SYSTEM, NETWORK, SOFTWARE OR OTHER TECHNOLOGY.
EA WILL NOT PROVIDE SUPPORT FOR THESE TOOLS & MATERIALS. PLEASE DO
NOT CALL OR SEND EMAIL TO EA CUSTOMER SUPPORT REGARDING THESE
TOOLS & MATERIALS, AS EA WILL NOT BE ABLE TO ANSWER THESE INQUIRIES.
IN NO EVENT SHALL EA BE LIABLE FOR ANY DIRECT, CONSEQUENTIAL,
INCIDENTAL, SPECIAL, PUNITIVE OR OTHER DAMAGES WHATSOEVER, ARISING
OUT OF OR RELATED TO THIS LICENSE EVEN IF EA HAS BEEN ADVISED OF THE
POSSIBILITY OF SUCH DAMAGES.
EA RESERVES THE RIGHT TO DISCONTINUE THE AVAILABILITY OF THESE
TOOLS & MATERIALS, OR MODIFY THEM, AT ANY TIME, WITHOUT OBLIGATION
TO ANYONE.
At EA’s request, you agree to defend, indemnify and hold harmless EA from all liabilities,
claims and expenses, including attorneys’ fees, arising from any breach of this License
by you and/or your use or misuse of the Tools & Materials.
EA may make the Tools & Materials available at its site(s) located in the United States
and/or Canada and/or the European Union. You are solely responsible for knowing and
complying with all federal, state, and local laws that may apply to your use of Tools &
Materials in your own locale. By downloading any Tools & Materials, you warrant that you
are not located in any country, or exporting the Tools & Materials to any person or place,
to which the United States and/or Canada and/or European Union or its member
countries has embargoed goods.
EA may revoke or terminate this License at any time, for any reason or no reason, in its
sole discretion. Upon termination, you must destroy or return to EA all Tools & Materials.
This License is governed by United States Copyright and California law (without regard to
conflicts of law), and is the entire agreement between EA and you regarding the Tools &
Materials.
By using the Tools & Materials you accept the terms of this License. If you do not
wish to accept this License, do not use the Tools & Materials. You may only use
the Tools & Materials pursuant to the terms and conditions of this License.
KEY FEATURES
Step-By-Step Process for Building Multiplayer Maps. Follow the steps listed in
this document to get up to speed building multiplayer maps for up to eight players.
With a few extra steps, you can turn your finished multiplayer map into a Skirmish
map.
Designed Like an Art Tool. The menus, tools, and their uses are derived from
desktop art tools. If you’re familiar with traditional art software programs,
Worldbuilder will feel very comfortable.
What You See Is What You Get. Interact with your maps through the same engine
as the game. Visual toggles and camera options in Worldbuilder allow you to
position the camera anywhere over the map and to view some or all of its
components at any time.
Many Environmental Settings. Use textures and settings to place your map in a
wide range of geographic locations with varying simulated weather con ditions at
any time of day.
Page 4
Page 5

Small Output. Created maps are small enough to e-mail to your friends who also
play Command & Conquer 3 Tiberium Wars.
NEW AND IMPROVED FEATURES
If you're familiar with previous versions of Worldbuilder, the most obvious difference in
this version will be having access to completely new assets from Command & Conquer 3
Tiberium Wars. However, the following differences may also be of interest:
Larger Maximum Map Size. Previous versions of Worldbuilder supported maps up
to 500x500. Maximum size has since increased by 50 percent to 750x750.
Single-player Scripting Changes. Fully-featured copy-paste between scripts; new
command for locking/unlocking player powers; attack priority system has been
removed; new skirmish AI behavior scripting added.
NOTE: While this release of Worldbuilder allows you to experiment with singleplayer scripting and design, user-created single-player maps (as opposed to
skirmish / multiplayer maps) are not compatible with Command & Conquer 3
Tiberium Wars as of this writing. A separately available Mod SDK will allow users
to create and play single-player maps.
GETTING STARTED
Prior to starting Worldbuilder, set your display resolution to 800 x 600 or higher in the
Display control panel. For information on how to set your display, see your Windows®
Help file.
To get up and running in Worldbuilder:
1. To create a new map, select NEW from the File menu. As you read through this
document you can test out what you learn inside Worldbuilder.
2. To get familiar with the components of a Command & Conquer 3 Tiberium Wars
map, see the Elements of a Map section in this document.
3. For explanations of the different elements of the Worldbuilder desktop, see the
Desktop section in this document.
4. For explanations about the individual menu items and toolbar controls, see the
Command Reference section in this document.
5. Follow the step-by-step instructions to build your first multiplayer map.
6. After you feel comfortable building multiplayer maps, you may want to try to create
single-player maps. Since behaviors for CPU-controlled armies must be scripted,
single-player maps are more difficult to create.
Page 5
Page 6

BASIC TOOL CONVENTIONS
Each square of the grid measures approximately 10 in-game feet on a side.
To toggle the display of the map grid, select Grid Settings from the View menu.
Then check the box “Show Grid.”
Be sure that the number in the Z box is greater than or equal to the base terrain
height of your map to be able to see the grid.
The most commonly used tools are placed in the toolbar above the Work window.
There are many more editing, viewing, and global tools in the menu system.
When you select a command or object, a window appears to the right of the Work
window. Change the parameters in this window to alter the properties of the
selected item or items.
To select an object on the map, left-click it. To rotate that object, click and drag the
pointer at the end of the object’s icon.
To dolly the camera, right-click and drag the mouse in the direction you want to
move the camera.
If possible, use a mouse with a mouse wheel. Press and hold the wheel to pivot the
camera in position. Scroll the wheel forward/backward to zoom in/out on the
current position. Click the wheel to reset the camera to the default angle and zoom.
NOTE TO BEGINNING MAP DESIGNERS
After installing Worldbuilder and reading through this Introduction, beginning map
designers should read the Getting Started chapter to learn the basic eleme nts of the
application. Some fundamental map designing concepts are presented in the Laying Out
a Map chapter.
Start by building a very simple multiplayer map. If you have questions during the process,
you can refer to the Tutorial: How To section, which describes in simple steps how to
build individual terrain, texture, and object features.
Skirmish maps are made by adding a few more things to a multiplayer map. If you
design a good multiplayer map, you can produce a good Skirmish map ea sily.
When you complete your map, be sure to test it in the game.
NOTE TO ADVANCED MAP DESIGNERS
Worldbuilder is a graphical tool based on industry-standard graphics applications. If you
are familiar with common art packages, the tools of Worldbuilder should be fairly intuitive.
As you learn, you may want to review the Command Reference section, which outlines
every toolbar tool and menu item in some detail.
Page 6
Page 7

It is highly recommended that all designers become familiar with the Creating a
Multiplayer Map and A Few Extra Steps for Skirmish Maps sections. These
sections present a general, step-by-step approach to developing m aps. When
you’re ready to build the more complicated maps for single-player games, see the
Building Single-Player Maps section.
Additionally, the Tutorial: How To section provides simple instructions for creating
rudimentary map features.
For definitions of terminology used in Worldbuilder, see the Glossary at the end of
this document.
Page 7
Page 8

GETTING STARTED
Because the Worldbuilder tools are easy to use, you can begin building usable
multiplayer maps immediately. This chapter discusses how to develop multiplayer and
single-player maps in Worldbuilder. However, since single-player maps require behavior
scripting of CPU-controlled opposition, you should begin with multiplayer maps.
At the conclusion of this chapter, you should have enough information to begin
developing your own map and have sufficient references to other parts of this
documentation to explore topics in depth.
Prior to starting Worldbuilder, you should set your display to 800 x 600 or higher in
the Display control panel. For information on how to set your display, see your
Windows Help file.
¾ To start Worldbuilder, double-click the Worldbuilder icon or use the Windows Start
menu. Select NEW from the File menu to begin building a new map.
NOTE: Worldbuilder requires significant system resources to update the map and your
computer screen. If it seems like your computer is updating too slowly, adjust the
display settings in Worldbuilder to improve performance.
Each designer discovers his or her own strategy for designing in Worldbuilder. Consi der
the following questions as you begin to design. What is the basic shape of the map? Is
there a dominating terrain feature? Is there a slope to it? Where is the map located?
Where are the best locations to build a base? These questions can affect the concept
that you begin to implement.
As you build your map, you may need to reposition the camera and change the
scale of the display.
When you want to test your work in the game, save your map for use in the game.
The following sections provide further details on getting started.
Elements of a Map. Defines the basic map components.
The Desktop. Describes the windows, tools, and status information displayed in
the application desktop.
Working with Map Files. How to accomplish the basic tasks of loading, saving,
erasing, and exporting your work.
ELEMENTS OF A MAP
All Command & Conquer 3 Tiberium Wars maps share three ba sic components: terrain,
textures, and objects (which are generally developed in that order). Using the
Worldbuilder tools, you can add, remove, raise, lower, and shape the terrain to describe
the land forms of your map. On top of the terrain, you layer textures that give the
Page 8
Page 9
appearance of futuristic cityscapes, war-torn wastelands, or expansive outdoor
environments representing any part of the world according to the game's sci-fi setting.
Finally, objects such as civilian buildings, civilians, trees, Tiberium fields and tech
structures are placed around your map for strategic purposes or to give your map a
natural appearance.
The table on the next page identifies map components and provides basic definitions. In
the section after the table, you can learn about the global parameters you can set for your
map.
For more definitions, see the Glossary at the end of this document.
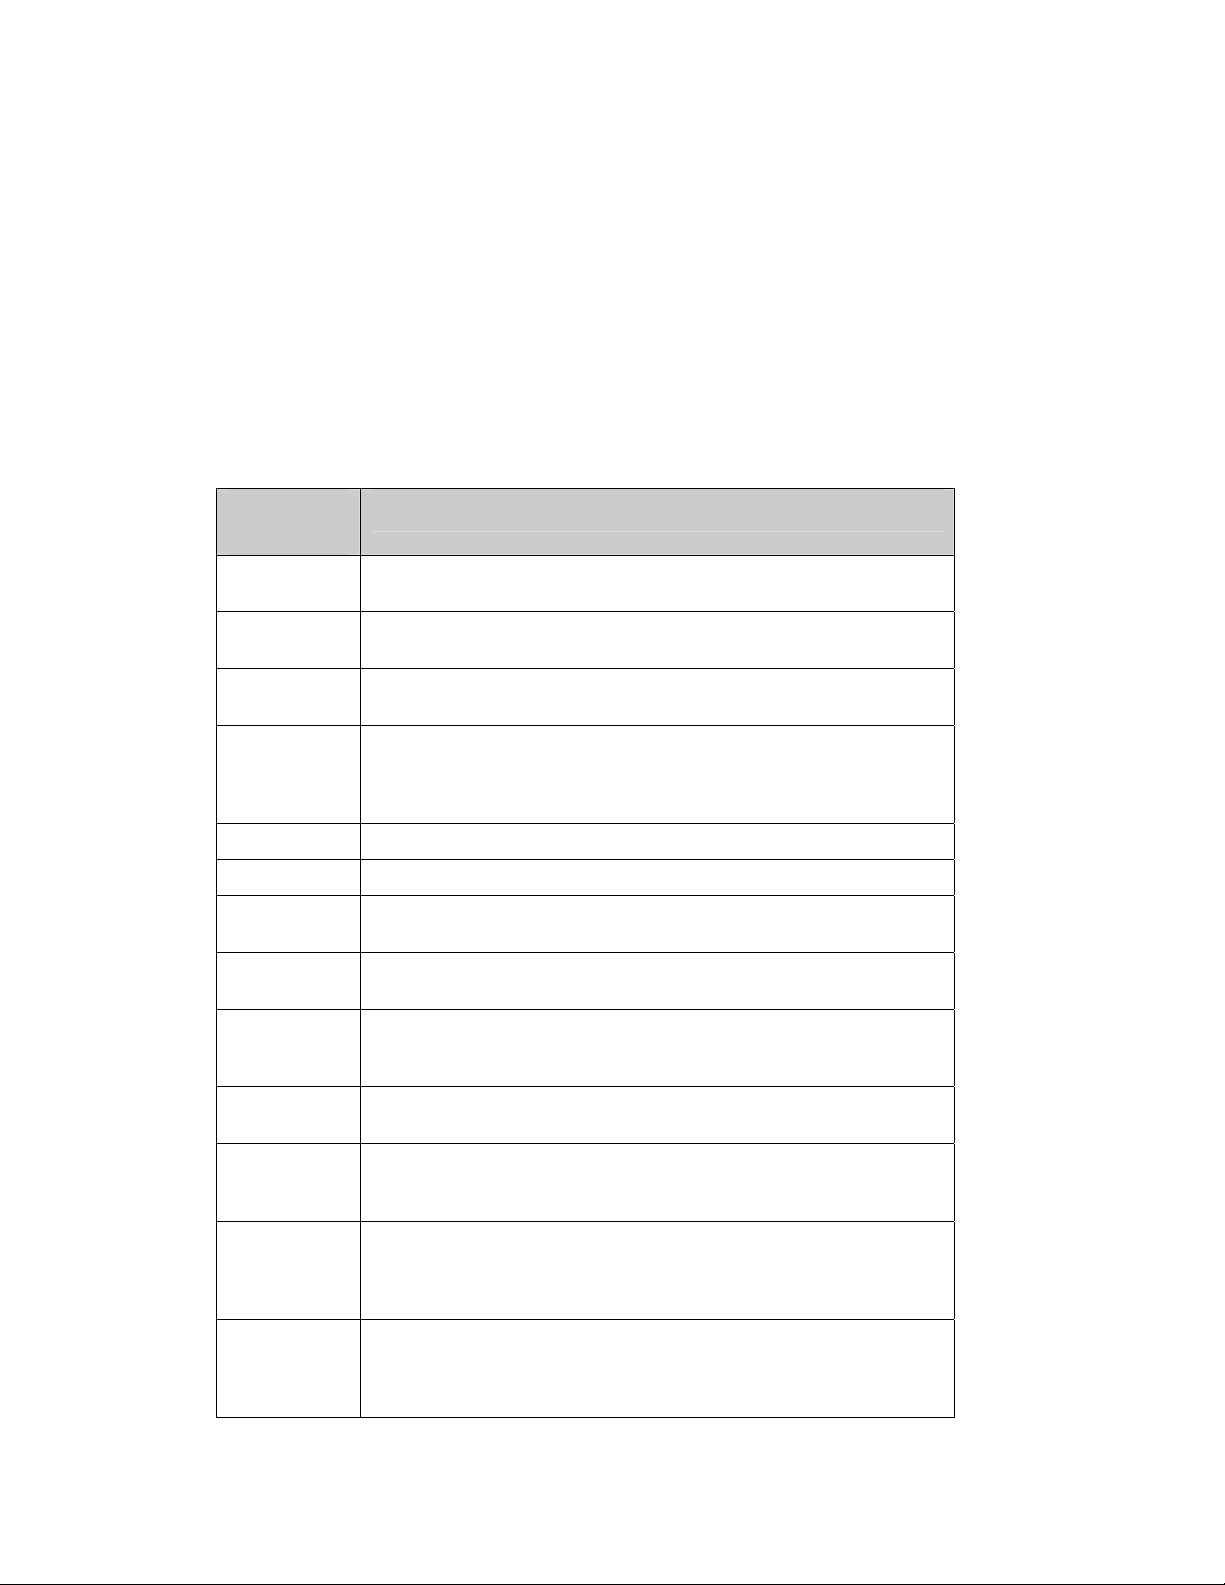
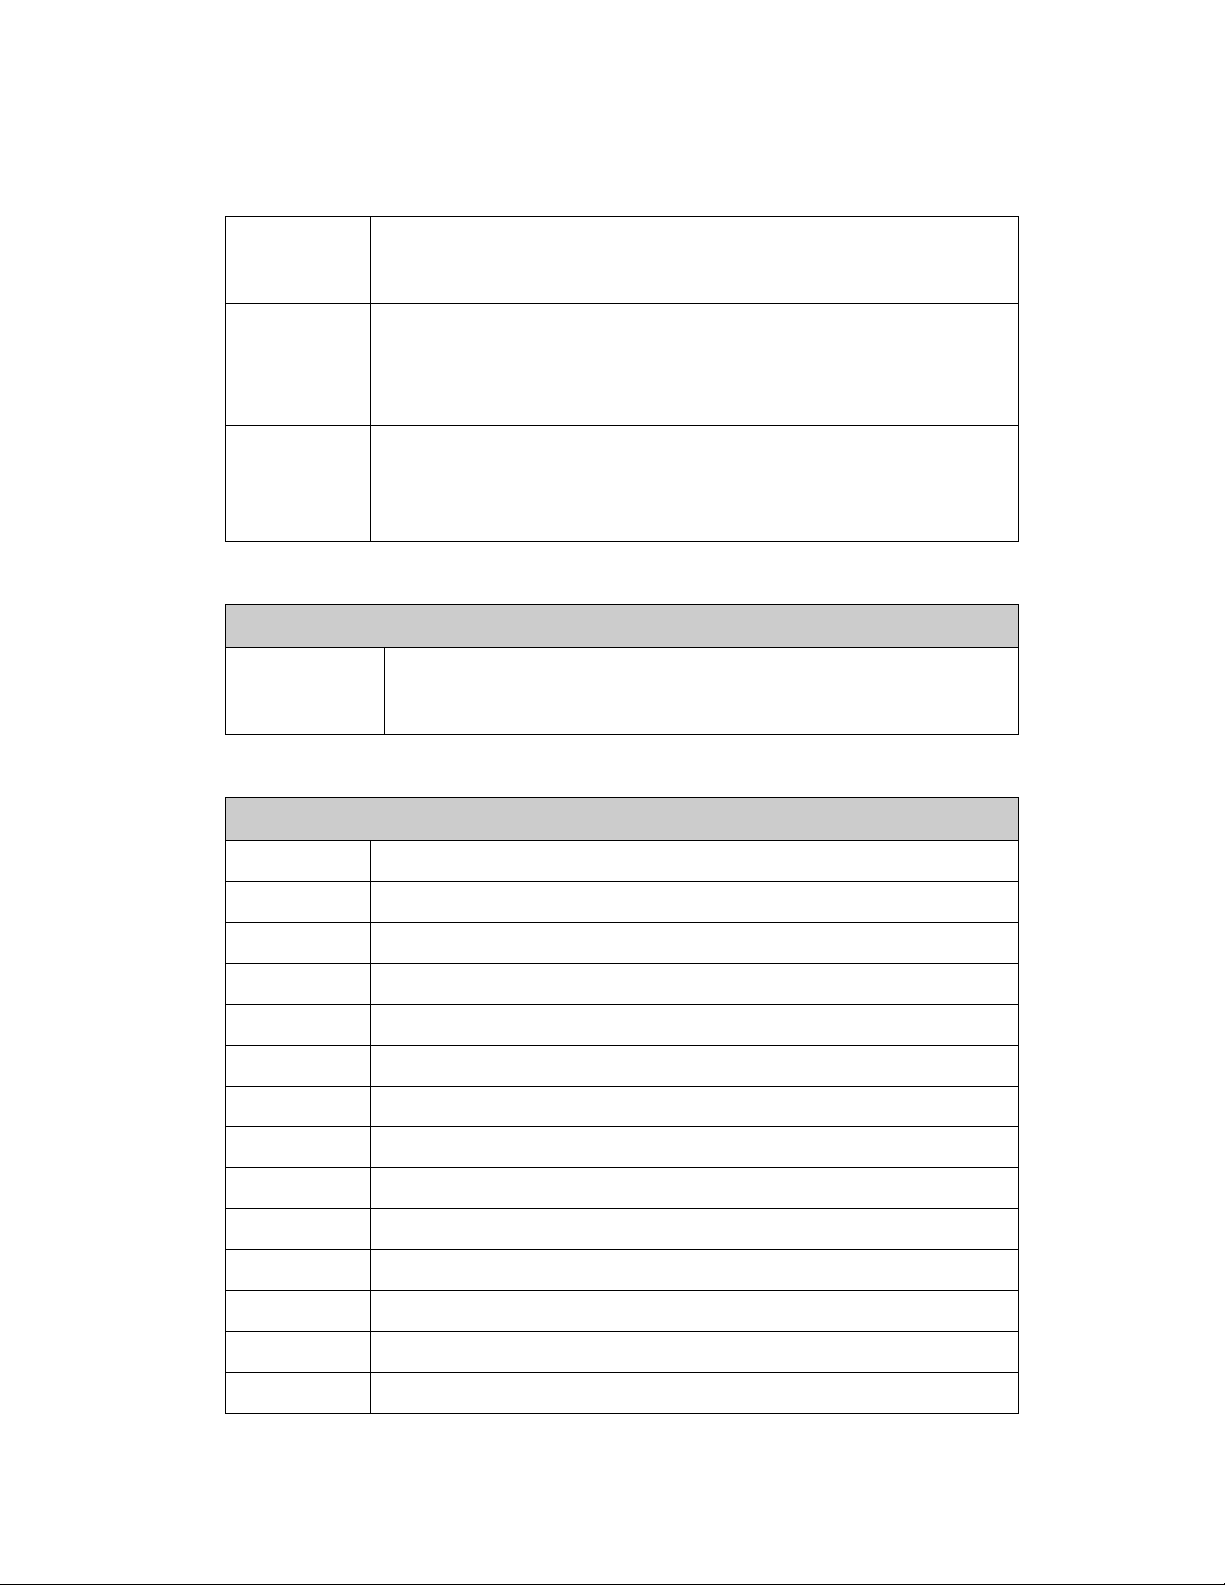
MAP
DEFINITION
COMPONENT
Terrain Terrain is the mesh underneath the surface that describes the shape of
the hills and valleys of the map.
Textures Textures cover the surface of the map and give the visual appearance
of the varying land forms.
Starting
locations
Civilian
Structures
Infantry Each side has multiple types of foot soldiers.
Vehicles The land war is usually won with tanks and other ground vehicles.
Air units Air units can transfer some of your ground forces across impassable
Roads These visual effects of the urban landscape are actually objects. In the
Bridges In almost any battle, a bridge becomes a key tactical objective. Bridges
Each side has a starting location where the ground is very flat to allow
for optimal build area.
Most civilian structures can be garrisoned to add protection for your
infantry units. If these structures drop below a certain health
percentage, they cease to be able to be garrisoned. Destroying them
will leave them in a rubble state.
terrain as well as provide combat support when assaulting your enemy.
game, they become textures.
can be blown up, but also repaired by Engineers, Saboteurs, or
Assimilators.
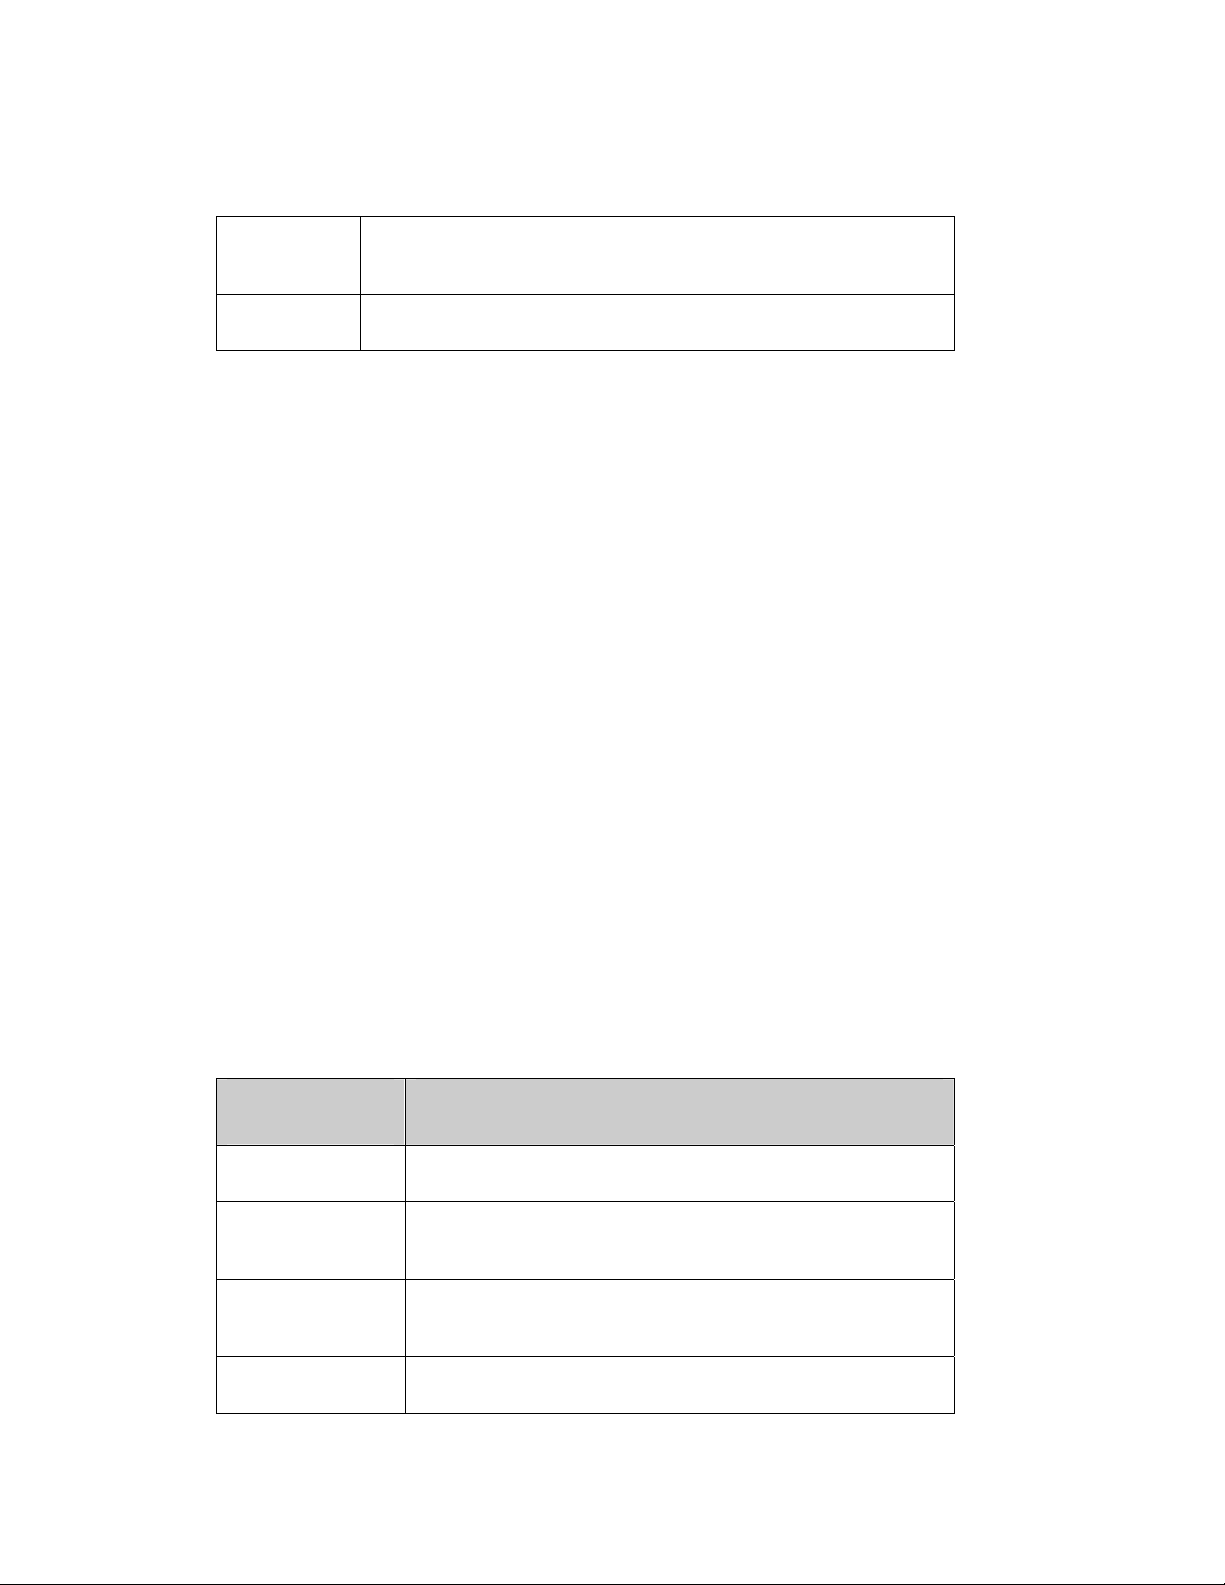
Bodies of
Water
Ambient
Sound
Trigger Areas You can define trigger areas as polygons to be referenced in scripts.
Waypoints A waypoint is a marker you place on the map. Through scripts, you can
Lakes and rivers are combinations of specialized shapes and textures.
Units can only cross at fords less than five feet deep.
You can apply ambient sound to areas such as forests, rivers, and
mountains. Sounds are placed like other objects. Do not place more
than three ambient sounds in any displayed map area.
These areas are invisible to the user but visible to every unit in the
game. Through scripts, units can take actions based on activities inside
and outside of trigger areas.
reference the waypoint as a map location. There are a number of
specially named waypoints, which are mentioned throu ghout this
manual.
Page 9
Page 10
Waypoint
Paths
Other Map
Elements
A string of connected waypoints becomes a waypoint path, which can
be referenced through scripts. Units and teams of units can be
instructed to move along waypoint paths.
Worldbuilder comes with a full library of miscellaneous objects, which
appear either natural or human-made, to add spice to your maps.
MAP ENVIRONMENTAL SETTINGS
Map Perimeter. A map perimeter indicates the edge of the map for AI-controlled objects.
The perimeter defaults to the map size specified in the Horizontal and Vertical feet set for
the map in the New Map menu and defaults to an orange color.
¾ To set your map perimeter, click the Border tool in the toolbar.
¾ The Orange border can never be changed. However, you can add a new border by
holding down the Shift key and left mouse button and dragging on the map. This
will create a new border that can be specified in the scripting tool.
GLOBAL LIGHTING
Basic global lighting defaults to one of four main settings: Morning, Afternoon, Evening,
and Night.
¾ To switch between these basic settings, press Ctrl + D.
More advanced users may want to tweak these default light settings. After establishing
the time of day, tweak these settings for terrain and objects.
¾ To change global lighting settings, select GLOBAL LIGHT OPTIONS from the Edit
menu.
You can create custom shadows for individual objects, although they can be taxing
on system resources.
In Global Light Options, you can modify the light source over the map.
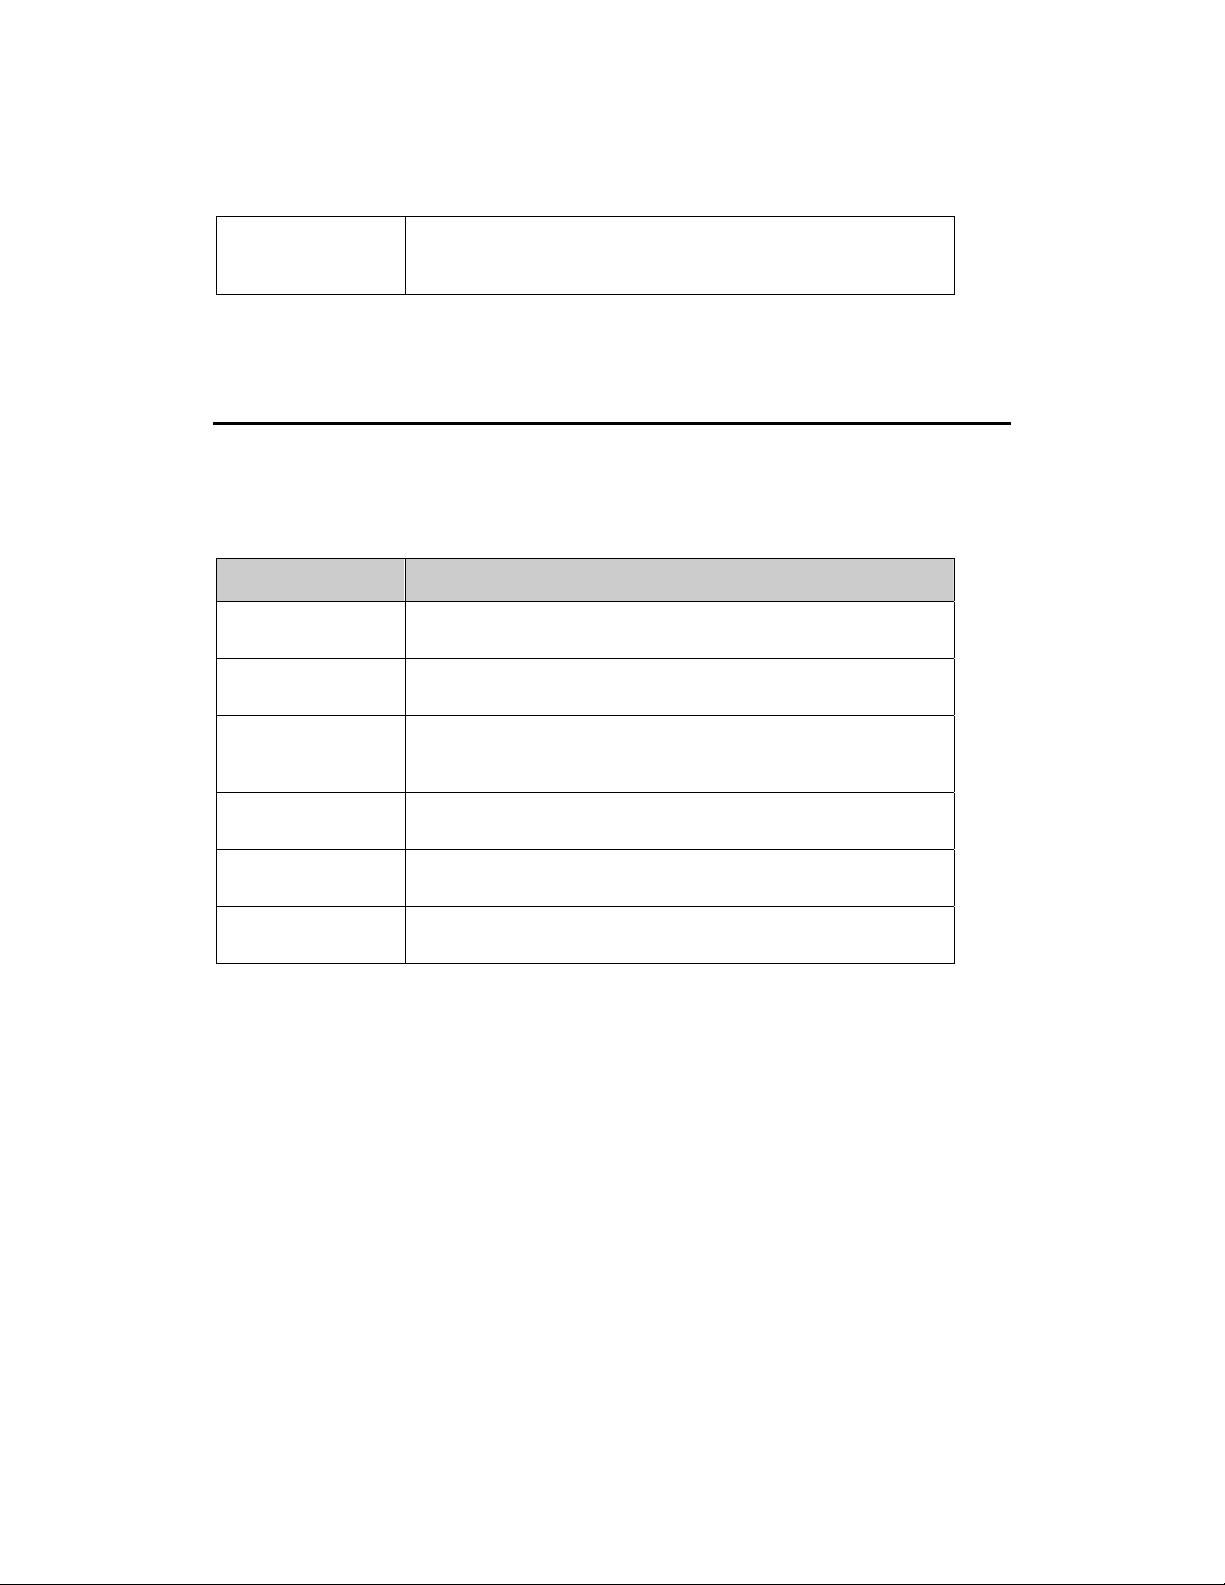
GLOBAL LIGHT
DEFINITION
OPTIONS
Ambient Ambient light comes from no single source. Enter RGB values for
ambient lighting. The new color is displayed in the square.
Sun Set the angle of the sun and its 360-degree location around the
map. Changes to these positions affect the lighting on the terrain.
Set RGB values to change the color of the sun.
Accent 1 Define an accent light source using the same controls as Sun
placement. An accent is an additional lighting source for
highlighting a specific area of the map.
Accent 2 Define a second light accent source using the same controls as
Sun placement.
Page 10
Page 11
Lighting Applies To Apply the lighting settings to selected elements of the map. In rare
cases you may want to light the terrain and the objects differently
for mood but keep the position of the light source consistent.
¾ To restore defaults, click RESTORE TO DEFAULT. To close the Global Light
Options window, click the X in the corner.
THE DESKTOP
Read this section to learn more about elements found on the Worldbuilder desktop.
DESKTOP ITEMS DEFINITION
Work Window The main window in the application, the Work Window is where all
terrain, textures, and objects are placed and manipulated.
Toolbar Across the top of the Work Window, the most commonly used
tools are available as clickable icons in the Toolbar.
Context Windows Depending on what tool is selected, a Context Window appears in
which you configure the settings of the tool or the object you are
placing.
Menus From the Menu system, select commands to edit and view your
map or change its textures and windows.
Status Bar At the bottom of the screen, the Status Bar displays current cursor
positional and color information.
Layers List You can organize objects into visual layers for display purposes.
Layers are listed and manipulated in the Layers List.
A
NOTE ABOUT 3D DIRECTIONS
Movements in three-dimensional space can be described in three directions. Stand up
from your computer (OK, you can just pretend). Let's call the position where you’re
located "Point A."
The X-direction refers to steps to the left or right of Point A. In-game, this is left and right
of the map when the camera is facing the default direction.
The Y-direction refers to steps forward or backward of Point A. In-game, this is towards
the top and bottom of the map when the camera is facing the default direction.
The Z-direction refers to changes in elevation from Point A. From where you're standing,
movements in the Z-direction would require you to jump into the air or dig into the ground.
In-game, the Z-direction refers to the height or depth of terrain and objects.
MAP SETTINGS
Page 11
Page 12

Through the Map Settings window, you can name and describe your map as well as set
the simulated time of day and weather. Your map’s name and description appear in the
game.
¾ To change your map settings, select EDIT MAP SETTINGS from the Edit menu. In
the window, enter a name and a description in the spaces provided. Select weather
and time of day settings from the drop-down. Click OK to accept the changes.
ESIZING YOUR MAP
R
You can add more space to your map or subtract terrain to trim off the unused pieces. It’s
best to resize your map before you add many objects or waypoints.
You should have at least 30 extra tiles (300 feet) on each side of your map as
additional workspace.
¾ To resize your map, select RESIZE from the File menu.
¾ When a map is resized, all areas and waypoints previously placed on the map
remain at their original coordinates and may need to be moved after the resize is
completed.
MAP GRID
You can toggle the display of a grid to assist in the placement of objects and the
measurement of distances between them.
¾ To toggle the display of the grid, select Grid Settings from the View menu. Then
check the “Show Grid” box. Be sure that the Z value is greater than your base
terrain height or the grid will exist under the terrain and not be visible.
¾ To force placed objects to align with the underlying grid, select SNAP TO GRID in
the Grid Settings menu. Snapping to the grid facilitates object placement,
alignment, and spacing.
¾ The grid defaults to 10 (10 x 10-foot squares) but can be scaled to show different
grid sizes by changing the number in the “Spacing” box of the Grid Settings menu.
For the measurement of distances between objects, switch your view to a top-down
orientation.
¾ To switch to a top-down view, select SHOW FROM TOP DOWN VIEW in the View
menu. You can also toggle this by pressing Ctrl + F on your keyboard.
Each grid square is equal to the spacing set in the Grid Settings menu scaled feet
on a side. Distances can be measured by counting squares, or you can move the
cursor over the two points and compare the locations displayed in the Status Bar. A
calculator may help.
¾ To change the number of grid squares displayed on-screen at any time, select
GRID SETTINGS from the View menu. In the sub-menu, select the grid size you
want.
¾ Spacing and distance can also be measured using the Ruler tool. Select the Ruler
tool from the tool bar and then left-click and drag the line across the distance you
want to measure. The distance measured is listed in the bottom left corner of the
Worldbuilder window.
CAMERA SETTINGS
Page 12
Page 13

You can place the camera over any map location and vary its pitch and distance from the
terrain.
¾ To change the camera pitch, select CAMERA OPTIONS from the Edit menu.
IEW TOGGLES
V
To simplify your view and to improve Worldbuilder performance, toggle the display of
various elements on the map.
¾ To toggle the display of map components, use the commands under the View
menu.
MOUSE FUNCTIONS
The mouse is your primary device for manipulating terrain and textures and placing
objects. Move the mouse to move the cursor over the section of map displayed in the
Work window. When using the mouse in conjunction with its buttons, you change the
view of the window over your map.
¾ To select an item, click the Select and Move tool in the toolbar. Then, move the
mouse over the item and click the left mouse button. To select multiple items, click
and drag a selection rectangle over the desired items. All items inside the rectangle
are selected and can be manipulated together.
¾ To dolly the camera across the map, click the right mouse button and drag until you
are over the desired location.
If possible, use a mouse with a wheel device in Worldbuilder. The wheel can be used to
zoom in or out of the map and to rotate the camera.
¾ To rotate the camera, click the mouse wheel and drag the mouse.
¾ To change the camera height, roll the mouse wheel.
QUITTING THE PROGRAM
¾ To safely exit the program, select EXIT from the File menu. (Please remember to
save your work if you wish to later resume designing from where you left off.)
WORKING WITH MAP FILES
This section covers the basic file functions of making maps—from creating a new map to
distributing a completed map to your Command & Conquer 3 Tiberium Wars friends.
CREATING A NEW MAP
¾ To create a new map, select NEW from the File menu. In the dialog box, enter the
X and Y size of the map, as well as the initial terrain height. Click OK.
Page 13
Page 14

SAVING YOUR WORK
Worldbuilder maps are stored as data, along with references to all of the art they use.
This storage method means that completed maps are usually less than 5 MB.
¾ To save your map, select SAVE from the File menu.
The default directory for saved maps is inside your Command & Conquer 3
Tiberium Wars folder. You can choose to save in any directory.
If you want to save a version under a different name or in a different location, select
SAVE AS… from the File menu. To save the map so it is usable in the game, click
USER MAPS. Save the map in that directory.
The Save As feature is useful if you are engaged in making major changes to your
map or if you want to experiment without committing to the change.
LOADING A MAP
To load your map, load the Worldbuilder program. These files end with the .MAP
extension.
¾ To load a map, select OPEN from the File menu. Navigate to the folder where you
saved your map. Select the .MAP file and press OPEN. Your map opens.
Worldbuilder files contain all of the data necessary to describe your map contents. They
do not contain the object and texture libraries; in a Worldbuilder .MAP file, objects and
textures are stored as references to the libraries that are automatically loaded when you
load the Worldbuilder file.
UNDOING CHANGES
In Worldbuilder, a few mouse clicks can undo or erase any mistakes or undesirable
changes.
Page 14
Page 15

UNDO/REDO
DELETING OBJECTS
DELETING TEXTURES
DELETING TERRAIN CHANGES
DELETING MAPS FROM YOUR COMPUTER
¾ To undo the last action, select UNDO from the Edit menu, or press Ctrl +
Z. (To redo an undone action, select REDO from the Edit menu, or press
+ Shift + Z.)
Ctrl
You can undo the last 10 operations. Changes to your view of the map
cannot be undone.
¾ To delete one or more objects, select the object(s) in the Work window.
Then, press Delete.
¾ To delete a texture, repaint it with a new one.
¾ To revert to the macrotexture, select the macrotexture with the
Eyedropper. You can fill in a texture field using the Flood Fill tool.
¾ To undo a completed terrain change, press Ctrl + Z.
¾ To flatten the terrain to the height of the surrounding terrain, use the
Height Brush tool configured to the terrain’s base height.
¾ To delete a map from your computer, navigate the directory tree of your
hard drive to the directory where you have saved your maps. Your map
and its support files are contained in a directory named for the map. Click
and drag the directory to the Recycle Bin on your Windows desktop.
MAKING MAPS AVAILABLE TO THE GAME
For debugging purposes, you can dump all of the naming, positional, and scripting
information for your map objects into a text file.
¾ To dump your map to a text file, select DUMP MAP TO FILE from the File menu.
This file will be saved in the same directory where you installed Command &
Conquer 3 Tiberium Wars.
You can share completed maps with friends by sending the file as an email attachment.
Most completed maps should be less than 5 MB.
For online multiplayer games, if the host selects a user-created map, that map
automatically transfers from his computer to all of the players. Single-player maps
must be manually transferred to other players.
Page 15
Page 16
COMMAND REFERENCE
The Command Reference contains all of the menu and toolbar commands available from
the desktop. Additionally, you can learn more about useful displays such as the Layers
List and the Object Properties window.
Menus can be accessed from the menu bar at the top of the screen.
The toolbar appears on-screen, and its display can be toggled in the View menu.
The status bar appears along the bottom of the application window.
The Layers List allows you to organize your map elements into visual layers—you
can toggle the display of these layers.
The Object Properties window lists the properties for any selected object.
MENUS
FILE MENU
NEW
OPEN
Create a new map. In the window, enter the dimensions, the basic height, and the
background texture to be applied.
Keyboard Shortcut: Ctrl +
Suggested Dimensions:
Single-player: no larger than 500 x 500 tiles.
2-player: 250 x 250 tiles.
4- to 6-player: 350 x 350 tiles.
8-player: 450 x 450 tiles. If you’re creating a map larger than 400 x 400 tiles,
you should have clear reasons to do so. For online games, you may not be
able to find seven other players who can play such a large map effectively.
Suggested Border:
30 tiles (300 feet) on each side.
Suggested Initial Height:
16, if terrain has very mild depressions. Use 50 for more drastic terrain
changes.
Open an existing map. In the dialog, navigate the directory tree to find the map.
Then, click OPEN.
Keyboard Shortcut: Ctrl + O
N
CLOSE
Close Worldbuilder and exit to the desktop. You are prompted to save any unsaved
work.
Page 16
Page 17

FILE MENU (CON’T)
SAVE
SAVE AS…
RESIZE MAP
*PRINT…
*PRINT PREVIEW
Save changes made to an existing project. If the current project is new, then you
must enter a file name.
Keyboard Shortcut: Ctrl
Save the current map under a new file name.
Add or subtract area on your map. In the window, the current size is displayed.
Enter your new map dimensions. In the Anchor area, click the square where you
want to locate the current map. To resize the map, click OK.
N
OTE: Resizing the map can change the location of waypoints, waypoint p aths, and
area polygons. This will also alter painted impassables and some texture
work, so be careful. After resizing the map, double-check the location of all
the elements.
Print the current map.
Keyboard Shortcut: Ctrl
Preview the printout of your map on-screen.
+ S
+ P
PRINT SETUP…
DUMP MAP
TO
FILE
RECENT FILES
EXIT
*Certain features may be disabled in this version of Worldbuilder. They may be available in a subsequent version.
Windows-based print setup screen.
Dump name, position, team, and scripting information of every object into a text
file. The dumped file is useful for debugging purposes. For example, you can
search for objects or waypoints that you can’t find on-screen in Worldbuilder.
List the last four maps opened in the editor. To open a recent map file, select it in
the menu.
Quit Worldbuilder. You are prompted to save any unsaved work.
EDIT MENU
Page 17
Page 18

UNDO
REDO
CUT
COPY
PASTE
DELETE
SELECT DUPLICATE OBJECTS
Remove the last operation performed on your map.
The last 10 operations can be undone. Changes to your view of the map
cannot be undone.
Keyboard Shortcut: Ctrl + Z
Perform again the last map operation that was undone.
Keyboard Shortcut: Shift +
Y
Remove all selected objects and place them on the clipboard.
Keyboard Shortcut: Ctrl + X
Duplicate all selected objects and place them on the clipboard.
Keyboard Shortcut: Ctrl
+ C
Place the contents of the clipboard at the selected location.
Keyboard Shortcut: Ctrl + V
OTE: Pasting objects can produce unexpected results.
N
Remove selected elements from the map.
Keyboard Shortcut: Delete
Select all objects that are located on top of another object. When you use the
Paste command, objects are pasted directly on top of the originals so that they
look like a single item. You should periodically search for duplicate objects.
Avoid placing objects on top of each other.
NOTE: Pasting objects can produce unexpected results.
SELECT
OBJECTS
/BAD TEAMS
W
When a created team is deleted, any objects remaining on the map from that
team have no team association and can cause problems in the game.
Periodically, use this feature to see if any objects have no team.
SELECT DEPRECATED OBJECTS
So if an object once existed in the game and was placed in a map and then
removed, the object’s point would still remain on the map but not do anything.
Selecting this option will select all those bad objects so they may be removed
from the map.
SELECT SIMILAR
When you select an object, the Select Similar command selects all objects of the
same type on the map.
Select Similar is most commonly used to change properties of object
types.
Keyboard Shortcut: Ctrl
+ M
EDIT MENU (CON’T)
Page 18
Page 19

SELECT CLOUD TEXTURE
*SELECT
MACRO-
TEXTURE…
SELECT ENVIRONMENT MAP
SELECT BASE OBJECT(S)
REPLACE SELECTED…
PICK ALLOWANCE
Selects the cloud texture to scroll over the map.
Select the background texture of the map.
This is the texture that will be reflected off of anything using the glass shader.
Generally this is never changed from the default texture.
When selected an object that has been marked as “Is a base”, this feature would
allow you to select all the objects belonging to that base and vice versa.
This feature is no longer available.
Replace all instances of the selected object with another object. In the object
library, navigate the object tree to find the object to replace. To make the
replacement, click OK.
Object properties are inherited by the replacement objects.
When you choose a constraint, all selection tools in Worldbuilder select only
objects of that type. For example, you can use Pick Constraint to click and drag a
rectangle over an area to select all buildings in it.
¾ To return to the default selection mode, select ANYTHING from the Pick
Constraint sub-menu.
¾
Use the keyboard shortcuts to pick constraints.
SCRIPTS…
GLOBAL LIGHT OPTIONS…
CAMERA OPTIONS…
EDIT SHADOWS…
*Certain features may be disabled in this version of Worldbuilder. They may be available in a subsequent version.
Open the Scripts window.
Open the Global Lighting window.
You can set camera positioning for use during development. Use this information
when developing cinematic scripts.
To set the camera angle, enter a new figure in the Pitch textbox.
¾
Set the color (in RGB values) and the opacity of shadows. Raising the
default intensity creates harsher shadows.
EDIT MENU (CON’T)
Page 19
Page 20

EDIT MAP SETTINGS…
EDIT SKYBOX SETTINGS…
EDIT POST EFFECTS…
EDIT CAMERA ANIMATIONS…
EDIT TEAMS…
EDIT PLAYER LIST…
Open the Map Settings window. Edit the name and description of the map that
appears in the game. Select a time of day and weather conditions. To apply the
changes, click OK.
N
OTE: When you change the time of day and conditions, you may have to re-
texture some elements and replace some objects with choices more
appropriate for the new environment.
This feature is no longer available and has been disabled.
This is where the bloom, the lookup table, distortion and light rays are setup for
the map. Distortion maps are always setup by default for every map.
By selecting which post effect you want and clicking the Add button, you can
apply a new post effect to your map. Once it’s been added, a selection of
parameters become available for tweaking.
This is used for cinematic moments, but has no application for making single or
multiplayer maps.
Open the Teams window.
Open the Player List.
EDIT MULTIPLAYER POSITIONS…
ITEM LIST…
SPECIAL
This feature is no longer supported in Command & Conquer 3 Tiberium Wars.
This bring up the Item List Tool window which is a quick reference to all the
objects that have been placed on the map.
Two options available in this section are:
¾ Adjust Terrain to GROUND Objects…
o This feature is no longer supported in Command & Conquer 3
Tiberium Wars.
¾ Remove all texture blends…
o All texture blends that have been applied on the map will be
undone and need to be reblended.
VIEW MENU
Page 20
Page 21

*SHOW GRID
GRID SETTINGS
REVERSE MOUSE SCROLLING
*SHOW TEXTURE
SHOW TERRAIN
SHOW OBJECT ICONS
SHOW WAYPOINTS
Keyboard Shortcut: Ctrl + G
Quickly open the Grid Settings menu to turn grid view ON/OFF or to turn Snap to
Grid ON/OFF.
Keyboard Shortcut: Ctrl
Reverse the mouse interface for scrolling. This is checked by default.
Toggle display of terrain textures.
Toggle display of terrain changes.
Toggle display of colored icons beneath objects to assist in selecting and
manipulating them.
Keyboard Shortcut: Ctrl
Toggle display of all waypoints.
+ E
+ B
SHOW TRIGGER AREAS
*Certain features may be disabled in this version of Worldbuilder. They may be available in a subsequent version.
Toggle display of trigger areas created with the Polygon tool.
VIEW MENU (CON’T)
Page 21
Page 22

SHOW SHADOWS
SHOW LABELS
SHOW OBJECTS
SHOW GRASS
SHOW ROADS
SHOW GARRISONED
SHOW SOUND FLAGS
Toggle display of object shadows. Terrain shadows remain on and are
determined by Global Lighting settings.
Object shadows impact Worldbuilder performance, so leave them OFF
if possible.
Toggling this on, will allow you to select the option, “Use Shad ow Map
Shadows” which appears directly under this option.
Toggle display of identifying labels for sounds and waypoints.
Toggle display of objects.
Toggle display of grass objects.
Toggle display of roads.
Toggle display of flags over buildings controlled by a side.
Toggle display of flags used to indicate the position of ambient sounds.
INFLUENCES
TILE FEEDBACK
VIEW IMPASSABLE AREAS
Toggle display of object attributes such as sight and weapon ranges.
Highlights different tile types, such as impassable terrain and tiles stretched
because of vertical cliff faces.
Toggle highlighting of areas that cannot be crossed by ground units. Use this
toggle frequently during development.
Impassable areas should be identified with consistent texturing.
Keyboard Shortcut: Ctrl
+ I
VIEW MENU (CON’T)
Page 22
Page 23
IMPASSABLE AREA OPTIONS
SHOW 3-WAY BLENDS IN WHITE
HIGHLIGHT TEST ART
In the window, you can enter, preview, and set the angle at which terrain
becomes impassable.
TIP You can set this tool at any angle to show slopes that are steeper
than a desired angle. You can highlight slopes too steep for units to
climb or imperfections in base areas and other mesas. Use this tool
in combination with the Smooth Height tool to polish your maps.
¾ To change the angle of impassability, enter a number from 0 to 90 in the
Angle textbox.
¾ To preview the effects, click PREVIEW. The changes are displayed in the
map.
¾ To accept the changes, click OK. To cancel and exit without changing the
angle, click CANCEL.
When textures are blended with the Auto Edge Out tool, more than two textures
can be affected. Three-way texture blends can cause performance slow-downs,
so try to find and repair three-way blends. Limit their count to 300 in your map.
Highlights any objects meant only for test purposes.
SHOW WIREFRAME 3D VIEW
SHOW FROM TOP DOWN VIEW
SHOW LETTERBOX
SHOW MAP BOUNDARIES
Toggle display of the 3D wireframe describing the terrain.
Keyboard Shortcut: Ctrl + W
Toggle view of the map from a top-down perspective.
TIP Use this feature with the grid view to position objects and features
relative to each other. If Snap to Grid is ON, then you can use all
three tools for careful placement and alignment of buildings, roads,
and sidewalks.
Keyboard Shortcut: Ctrl + F
Adds letterbox bars for previewing cinematics.
Toggle display of the map perimeter.
VIEW MENU (CON’T)
Page 23
Page 24

SHOW ALL OF 3D MAP
PARTIAL MAP SIZE
SHOW CAMERA SAFE IN PREVIEW
SHOW SAFE FRAME OVERLAY
SAFE FRAME OVERLAY SETTINGS
SHOW CLOUDS
Toggle display of the entire map. Use this toggle to see how your work in a local
area fits into the entire map.
This feature can impact performance, so keep it OFF when you don’t
need it.
Keyboard Shortcut: Ctrl
Change the displayed area of the map in the Work window to one of the
available selections.
If you experience performance problems, keep this setting at the smallest
grid size.
This feature is no longer supported in Command & Conquer 3 Tiberium Wars.
This is for cinematics and is no longer supported in Command & Conquer 3
Tiberium Wars.
Allows you to adjust the size of the Safe Frame Overlay.
Toggle display of clouds. In Worldbuilder, clouds pass in front of the light source
off-screen to create the sense of cloud cover. Showing clouds can affect
Worldbuilder performance.
Keyboard Shortcut: Ctrl
+ A
+ U
SHOW BUMPED MAP TEXTURE
SHOW WATER
SHOW
MACRO-
TEXTURE
SHOW REFLECTIONS
Will allow any bump maps to appear as so in Worldbuilder.
Displays water plane.
Toggle display of the background texture. Turn it OFF to improve performance.
Displays the reflection of textures off of water, and anything marked with the
glass shader.
VIEW MENU (CON’T)
Page 24
Page 25
SHOW SKYBOX
SHOW EFX
CHANGE TIME OF DAY
SHOW BRUSH FEEDBACK
RELOAD TEXTURES
This feature is no longer supported in Command & Conquer 3 Tiberium Wars.
Displays particle effects.
Toggle between the four time of day settings: DAY, DUSK, NIGHT, and DAWN.
Each of the basic settings can be tweaked with custom Global Lighting settings.
N
OTE: Not all objects can be used during all settings. For example, if an object
does not have a “Night” image, it disappears from view although it still
exists on the map. In the game, players may crash into objects they cannot
see, so if you switch the time of day in the middle of development, be sure
to double-check for the existence of invisible objects.
Keyboard Shortcut: Ctrl + D
Toggle display of the texture or terrain brush passing over the map.
Terrain, object, and texture manipulations can cause textures to disappear or to
get scrambled. Select RELOAD TEXTURES to reload your map textures.
TOOLBAR
STATUS BAR
LAYERS LIST
LISTEN TO MAP
SET LOD
Toggle display of the toolbar. Some tools are available only through the toolbar.
Toggle display of the Status Bar at the bottom of the screen.
Toggle display of the Layers List window.
Activate ambient audio sound markers. Scroll around the map to hear the
effects.
Toggle display of the different Level Of Detail settings for textures and objects.
WINDOW MENU
In the Window menu, you can set the resolution for the Worldbuilder window. 800 x 600 is the
default setting. Higher resolutions impact system performance.
¾
To reset the resolution and window positions to their default settings, select
RESET WINDOW POSITIONS.
Page 25
Page 26
TEXTURE SIZING MENU
MAP CLIFF TEXTURES
REMOVE CLIFF TEXTURES
OPTIMIZE TILES AND BLEND TILES
REMAP TEXTURES…
When textures are stretched across cliffs higher than 80 feet, they can look too
stretched. To do a special mapping for a cliff surface, click this command then
click on the texture you want to make a cliff texture. Textures are shrunk to their
maximum height without distortion, leaving black areas above and below, which
you can fill in with other textures.
To remove the special texturing applied to cliffs, click the texture, and then select
this command.
TIP If you have created a very tall cliff and cannot get textures to look
good on it, smooth the cliff into multiple slopes using the Smooth
Height tool.
Two- and three-way blended textures can slow down your machine. By
optimizing textures, you allow Worldbuilder to look at your blended textures to
see if it can find similarities between them. Similar blended textures are replaced
by a single texture. Optimize tiles before releasing a final version of your map.
Replace each texture with a new selection. You may have to remap textures if
you change the time of day, geographic location, or conditions.
¾ To replace a texture, navigate the texture tree in the window to find a
replacement and click OK.
¾ To skip that texture, click CANCEL. You can now choose to replace the
next texture.
After you have remapped textures, check your blended textures again.
TEXTURE SIZING INFO…
*TILE 4 X 4
*TILE 6 X 6
*TILE 8 X 8
*Certain features may be disabled in this version of Worldbuilder. They may be available in a subsequent version.
Display the amount of space and its percentage of the total available occupied
by regular and blended textures.
Each map can contain up to 4MB of texture space for regular and blended tiles.
You are unlikely to reach the maximum limit for blended textures, but you should
check your usage for regular tiles.
Set the texture brush size to 4 tiles x 4 tiles.
Set the texture brush size to 6 tiles x 6 tiles.
Set the texture brush size to 8 tiles x 8 tiles.
VALIDATION MENU
Page 26
Page 27
GENERATE REPORT
FIX TEAMS
REMOVE MINVOLUME CUSTOMIZATION
ABOUT WORLDBUILDER…
This feature may be unavailable in the current version of Worldbuilder.
If you have units on your map that are not assigned to a team, you can use
this command to place those objects in the first team listed in the Teams
window. However, it usually makes better sense to fix them manually.
Resets any minimum volume values you have customized.
HELP MENU
Learn more about Worldbuilder.
CTRL+ `
CTRL+ 1
CTRL+ 2
CTRL+ 3
CTRL+ 4
CTRL+ 5
CTRL+ 6
CTRL+ 7
CTRL+ 8
CTRL+ 9
CTRL+ 0
CTRL+ W
CTRL + W
E
COMPLETE KEYBOARD SHORTCUTS
Pick Nothing
Pick Buildings
Pick Units
Pick Shrubbery
Pick Props
Pick Natural
Pick Debris
Pick Waypoints
Pick Roads
Pick Sounds
Pick Anything
Waypoint
Wireframe
BlendSingleEdge
Page 27
Page 28

SHIFT + E
ALT + E
R
CTRL + ALT + R
T
CTRL + ALT + T
Y
CTRL + U
CTRL + I
CTRL + ALT + I
CTRL + O
P
CTRL + ALT + P
[
SHIFT + [
AutoEdge Out
AutoEdge In
Road
Edit Scripts
SingleTile
Edit Teams
LargeTile
Show Clouds
View Impassables
Item List
Open
Place Object
Edit Player
Zoom In
Zoom In Slowly
]
CTRL + ]
CTRL + A
S
CTRL + S
CTRL + D
F
CTRL + F
H
SHIFT + H
CTRL + H
SHIFT +
(FLOODFILL)
SHIFT + (SELECT)
CTRL + Z
Zoom Out
Zoom Out Slowly
Show All 3D Map
Smooth Height
Save
Cycle Lighting
FloodFill
Top Down
Height Tool
Mound
Dig
Replace All Texture Occurrences
Add to Selection
Undo
Page 28
Page 29

CTRL + SHIFT + Z
CTRL + X
C
CTRL + C
CTRL + V
CTRL + B
CTRL + N
CTRL + M
CTRL
ALT
SPACE
SHIFT + SPACE
TOOLBAR
Redo
Cut
Fence
Copy
Paste
Show Object Icons
New File
Select Similar
Temp. Move/Rotate
Temp. Eye Dropper
Pan Camera
Pan Camera Slowly
The most important tools for shaping the terrain, painting textures, placing objects, and
adding waypoints and trigger areas to your maps are located for easy access in the
toolbar above the main application window.
¾ To activate a tool, click its icon in the toolbar.
¾ To learn the name of a tool, move the mouse cursor over its icon in the toolbar.
FILE TOOLS
All of the File tools in the toolbar are also available from the File menu.
EDIT TOOLS
Edit tools unavailable in the Edit menu are described below.
Page 29
Page 30

SELECT AND MOVE
LOCK ANGLE
Use this default tool to select, adjust, and move objects. When using this tool,
each mouse button has a separate function.
Toggle the locking angle for all selection and placement functions. When the
angle is locked, all textures and objects are angled in the same direction,
which is useful for urban development.
You can use the 3D wireframe of the terrain as a guide.
ERRAIN TOOLS
T
When shaping your map terrain, it is best to shape the largest elements first and then
work on the finer details. The Terrain tools can scale to accomplish both tasks.
The Terrain tools allow you to raise, lower, and flatten terrain in large and small
brushstrokes. When you select a terrain tool, you can configure the settings of your brush
in the Terrain Brush Options window. With the Ramp tool, you can create pre-fabricated
forms in the terrain with a smoothness and finish that is difficult to achieve by hand.
After manipulating terrain, double-check the placement of all objects located on the
changed terrain. Some objects do not conform to the terrain.
After you dig out an area, use the Water tool to fill the area with water and give it a
current like a river or an undulating tide like a lake or sea.
TERRAIN TOOLS
Page 30
Page 31

TERRAIN BRUSH OPTIONS
HEIGHT BRUSH
MOUND
DIG
SMOOTH HEIGHT
Configure the options for the terrain brush used in the Height Brush, Mound,
and Dig tools.
Brush Width. The diameter in cells and feet affected by the Brush
Height setting.
Brush Feather Width. The distance beyond the center circle in
which the changed terrain is blended into the surrounding terrain.
Brush Height. The height by which each application of the tool
raises or lowers the terrain.
Raises or lowers the selected terrain to the height defined in the window. Set
the height, width, and feathering circumference from the center point. Then,
click on map locations to change the height. The Height Brush is useful for
building base areas, cities, and riverbeds.
Piles more terrain onto the selected location.
Removes terrain from the map based on the settings in the Terrain Brush
Options window.
Smoothes the terrain between the edges of the terrain brush. Use the Smooth
Height tool to remove impassable areas and odd edges that can be created
with the other terrain tools.
Brush Width. Brush diameter in cells or feet.
Filter Radius. The area beyond the brush width into which the tool
attempts to smooth. Large values create more smoothing and more
dramatic effects.
Feather Rate. The rate at which smoothing takes place. Low values
require scrubbing with the tool over an area to get the desired effect.
TIP In many cases, the Feather Rate should be turned up to the
highest settings.
TERRAIN TOOLS (CON’T)
Page 31
Page 32

*MESH MOLD TOOL
LAKE/OCEAN TOOL
RIVER TOOL
WAVES TOOL
Instead of forcing you to create common terrain shapes by hand each time,
use the Mesh Mold tool to apply pre-defined shapes into the terrain. The
Curved Ramp and Ramp options are useful for creating inclines and declines
suitable for roads.
Scale %. Scales the mold applied to the terrain as a percentage of the
displayed mold.
Height. The elevation at the center point of the mold.
Angle. The angle of the mold relative to the plane of the map.
Adjust Heights. Adjust the heights of the surrounding terrain to meet
the terrain surface of the applied mesh mold.
Preview. Check this box to see a preview of the mold applied to the
terrain.
¾ To apply the defined mold to the terrain, click APPLY.
Allows you to place down lakes and oceans to cover large areas of terrain.
Allows you to create rivers that run directionally from one end to the other.
Allows you to create waves that can move along a shore, or within an ocean
plane.
*Certain features may be disabled in this version of Worldbuilder. They may be available in a subsequent version.
TEXTURE TOOLS
When painting textures, follow a large-to-small approach like you do for defining terrain.
Start with the Large Tile brush or Flood Fill tool to paint terrain over large areas having
few distinctive features. Then, use the Single Tile tool to get down to the nitty-gritty.
In the Terrain Material Options window, select the texture to apply. A sample is then
displayed. Behind it the texture is displayed that most closely blends the selected texture
to the background macrotexture.
¾ To paint a texture, select it in the texture tree. Then, click on the location in the map
to paint. A texture is painted.
You can paint textures as passable or impassable for moving units.
Page 32
Page 33

SINGLE TILE
LARGE TILE
EYEDROPPER
FLOOD FILL
AUTO EDGE OUT
Switch brushes to paint textures on individual tiles.
Switch brushes to paint textures across multiple tiles. Large tile sizes are set in
the Texture Sizing Menu.
¾ To select a texture already on the map, click the Eyedropper in the
toolbar. Then, click the texture in the map. You can now paint this
texture with the other texture tools.
You cannot select and apply blended textures. Use the source textures
and re-create the blend.
¾ To fill an area with a single texture, select the texture. Then, click the
Flood Fill tool in the toolbar. Then, click the area to fill.
This very important tool lets you blend one texture outward into the
surrounding textures to create more natural effects. The Auto Edge Out tool
blends a selected texture outward and into the surrounding textures.
¾ To blend one texture into another, click the Auto Edge Out tool in the
toolbar. Then, click the texture to blend outward.
It is possible to apply three-way blends, but they can impact
performance in Worldbuilder and in the game.
N
OTE: In some cases, blending may not produce desirable results. You may
have to repaint initial textures before you blend them. Do not apply blends
on top of blends.
AUTO EDGE IN
BLEND SINGLE EDGE
TERRAIN COPY TOOL
Blend a selected texture inward using the surrounding textures.
Blend a single edge of a texture tile inward. Use it for detailed work towards
the end of your development process.
This tool allows you to select an area of the map and then paste the selected
area anywhere on the map.
• Make sure you’re in “Selection Mode” when painting the area of the
map you wish to copy.
• Make sure you’re in “Copy Mode” when attempting to paste the area
you’ve selected to copy.
OBJECT TOOLS
Page 33
Page 34

The Object tools assist in the placement of single objects and sets of objects on your
map. Using the Place Object tool, you can place single object types one or more times on
your map. For specialized objects like roads, fences, and scorchmarks, individual tools let
you get the right look. To place natural-looking tree groves, use the Grove tool.
In single-player maps, each CPU-controlled faction must be directed to build its
structures in a specific order through the Build List tool.
PLACE OBJECT
ROAD
GROVE
RAMP
ADD SCORCHMARKS
Place any object in the library on your map.
Roads, bridges, and sidewalks are specialized textures you can paint on your
map. To create finished versions of these map elements, add other objects
around them for polish.
Create random, natural-looking tree groves.
Place ramps in the terrain.
¾ To create a ramp, select the Ramp tool. Click and drag the length of the
ramp in the map. In the Ramp Options window, enter a width for the
ramp. Then, click PLACE RAMP.
Add scorchmarks to the terrain to create battlefield effects. You can change
the size and the type of scorchmark in the Scorch Options window.
Like roads, scorchmarks are objects that get baked into the terrain
during the game.
BUILD LIST TOOL
When using this tool, make sure to specify the player you wish to have the
buildings placed for. Also make sure to denote the build order and try not to
have the AI player build a base in such a way that doesn’t make sense, such
as building all production structures, but no Power Plants.
LINE TOOLS
With the line tools, you can create waypoint paths for units to follow, trigger area
polygons for use in scripts, and your map perimeter.
Page 34
Page 35

WAYPOINT TOOL
POLYGON TOOL
Place single waypoints or waypoint paths for moving objects to follow.
¾ To place a set of waypoints, select the Waypoint tool. Click a location in
the map, and the waypoint is created. Drag to another location, and
click again. A waypoint path joins the two waypoints. Continue clicking
and dragging until you create the waypoint path. In the Waypoint Path
Label textbox, enter a name for your waypoint path. You can enter
multiple path names for the same set of waypoints as a form of creating
aliases.
¾ To rename a waypoint, select it. In the Waypoint Options window, enter
a new waypoint name.
Waypoints on the same waypoint path should have consistent names.
TIP A single waypoint can be a useful bookmark or placeholder for
unfinished work. Looped sets of waypoints can be used to assign
patrols to units.
Define areas that can be used to trigger script actions. If you plan to create
conditional events based on map locations, you must use the Polygon tool to
define those locations.
¾ To create a polygon, click the Polygon tool. On the map, click the
location for the initial corner. Click and drag to other locations to define
the corners and the perimeter of the polygon. In the Polygon Options
window, enter an appropriate name for the polygon.
Scripts are used to control CPU-controlled units, teams, and players.
BORDER TOOL Define your map perimeter. Units and structures can operate only inside the
map perimeter.
Although the orange perimeter is always the default, you can create multiple
perimeters, each of which can be activated during the mission. Use multiple
borders to open new terrain areas as a reward for a player who accomplishes
partial mission goals.
¾ To define the perimeter, select the Border tool. In the map, click and
drag any corner of the orange perimeter to redefine the border.
The lower-left corner of the perimeter is always fixed.
OTHER TOOLS
¾ To open the Help file, click the Help icon in the toolbar.
STATUS BAR
Page 35
Page 36

OBJECT COUNT
WAYPOINT COUNT
3-WAY BLENDS COUNT
(X-COORDINATE, Y-COORDINATE, HEIGHT)
RGB COLOR VALUES
The number of objects on your map. Try to keep it below 100 objects per
player in multiplayer maps and 1,800 objects for single-player maps.
The number of waypoints on your map.
The number of 3-way blends on your map.
The current X, Y coordinates of the cursor and the height of the terrain over
which the cursor is located.
The RGB color values of the terrain over which the cursor is located.
LAYERS LIST
The Layers List window displays all map objects in layers. When an object is added to
your map, it is placed in the default layer. You can then create a new layer and move
objects into it. The display of a created layer can be toggled. Layers are a useful tool for
visually sorting your map and hiding objects that don’t need to be displayed in
Worldbuilder. Those objects do remain in your map and appear in the game.
¾ To toggle the display of the Layers List, select LAYERS LIST from the View menu.
¾ To open the Layers List menu for any item, right-click on it.
INSERT NEW LAYER
DELETE CURRENT LAYER
MERGE OBJECT INTO
MERGE VIEW SELECTION INTO
SHOW/HIDE CURRENT LAYER
Insert a new layer.
Delete the current layer without prompting.
Merge the selected object into another layer.
Merge multiple objects that have been selected into another layer.
Toggle the display of the current layer in the Work window.
OBJECT PROPERTIES
Whenever you select or place an object, the Object Properties window appears and lists
the properties assigned to that particular object.
GENERAL TAB
Page 36
Page 37

NAME
TEAM
EVENT LIST
IN BASE
XY POS
Z
ANGLE
SCALE
An object’s name is used both in the game and in Worldbuilder to identify the
art asset.
Identify which faction the object belongs to.
This feature is no longer supported in Command & Conquer 3 Tiberium
Wars.
This feature is no longer supported in Command & Conquer 3 Tiberium
Wars.
This is the current position of the object selected on the map.
Set the object’s elevation relative to the terrain (Z=0).
TIP Negative values can bury the object for interesting visual effects.
Be careful, though. Additional terrain changes can bury the
object entirely.
To change the angle of the object, enter a figure in the space provided.
East=0. Positive figures climb towards North.
This defaults to “No Scale”. Applying a scale to the object would make it
appear larger.
This feature is no longer supported in Command & Conquer 3 Tiberium
Wars.
ALIGN TO TERRAIN
TIME
WEATHER
Selecting this checkbox will align whatever object(s) you have selected to
the terrains facing.
For example. If you put a tree on a cliff wall, it would stand straight up and
down. Selecting this checkbox would make the tree probably turn sideways,
aligning itself to the surface of the terrain.
This setting dictates the type of model light setting the object will use.
This setting dictates the type of weather model setting the object will use.
LOGICAL TAB
Page 37
Page 38

INITIAL HEALTH %
MAX HP
EXPERIENCE LEVEL
STANCE
VISION RANGE MOD
ENABLED
UNSELLABLE
TARGETABLE
INDESTRUCTIBLE
SLEEPING
Select the percentage of health points you wish you start the selected
object(s) at. Selecting “Other” will allow you to enter your own value.
Select the maximum number of hit points available to the unit.
It’s best to set custom values for hit points using the Initial Health %
setting.
This is the Veterancy level you wish to start the selected object(s) at when
the mission starts.
All faction units are able to take different Stances to grant them armor or
damage bonuses. You may set the Stance here for the selected object(s).
You may increase or decrease the selected object’s vision range by moving
the slider to the left or the right. A grayed box to the right of this slider shows
the modifier being assigned to the vision range.
The object can move and respond to its environment.
The object cannot be sold.
The object can be targeted by enemy units.
The object cannot be destroyed.
Putting an object to sleep disables all it’s normal checking and is used for
optimization purposes.
AI RECRUITABLE
POWERED
IS A BASE
IS SELECTABLE OVERRIDE
STOPPING DISTANCE
The object can be recruited by units on the same CPU-controlled side to
execute scripted orders.
The object has power. Without power, an object does not animate and does
nothing.
This feature is no longer supported in Command & Conquer 3 Tiberium
Wars.
The object can be selected if it normally cannot be, such as a decoration.
To change the stopping distance for moving units, enter a new figure in the
space provided.
Changing the stopping distance is most useful for building cinematic
scripts. For most map development, use the default settings.
LOGICAL TAB CONT’D
Page 38
Page 39

TARGETING DISTANCE
SHROUD CLEARING DISTANCE
AVAILABLE UPGRADES
ATTACHED SOUND
CUSTOMIZE
ENABLED
PRIORITY
VOLUME
Set the maximum distance at which the object can begin targeting other
objects.
Set the maximum distance the object can peel back the black shroud to
reveal what is underneath it.
This feature allows pre-placed objects to start with any upgrades available to
them by clicking on the check box for the upgrade you wish to start them
with.
SOUND TAB
You may set any sound you wish as the default sound for a unit.
Enabling this option will turn on the Looping, Priority, Volume, Min Volume,
Min Range, and Max Range options.
Enabling this option allows the sound to actually play when told to do so.
Setting the priority higher or lower will let the sound engine determine which
other sounds on the map should lower when this sound plays, or if this
sound should lower when other, higher priority sounds play.
Raising or lowering this will adjust the volume for the Attached Sound.
MIN VOLUME
MIN RANGE
MAX RANGE
LISTEN
GAMEPLAY TYPES SUPPORTED
This is the volume the sound will play at when the camera is at it’s furthest
possible distance from the object that the sound is attached to.
This is the minimum range that the sound will play at full volume. Moving
past this distance with the camera will allow the sound to start fading.
This is the maximum range that the sound can be heard on the map. Moving
past this distance with the camera will make the sound not heard at all.
Clicking this button will play the associated Attached Sound.
MULTIPLAYER TAB
These checkboxes are always on by default for all multiplayer maps. These
options are for Xbox 360-only multiplayer maps and should never be
unchecked.
Page 39
Page 40

LAYING OUT A MAP
The best maps tell a story. Whether it’s a single-player or multiplayer map, a good map
creates a sense of time and place and establishes the nature of the gameplay. Based on
map terrain and resources, savvy players immediately begin formulating their strategies,
which in turn shape the struggle to win the campaign.
A good designer never takes control of the storytelling away from the player(s). In
deciding your map layout, create situations with open-ended possibilities. For example,
create multiple entrances to a base area or critical piles of resources between two base
areas to allow the player to choose how the story unfolds.
For ambitious designers who are creating multi-mission campaigns, it’s a good idea
to have a sense of the content of each mission and the shape of the story before
you begin.
This chapter provides some useful information to consider when laying out any map.
BASIC DESIGN DECISIONS
A good design is a delicate, yet flexible balance between a myriad of decisions. A good
designer always looks ahead. To the degree that you can, make decisions at the
beginning of your project about the following issues.
SINGLE-PLAYER OR MULTIPLAYER
The first decision: Are you creating a single-player map or a multiplayer map?
Successful designs for single-player and multiplayer missions vary greatly. A well-
designed single-player map applies escalating pressure on the player as the battle
progresses, with satisfying results for conquering each challenge.
When scripting behavior for single-player missions, remember that you are not
creating a fair system. You are creating the perception of a fair system inside a
satisfying user experience. The difference is critical; if you can create more
interesting challenges by providing information to the CPU-controlled sides through
scripting, do it.
Multiplayer maps are more open-ended. In a multiplayer map, you want each player to
begin at relatively equal strength in terms of map position, tactical advantages, and
available resources. Consequently, maps favoring an arena style of organization tend to
create more interesting multiplayer missions.
DRAMA VS. REALISM
Before beginning to work on your map, take the time to make some essential decisions.
Are you creating a realistic simulation of a location in the world, or are you creating a
fantasy environment? A realistic map requires more detailed work in molding the terrain,
choosing your textures, and placing objects. For example, while it can be a lot of fun to
create battles in your hometown, you may find yourself spending significant time looking
at offline maps and photographs.
Page 40
Page 41

If you prefer the dramatic approach, focus on creating the most interesting gameplay for
all participants in your map.
The best maps blend drama and realism. It’s a good idea to have an impression of where
your map fits along this spectrum.
THINK SPACE
Many user-created maps reflect the creator’s preferred style of play. For beginning users
and designers, that style favors turtling up in a base to develop an overwhelming army to
crush the opposition. To support this style of play, designs tend to have only one way in
and out of a base and are filled with objects. Lacking open space and containing too
many units, maps of this variety produce slow, drawn-out games that tend to follow a
predictable slugfest pattern. Try to keep plenty of open space in your map. Openness
means flexibility, and a good designer tries to accommodate multiple gaming styles.
NOTE: You cannot limit a start location to a particular army, so, for example, don’t
design start areas only for the Brotherhood of Nod.
Don’t isolate bases from each other (unless it's expressly your intent to create a
map in this style). Isolation inherently forces players to rely heavily on flying units,
and limits the effectiveness of standard forces.
GEOGRAPHIC LOCATION AND TIME OF DAY
What time of day does the battle begin? Where is your map located? Is it a desert
environment, or up in the mountains? How many trees do you want in your map?
Making decisions about the location, weather, and time of day at the beginning of
development can impact your map design. For example, if you’re placing your map in
wooded terrain, remember that trees are objects that can impact performance. After you
have decided your map’s when, where, and what, spend some time in the object and
texture libraries assessing which elements are going to work best.
DEGREE OF DIFFICULTY
Particularly for single-player missions, the degree of difficulty is an important
consideration and covers many aspects of design.
Do the challenges grow as the player expands his control towards CPU-controlled
locations? Do you want the player to be able to have a different experience depending on
the EASY, NORMAL, or HARD difficulty setting he selects in the game?
TIP In general, the approach to difficulty ramping based on use r-co ntrolled
settings is to create the map under either the easiest or the hardest setting.
Then, scale up or back in units, structures, and behaviors for other settings.
Degree of difficulty also covers design elements having nothing to do with hostile
opposition. For example, if the base area closest to a player’s start location is very small,
Page 41
Page 42

then the player must fortify that location and expand into new territory early in the game.
His forces are extended, making him more vulnerable.
OME DIFFICULTY FACTORS
S
Are players able to begin
building full bases easily?
How hard is it to find
additional resources?
How many entrances are
there for each base
location?
What are the terrain
advantages/disadvantages?
Are there bridges?
Most designs provide an expansion base close to the user’s
start point, but interesting possibilities are available if the user
enters the map with a strike force that he must use to find
supplies and start a base at some distance from his start point.
You can increase the challenge by placing settlements close to
or far from a player’s start point. If one player must travel
significant distance to reach a settlement while another has two
settlements close to his start location, the first player faces a
greater challenge.
While each base entrance should have at least three entrances,
you can create a different kind of challenge by having only one
entrance to an area that is sunken below the surrounding
terrain. So, while the player can defend the entrances to his
base easily, it is important for him to gain control of the terrain
above his base location.
Is the shortest route to the enemy’s base fraught with peril? Will
the successful commander quickly rampage through a terrain
disadvantage, or should he circumnavigate the danger area
with a much larger, occupying force? The best maps allow all of
these possibilities and more.
A bridge in a well-designed map offers a tactical advantage for
the team that can control it, yet the advantage should be
counterbalanced by the difficulty of defending the bridge. Never
let a bridge be the only path between two areas.
In multiplayer missions, the degree of difficulty is a factor, yet you should tend towards
keeping the map open, even, and conducive to combat.
While you may not have answers to all of the questions in this section, it's important that
you know what you don't know. It's reasonable to postpone resolution until you're actually
shaping the map with the tools. However, you should be aware that making large-scale
changes can take a long time when you are far into development.
TIP If you have yet to resolve some of these fundamental issues, try to figure them
out as soon as possible. Alternatively, you can regularly use the SAVE AS…
feature to save copies of your map.
MAKE A SKETCH
Page 42
Page 43

Whether you do it by hand or in an art application, create a sketch of your map before
you begin. While your final map is likely to change significantly from an initial sketch, it
does give you a clearer view of the relative positions of large map features and the space
you need to create them.
On your sketch you should include major design decisions such as time of day,
geographic location, mission objective, and story synopsis (if applicable).
TIP When planning your map on pape r, use graph paper. You can scale each cell
to a number of Worldbuilder units, following the suggested map sizes.
MAP DESIGN ISSUES
In very rough-cut form, plan your entire map before you begin. Keep in mind the following
concerns:
How big is the entire land plot on which the map sits?
TIP Whatever you need to design a map, add 70 tiles (700 feet) in all directions.
You can always trim back later. You can also reposition your map on the land
plot.
How does the map fit into the topography of the surrounding terrain? Is there a
general slope? Does it have large terrain features?
How are the base areas positioned throughout the map? How are they placed
relative to each other? How big are they?
Have you identified north on your map? In Worldbuilder, the north direction defaults
to the top of the screen.
What are the unique features, terrain or otherwise, of your map?
While you should develop your map on graph paper first, you may find it easier and faster
to prototype in Worldbuilder. You can turn on the map grid to overlay a grid for alignment
and measurement purposes.
GAME BALANCE: THE FUN FACTOR
Whether you’re creating a single-player map or a multiplayer map, it’s important to make
sure each army has a fair shot to win the game. When you’re developing maps,
remember the following tips to ensure that you create a fun map for everyone.
Each map requires significant playtesting to make it fun. No one gets it right the
first time. Try to find a group of designers with whom you can share and playtest
Page 43
Page 44

your designs. If you’re doing your own playtesting, try to check all base areas
under all types of armies.
In a multiplayer map, create open spaces between base areas where opposing
sides can fight. Open spaces allow players to engage in battles of varying size s.
They are also hard to control, so an open area can switch hands several times
during a game.
Between base areas of a multiplayer map you can also create strategically
significant areas, including towns, expansion bases, bridges, and resources such
as creeps and settlements. It is critical to create combat zones in multiplayer maps.
ACCOMMODATING VARYING STYLES OF PLAY
In addition to soliciting feedback on bugs and overall quality, playtesting with others lets
you see how your map might be played by players with different gaming styles. It’s
important to avoid forcing players to win a game with only one playing style. You also do
not want to allow players to win by relying on a single gaming style. The following is a
short list of some of the more common playing styles and how they can be
accommodated and limited in your maps.
THE EARLY
RUSHERS
THE TURTLERS
THE
STEAMROLLERS
THE GUERILLAS
Some players attack as soon as they possibly can. While you want to encourage
combat, it isn’t fun for other players if they get wiped out in the first two minutes. A
choke point can limit Early Rushers, while multiple openings to each base area
allows for effective counter-attacks.
New players tend to hunker down in their base areas and build their bases and
units. In all maps, it’s good to have some worthwhile resources, such as Tech
buildings, and expansion Tiberium fields near each base area. T hese resources
provide incentives for the Turtlers to expand out of their base areas. In singleplayer maps, an early attack from AI-controlled sides can rattle a Turtler’s shell.
Some players prefer to build a massive artillery to crush the opposition. These
players slowly and steadily build an army of artillery, which can clutter the board
and slow down the game. While open spaces can encourage mighty battles, you
as a designer can limit the scope of massive battles by creating a variety of
smaller objectives that cannot be won as easily with a huge army. For example,
scattering base expansions on the map splinters an army. Additionally,
strategically placed choke points can slow the progress of a large army, giving
defenders a chance to thin the herd. In single-player games, regular attacks by AIcontrolled sides can slow down the build-up.
Particularly for fans of the Brotherhood of Nod, the strike-and-move method of
attack is appealing. To assist the Guerilla types, you can create strategically
advantageous positions from which to launch attacks. Buildings that can be
garrisoned provide a great opportunity for a small force to effectively thwart a
larger one. Also, units on higher terrain have a longer range of attack than the
units on lower terrain, so it’s never a bad idea to have ridges overlooking base
areas. Multiple entries and space at the back of a base area allow for
Commandos to make their mark. Commandos, however, are vulnerable to air
Page 44
Page 45

attack and can be easily defeated at choke points. You certainly want to reward
players that find clever and sneaky ways to bring a small strike force to bear
against a larger and more powerful enemy.
When you are planning your map, you may want to examine it from the perspective of all
of these types of players. How would a Commando-style player approach each base
area? Will a Road Grader enjoy this map? While it’s impossible to please every player
and style, considering each style often illuminates mistakes and leads you to simpler and
more effective ways to build a better map.
LAYOUT DOS AND DON’TS
The previous section alludes to a number of the critical design considerations for any
map. Similarly, use these executional Dos and Don’ts for any type of map.
DON’T… BECAUSE…
Litter the map with
sources of money.
Confine yourself to the
rectangular or symmetrical
map.
Put larger buildings and
objects in the front and
center of your maps.
Become infatuated with
choke points.
Isolate bases. Don’t make bases difficult to access either through protection by natural resources,
Make a bridge the only
access to a base area.
Build King of the Hill
maps.
For good balance, each player should have access to 2-3 expansions with comparatively
the same difficulty in gaining and holding the resources. In general, too much money on
a map results in massive slugfests that can take a long time to play and can slow frame
rate in the process.
Although the map perimeter is defined with a rectangle, you can build impassable terrain
such as mountains or bodies of water along the edges to reshape your map’s playable
area. Additionally, you can script changes in the active map perimeter, effectively
opening new terrain. While maps of differing sizes, shapes, and symmetries do limit the
possibilities, they can be a lot of fun to play.
While players can rotate the camera, they tend to keep it in the standard view. So,
objects you place behind larger objects can get hidden. Place large objects towards the
rear and the extremities of the map.
It’s easy to fall into the trap of creating choke points where a few units can hold off a
whole army. If you have too many choke points, the game can be slowed down too
much. It’s probably a good idea to have, at most, one choke point per base. When you
do create a choke point, it should be two horde widths at a minimum.
hiding them behind a maze of mountains, or on islands.
It sounds like a fun idea to make a Bridge Over the River Kwai scenario, but such maps
make for bad games. Bridges are frustrating attack routes and usually offer advantages
to the defenders. If a bridge is a set piece to your map, make sure there’s at least one
other way to cross the gap.
If you create one base area in the middle, then that army must fight all of the others. If
that general is successful, then everyone else is frustrated. Either have all of the base
areas in the middle or all of them on the perimeter.
Overlap textures. Choose a good macrotexture, and build your texture fields so they do not overlap. It’s
very easy to create long seams of three-way blended textures by overlapping. You can
create nice effects without overlap.
Overuse massive objects. If you must use objects like Fortress Walls or a Dam, make them Indestructible and
Page 45
Page 46

Unselectable.
Build lots of flowing rivers. Flowing rivers tax system resources. Instead, try to build rivers that cut into the map and
then cut back out.
Go crazy building fences. Each individual unit in a shrub fence, for example, is an object. A long string of fences of
this type is a big hit on system resources.
Build mazes. Mazes cause problems for pathfinding units and slow down the game. Generally, maze
maps aren’t much fun either.
DO… BECAUSE…
Utilize space. Space, space, and more space. Create plenty of open space in your maps. You should
physically lay out a base at the start points to provide ample room for the player or AI.
Choose a theme for your
map and stick with it.
Build large areas for your
bases.
Build space at the back of
each base area where
troops can be dropped for
surprise attacks.
Create open space
between base areas in a
multiplayer map.
Even in an urban setting,
create as much space as
possible.
Check to make sure there
are at least three ways to
access each base area.
Create a palette of
textures in use.
Maps that change direction in the middle of development are easy to spot. Choose a
climate, time of day, and a location (urban or rural). You can combine some of these
elements, and a number of good maps have been placed at the edge of a big city. Make
a choice and stick to it; write down your commitments so you don’t forget them.
Leave flat ground around the outside for siege towers.
Most players build their initial defenses to face the opposition and rarely consider the
back of the base. Later in the game, as the conflicts heighten, a well-timed attack by
infantry units from the back can do serious damage, change the balance of the game,
and make it more enjoyable (for everyone else).
Open areas become combat zones that often determine who controls which areas of the
map. The early and middle games are all about map control, so create the spaces where
these battles can be resolved.
Units can have a hard time finding paths through urban environments if they are too
congested.
There should be two direct routes, and a third indirect route. Each entrance should be
some distance from the other routes. In single-player games, an effective scripting
technique is to have the initial attack come from the front for Easy and Medium difficulty
and to have the first hit come from the third route on Hard difficulty.
As you use a new texture, it’s a good idea to paint a small swatch of the texture outside
the map perimeter. You can use the swatch to quickly select the texture and to track the
number of textures in use on your map.
Give cliffs their own
unique texture.
Build visual set pieces
such as farms, oases,
town squares, etc.
It helps to identify cliffs for the player who may be looking ahead to plan routes into the
enemy’s base, only to discover there’s a “hidden” cliff in the way. It is critical to visually
identify impassable areas like cliffs with artwork that is unique from playable terrain.
Set pieces give a real sense of place and add a lot to the atmosphere. Many usercreated maps neglect these elements, and these maps look like arenas instead of
environments. To build good-looking set pieces, determine the geographic setting for
your map, build one set piece with which you are satisfied, and then add others through
copy, paste, and edit. If the set piece has no strategic value, keep it small: no more than
Page 46
Page 47

six objects.
Limit yourself to about 100
objects per player in a
multiplayer map.
Use your props wisely.
Page 47
Page 48

CREATING A MULTIPLAYER MAP
Worldbuilder is a deep and sophisticated tool that lets you create dynamic multiplayer
maps. While our in-house designers have been using and perfecting this tool for years,
you can begin right away to create exciting maps of your own by following the eighteen
steps in this chapter.
CARDINAL RULES FOR MULTIPLAYER MAPS
Space is key. Make as much space as possible between and in base areas. Siege
weapons need room to advance on the walls.
For each player, try to make 2-3 settlements and one 3-foundation expansion base.
Maximum multiplayer map sizes. While it’s possible to exceed these map sizes,
you should have good reasons to do so. For two-player maps, the max size should
be 350 x 350 tiles. For four to six players, 500 x 500. Eight player maps should
probably not exceed 600 x 600. If you make a map larger than 400 x 400, you
should have a clear reason for doing so.
Keep 30 tiles (300 feet) of space beyond the map perimeter on each side of your
map. This overflow area serves as a staging area and a workspace for terrain
features flowing into the map.
EIGHTEEN STEPS FOR MULTIPLAYER MAPS
(1)
DECIDE THE MAP LAYOUT
Before you begin, have a good idea of what you’re trying to develop in your map. What
will it look like? What is the basic topography? Are there any distinctive features? Is there
a general slope to the map? Is it in an arid climate, or is there snow on the ground? What
time of day will the battle take place? How many sides will participate? A design decision
is a commitment, and making more decisions at the beginning of development can
streamline the process of finishing the map.
You should have a good idea of the design unknowns, too. Try to resolve them as
soon as you can during development. Use the SAVE AS… feature to experiment
with those unknowns.
You can change your map’s background texture by using the Flood Fill tool.
PROTOTYPE YOUR MAP
(2)
When you’re deciding your layout, you may choose to sketch your ideas on paper. To
flesh out your ideas, follow a top-down approach. Figure out the largest map features,
such as lakes, mountain ranges, valleys, cities, and rivers. Also, you should have a basic
idea of where you want the various sides to build their bases. Decide their location and
begin using the tools in the order described in these eighteen steps.
TIP You can essentially create a graph paper overlay for your map. In the View
menu, turn ON Show Wireframe 3D View and Show from Top Down View.
The displayed squares are 10 scaled feet on each side.
Page 48
Page 49

Units coming to the edge of your map can, in some cases, exit the map. To prevent
such occurrences, create impassable terrain on the perimeter or paint impassable
textures to prevent passage.
Build large areas for your bases. Use a camp if there is not enough room for a
castle. Leave flat space around castles for siege weapons to approach.
(3)
SET WAYPOINTS
It’s a good idea to mark the locations of bases and resource depots early in the map
development process. Since tall units should not move on uneven terrain, you should
identify these locations as soon as you can.
Add waypoints for important features such as bridges, settlements, roads, and
creeps.
¾ To set a waypoint, click the Waypoint tool in the toolbar. In the Waypoint Options
window, enter a name for your waypoint.
NOTE: If you are creating waypoints to identify where players are going to begin in a
multiplayer map, the names must follow a specific format. For example,
“PLAYER_1_START” is always the starting location for Player 1. For each player in
a multiplayer map, you must also create a player in the Player List.
(4) BUILD THE BASIC TERRAIN
The Height Brush tool lets you flatten areas to the same elevation. Using the Mound and
Dig tools, you can shape the terrain. As you move the mouse back and forth over an
area, you begin piling (or digging) more terrain on the map. At this point, you just want to
create the basic features in their approximate locations at relative heights to each other.
¾ To view the underlying mesh of the terrain, select SHOW WIREFRAME 3D VIEW
from the View menu.
¾ To view the entire map, select SHOW ALL OF 3D MAP from the View menu.
TIP The entrances and exits of each base area are very important for gameplay.
Each base should have at least three entrances. Fewer entrances allow users
to fortify their bases too easily. Also, don’t create choke points that are too
tight or you may experience pathfinding problems for your units.
If you’re going to add bodies of water, make sure you reserve space in your map
for them.
CHECK THE SIZE
(5)
Now that you have created the basic terrain and the locations of your major gameplay
elements, make sure the map is big enough to contain everything. Remember that you
have to add extra workspace to your map and should create impassable terrain at the
edge. So, adjust your map size accordingly.
¾ To resize a map, select RESIZE under the File menu.
Page 49
Page 50

BUILD THE TERRAIN IN DETAIL
(6)
You’re now ready to get the terrain just right. Use the Mound and Dig tools to raise and
lower terrain to the heights you want. These tools can create rough-looking terrain, so
use the Smooth Height tool to blend the peaks and valleys into a more natural
appearance.
¾ To refine the brush used with each terrain tool, change the properties in the Terrain
Brush Options window that appear when you select a tool.
¾ To see if a piece of terrain can be passed over by a unit, select VIEW
IMPASSABLE AREAS in the View menu. Use the Smooth Height tool to make
these areas passable, if desired.
(7)
ADD A PERIMETER TO YOUR MAP
To create a more natural appearance, you should have a fringe of unplayable area
around your map that is at least 70 tiles on each side. You should also have terra in on
the edge of your map that units cannot cross. Terrain shapes that begin on the map can
use this perimeter area as overflow so you avoid abrupt edges to your maps.
¾ To create a map perimeter, click the Border Tool in the toolbar. Then, click and
drag any corner of the orange perimeter to resize the actual playable surfa ce of
your map.
Make sure the orange and blue borders cover the same area.
All maps are rectangular in shape, and the lower-left corner of your map perimeter
is always fixed.
TIP If you don’t want to create a set of natural elements at the edge of your map to
serve as impassable terrain, you can paint impassable textures along your
perimeter. These textures should be unique and appear impassable. Do this
at the end of your development process.
CREATE WATERWAYS
(8)
Next, create the bodies of water on your map. Left-click on the Lake/Ocean Tool in the
toolbar. Then, click and drag in the map to create the perimeter of the water polygon.
Adjust the settings in the Water Tool Options window to set the height of the water and
the density of control points in it.
When shaping a water polygon, you do not need to fit it exactly to the shape. In
fact, you can shape a water polygon around multiple lake beds or rivers. Create the
polygon so it merely encloses the area.
TIP When possible, use the default water plane in your map.
¾ To reshape your body of water, click and drag any control point.
¾ To identify the shape as a river, do the above using the River tool. Then, reshape
adjust the flow of the water texture.
While lakes have tides, river water textures have flowing currents.
Page 50
Page 51

(9)
PAINT TEXTURES
Now that all of your terrain shapes have been created, you can paint textures on them to
create realistic map features. In the toolbar, select the Large Tile tool to begin. In the
Terrain Material Options window, you can select the texture and define your texture
brush.
Textures are organized in folders based on appearance and geographical
connections. All textures in the same folder should work well together.
¾ To select a texture from the map with which to paint, select the Eyedropper tool in
the toolbar. Then, click the texture to use. That texture can now be painted with the
other texturing tools.
You can also fill a defined area with a single texture.
TIP When you select a new texture to paint, place a single-tile swatch of it outside
your map perimeter. A texture palette simplifies the selection, tracking, and
replacement of your map textures.
REFINE AND BLEND TEXTURES
(10)
After using the Large Tile and Flood Fill texturing tools to define the large texture areas,
you can use the Single Tile tool to tweak the textures of individual cells. Additionally, you
can blend textures together.
¾ To blend two textures together, click the Auto Edge Out texture tool in the toolbar.
Then, select the texture you want to blend into the surrounding textures.
NOTE: You can add some three-way blends between textures, but be careful. Don’t
have more than 300 three-way blends on your map or you may experience
performance problems in the game.
¾ To blend a single edge of a texture inward, use the Blend Single Edge tool.
What about the funny textures on cliffs? When you apply textures to steep
surfaces such as cliffs, the textures are stretched to cover the area. The results can
be ugly. To smooth a cliffside texture, select MAP CLIFF TEXTURES from the
Texture Sizing menu. Then, click the texture to map as a cliff.
(11)
PLACE COMBAT AND CIVILIAN OBJECTS
Now that you’re satisfied with your map terrain and textures, you’re ready to place objects
on the surface.
Only place objects that exist at the beginning of the game. Objects that appear
during the course of the game are created through scripts.
¾ To place an object on the map, click the Place Object tool in the toolbar. In the
window, navigate the object library tree to find the object to place. Change its
properties as needed. Click in the map to place the object.
Page 51
Page 52

¾ To move an object, click and drag it. To rotate it, click the edge of the icon and drag
the object to a new angle. To delete an object from the map, click it and press
Delete.
TIP For a multiplayer game, don’t have more than 100 objects p er player on the
screen or users may experience performance problems. For single-player
missions, don’t have more than 1,800 total objects.
ROADS
(12)
Roads can be key tactical points on your maps and add color to your landscapes. These
elements are specialized textures that are treated like objects.
Groves. You can also use the Grove tool to place natural-looking tree grove on
your map with just a few clicks.
PLACE RESOURCES ON YOUR MAP
(13)
Tiberium fields and expansion bases are key elements in balancing gameplay. Place
these items in equal quantity at equal distance from the starting points for each player.
In the Object library tree, resource objects are located under
Neutral\MISC_NATURAL.
TIP A good guideline is to budget 2-3 Tiberiu m fields for each player. If you
exceed this range, you may experience performance problems later in the
game because of the large number of created objects.
CREATE AND NAME WAYPOINTS
(14)
If you’re adding more waypoints for units to follow or as markers for the placement of
other materials, do so now.
¾ To place a waypoint, select the Waypoint tool in the toolbar. Then click a location
on the map to create the waypoint. In the Waypoint Options window, you can
change the waypoint name.
Sets of waypoints can be sequenced together into waypoint paths that units and
teams can follow.
WHAT’S THE AMBIANCE?
(15)
Ambient sound can be added to your map to add life to the civilian structures on it. You
can add the sounds of dogs, birds, markets, and ruins—among others.
In the object library tree, ambient sounds are listed in Neutral\Audio.
TIP Don’t put more than three ambient sounds in any screen. Test ambient
sounds in the game for appropriateness.
Page 52
Page 53

TEST IN THE GAME
(16)
When you have finished adding all of the elements to your multiplayer map, test the map
in the game. Spend some time in the map as a single player, and test it with a couple of
friends who are willing to help you find problems. No one gets it right on the first pass, so
be patient. The simplest answer is usually the best one.
¾ To open a user-created map in the game, select SOLO PLAY from the Main menu.
Then, select SKIRMISH. In the Skirmish Setup screen, click SELECT MAP. Usercreated maps are listed under Player-Made Maps. Select your map and click
ACCEPT. In online multiplayer games, user-created maps are automatically
transferred to all players who join the game.
OPTIMIZE TILES
(17)
During development, you may have blended textures together in order to create subtler,
more realistic effects. However, blended textures can be a burden on the game. Prior to
releasing your map, attempt to optimize your texture tiles.
¾ To optimize textures, select OPTIMIZE TILES AND BLEND TILES from the Texture
Sizing menu.
(18)
SHIP IT!
When you are ready to distribute your multiplayer map, all of your gaming buddies must
install it on their system. A completed map should be approximately 1MB and can be
emailed as a set of attachments.
When using multiplayer maps online, the creator of the map should host the game.
The map is automatically transferred to all players who join. Single-player maps
must be transferred via email, FTP, etc.
¾ To install a user-created map, save the map under C:\Documents and
Settings\USER NAME\Application Data\Command and Conquer 3 Tiberium
Wars\Maps, or wherever your game data is stored. Give the directory the exact
name of the map file, minus the filename extension. Place the map file, the .TGA
preview file, and any other related files inside that directory. The map is then
available through the Skirmish Setup screen in the game.
Page 53
Page 54

A FEW EXTRA STEPS FOR SKIRMISH MAPS
A good multiplayer map makes a good Skirmish map as well, because a Skirmish map is,
in fact, a multiplayer map that is playable by only one player. All other players are CPUcontrolled. Designing a Skirmish map is similar to building a multiplayer map as
described in the previous chapter, with a few extra steps.
1. Before you begin building your map, read all of these instructions so you can plan
ahead to convert your multiplayer map to a Skirmish map.
2. Complete Multiplayer Steps 1–17. Follow the steps listed in the previous section
to build a multiplayer map to completion, including playtesting.
3. Add Computer Controlled Players. Follow the guidelines set out in the
“Multiplayer Map Processes” documentation available separately online.
4. Save Your Completed Multiplayer Map Under a Different Name. You should
work on a separate file for your Skirmish map.
5. Save and Play. Save your map and give it a try.
Page 54
Page 55

BUILDING SINGLE-PLAYER MAPS
Designing single-player maps is a bit more complicated because the designer is
responsible for all of the challenges. Instead of relying on players to challenge each
other, you must present a carefully constructed set of challenges for a single play er.
The time you spent learning the nuances of each side’s strategy and tactics can now be
applied to your single-player designs. While the steps for single-player designs d o
overlap with multiplayer, there are a few extra steps to consider.
1. Additional
Design Issues
2. Complete
Multiplayer Steps
2–10
3. Edit the Player
List
Before you begin, consider all of the issues outlined in Multiplayer Step #1.
Then, think of issues specific to a single player. What is the “story” of the
mission? Are there any scripted events that happen at the beginning of the
mission? Are there “plot points” at which events should occur? How many
sides are on the map? What resources, structures, and units does each side
begin with? Is the player started at a disadvantage? What are the civilian
resources?
TIP When designing the story of a single-player mission, keep in mind
that the player is more interested in playing the game than reading
text. Storylines should be very clear and easy to tell. Changes to
the plot in the middle of the mission should be direct and reinforced with displayed text and physical changes to the map,
such as the arrival of new objects from off-screen.
See Creating a Multiplayer Map.
How many CPU-controlled players are going to participate in the mission? Are
there multiple CPU-controlled players playing the same faction? Are there any
alliances? These questions need answers in the Player List.
To open the Player List, select EDIT PLAYER LIST from the Edit menu. To
create a new player, click NEW PLAYER. In the drop-down, select the faction
template to apply to the player, and click OK.
4. Complete
Multiplayer Steps
11–14
5. Write Your
Scripts
6. Complete
Multiplayer Steps
15–18
See Creating a Multiplayer Map.
Scripts determine unit behavior based on in-game events. The essential
structure of a script is: IF (condition), THEN (Action1) ELSE (Action2).
Scripts are the keys to creating dynamic single-player missions. To open the
Scripts window, select SCRIPTS from the Edit menu.
See Creating a Multiplayer Map.
Page 55
Page 56

TUTORIAL: HOW TO
Worldbuilder tools are easy to learn and versatile in application. While many of these
tools take a few seconds to master, some of the core design tasks require attention to
detail to produce professional-quality maps. This section covers the step-by-step
processes for completing core tasks necessary to build a map, and you may find a tip or
two to simplify development and improve results.
¾ To learn toolbar tool names, move the mouse and hold the cursor over a tool.
HOW TO
BUILD A
HILL
HOW TO BUILD A VALLEY
Use the Mound Terrain tool to create a hill. By painting over and over an area with
the Mound tool, you heap terrain on top of terrain, creating mounding effects that are
smoothed by the application into the surrounding terrain. With practice, you can
learn to create sharp cliffs, craggy mountains, gentle knolls, and tiny undulations in
the terrain.
1. To build a hill, click the Mound button in the toolbar. It looks like a paint brush
with a plus sign (+) next to it. The cursor changes, and the Terrain Brush
Options window opens.
2. In the Terrain Brush Options window, you can configure the Brush Width,
Brush Feather Width, and Brush Height before you begin painting terrain.
3. In the map, click and hold the mouse button when the cursor is at the location
where you want to add terrain. As you hold down the mouse button, terrain is
added around the cursor according to the parameters set in the Terrain Brush
Options window. Continue clicking, holding, and moving the mouse back and
forth until you create the approximate shape you want for your mound.
4. To soften the effects of the Mound tool, use the Smooth Height tool in the
toolbar, which smoothes curves along the edge of your terrain shapes.
Building a valley is very similar to building a hill.
1. To build a valley, click the Dig button in the toolbar. It looks like a paint brush
with a minus sign (-) next to it.
2. Repeat steps 2–4 for How to Build a Hill until you are satisfied with the results.
HOW TO BUILD A RAMP
No matter how carefully you add/remove terrain, you’re going to have a hard time
creating smooth inclines and declines. For these terrain effects, use the Ramp tool.
1. In the toolbar, click the Ramp tool.
2. In the map, click the start location for the ramp and drag to its end location.
3. In the Ramp Options window, select the width for the ramp.
4. To create the ramp of terrain, click PLACE RAMP.
¾ To undo the placement of the ramp, press Ctrl + Z.
Page 56
Page 57

HOW TO
BUILD AN
AREA FOR
BASE
A
When designing a map, you must designate areas where each side can build its
base. A base area must be of sufficient size to accommodate all the buildings the
side needs to win the map. What is this size? Unfortunately, there is no golden rule.
However, if you follow these steps, you should minimize the amount of reworking
required during the remainder of your designing process.
1. Each base should have a minimum of three entrances. Whether the base
faces human- or CPU-controlled opponents, experience suggests that it’s not
so hard to effectively defend two entrances. However, defending a third
entrance is very hard to do. If all bases face similar challenges, the game gets
interesting in a hurry.
For single-player base areas, you should consider the nature of the mission
and how much of the tech tree is going to be available to the base creator. If
he can access everything, then the confrontation is likely to be large and
require many base structures. However, for specialized single-player missions
with a reduced tech tree, you may not need to build a large base area. It can
be a good idea to give a human player a few buildings with which to
commence the mission.
2. Place all of the structures that you think the player needs in order to win
the game. Will players have medium-sized camps or large castles? How many
settlements are available? Be sure to place 3-foundation expansion outposts
and settlements strategically so the player is drawn to all of the remote corners
of the map.
3. Flatten out the base area. When you have defined the polygon trigger area,
make the space inside the area as flat as possible. Large Units like the
Mammoth Tank need room to approach.
HOW TO PAINT TEXTURES
You can paint textures in large or small tiles.
1. To paint a texture, select either the Large Tile or Single Tile tool in the toolbar.
2. In the Terrain Materials Options window, you can navigate the texture tree to
preview and select the texture you want to paint.
¾ To use the texture partially hidden in the Terrain Materials Options window,
click SWAP. This texture reflects the “midpoint” between the current texture
and the macrotexture.
For the Large Tile tool, you can change the width of the brush in the Terrain
Materials Options window.
TIP As you paint a new texture, add a one-square swatch of it outside the
area of your map. You can build a palette of all of the textures in your
terrain, which makes for easier selection and replacement.
3. In the map, click and drag over the areas to paint with the selected texture.
Cover the entire area, and don’t worry about the shape of the edges.
Don’t overlap textures too frequently. Choose a good macrotexture and build
your texture fields so they don’t overlap. It’s very easy to create long seams of
three-way blended textures by overlapping. You can create nice effects without
the overlap.
TIP When painting textures over a large area, use one base texture over an
area and add a couple of textures for nice effect. Apply the textures
using the Flood Fill tool. Keep five grid cells between blended areas or
Page 57
Page 58

you may have to address three-way blends. When in doubt, start over
and repaint.
HOW TO BLEND TEXTURES
HOW TO COPY TEXTURES
HOW TO
PAINT
PASSABLE
AND
IM-
PASSABLE
TERRAIN
After you have painted an area, you may want to blend the texture into the
surrounding textures for better appearance and edging.
¾ To blend the texture into the surroundi ng areas, select the Auto Edge Out tool
in the toolbar. Click inside the texture area to blend outwards.
¾ To blend a single edge of a texture an d smooth its appearance, select the
Blend Single Edge tool in the toolbar. Click and drag from one texture across
the sharp edge and into the other. This softens the edge.
While you cannot currently copy texture shapes from one location to another, you
can quickly select textures from one area and apply them to a new one.
¾ To select a texture, select the Eyedropper tool in the toolbar.
N
OTE: You cannot select blended textures, which are algorithmically created. When
you select a blended texture, you select the texture beneath it. You can then
re-create the blend in a new location.
During map development, your manipulations may create impassable terrain forms.
You can paint those units as passable. Similarly (and more commonly done) you
can paint passable terrain as impassable.
W
ARNINGS
It can be tempting to repaint the entire map as either passable or impassable as you
see fit. However, doing so may cause problems, so read the following warnings and
paint with caution.
If there is no gameplay reason for units to cross the terrain, make it
impassable.
Do not paint cliffs as passable terrain. It looks bad to have tall units like the
Avatar climbing vertical surfaces—the sense of a real-world experience is lost.
The ability to climb cliffs can cause problems for the long-range, too.
In general, do not turn terrain that is naturally impassable into passable terrain.
In Worldbuilder, terrain that is steeper than 45 degrees is impassable—and
should stay that way.
Do not create islands of passable terrain inside of seas of impassable terrain.
For example, if there is a spot of passable terrain at the top of an impassable
mountain, Units trapped inside a sea of impassable terrain spend the rest of
the game trying to get out and cause a significant impact on the frame rate.
Instead, paint the entire area as impassable.
Paint impassable textures around the outside of the map perimeter.
Particularly for single-player maps, it’s important to limit the ability to move
beyond the map.
Paint impassable terrain beneath boulder objects.
Page 58
Page 59

TO PAINT:
1. Under the View menu, select SHOW IMPASSABLE AREAS.
2. To set the angle at which terrain becomes impassable, select IMPASSABLE
AREAS OPTIONS under the View menu.
3. To paint terrain as passable or impassable, select the Single Tile or Large Tile
tool in the toolbar.
4. At the bottom of the Terrain Materials Options window, check the box next to
Paint passable/impassable terrain. Choose whether you are painting Passable
or Impassable terrain.
5. On the map, begin painting the selected textures. Remember to observe the
warnings above.
6. When you finish painting, it’s a good idea to give a texture clue so the player
knows what’s expected of the terrain. For example, if you painted a rocky slope
as passable, you should repaint it with a softer texture. Such painting helps
users figure out where to go.
HOW TO
PLACE
OBJECTS
FROM THE
OBJECT
LIBRARY
HOW TO ROTATE AN OBJECT
Objects include structures, units, and all types of civilian items. At this point, only
place objects appearing at the beginning of the map. You will use scripts to place
objects created and appearing later in the mission.
1. From the toolbar, select the Place Object tool.
2. In the Object Selection Options window, navigate the tree to find the object to
place. Click the object.
Do not use objects with names beginning with “CINE_”. These objects are for
use only when creating cinematics. They should not be placed on the map.
3. In the map, click the location where you want to place the object. The object
is placed. (You can place this same object in another location by clicking in a
new location.)
4. In Worldbuilder, you can place any object anywhere on the map; the terrain
beneath it is not considered. Either before or after placing the object, you
should reshape the terrain for a more natural appearance.
You can partially bury some objects for a different look. For example, a half-
buried tree becomes a bush. However, it’s recommended that you don’t try
these effects until you have settled on the shape of your terrain.
5. After placing the object, you can configure its properties.
¾ To rotate an object, use the Select and Move tool in the toolbar. Click and
drag the outer line of the icon in the middle of the object. The object rotates.
HOW TO
REPOSITION
OBJECT
AN
¾ To move an object, use the Select and Move tool in the toolbar. Click a nd
drag the object to a new location. Adjust the terrain and texture underneath
the object, as needed. Make sure the Show Object Icons option is checked in
the View menu.
Page 59
Page 60

HOW TO COPY AND PASTE AN OBJECT
HOW TO
ADD ANY
STRUCTURE
ON
YOUR
TEAM
HOW TO
BUILD A
WAYPOINT
PATH
¾ To copy and paste an object, use the Select and Move tool in the toolbar.
Click the object. Select COPY from the Edit menu. Then, select PASTE. The
object is pasted directly over the original. Click and drag the copy to a new
location.
Assigning a placed structure to a defined team requires just a few more steps.
1. Follow Steps 1–5 in How to Place Objects from the Object Library.
2. In the Object Properties, select the player team to which the structure belongs
from the Team drop-down.
¾ To define a player team, select EDIT PLAYER LIST from the Edit menu.
You can develop waypoints or sets of waypoints called waypoint paths that units can
be ordered through scripts to follow during patrols, attacks, or reconnaissance
assignments.
Try to design your waypoint paths to be essentially straight. At most, give them
a nice arc. Avoid S-turn paths because they cause pathfinding problems for
units.
1. To begin placing waypoints, select the Waypoint tool in the toolbar.
2. At the location of the first waypoint on the map, click and hold the mouse
button. The first waypoint is created.
3. Drag the mouse to the location of the second waypoint. Click and continue
dragging until you have created all of the waypoints of the path.
4. When you have finished creating the waypoints of the path, enter a uniqu e
name for the path in the Path Labels textbox.
¾ To select all of a path’s waypoints, press Ctrl and then click one of the
waypoints.
HOW TO BUILD A ROAD
A road is treated as an object in Worldbuilder. In the game, however, it is baked into
the terrain and becomes a texture. You can automatically create intersections that
have up to four different roads of the same type. To create larger intersections or
ones involving dissimilar road types, you must take additional steps.
1. Before you place the road, you must prepare the terrain. While roads can climb
hills, you should avoid placing the road on terrain that slopes across the grain
of the road. Placement of roads on such terrain can cause unnatural spiking in
the road object. Use the Smooth Height and Height Brush tools in the toolbar
to create a flat bed for your road.
2. To place the road, select the Road tool in the toolbar. Then, in the Road
Options window, select the type of road to place.
3. From the road’s start position, click and drag a small section of road. Rightclick to move the screen a bit. Click the end of the first section of road and drag
a new section. The corners are automatically smoothed. Repeat this technique
(click-and-drag, right-click, click-and-drag) until you’ve created the roa d.
Page 60
Page 61

Don’t create turns in your roads greater than 90 degrees. They are unsightly
and can cause performance problems. Create very sharp turns as a series of
more gradual turns.
4. When you finish placing the road, check the corners. You can change the
smoothness of the corners. To change the shape of a corner, click the middle
of the corner. An icon should appear. In the Road Options window, select a
different corner type. Click APPLY TO SELECTION to change the corner.
Intersections
Roads of the same type automatically connect when you bring them together.
However, you can create new intersections after you have placed your entire road.
¾ To create a new stretch of road off an existing road, click in the middle of the
existing road at the point where you want the new road to begin. Drag a stretch
of road away from the existing road. The intersection is automatically formed.
¾ To create an intersection between dissimi lar road types, drag the second road
to the edge of the main road. Do not try to overlap the two roads; get them as
close as possible without touching. Select the end of the second road. In the
Road Options window, select Add End Cap and click APPLY. A nice
overlapping touch is applied from the second road onto the first.
For intersections involving more than four roads of the same type, you must
offset the additional roads from the main intersection.
HOW TO ADD A SIDEWALK
HOW TO BUILD A BRIDGE
The process of adding a sidewalk next to a road consists of simply adding a second
road object parallel to the first.
1. Click the Road tool in the toolbar. In the Road Options window, select the
sidewalk to apply.
2. In the map, click your sidewalk’s start location. Try to match the turnpoints and
shape of the road.
3. Change the type of corners as needed to get the proper appearance.
4. After placing the sidewalk to your satisfaction, you may want to examine the
seam between sidewalk and road. Sometimes, inadvertent gaps appear, which
you can cover using specialized textures. Select either the Single Tile or Large
Tile tool in the toolbar. Browse the texture library to find a texture that blends
well between the look of the sidewalk and the road. When it is applied, the
texture appears beneath and between the two road objects.
When building a bridge you must prepare the terrain before laying down the bridge.
The heights of the two ends of the bridge must be roughly equal. While you can
have discrepancies of a couple feet, you should avoid creating bridges having a
significant slope to them because this causes pathfinding problems for the units.
You cannot create turns in bridges. To create a turn in your bridge, build an
island at the turnpoint. The island should be wider than the bridge and larg e
enough to serve as a gathering point for armies crossing the bridge.
1. Check the height of each terminus of the bridge or bridge segments. The
heights of a segment should be within a few feet of each other.
2. Select the Object Placement tool in the toolbar.
Page 61
Page 62

3. Navigate the Civilian Structures category of the object library to find the bridge
you want to place.
4. Place the bridge in the game world. Click and drag from one bridge endpoint to
the other. Make sure you have plenty of overlap onto the ground next to the
gap. Do not create bridges that barely touch the edges of the gap because
units may not be able to cross them.
HOW TO BUILD A GROVE OF TREES
Use the Grove tool to create random groups of multiple types of trees to give your
vegetation a natural appearance.
Trees are objects and in large numbers can impact performance. You can
create nice effects with as few as six total trees. Create groves of more than 40
trees only if you’re sure you want them.
When creating forested areas, remember that you are creating the impression
of a forested area; you are not creating an entire forest. If the player is not
going to spend much time in the area or won’t cross the forest at all, then you
might be able to just place trees around the edge of the area.
1. Select the Grove tool from the toolbar.
2. In the window, enter the total number of trees to create in the Total Tree Count
textbox.
3. To allow placement of trees in water, click the appropriate box. Make sure that
water is shallow enough. Submerged trees are hard to find.
4. To allow placement of trees on cliffsides, select the appropriate box. Avoid
placement of trees on nearly vertical cliffsides.
5. In the tree drop-downs, select the types of trees you want to add to your grove.
Enter the percentages for the selected trees.
The total number of trees is always created, regardless of whether the
percentages add to 100.
6. On the map, click and drag a rectangle for your grove. When you release the
mouse button, the trees are placed.
¾ To undo the placement of the grove, press Ctrl + Z.
¾ To delete an individual tree, click and press DELET E.
7. After placing your grove, check to make sure all trees are in good positions.
You can move trees individually, select them using the Select Similar menu
command, or rotate the camera to view the grove from another angle.
8. If you need to add trees, you can add them individually or use the Grove tool
again.
HOW TO
BUILD A
LAKE
USING THE
DEFAULT
Page 62
Each map contains a default water plane which sets the “sea level” for the entire
map. Whenever possible, use the default water plane because it is less taxing on
system resources in Worldbuilder and the game.
The default water plane can be raised and lowered. Where possible, create your
Page 63

WATER
PLANE
HOW TO BUILD A LAKE USING WATER POLYGONS
largest body of water using the default water plane.
1. If you have not done so, use the terrain tools to dig the lake bed.
2. Click the Water tool in the toolbar.
3. In the map, find the blue polygon on the map perimeter. That blue polygon
defines the default water plane.
4. To reshape the default water plane, click and drag any corner. When shaping
the water plane, you are not defining the perimeter of the lowest lake; you are
using the polygon to define the water level for a specific area of the map. The
default water plane does not have to mark the perimeter; it simply must
encompass it.
5. In the Water Options window, you can apply a name to the default water
polygon, and you can use the slider bar to change the water level height.
Changes to the water level update in real-time.
The other options in the Water Options window do not apply to the default
water plane.
If you are building more than one body of water in your map, you can create
additional water polygons to turn into lakes.
1. If you have not done so, use the terrain tools to dig the lake bed.
2. Click the Lake/Ocean tool in the toolbar.
3. Click the start point for the water polygon. Click the location of the next point.
Continue clicking at the turn points around the perimeter of the lake bed until
you return to the start point. The water polygon is created.
Note the control points defining the shape of the water polygon; these are
expensive resources. If possible, increase the Point spacing for your polygon.
A water polygon does not have to form-fit the hole. It just needs to surround
the lake bed. A good starting point for the Point spacing for a lake is 50.
4. Use the Water Height slider to adjust the water level of the polygon until you
have created a desirable lake.
5. If needed, you can reshape the terrain around the lake bed to improve the
appearance of your lake’s shape.
6. When you are satisfied with the appearance of your lake, it’s a good idea to
paint impassable terrain tiles around its perimeter.
HOW TO BUILD A RIVER
Page 63
Building a realistic river takes a few more steps than building a lake.
1. If you have not done so, use the terrain tools to dig the river bed. Due to
technical considerations, rivers tend to look better if they are wider at both
ends. You can put the ends of your river outside the map perimeter to hide
them while making the river look better on the map.
Remember that a real river flows down a slight grade.
2. Click the River tool in the toolbar.
3. Click and drag the width of the river to create the start points. Click
and drag the start points to the location of the next point to drag out
Page 64

the end points. You can add more points between the start and end
points by clicking on the lines between the start and end points.
Remember to add points to both sides of the river.
4. The water texturing system uses the control points of a river polygon
as anchors in shaping the image of the flowing water. So, you need
to pay attention to their count and positioning while creating rivers. If
you are creating a bend in the river, there should be an equal
number of control points on the inside and outside of the bend, with
the points on the outside of the bend spaced further apart.
HOW TO BUILD A MAP PERIMETER
The map perimeter defines the playable area for the player and all of the units in
the game. Each map must have at least one map perimeter. During the course of a
mission or game, you can activate and deactivate map perimeters to change the
boundaries of your map on the fly. This technique is particularly useful for singleplayer missions in which the user should proceed step-by-step from one challenge
to the next.
1. To show the current map perimeter, select SHOW MAP BOUNDARIES in
the View menu.
2. In the toolbar, click the Border tool.
3. If you have not yet made changes to the map perimeter, the default orange
perimeter encompasses the exact map size.
¾ To resize the default orange perimeter, click and drag the p erimeter’s
northeast corner.
4. To create a new map perimeter, go to point 0,0 on the map. Click and drag
to create a new perimeter.
You can create up to nine map perimeters. Each perimeter always starts at
point 0,0, which is always the lower left corner even if you resize your map.
5.
After creating a new perimeter, you can reference all perimeters
through scripts by color. In the Script window, look for the “Change
Active Script Boundary” action. Select the color of the new map
perimeter from the drop-down list.
HOW TO
CHANGE
THE
TIME
DAY
OF
HOW TO
MAKE A
MAP
AVAILABLE
TO THE
GAME
You can create map environments set at any time of day.
1. From the Edit menu, select MAP SETTINGS.
2. In the Map Settings window, select a different time of day under the Time of
Day drop-down. Click OK.
OTE: When you change the time of day for your map, all structures, bridges, and
N
some other props are automatically re-textured. However, many map
elements are not re-textured, so it’s recommended that you decide the time of
day at an early stage of development.
If you have saved your map in a non-standard directory, you must follow these
steps to make it available to the game.
1. From the File menu, select SAVE AS….
2. In the Save dialog box, click USER MAPS.
3. Enter a name for your map. Click SAVE.
Page 64
Page 65

If the User Maps directory is a new location for your map, remember to
reconcile the new file with the old one. Do not have two files with the same
name containing different versions of your map.
¾ To open a user-created map in the game, select SOLO PLAY from the Main
menu. Then, select SKIRMISH. In the Skirmish Setup screen, click SELECT
MAP. User-created maps are listed under Unofficial Maps. Select your map
and click ACCEPT.
Page 65
Page 66

PLAYERS, TEAMS, AND THE BUILD LIST
Using the Player List and the Build List, you can define the CPU-controlled players in the
map and the order in which they develop their bases.
Teams are groups of units that can be assembled by CPU-controlled players based on a
set of priorities and conditions and then given orders.
PLAYER LIST
In the Player List, you can add new players to your map and edit their settings, including
any alliances.
¾ To open the Player List, select EDIT PLAYER LIST from the Edit menu.
In the Player List window, the current players in the game are listed at the top of the
screen. All objects that have been placed in the map but have not been assigned to a
player are part of the Neutral player.
To create a new player:
1. In the Player List window, click NEW PLAYER.
2. In the window, select the faction for the player from the drop-down list. Click OK.
For multiplayer maps, you can create an Observer faction which allows players to
view the game without participating. Defeated players are switched over to the
Observer faction.
¾ To delete a player from the Player List, select the player’s name. Click REMOVE
PLAYER.
3. Player Name. The new team appears in the Player List. To change the player’s
name, enter a new name and the displayed name in the appropriate boxes. Click
SET NAME. (The Player name is for reference use in scripts. The Display name
appears on-screen in the game for CPU-controlled players.)
4. Human or CPU. To register the player as a CPU-controlled side, check the
appropriate box. (By definition, single-player maps have only one human-controlled
player. For multiplayer maps, a human-controlled player must be created for each
potential participant in a game.)
5. Factions and Colors. To assign the player to a different faction, select a new one
from the Faction drop-down. To change the color of the player’s units and
structures, select a new color from the appropriate drop-down list.
6. Allies and Enemies. At the bottom of the screen, you can review the allies and
enemies for the selected player. The other players are listed in each box.
¾ To make a player an ally (or enemy) of the selected player, click the player’s name
in the Allies (or Enemies) box. The player listing changes under How Player
Regards Others.
Page 66
Page 67

NOTE: It is possible for Player A to see Player B as an ally while Player B sees Player A
as an enemy. Player B can then massacre Player A without any return fire. Such
possibilities are useful for scripting set pieces, but be careful when using them.
¾ To toggle the selected player’s regard for an enemy between ENEMY and
NEUTRAL, click the player name under Enemies. The player listing changes under
How Player Regards Others.
The How Others Regard Player box displays the views of other players towards the
player selected.
7. Skirmish Players. If you are making a Skirmish map, you add Skirmish players as
the final step to creating your map. The Skirmish players are controlled by AI. (To
add Skirmish players to your Skirmish Map, click ADD SKIRMISH PLAYER.)
8. To finish editing the Player List, click OK. To cancel your edits, click CANCEL.
BUILDING TEAMS
In Worldbuilder, you can create team structures so CPU-controlled players can assemble
groups of units to attack opponents, defend their bases, and secure territory. In no small
measure, the presence and structure of teams determine the ability of a computer
opponent to present a worthy challenge.
Teams can be created from units that are on the map at the beginning of the game or
from units that the player has yet to create. Each team can be assigned a set of scripted
behaviors to be applied on a variety of triggers.
¾ To open the Teams window, select EDIT TEAMS from the Edit menu.
TEAMS WINDOW
In the Teams window, a list of available players is displayed on the left side of the screen.
Created teams for the selected player are displayed on the right.
¾ To create a new team, select a player. Then, click ADD NEW TEAM.
¾ To copy a team, select the team and click COPY TEAM.
¾ To delete a team, select the team and click DELETE TEAM.
¾ To edit a team, double-click on it.
¾ To move a team up or down in the list of teams for organizational purposes, select
the team and click MOVE TEAM UP or MOVE TEAM DOWN.
¾ To display the number of units on the map already associated with the selected
team, click SELECT TEAM MEMBERS.
¾ To accept the team definitions, click OK. To cancel edits, click CANCEL.
C
REATING A TEAM
Page 67
Page 68

When you choose to create a team, the Edit Team window opens. Each of the four tabs
(described on the following pages) is fairly detailed, so it’s recommended you start by
building simple teams to complete basic actions.
¾ To create the team, click OK. To cancel, click CANCEL.
¾ To apply changes to the team, click APPLY.
TIP Since some units require faction structures in order to be created, your Build
List for the player should be synchronized with the priorities of teams created
in the Teams window.
Page 68
Page 69

IDENTITY TAB
In the Identity tab, you configure the team’s basic characteristics.
Name. The team name must be unique and is the reference used in scripts.
Owner. Select the player who owns the team.
Maximum. Enter the maximum number of teams of this type that can be on
the map at any time.
Home Position. The reference to the named waypoint where the team rallies
as it is assembled.
Condition. A reference to the script allowing the AI to build this team. The
script must be a subroutine that has a condition. When the script condition is
met, the AI considers building the team based on the priorities of all active
teams.
Execute associated actions. When checked, the AI executes the actions of
the script referenced as the Condition. By default, the script’s actions are
ignored.
N
OTE: The condition checked under Production is examined when the team has
been authorized to be built. This subroutine is not a substitute for On Create
under the Behaviors tab. If you are referencing a subroutine through the
Condition drop-down, that subroutine must contain a condition, as the
subroutine may fire before the team is actually produced. To execute the
associated actions of that subroutine, check the box next to Execute
associated actions.
Priority. The priority for a team indicates to the AI the importance of building
the team. A higher priority number is more important. You can set the priority
to be any positive integer, but be sure to use a consistent range.
Build for. When a team’s script condition and priority have been met, the AI
attempts to build the team for the number of frames in this field. Time in the
game corresponds to 30 frames/second in most cases.
Success/Failure Priority Increase/Decrease. Whether a team succeeds or
fails in completing its objective, you can increase or decrease the priority for
creating another instance of the team.
N
OTE: In the Success and Failure priority settings, you can enter both positive
and negative numbers. While you are learning to develop teams, you should
ignore changing priorities.
Min, Max, and Unit Type. On each line, you select a type of unit to include in
the team. Select a unit type from the drop-down list, and enter minimum and
maximum numbers for the units in the team. When reaching its Build For
limit, the team is deployed if it contains the minimum number of units (it
continues building until that minimum is reached).
Automatically reinforce whenever possible. When selected, the AI attempts
to bring reinforcements to this unit until it reaches maximum strength.
Team members are AI recruitable. A team with higher priority settings than
the current one can recruit members from this team.
N
OTE: Team settings, such as AI Recruitable, override individual unit settings.
Team created once and only once. This team is created one time only during
the game.
Team Description. You can add a custom description and notes pertaining to
the team and its function.
Page 69
Page 70

REIN-
FORCEMENT
TAB
BEHAVIOR TAB
Under the Reinforcement tab, you define the reinforcements for this team.
Deploy by. (This feature may be disabled in this version of Worldbuilder.)
Start teams or transports at waypoint. Select the waypoint where
reinforcements rally before deploying.
Load members into transports (if applicable). When checked, all team
members are automatically loaded into the transport.
Veterancy level. Units must be at least at the minimum veterancy level to be
recruited. This setting doesn’t affect units created to become reinforcements.
You can define the team’s behaviors based on the events listed in this tab.
In subroutines referenced in this window, you can use the drop-down
selection, “<This Team>” to indicate this defined team.
N
OTE: Scripts referenced in the drop-down lists must be subroutine scripts. When
the condition in this tab is met, the subroutine is activated and its condition is
tested. If you want the subroutine’s actions to be executed in all cases, leave
the subroutine script’s condition as the default (TRUE).
On Create. Subroutine is activated when the team is created.
On Enemy Sighted. Subroutine is activated when an enemy is sighted.
On All Clear. Subroutine is activated when the team detects no enemies.
On Destroyed. When the selected percentage of units in the team is
destroyed, the AI activates and tests the selected subroutine script.
On Idle. Subroutine is activated when the team is in the Idle state.
On Unit Destroyed. Subroutine is activated when a unit of the team is
destroyed.
Transports return to base after unloading. When checked, all transports in
the team return to base after their cargo has been released.
Team avoids threats. When checked, the team makes an effort to
circumvent threats when headed to its goals.
Initial Team Behavior. Select the initial AI aggressiveness, which overrides
the setting of any individual unit.
Attack: Does this team focus on a single target at a time in Hard and Brutal
(never
in Normal)? When it’s checked, the team aggressively pursues a
single target in the harder difficulty levels, which creates a greater challenge
for the player. Difficulty levels listed here for Worldbuilder correspond to
Easy, Medium, and Hard in Command & Conquer 3
GENERIC TAB
Under the Generic tab, you can select one or more subroutine scripts to be active
and tested after the team has been built.
¾ To apply a generic subroutine to the team, select the subro utine from the
drop-down list. Another slot appears so you can select another subroutine.
COMMON
If all objects on the team share a specific property it can be activated here.
OBJECT
PROPERTIES
Page 70
Page 71

TEAM BUILDING TIPS
For single-player missions, check what the player is doing through scripts. Then,
depending on player action, you can build teams to present a good challenge.
If you just want to keep the player busy, create and send teams with just one type
of unit. For a better challenge, create teams of mixed unit types.
Attack the player early. Speed matters.
Through scripts, you can learn more about the player than he can learn through
radar. Build “radar” scripts to increase the challenge. Avoid this technique in
multiplayer.
Page 71
Page 72

SCRIPTS
The Scripts facility is the mechanism for creating mission briefings, introductory
sequences, ramping of difficulty, behaviors of ambient objects, and the tactics of CPUcontrolled opponents. Using a simple, descriptive format, you can build very powerful
scripts to govern game events, unit actions, and other environmental variables.
NOTE: Scripts are not the only way to change unit and team behavior. Setting the basic
aggressiveness level for a unit or team goes a long way towards creating worthy
opposition.
¾ To open the Scripts tool, select SCRIPTS from the Edit menu.
In the Scripts window, you can see the Scripts library tree at the top of the screen and a
folder for every player you have created.
You may end up creating up to 100 scripts for your mission, so the folders in the
Script window become an important organizational tool.
CREATING AND EDITING SCRIPTS
The structure of a script is fairly simple:
IF (condition), THEN (Action1) ELSE (Action2)
Conditions are triggered by various kinds of events in the game. So, you can trigger a
script at a specific time during the mission or when a trigger area has been breached.
You can also trigger scripts when objects are created or destroyed.
However, the results can have huge and sometimes conflicting effects on events during a
mission. So, as you learn to create scripts, start with very simple ones and then slowly
add complexity.
It’s very important to test your scripts in the game as you develop them. If you write
many scripts before testing, then you may have difficulty figuring out which ones
are creating problems.
TO CREATE A NEW SCRIPT
TIP Avoid creating scripts that must occu r after the start of the game. You want to
keep single-player missions as open as possible, and the outcome should
always be determined by user action.
1. To create a new script, click the folder in which you want to place the script.
2. Click NEW SCRIPT. In the Script Builder window, enter a name for the script in the
Script Name textbox.
Page 72
Page 73

TIP It’s a good habit to name your scripts in a logical and consistent manner. For
example, the names of scripts that apply to one player might all begin with the
player’s name followed by an underscore (_) and an identifier for the script.
3. Script Properties tab. You set the flags and difficulty settings that apply to the
script.
Subroutine. A subroutine script is referenced by another script. Until it is specifically
called by another script, a subroutine script is not executable and does not
consume any CPU resources to check its conditi ons.
Active. Active scripts can be triggered as soon as the mission starts. Scripts can be
activated and deactivated by other scripts.
Deactivate upon success. After a script has been executed, you can prevent it from
being executed again.
Active in. Use the Active In settings to establish the difficulty levels in which the
script can be used (Easy, Normal or Hard, which corresponds to
Easy/Medium/Hard in Command and Conquer 3)
Script Comment. This catch-all field is useful for writing notes to yourself about
bugs, implementation tricks, version control information, or tasks to complete
related to this script.
TIP If another of your scripts is activated via this script, it is worthwhile to note this
in your comments, if only to aid any debugging effort.
Evaluate Script. This determines how often the script is evaluated. Use every X
seconds to evaluate a script less often, thus saving frame rate. Use this feature
often. Scripts should not be evaluated any more than necessary. Some scripts
might be evaluated every 30 seconds or so. Be careful. Some scripts need to be
evaluated constantly, especially if you want to check to see if a unit is passing
through a small area.
4. Script Conditions tab. You define the condition(s) to be tested and met before the
script is executed.
TIP The default condition for a newly created script is TRUE. If this condition is not
changed, then the script actions are executed as soon as the map is loaded
and the game begins. Use a True condition to execute scripts at the beginning
of the mission. If you are not using the default condition, delete it.
¾ To create a new script condition, click NEW. In the window, select a condition from
the drop-down list. The condition is displayed. Click any blue links to define the
condition from the available list of parameters. To define the condition, click OK.
NOTE: There are quite a few different conditions from which to choose, and you can
build very complicated scripting conditions if needed. However, it’s recommended
that you begin with simple conditions to learn how the Script tool works.
When you create multiple conditions, it is assumed that they are connected by a
logical AND. To create a second condition with a logical OR, highlight the condition
to compare, click OR and then click NEW to define the second condition.
Page 73
Page 74

¾ To duplicate a condition, select it and click COPY, then click PASTE.
NOTE: You can COPY and PASTE multiple conditions or actions – if you are using
variations on the same few routines throughout your map, this will greatly speed up
your work.
¾ To delete a condition, select it and click DELETE.
¾ To move a condition in the window, click MOVE UP or MOVE DOWN.
5. Actions if True tab. You define what happens if the condition(s) are met. The
controls are similar to the Script Conditions tab.
By default, a script does nothing if its conditions are true. To create an action,
delete the default action. Then, click NEW to create the new one.
6. Actions if False tab. You define what happens if the condition(s) are not met. The
controls are similar to the Script Conditions tab.
The False condition does not often need to be defined. In most scripts, you can
leave this area blank.
7. Your script has been defined. To create the script, click OK. The script is now listed
in the script directory.
¾ To view a created script, select it in the Scripts window. The contents of the script
are displayed at the bottom of the window. To edit the script, click EDIT.
MAP TOOLS FOR SCRIPTING
These two Worldbuilder tools can be useful for identifying locations and areas for use in
scripts.
Polygon Tool. Use the Polygon tool to define trigger areas that can be referred to
by name in scripted conditions and actions.
Waypoint Tool. In addition to defining unit movements, you can use waypoints to
identify locations on the map for your scripts.
MISSION INTROS
You can create mission briefings and scripted introductory sequences using scripts.
Start Mission events. Unless they are subroutines, scripts created with the default
TRUE as the condition are executed as soon as the map is loaded.
Disabled Input. In the Interface category, you can disable user input until the
scripted intro sequence is completed.
Camera effects. You can script a variety of camera effects including letter box and
black-and-white modes. See the Camera category of actions.
Page 74
Page 75

Variables. Under the Scripting category, you can define and use variable counters,
as well as set and manage timers. Variables and timers can be referenced by any
script in the map.
RAMPING DIFFICULTY
The Active In settings are the primary mechanisms for ramping difficulty in your maps.
When building maps with variable difficulties, you should begin by creating all scripts on
either the hardest or easiest difficulty setting.
When you have completed the map to your satisfaction for the defined difficulty level,
adjust the Active In settings of your scripts to test them under other difficulty settings.
TIP When creating a team under the Brutal difficulty setting, break it up into
multiple teams. Then, you can reduce the number of teams for easier difficulty
settings. For Hard and Brutal settings, you can set the Attack checkbox under
Behavior to make units more aggressive.
As a final resort, you can write new scripts for the other difficulty levels. The Copy feature
works well if you need scripts that are identical except for a few small changes.
ORGANIZING YOUR SCRIPTS
In the Scripts window, you can organize your scripts to simplify script development and
editing. By creating and moving folders, you can keep track of your script locations.
¾ To toggle the active state of a script or folder, right-click on the folder. Select the
menu item to toggle the state. All scripts inside an inactive folder are unavailable,
which is useful for debugging purposes.
NOTE: You cannot delete or disable the base folders for players that have been
created.
If a script has a red question mark over its icon in the Scripts directory, some
element of the script has not been defined.
SCRIPT FOLDERS
The Scripts window organizes scripts like the files in a directory. Scripts should be placed
in the same folder if they refer to each other, apply to a set piece event in the mission, or
link together through another grouping mechanism.
¾ To create a new folder, click NEW FOLDER. In the window, enter a folder name.
Select whether the folder is full of subroutine scripts and whether the folder scripts
are active at startup.
Folder Creation Tips
Put scripts that apply to all players in the Neutral folder. These scripts include map
initializations and win/loss conditions.
Page 75
Page 76

Scripts that apply to a player should be placed in the player’s folder.
Inside a player’s folder, you can organize scripts by geographic area, stage of the
game (Begin, Middle, or End), or another logical convention.
COPYING AND DELETING SCRIPTS
After creating scripts, you can use them as templates to build other scripts. You can also
move them to other folders.
¾ To copy a script, select it and click COPY. The copied script is placed in the same
directory as the source and given a name with a “_#” at the end.
¾ To move a script, click and drag it to a different folder.
¾ To delete a script, select it and click DELETE.
¾ To cancel your edits in the scripting window, click CANCEL. All unsaved changes
are discarded.
IMPORT AND EXPORT
Scripts can also be imported to and exported from a map for use in other maps.
If you are logical and consistent in the naming of your map elements, then it’s
much easier to reuse scripts from one map in another.
¾ To export a script, select it and click EXPORT SCRIPTS. In the dialog, select the
options for your export. Click OK. Select a destination for the .SCB file, enter a
name, and click OK. The selected scripts are exported.
Exported scripts are in a binary form and should not be edited in a text editor.
¾ To import a script, click IMPORT SCRIPTS. Navigate your local computer to find
the .SCB file to import. Select the file, and click OK. The script(s) are imported.
SCRIPTING VARIABLES
As part of your map designing toolkit, variables can be defined for all kinds of information
in the game. You can use flags to track binary states, timers to monitor game time, and
counters to watch numbers of units on a side or in a trigger area.
FLAGS
A flag is a variable you can set to TRUE or FALSE. Flags are very useful in testing and
tracking whether events have occurred in the game. For example, you may want to
change the behavior of the AI after a player has crossed into a new map area.
¾ To create a flag, use the action [Scripting] Flag: Set flag to value. Click the links
to enter a flag name and an initial value for it.
When a flag has been defined, its default value is FALSE. After it has been defined
anywhere in your map’s scripts, the flag exists and can be accessed by any script.
Page 76
Page 77

Useful Actions
¾ To change the flag value, use the same action ([Scripting] Flags: Set flag to
value) that was used to create it. Enter a different value for the flag.
COUNTERS
A counter allows you to count integer numbers. You can use counters to track the
number of times a repeated event occurs, such as attacks by one player against another.
They are also useful in missions in which the player must destroy a fixed number of units
before the mission is successful or switches to a new phase.
¾ To create a counter, use the action [Scripting] Counters: Counter - set to a
value. Enter a name and an initial value for the counter.
When a counter is defined, its default value is 0. After being defined anywhere in
your map’s scripts, the counter exists and can be accessed by any script.
After a counter has been created, it is available through drop-downs in the scripting
system wherever a counter can be applied.
Useful Conditions
[Scripting] Counter Compared to Value: Use this condition to compare a
counter’s value to an entered value.
[Scripting] Counter Compared to Count: Use this condition to compare a
counter’s value to another counter’s value.
SEFUL ACTIONS
U
[Scripting] Counters: Increment Counter: Add the entered value to the selected
counter.
[Scripting] Counters: Decrement Counter: Subtract the entered value to the
selected counter.
TIMERS
Countdown timers monitor the passage of time in the game. Timers come in two
varieties: Seconds timers and Frame timers. Both timers assume that in the game one
second equals 30 frames. On faster machines, the game can perform at this rate. On a
machine producing 18 frames per second, the rate for timers is still assumed to be 30
frames per second. So, on a slower machine, while 30 frames may last nearly two
seconds in real time, they are treated as a single second in game time.
¾ To create a Seconds timer, use the action [Scripting] Timer: Seconds
countdown timer - set. Enter a name for the timer and its initial value in seconds.
The timer begins as soon as the script is executed.
¾ To create a Frame timer, use the action [Scripting] Timer: Frame countdown
timer - set. Enter a name for the timer and its initial value in frames. The timer
begins to count down frames as soon as the script is executed.
The [Scripting] Timer: Set Frame/Seconds countdown timer - random action
lets you set up a seconds or frame timer of random duration, which is useful for
creating the appearance of random behavior in your maps.
Page 77
Page 78

Avoid using timers in multiplayer missions.
Timers always count down from the start time you set. A timer can be used as a counter,
too. You can perform all of the operations on a timer that you can perform on a counter.
Useful Conditions
When scripting timers, there are some useful conditions that you can test to determine if
action should be taken:
[Scripting] Timer Expired: You can fire actions when a timer reaches 0 seconds
or frames. The Timer Expired condition is useful for scripted cinematics or for
delaying action. For pacing purposes, you may want to use timers to delay AI
counter-attacks.
[Scripting] Counter Compared to Value: Use this condition to compare a named
timer to an entered value. Note that the default setting is “less than zero.” If you
don’t set a positive value for the counter, the condition never fires.
CONDITIONALS
When you have multiple conditions to test in a script, you can compare them with AND or
OR conditionals.
AND
If a script contains two conditions, Condition 1 AND Condition 2 must be TRUE for the
Action if True to be executed.
Whenever a new condition is added to a script, the conditional AND is automatically
applied. Unless otherwise defined, in any list of scripted conditions, the conditions must
all be TRUE for the action to fire.
The AND conditional always has precedence over OR. In a list of scripted
conditions, all of the conditions joined by the default AND conditional are tested
before any of the OR conditions.
OR
If a script contains two conditions connected by an OR conditional, Condition 1 OR
Condition 2 must be TRUE for the Action if True to be executed.
¾ To change a conditional to an OR condition, click OR. Use the MOVE UP and
MOVE DOWN buttons to reposition the OR condition. The conditions before the
OR are compared to the conditions after it.
¾ To remove an OR conditional, click the OR line in the list of conditionals, and then
click DELETE.
NOTE: When you delete an OR conditional, all of the conditions below the OR are
deleted as well. If you are going to use OR conditionals, be sure to check the logic
of them before you build the scripts.
Page 78
Page 79

TRIGGER AREAS
Trigger areas are created with the Polygon tool. When you create a polygon on the map,
you can name it and then reference it in scripts. They are very powerful elements of the
scripting library.
It becomes apparent very quickly that you can create scripting systems knowing
everything about every player on the map. However, testing many trigger areas
simultaneously can slow the frame rate. Also, it is less realistic to have all-knowing
armies. When using trigger areas, remember that the overarching goal is to create a fun
and lively experience that seems like realistic combat.
NOTE: Don’t have more than five overlapping trigger areas. The outer areas tend to be
forgotten.
When creating trigger areas, be sure to give them descriptive names.
The following sections describe the key conditions for using trigger areas to test for the
presence of teams, individual units, and players.
TEAMS AND TRIGGER AREAS
[Team] Area or Path: One Unit Enters an Area: Select the team name,
area name, and whether the team can enter via ground, air, or both. You
must select how the team enters. A player’s default team includes all of the
units on his side that have not been assigned to a team.
[Team] Area or Path: One Unit Exits an Area: The assumption of this
condition is that the team is already in the area, so don’t activate scripts
using this conditional unless you are sure that the team has already
entered the area.
[Team] Area or Path: Team Completely Inside an Area: This script state
becomes TRUE when all surviving members of a team are inside an area.
It is a good way to time events. For example, when all units are in an area,
you can launch an attack on them.
[Team] Area or Path: Team Entirely Enters an Area: This script state
becomes TRUE when all surviving members of a team have at one point or
another entered an area. Use it to pass between the beginning, middle,
and end of your mission, for example. A common technique is to change
the map perimeter during various stages of the game, and this condition
can be used to assess when to change it.
[Team] Area or Path: Team Entirely Exits an Area: This condition
assumes that all surviving team members were in the area at some time.
Use it carefully.
[Team] ] Area or Path: Team Has Units in an Area: The team has
entered the area in some form. This condition is a catch-all trigger test.
[Team] ] Area or Path: Team Is Completely Outside an Area: The team
has no presence at all in an area. This script is useful for managing retreats
or scripted exits of units from the map. You can also use it for checking
outer and inner perimeter breaching in Skirmish missions.
Page 79
Page 80

UNITS AND TRIGGER AREAS
PLAYERS
TRIGGER
AND
AREAS
You can also perform some of the team tests on individual units. Note that these
units must be given specific names, so these tests are useful for examining the
state of units placed on the map by the designer—not units created by a player.
Some conditions available for teams are unavailable to test for individual units. To
make those comparisons, put the individual unit in its own team.
[Unit] ] Area or Path: Unit Enters an Area: The named unit has crossed
into a trigger area.
[Unit] ] Area or Path: Unit Exits an Area: The named unit has left a
trigger area.
[Unit] ] Area or Path: Unit Inside an Area: The named unit is inside a
trigger area.
[Unit] ] Area or Path: Unit Outside an Area: The named unit is outside a
trigger area.
You can also perform checks for the presence of a player’s army in a trigger area.
[Player] Area: Player Has Units in an Area: The player has any number
of units in an area.
[Player] Area: Player Doesn’t Have Units in an Area: The player is
completely outside of an area.
[Player] Area: Player Has Comparison Unit Type in an Area: The player
has more than, less than, or equal to the entered number of selected units
in an area.
[Player] Area: Player Has Total Value in an Area: If the player has units
and structures of value greater than the value you define, action is taken.
This condition is useful for timing attacks.
[Player] Area: Player Has Unit Type in an Area: This condition tests for
the presence of a minimum number of units of a selected type in an area.
For example, you can script an AI attack on a player when 10 Gondor
soldiers have been created. Use this condition to test for initial or largescale attacks from the AI; you don’t want the AI to overreact to small
changes in a player’s army.
[Player] Area: Player Has Kind of Unit or Structure in an Area: This
condition tests for the presence of a minimum number of structures or units
of a selected type in an area. For example, you can use it to change
strategies. If a player has created five Ents, you might tell the AI to stop
attacking with infantry and to use fire archers instead.
SCRIPTING TUTORIAL
In this section, you can learn how to script fundamental events in a scripted mission. The
materials covered here are just the basics, so be sure to test your scripts thoroughly.
Page 80
Page 81

Keep it as simple as possible. No one cares if the AI made a right turn at a specific
point. Avoid being too specific. If your scripts are too specific, then re-examine your
design goal. You could be setting up a debugging nightmare for yourself.
When developing for multiple difficulty settings, build either for the easiest or
hardest difficulty setting. Then, you can select or deselect scripts to modify difficulty
settings.
HOW TO
ACTIVATE
THE
SCRIPT
DEBUGGER
HOW TO SET WIN CONDITIONS
HOW TO SET LOSS CONDITIONS
Worldbuilder includes a utility for debugging your scripts inside the game. See
Debugging in this manual for more info.
You can tell a player he has won the game at any time with any condition. When
your chosen condition has been met, the action to select is [Win & Loss]
Announce Quick Win The game is immediately over.
You may choose to take other script actions, such as destroying the remaining faction buildings, before you announce the win.
You can declare a player loss at any time with any condition. If the game is over
for all players, use the action [Win & Loss] Announce Defeat. If the game has
ended for only one player, use [Win & Loss] Announce Local Defeat.
HOW TO
CREATE
SUB-
ROUTINES
HOW TO CREATE SEQUENTIAL SCRIPTS
A subroutine is a script that is accessed via another script. You do not perform a
test to run a subroutine. Instead, you call it from another script.
When defined, subroutines are always active and can never be tested.
Subroutines are useful for optimizing your scripts, especially if you call actions
multiple times under multiple conditions. Through subroutines, you can create a
generic set of actions that can be applied to multiple teams. For example, you can
use subroutines to instruct a team to hunt.
Most AI orders are triggered through subroutines. When you are creating a
team, the conditions you select under the Identity and Behavior tabs are
subroutines only. These scripts are created as subroutines, and the
indicated condition is applied to them.
To define a subroutine: Under Script Properties in the Script Builder window,
check Script is Subroutine. Since subroutine scripts are always active, deselect
Deactivate Upon Success, which is not needed. In almost all cases, leave the
script condition to test empty (TRUE), then define the action.
Again, a subroutine cannot be enabled or disabled. So, be careful in using
subroutines, which can run and run over again.
To execute a subroutine: To run the subroutine from another script, select a
script action called [Scripting] Script: Run subroutine script. Select the name
of the subroutine from the drop-down.
A sequential script is configured to execute its sequence of actions one after the
other. Typically, all actions in a script are executed at the same time. In a
sequential script, the first action is executed to completion, followed by the next
one, until all actions are complete. Sequential scripts are useful for scripting endgame sequences.
1. Create a standard script with the desired test conditions in place. Do not
Page 81
Page 82

HOW TO SET DIFFICULTY LEVELS
script any actions.
2. Build a subroutine containing all of the actions to be taken in sequence.
3. For the first script, find and add the action [Team Other]SequentialScript: Execute Script Sequentially - Start. Select the
subroutine containing all of the sequential actions.
¾ To script the stoppage of a sequential script, use [Team-
Other]SequentialScript: Execute Script Sequentially - Stop and select
the subroutine containing the scripted sequence.
¾ To loop a sequential script, use the action [Team-
Other]SequentialScript: Execute Script Sequentially - Looping.
Looping sequences are useful for building railroads.
In the Script Panel for each script, you can select or deselect whether the script
applies to EASY, NORMAL, or HARD difficulty settings.
If no difficulty levels are selected, the script cannot run at all in that difficulty
setting, even when it is called for explicitly.
HOW TO SPAWN OBJECTS
You can add flavor to your maps by spawning objects that execute scripted
actions to change the nature and course of the mission. For example, you can
script civilians to walk across the map, requiring your protection.
1. To spawn an object, use the the [Unit – Other] Spawn: Spawn Unit
action. Select the object and team to spawn. (To spawn an object without
assigning it to a team, select a player’s default team.) Be sure to spawn
objects outside the map perimeter because they appear out of thin air
when spawned.
2. Enter the X, Y, and Z coordinates on the map where the unit should spawn.
X, Y, and Z coordinates can be found in the status bar. If you do not specify
a Z (height) coordinate, the object is placed on the terrain. Do not place
objects below ground.
3. Enter a figure for its angle of rotation. Object angles can be found in each
object’s Object Properties window.
PAWNING UNNAMED UNITS
S
¾ To spawn an unnamed unit, use the action [Unit – Other] Spawn: Spawn
- unnamed unit on a team at a waypoint. You must specify the team to
which it belongs and its starting waypoint.
S
PAWNING NAMED UNITS
You can also spawn units that have defined names. Naming spawned units is
useful for missions in which a known event must occur at some point during the
mission. You can write scripts for the named unit, spawn the unit, and then
execute the scripts accordingly.
Page 82
Page 83

HOW TO SPAWN TEAMS
1. To spawn a named unit, use the action [Unit – Other] Spawn: Spawn named unit on a team at a waypoint.
2. Select the name of the unit from the drop-down list, or enter a name of a
unit that has not been created.
3. Select the type of unit and assign it to a team.
4. Select a waypoint where the unit spawns.
After you define this particular script, the three question marks (???) in
front of the listed action do not necessarily indicate an error; they may
indicate that this script is the first instance of the named entity. Ignore the
question marks. Click OK, and your script may be fine.
[Team – Other] Build, Spawn or Merge: Spawn a reinforcement team: Use
this action to spawn a reinforcement team that you have defined. If no waypoint is
specified in the Edit Teams window, then the waypoint defined here is where the
team appears.
HOW TO MOVE A TEAM TO A NEW LOCATION
One of the most commonly used actions is to move teams into new positions. It’s
particularly important for scripting attacks—a good designer places units near the target
so they are not distracted en route and their inherent AI can manage attack functions.
Page 83
Page 84

MOVE TEAM
ON A
WAYPOINT
PATH
MOVE TEAM
ON A
WAYPOINT
PATH -
EXACTLY
MOVE TEAM
ON A
WAYPOINT
PATH -
WANDERING
MOVE TEAM
ON A
WAYPOINT
PATH -
PANIC
[Team – Action ] Set to follow a waypoint path: Use this action to tell a team of
units to follow a named waypoint path. Select the team and the waypoint path
from the drop-down lists. If the team does not travel as a team (FALSE), then
each unit of the team travels the waypoint as an individual. Using this flag on a
branching waypoint path is an inexpensive way to create the appearance of
flanking attacks. You can also use it to add randomness to civilian behaviors.
[Team – Action] Set to EXACTLY follow a waypoint path: Use this action to tell
a team to follow a named waypoint path exactly as it is laid out on the map. This
action should be used only if you are creating scripted cinematics and need units
to behave in an exact manner. Units following a path exactly pass through
buildings and other objects without effect, so it is impractical for game actions.
[Team – Action] Set to follow a waypoint path - wander: Use this action to tell
a team of units to follow a named waypoint path in a wandering manner. Each unit
of the team uses the waypoints as a general guideline. Teams that wander tend to
spread out more, which avoids traffic jams and looks more natural. However, a
unit of a wandering team can venture into territory that it should not, so use this
action carefully.
[Team – Action] Set to follow a waypoint path - panic: For civilian use only. Use this action to tell a group of civilians to move in panic along a named waypoint path. The civilians are displayed in their “panic” anim ation state.
MOVE TEAM
TO A
WAYPOINT
MOVE TEAM TOWARDS AN OBJECT OF A SPECIFIC TYPE
UNIT
[Team – Action] Set to move to a location: Use this action to move a named
team to a defined waypoint. The team takes whatever available route it can find.
Sometimes, teams following this script action can end up in unexpected places.
However, it can be a useful means of gathering units from diverse sources. In
general, rally the team at a waypoint some distance from its current location and
leave space around the waypoint for units to cluster.
[Team - Action] Move team towards the nearest object of a specific type:
This action allows you to direct a named team towards the nearest object of a
type. You can use it in combination with other scripts. For example, when a team
has finished moving along a set of waypoints, you can direct it to move towards
the nearest enemy soldier. When this action finishes executing, the team should
be able to attack.
All of the above script actions are available for individual units, except for Panic
and Wander actions.
HOW TO SCRIPT ACTIONS FOR AI TEAMS
When you create a new player, whether it is human- or CPU-controlled, a default team is
created for the player. The team name is “team” followed by the Player name. This team
contains all units for the player. You can script actions to apply to this team, which apply
Page 84
Page 85

to all units for that player.
INITIAL ACTIONS
AI ATTACK TEAMS
AI DEFENSIVE TEAMS
When a team is created for the AI, it’s a good idea to have a set of scripted
actions for the team to follow. Otherwise, it sits in the base area, doing nothing. A
good structure for a team’s initial action is to send it along a waypoint path to get it
closer to combat. When the team reaches the end of the waypoint path, you can
assign it to move towards the nearest enemy unit, guard an area, or hunt through
scripts. If the team is scripted to attack a specific target and succeeds, its final
action should be to hunt enemy units. Otherwise, the team sits, doing nothing.
You can create basic AI responsiveness setting each team’s
Aggressiveness in the Behavior tab of the Edit Team window.
An attack group for an AI player should consist of two or so attack teams. For
easier difficulty settings, you may consider sending only one attack team. A high
number of teams in an attack is hard to defend and hard for the designer to
manage. Keep it simple, if possible.
You can establish priorities for your attack teams by setting attack priorities for
object lists, or by sequential scripting for specific targets.
Following the principle of having three entrances to each base, an AI army should
have three defensive teams or one for each entrance to its base.
Defensive teams for the AI can be set to varying responsiveness levels. You can
tell a unit to simply guard an area, changing the Aggressiveness setting to a low
level. Or, you can have one fast defensive team that is responsible for attacking
anything that breaches perimeters you define with the Polygon Tool.
The condition [Player] Sighted: Player has sighted Team can be used to
switch the AI into a different defensive posture.
N
OTE: Be sure to create a subroutine to be called when the situation is all clear for
a defensive team. This script should tell the units to resume their original
behaviors. You select the On All Clear subroutine in the Edit Teams window.
HOW TO CREATE OBJECT LISTS
Object lists are sets of multiple choices of objects that the AI can use to establish a valid
target. You can use an object list anywhere in the Script Builder where you can specify a
type of object. Available object lists are listed below the types of objects.
Page 85
Page 86

[SCRIPTING] OBJECT TYPE LIST – ADD OBJECT TYPE
[SCRIPTING] OBJECT TYPE LIST – REMOVE OBJECT TYPE
Use this action to create new object lists and add objects to existing ones. To create a new object list, enter a name in the drop-down. Then, select an object to add.
Use this action to remove object types from an object list. This action is useful for re-assigning priorities if an enemy’s capabilities have been destroyed.
HOW TO GET THE AI TO ATTACK
You can use scripts to define specific attacks against other players. Attack scripts can be
applied to individual units, teams, or every unit in a player’s army. Use the following
actions to get units on the attack.
AI TEAM ATTACKS
AI UNIT ATTACKS
[Team – Action] Attack or Hunt: Hunt: Select the team to begin hunting.
In hunt mode, teams scout for enemies and attack them when they are
discovered. Hunt mode can be superseded by priority lists.
[Team – Action] Attack or Hunt: Team attacks Team: Select the team
that is attacking. Then, choose the team to be attacked.
[Team – Action] Attack or Hunt: Team attacks a specific unit: Select
the team that is attacking. Then, choose the named unit, such as Aragorn,
to attack.
[Team – Action] Attack or Hunt: Team attacks an Area: Select the team
that is attacking. Then, choose the trigger area to attack. The team moves
to the trigger area and attacks any enemy units or structures in the trigger
area.
[Team – Other] Settings: Set the general attitude of a team: Select the
team. From the drop-down list, select a new behavior. These options match
those available in the Initial Team Behavior drop-down in the Behavior tab
of the Edit Team window.
All of the AI Team Attack actions can be applied to units, too, via the commands
in [Unit – Action] Attack or Hunt
AI PLAYER ATTACKS
You can put an entire army in motion. While these all-or-nothing scenarios can be
exciting in concept, they can ruin the frame rate if the army is large. However,
when a player’s in dire circumstances, there may be no other option but to use it.
[Player] Set all of a player’s units to hunt: Any available unit of a player
begins hunting for enemies.
HOW TO CONFIGURE THE AVAILABLE TECHNOLOGY TREE
Page 86
Page 87

In the single-player campaigns, you may have noticed that parts of the technology tree
may not be available on some missions. Through scripts, you can make specific
structures, units, or abilities unavailable. Additionally, you can define the beginning and
limiting rank for a mission, which limits the Special Powers available to players.
MAKING SPECIFIC OBJECTS UNAVAILABLE
MAKING SPECIFIC ABILITIES UNAVAILABLE
[Map] Gameplay: Adjust the tech tree for a specific object type: Select the
object in the drop-down list. Then, select the object availability.
IGNORE_PREREQUISITES means that the object is immediately available at
the beginning of the mission, no matter where it is located in the standard
technology tree. ONLY BY AI prevents human players from building the object.
[Player] Special Power – Set Special Power Availability: You can use this to
disable certain powers or upgrades for specific Players. There are three settings
(i) Available – the default. Ability is available to Player.
(ii) Disabled – disabled, but visible in the UI. Power is grayed out
(iii) Hidden – disabled, not visible in the UI.
HOW TO CHANGE THE MAP SIZE DURING A MISSION
In some of the single-player missions, the player appears to open new parts of the map
by completing game objectives. You can do the same thing in your maps by changing the
map boundaries through scripted events.
CREATING MAP BOUNDARIES
CHANGING
ACTIVE
THE
MAP
BOUNDARY
When you create a new map, the default map perimeter is displayed as an oran ge rectangle around the perimeter. You can adjust this perimeter or create up to eight additional ones.
Through scripts, you can designate which of your created map per imeters is
active.
[Map] Change the active boundary: Use this action to change the active
perimeter. From the drop-down, select the color of the map perimeter you
are now activating.
Warnings
If your map size must change during the mission, start with a smaller-sized
map using the orange default map perimeter first. Then, grow the map size
over the course of the mission. Shrinking the map can cause problems.
If you peel back the entire shroud through scripts and then change the
borders, the new border’s shroud may still be partially obscured.
HOW TO TRIGGER AUDIO
You can use the conditions and actions in the Audio section of the Script Builder’s lists to
manage the audio in your map. The following conditions and actions are useful.
Page 87
Page 88

PLAYING SOUND
SETTING AUDIO VOLUME
SETTING AUDIO CONDITIONS
[Audio] Play a speech file: Use this action to play back a speech file. Select a
speech file from the drop-down list. To hear a preview, click PREVIEW SOUND.
You can select whether to allow sound overlap. If it is set to FALSE, all other
scripted audio gets turned off as it plays. You can use that flag to ensure that
mission-critical voice-over is heard by the user.
N
OTE: Never rely on speech to be the exclusive means by which players hear
critical information. Always back up any mission-critical audio with on-scr een
text messages.
[Audio] Set the current sound volume: This action sets the basic sound
volume. It can be overridden by other scripted actions.
[Audio] Sound Events - Override volume - type: Use this action to play
back a selected sound at a selected volume. You can set volumes to be
greater than 100%.
[Audio] Sound Events - reset volume - all: This action restores the
volume of all sound types to their default levels.
[Audio] Sound Events - reset volume - type: This action restores the
volume of a specified sound type to its default levels.
[Audio] Sound Events - disable type: Disables playback of a specified
sound type.
[Audio] Pause the ambient sounds: This action pauses the playback of
ambient sound, which is useful if the user needs to hear very important
audio.
The triggering of audio is often based on user action or a timer. You can test
whether audio has finished playback to execute scripts with the following
conditions.
[Audio] Speech has completed playing: This condition tests whether a
specified speech file has completed playback.
[Audio] Sound has completed playing: This condition tests whether a
specified sound file has completed playback.
[Audio] Music Track has completed some number of times: Us e this
condition to test whether a specified music track has played a specified
number of times. Use this condition only for triggering another piece of
music.
Page 88
Page 89

DEBUGGING
During the course of developing your map, you may discover problems with it. Textures
can get blended poorly, objects can get misplaced, scripts can acquire bugs, and
designers can get confused. This chapter offers some basic suggestions for ho w to
debug problems with your maps and scripts.
DEBUGGING OBJECTS
SELECTING DUPLICATE OBJECTS
When you copy and paste an object, the new object is pasted on top of the original one.
Looking at the two objects, you see one image. If you forget about the object, you can
end up with duplicate objects. Use this command to select objects on top of each other. It
selects the top instance of every object that has a duplicate on the map. From time to
time, you should select duplicate objects to locate these errors.
¾ To select duplicate objects, choose SELECT DUPLICATE OBJECTS from the Edit
menu.
FINDING LOST OBJECTS
Have you misplaced an object? If so, you can use the Select Similar tool to select items
of the same class. When a building is selected, for example, apply the Select Similar tool
to select each building on the map. You can use this tool to select for all object types
across the entire map.
If you have a mouse wheel, you can use it to rotate the camera to other
perspectives, which may reveal smaller objects hidden behind larger ones.
You can use the Item List tool, which lists every existent object in the map.
Additionally, you can scan through the Layers List to search for the missing item.
¾ To reveal each layer in the Layers List, right-click on the icon next to the layer.
Then, deselect HIDE CURRENT LAYER. Check the map to see if the missing
object is revealed.
FIXING TEAMS
If you delete a player from your map’s Player List, any units or structures that were
assigned to the player now have invalid associations. They don’t belong to a team.
You can fix teams in two ways:
¾ To let the application fix teams to the best of its ability, select FIX TEAMS from the
Validation menu.
When the application fixes teams, it assigns unaligned units and structures to the
remaining teams in the map.
Page 89
Page 90

¾ To manually assign units to a team, choose SELECT BAD TEAM OBJECTS from
the Edit menu. All objects having invalid team assignments are selected. You can
then fix them manually.
¾ To fix a unit’s team, select the unit. In the Object Properties window, select a new
team from the drop-down list. The unit has been re-assigned.
REPAIRING TEXTURE ERRORS
To produce good texturing requires plenty of design work in Worldbuilder and lots of
computation by the application. During development, you may see bad blends between
textures, or you may accidentally create the computationally intensive three-way blends.
HARD TEXTURE EDGES
BLENDS IN
MIDDLE
THE
OF A
TEXTURE
FIELD
THREE-WAY BLENDS
While painting textures, you can create hard edges to your texture fields and nee d
to soften them with blending. Instead of blending the whole texture field outward,
you can blend a single edge inward.
1. To blend a single edge, select the Blend Single Edge tool in the toolbar.
2. Place the cursor just outside the hard edge. Click and drag across the
border into the other texture. Release the mouse button.
3. The edge is softened.
If you discover an accidental dab of incorrect texture in a field of color, you can
remove it easily.
1. Click the Eyedropper tool in the toolbar.
2. Click the texture to paint over the incorrect texture.
3. Click the Single Tile or Large Tile tool in the toolbar.
4. Paint over the incorrect texture with the correct texture.
5. Blend the texture as needed.
When three fields of texture are blended together, you can create three-way
blended textures.
1. To show the three-way blends in your map, select SHOW 3-WAY BLENDS
IN WHITE. The three-way blends appear as white tiles on your map.
2. Be sure these errors blend appropriately. Sometimes you may need to
repaint the area to ensure smooth blending.
STRETCHED CLIFF TEXTURES
When textures are stretched over cliffsides, the effect can be grotesque. You can
try these three approaches to get a better effect:
1. Smooth Height tool. In the toolbar, select the Smooth Height tool. After
setting tool options, click and drag all over the cliffside to scrub out the
roughness. Turn up the Feather Rate to its highest setting.
2. Map Cliff Textures. If the Smooth Height tool fails to produce the desired
results, select MAP CLIFF TEXTURES from the Texture Sizing menu.
Then, click the bad-looking textures. How do they look? If there is a black
band at the top or bottom of the texture field, apply textures to those areas
and blend them.
¾ To undo the cliff texture mapping, press Ctrl + Z.
Page 90
Page 91

3. Reshape the Cliff. If mapping cliff textures fails to work, you should
reshape the face of the cliff. Instead of a single long face, make the cliff
multiple shorter and slighter grades.
SCRIPT DEBUGGER
NOTE: The Script Debugger may not be available in the current version of Worldbuilder.
One of the more useful tools in Worldbuilder is accessed outside of it. The Script
Debugger allows you to see the real-time progress of your variables, counters, flags, and
timers as you play your designs inside the game. It is an invaluable resource to the
process of completing quality maps.
If your computer is good enough to do so, you can open Worldbuilder and the
game at the same time. Such an arrangement allows you to jump back and forth
between design and debugging tasks. Worldbuilder supports dual monitor usage.
ACTIVATING
THE
SCRIPT
DEBUGGER
SCRIPT DEBUGGER
SCREEN
1. Exit Worldbuilder.
2. Navigate your local computer to the Command and Conquer 3: Tiberium
Wars directory.
3. Create a shortcut for CNC3.EXE. To create a shortcut, right-click
CNC3.EXE and select CREATE SHORTCUT. The shortcut is created in
the directory.
4. Cut and paste the shortcut to the desktop, and then right-click on the
shortcut.
5. Create shortcut to CNC3.EXE.
6. Under the Shortcut tab, select the Target text field. Add “ – win –
scriptdebug” to the end of it, outside the quote mark. These switches tell
the game application to activate the Script Debugger.
7. When you design and debug maps with scripts, double-click this shortcut to
open the game. The Script Debugger opens with it.
When you open the game with the Script Debugger activated, the Script
Debugger screen is displayed over the game screen.
Frame. A counter indicating the current frame of the game session. After a
map is started, this counter does not reset.
Variables. In the Variables pane, you can review the current state of all of
your scripted boolean flags, timers, and counters.
Messages. The Messages pane lists all of the scripts that have been fired
and some other AI messages. The left-hand number of a message
indicates the frame in which the event was fired.
¾ To pause the game momentarily, click PAUSE.
¾ To step through the game frame-by-frame, click PAUSE, and then click
Page 91
Page 92

STEP. Continue clicking STEP to advance additional frames.
¾ To step in 10-step frame jumps, click RUN FAST 10X.
¾ To remove all of the messages from the Variables and Messages panes,
click CLEAR.
Page 92
Page 93

OPTIMIZING YOUR MAP
As you build your map, it’s important to optimize periodically. It’s very easy to use
Worldbuilder tools to create maps that play too slowly on even good machines. When the
frame rate for the game gets too low, the gaming experience is degraded. From time to
time, perform these tasks to optimize your maps for good performance on all systems.
If you’re having problems with performance in Worldbuilder, consult the
suggestions at the end of this section.
ELEMENTS TO OPTIMIZE
OBJECT COUNTS
STEEP SLOPES
The number of objects on your map is displayed on the far left side of the
status bar at the bottom of the screen.
Limit the number of objects you use. A good limit is 100 objects per player
in multiplayer maps. If you have two players on the map, you can increase
this limit somewhat since not as many players are creating objects.
For single-player maps, 1,800 total objects is the recommended limit.
Be careful when creating cities and forests with high object counts.
Remember that you are creating a battleground with the impression of a
city or a forest; you are not creating the city or forest itself. You need fewer
objects to create a simple impression. For example, you can create the
impression of a forest with no more than 40 trees. Practice to see what you
can get away with, and remember that the quality of the gameplay is
always the overriding factor.
Don’t build unnecessarily steep slopes. Units cannot target up a steep
slope. To see which slopes are too steep, select VIEW IMPASSABLE
AREAS and then select IMPASSABLE AREA OPTIONS from the View
menu. In the dialog, enter the maximum acceptable angle and click OK.
You can now see impassable areas in your map. Use the Smooth Height
tool to smooth them down.
Remember to reset the Impassable Area option to 45 degrees.
Before you release your map, use the Smooth Height tool on all cliffs and
across all flat areas. Use it to smooth as much as possible. Don’t be afraid
to turn up the Feather Rate to its highest setting. Smoothing makes your
map look nicer and perform better.
BLENDED TEXTURES
You must blend textures to create more natural effects, but do not blend
textures unnecessarily. There is always a resource hit when blending
textures.
When in doubt, start over painting textures, and try to avoid overlaps.
MAP SIZE
If your map has grown to larger than 400 x 400 tiles, consider reducing the
open space between areas of your map. Alternatively, you can save two
copies of the map and continue developing two separate maps.
Page 93
Page 94

MAP PERIMETER
TRIGGER AREA POLYGONS
SUFFICIENT SPACE
There is a script available called, “Oversize Terrain.” Do not use it. Used
mostly for cinematic sequences, the script allows the camera to display a
larger map area during pans and tilts. However, it is a huge hit on the
frame rate and is not worth the cost. In the single-player campaigns, the
script is no longer used.
Before you release your map, check the map perimeter. Click the Border
tool in the toolbar. The orange border marks the play area, and the blue
border marks the edge of the workspace. If they do not match, players may
not be able to access all of your map. However, if you change map borders
during the course of the mission, this caution may not apply.
Don’t have more than five overlapping polygons. The outer ones tend to be
forgotten.
Avoid creating choke points. Too many choke points slow the game, turn it
into a slugfest, and kill the frame rate. Open maps are better in most cases.
If you are creating a choke point, it should be wider than two hordes at a
minimum.
Even in urban settings, create as much space as possible. Extremely
narrow spaces between buildings can cause pathfinding problems for the
units. If the group is sufficiently large, the units in the rear tend to twitch as
they search for various paths. This slows the game down. Open up your
maps where possible.
OBJECT PLACEMENT
Avoid overlapping objects. While you can sometimes produce interesting
visual effects, these screen elements are interactive objects that can result
in some strange behaviors in the game.
Did you raise your terrain recently? Some objects may be buried now. Use
the Pick Similar command or the Item List Tool to find missing objects.
Roads, as objects, are different from regular objects. You can overlap
roads of the same type to create intersections, but you cannot overlap
dissimilar roads.
BODIES OF WATER
RESOURCE COUNTS
Use the default water polygon as much as possible. If you consider the
water polygon as sea level in your map, you can use it to build multiple
lakes and even the border of the ocean.
Never overlap water polygons. It drastically increases the number of
control points. Instead, create a single, more elaborate water polygon, or
create nested polygons.
There should be 2-3 settlements per player on the screen.
Limit the number of units that generate resources on your map. Three-
foundation outposts or extra castles can create too much support for a
given side. Too many of them can turn each game into a slugfest.
Page 94
Page 95

WAYPOINT PATHS
SCRIPT MANAGEMENT
SELECT OBJECTS
Avoid having S-turns in your waypoint paths. They should be straight lines,
simple turns, or at most, arcs to their target.
Use the Script Debugger to track your scripts during a mission.
Don’t activate a script and check its condition unless it is necessary.
Enable scripts only when they are needed. Scripts that check to see if units
should take actions such as move, attack, or guard are expensive to
check. So are trigger areas. They can cause a reduction in frame rate.
If you are giving out attack or move commands, don’t give them all out in a
single frame. Dispense orders over a sequence of frames.
Similarly, spread out the spawning, destruction, and deletion of objects
over time. When a unit is spawned, its AI immediately begins working,
which impacts the game. Space these events out.
A good checkup before you publish a map is to check each type of object
to make sure every instance is accounted for and intended to be part of
your map. Use the Select Similar tool to select objects of the same type.
Prior to release, use the Select Duplicate tool to check if you’ve
accidentally placed objects on top of each other, which is an artifact of the
copy and paste functions.
IMPROVING PERFORMANCE IN WORLDBUILDER
Worldbuilder is a high-performance application that makes si gnificant demands on
system resources. If you experience slow-downs in screen updating, try the following tips
to improve performance.
Reduce the amount of
map displayed onscreen.
Close all other
applications.
Display only what
needs to be displayed.
Turn OFF object
shadows.
Turn OFF display of
clouds.
Get acquainted with
Worldbuilder slows down if the display area is too large. Under the View
menu, select VIEW PARTIAL MAP SIZE. Choose a smaller size of map to
display.
While Worldbuilder can work when other applications including the game are
open, it works better if all other applications are closed.
Use the View toggles to hide elements of the map that are not germane to
your current task.
The shadowing of objects can significantly impact Worldbuilder
performance. To turn off shadows, deselect SHOW SHADOWS in the View
menu.
Similarly, clouds can significantly impact Worldbuilder performance. To turn
off cloud display, deselect SHOW CLOUDS in the View menu.
You can organize your map objects into layers whose display can be
Page 95
Page 96

layers.
Lower window
resolution.
Use the default water
plane.
Use default object
shadows.
Check the amount of
map displayed onscreen.
Watch your object
counts.
Toggle OFF display of
the macrotexture.
toggled.
If you set the window resolution too high, you may experience slow-downs in
performance. Try lowering the window resolution through the Window menu.
If the Work window becomes too small, set the screen resolution through the
Windows control panel. For more info, see your Windows documentation.
Each map comes with one default water shape that has much less impact
on performance than any custom water shapes.
While customizing shadows for individual objects can produce some nice
effects, there are more important design tasks. Plus, this can also slow
down completion speed for these more important tasks. Use customized
object shadows sparingly.
Are you displaying the entire map? To toggle displa y of the entire map,
select SHOW ALL OF 3D MAP from the View menu.
As a general rule, keep the number of objects below 100 per player in
multiplayer/Skirmish maps and 1,800 total objects for single-player mission
maps. Object counts can impact performance in Worldbuilder and in the
game.
To toggle display of the macrotexture, select SHOW MACROTEXTURE
from the View menu.
Page 96
Page 97

GLOSSARY
3D Wireframe
Ambient Sound
Auto Edge Out Tool
Blend Single Edge
Tool
Build List Tool
Camera
Cliff Textures
Dig Tool
Global Lighting
The underlying mesh describing the shape of the terrain. To see the 3D
wireframe, select SHOW WIREFRAME 3D VIEW from the View menu.
Ambient sounds can be placed on your map to create a nice sense of
environment.
The Auto Edge Out tool blends a selected texture outward into the
surrounding textures, creating new blended textures between them.
Painting with textures often leaves the sharp edges of the tiles on your
map. You can smooth individual edges using the Blend Single Edge
tool.
For CPU-controlled players, a Build List indicates the order in which its
structures should be built.
The position of the camera over the terrain can be manipulated with the
mouse.
Due to the sharp change in elevation, cliffs can cause a stretching of
the textures that looks unnatural. Worldbuilder can assist in the
placement of cliff textures.
Use the Dig tool to remove terrain and dig valleys, riverbeds, and
canyons in the map. To remove terrain, select the Dig tool from the
toolbar.
Using global lighting options, you can set the overall map lighting and
vary the lighting for objects and structures.
Grid
Grove Tool
Impassable Area
Impassable Area
Options
Item List Tool
Layer
Layers List
A square grid can be displayed over your map to assist in measuring
distances and aligning the placement of objects. To toggle display of
the grid, select SHOW GRID from the View menu.
The Grove tool can be used to place natural-looking collections of trees
of different types.
When the terrain is too steep, units cannot pass directly over it. To
toggle display of the impassable areas of your terrain, select T I LE
FEEDBACK - VIEW IMPASSABLE AREAS from the View menu. You
can also paint impassable textures onto your map.
You can set the angle at which a slope becomes impassable to ground
units. To set the angle, select TILE FEEDBACK - IMPASSABLE AREA
OPTIONS from the View menu.
Lists all object types in the current map
A layer is a collection of objects on a map whose display can be toggled
through the Layers List.
Through the Layers List, you can organize objects into layers whose
display in Worldbuilder can be toggled to simplify your view.
Page 97
Page 98

Macrotexture
Map Perimeter
Mesh Mold Tool
Mound Tool
Object
Object Count
Object Library
Object Properties
Pick Constraint
The macrotexture is your map’s default background texture. When you
first create a map, the macrotexture is displayed over its entirety.
Around the edge of the map, you must define its perimeter for AIcontrolled units.
The Mesh Mold tool can be used to add pre-formed shapes to the
terrain.
Use the Mound tool to raise the elevation of the terrain under the
cursor.
An object is a structure, unit, sound, or other element you place on your
map. Depending on the type of object, other parameters and behaviors
must be defined as well.
The number of objects in the map is displayed in the lower-left corner of
the Status Bar. Try to keep below 100 objects per player in multiplayer
maps and 1,800 objects for single-player maps.
Through the Object Library, you can find and place objects on your
map.
Associated with each object is a set of properties describing its side,
health, visual appearance, and behaviors. When the object is selected,
these properties are displayed in the Object Properties window.
To select a type of object on the map, use the Pick Constraint tool.
Player
Player List Tool
Polygon Tool
Ramp Tool
Road Tool
Scripts
Shadows
Smooth Height Tool
Status Bar
A Player is any human- or CPU-controlled army on the map. Each
player must be defined through the Player List.
The Player List tool lets you define the players in the game.
Using the Polygon tool, you can define trigger areas that can be
referenced in scripts.
The Ramp tool lets you build ramps in the terrain.
Use the Road tool to create roads, sidewalks, and railroads.
Using scripts, you can generate actions based on events occurring
during gameplay.
You can create shadowing effects different from those implied by the
global lighting settings.
The Smooth Height tool lets you smooth a shaped terrain’s roughness.
At the bottom of the screen, the Status Bar displays important
information on object counts, waypoint counts, and cursor position.
Team
A team is a collection of one or more units that can be controlled as a
single entity. Users can create teams in the game, and designers can
Page 98
Page 99

create teams for CPU-controlled sides.
Terrain
Terrain Brush Options
Texture
Three-Way Blends
Time of Day
Toolbar
Trigger Area
Unit
Water Plane
Terrain is the general term used to describe your map’s land forms.
Using the Worldbuilder tools, you can add, remove, smooth, and shape
the terrain.
When using the terrain tools, you can configure the size and effects of
the brush used to shape the terrain.
A texture is a two-dimensional graphic image that is laid across the
terrain to give the appearance of a land form. For example, textures can
look like grass, mountain, sidewalk, or road.
When the Auto Edge Out tool is used to blend more than two textures
together, three-way blends can occur. Three-way blends can
significantly slow down the game. To see the three-way blends in a
map, select SHOW 3-WAY BLENDS IN WHITE from the View menu.
You can set the time of day on your map.
Across the top of the screen, the toolbar contains a set of icons that,
when pressed, activate map tools.
A trigger area is a map area you define and name. The trigger area can
then be referenced in scripts. For example, when a unit enters an area,
a scripted action can be taken.
An individual infantry, cavalry, or air unit. A unit is the fundamental
piece of an army.
Appearing as a blue rectangle in a newly created map, the water plane
can be used to define large bodies of water in your map.
Water Tool
Waypoint
Waypoint Count
Waypoint Path
Waypoint Tool
Weather
The Water tool allows you to create rivers or lakes.
A waypoint is a location on a map. Units can be ordered to move to a
waypoint or through a sequence of waypoints.
In the Status Bar at the bottom of the screen, the total number of
waypoints used in the map is displayed.
A sequence of waypoints on the map which can be accessed through
scripts. Units can be ordered to follow a waypoint path to complete a
scripted task.
Using the Waypoint tool, you can define sets of waypoints for units to
follow.
You can define your map’s weather conditions and use unit models
from different weather conditions in your maps.
NOTICE
Electronic Arts reserves the right to make improvements in the product described in this manual at any time and
without notice.
Page 99
Page 100

This manual and the software described in this manual are copyrighted. All rights are reserved. No part of this
manual or the described software may be copied, reproduced, translated, or reduced to any electronic medium
or machine-readable form without the prior written consent of Electronic Arts.
Worldbuilder: © 2003 - 2007 Electronic Arts Inc. All rights reserved.
© 2007 Electronic Arts Inc. Electronic Arts, EA, the EA logo, Command & Conquer, and Command & Conquer
3 Tiberium Wars are trademarks or registered trademarks of Electronic Arts Inc. in the U.S. and/or other
countries. All rights reserved. All other trademarks are the property of their respective owners.
Page 100
 Loading...